Showing 339 Result(s)
Cake Spaghetti

Spaghetti Layer Cake
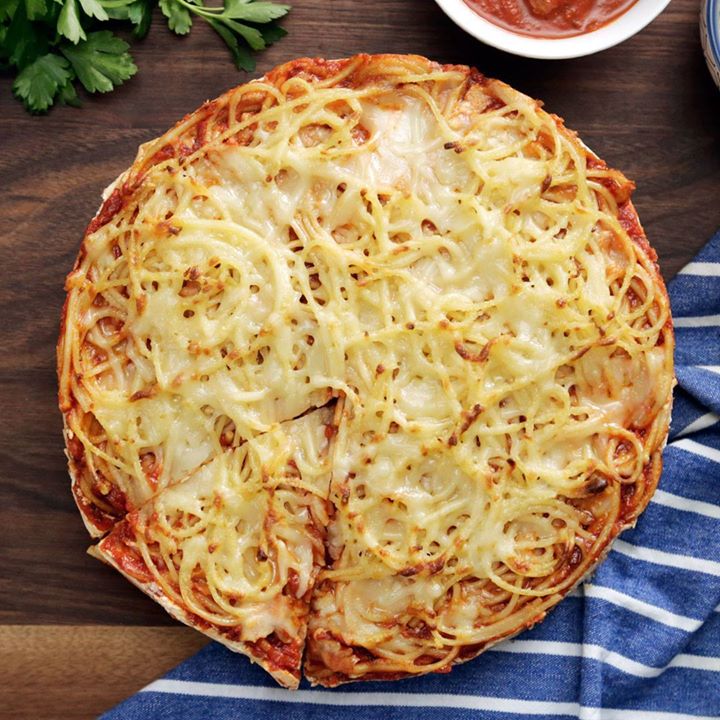
Spaghetti Layer Cake
Because spaghetti pie was so last season, enjoy it now in cake form with layers of pasta, bolognese, mozzarella, ricotta and more.
Author:
Cuisine: American
Recipe type: Cake
Ingredients
  • 1 pound spaghetti noodles, cooked al dente
  • 3 eggs, beaten
  • 2 cups whole milk ricotta
  • 1 (8-ounce) package mozzarella slices
  • 2 cups bolognese sauce, cold
  • ½ cup shredded mozzarella
  • ¼ cup Parmesan, grated
  • Salt and pepper, to taste
  • Parsley, for garnish
Instructions
  1. Preheat oven to 375 degrees. Lightly grease a springform cake pan.
  2. In a large bowl, combine cooked and slightly cooled spaghetti with beaten eggs. Place one-third of the spaghetti mixture in the bottom of the prepared pan. Add slices of mozzarella cheese followed by 1 cup of the ricotta cheese and a sprinkle of salt and pepper. Use an offset spatula to spread ricotta evenly. Next, add 1 cup of the bolognese sauce. Repeat these steps one more time, ending with spaghetti on top.
  3. Sprinkle pasta with shredded mozzarella and Parmesan. Bake for 35 to 45 minutes. Allow layered pasta cake to cool for 20 to 30 minutes before serving. This will ensure that the layers stay intact for a surprising presentation. Cut slices like a cake and enjoy!

Watch the recipe video here:

Spaghetti Layer Cake

Grab yourself a slice of… spaghetti? That's right. A cheesy, meaty slice of spaghetti cake.Full Recipe: taste.md/2rZcT4M

Posted by Tastemade on Friday, February 2, 2018
Cake

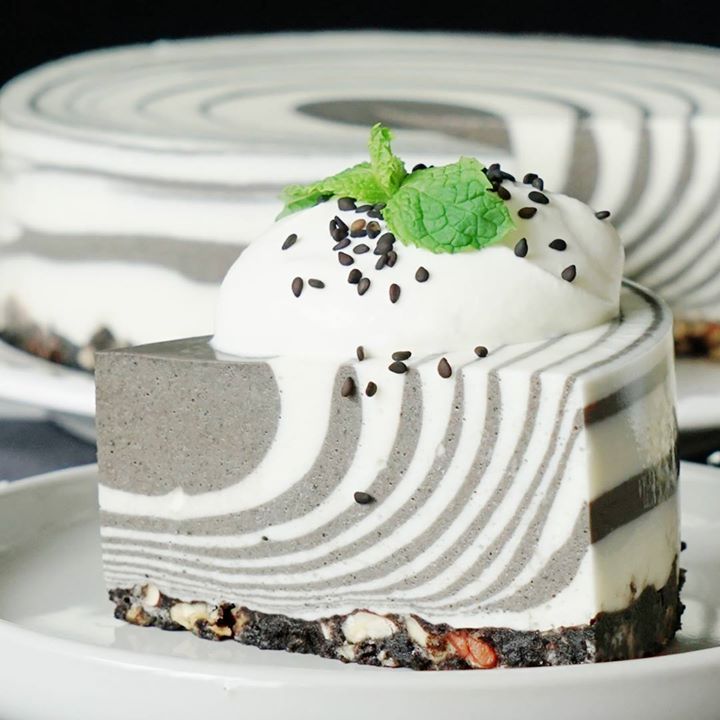
Zebra Striped Cheesecake

Zebra Striped Cheesecake
This hypnotic striped cheesecake made by layering a black sesame paste cream cheese filling is easier than you think.
Author:
Cuisine: American
Recipe type: Cake
Ingredients
  • 3 teaspoons powdered gelatin
  • 2 tablespoons water
  • 3 tablespoons black sesame paste
Crust:
  • 5 Oreos
  • ¼ cup pecans
  • 2 tablespoons butter, melted
Cheesecake filling:
  • 1 8-ounce package cream cheese
  • ¾ cup fresh cream
  • ½ cup plain yogurt
  • ½ cup milk
  • 4 tablespoons granulated sugar
  • 1 tablespoon lemon juice
To garnish:
  • Whipped cream
  • Black sesame seeds
  • Mint
Instructions
  1. Sprinkle the gelatin over the water and let it bloom. Heat dissolved gelatin in the microwave at 500 watts for 30 seconds.
  2. Prepare the crust: Add Oreos and pecans to a plastic zip top bag. Use a rolling pin to crush into small pieces. Transfer to a mixing bowl and add melted butter. Stir to combine, then transfer to a springform pan lined with parchment paper. Press down to form the crust. Refrigerate until set.
  3. In a blender, add all cheesecake filling ingredients. Blend until combined, then divide mixture between 2 bowls. Add black sesame paste to one of the bowls and whisk to combine until batter is gray in color.
  4. Use an ice cream scoop to dollop scoopfuls of the batter in the center of the crust, alternating between white and gray.
  5. Refrigerate until set, then garnish with whipped cream, mint and black sesame seeds.

Watch the recipe video here:

Zebra Striped Cheesecake

Is this a white cake with black stripes, or a black cake with white stripes? Full Recipe: https://taste.md/2vCxU2t?: Tastemade Japan

Posted by Tastemade on Friday, February 2, 2018
Dessert

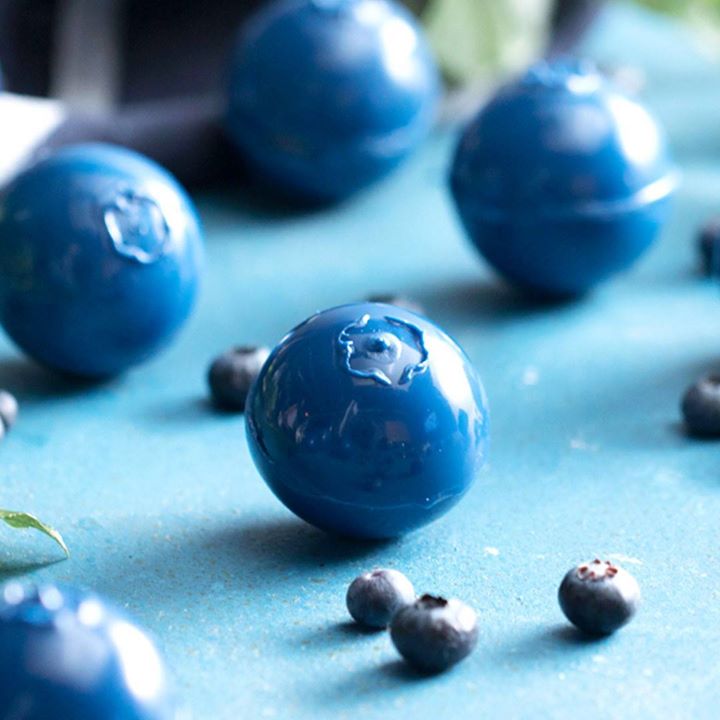
Blueberry Bombs

Blueberry Bombs
A blue chocolate shell encases a sweet blueberry and whipped cream surprise.
Author:
Cuisine: American
Recipe type: Dessert
Ingredients
For the blueberry gelee:
  • 1 (1/4-ounce) packet powdered gelatin
  • ¼ cup water
  • 1½ cups blueberries
  • 1 tablespoon honey
  • 2 tablespoons sugar
  • 2 teaspoons fresh lemon juice
For the blueberry shell:
  • 3 cups blue tinted chocolate wafers
For the whipped cream:
  • 2 cups heavy cream
  • 1 cup powdered sugar
  • 1 teaspoon vanilla
Instructions
  1. Sprinkle the powdered gelatin over the water and let stand for 5 minutes.
  2. In a small saucepan, bring the blueberries, honey, sugar and lemon juice to a boil over medium heat. Reduce heat and simmer until the sugar is dissolved. Add the gelatin water and stir until dissolved, about 3 minutes. Let cool slightly then pour into ¾-inch round silicone half sphere molds. Refrigerate for one hour.
  3. Melt the blue chocolate wafers and pour into the bottom and sides of 2-inch round silicone molds. Allow to set slightly then tip molds upside down to pour out excess. Place in the refrigerator for about 10 minutes to set.
  4. Meanwhile, mix the heavy cream and sugar in the bowl of a stand mixer, starting with low speed and working up to medium-high. Whip the cream until stiff peaks form then fold in vanilla.
  5. Fill the chocolate shells two-thirds of the way with the whipped cream and top with a mini round of blueberry gelee. Place in the freezer to set for about 1 hour.
  6. Unmold the halves. Pipe a ring of blue chocolate around the outer shell and attach two halves then press them together. Dip a tiny flower cookie cutter into some melted blue chocolate and create the top of the blueberry shape by pressing gently on the center top of the blueberry. Let them rest at room temperature for 15 minutes then serve.

Watch the recipe video here:

Blueberry Bombs

These blueberries are ripe for the eating.Full Recipe: taste.md/2GsqSTN

Posted by Tastemade on Tuesday, January 30, 2018

Cake Dessert

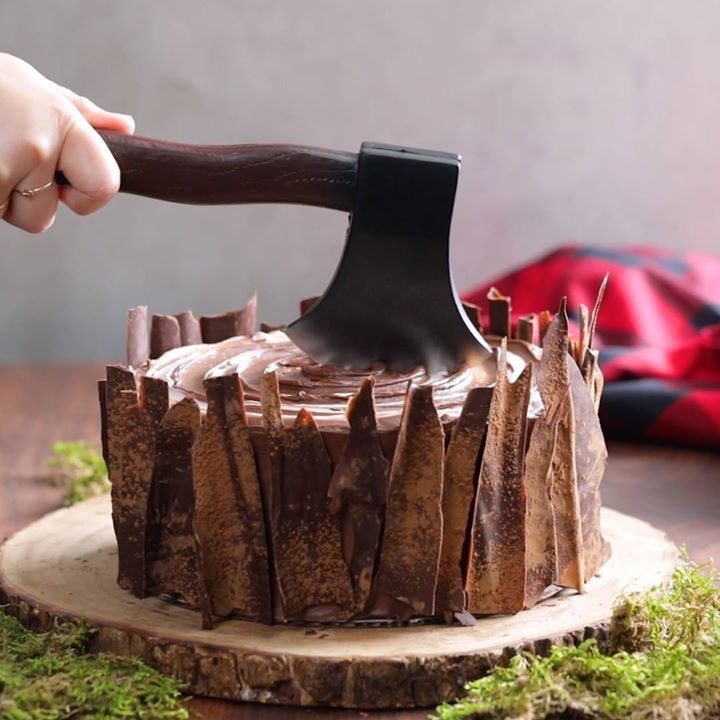
Lumberjack Cake

Lumberjack Cake
After cutting down trees and eating lunch, skip and jump your way over to this chocolate-frosted plaid red velvet cake.
Author:
Cuisine: American
Recipe type: Cake
Ingredients
Red velvet cake (dark red layer):
  • ½ cup butter, softened at room temperature
  • 2 tablespoons cocoa powder
  • 2 tablespoons red food coloring
  • 2½ cups all-purpose flour, sifted
  • 1 teaspoon salt
  • 1½ cups sugar
  • 2 large eggs
  • 2 teaspoons vanilla
  • 1 cup buttermilk
  • 1 tablespoon vinegar
White cake (red layer):
  • 2½ cups cake flour
  • 1½ teaspoons baking powder
  • ½ teaspoon baking soda
  • 1 teaspoon salt
  • 3 large eggs
  • 1 teaspoon vanilla
  • ¾ cup butter, softened at room temperature
  • 1½ cups sugar
  • 1 cup buttermilk
  • 8 tablespoons red food coloring
  • Chocolate cake layer:
  • 1½ cups all-purpose flour
  • 1 cup sugar
  • 1 teaspoon baking powder
  • ½ teaspoon baking soda
  • 1 teaspoon salt
  • ⅓ cup cocoa powder
  • ¾ cup butter, softened at room temperature
  • 2 large eggs
  • 2 teaspoons vanilla extract
  • ¾ cup sour cream, room temperature
Decorating the cakes:
  • 2 cups chocolate frosting
  • 1 cup milk chocolate frosting
For the chocolate bark:
  • 2 cups melted dark chocolate
  • 2 tablespoons cocoa powder, for dusting
For the wood cream cheese frosting:
  • 2 cups cream cheese, room temperature
  • 1 cup butter, room temperature
  • 1 cup powdered sugar, sifted
  • 2 tablespoons vanilla
  • 1 tablespoon lemon juice
Instructions
  1. Make the cakes: Preheat the oven to 350 degrees. Line two 9-inch cake pans with baking spray and parchment paper.
  2. For the red velvet layer: In a small bowl, combine cocoa powder and red food coloring to a paste consistency. Set aside. Combine flour and salt and set aside.
  3. In a large bowl of a stand mixer fitted with the paddle attachment, cream butter and sugar. Once smooth, add in eggs one at a time. Add in vanilla and the red paste. Alternate between adding the flour mixture and the buttermilk, making sure to combine thoroughly after each addition. Add vinegar and mix until batter is smooth. Divide batter between the two prepared pans and bake for 25 to 30 minutes until a toothpick comes out clean from the center. Set aside to cool.
  4. For the white cake layer: Preheat the oven to 350 degrees. Line two 9-inch cake pans with baking spray and parchment paper.
  5. In a medium bowl, sift together the flour, baking powder, baking soda and salt. Set aside. In a small bowl, whisk together eggs and vanilla.
  6. In a large bowl, cream butter and sugar. Add egg mixture. Alternate adding in the flour mixture and the buttermilk until completely combined. Stir in red food coloring. Divide batter between the two prepared pans and bake for 25 to 30 minutes until a toothpick comes out clean from the center. Set aside to cool.
  7. For the chocolate cake layer: Preheat the oven to 350 degrees. Line two 9-inch cake pans with baking spray and parchment paper.
  8. In a large bowl, combine the flour, sugar, baking powder, baking soda, salt and cocoa powder. Using a hand mixer, blend the butter, eggs and vanilla into the dry mix. Fold in the sour cream. Divide the batter between the two cake pans and bake for 25 to 30 minutes until fragrant and a toothpick comes out clean from the center of the cake. Set aside to cool.
  9. Make the wood cream cheese frosting: In a large bowl, cream together cream cheese and butter with a hand mixer until smooth. Add powdered sugar, lemon juice and vanilla. Set aside.
  10. Make the chocolate bark: Spread chocolate in a thin layer across a piece of 18 by 13-inch parchment paper. Lay another piece of parchment paper on top of the chocolate and smooth out. Roll the parchment paper lengthwise and set in the fridge to chill for up to 2 hours.
  11. Assemble the cake: When cakes are cool, cut off the tops and divide into two layers. Using a 5-inch and 2-inch cake mold, cut circles out of each layer. Stack the cake layers and add frosting. Remove chocolate bark from the fridge, dust with cocoa powder, and place around the edge of the cake to resemble bark.

Watch the recipe video here:

Lumberjack Cake

Button up your flannel, grab your axe, and hack yourself a slice.Full Recipe: taste.md/2DQDAgw

Posted by Tastemade on Friday, January 26, 2018

Cake Dessert

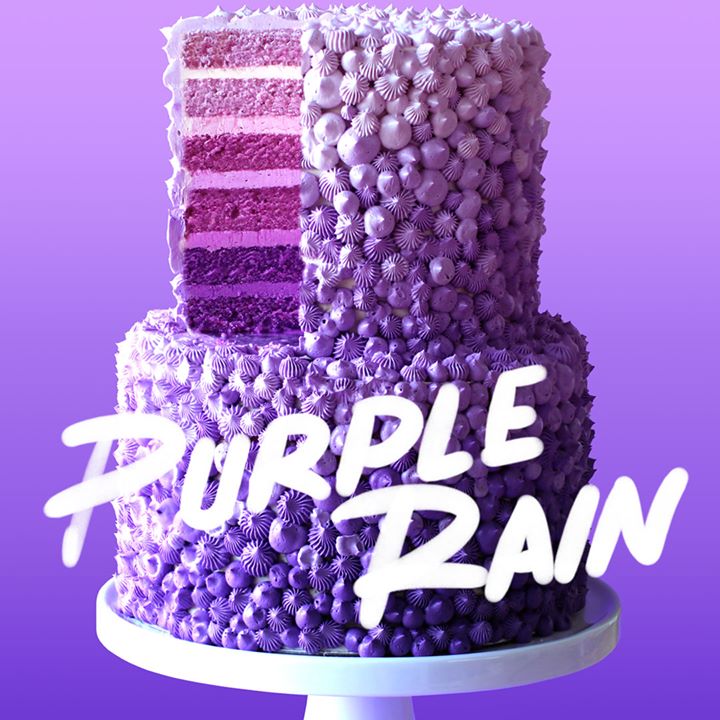
Purple Rain Cake

Purple Rain Cake
This magnificent blackberry-flavored cake made in honor of Prince just might taste good enough to make dove's cry.
Author:
Cuisine: American
Recipe type: Cake
Ingredients
Cake
  • You’ll need to triple this recipe
  • 429g all-purpose flour
  • 265g caster (superfine) sugar
  • ½ tsp salt
  • 3 tsp baking powder
  • 375ml of milk
  • 125ml vegetable oil
  • 125g unsalted butter, softened
  • 2 tbsp Greek yogurt (can substitute with sour cream)
  • 1 tsp vanilla extract
  • 2 large eggs
Cake extras
  • Regal purple food gel
  • Deep pink food gel
  • 3 tsp blackberry essence
Frosting
  • X3 batches Swiss meringue buttercream frosting (recipe on thescranline.com)
  • Regal purple food gel
  • Deep pink food gel
  • 2 tsp blackberry essence
Instructions
  1. Cake
  2. Before you begin
  3. You’ll need to triple this cake recipe. Not the cake extras, just the cake recipe itself. Nobody has a bowl big enough to handle all that batter so it’s just easier to make in 3 batches. I’d recommend making all the batter and then split it amongst the different cake tins.
  4. Preheat a fan-forced oven to 160C (320F) or 180C (356F) for a conventional oven. Spray three 8” cake tins with oil spray and line the bottom with baking paper. You’ll also need three 6” cake tins for the top tier. If you only have one of each sized tin you can just bake them in the oven one at a time it will just take longer. I’d recommend baking the cake the day before it’s being served to allow yourself plenty of time to make the entire cake and to allow it to cool down properly before frosting.
  5. Let’s begin!
  6. Making the batter
  7. In the bowl of a stand mixer fitted with the paddle attachment, add the flour, baking powder, caster sugar and salt. Turn mixer on low speed and allow it to mix for a couple minutes to help everything combine well (alternatively you may do this by sifting the ingredients together). Add the softened butter and mix until it resembles a fine sand like texture.
  8. Add the milk, oil, Greek yogurt, blackberry essence, eggs and vanilla extract into the bowl with the dry ingredients and mix on medium speed until no dry ingredients are visible. Scrape down the bowl and mix for another 20 seconds.
  9. Colouring the batter
  10. Once you’ve made triple the recipe split into 3 bowls evenly. To colour the batter use the following formulas:
  11. DARK PURPLE LAYER: 6 drops purple food gel + 3 drops pink food gel. Gently fold until well combined.
  12. MIDDLE PURPLE LAYER: 4 drops purple food gel + 2 drops pink food gel. Gently fold until well combined.
  13. LIGHT PURPLE LAYER: 2 drops purple food gel + 2 drops pink food gel. Gently fold until well combined.
  14. Filling the cake tins
  15. So you’re going to have fill three 8” cake tins with batter and three 6” cake tins with batter. For each colour you want to add about ⅔ of the batter into the 8” cake tin and ⅓ of the batter into the 6” cake tin.
  16. Bake the 8” cake tins for 45 min and the 6” cake tins for 30 min or until a toothpick inserted comes out clean. Allow the tins to cool for 2 min and then carefully flip the cake tins over on to a cooling rack to cool completely before using. I’d recommend chilling them overnight.
  17. Using a large serrated knife, carefully trim the top off each layer of cake to make even and flat layers. Try to aim to get them all the same height. An easy way to do this is to find the lowest height of the cake, place a skewer or toothpick next to that point and mark it. As you go around each side of the cake cutting it, use the marked skewer to make sure each cut is at the same height. I used a cake leveller in the video which is the simplest way to do it.
  18. Frosting
  19. So you’re going to colour the frosting in 5 different shades. Those shades will be used to fill the cakes but also to frost the outside of the cakes. But you’ll just use white frosting for the crumb coat. So set about ⅙ of the white frosting aside before you colour it. Split the rest of the frosting into 5 bowls. These are the colour formulas starting with the lightest:
  20. / 10 drops purple food gel + 5 drops pink food gel + a couple drops of black berry essence
  21. / 7 drops purple food gel + 4 drops pink food gel + a couple drops of black berry essence
  22. / 4 drops purple food gel + 3 drops pink food gel + a couple drops of black berry essence
  23. / 2 drops purple food gel + 2 drops pink food gel + a couple drops of black berry essence
  24. / 1 drops purple food gel + 1 drops pink food gel + a couple drops of black berry essence
  25. If you feel like you want darker shades add more purple food gel.
  26. Crumb Coat
  27. Let’s start by assembling the 8” cake. You’re going to start by adding a dab of the dark frosting on the board.
  28. Add the first dark cake layer on top of that and gently but firmly press down to make it stick to the frosting on the cake board. Add a layer of the darkest frosting on top and level off with an offset spatula. Then add the second layer of the darkest cake. Add the next lightest layer of frosting. You’re going to work your way up to the lightest cake layers and frosting.
  29. Add some white frosting around the outside of the cake. Use a small offset spatula to spread the frosting around making sure to fill in any cracks that may be showing in between each layer. Then use a cake scraper to level off the sides and top. It doesn’t have to be perfect! Just make sure everything looks neat and even.
  30. You’re going to repeat this for the 6” cake too.
  31. Chill them both for at least 3 hours.
  32. Assembling the cake!
  33. To assemble the cake, add three bubble straws into the chilled 8” cake. This is going to ensure your cake doesn’t collapse when it thaws before serving. The best way to make sure the bubble straws are even in height and don’t peak out the top is to add one straw all the way in. Lift it slightly and then marks it. Put it flush next to the other 2 straws and cut. Insert them into the cake in a triangle shape toward the middle so they support the 6” cake. Add a dab of frosting on top of the 8” cake and then carefully place the 6” cake on top. I’ve found the easiest way to do this is using a large offset spatula. Take your time it’s not a race!
  34. Ok so to finish off the cake you’re going to add the rest of your 5 different shades into two separate piping bags each. One bag will be fitted with a Wilton #32 piping tip and the other with a small round tip about the same size as the #32. And from here folks it’s about patience. You’re going to be piping blobs of frosting starting at the bottom of the cake with the dark purple and working your way up to the top using the lightest shade of purple.

Watch the recipe video here:

Purple Rain Cake

This cake tastes so good, it makes doves cry.Full Recipe: taste.md/2Dy0wxL?: The Scran Line

Posted by Tastemade on Saturday, January 27, 2018

Main dish

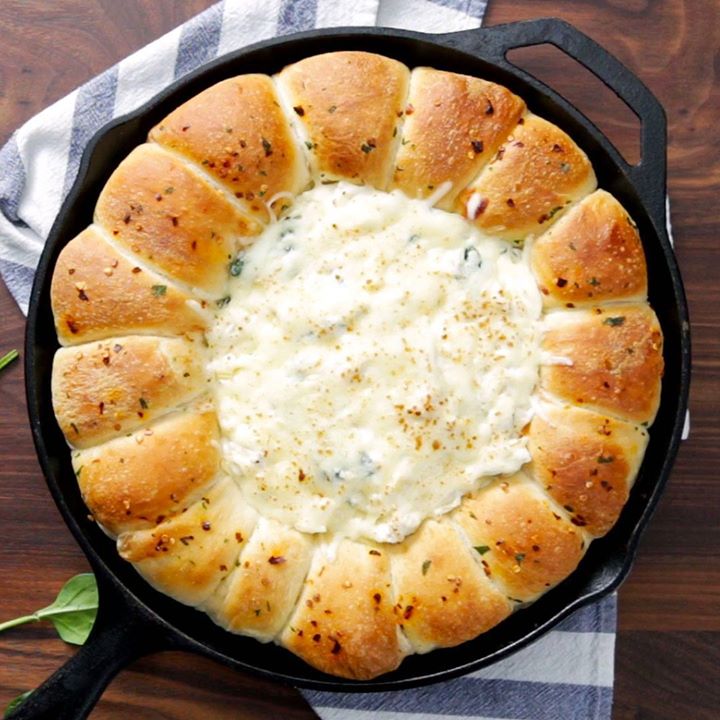
Skillet Bread with Creamy Spinach Artichoke Dip

Skillet Bread with Creamy Spinach Artichoke Dip
Indulge in every bite of this rich, chewy, ooey-gooey skillet bread with creamy spinach artichoke dip center.
Author:
Cuisine: American
Recipe type: Main dish
Ingredients
  • 14 frozen dinner rolls, thawed
  • 2 tablespoons extra-virgin olive oil
  • 2 cups fresh baby spinach
  • 1 (14-ounce) can artichoke hearts, drained and chopped
  • ½ cup sour cream
  • ¼ cup mayonnaise
  • 8 ounces cream cheese, room temperature
  • ½ teaspoon garlic powder
  • 1 cup shredded mozzarella cheese
  • ½ cup grated Parmesan cheese, divided
  • Salt and pepper, to taste
  • ½ cup unsalted butter
  • 2 teaspoons red chili flakes
  • 1 tablespoon fresh parsley, chopped
Instructions
  1. Preheat oven to 350 degrees
  2. Spray a large cast-iron skillet with cooking spray, and place a small bowl top side down in the center of the skillet. Spray bowl with cooking spray, and arrange the bread rolls around the outside of the skillet. Cover with plastic wrap and let proof until doubled in size for about an hour.
  3. In a medium nonstick skillet, heat the olive oil. Add the spinach and artichokes and cook until the spinach is slightly wilted. Add in the sour cream, mayonnaise, cream cheese, garlic powder, mozzarella cheese and half the Parmesan, stirring until the cheese melts, about 5 minutes. Season with salt and pepper.
  4. In a small saucepan, melt the butter and add chili flakes and chopped parsley. Stir to combine.
  5. Remove the bowl from the center of the cast-iron skillet and carefully spoon the dip into the center well. Brush the tops of the rolls with the melted butter mixture and sprinkle with the remaining Parmesan.
  6. Bake for 20 to 25 minutes or until the rolls are golden brown and the dip is nice and bubbly. Let cool slightly, serve in the skillet and enjoy!

Watch the recipe video here:

Creamy Spinach Artichoke Skillet Ring

Full disclosure: This dish was DEMOLISHED in less than 5 minutes. Full Recipe: taste.md/2n5qz8G

Posted by Tastemade on Thursday, January 25, 2018

Burgers

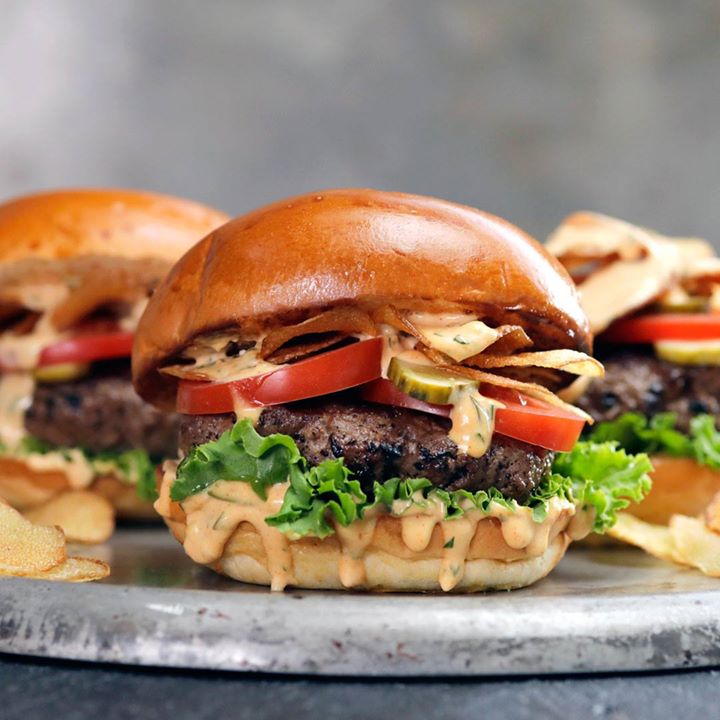
Juicy Lucy Crunch Burger

Juicy Lucy Crunch Burger
Nutella Stuffed Pancake recipe
Author:
Cuisine: American
Recipe type: Burger
Ingredients
  • 1 cup flour
  • 2 tablespoons sugar
  • 2 teaspoons baking powder
  • ½ teaspoon salt
  • 1 cup of milk
  • 2 tablespoons melted butter
  • 1 egg
  • ½ cup Nutella
  • Oil
Instructions
  1. Mix all dry ingredients.
  2. Beat the milk, melted butter and egg in a blender.
  3. Add the dry ingredients, beat some more.
  4. Add the liquid ingredients to the dry ones and mix, always beating.
  5. In a hot skillet, add the oil and a spoonful of batter.
  6. In the center of the skillet, add a spoonful of Nutella and cover with a little more pancake batter.
  7. Turn and brown the other side.

Watch the recipe video here:

Juicy Lucy Crunch Burger

Last name Hungry, first name Always? Then Juicy Lucy is for YOU.Save this recipe: https://taste.md/2vJi4nJ

Posted by Tastemade on Sunday, January 21, 2018

Main dish

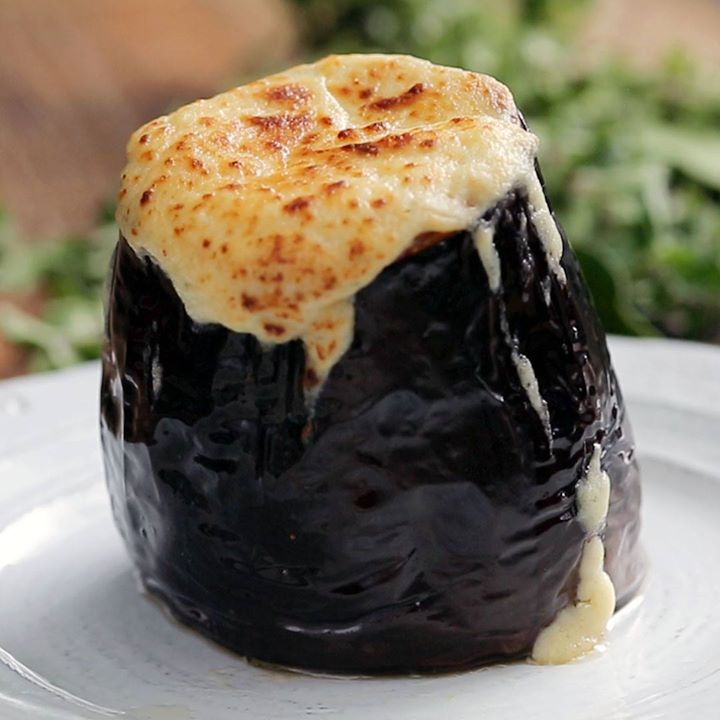
Moussaka Stuffed Eggplant Cups

Moussaka Stuffed Eggplant Cups
We've transformed this traditional Greek dish made with ground lamb and a cheesy white sauce from a casserole into eggplant cups.
Author:
Cuisine: American
Recipe type: Main dish
Ingredients
For the eggplant filling:
  • 4 large eggplants
  • 2 tablespoons olive oil
  • 1½ pounds ground lamb
  • 6 cloves garlic, finely minced
  • 1 large yellow onion, finely diced
  • 2 tablespoons chopped mint
  • 1 tablespoon chopped oregano
  • 1 teaspoon salt
  • ½ teaspoon black pepper
  • 1 teaspoon paprika
  • ½ teaspoon cinnamon
  • ½ teaspoon nutmeg
  • 2 tablespoons tomato paste
  • ½ cup red wine
  • 1½ cups chopped tomatoes
For the cheese sauce:
  • ½ cup butter
  • ¾ cup all-purpose flour
  • 2 cups whole milk
  • 1 teaspoon salt
  • 1½ cups grated pecorino cheese
  • 2 large eggs, beaten
Instructions
  1. Preheat the oven to 350 degrees.
  2. Make the eggplants and filling: Slice the tops and bottoms off the eggplants, and hollow out the insides, making sure to leave some flesh at the bottom to hold the filling in place. Set eggplants upright on a baking sheet lined with parchment. Brush with olive oil and set aside.
  3. In a large skillet on medium-high heat, saute lamb with garlic and onions until golden. Add fresh herbs and spices. Turn heat down to medium-low and add tomato paste, wine and tomatoes. Cook for 10 to 15 minutes until tomatoes cook down. Remove from heat and set aside.
  4. Make the cheese sauce: In a skillet over medium heat, make a roux by melting butter and adding flour. Toast until golden brown, stirring constantly. Add milk and bring to a boil. Once cheese mixture is thick, approximately 3 minutes, remove from heat and stir in pecorino. Allow cheese to melt and stir in eggs.
  5. Assemble the eggplant cups: Pour lamb mixture into prepared eggplant cups. Top with cheese sauce and bake for 20 to 25 minutes until cheese bubbles and turns golden. Serve warm.

Watch the recipe video here:

Moussaka Stuffed Eggplant Cups

Vegetables aren't half bad when you stuff them with meat & cheese.Full Recipe: taste.md/2BXZ7D0

Posted by Tastemade on Tuesday, December 26, 2017

Dessert

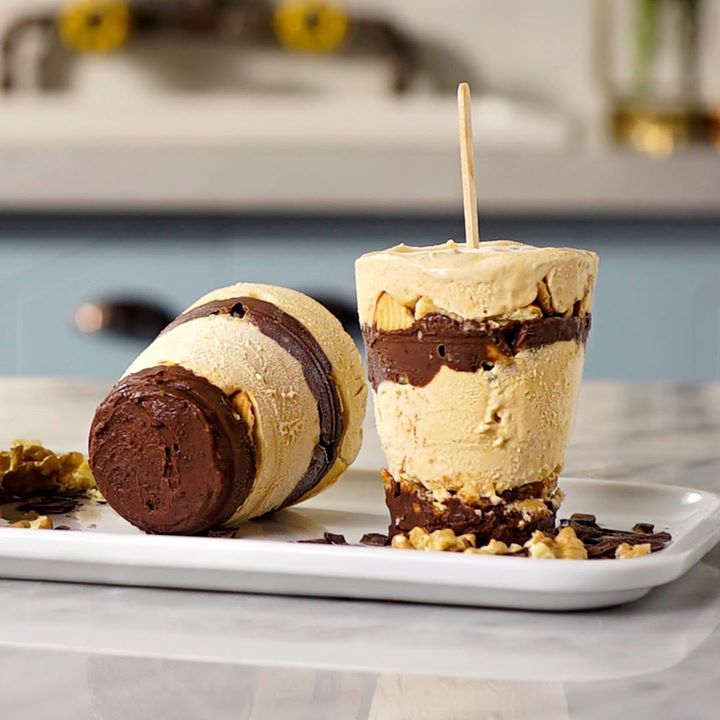
Chocolate & Dulce de Leche Popsicles

Chocolate & Dulce de Leche Popsicles
Crumbled cookies and walnuts give these creamy milk chocolate and dulce de leche popsicles some necessary crunch.
Author:
Cuisine: American
Recipe type: Dessert
Ingredients
  • 2 cups heavy cream, cold
  • 1 cup heavy cream, room temperature
  • 1 cup dulce de leche
  • 5 ounces dark chocolate, chopped
  • ½ cup walnuts, chopped
  • ½ cup plain cookies, chopped
Instructions
  1. Using a mixer, whip the cream until stiff peaks form. Add the caramel and mix gently. Set aside.
  2. In a double boiler, melt the chocolate. Remove from heat and add the cream. Mix well and set aside.
  3. In plastic cups or popsicle molds, place a layer of the chocolate ganache followed by a layer of cookies. Top with a layer of the caramel cream and chopped walnuts.
  4. Continue layering until the molds are filled, and then insert the popsicle sticks.
  5. Place in the freezer for at least 4 hours, or until hardened.

Watch the recipe video here:

Chocolate & Dulce de Leche Popsicles

Tell us – what is proper popsicle etiquette? To lick or bite?Full Recipe: taste.md/2quWeFl?: Tastemade Brasil

Posted by Tastemade on Sunday, January 7, 2018

Cake Dessert

Apple Crisp Strudel

Apple Crisp Strudel
You may be inspired to sing while you bake — and eat. Don't say we didn't warn you.
Author:
Cuisine: American
Recipe type: Cake
Ingredients
Dough Recipe
  • 1 cup all-purpose flour, plus extra for dusting
  • ⅓ cup lukewarm water
  • ½ teaspoon kosher salt
  • Vegetable oil, enough to coat the dough
Filling Recipe
  • 11/2 pounds apples (about 3-4 apples), cored, peeled, and sliced
  • ¾ cup unseasoned bread crumbs
  • 6 tablespoons granulated sugar
  • 1 tablespoon ground cinnamon
  • 3 tablespoons raisins, soaked in rum
  • 6 tablespoons butter, melted
  • 1 tablespoon lemon juice
  • Egg wash (1 egg 1 tablespoon water, whisked)
Crisp Apple Strudel
  • Whipped cream, flavored with rum, vanilla or almond extract
  • Confectioner's sugar
Instructions
Dough Recipe
  1. In a bowl, combine flour and salt.
  2. Slowly incorporate the water, while mixing until a mass is formed.
  3. Begin kneading the dough on a floured surface for about 10 minutes or until smooth.
  4. It should feel moist, but not sticky.
  5. Dust the dough with a little more flour if needed.
  6. Then beat or slam the dough a few times to help relax the gluten.
  7. Form it into a ball, and set it aside in a bowl of vegetable oil to rest for at least one hour.
Filling Recipe
  1. In a pan, toast bread crumbs in 3 tablespoons of melted butter, until golden brown.
  2. Set aside to cool, and then combine with sugar and cinnamon.
  3. In a bowl, add the sliced apples and cover with lemon juice to prevent browning.
  4. Add raisins, without the rum, and mix everything well.
Crisp Apple Strudel
  1. Preheat oven to 375F.
  2. Drip off the excess oil, and roll the dough in some flour.
  3. Then roll it out on a floured surface.
  4. When the dough reaches about a foot wide, place it on a clean, floured tablecloth.
  5. Pick up the dough with your the back of your hand and knuckles, and begin to gently stretch the dough from the middle outwards. The goal is to make it almost paper thin and rectangular in shape.
  6. Once the dough is too large to handle, carefully place it back onto the floured tablecloth.
  7. Go around the edges and continue stretching it, until it's thin enough to read through the dough. Use scissors to trim off the thick edges.
  8. Brush the entire surface with the remaining melted butter.
  9. Spread the bread crumb mixture on one half, and then place the apple mixture on top.
  10. Fold in all the edges. Starting at the end with the filling, use the tablecloth to gently roll the strudel all the way to the end.
  11. Carefully place it on a baking sheet, and brush it with melted butter and the egg wash. Bake on 375F for about 30 minutes or until golden brown.
  12. Allow it to cool before serving.
  13. Slice and serve with a dusting of confectioners sugar and a dollop of whipped cream.

Watch the recipe video here:

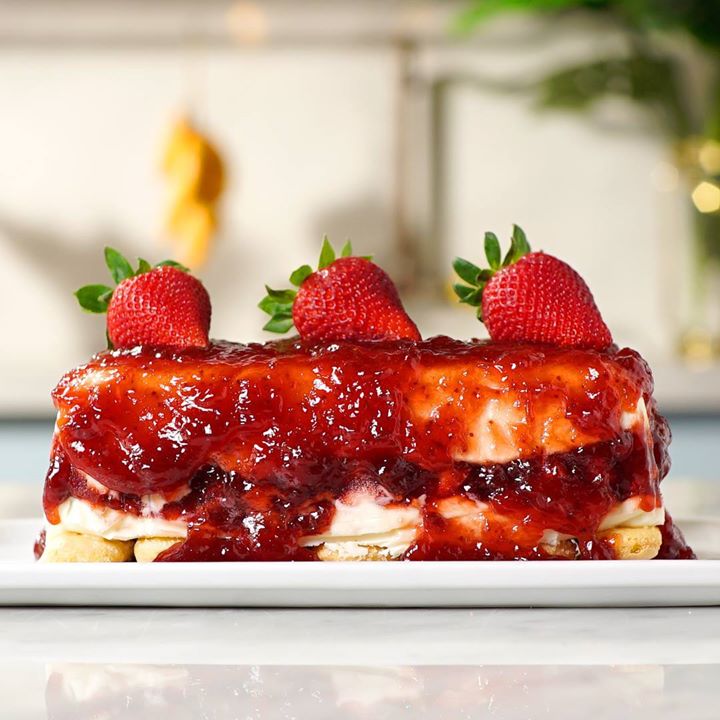
Frozen Strawberry Pie

When you're craving berries & cream – look no further…Full Recipe: taste.md/2kLVjdL?: Tastemade Brasil

Posted by Tastemade on Saturday, January 13, 2018