Showing 3,071 Result(s)
Breakfast

Cheeseburger Dough Ball Dip Tray
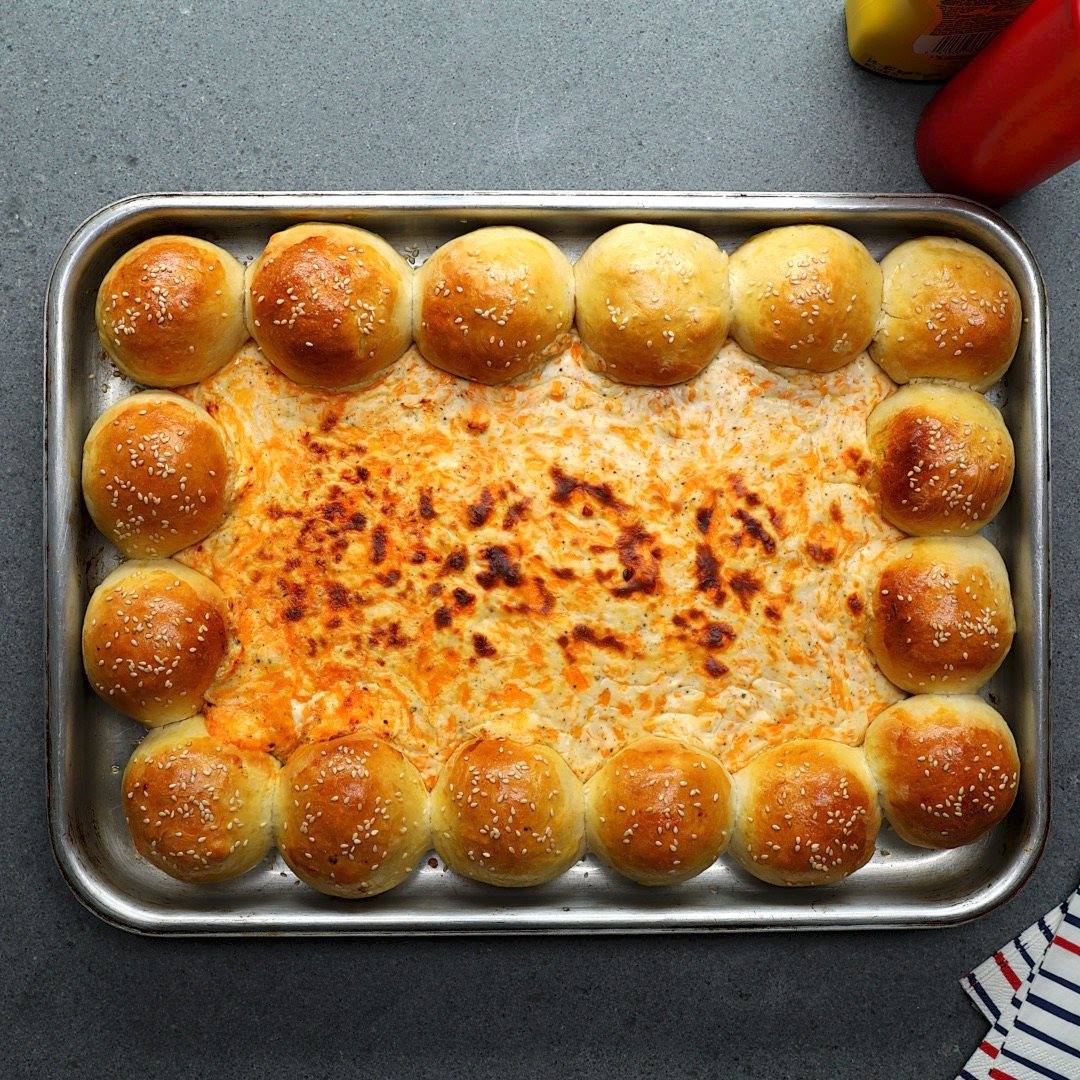
Cheeseburger Dough Ball Dip Tray
Cheeseburger dip tray - behold a thing of beauty. Gooey cheese sauce. Tiny burgers. Whats not to like?
Author:
Cuisine: American
Recipe type: Breakfast
Ingredients
  • 600g beef mince
  • 1 tbsp salt
  • ½ tbsp pepper
  • 1 tsp garlic powder
  • 2 tbsp oil
  • Sliced American-style cheese
  • 800g pizza dough
  • 1 egg, beaten
  • 2 tbsp sesame seeds
  • 500g cream cheese
  • 200ml cream
  • 300g grated cheddar
  • 1 tsp salt
  • 1 tsp pepper
Instructions
  1. Mix the beef mince with the salt, pepper and garlic powder. Form into small patties.
  2. Heat the oil until very hot and fry the mini burgers in batches.
  3. When they are done, divide the pizza dough into walnut sized balls. Press them flat to make disks, then place a square of American cheese in the middle. Top with a burger and carefully bring up the sides, pinching together to seal the burgers inside.
  4. Place them around the edge of a greased baking tray and bake for around 15 minutes until lightly browned.
  5. Meanwhile, mix the cheeses and cream together and season.
  6. Spoon this mixture into the middle of the tray.
  7. Bake again for around 15 minutes until the cheese dip is bubbling.
  8. Serve with friends!

Watch the recipe video here:

Cheeseburger Dough Ball Dip Tray

Cheeseburger Dough Ball Dip Tray

Posted by Twisted on Thursday, July 5, 2018
Breakfast

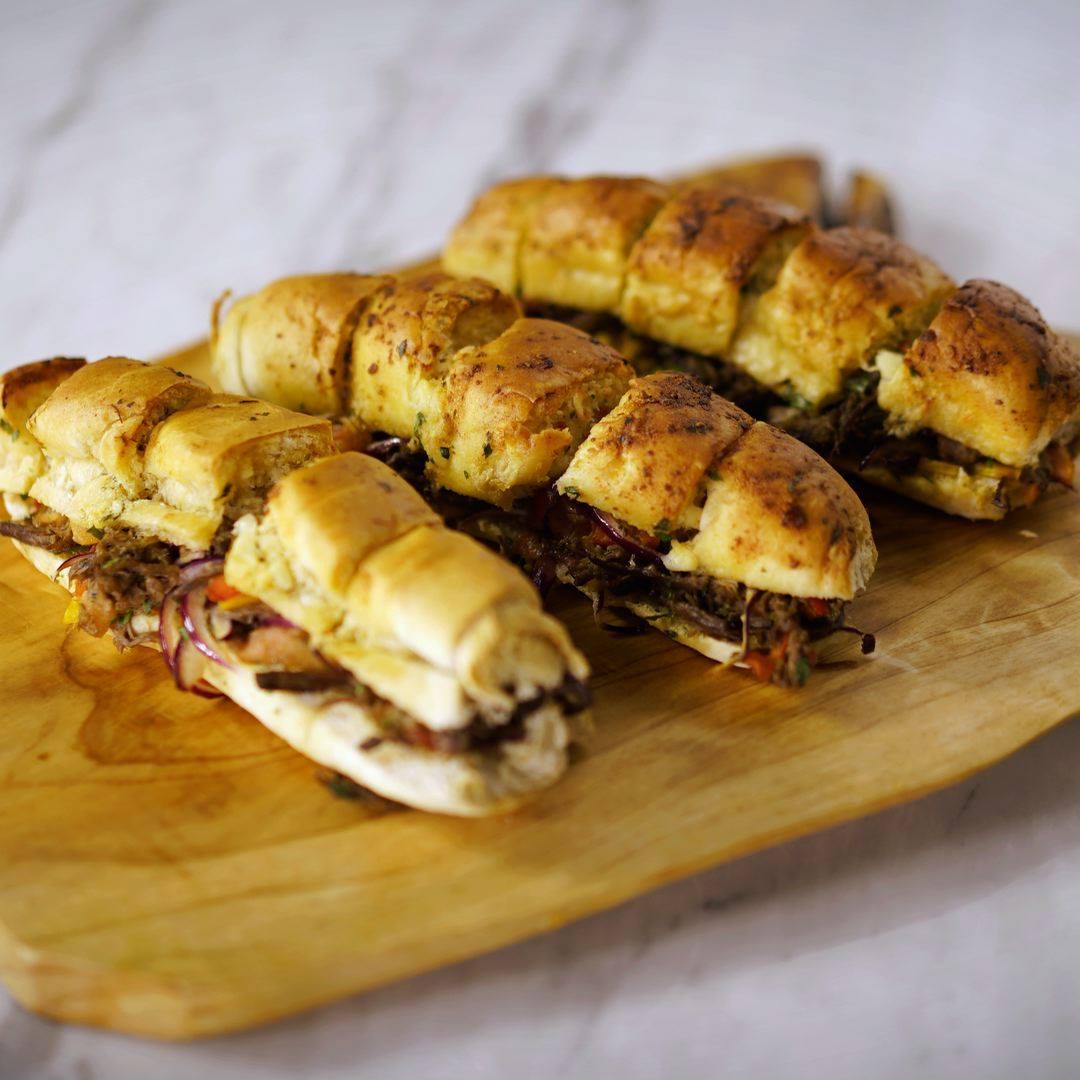
Garlic Bread With Shredded Beef

Garlic Bread With Shredded Beef
Um, why aren't all sandwiches made with garlic bread?
Author:
Cuisine: American
Recipe type: Breakfast
Ingredients
  • ½ pound shredded beef
  • 2 tomatoes, skinned, seeded and chopped
  • ½ onion, cut into rings
  • ½ red bell pepper, chopped
  • ½ yellow bell pepper, chopped
  • ¼ bunch of parsley, chopped
  • ¼ cup red wine vinegar
  • ½ cup olive oil
  • Salt
  • Black pepper
  • 10 garlic bread rolls
Instructions
  1. Preheat oven to 350 degrees.
  2. In a mixing bowl, combine the beef, tomatoes, onion, red pepper, yellow pepper and parsley. Season with the vinegar, olive oil, salt and pepper.
  3. Cut the garlic bread in half, fill it with the meat, then bake for about 25 minutes. Slice and serve.

Watch the recipe video here:

Garlic Bread Beef Sandwich

Um, why aren't all sandwiches made with garlic bread?Taste for Yourself: taste.md/2tOdG62Try Tastemade TV, Free for 7 days: https://taste.md/2zcId3s

Posted by Tastemade on Friday, July 6, 2018

Breakfast

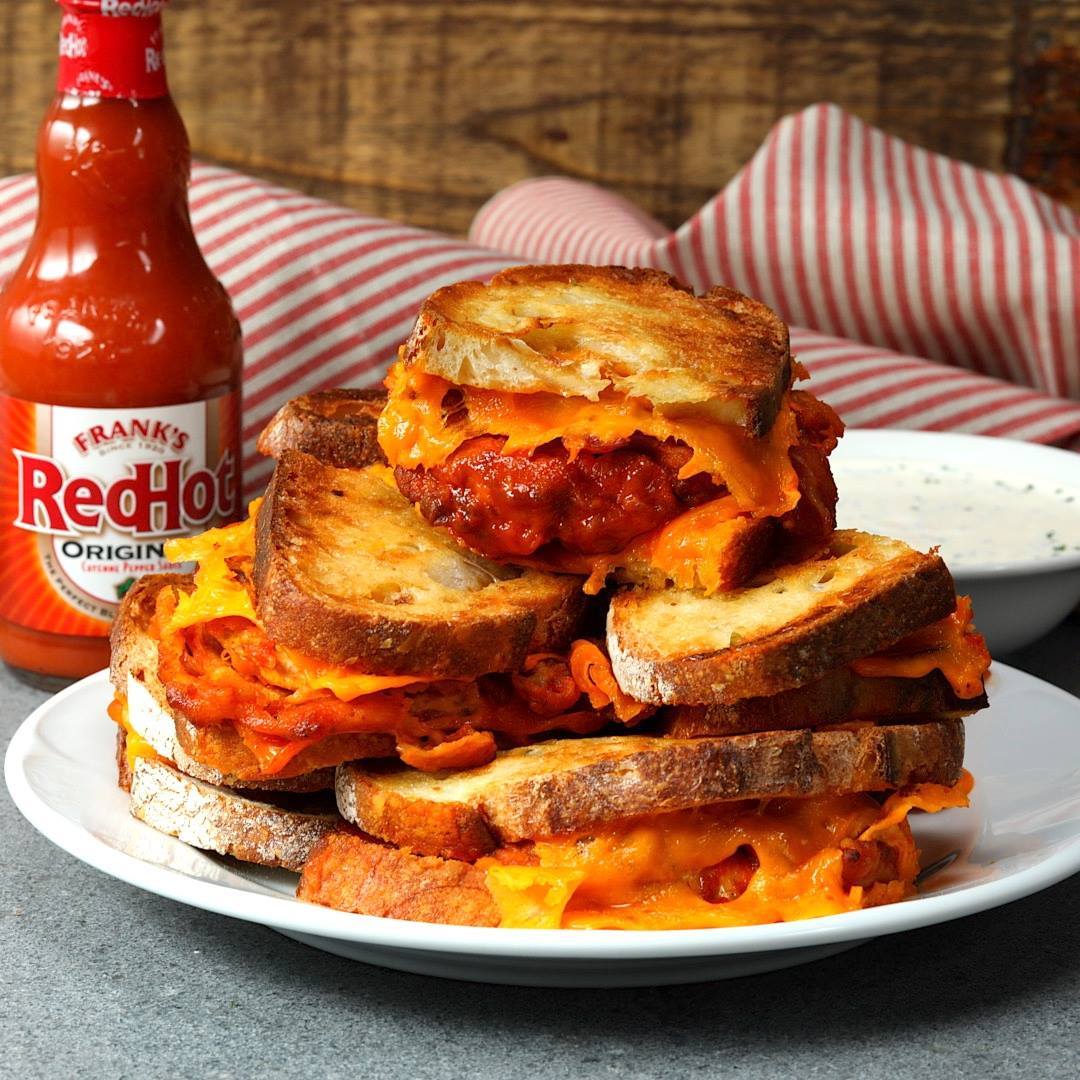
Frank’s Sheet Pan Chicken Grilled Cheese

Frank’s Sheet Pan Chicken Grilled Cheese
As we pay homage to the greatest food of all time on National Fried Chicken Day, Team Twisted began asking ourselves, ‘how could we take fried chicken to the next level this year’? After testing every delicious combination under the sun, we can officially confirm that Frank’s Sheet Pan Chicken Grilled Cheese is the taste sensation you deserve this summer. Sometimes stars align to create something truly epic. And cheesy.
Author:
Cuisine: American
Recipe type: Breakfast
Ingredients
  • 1 large sourdough loaf- cut into slices
  • 4 chicken breasts, butterflied, flattened and cut into 4” pieces
  • 1 ½ cups plain flour
  • 2 cups buttermilk
  • 1 tbsp black pepper
  • 1 tbsp salt, plus ½ tsp
  • ½ tbsp paprika
  • ½ tbsp garlic powder
  • 12 slices American cheese
  • ¼ cup mayonnaise
  • oil, for frying
  • 1 cup franks original hot sauce
  • 4 tbsps honey
  • 2 tbsp butter
  • 12 strips bacon, cooked (optional)
  • cool ranch dressing, for serving
Instructions
  1. Pop your pieces of chicken into the buttermilk along with ½ tsp salt.
  2. Pop in the fridge for a couple of hours.
  3. Mix the flour with the ¼ tsp salt, pepper, paprika, garlic powder. Lift out a chicken breast and allow excess to drip off before dunking into the flour. Shake off excess.
  4. Fry in hot oil until nicely golden and cooked through. Repeat with the rest and drain well on kitchen towel.
  5. Make your buffalo sauce. Heat the hot sauce and honey over medium heat. Whisk in cold butter until emulsified. Dunk your fried chicken in the sauce.
  6. Spread a thin layer of mayonnaise over one side of the bread slices. Lay these slices on a lined baking tray, mayonnaise side facing downwards. Top with a little cheese, then top with the chicken pieces, the cooked bacon, a little more cheese, then the top piece of bread. Weigh down with another tray and bake at 200°C for 10-15 minutes, or until nicely melted and delicious.

Watch the recipe video here:

Frank’s Sheet Pan Chicken Grilled Cheese

Frank’s Sheet Pan Chicken Grilled Cheese

Posted by Twisted on Friday, July 6, 2018

Breakfast

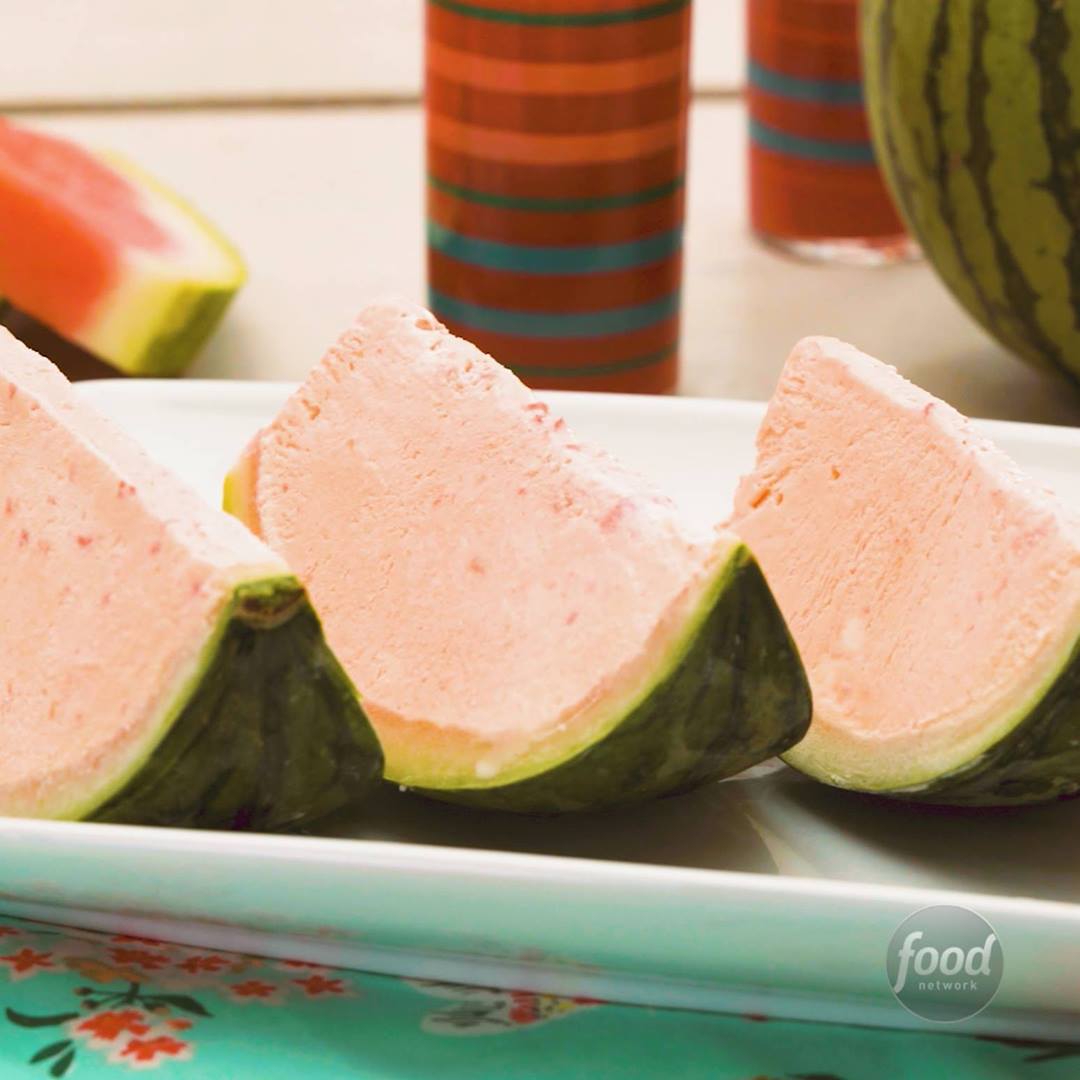
No-Churn Watermelon Ice Cream Slices

No-Churn Watermelon Ice Cream Slices
What fun to slice into a mini watermelon and reveal luscious watermelon ice cream hidden inside!
Author:
Cuisine: American
Recipe type: Breakfast
Ingredients
  • One 4- to 5-pound mini seedless watermelon
  • One 14-ounce can sweetened condensed milk
  • Pinch fine salt
  • 2 cups heavy cream, chilled
Instructions
Special equipment:
  1. an immersion blender
  2. Cut a thin slice off the top of the watermelon, just enough to show the pink of the inside flesh. Stand the watermelon upright vertically in a large bowl. Place an immersion blender into the cut part at the top of the watermelon and puree the flesh, moving the blender in and around, following the shape of the inside of the watermelon. Be careful not to cut through the sides or bottom of the watermelon rind.
  3. Pour out the juice and reserve 1 cup for the ice cream; save the rest for another use. Using a spoon, scoop out any remaining red watermelon flesh so you have a smooth white interior (this is important so the melon freezes properly). Make sure there is no juice remaining inside and pat dry with a paper towel.
  4. Freeze the watermelon while you make the ice cream.
  5. Whisk together the condensed milk, salt and reserved watermelon juice in a large bowl and set aside.
  6. Whip the heavy cream in a large bowl with an electric mixer on medium-high speed until firm peaks form, about 2 minutes. Fold about one-half of the whipped cream into the condensed milk mixture with a rubber spatula until combined, then fold the lightened mixture into the remaining whipped cream until well blended. Pour the mixture into the frozen watermelon, filling it all the way to the top. Cover with plastic wrap and freeze until solid, 3 hours and up to overnight.
  7. If frozen overnight, let the watermelon thaw for about 2 hours in the refrigerator before serving. Place the watermelon cut-side down on a cutting board and halve lengthwise with a long chef's knife. Cut each half lengthwise into 3 wedges.

Watch the recipe video here:

How to Make No-Churn Watermelon Ice Cream Slices

Recipe of the Day: No-Churn Watermelon Ice Cream Slices ??? Save this recipe: http://bit.ly/2K9KS32.

Posted by Food Network on Friday, July 6, 2018

Breakfast

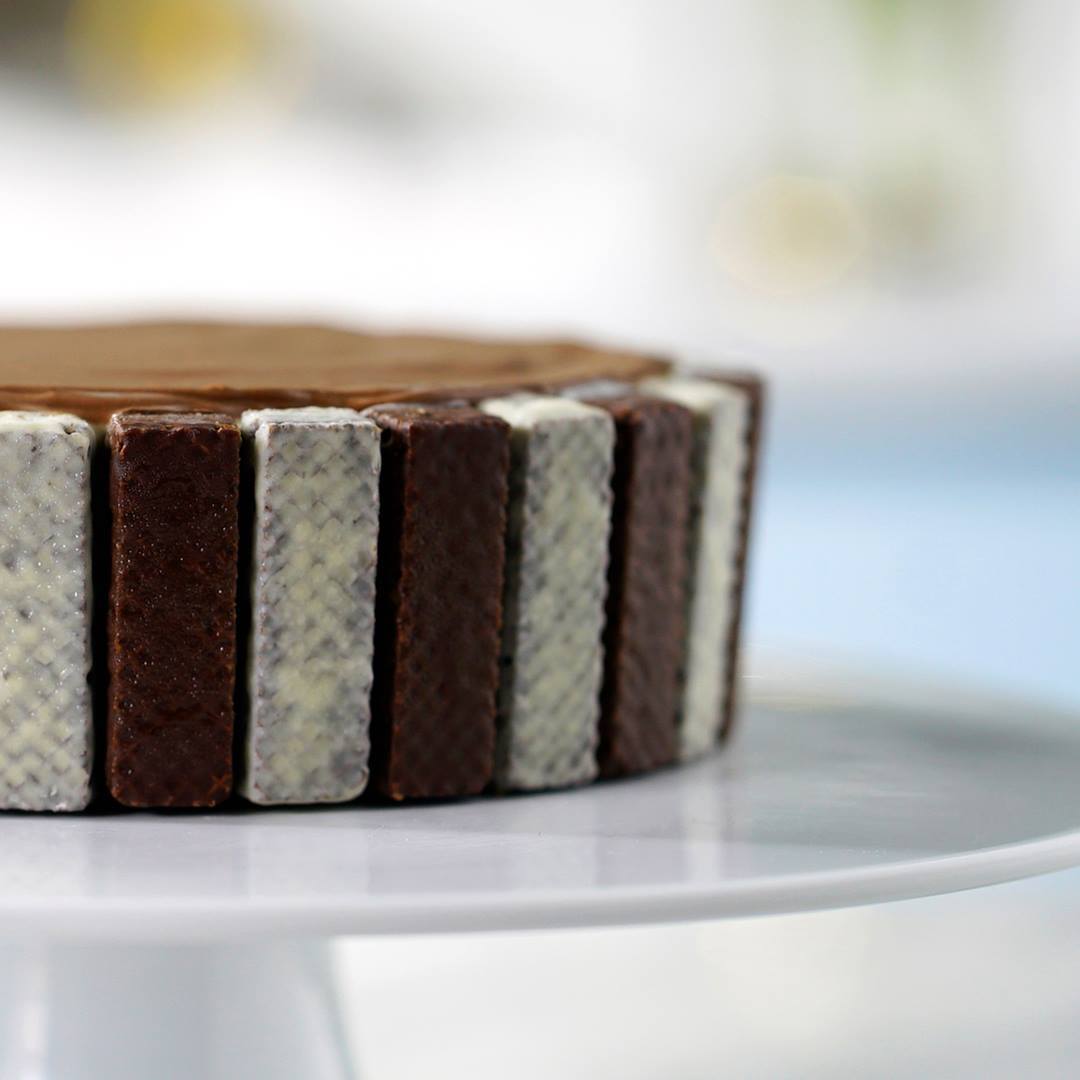
Candy Wafer Pie

Candy Wafer Pie
Skinny people are easier to kidnap. Stay safe, eat cake.
Author:
Cuisine: American
Recipe type: Breakfast
Ingredients
  • 2 packages cookies 'n' cream Hershey's Mais (cookie wafers)
  • 2 packages milk chocolate Hershey's Mais (cookie wafers)
  • 2 cans condensed milk
  • 1½ cups milk
  • 2 egg yolks
  • 1 teaspoon vanilla extract
  • 1¼ cups heavy cream
  • Chocolate topping:
  • ½ cup heavy cream
  • 1 cup chopped bittersweet chocolate
Instructions
  1. In a saucepan, add the condensed milk, milk and eggs. Simmer over low heat until it's the consistency of a thick cream. Remove from heat and add the vanilla extract. Transfer to a mixing bowl and stir in the heavy cream. Set aside.
  2. In a springform pan, line the outer edges with the chocolate wafers, alternating colors. Use remaining wafers (about half a package each) to crush into crumbs and press into the bottom of the pan. Pour the condensed milk mixture into the mold, then freeze for 6 hours.
  3. Heat the ½ cup heavy cream, then add to a bowl with the chopped chocolate and stir until the chocolate has melted completely. Pour this over the cake before serving.

Watch the recipe video here:

Candy Wafer Pie

Sweet tooth? HA – more like sweet teeth. Taste for Yourself: taste.md/2Kunr0B?: Tastemade BrasilTry Tastemade TV, Free for 7 days: https://taste.md/2zcId3s

Posted by Tastemade on Saturday, July 7, 2018

Breakfast

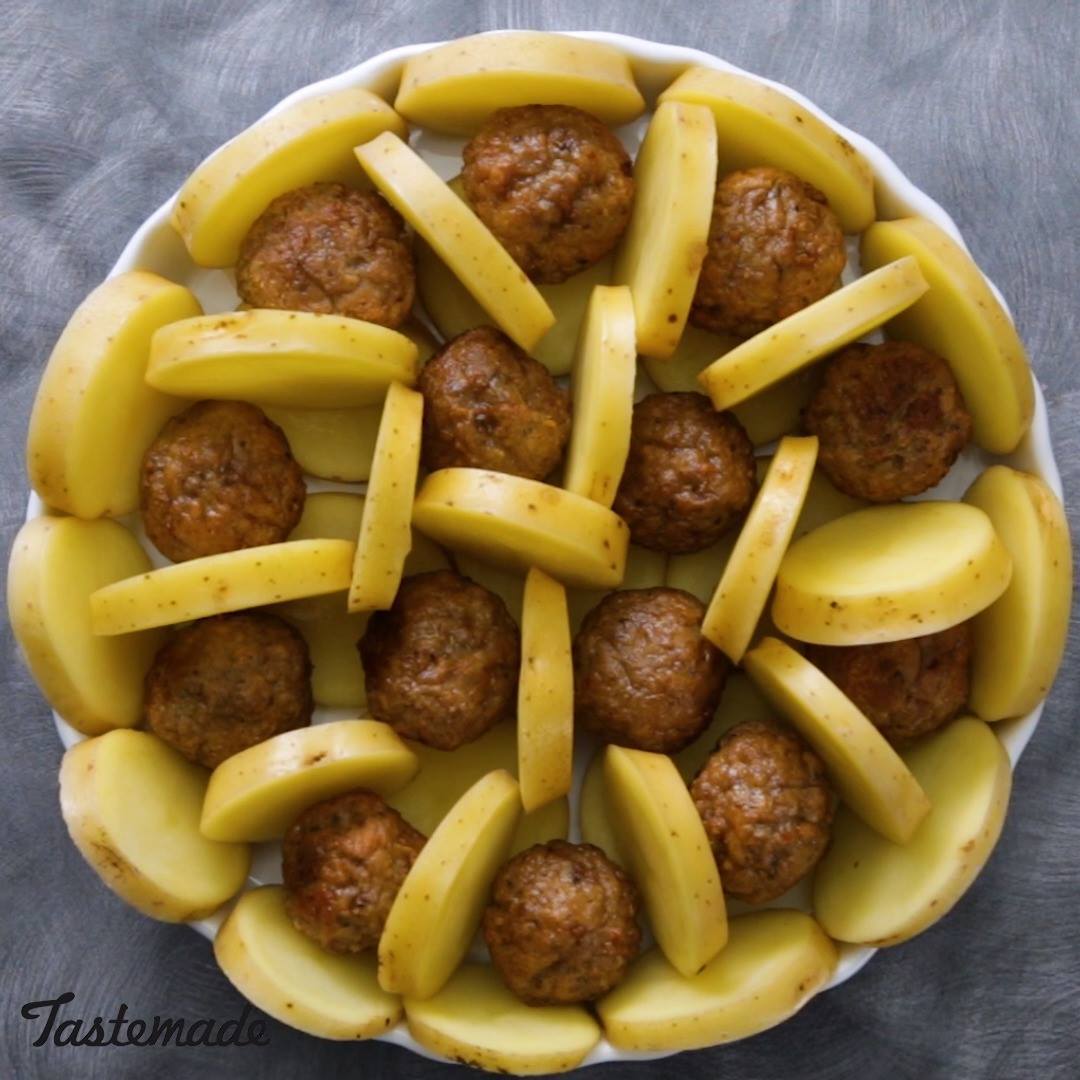
Potato Meatball Bake

Potato Meatball Bake
Meat and potatoes - the remix!
Author:
Cuisine: American
Recipe type: Breakfast
Ingredients
For the meatballs:
  • 1 pound ground beef
  • ½ cup yellow onion, finely diced
  • 1 large egg
  • ¼ cup panko
  • 1 teaspoon salt
  • 1 teaspoon chopped parsley
  • 1 teaspoon oregano
  • ¼ teaspoon black pepper
  • Lemon juice
For the cream sauce:
  • 3 tablespoons butter
  • 4 tablespoons all-purpose flour
  • 2 cups whole milk
  • Salt and pepper, to taste
For the bake:
  • 5 medium-sized Yukon gold potatoes, sliced into ¼-inch rounds
  • 1 cup tomato puree
  • 2 tablespoons chopped parsley
  • 2 tablespoons chopped basil
  • ½ cup shredded mozzarella
Instructions
Make the meatballs:
  1. Preheat oven to 350 degrees, and line a baking sheet with parchment paper.
  2. In a medium-sized bowl, combine beef, onions, panko and egg. Mix to combine. Add salt, herbs and spices. Finish with lemon, and gently mix to combine. Divide into approximately 22 one-inch balls, and bake for 12 to 15 minutes until golden. Allow to cool.
Make the sauce:
  1. In a small saucepan, melt butter and add flour. Continue to stir until flour darkens slightly. Slowly pour in milk and continue to stir on medium-low heat until mixture thickens. Season with salt and pepper and allow to cool slightly while bake is assembled.
Assemble the bake:
  1. Preheat the oven to 375 degrees. Line the bottom of a cast-iron or round casserole dish with 4 sliced potatoes. Place meatballs on top. Alternating between potato and meatball, place around the outside edge of the casserole dish. They should fit pretty tightly around. Carefully spoon tomato sauce over meatballs. Top with chopped herbs. Carefully spoon cream sauce over meatballs and potatoes and top with shredded cheese. Bake for 45 to 50 minutes until cheese and sauce are bubbling and the potatoes feel tender to the touch. Allow to cool for 15 minutes and serve immediately.

Watch the recipe video here:

Potato Meatball Bake

Forget what you thought you knew about meat & potatoes.Taste for Yourself: taste.md/2IOQ5smTry Tastemade TV, Free for 7 days: https://taste.md/2zcId3s

Posted by Tastemade on Saturday, July 7, 2018

Dessert

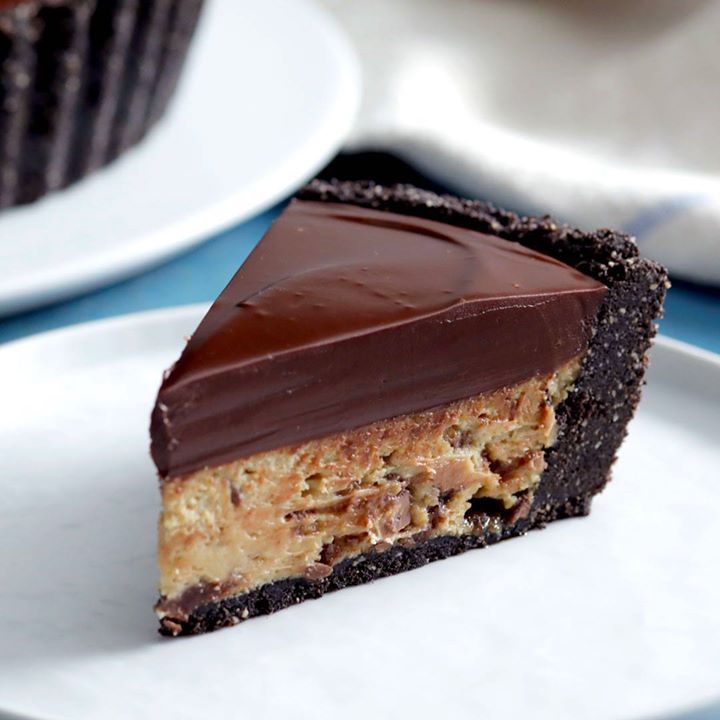
Giant Peanut Butter Cup Cheesecake

Giant Peanut Butter Cup Cheesecake
Make your sweet dreams a reality with a cake made with cream cheese peanut butter filling and topped with chocolate ganache.
Author:
Cuisine: American
Recipe type: Dessert
Ingredients
For the crust:
  • 5 cups chocolate wafer cookies
  • 1 cup peanuts, roasted and salted
  • ½ cup butter, melted and slightly cooled
For the filling:
  • 2 pounds cream cheese, softened
  • 5 eggs, room temperature
  • 1 cup dark brown sugar, packed
  • ¼ cup granulated sugar
  • 1¼ cups smooth peanut butter
  • ½ cup heavy cream
  • 1 vanilla bean, scraped
  • 12 peanut butter cups, chopped
  • ½ cup milk chocolate chips
For the ganache topping:
  • 2 cups heavy cream
  • 16 ounces chocolate, chopped
  • 1 pinch salt
  • 1 cup mini peanut butter cups
  • ½ cup peanuts, roasted, salted and roughly chopped
Instructions
For the crust:
  1. Mix all ingredients in a food processor and pulse until crumbly. Press into a 9½-inch deep-dish tart pan with removable bottom. Place in the refrigerator to chill.
For the filling:
  1. Preheat oven to 275 degrees. In the bowl of a stand mixer, cream the softened cream cheese until fluffy. Add eggs, one at a time, until well incorporated. Add sugars, peanut butter, cream and vanilla bean and mix well.
  2. Gently stir in the peanut butter cups and chocolate chips, then pour the filling into the prepared and chilled crust. Level the top gently. Place the tart pan on a large sheet of aluminum foil in a large baking pan. Pour water around the outside of the cheesecake, taking care not to allow the water to seep into the tart pan. Bake for about 1½ hours or until just firm.
  3. Allow to cool for 20 minutes, then place the cheesecake in the refrigerator for at least 4 hours.
For the ganache:
  1. In a heavy bottomed saucepan, bring cream just to boiling. Place the chopped chocolate and salt into a heatproof bowl and pour the cream over. Allow to sit without mixing for about 5 minutes. Whisk until shiny and smooth then pour over chilled cheesecake. Garnish with mini peanut butter cups and chopped peanuts. Serve immediately.

Watch the recipe video here:

https://www.facebook.com/tastemade/videos/1708245745929252/

Breakfast

Cheesy Jalapeño Chicken Enchiladas

Cheesy Jalapeño Chicken Enchiladas
These cheesy jalapeño chicken enchiladas are just as delicious as they look. We pack them pretty full they're filling and perfect along side a salad.
Author:
Cuisine: American
Recipe type: Breakfast
Ingredients
  • 4 cooked chicken breasts, shredded
  • 8oz cream cheese
  • 6 jalapeños, seeded and diced, split
  • 3 cups grated mixed cheese, split
  • 6 rashers bacon, cooked and chopped
  • 2 tsp pepper, split
  • 1 tsp garlic powder, split
  • ½ cup mayonnaise
  • ½ cup ranch dressing
  • Grated cheese for garnish
  • Sliced jalapeños for garnish
Instructions
  1. Mix together chicken, cream cheese, ½ jalapeños, 2 cups cheese, pepper and garlic powder.
  2. Lay out 10 tortillas and fill each with chicken mixture. Roll into a log and place each into a large greased baking dish.
  3. Bake at 180ºC (350ºF) for 10 minutes until golden brown and just crispy.
  4. Mean while, mix together mayonnaise, ranch dressing and remaining cheese, jalapeños, pepper and garlic powder. Remove tortillas from oven and pour sauce over top, spread evenly.
  5. Sprinkle within extra greased cheese and sliced jalapeños if desired.
  6. Bake for 10-15 minutes until bubbling and golden brown.
  7. Enjoy!

Watch the recipe video here:

Cheesy Jalapeño Chicken Enchiladas

Cheesy Jalapeño Chicken Enchiladas

Posted by Twisted on Friday, June 22, 2018

Breakfast

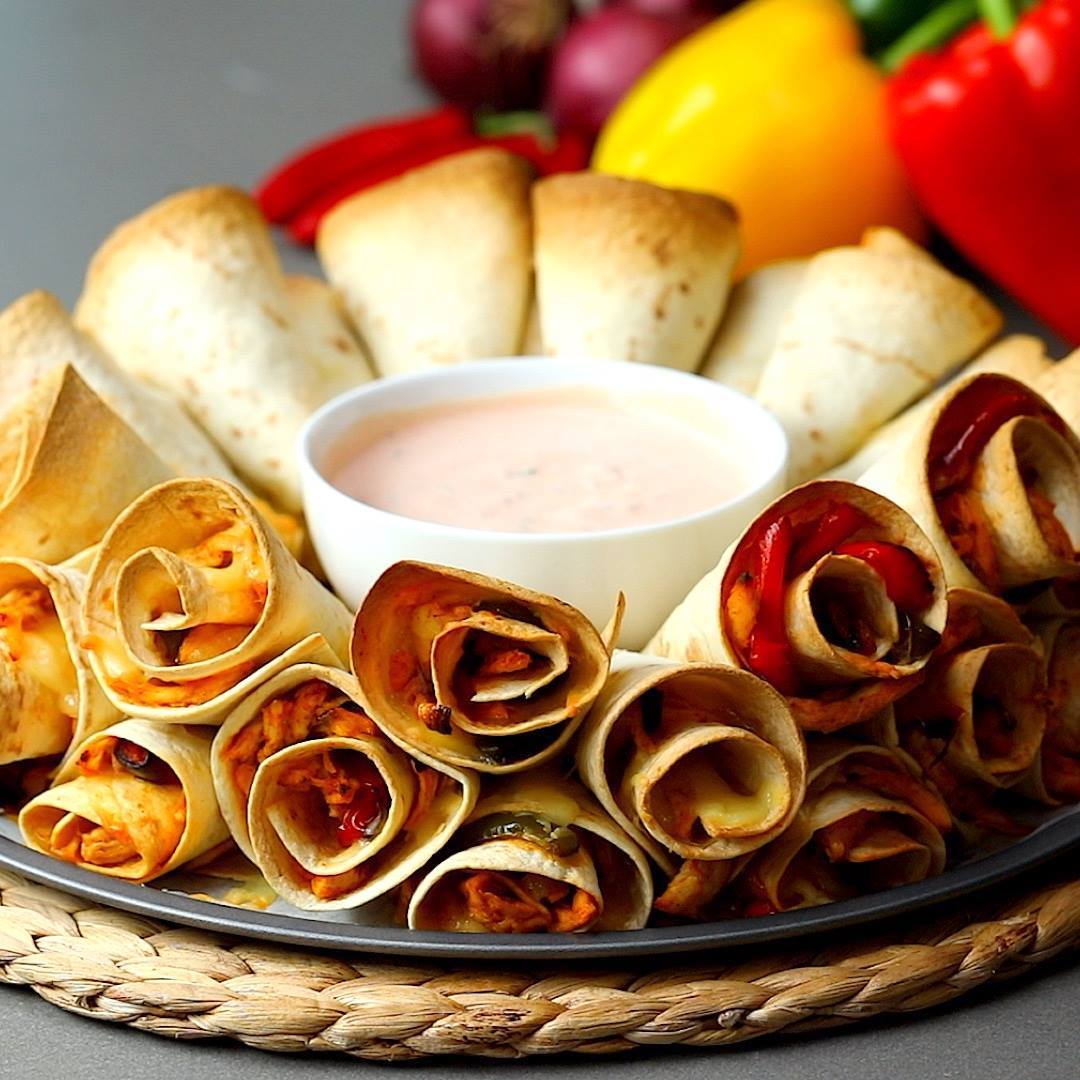
Fajita Cone Dip Ring

Fajita Cone Dip Ring
Here a really fun way to make the ultimate Twisted fajita sharer!
Author:
Cuisine: American
Recipe type: Breakfast
Ingredients
  • 3 Chicken breasts
  • 3 Mixed peppers
  • 1 White onion
  • 2 tbsp Fajita seasoning
  • 1 tbsp Olive oil
  • Tortillas
  • 2 cups Cheddar grated
  • 2 cups Sour cream
  • 1 cup Salsa
  • 1 tbsp Coriander
  • 1 clove Garlic
  • 1 tsp Salt
  • 1 tsp Pepper
Instructions
  1. Place the chicken breasts, chopped mixed peppers and onions on a sheet pan and mix it with the fajita seasoning and oil making sure all the ingredients is fully covered in oil and seasoning.
  2. Place in the oven for 30 minutes at 180 degrees.
  3. Once thats cooked, shred the chicken and mix it through with the peppers.
  4. Take a tortilla and cut it in half using a pizza cutter. Place a portion of the cheddar onto the tortilla half followed by the chicken and pepper mix.
  5. Roll the tortilla into a cone shape and repeat until you have used up all the fajita mix.
  6. Take a pizza tray lined with grease proof paper and place a glass in the middle. Start placing the fajita cones around the glass in a circle with the point of the cones facing inwards.
  7. Put a handful of cheddar on top of the first layer and repeat two more times until you have 3 layers of cones.
  8. Remove the glass and place in the oven for 20 minutes at 180 degrees.
  9. Whilst thats cooking start making the dip by adding the sour cream, salsa, chopped onion, coriander, salt and pepper to a bowl, mixing it all together.
  10. Remove the the cone ring from the oven and place the dip in the middle of the ring.
  11. Rip 'n' dip and enjoy!!

Watch the recipe video here:

Fajita Cone Dip Ring

Fajita Cone Dip Ring

Posted by Twisted on Wednesday, July 4, 2018

Dessert

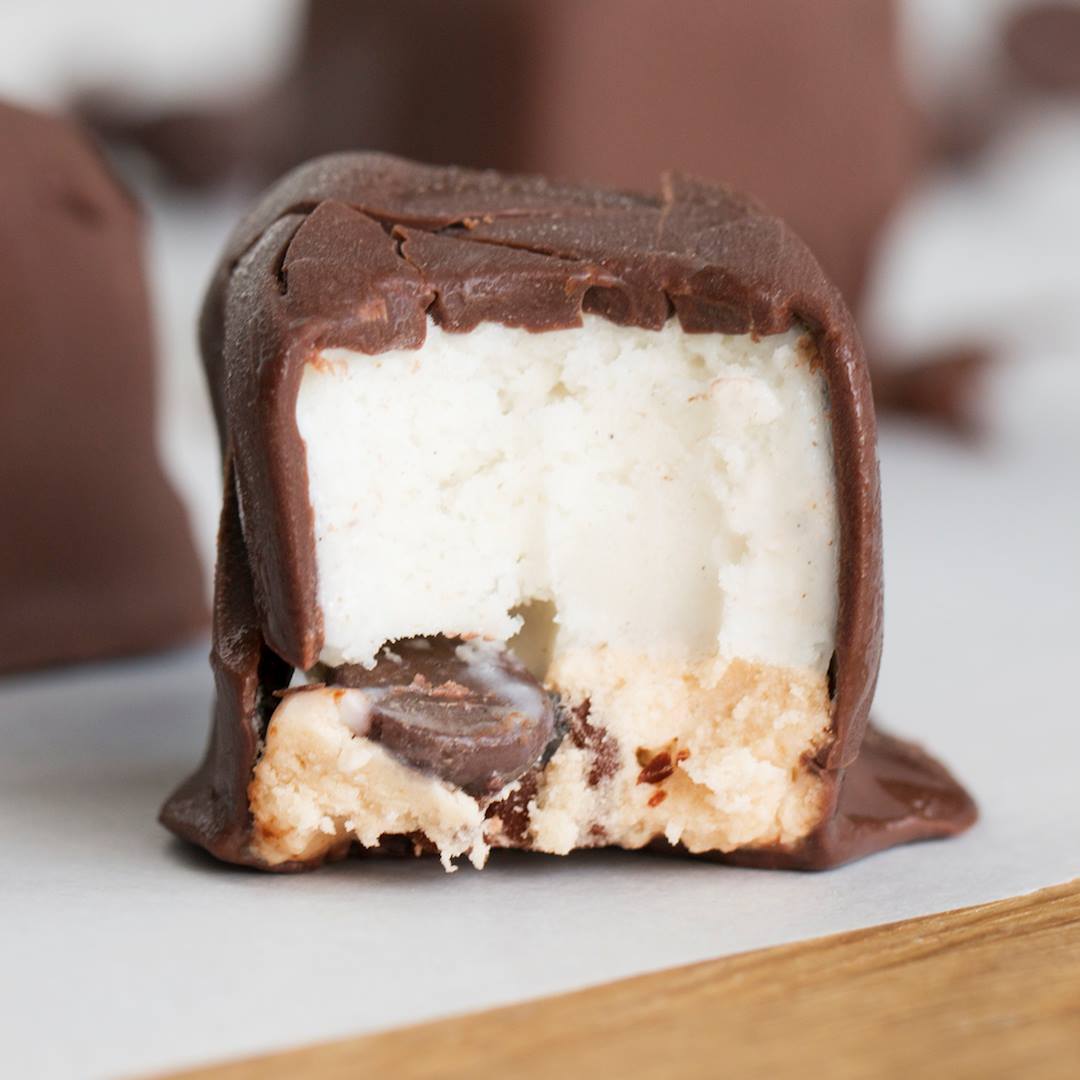
Cookie Dough Ice Cream Bites

Cookie Dough Ice Cream Bites
The cookie dough ice cream bites are a delicious summer treat ?
Author:
Cuisine: American
Recipe type: Dessert
Ingredients
  • ½ cup (110 g) brown sugar
  • 1 pt (288 g) vanilla ice cream, softened
  • ½ cup (120 g) butter, softened
  • ½ teaspoon vanilla extract
  • 1 tablespoon milk
  • 1 cup (140 g) flour
  • ¼ teaspoon salt
  • 1 cup (175 g) Semi-Sweet Chocolate Morsels
  • ¼ cup (50 g) coconut oil
Instructions
  1. In a large bowl, mix together brown sugar and softened butter.
  2. Mix in vanilla extract and milk until well-combined.
  3. Add flour and salt, and continue mixing until you’ve reached a dough-like consistency.
  4. Spread the “dough” mixture evenly on the bottom of a parchment-lined 9 × 9 inch (22 x 22 cm) pan.
  5. Sprinkle about half of the chocolate morsels over the dough so that they are evenly distributed, and then press the morsels into the dough with a sheet of parchment paper.
  6. Scoop softened ice cream on top of the dough mixture, and spread evenly.
  7. Freeze overnight or until frozen.
  8. In a small bowl, melt the remaining chocolate morsels with coconut oil until smooth.
  9. Lift ice cream out using the parchment, then cut into an 8 x 8 grid.
  10. Evenly coat each piece with the melted chocolate.
  11. Place back in the freezer for 30 minutes.
  12. Enjoy!

Watch the recipe video here:

Cookie Dough Ice Cream Bites

The cookie dough ice cream bites are a delicious summer treat ?FULL RECIPE: https://tasty.co/recipe/cookie-dough-ice-cream-bitesLove Tasty? Join our exclusive research panel and help us make it better! (U.S. only)Click here: https://bzfd.it/2MNGjZN

Posted by Tasty on Thursday, June 28, 2018