Showing 569 Result(s)
Main dish

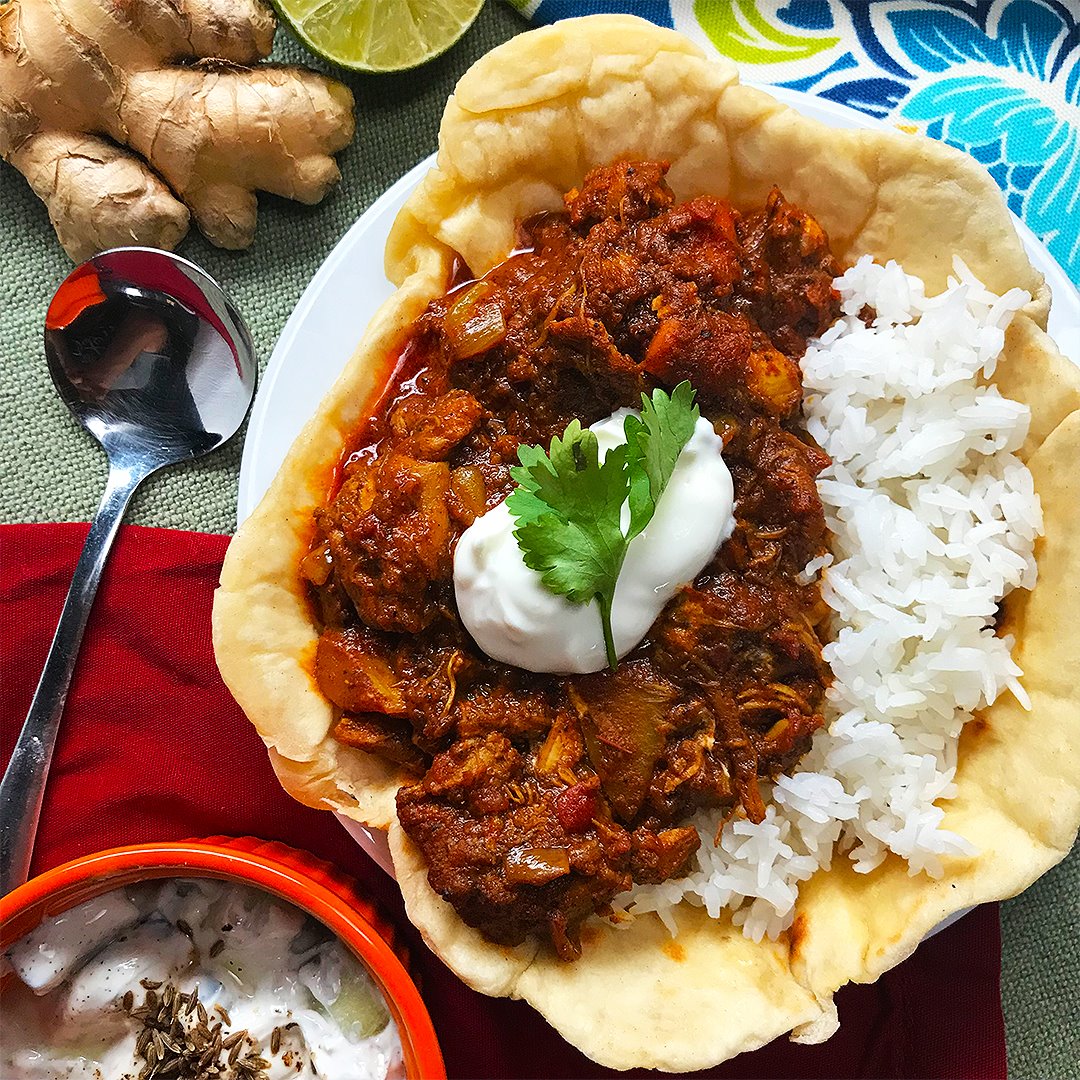
Chicken Curry Naan Bowls
Chicken Curry Naan Bowls
I've always dreamed of having naan bowls for my curry!
Author:
Cuisine: American
Recipe type: Main dish
Ingredients
RED CHICKEN CURRY
  • 2 tablespoons salt
  • 1 tablespoon ground pepper
  • 1 tablespoon ground cumin
  • 1 tablespoon smoked paprika
  • 1 tablespoon ground turmeric
  • 1 tablespoon coriander
  • 1 teaspoon ground cardamom
  • 1 teaspoon dry mustard
  • 1 teaspoon cayenne
  • ½ teaspoon allspice
  • 3 lb boneless, skinless chicken thighs, cut into 2 in (5 cm) cubes (1.5 g)
  • 5 tablespoons full-fat yogurt, divided, plus more for serving
  • 9 cloves garlic, minced, divided
  • 1 tablespoon fresh ginger, minced
  • 3 tablespoons olive oil, plus more as needed
  • 3 carrots, chopped
  • 1 white onion, chopped
  • 1 lb yukon gold potato, chopped (455 g)
  • 2 tablespoons tomato paste
  • 28 oz crushed tomatoes, 1 can (795 g)
  • 2 cups chicken broth (480 mL)
  • 2 cups basmati rice, or long-grain jasmine, cooked, for serving (460 g)
  • 1 fresh cilantro, for serving
  • Lime wedges, for serving
NAAN BOWLS
  • ½ cup warm water (120 mL)
  • 2 tablespoons sugar
  • 1 tablespoon active dry yeast
  • 4 cups all-purpose flour, plus more for dusting (500 g)
  • 1 teaspoon baking powder
  • 1 teaspoon baking soda
  • 1 tablespoon kosher salt, plus more to taste
  • 1 cup full-fat yogurt (245 g)
  • 1 cup whole milk, room temperature (240 mL)
  • olive oil, for greasing
  • ½ cup unsalted butter, 1 stick, melted (115 g)
Instructions
  1. In a small bowl, combine the salt, pepper, cumin, smoked paprika, turmeric, coriander, cardamom, dry mustard, cayenne, and allspice. Stir to combine.
  2. In a large bowl, add the cubed chicken thighs, 2 tablespoons of yogurt, 4 cloves of minced garlic, the ginger, and half of the spice mixture. Toss the chicken until it is fully coated. Cover the bowl with plastic wrap, and marinate in the fridge for 2 hours or overnight.
  3. Make the naan bowls: In a liquid measuring cup, combine the warm water, sugar, and yeast. Set aside to bloom for 10 minutes.
  4. In the meantime, mix the flour, baking powder, baking soda, and salt together in a large bowl.
  5. To the yeast mixture, add the yogurt and milk. Stir until smooth, then pour into the dry ingredients. Stir to combine, then dump the dough out onto a floured surface and knead with your hands until it forms a smooth, soft ball, about 2 minutes.
  6. Place the dough in a clean large bowl greased with olive oil and cover with a clean kitchen towel or plastic wrap. Let rise at room temperature until doubled in size, about 2 hours.
  7. Heat the olive oil in a large Dutch oven over medium-high heat. Working in batches to avoid overcrowding the pot, cook the marinated chicken on all sides until cooked through and browned, about 20 minutes. Drizzle in more oil, as needed, to prevent the meat from sticking to the bottom of the pot. Transfer the browned meat to a plate as it finishes cooking and set aside.
  8. Add the carrots, onion, potatoes, remaining 5 cloves of minced garlic, and reserved spice mixture, Stir and cook until the vegetables brown slightly and start to soften, 15 minutes.
  9. Stir in the tomato paste and cook until aromatic, about 3 minutes.
  10. Add the crushed tomatoes and chicken broth. Stir to combine. Bring to a simmer.
  11. Add the chicken, stir, and return to a simmer. Cover and cook for 30 minutes, or until the potatoes are tender and the chicken is cooked through.
  12. Stir in the remaining 3 tablespoons of yogurt, then cover and keep warm.
  13. Once the naan dough has risen, dump onto a floured surface, and divide into 6 equal portions. Roll each portion into a ¼-inch (1 /2 cm) thick circle, approximately 10 inches (25 cm) in diameter.
  14. Heat a large cast-iron skillet over medium-high heat. Place a disc of naan dough in the skillet. Cook for about 2 minutes, until the dough puffs up, then flip and cook on the other side until browned, 1 minute. Transfer the naan to a medium bowl and place another bowl on top. Repeat with the rest of the naan dough, stacking bowls between each round. As the naan cools, they will retain the bowl shape.
  15. Brush the naan bowls with warm melted butter.
  16. Fill the naan bowls with the chicken curry and rice. Serve with yogurt, cilantro, and lime wedges.
  17. Enjoy!

Watch the recipe video here:

I've always dreamed of having naan bowls for my curry! Full Recipe: https://tasty.co/recipe/chicken-curry-naan-bowls

Posted by Tasty on Wednesday, August 14, 2019
Main dish

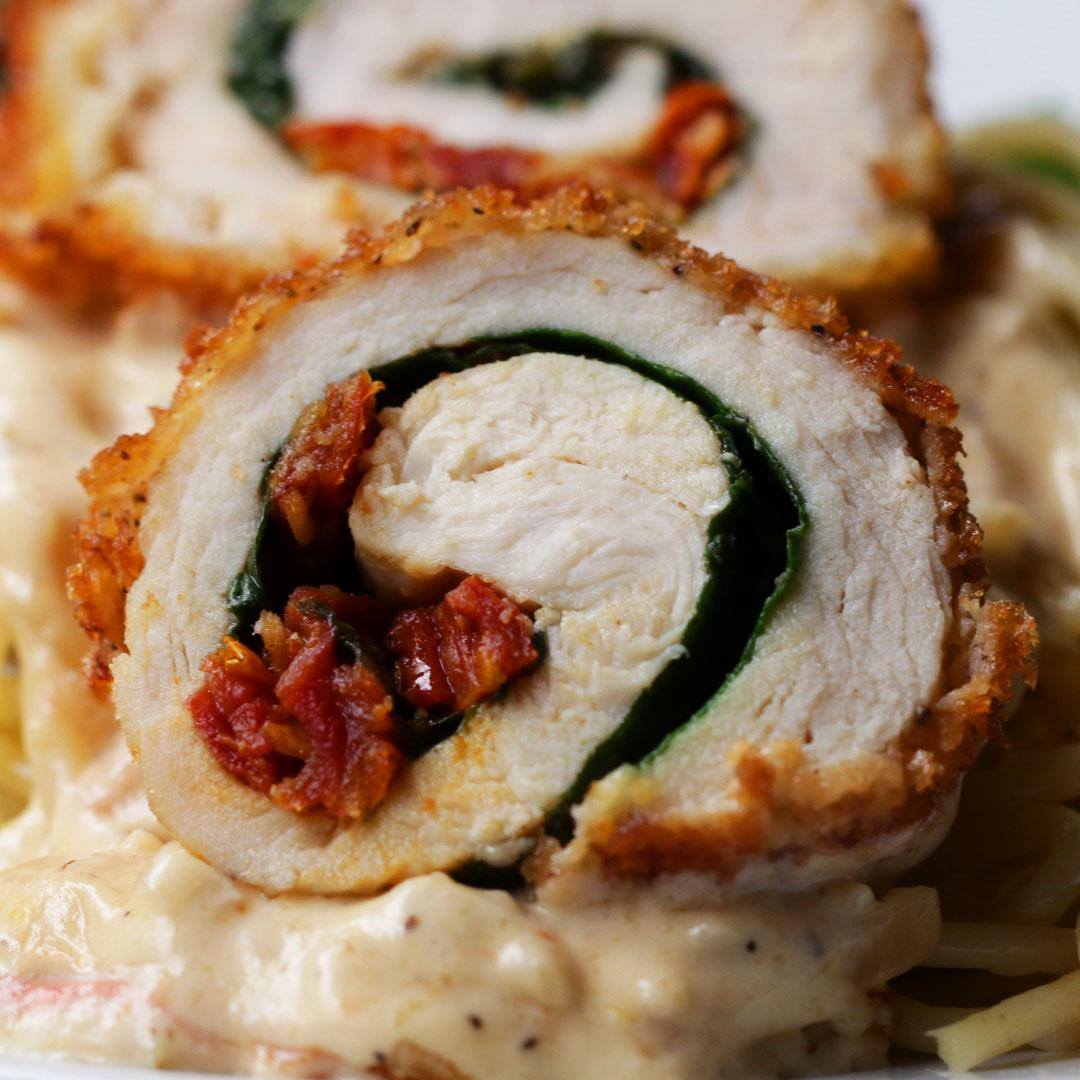
Creamy Tuscan Chicken Rolls

Creamy Tuscan Chicken Rolls
These chicken rolls are sure to be your family’s new favorite dinner. The béchamel sauce gets a boost of flavor and texture from the tomatoes and spinach, which balances the crunchy chicken rolls perfectly. Serve over spaghetti with a green salad alongside and you have a complete meal!
Author:
Cuisine: American
Recipe type: Main dish
Ingredients
CHICKEN ROLLS
  • 4 boneless, skinless chicken breasts
  • 2 teaspoons pepper, divided
  • 1 tablespoon onion powder
  • 4 teaspoons kosher salt, divided
  • 1 tablespoon garlic powder
  • 8 oz baby spinach (225 g)
  • 1 cup sun-dried tomato (200 g)
  • 2 cups canola oil (480 mL)
  • 2 cups panko breadcrumbs (100 g)
  • 4 large eggs, beaten
  • 1 cup all purpose flour (125 g)
BÉCHAMEL SAUCE
  • 3 tablespoons unsalted butter
  • 5 cloves garlic, minced
  • 2 medium shallots, diced
  • 2 cups baby spinach (80 g)
  • 1 ½ tablespoons sun-dried tomato, chopped
  • ¾ cup tomato, diced (150 g)
  • 2 cups heavy cream (480 mL)
  • 1 tablespoon all purpose flour
  • 1 ½ teaspoons kosher salt
  • 1 teaspoon pepper
  • ¾ cup grated parmesan cheese (80 g)
  • 1 tablespoon lemon juice
FOR SERVING
  • 4 cups spaghetti (800 g)
  • 4 cups green salad, lightly dressed (290 g)
Instructions
Make the chicken rolls:
  1. Butterfly the chicken breasts and season on both sides with 1 teaspoon of pepper, the onion powder, 2 teaspoons of salt, and the garlic powder.
  2. Place a chicken breast between 2 sheets of plastic wrap and pound with a meat mallet, rolling pin, or heavy pan until about ¼ inch (6 mm) thick.
  3. Remove the top sheet of plastic wrap and place a handful of baby spinach over the center of the chicken breast, then cover with ¼ cup (50 G) of sun-dried tomatoes. Starting from the bottom, tightly roll the chicken, using the plastic wrap to help. Wrap the chicken roll tightly in plastic wrap to secure. Repeat with the remaining ingredients.
  4. Chill the chicken rolls in the fridge for 30–60 minutes.
Make the béchamel sauce:
  1. Melt the butter in a medium saucepan over medium heat. Add the garlic and shallot and cook until softened and the onions are beginning to caramelize and become very fragrant, about 5 minutes. Stir in the spinach, sun-dried tomatoes, and diced tomatoes and cook until the spinach is wilted, about 3 minutes. Add the heavy cream and flour and stir to incorporate. Add the salt and pepper and bring to a boil. Stir in the Parmesan cheese and cook until the sauce thickens slightly, 5–7 minutes. Remove the pot from the heat and stir in the lemon juice.
  2. Heat 2–3 (5 - 7 cm) inches of oil in a large heavy-bottomed pan over medium heat until it reaches 325°F (170°C).
  3. Add the panko to a shallow dish and stir in 1 teaspoon of salt and ½ teaspoon pepper. Add the eggs to a separate shallow dish. Add the flour to a third shallow dish and stir in the remaining teaspoon of salt and ½ teaspoon pepper.
  4. Remove the chicken rolls from the fridge and coat in the flour, then the eggs, then the bread crumbs.
  5. Fry the breaded chicken rolls in the hot oil for about 5 minutes per side, or until the outside is an even golden brown and the internal temperature reaches 165°F (75°C). You may need to work in batches, so as not to overcrowd the pan. If a good color is achieved and the chicken’s center is still not to temperature, place the chicken on a wire rack set over a baking sheet and finish cooking in the oven at 325°F (170°C) until the proper temperature is reached. Once the proper internal temperature is reached, place the rolls on a baking sheet lined with paper towels and a wire rack to cool slightly before slicing and serving.
  6. Slice the chicken rolls and serve over a bed of spaghetti with the béchamel sauce and a green salad alongside.
  7. Enjoy!

Watch the recipe video here:

These chicken rolls are sure to be your family’s new favorite dinner. Serve over spaghetti with a green salad alongside…

Posted by Tasty on Tuesday, August 13, 2019

Main dish

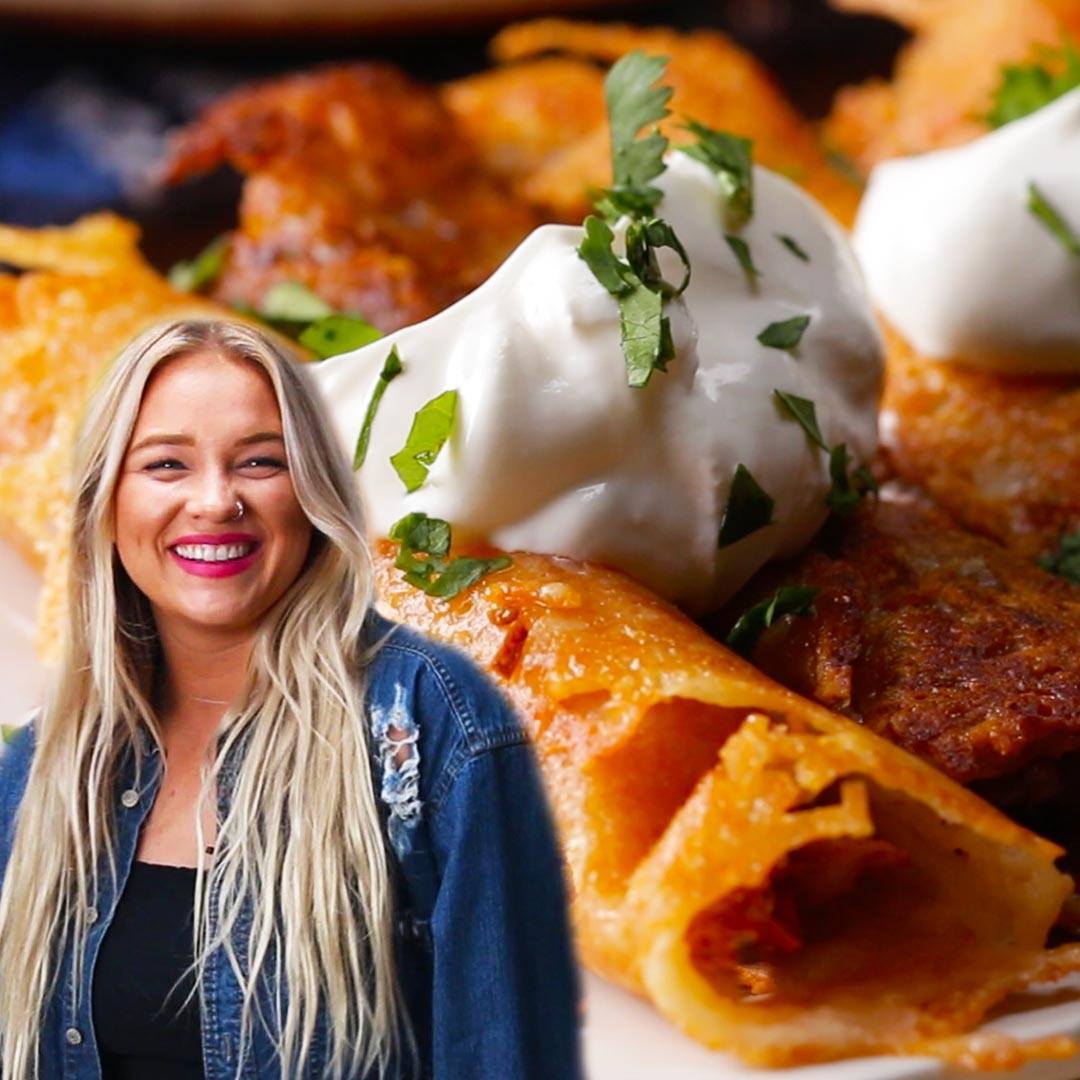
Cheesy Taquitos (Chequitos)

Cheesy Taquitos (Chequitos)
Cheesy "Taquitos" with Alix!
Author:
Cuisine: American
Recipe type: Main dish
Ingredients
GROUND BEEF
  • 1 lb ground beef, 80/20 (455 g)
  • 1 cup white onion, diced (150 g)
  • 3 cloves garlic, minced
  • 1 teaspoon kosher salt
  • 1 ½ teaspoons ground cumin
  • ½ teaspoon chili powder
  • ½ teaspoon cayenne
  • 2 teaspoons paprika
  • 1 teaspoon dried oregano
SHREDDED CHICKEN
  • 2 cups shredded chicken, cooked (250 g)
  • 1 cup tomato, crushed or diced (200 g)
  • 1 teaspoon kosher salt
  • 1 ½ teaspoons ground cumin
  • ½ teaspoon chili powder
  • ½ teaspoon cayenne
  • 2 teaspoons paprika
  • 1 teaspoon dried oregano
  • 2 cups shredded parmesan cheese (200 g)
  • 1 cup shredded mexican cheese blend (100 g)
FOR SERVING
  • lime wedge
  • sour cream
  • fresh cilantro, chopped
Instructions
  1. In a large saucepan over medium heat, brown the ground beef. Once the beef is browned, add the onion and garlic. Cook until the onion is translucent, about 5 minutes. Add the salt, cumin, chili powder, cayenne, paprika, and oregano. Cook for 2-3 minutes more to allow the flavors to meld and ensure the beef is cooked through. Remove the beef mixture from the pan and set aside.
  2. In a clean large saucepan over medium heat, combine the shredded chicken and crushed tomatoes. Add the salt, cumin, chili powder, cayenne, paprika, and oregano. Cook until warmed through, about 5 minutes. Remove from the pan and set aside.
  3. In a medium bowl, mix together the Parmesan and Mexican-blend cheeses.
  4. Heat a medium nonstick pan over medium heat. Add about ¼ cup (25 G) of cheese to the center of the pan and spread into a circle. Let the cheese melt, then add a spoonful of beef or chicken filling to the bottom of the circle.
  5. Slide the cheese shell out of the pan onto a cutting board and let cool for 30 seconds, then roll tightly to encase the filling. The melted cheese should stick to the outside, sealing the taquito. Repeat with the remaining ingredients.
  6. Serve the taquitos with lime wedges, sour cream, and fresh cilantro.
  7. Enjoy!

Watch the recipe video here:

Cheesy "Taquitos" with Alix! Get the recipe: https://tasty.co/recipe/cheesy-taquitos-chequitos

Posted by Tasty on Monday, August 12, 2019

Dessert

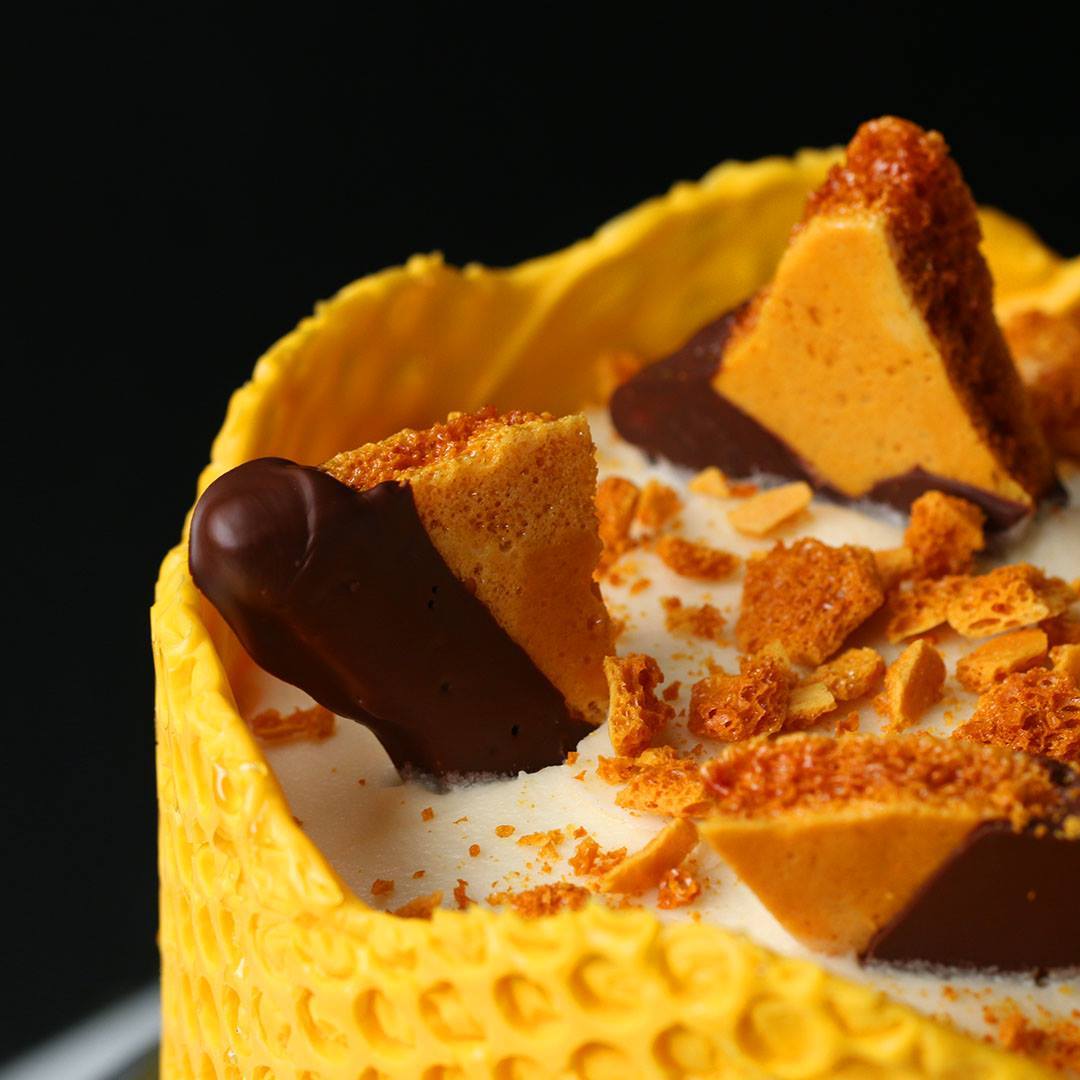
Bubble Wrap Honeycomb Cake

Bubble Wrap Honeycomb Cake
This cake is the bee’s knees! We used boxed cake mix to keep things simple, but feel free to get fancy by making your own. When melting the candy, make sure you’re on medium power. Microwaving on high power will cause the candy to seize. For a finishing touch, drizzle on extra honey and top with our homemade honeycomb. You and your guests won’t be able to stop buzzin’ about it!
Author:
Cuisine: American
Recipe type: Dessert
Ingredients
HONEY BUTTERCREAM FROSTING
  • 2 cups unsalted butter, softened (460 g)
  • 1 cup cream cheese, softened (225 g)
  • ½ cup honey (170 g)
  • 4 cups powdered sugar, sifted (480 g)
  • 1 pinch of salt
ASSEMBLY
  • 15.25 oz yellow cake mix, baked according to package instructions in 2 8-inch round cake pans, cooled completely and trimmed level (to remove domed tops) (430 g)
  • 15.25 oz chocolate cake mix, baked according to package instructions in 2 8-inch round cake pans, cooled completely and trimmed level (to remove domed tops) (430 g)
  • 24 oz yellow candy melts (680 g)
  • homemade honeycomb, to garnish
  • ⅓ cup crushed honeycomb, to garnish (115 g)
  • honey, for drizzling
SPECIAL EQUIPMENT
  • cake turntable
  • cardboard cake round
  • large offset spatula
  • bubble wrap, Clean, atleast 27x7 inch (70x18 cm) piece. 5/16 inch (1 cm) thick
Instructions
  1. Make the honey buttercream frosting: In a large bowl, cream together the butter and cream cheese with an electric mixer on medium speed until well combined, scraping down the sides of the bowl as needed. Add the honey and beat to incorporate. Add the powdered sugar and a pinch of salt and beat on low until mostly combined. Increase the mixer speed to high and beat for 3-5 minutes more, until the buttercream is light and fluffy. If the frosting feels soft, you can also refrigerate it for 10-15 minutes so it stiffens slightly.
  2. Assemble the cake: Place a cardboard cake round on a cake turntable and dab a small amount of frosting in the center of the cardboard round. Center one yellow cake layer over the dab of frosting, then evenly spread about ½ cup of buttercream on top with an offset spatula. Top with a layer of chocolate cake, then another ½ cup of frosting. Repeat with the remaining cake layers and frosting. After adding the final layer, lightly frost the entire cake to create a thin crumb coat.
  3. Refrigerate the cake for 15 minutes.
  4. Cover the chilled cake with the remaining frosting in an even layer. Return the cake to the refrigerator for 15 minutes more, to allow the frosting to stiffen.
  5. Take the cake out of the refrigerator. With the bubbles facing outward so they don’t get frosting on them, wrap the sheet of bubble wrap around the perimeter of the cake. Trim the wrap to form a collar that fits loosely around the cake and comes about 2 inches over the top edge. Remove the bubble wrap. Keep the cake in the refrigerator until you’re ready to finish the assembly.
  6. Make the yellow candy honeycomb: Place the candy melts in a medium microwave-safe bowl. Microwave on medium power (not on high, which will cause the candy to seize) in 30-second intervals, stirring in between, until the candy is fully melted and smooth.
  7. Place the bubble wrap bubble-side up on a flat surface. Pour most of the melted candy along the bottom two-thirds of the bubble wrap. Working quickly, use an offset spatula to spread the candy over the bubble wrap, leaving the top third empty. Once the bottom two-thirds are evenly covered, use a spatula to spread the candy in a wave pattern along the top edge. Let sit for 5 minutes. While you wait, remove the cake from the refrigerator and position it near the bubble wrap.
  8. After 5 minutes, test the bubble wrap by lifting up a corner. If it looks like it is beginning to harden and has a sheen to it but is still pliable, it is ready to be used. If the candy is still very loose and dripping, let sit for another 1-3 minutes, checking every minute.
  9. Once the candy has set, pick it up by the top corners and quickly wrap the side with the candy around the cake. Press it onto the cake so it sticks. Once attached, try to slowly peel one corner of bubble wrap off. It it sticks, let sit for 1-3 minutes, checking every minute, until ready to peel. If it begins to peel, continue slowly peeling off the bubble wrap until entirely removed. If the candy cracks while you are peeling off the bubble wrap, either remelt and repeat the process, or break it into large shards to decorate the outside of the cake. Refrigerate until serving time.
  10. Immediately before serving, top the cake with homemade honeycomb pieces and crushed honeycomb. Drizzle honey around the edges of the yellow candy honeycomb.
  11. Carefully slice the cake. Drizzle each piece with more honey before serving.
  12. Enjoy!

Watch the recipe video here:

This cake is the bee’s knees!Get the recipe: https://tasty.co/recipe/bubble-wrap-honeycomb-cake

Posted by Tasty on Friday, August 9, 2019

Main dish

Potato Deviled Eggs

Potato Deviled Eggs
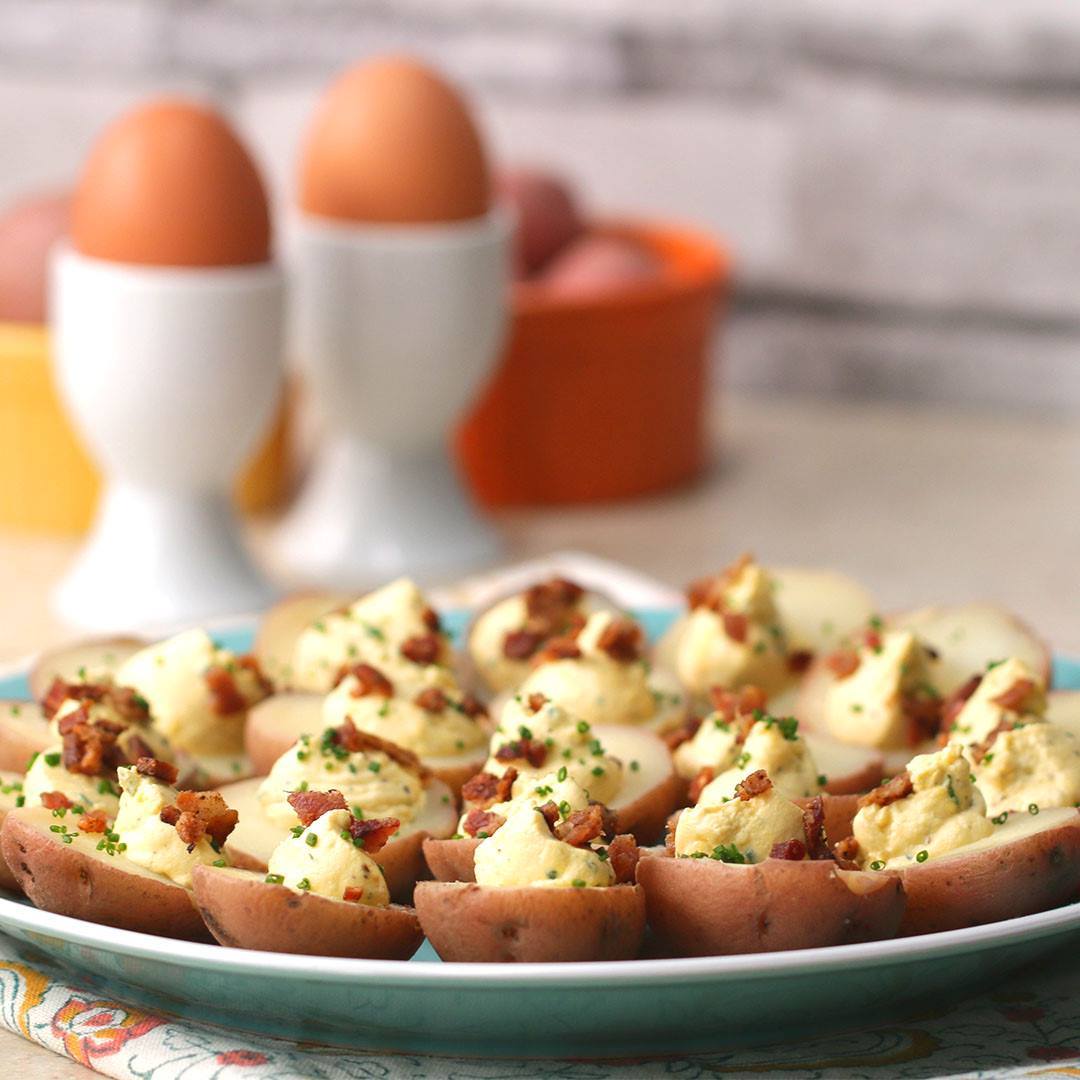
Eggs and potatoes are a classic combo, but we bet you’ve never had them like this! The egg whites are swapped out for the potato cups, which are filled the classic creamy egg yolk filling (save the whites for another use!). Topped with fresh chives and crunchy bacon, these make the perfect one-bite snack for your next gathering.
Author:
Cuisine: American
Recipe type: Main dish
Ingredients
  • 12 baby red potatoes
  • 3 teaspoons kosher salt, divided
  • 12 hard boiled egg yolks
  • ½ cup sour cream (115 g)
  • 1 teaspoon dijon mustard
  • ½ teaspoon ground black pepper
  • 2 teaspoons fresh chives, minced, plus more for garnish
  • 2 strips bacon, cooked and crumbled
Instructions
  1. Add the potatoes and 1½ teaspoons of salt to a large saucepan with enough cold water to cover the potatoes. Bring to a boil over high heat, then cook for 10-12 minutes, until tender when poked with a fork. Drain and let cool completely.
  2. Once the potatoes are cooled, cut in half and use a measuring spoon to scoop out 1 teaspoon of the center of each half.
  3. In a medium bowl, combine the egg yolks, sour cream, mustard, pepper, chives, and the remaining 1½ teaspoons of salt. Mash together with a fork until smooth.
  4. Transfer the deviled egg filling to a zip-top plastic bag. Snip off a corner of the bag to create an opening.
  5. Pipe the filling into the potato cups. Garnish with the bacon and chives.
  6. Enjoy!

Watch the recipe video here:

Eggs and potatoes are a classic combo, but we bet you’ve never had them like this! Recipe: https://tasty.co/recipe/potato-deviled-eggs

Posted by Tasty on Friday, August 9, 2019

Dessert

Chocolate Lava Cakes

Chocolate Lava Cakes
When you just really need that chocolate lava... ?
Author:
Cuisine: American
Recipe type: Dessert
Ingredients
  • 5 tablespoons unsalted butter, plus more, softened, for greasing ramekins
  • 2 tablespoons granulated sugar
  • ¼ cup heavy cream (60 mL)
  • 1 ¼ cups dark chocolate chip, divided (215 g)
  • 2 large eggs
  • 2 large egg yolks
  • ⅓ cup light brown sugar (75 g)
  • ½ teaspoon kosher salt
  • 1 teaspoon vanilla extract
  • 2 tablespoons all purpose flour
  • 1 cup whipped cream, for serving (240 mL)
  • 1 cup fresh berries, for serving (150 g)
Instructions
  1. Coat the inside of 4 1-cup (125 G) ramekins with softened butter, then sprinkle with the granulated sugar, tilting to coat completely. Set aside on a rimmed baking sheet.
  2. Heat the heavy cream in a small pot until boiling.
  3. Pour the boiling cream over ½ cup (120 ml) dark chocolate in a small bowl and let sit for 3 minutes. Stir until the chocolate is melted and smooth. Refrigerate for at least 30 minutes, or store in the freezer for up to 3 months.
  4. Preheat the oven to 425°F (220°C).
  5. In a small microwave-safe bowl, combine the remaining ¾ cup (170 G) chocolate and the butter. Microwave in 30-second intervals, stirring between, until completely melted.
  6. In a medium bowl, beat the eggs, egg yolks, brown sugar, salt, and vanilla with an electric hand mixer on medium-high speed until light and frothy, about 8 minutes.
  7. Gently fold the chocolate mixture into the egg mixture, being careful not to deflate the eggs. Add the flour and fold to incorporate.
  8. Divide half of the batter between the prepared ramekins. Add ½ tablespoon of the chilled ganache to the center of each ramekin, then scoop the remaining batter on top.
  9. Bake for 12 minutes, until the tops are set and the cakes begin to pull away from the sides of the ramekins.
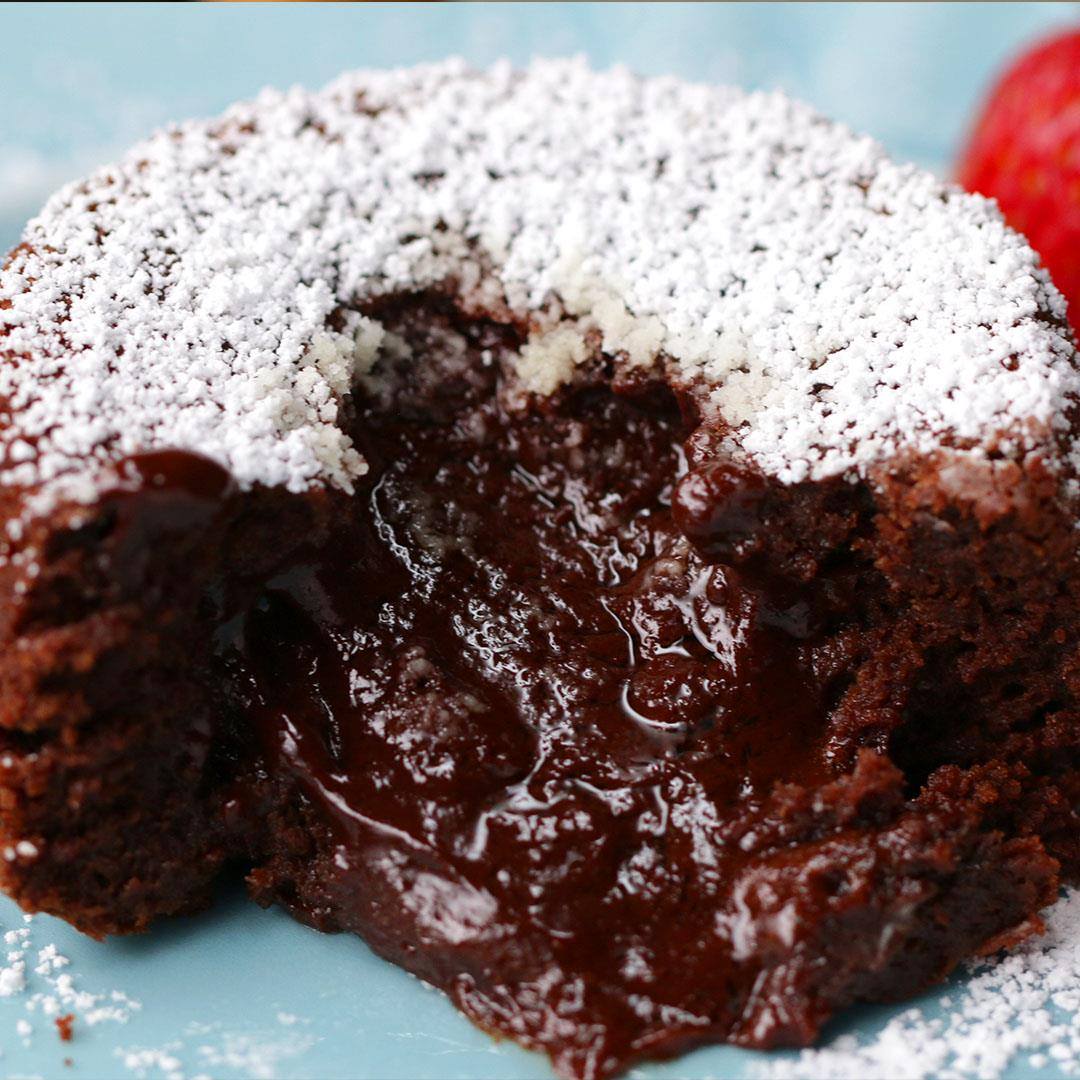
  10. Let the lava cakes cool slightly, then invert onto plates. Dust with powdered sugar and garnish with berries. Serve immediately.
  11. Enjoy!

Watch the recipe video here:

When you just really need that chocolate lava… ?Recipe: https://tasty.co/recipe/chocolate-lava-cakes

Posted by Tasty on Tuesday, August 6, 2019

Main dish

Roth Family Matzo Ball Soup

Roth Family Matzo Ball Soup
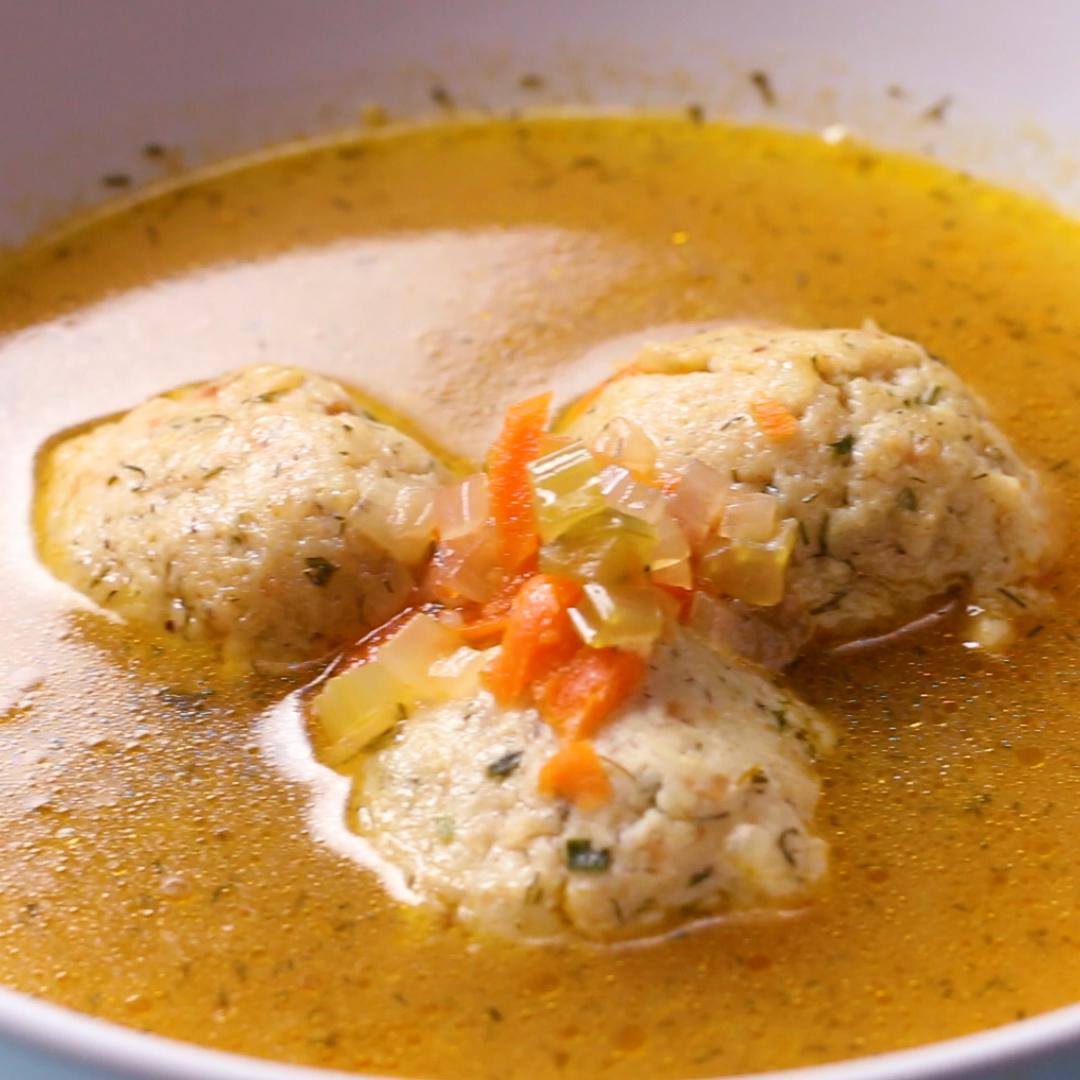
Learn how to make Mike's grandparents' warm and fuzzy matzo ball soup recipe
Author:
Cuisine: American
Recipe type: Main dish
Ingredients
  • 2 teaspoons canola oil
  • 2 cups medium yellow onion, diced (300 g)
  • 1 cup celery stalk, diced (225 g)
  • 2 teaspoons garlic, minced
  • 1 cup shredded carrot (110 g)
  • 3 qt low-sodium chicken broth (3 L)
  • 1 teaspoon kosher salt
  • ½ teaspoon ground black pepper
  • ½ teaspoon garlic powder
  • ½ teaspoon dried dill
  • ½ teaspoon dried chive
  • ½ teaspoon dried parsley
  • 20 matzo balls
Instructions
  1. In a large pot, heat the canola oil over medium heat. Once the oil is shimmering, add the onion, celery, and garlic and sauté until translucent and tender, about 5 minutes.
  2. Add the carrots and continue cooking for another 2 minutes, until all of the vegetables are heated through.
  3. Add the chicken broth, salt, pepper, garlic powder, dill, chives, and parsley. Bring to a boil, then reduce the heat to medium-low and simmer for about 30 minutes, until vegetables are tender.
  4. When ready to serve, add the matzo balls to the simmering soup and cook until heated through, about 5 minutes.
  5. Ladle into bowls.
  6. Enjoy!

Watch the recipe video here:

Learn how to make Mike's grandparents' warm and fuzzy matzo ball soup recipe ??Get the recipe: https://tasty.co/recipe/roth-family-matzo-ball-soup

Posted by Tasty on Sunday, August 4, 2019

Main dish

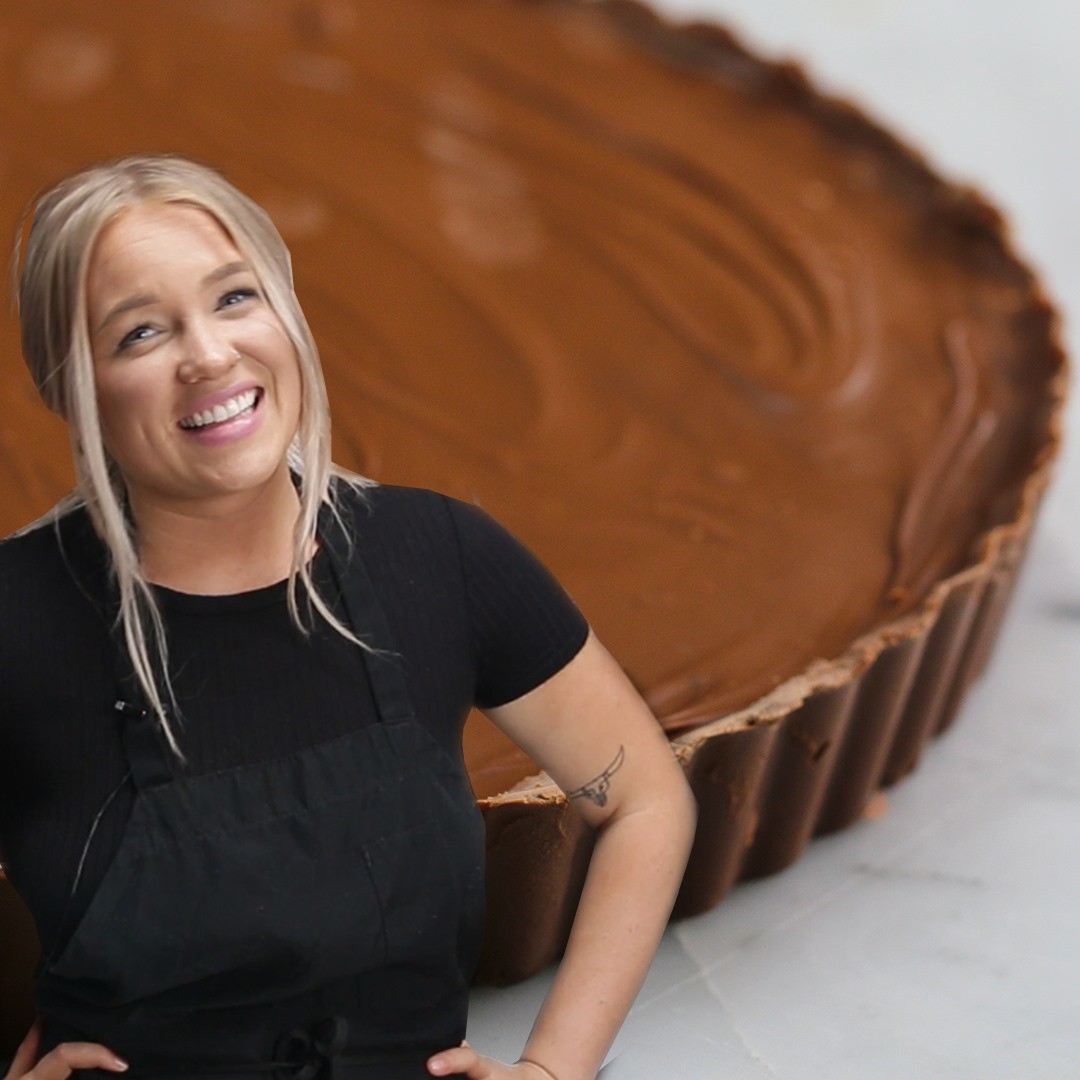
Giant Peanut Butter Cup

Giant Peanut Butter Cup
Author:
Cuisine: American
Recipe type: Main dish
Ingredients
  • 4 cups milk chocolate chips, divided (700 g)
  • 2 cups creamy peanut butter (480 g)
  • 2 cups powdered sugar, sifted (320 g)
  • ½ cup butter, softened (115 g)
Instructions
  1. In a small bowl, place half of the chocolate chips.
  2. Melt in the microwave in 30 second intervals, stirring in between, until fully melted.
  3. Pour melted chocolate into a 10-inch (25 cm) tart pan making sure to coat the entire pan, including all sides.
  4. Refrigerate until set.
  5. In a large bowl, place the peanut butter, powdered sugar, and softened butter and mix until smooth.
  6. Pour the peanut butter into the tart pan and smooth the surface.
  7. Melt remaining chocolate and pour over the peanut butter.
  8. Smooth out the chocolate making sure it covers the entire surface.
  9. Refrigerate until set, about 1 hour.
  10. Slice and serve.
  11. Enjoy!

Watch the recipe video here:

How To Make A Giant Peanut Butter Cup With AlixGet the recipe: https://tasty.co/recipe/giant-peanut-butter-cup

Posted by Tasty on Wednesday, July 31, 2019

Main dish

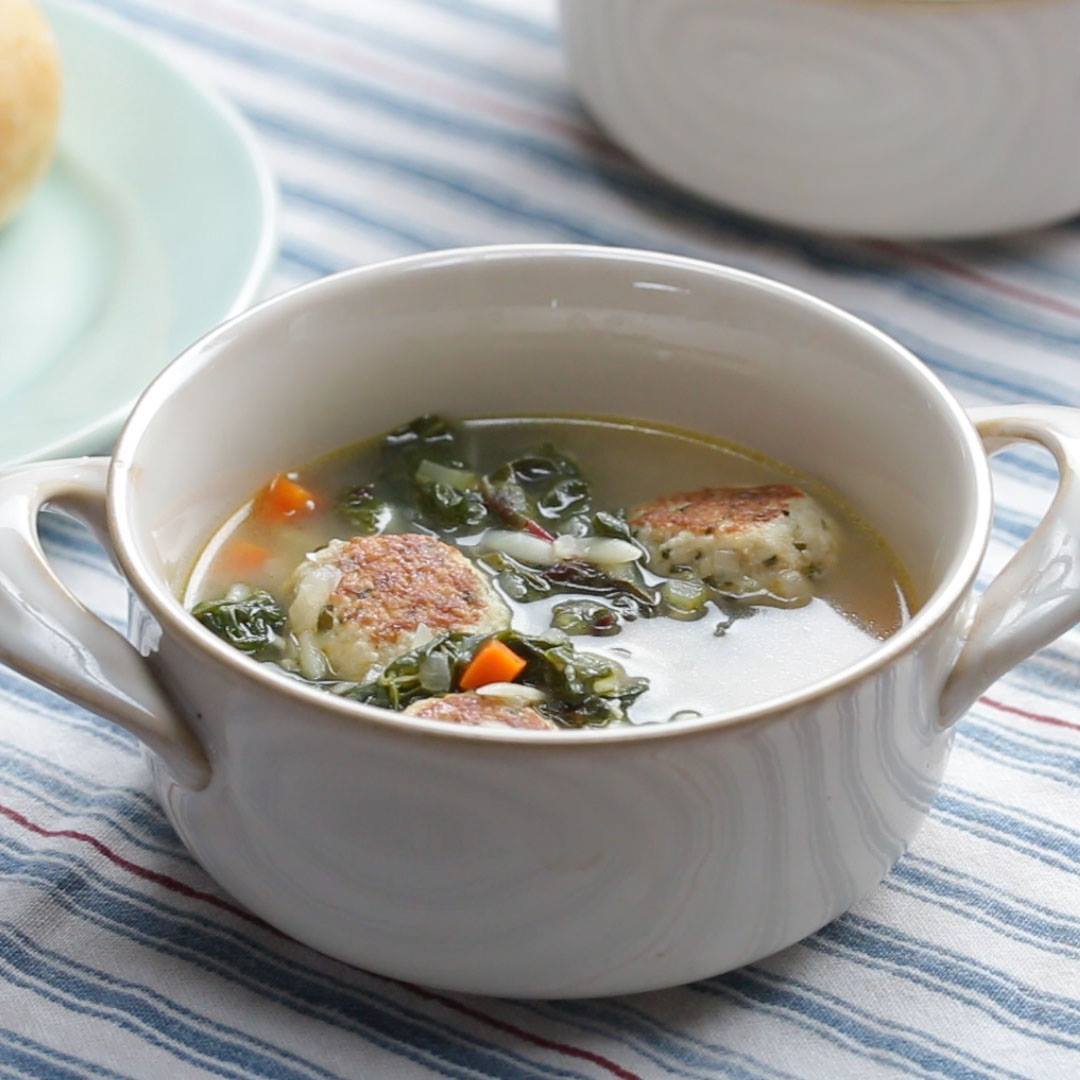
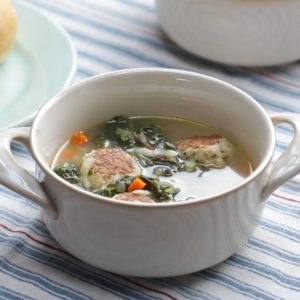
Chicken Meatball Soup

Chicken Meatball Soup
Author:
Cuisine: American
Recipe type: Main dish
Ingredients
  • CHICKEN MEATBALLS
  • 1 lb ground chicken (455 g)
  • ½ cup panko bread crumbs (25 g)
  • 1 large egg
  • ½ cup grated parmesan cheese (55 g)
  • 2 cloves garlic, minced
  • ¼ cup fresh parsley, finely chopped (10 g)
  • 1 teaspoon kosher salt
  • ½ teaspoon pepper
  • SOUP
  • 2 tablespoons olive oil, divided
  • 1 cup white onion, diced (150 g)
  • ½ cup carrot, diced (60 g)
  • ½ cup celery, diced (110 g)
  • 2 cloves garlic, minced
  • 8 cups chicken stock (1.9 L)
  • 1 bay leaf
  • 1 cup dry orzo pasta (145 g)
  • 4 cups swiss chard, roughly chopped (400 g)
  • 3 tablespoons grated parmesan cheese
  • kosher salt, to taste
  • pepper, to taste
  • 1 tablespoon lemon juice
Instructions
  1. In a medium bowl, combine the ground chicken, bread crumbs, egg, Parmesan, garlic, parsley, salt, and pepper. Mix well, then form into 1-inch (2 cm) meatballs. You should have 16-18 total.
  2. In a large pot, heat 1 tablespoon of olive oil over medium heat. Sear the meatballs on all sides until golden brown, 4-5 minutes. Remove from the pot and set aside.
  3. In the same pot, heat the remaining tablespoon of oil. Add the onion, carrot, and celery and cook, stirring occasionally until tender, 3-4 minutes. Add the garlic and cook until fragrant, 1-2 minutes.
  4. Add the chicken stock and bay leaf. Cover and bring to a boil.
  5. Once boiling, add the orzo and meatballs. Cover and simmer for 7-8 minutes, until the orzo is tender.
  6. Add the Swiss chard, cover, and cook for 2-3 minutes until the chard has wilted.
  7. Add the Parmesan cheese and season to taste with salt and pepper. Add the lemon juice.
  8. Ladle into bowls and serve.
  9. Enjoy!

Watch the recipe video here:

A little comfort food ??Get the recipe: https://tasty.co/recipe/chicken-meatball-soup

Posted by Tasty on Saturday, July 20, 2019

Dessert

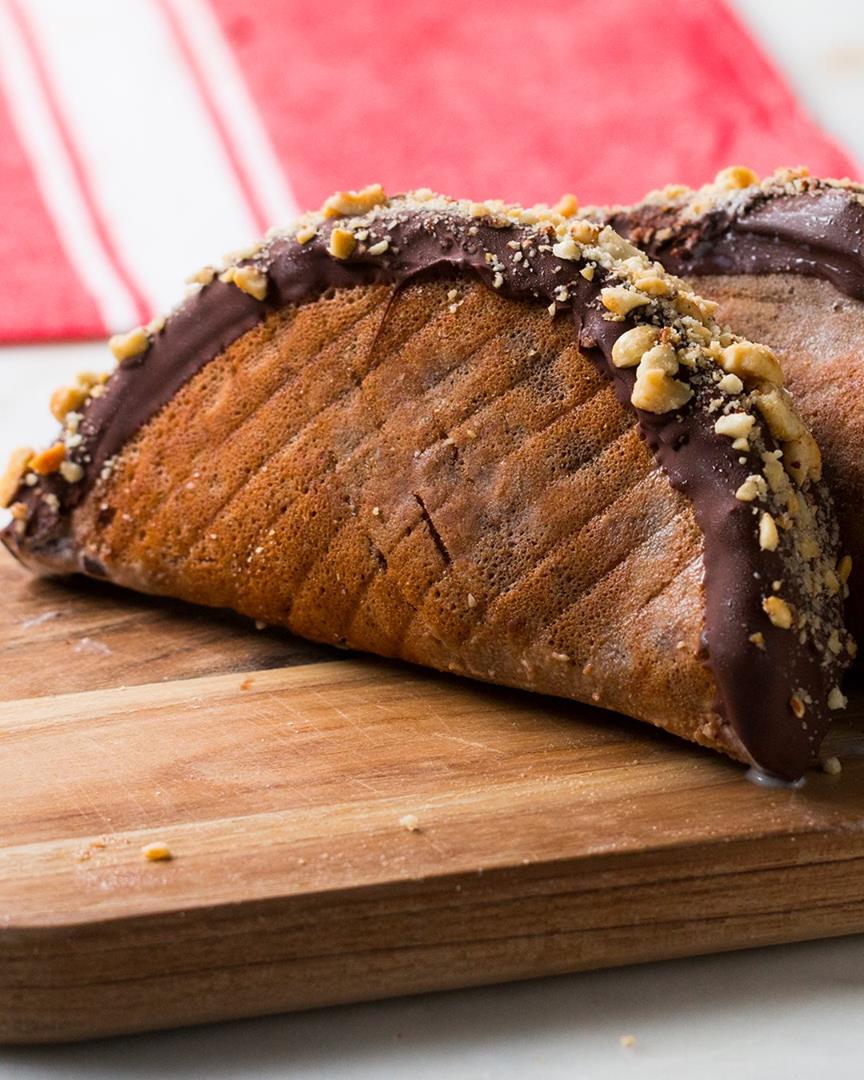
Chocolate-Dipped Ice Cream Tacos

Chocolate-Dipped Ice Cream Tacos
Chocolate-Dipped Ice Cream Tacos recipe.
Author:
Cuisine: American
Recipe type: Dessert
Ingredients
TACO SHELLS
  • 2 large eggs
  • ½ cup sugar (100 g)
  • ¼ cup milk (60 mL)
  • 1 teaspoon vanilla extract
  • ¼ cup unsalted butter, ¼ stick, melted (55 g)
  • ½ cup all purpose flour (60 g)
  • 1 tablespoon cocoa powder
MAGIC SHELL
  • 18 oz good-quality chocolate, finely chopped (510 g)
  • ¼ cup coconut oil, melted (60 mL)
ASSEMBLY
  • 4 cups vanilla ice cream, softened (575 g)
  • 1 cup salted peanut, crushed (125 g)
Instructions
  1. Make the taco shells: in a medium bowl, whisk together the eggs and sugar until combined.
  2. Add the milk, vanilla, and butter, and whisk until fully incorporated.
  3. Sift in the flour and cocoa powder. Whisk until smooth.
  4. Heat a small non-stick pan over medium-low heat, then add ⅓ cup (95 g) of batter at a time and tilt the pan to spread the batter evenly like a crepe.
  5. Cook until bubbles appear on the surface and the batter is set, about 6-8 minutes. Flip the taco shell and cook on other side for another 3-4 minutes, until cooked through.
  6. If desired, remove the taco shell from pan and place on a grated cooling rack while still hot. Place a sheet of parchment over the shell and press into the rack, allowing the grate marks to set into the shell. Rotate the shell 90 degrees and press the cone into the grates again for a waffled look. Or, skip to the next step.
  7. Place the taco shells between the cups of an inverted muffin tin to form their shape. Let set for about 10 minutes, then freeze for 20 minutes to harden.
  8. Make the magic shell: combine the chocolate and coconut oil in a medium bowl and microwave for 2 minutes, stirring every 30 seconds until melted and shiny.
  9. Remove the taco shells from the freezer and use a spoon to coat the inside of each taco shell with melted magic shell. Return to the freezer for 20 minutes, until the magic shell hardens. Reserve the leftover magic shell.
  10. Add the ice cream to a piping bag fitted with a round tip or a zip-top bag with the corner cut off.
  11. Remove the shells from the freezer and pipe in the ice cream, filling the tacos. Smooth out the tops with a knife or rubber spatula. Freeze for 2 hours.
  12. Microwave the reserved magic shell, if needed, to re-melt. Remove the tacos from the freezer and dip the tops of each taco in the magic shell, then immediately sprinkle with the crushed peanuts.
  13. Serve immediately or return to the freezer until ready to eat.
  14. Enjoy!

Watch the recipe video here:

Just when you thought tacos couldn't get any better! ??Get the recipe: https://tasty.co/recipe/chocolate-dipped-ice-cream-tacos

Posted by Tasty on Wednesday, July 10, 2019