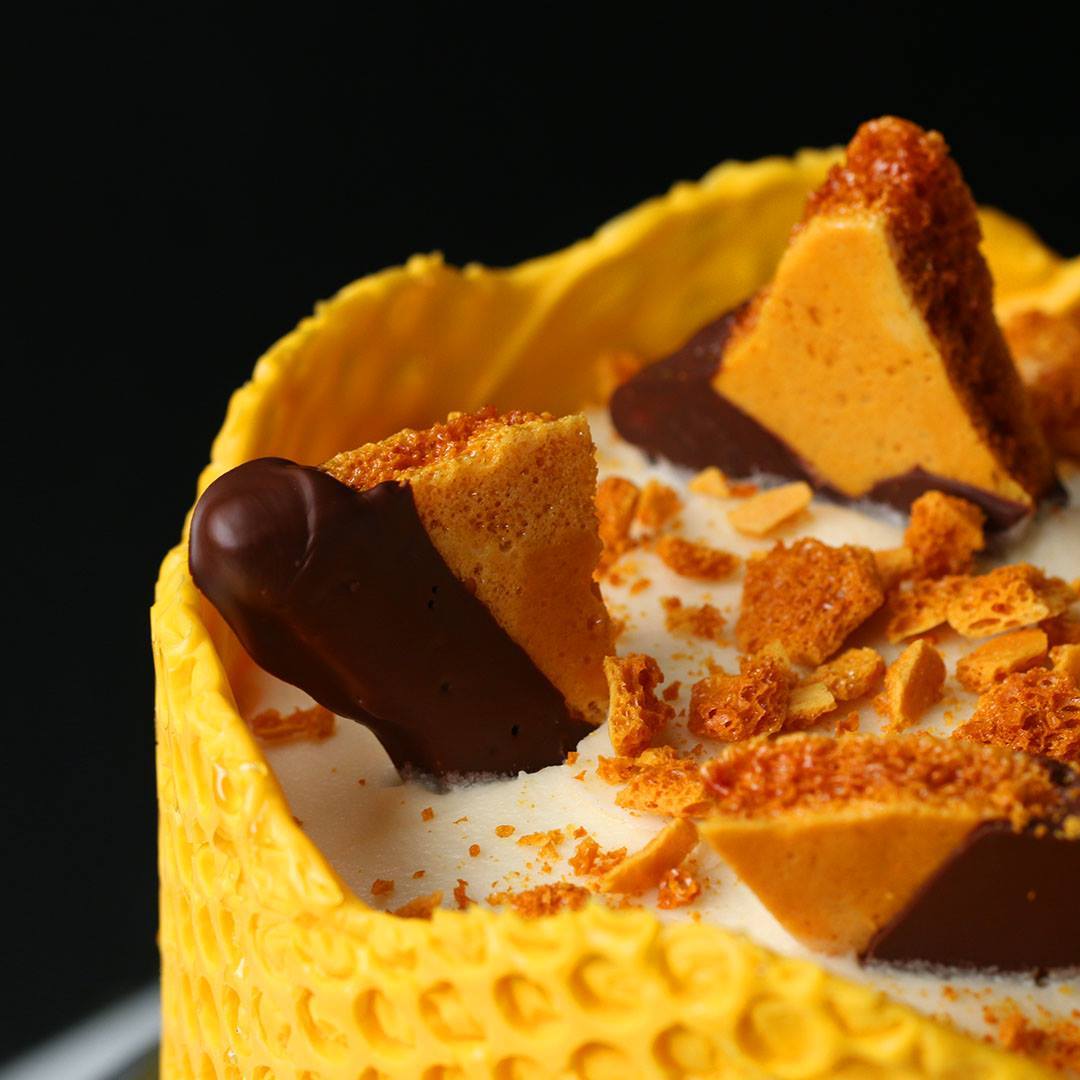
Bubble Wrap Honeycomb Cake
This cake is the bee’s knees! We used boxed cake mix to keep things simple, but feel free to get fancy by making your own. When melting the candy, make sure you’re on medium power. Microwaving on high power will cause the candy to seize. For a finishing touch, drizzle on extra honey and top with our homemade honeycomb. You and your guests won’t be able to stop buzzin’ about it!

Author: The Chef
Cuisine: American
Recipe type: Dessert
Ingredients
HONEY BUTTERCREAM FROSTING
- 2 cups unsalted butter, softened (460 g)
- 1 cup cream cheese, softened (225 g)
- ½ cup honey (170 g)
- 4 cups powdered sugar, sifted (480 g)
- 1 pinch of salt
ASSEMBLY
- 15.25 oz yellow cake mix, baked according to package instructions in 2 8-inch round cake pans, cooled completely and trimmed level (to remove domed tops) (430 g)
- 15.25 oz chocolate cake mix, baked according to package instructions in 2 8-inch round cake pans, cooled completely and trimmed level (to remove domed tops) (430 g)
- 24 oz yellow candy melts (680 g)
- homemade honeycomb, to garnish
- ⅓ cup crushed honeycomb, to garnish (115 g)
- honey, for drizzling
SPECIAL EQUIPMENT
- cake turntable
- cardboard cake round
- large offset spatula
- bubble wrap, Clean, atleast 27x7 inch (70x18 cm) piece. 5/16 inch (1 cm) thick
Instructions
- Make the honey buttercream frosting: In a large bowl, cream together the butter and cream cheese with an electric mixer on medium speed until well combined, scraping down the sides of the bowl as needed. Add the honey and beat to incorporate. Add the powdered sugar and a pinch of salt and beat on low until mostly combined. Increase the mixer speed to high and beat for 3-5 minutes more, until the buttercream is light and fluffy. If the frosting feels soft, you can also refrigerate it for 10-15 minutes so it stiffens slightly.
- Assemble the cake: Place a cardboard cake round on a cake turntable and dab a small amount of frosting in the center of the cardboard round. Center one yellow cake layer over the dab of frosting, then evenly spread about ½ cup of buttercream on top with an offset spatula. Top with a layer of chocolate cake, then another ½ cup of frosting. Repeat with the remaining cake layers and frosting. After adding the final layer, lightly frost the entire cake to create a thin crumb coat.
- Refrigerate the cake for 15 minutes.
- Cover the chilled cake with the remaining frosting in an even layer. Return the cake to the refrigerator for 15 minutes more, to allow the frosting to stiffen.
- Take the cake out of the refrigerator. With the bubbles facing outward so they don’t get frosting on them, wrap the sheet of bubble wrap around the perimeter of the cake. Trim the wrap to form a collar that fits loosely around the cake and comes about 2 inches over the top edge. Remove the bubble wrap. Keep the cake in the refrigerator until you’re ready to finish the assembly.
- Make the yellow candy honeycomb: Place the candy melts in a medium microwave-safe bowl. Microwave on medium power (not on high, which will cause the candy to seize) in 30-second intervals, stirring in between, until the candy is fully melted and smooth.
- Place the bubble wrap bubble-side up on a flat surface. Pour most of the melted candy along the bottom two-thirds of the bubble wrap. Working quickly, use an offset spatula to spread the candy over the bubble wrap, leaving the top third empty. Once the bottom two-thirds are evenly covered, use a spatula to spread the candy in a wave pattern along the top edge. Let sit for 5 minutes. While you wait, remove the cake from the refrigerator and position it near the bubble wrap.
- After 5 minutes, test the bubble wrap by lifting up a corner. If it looks like it is beginning to harden and has a sheen to it but is still pliable, it is ready to be used. If the candy is still very loose and dripping, let sit for another 1-3 minutes, checking every minute.
- Once the candy has set, pick it up by the top corners and quickly wrap the side with the candy around the cake. Press it onto the cake so it sticks. Once attached, try to slowly peel one corner of bubble wrap off. It it sticks, let sit for 1-3 minutes, checking every minute, until ready to peel. If it begins to peel, continue slowly peeling off the bubble wrap until entirely removed. If the candy cracks while you are peeling off the bubble wrap, either remelt and repeat the process, or break it into large shards to decorate the outside of the cake. Refrigerate until serving time.
- Immediately before serving, top the cake with homemade honeycomb pieces and crushed honeycomb. Drizzle honey around the edges of the yellow candy honeycomb.
- Carefully slice the cake. Drizzle each piece with more honey before serving.
- Enjoy!
Watch the recipe video here:
This cake is the bee’s knees!Get the recipe: https://tasty.co/recipe/bubble-wrap-honeycomb-cake
Posted by Tasty on Friday, August 9, 2019