Showing 569 Result(s)
Main dish

Watermelon Poke Bowl
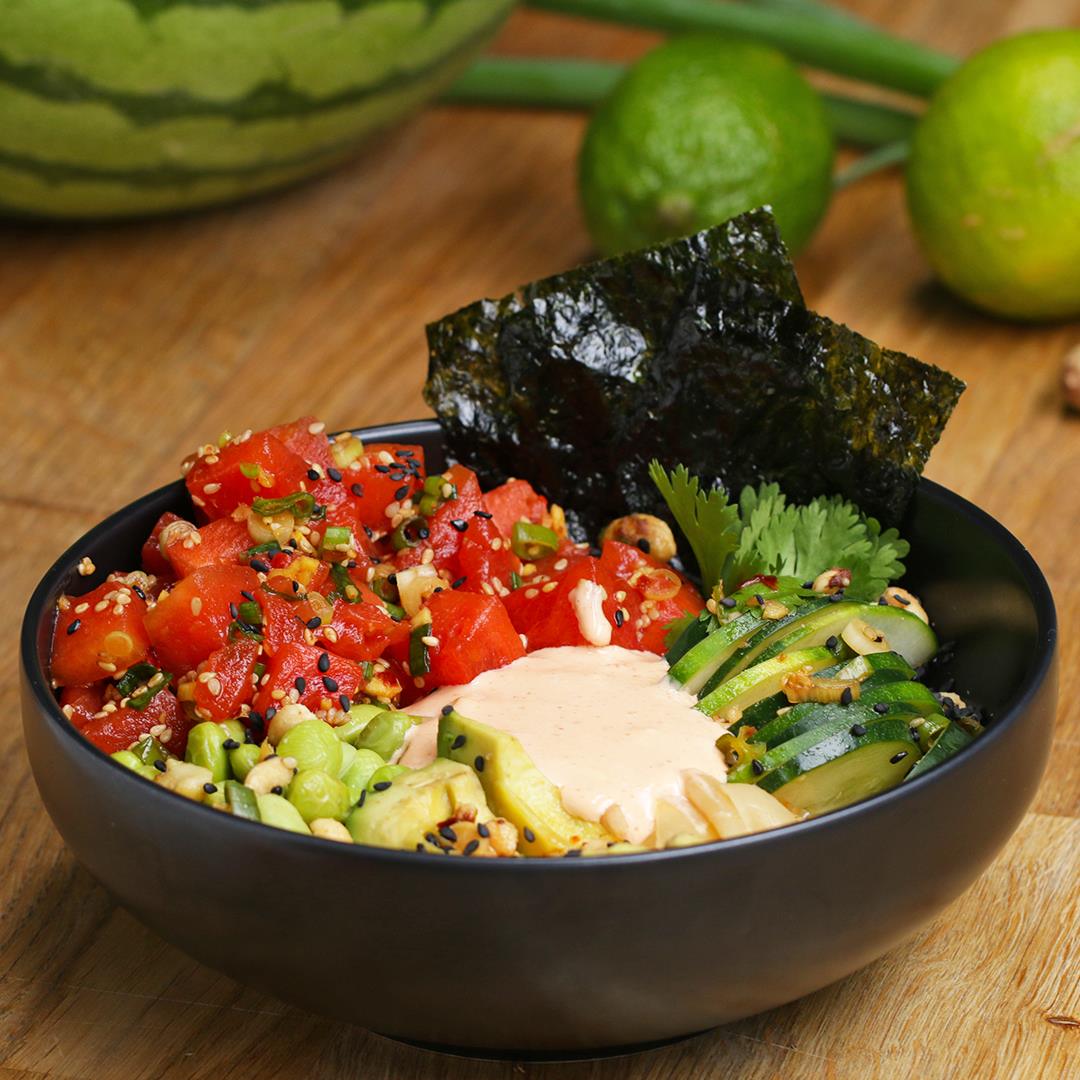
Watermelon Poke Bowl
Enjoy watermelon while it's still in season with this watermelon poke bowl!
Author:
Cuisine: American
Recipe type: Main dish
Ingredients
  • 1 mini watermelon, sliced
  • 6 tablespoons soy sauce
  • 2 teaspoons rice vinegar
  • 1 tablespoon sesame oil
  • 1 lime, juiced
  • 1 tablespoon agave nectar
  • 2 scallions, minced
  • 2 tablespoons fresh ginger, minced
  • 2 tablespoons white sesame seeds, toasted
  • 1 teaspoon red chile flakes
  • 1 medium cucumber
  • 6 tablespoons mayonnaise
  • 2 tablespoons sriracha
  • white rice, cooked, for serving
  • avocado, sliced, for serving
  • shelled edamame, for serving
  • nori sheets, for serving
  • pickled ginger, for serving
  • fresh cilantro, for serving
  • peanuts, crushed, for serving
  • black sesame seeds, for garnish, optional
Instructions
  1. Using a sharp knife, cut around the watermelon slices rind to remove, then dice into 1-inch (2 cm) cubes.
  2. Transfer 4 cups (600 g) to a medium bowl, reserving the rest for another use.
  3. In a small bowl, combine the soy sauce, rice vinegar, sesame oil, lime juice, agave, scallions, ginger, white sesame seeds, and chile flakes. Mix well.
  4. Pour the marinade over the watermelon cubes and stir. Cover the bowl with plastic wrap and let marinate in the fridge for 1 hour.
  5. Slice the cucumber into thin half moons and set aside.
  6. In a small bowl, combine the mayo and Sriracha.
  7. To assemble the poke bowls, start with rice as a base and top with cucumbers, avocado, edamame, nori, pickled ginger, Sriracha mayo, cilantro, and crushed peanuts.
  8. Add a scoop of the marinated watermelon and use the marinade as a dressing to drizzle over the bowl.
  9. Garnish with black sesame seeds, if desired.
  10. Enjoy!

Watch the recipe video here:

Watermelon Poke Bowl

Enjoy watermelon while it's still in season with this watermelon poke bowl!Get the recipe: https://tasty.co/recipe/watermelon-poke-bowl

Posted by Tasty on Saturday, September 15, 2018
Main dish

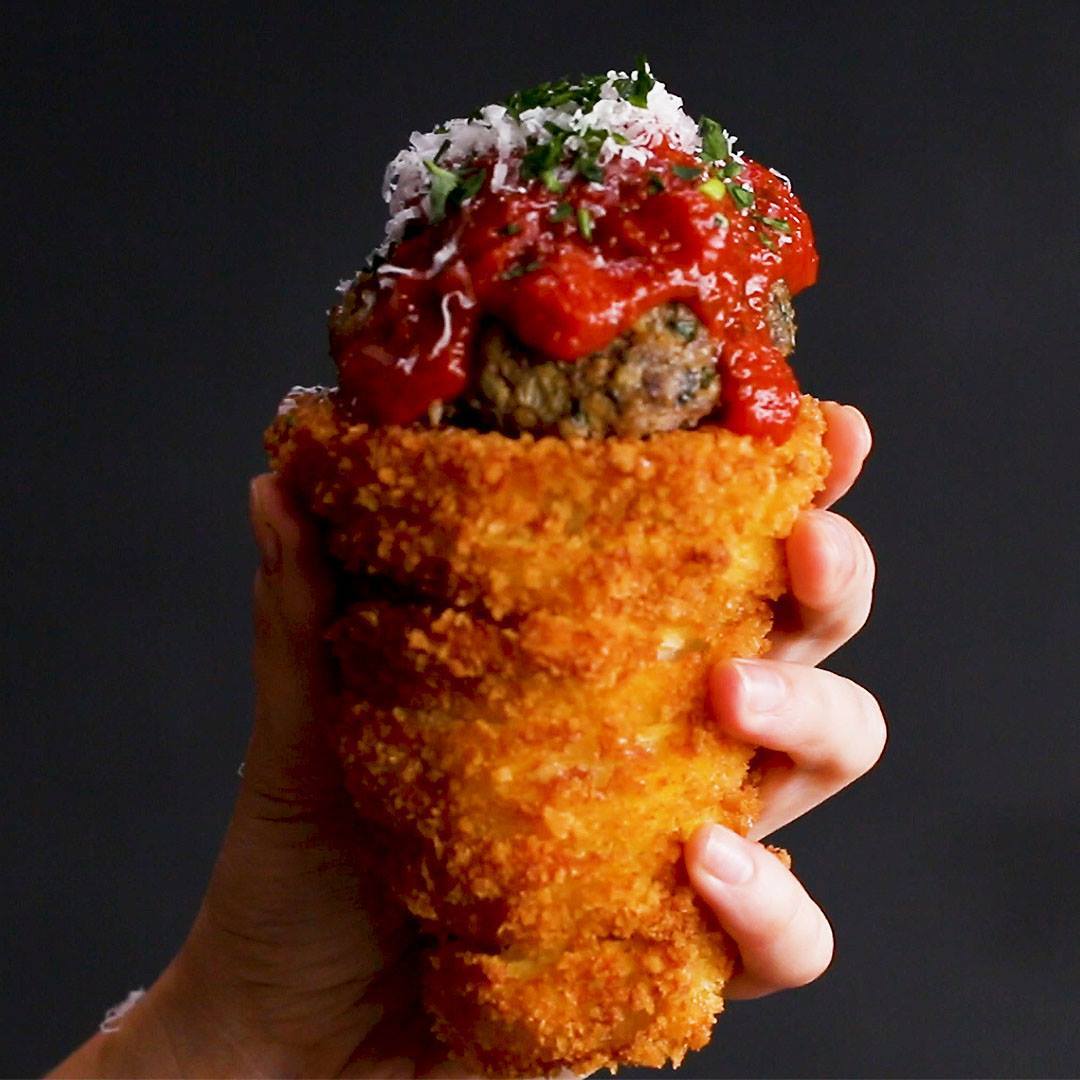
Meatball-Stuffed Onion Ring Cone

Meatball-Stuffed Onion Ring Cone
Meatball-Stuffed Onion Ring Cone recipe.
Author:
Cuisine: American
Recipe type: Main dish
Ingredients
ONION RINGS
  • 2 large white onions
  • 1 cup all-purpose flour (125 g)
  • 6 large eggs, beaten
  • 3 cups panko breadcrumbs (150 g)
MEATBALLS
  • 1 lb ground beef (455 g)
  • 1 small yellow onion, finely chopped
  • 1 clove garlic, minced
  • ½ cup grated parmesan cheese (55 g)
  • ½ cup panko breadcrumbs (25 g)
  • ¼ cup fresh flat-leaf parsley, finely chopped (10 g)
  • 1 tablespoon worcestershire sauce
  • 1 large egg
  • 1 teaspoon salt
  • ½ teaspoon black pepper
  • oil, for frying
  • marinara sauce, for serving
  • grated parmesan cheese, for serving
  • fresh basil, chopped
Instructions
  1. On a cutting board, peel the onions, and cut into ½-inch (1 ¼-cm) rings. Separate the rings.
  2. Sort the onion rings into four cones, starting with a big ring and going up to a small one.
  3. Place the flour, eggs, and panko in 3 separate medium bowls.
  4. Dip an onion ring into the flour, shaking off any excess. Dip it into the eggs, then the panko, then back into the eggs, and into the panko again.
  5. Place the onion ring on a greased, parchment-lined baking sheet. Repeat with remaining onion rings, creating four stacked cones on the tray. Freeze the onions ring cones for 1-3 hours.
  6. Preheat the oven to 400˚F (200˚C).
  7. In a medium bowl, mix the ground beef, onion, garlic, Parmesan, panko, parsley, Worcestershire, egg, salt, and pepper with your hands until fully combined.
  8. Take a baseball-size handful of the meat mixture and roll it into a ball. Transfer to a parchment-lined baking sheet. Repeat with the remaining meat mixture, creating four meatballs total.
  9. Bake for 18 minutes.
  10. Heat the oil in a large pot over medium heat until it reaches 350˚F (180˚C).
  11. Gently lower one frozen onion ring cone into the oil. Fry until golden brown all over, 2-4 minutes.
  12. Remove the cone with a slotted spoon and transfer to a wire rack set over paper towels to drain. Repeat with the remaining onion ring cones.
  13. Add 1 meatball to each onion ring cone. Top with marinara sauce, grated Parmesan cheese, and basil.
  14. Enjoy!

Watch the recipe video here:

Meatball-Stuffed Onion Ring Cones

We transformed onion rings into the most delicious vessel… ? ?FULL RECIPE: https://tasty.co/recipe/meatball-stuffed-onion-ring-cone

Posted by Tasty on Saturday, September 15, 2018
Dessert

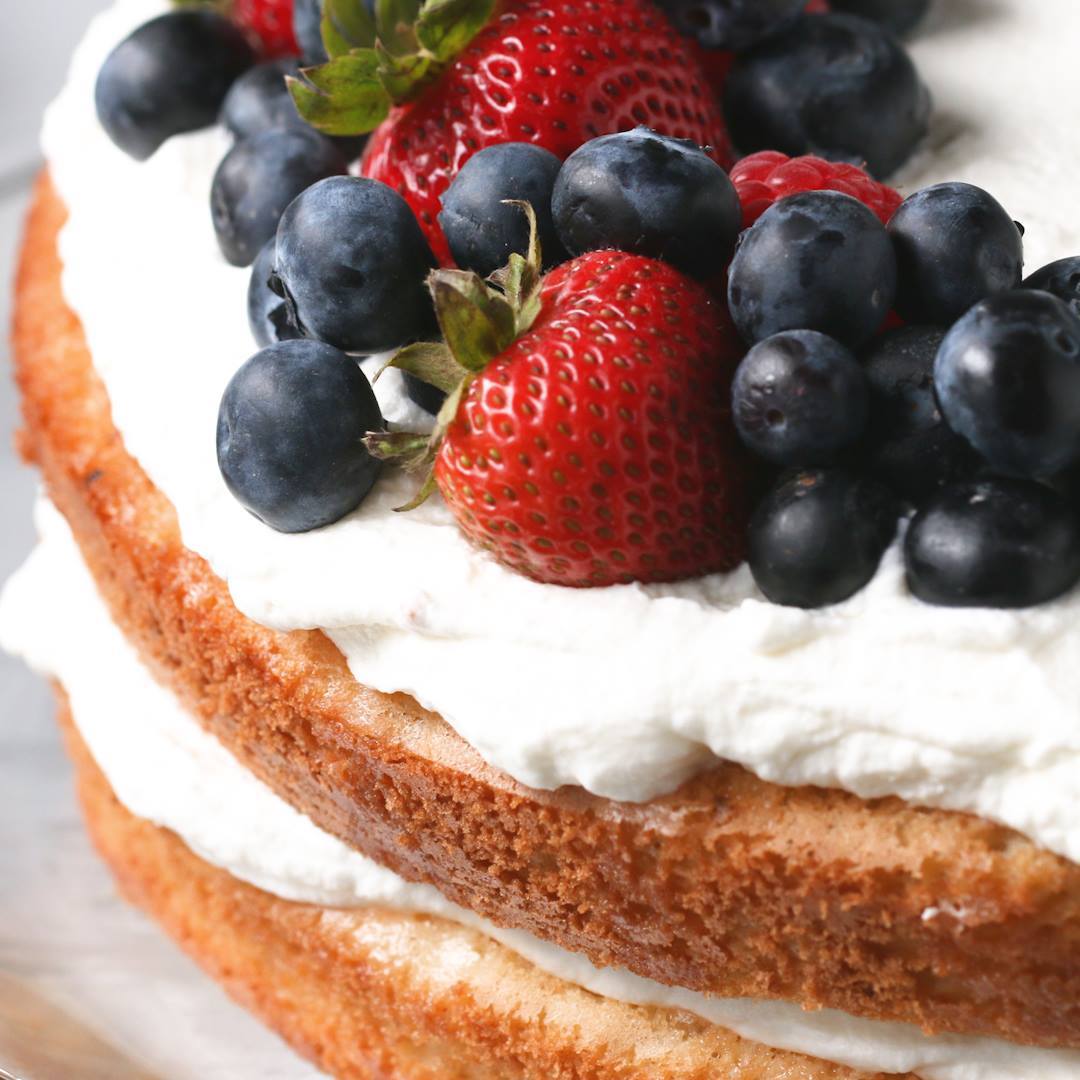
2-Layer Tres Leches Cake

2-Layer Tres Leches Cake
2-Layer Tres Leches Cake recipe.
Author:
Cuisine: American
Recipe type: Dessert
Ingredients
  • 1 ¾ cups all-purpose flour (220 g)
  • 1 tablespoon baking powder
  • ¾ teaspoon kosher salt
  • ¼ teaspoon ground cinnamon
  • 6 large eggs
  • 1 ¼ cups granulated sugar (250 g)
  • ¼ cup whole milk (60 mL)
  • ½ teaspoon vanilla extract
  • nonstick cooking spray, for greasing
  • ½ cup evaporated milk (120 mL)
  • ½ cup coconut milk (120 mL)
  • 14 oz condensed milk, 1 can (395 g)
  • 2 cups heavy whipping cream (480 mL)
  • ¼ cup powdered sugar (30 g)
  • assorted berries, for serving, optional
Instructions
  1. Whisk the flour, baking powder, salt, and cinnamon together in a medium bowl.
  2. In a separate large bowl, beat the eggs and sugar together with an electric mixer until light, fluffy, and nearly doubled in size, 6-8 minutes.
  3. Using a spatula, gently fold in the flour mixture until just combined (some streaks of flour are okay).
  4. Preheat the oven to 350°F (180°C).
  5. Combine the milk and vanilla extract in a liquid measuring cup or small bowl, then gently fold into the batter, mixing just to blend.
  6. Spray 2 9-inch (23 cm) round cake pans with nonstick cooking spray. Divide the batter between the pans.
  7. Bake until the cakes are golden brown around the edges and spring back slightly when pressed in the center, about 20-25 minutes.
  8. While the cakes are baking, combine the evaporated milk, coconut milk and condensed milk in a liquid measuring cup or small bowl and whisk to blend.
  9. Once the cakes are done, immediately remove the cakes from the pans and invert them onto a wire rack or baking sheet. Cool for 2 minutes. Then, poke the cakes all over with a fork.
  10. Return the cakes to the pans. Drizzle the condensed milk mixture over the cakes, letting it soak in. Let sit for 15 minutes.
  11. In a medium bowl, whip the heavy cream and powdered sugar with an electric hand mixer until stiff peaks form.
  12. Carefully transfer one of the cakes to a cake stand.
  13. Spread a layer of the whipped cream over the cake. Place the other cake on top and spread with the remaining whipped cream.
  14. Decorate with berries, if desired.
  15. Slice and serve.
  16. Enjoy!

Watch the recipe video here:

2-Layer Tres Leches Cake

Double the layers, double the delicious! ? Full Recipe: https://tasty.co/recipe/2-layer-tres-leches-cake

Posted by Tasty on Sunday, September 16, 2018

Dessert

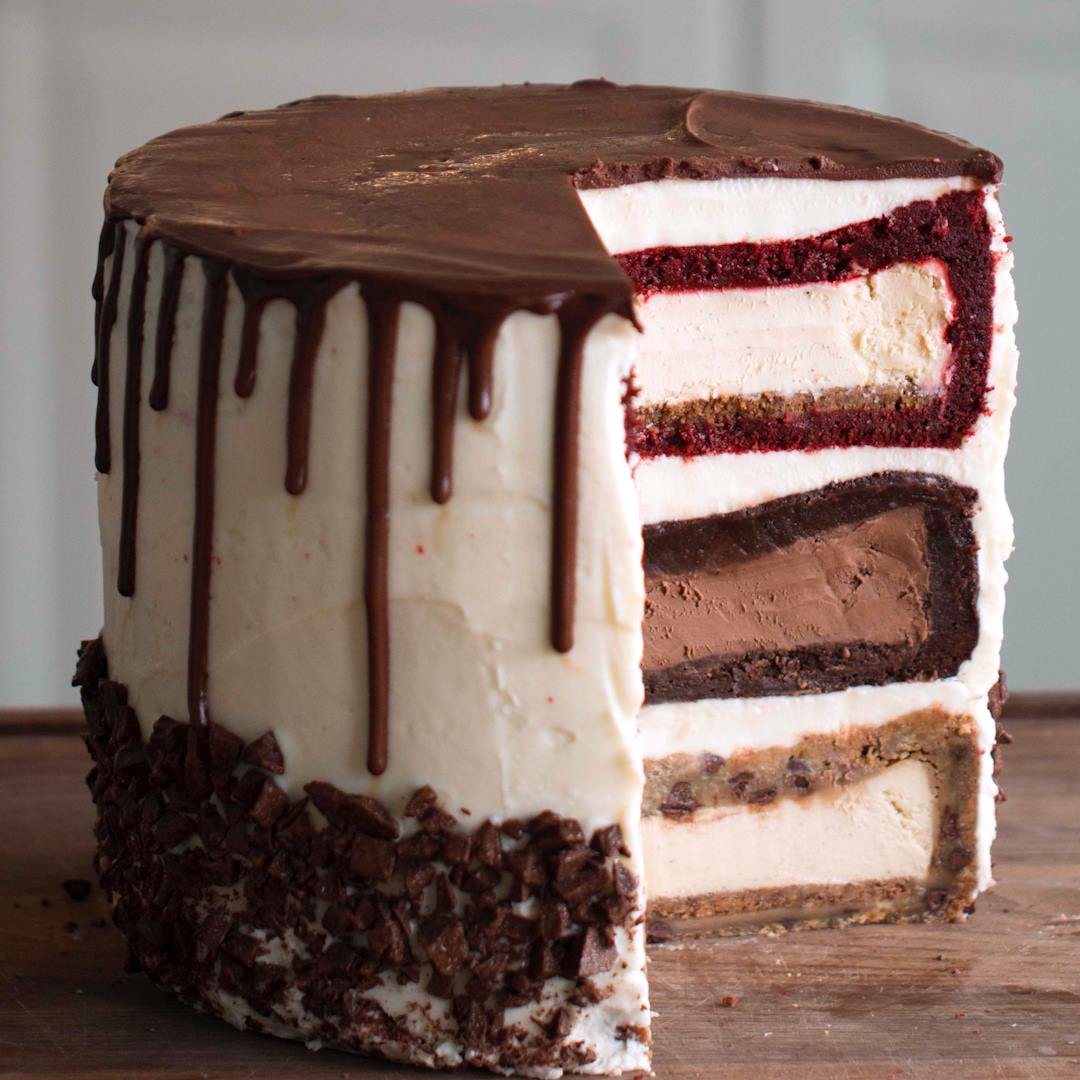
Triple-Decker Cheesecake Tower

Triple-Decker Cheesecake Tower
Triple-Decker Cheesecake Tower recipe.
Author:
Cuisine: American
Recipe type: Dessert
Ingredients
  • 18 oz brownie mix, 2 boxes, prepared according to package instructions (510 g)
  • 1 chocolate cheesecake, 8 inch (20 cm) prepared
  • 15 oz red velvet cake mix, 1½ boxes, prepared according to package instructions without the water (425 g)
  • 2 vanilla cheesecakes, 8 inch (20 cm) prepared
  • 40 oz chocolate chip cookie dough (1.1 kg)
  • 8 cups cream cheese icing (920 g)
  • 2 cups chocolate ganache (575 g)
  • 10 oz chocolate, chopped (285 g)
SPECIAL EQUIPMENT
  • 3 springform pans, 9 inch (23 cm)
Instructions
  1. Preheat the oven to 300°F (150°C).
  2. In a greased, 9-inch (23 cm) springform pan, spread ⅓ of the brownie batter evenly on the bottom. Lay the chocolate cheesecake in the center, then spread the rest of the batter on top. Set aside.
  3. In another greased springform pan, spread ⅓ of the cake batter evenly on the bottom, then lay the vanilla cheesecake on top. Spread the rest of the red velvet batter over the cheesecake and set aside.
  4. In a third springform pan, press ⅓ of the cookie dough evenly on the bottom, then another ⅓ of the dough around the sides of the pan to make a wall. Lay the remaining vanilla cheesecake in the center, then cover with the rest of the cookie dough and seal the edges.
  5. Bake all 3 filled cakes for 2 hours, until a toothpick inserted in the center of each comes out clean.
  6. Chill the cakes overnight in the refrigerator.
  7. Dollop a bit of of cream cheese frosting onto a serving platter and line the sides with parchment paper.
  8. Add the cookie cake to the platter and spread the top with layer of frosting.
  9. Stack the brownie cake on top, then spread another layer of frosting on top.
  10. Finally, place the red velvet cake on top, then frost the top and sides evenly.
  11. Add the chocolate ganache to a squeeze bottle, then decorate the top of the cake working your way around the top edge of the cake to make a drip pattern. Squeeze more ganache over the top of the cake and spread evenly to cover.
  12. Decorate the lower part of the cake by pressing the chocolate chunks into the sides.
  13. Slice and serve.
  14. Enjoy!

Watch the recipe video here:

Triple Decker Cheesecake Tower

3 Cheesecakes, 3 desserts, one dream.Get the full recipe: https://tasty.co/recipe/triple-decker-cheesecake-towerCheck out the featured springform pan HERE: https://bzfd.it/2MpLhdZ – We may make some $$ if you buy!

Posted by Tasty on Wednesday, September 12, 2018

Breakfast

Queso “Chips”

Queso “Chips”
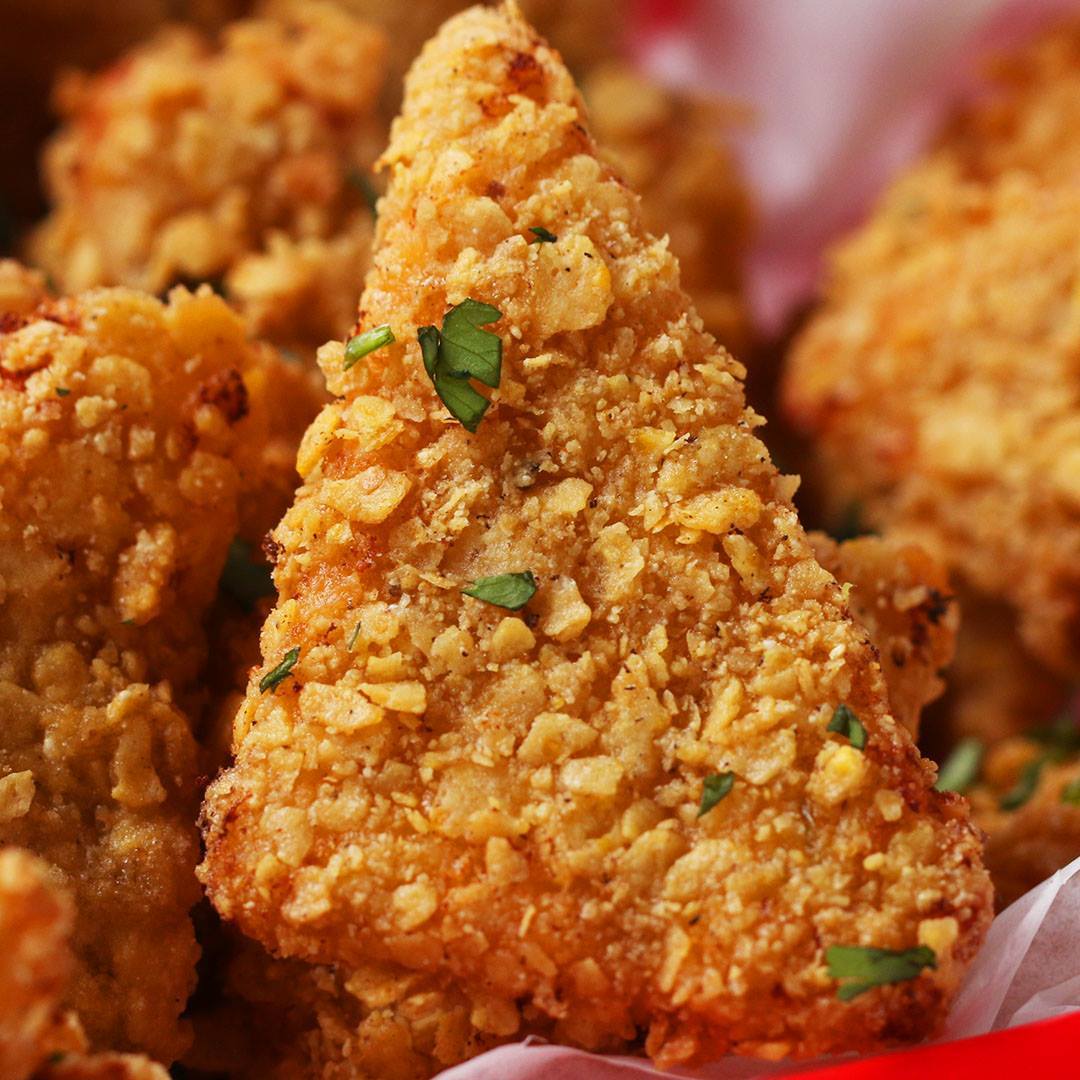
Queso “Chips” recipe.
Author:
Cuisine: American
Recipe type: Breakfast
Ingredients
  • 2 tablespoons unsalted butter
  • ½ medium white onion, diced
  • 2 jalapeñoes, diced
  • 2 cloves garlic, minced
  • 1 tablespoon cornstarch
  • 12 fl oz evaporated milk (355 mL)
  • 3 cups shredded sharp cheddar cheese (300 g)
  • 1 cup all-purpose flour (125 g)
  • 2 large eggs, beaten
  • 3 cups tortilla chips, crushed (80 g)
  • 4 cups canola oil (960 mL)
FOR SERVING
  • fresh cilantro, chopped, for serving
  • pico de gallo, for serving
  • guacamole, for serving
  • sour cream, for serving
Instructions
  1. Melt butter in a medium saucepan over medium-high heat. Add the onion and cook for 4-6 minutes, until translucent.
  2. Add the jalapeño and stir for 4 minutes, until soft. Add the garlic and cook for about 1 minute.
  3. Sprinkle in the cornstarch and stir for two minutes. Add the evaporated milk and stir for 3 minutes, or until the mixture thickens.
  4. Slowly add the cheese ½ cup (50 g) at a time. Stir constantly until the cheese is completely melted.
  5. Remove the queso from the heat. Line a baking sheet with parchment paper, then pour the queso over it. Use a spatula to spread the queso in an even layer about an ⅛ inch (3 mm) thick.
  6. Freeze for three hours.
  7. Remove the queso from the freezer and transfer to a cutting board. Carefully cut the queso horizontally into 7 rows, about 2½-inches (6-cm) apart.
  8. At the end of the bottom row, cut a triangle. Continue cutting triangles down the length of the row. Repeat with the remaining rows.
  9. Place the flour, eggs, and tortilla chip crumbs in 3 separate medium bowls.
  10. Heat the oil in a large pot until it reaches 350°F (180°C).
  11. Toss a triangle of queso in the flour. Tap off any excess flour, then dip the piece in the egg, then toss it in the tortilla chip crumbs. Repeat with the remaining queso chips.
  12. Fry the breaded queso chips 3-4 at a time, until golden brown, 15–30 seconds.
  13. Drain the chips on a wire rack or paper towels.
  14. Garnish with cilantro. Serve with guacamole, pico de gallo, and sour cream.
  15. Enjoy!

Watch the recipe video here:

Queso "Chips"

Take queso to a whole new level with these… ??FULL RECIPE: https://tasty.co/recipe/queso-chips

Posted by Tasty on Thursday, September 13, 2018

Main dish

Pulled Pork-Stuffed Cornbread Muffins

Pulled Pork-Stuffed Cornbread Muffins
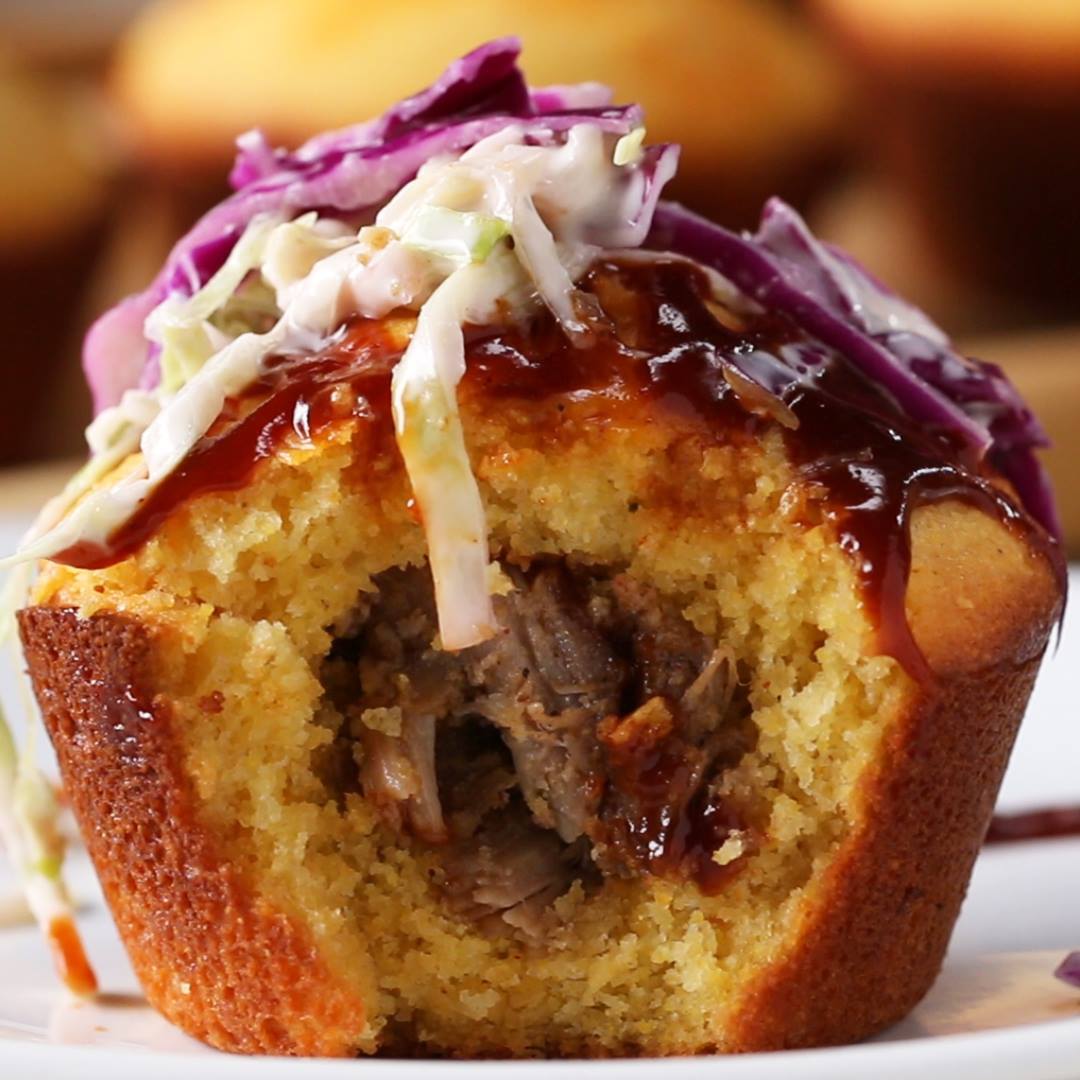
Pulled Pork-Stuffed Cornbread Muffins recipe.
Author:
Cuisine: American
Recipe type: Main dish
Ingredients
  • ¾ cup milk (180 mL)
  • ½ cup unsalted butter, 1 stick, melted (115 g)
  • 2 tablespoons honey
  • 2 large eggs
  • 1 cup all-purpose flour (125 g)
  • 1 cup yellow cornmeal (150 g)
  • ¼ cup sugar (50 g)
  • 1 tablespoon baking powder
  • 1 teaspoon salt
  • nonstick cooking spray, for greasing
  • 6 tablespoons pulled pork
  • 6 tablespoons cheddar cheese
  • barbecue sauce, for serving
  • coleslaw, for serving
Instructions
  1. Preheat the oven to 350°F (180°C).
  2. In a medium bowl, whisk together the milk, butter, honey, and eggs until combined.
  3. In a separate large bowl, mix the flour, cornmeal, sugar, baking powder, and salt until combined.
  4. Pour the wet ingredients into the dry ingredients and mix until smooth.
  5. Grease a 6-cup muffin tin with nonstick spray. Using an ice cream scoop or measuring cup, spoon about ¼ cup (70 g) of batter into each cup.
  6. Spoon about 1 tablespoon of pulled pork in the center of the batter.
  7. Top the pork with another ¼ cup (70 g) of batter to cover, using a spoon to spread the batter over the pork if necessary.
  8. Sprinkle about 1 tablespoon of cheddar cheese over each muffin.
  9. Bake for 25 minutes, or until the tops of the muffins spring back when touched.
  10. Remove the muffins from the tin and top with barbecue sauce and coleslaw.
  11. Enjoy!

Watch the recipe video here:

Pulled Pork-Stuffed Cornbread Muffins

These pulled pork-stuffed cornbread muffins are the collab of the year! ?FULL RECIPE: https://tasty.co/recipe/pulled-pork-stuffed-cornbread-muffins

Posted by Tasty on Friday, September 14, 2018

Main dish

Mutant Underground Sheet-Pan PiXXa

Mutant Underground Sheet-Pan PiXXa
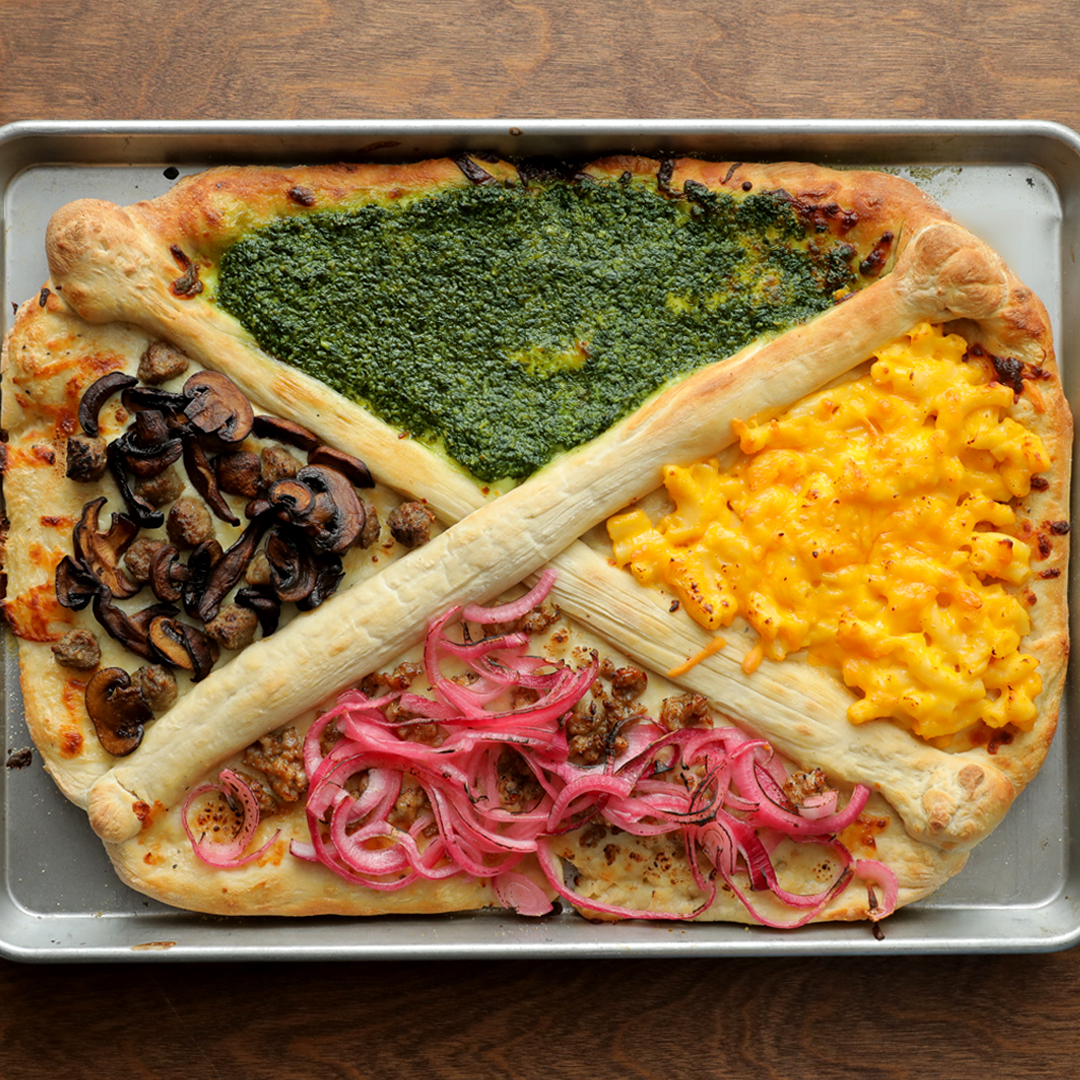
Pick a side! This piXXa lets you choose the perfect ingredients to match your mutant powers! Serve this to friends for the season premiere of The Gifted on Tuesday, September 25 on Fox!
Author:
Cuisine: American
Recipe type: Main dish
Ingredients
  • * 3 small (about 36-ounce) fresh pizza-dough balls, divided
  • * 1½ cups alfredo sauce
  • * ¼ cup fresh pesto
  • * ⅓ cup fresh macaroni and cheese
  • * ¼ cup sautéed mushrooms
  • * ¼ cup cooked Italian sausage (crumbled)
  • * ⅓ cup red onions, sliced
  • * 1 cup apple cider vinegar
  • * 2 tablespoons sugar
  • * 1 tablespoon kosher salt
  • * ¼ cup cooked meatballs
  • * 1 cup shredded mozzarella cheese, divided
  • * ¼ cup cheddar cheese
  • * 3 tablespoons olive oil
  • * 3 tablespoons cornmeal
  • * Additional marinara sauce (dipping)
Instructions
  1. Preheat oven to 450°F. Oil a sheet pan and dust with cornmeal. Carefully press dough across half of sheet pan, using 2 balls and making sure to completely cover the bottom and sides. Use remaining ball of dough to roll out 2 tubes of dough that will cross the pan (lengthwise) to create an X shape. Secure the X to the corners (press into the bottom and sides). Brush sides and X with olive oil.
  2. Add apple cider vinegar, sugar, and kosher salt to pot and boil. Pour over onions and let sit at least 1 hour to pickle.
  3. Carefully spoon ¼ cup of alfredo sauce into each section. Place ¼ cup of cheese on top of each section. Bake for 6–8 minutes until dough is set and cheese is melted. Remove from oven and carefully place ingredients in each section.
  4. * Macaroni and cheese with cheddar
  5. * Crumbled sausage with pickled onions
  6. * Cooked mushrooms and meatballs
  7. * Pesto
  8. Bake an additional 8–10 minutes or until pizza is well browned.
  9. Cut each section into slices, being careful to leave the X intact. Serve the X with marinara sauce.

Watch the recipe video here:

Mutant Underground Sheet-Pan PiXXaPick a side! This piXXa lets you choose the perfect ingredients to match your mutant powers! Serve this to friends for the season premiere of The Gifted on Tuesday, September 25 on Fox!

Posted by Tasty on Friday, September 14, 2018

Dessert

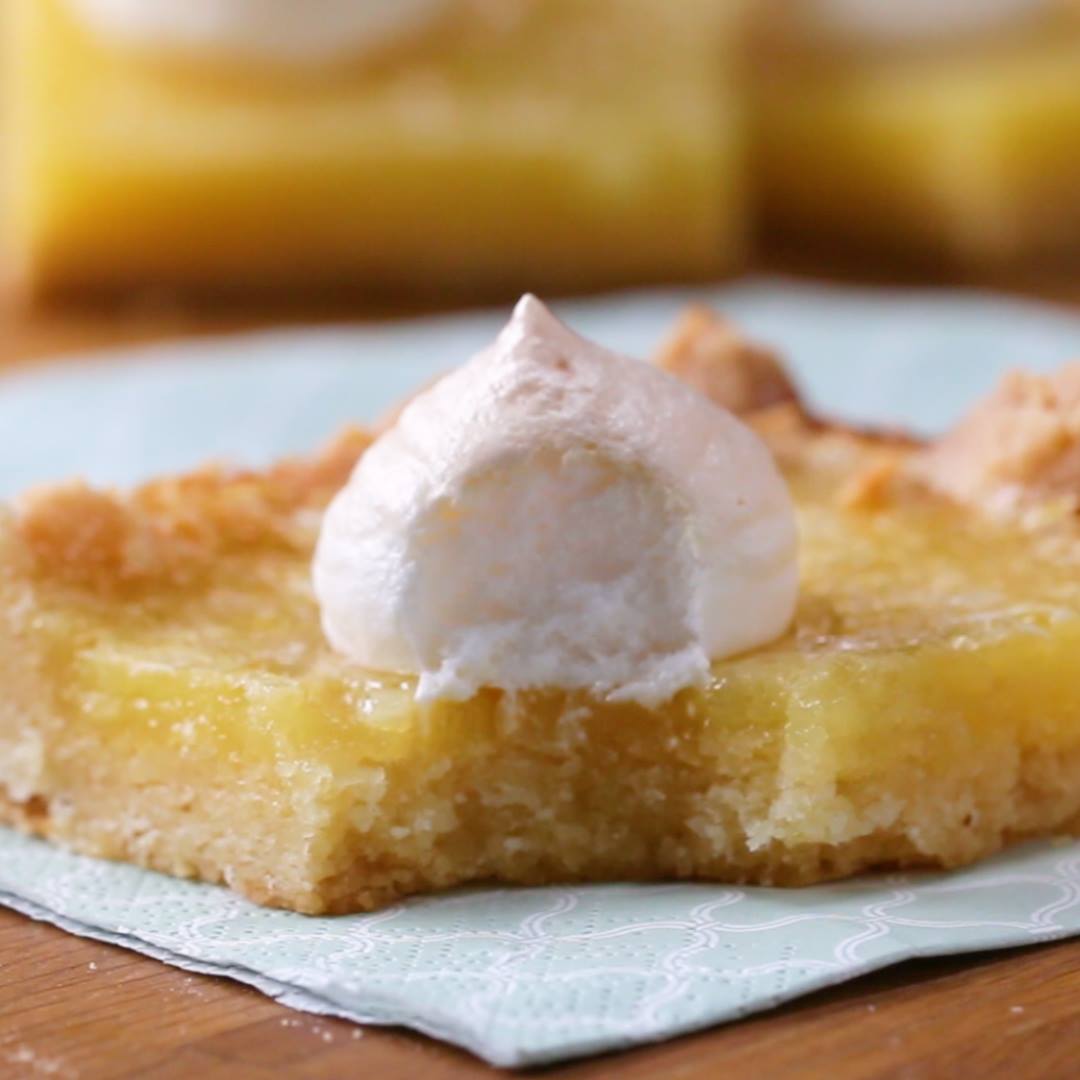
Lemon Meringue Bars

Lemon Meringue Bars
Lemon Meringue Bars recipe.
Author:
Cuisine: American
Recipe type: Dessert
Ingredients
CRUST
  • 1 ½ cups all-purpose flour (185 g)
  • ½ cup powdered sugar (60 g)
  • ½ teaspoon salt
  • ¾ cup unsalted butter, 1½ sticks, cubed, room temperature (165 g)
LEMON FILLING
  • 3 large eggs
  • 1 egg yolk, reserve white for meringue
  • 1 cup granulated sugar (200 g)
  • ½ cup lemon juice (120 mL)
  • 1 tablespoon lemon zest
  • ¼ cup all-purpose flour (30 g)
MERINGUE
  • 1 egg white
  • 1 pinch salt
  • ⅓ cup granulated sugar (65 g)
Instructions
  1. Preheat oven to 325˚F (170˚C). Grease and line a 9-inch (23 cm) square baking dish with parchment paper and place on a baking sheet.
  2. Make the crust: combine the flour, powdered sugar, salt, and butter in a medium bowl, and use your hands to mix until a crumbly dough forms.
  3. Transfer the dough to the prepared pan, and use your hands to press it against the bottom and about 1 inch (2 cm) up the sides. Poke the bottom all over with a fork.
  4. Bake for 20 minutes, until light golden brown.
  5. While the crust is baking, make the lemon filling: In a large bowl, whisk together the eggs and egg yolk. Add the granulated sugar, lemon juice, zest, and a pinch of salt, and whisk to combine. Whisk in the flour until just combined.
  6. When the crust is done baking, remove it from the oven. Pour the lemon filling over the crust and carefully return it to the oven for 25 minutes, until the filling no longer jiggles and the center is mostly set.
  7. While the filling bakes, make the meringue: In a clean, dry medium bowl, use an electric hand mixer to beat the egg white until stiff peaks form. Add about half of the sugar, whip for 30 seconds, then add the rest of the sugar and whip until combined. Transfer the meringue to a pastry bag fitted with a large tip or zip-top bag with a corner snipped off.
  8. Pipe 9 evenly-spaced dollops of meringue on top of the lemon bars.
  9. Return to the oven for 10-12 minutes, until the meringues are lightly browned.
  10. Let cool completely, then refrigerate for 1-2 hours.
  11. Slice into 9 bars. Serve chilled or at room temperature.
  12. Enjoy!

Watch the recipe video here:

Lemon Meringue Bars

When life hands you lemons, make this ?Full Recipe: https://tasty.co/recipe/lemon-meringue-bars

Posted by Tasty on Friday, September 14, 2018

Dessert

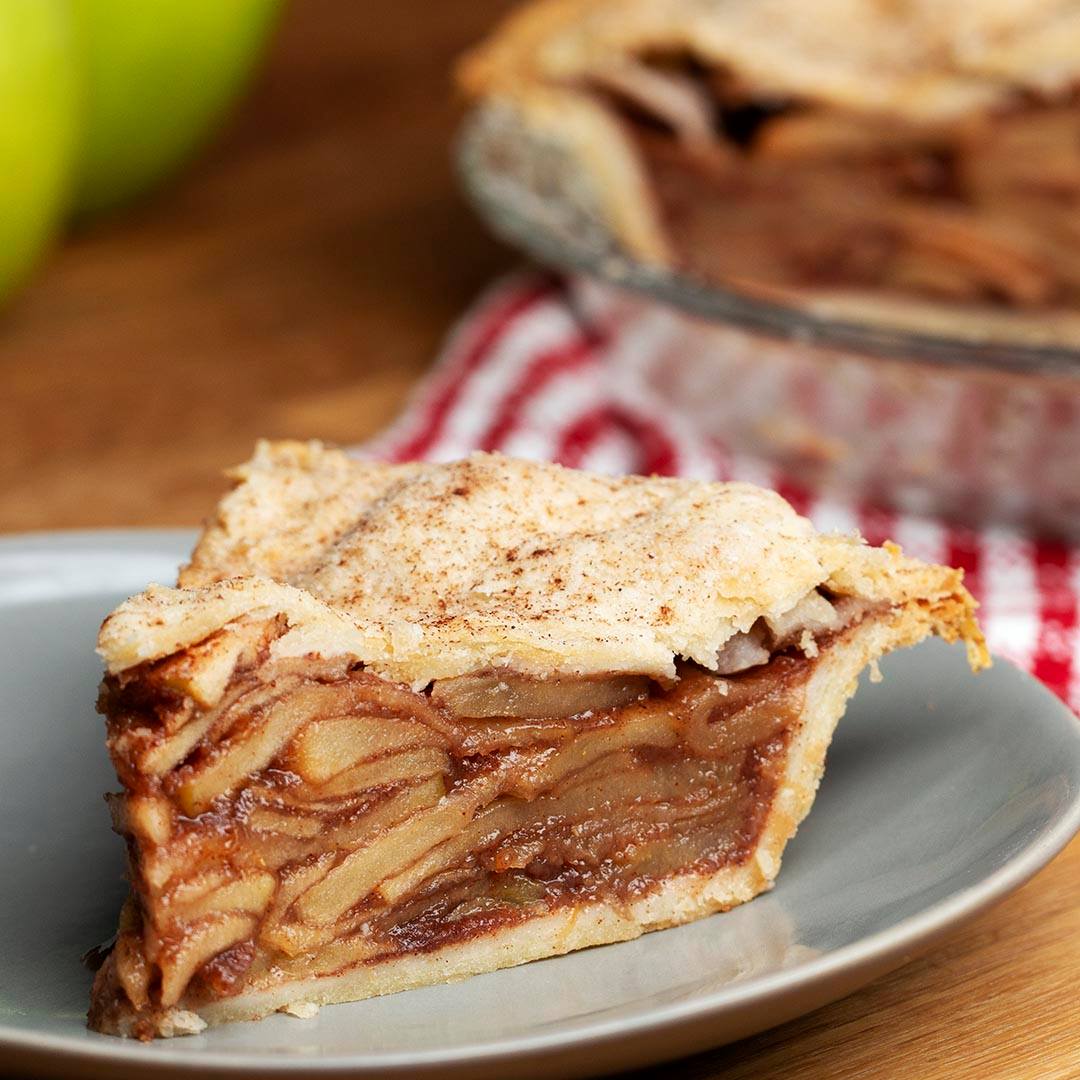
Vegan Apple Pie

Vegan Apple Pie
Vegan Apple Pie recipe.
Author:
Cuisine: American
Recipe type: Dessert
Ingredients
CRUST
  • 2 ½ cups all-purpose flour, plus more for dusting (310 g)
  • 1 tablespoon organic sugar
  • 1 teaspoon kosher salt
  • 1 cup vegan butter, cubed and chilled (225 g)
  • 6 tablespoons ice water
FILLING
  • 7 granny smith apples
  • 2 cups organic sugar, plus 1 teaspoon, divided (400 g)
  • 1 lemon, zested
  • 5 tablespoons cornstarch
  • ½ lemon, juiced
  • 1 tablespoon coconut oil, melted, plus 1 teaspoon, divided
  • ½ teaspoon salt
  • 4 teaspoons cinnamon, divided
Instructions
Make the crust:
  1. In a large bowl, combine the flour, sugar, and salt.
  2. Add the cubed butter, a bit at a time, and use a fork to work it into the flour with a fork until it breaks down to dime-sized pieces.
  3. Gradually add the ice water and mix just until the dough can be pressed together.
  4. Divide the dough in half and shape into discs. Wrap in plastic wrap and chill in the fridge for 1 hour.
  5. Preheat the oven to 350˚F (180˚C).
Make the filling:
  1. Peel and core apples, then thinly slice. Transfer to a large bowl and add 2 cups of sugar, the lemon zest, cornstarch, lemon juice, 1 teaspoon melted coconut oil, salt, and 3 teaspoons cinnamon. Toss until the apples are well-coated. Set aside.
  2. On a lightly floured surface, roll out both of the discs of dough to about 1 inch (2 cm) thick. Transfer one round to a greased 8-inch (20-cm) pie dish and gently press against the bottom and sides. Trim the excess dough around the edges, then prick the bottom of the pie crust all over with a fork
  3. Pour the apples into the bottom crust and cover with the top crust. Trim the excess dough around the edges, then crimp the top and bottom crusts together with a fork. Brush the top of the crust with the remaining tablespoon of melted coconut oil and sprinkle with the remaining teaspoon of sugar and cinnamon. Cut 4 vents in the top crust
  4. Bake for 1 hour, until crust is starting to turn golden brown.
  5. Let cool for 10 minutes, then slice and serve.
  6. Enjoy!

Watch the recipe video here:

We only have eyes for this vegan apple pie ?Get the recipe: https://tasty.co/recipe/vegan-apple-pie

Posted by Tasty on Wednesday, September 12, 2018

Main dish

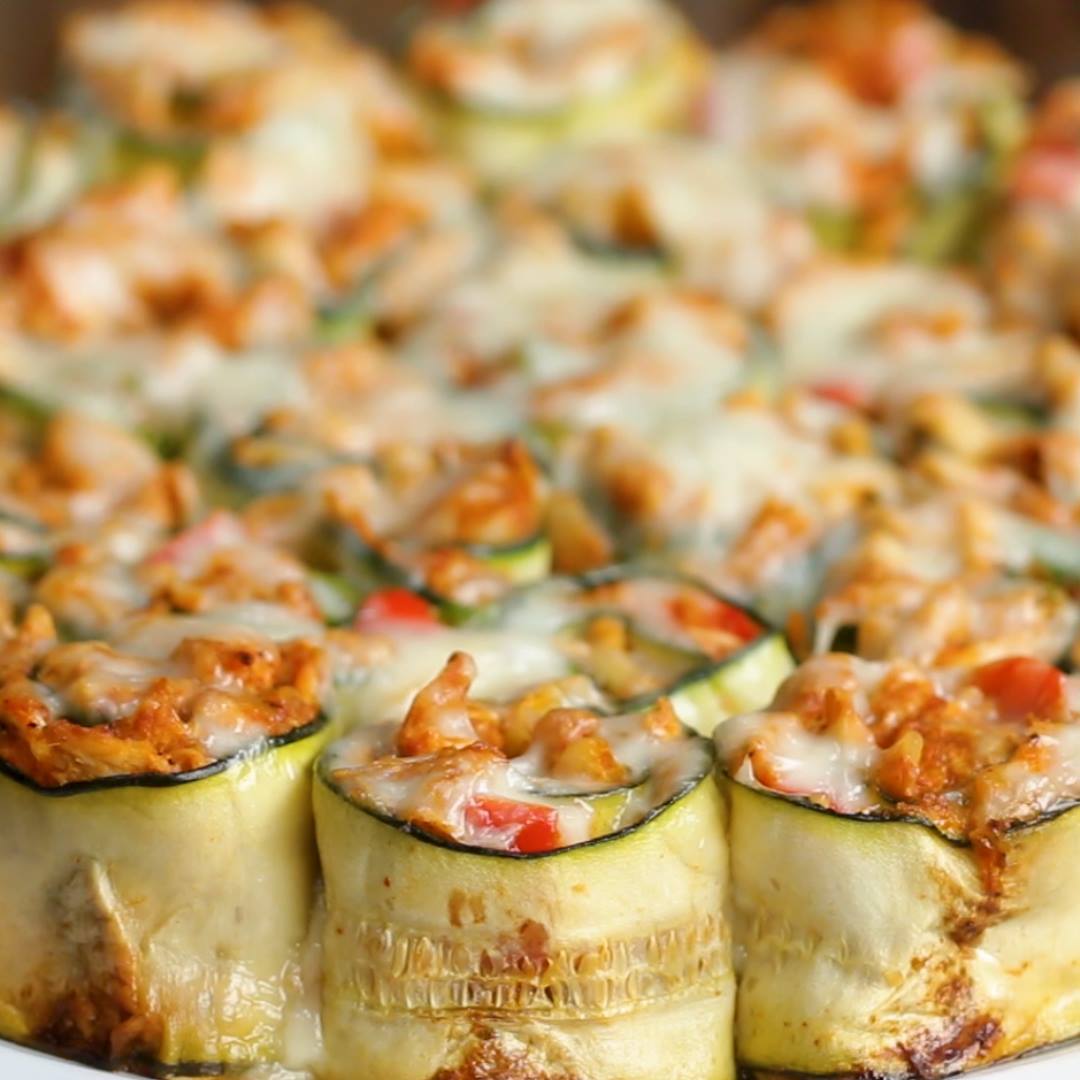
Zucchini Enchilada Roll-Ups

Zucchini Enchilada Roll-Ups
When you're trying to be healthy but you're craving enchiladas ?
Author:
Cuisine: American
Recipe type: Main dish
Ingredients
  • 2 cups shredded chicken, cooked (250 g)
  • 1 teaspoon salt
  • 1 onion, diced
  • 1 red bell pepper, diced
  • 1 jalapeño, diced
  • 2 cups shredded monterey jack cheese, divided (200 g)
  • 1 teaspoon garlic powder
  • 1 tablespoon paprika
  • 1 teaspoon chili powder
  • 1 teaspoon salt
  • ½ teaspoon pepper
  • 1 lime, juiced
  • 1 cup red enchilada sauce (290 g)
  • 4 zucchinis
  • fresh cilantro, chopped, for ganish
Instructions
  1. In a bowl mix together chicken, onion, red bell pepper, jalapeno, 1 cup of Monterey Jack (100 g), enchilada sauce, lime juice, garlic powder, chili powder, salt, pepper. Mix thoroughly and set aside until ready to use.
  2. With a peeler, peel slices of zucchini vertically. Once you can no longer peel a whole slice of zucchini peel the rest into smaller strips and save for zoodles!
  3. Preheat the oven to 400˚F (200˚C).
  4. Spread chicken mixture on to a slice of zucchini and roll into a tight spiral.
  5. Place in a greased springform pan and bake for 15 minutes. Sprinkle with the rest of the cheese and bake for 10 more minutes until cheese has melted.
  6. Transfer to a plate and sprinkle with cilantro.
  7. Serve immediately.
  8. Enjoy!

Watch the recipe video here:

Zucchini Enchilada Roll-Ups

When you're trying to be healthy but you're craving enchiladas ?Full Recipe: https://tasty.co/recipe/zucchini-enchilada-roll-ups

Posted by Tasty on Wednesday, September 12, 2018