Showing 177 Result(s)
Breakfast

Egg Cups and Bacon Soldiers
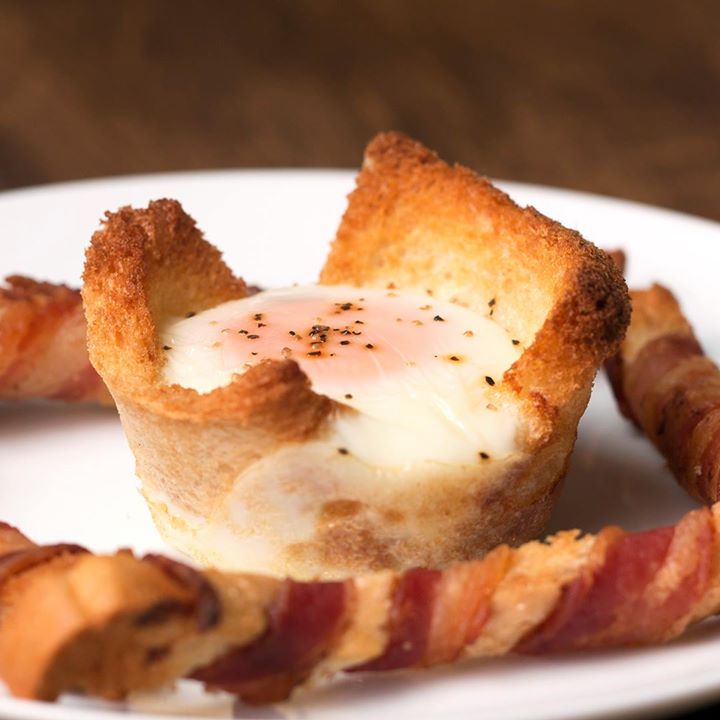
Egg Cups and Bacon Soldiers
Author:
Cuisine: American
Recipe type: Breakfast
Ingredients
  • 6 slices pre-sliced sandwich bread
  • 12 slices streaky bacon
  • 50 g (¼ cup) butter, melted
  • salt, to taste
  • pepper, to taste
Instructions
  1. Preheat the oven to 190°C (375°F).
  2. Cut the crusts off the bread.
  3. Slice the bacon in half lengthways, and wrap a piece around each crust. Place them on a baking tray.
  4. Brush cupcake tin with melted butter. Press the bread into the muffin tin, then brush more butter onto the bread.
  5. Bake the bacon soldiers for 10 minutes til they are about halfway cooked and starting to render their fat.
  6. At the same time, bake bread cups for 10 minutes or until the bread is turning golden brown.
  7. Flip the bacon. Crack an egg into each bread cup. Season with salt and pepper.
  8. Bake the bacon soldiers for another 10-12 minutes until the bacon is crispy. At the same time, bake the eggs for another 10-12 minutes until they are just cooked.
  9. Dip and Enjoy!

Watch the recipe video here:

Egg Cup and Bacon Soldiers

Egg cup and bacon soldiers to kick-start your morning ?RECIPE: https://tasty.co/recipe/egg-cups-and-bacon-soldiers

Posted by Proper Tasty on Thursday, February 22, 2018
Main dish

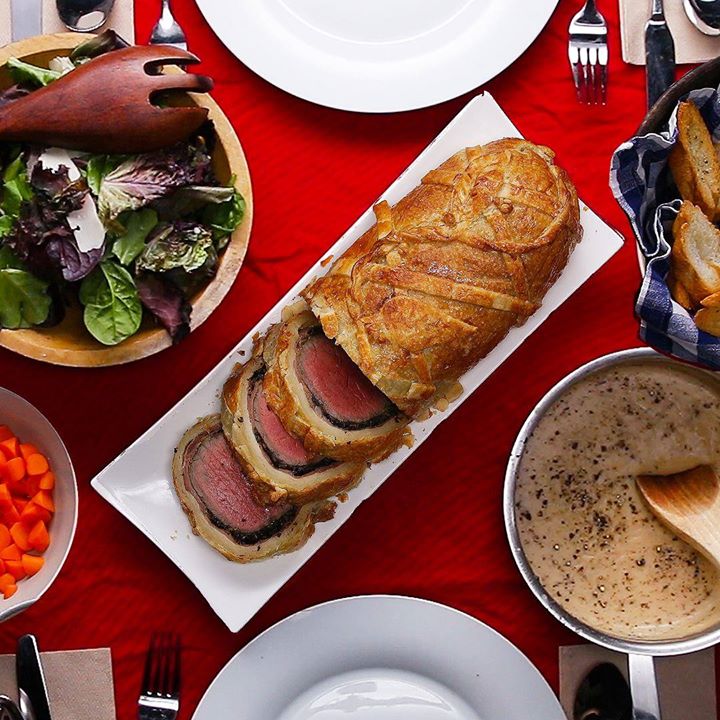
Show-Stopping Beef Wellington

Show-Stopping Beef Wellington
Show-Stopping Beef Wellington recipe.
Author:
Cuisine: American
Recipe type: Main dish
Ingredients
  • 3 lb center-cut beef tenderloin
  • kosher salt, to taste
  • black pepper, to taste
  • 2 tablespoons canola oil
  • ¼ cup english mustard
  • 1 tablespoon butter
  • 2 shallots, minced
  • 2 lb cremini mushroom, minced
  • 5 cloves garlic, minced
  • ½ lb prosciutto, thinly sliced, or ham
  • 1 sheet puff pastry
  • 2 eggs, beaten
Instructions
  1. Preheat oven to 400°F (200°C).
  2. Let the beef tenderloin come to room temperature. Season with kosher salt and pepper on all sides.
  3. Add canola oil to a large pan on high heat. Once the oil is hot, add the tenderloin. Without moving the tenderloin, cook until a dark brown crust forms, about 3 minutes. Repeat searing on all sides, including the tenderloin ends.
  4. Remove the tenderloin from the pan and transfer to a cutting board or wire rack and remove ties.
  5. Brush the mustard on all sides of the meat while it’s still warm. Let the meat rest for while making the duxelle (mushrooms cooked and reduced until dry).
  6. To the same pan, add the butter, mushrooms, minced shallot, and minced garlic over medium heat. Cook, stirring occasionally, until all the liquid evaporates and the mushroom mixture becomes a thick, dry-like paste.
  7. Remove the mushrooms from the pan and let cool completely.
  8. Place a large layer of overlapping sheets of plastic wrap on your work surface that is twice the length and width of the tenderloin.
  9. Lay overlapping strips of prosciutto on the plastic into an even square layer.
  10. Spread a layer of the mushrooms evenly over the prosciutto.
  11. Tightly and evenly wrap the tenderloin with the prosciutto, using the plastic wrap to wrap it even tighter and seal ends. Tie the ends of the plastic wrap together to hold the Wellington’s shape. Place in the refrigerator for 15 minutes.
  12. Place a new layer of plastic wrap on the work surface and lay a sheet of puff pastry over it. Unwrap the prosciutto-wrapped beef tenderloin onto the puff pastry, wrapping until the ends meet. Cut off any extra puff pastry, making sure there is no overlap.
  13. Wrap the puff pastry in plastic wrap, tying the ends together to form a log shape. Place in the refrigerator for 15 minutes.
  14. Place the beef Wellington on a greased, parchment paper-lined baking sheet. Brush the surface with the beaten eggs. With a fork, score a decorative design onto the surface of the puff pastry.
  15. Decorate with additional pastry (optional). Sprinkle with kosher salt.
  16. Bake for 40 minutes or until the puff pastry is a dark golden brown and the internal temperature of the beef is 135°F (57°C) for medium-rare.
  17. Enjoy!

Watch the recipe video here:

Show-Stopping Beef Wellington

Now THIS is a show-stopping centerpiece for a family feast! ? ✨FULL RECIPE: https://tasty.co/recipe/show-stopping-beef-wellington

Posted by Proper Tasty on Sunday, January 28, 2018

Main dish

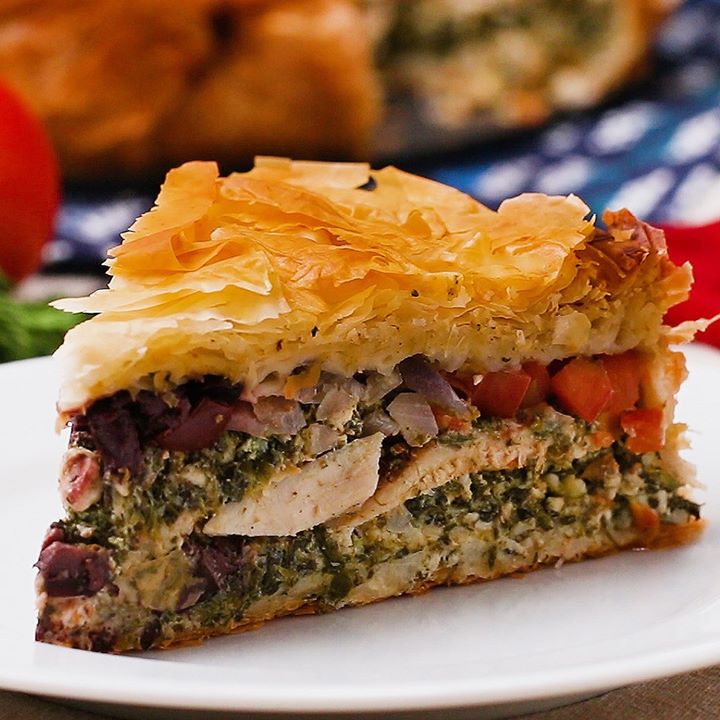
Chicken Spinach Feta Pie

Chicken Spinach Feta Pie
Chicken Spinach Feta Pie recipe.
Author:
Cuisine: American
Recipe type: Main dish
Ingredients
  • 4 boneless, skinless chicken breasts
  • 1 salt, to taste
  • 1 pepper, to taste
  • 4 cloves garlic, minced
  • 1 tablespoon greek oregano
  • 2 tablespoons olive oil
  • ½ cup ricotta cheese
  • 2 cups frozen spinach, thawed, chopped
  • 1 cup feta cheese, crumbled
  • ½ cup green onion, chopped
  • 2 eggs, beaten
  • 2 tablespoons fresh dill, chopped
  • 1 package phyllo dough
  • 1 cup butter, melted
  • 1 cup red onion, diced
  • ½ cup kalamata olive, chopped
  • 1 cup tomato, diced
Instructions
  1. Preheat oven to 400°F (200°C).
  2. Season the chicken breasts with the salt, pepper, garlic, greek oregano, and olive oil.
  3. Place the chicken breasts in a large skillet on medium-high heat with a tablespoon of oil. Cook until the first side is a dark golden brown, about 5 minutes. Flip the chicken and cook the other side until equally brown, about 5 minutes. Turn the heat to low and cook the chicken until it’s cooked through about 10 more minutes. Set the chicken aside to cool and then slice it.
  4. To a bowl, add the ricotta, chopped frozen spinach, feta cheese, chopped green onion, beaten eggs, dill, and pepper, and stir to combine.
  5. Place the butter into a large shallow dish. Take about 5 sheets of the thin phyllo dough and dip it in the butter.
  6. Place the buttered phyllo into a 9 inch (23 cm) springform pan. Make sure the dough complete covers the sides and hangs over the edges of the pan. Use as many sheets as needed to create a even layer all around.
  7. Spread half of the feta spinach mixture on the bottom of the springform pan on top of the phyllo dough. Shingle one layer of the sliced cooked chicken, and spread the other half of the spinach feta mixture. Make sure each layer is tightly pressed.
  8. Place the chopped tomatoes on the outer rim of the pie. Place a ring of chopped red onion, and then place chopped kalamata olives in the center.
  9. Fold the phyllo dough from the edges of the pan to the center and cover the top of the pie with 3 more batches of buttered phyllo.
  10. Cover the pie with aluminum foil and bake for 1 hour. Remove the aluminum foil cover and cook for about 20 more minutes, until the top is golden brown.
  11. Let rest at room temperature for at least 30 minutes.
  12. Remove the pie from the springform pan, slice, and serve.
  13. Enjoy!

Watch the recipe video here:

Chicken Spinach Feta Pie

Chicken spinach feta pie. Perfect for Sunday sharing ?FULL RECIPE: https://tasty.co/recipe/chicken-spanakopita-pie

Posted by Proper Tasty on Sunday, February 11, 2018

Dessert

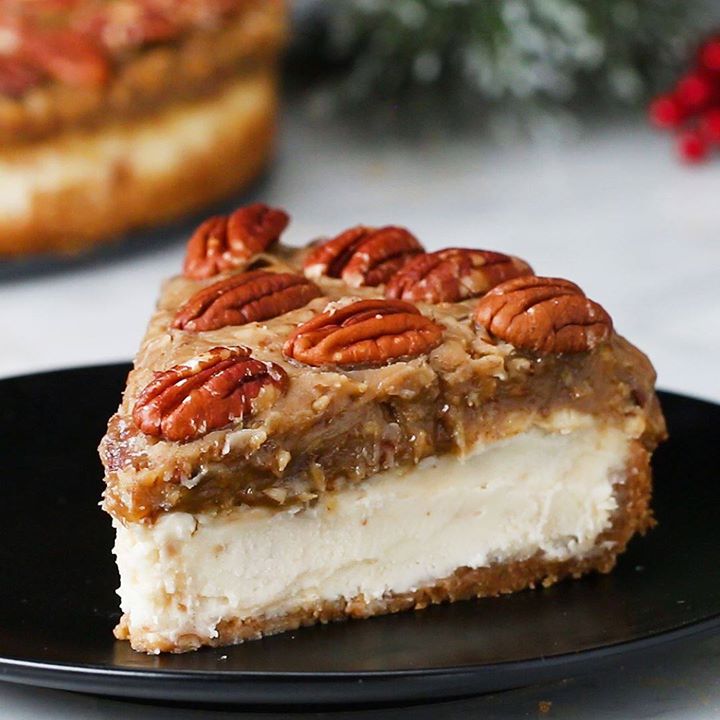
Pecan Pie Cheesecake

Pecan Pie Cheesecake
Pecan Pie Cheesecake recipe.
Author:
Cuisine: American
Recipe type: Cake
Ingredients
  • 2 cups graham cracker crumb
  • ⅓ cup butter, melted
  • 16 oz cream cheese, at room temperature
  • ¾ cup sugar
  • ¼ cup milk
  • ½ cup sour cream
  • 2 tablespoons flour
  • 3 teaspoons vanilla extract, divided
  • 2 eggs
  • 1 cup dark brown sugar
  • ¼ cup cornstarch
  • ½ teaspoon salt
  • 4 egg yolks
  • ⅔ cup maple syrup, or dark corn syrup
  • ½ cup cream, warm to the touch
  • 4 tablespoons butter, cold
  • 2 cups roasted pecan, chopped
  • whole roasted pecan, to serve
Instructions
  1. Preheat oven to 325°F (170°C).
  2. In a bowl, combine the graham cracker crumbs and melted butter. Stir to combine.
  3. Pour the mixture into a 9-inch (23 cm) springform pan and press it evenly into the bottom and halfway up the sides. Transfer to the refrigerator to chill.
  4. In a large bowl add the cream cheese, sugar, and milk. With a hand mixer, beat until fluffy and fully incorporated.
  5. Add in the sour cream, flour, 2 teaspoons of the vanilla extract, and the two eggs and gently continue to mix until the cream cheese filling is smooth.
  6. Pour the mixture into the springform pan with the graham cracker crust and bake for 1 hour, or until the cheesecake no longer jiggles.
  7. While the cheesecake is cooking, prepare the stove-top pecan pie filling.
  8. In a bowl combine the brown sugar, cornstarch, and salt, stir together and pour into a medium saucepan on low heat.
  9. Pour in the egg yolks, maple syrup, and warm cream and whisk until smooth.
  10. Cook on low heat until the mixture thickens like a pudding, 5-10 minutes. Remove from the heat.
  11. Stir in the cold butter and the final teaspoon of vanilla extract and whisk until fully emulsified. The pudding-like mixture should be around room temperature.
  12. Fold in the roasted, chopped pecans and then pour the mixture over the cooked cheesecake and spread it out as an even layer.
  13. If you like, sprinkle with extra chopped pecans or garnish with whole pecans.
  14. Let the cheesecake chill in the refrigerator until completely set.
  15. Slice and serve cold or at room temperature.
  16. Enjoy!

Watch the recipe video here:

Pecan Pie Cheesecake

This pecan pie cheesecake is the perfect accompaniment to any Sunday ?FULL RECIPE: https://tasty.co/recipe/pecan-pie-cheesecake

Posted by Proper Tasty on Sunday, February 4, 2018

Breakfast

Homemade Chocolate Croissants (Pain Au Chocolate)

Homemade Chocolate Croissants (Pain Au Chocolate)
Author:
Cuisine: American
Recipe type: Breakfast
Ingredients
  • 4 cups flour
  • ½ cup water
  • ½ cup milk
  • ¼ cup sugar
  • 2 teaspoons salt
  • 1 packet instant yeast
  • 3 tablespoons unsalted butter, softened
  • 1 ¼ cups cold unsalted butter, cut into ½-inch (1 cm) thick slices
  • 1 egg, beaten
  • 2 bars chocolate
Instructions
  1. In a large bowl, mix the flour, water, milk, sugar, salt, yeast, and butter.
  2. Once the dough starts to clump, turn it out onto a clean counter.
  3. Lightly knead the dough and form it into a ball, making sure not to over-knead it.
  4. Cover the dough with plastic wrap and refrigerate for one hour.
  5. Slice the cold butter in thirds and place it onto a sheet of parchment paper..
  6. Place another piece of parchment on top of the butter, and beat it with a rolling pin.
  7. Keeping the parchment paper on the butter, use a rolling pin to roll the butter into a 7-inch (18 cm) square, ½-inch (1 cm) thick. If necessary, use a knife to trim the edges and place the trimmings back on top of the butter and continue to roll into a square.
  8. Transfer the butter layer to the refrigerator.
  9. To roll out the dough, lightly flour the counter. Place the dough on the counter, and push the rolling pin once vertically into the dough and once horizontally to form four quadrants.
  10. Roll out each corner and form a 10-inch (25 cm) square.
  11. Place the butter layer on top of the dough and fold the sides of the dough over the butter, enclosing it completely.
  12. Roll the dough with a rolling pin to seal the seams, making sure to lengthen the dough, rather than widening it.
  13. Transfer the dough to a baking sheet and cover with plastic wrap. Refrigerate for 1 hour.
  14. Roll out the dough on a floured surface until it’s 8x24 inches (20x61 cm).
  15. Fold the top half down to the middle, and brush off any excess flour.
  16. Fold the bottom half over the top and turn the dough clockwise to the left. This completes the first turn.
  17. Cover and refrigerate for one hour.
  18. Roll out the dough again two more times, completing three turns in total and refrigerating for 1 hour in between each turn. If at anytime the dough or butter begins to soften, stop and transfer back to the fridge.
  19. After the final turn, cover the dough with plastic wrap and refrigerate overnight.
  20. To form the croissants, cut the dough in half. Place one half in the refrigerator.
  21. Flour the surface and roll out the dough into a long narrow strip, about 8x40 inches (20x101 cm).
  22. With a knife, trim the edges of the dough.
  23. Cut the dough into 4 rectangles.
  24. Place the chocolate on the edge of the dough and roll tightly enclosing it in the dough.
  25. Place the croissants on a baking sheet, seam side down.
  26. Repeat with the other half of the dough.
  27. Brush the croissants with the beaten egg. Save the rest of the egg wash in the fridge for later.
  28. Place the croissants in a warm place to rise for 1-2 hours.
  29. Preheat oven to 400°F (200°C).
  30. Once the croissants have proofed, brush them with one more layer of egg wash.
  31. Bake for 15 minutes or until golden brown and cooked through. Serve warm.
  32. Enjoy!

Watch the recipe video here:

Homemade Chocolate Croissants

Homemade chocolate croissants ?FULL RECIPE: http://bit.ly/2hxqGex

Posted by Proper Tasty on Thursday, January 25, 2018

Breakfast

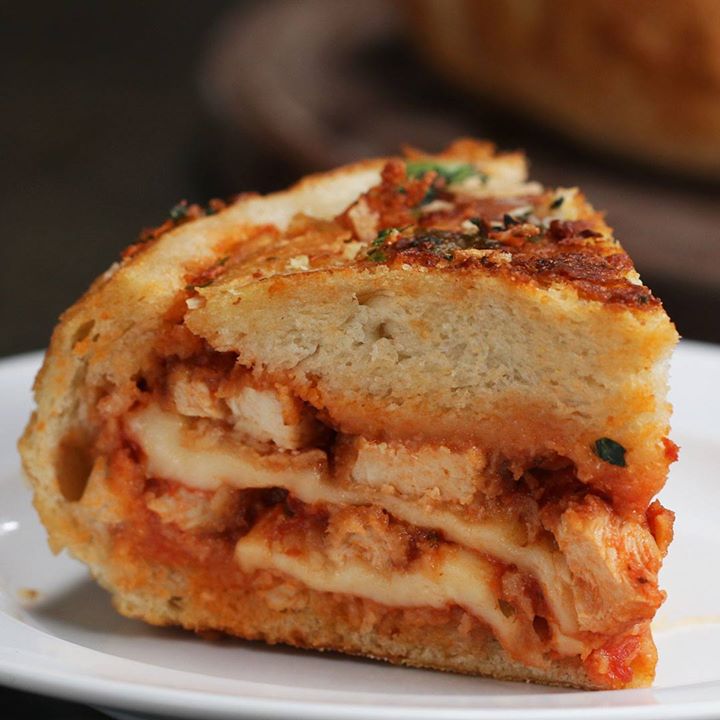
Chicken Parmesan Bread Bowl

Chicken Parmesan Bread Bowl
Author:
Cuisine: American
Recipe type: Breakfast
Ingredients
  • 1 cup breadcrumb
  • ½ teaspoon fresh parsley, chopped
  • ½ teaspoon garlic powder
  • ½ teaspoon onion powder
  • ¼ teaspoon dried oregano
  • ½ teaspoon salt
  • ¼ teaspoon pepper
  • 1 cup flour
  • 3 eggs, beaten
  • 2 boneless, skinless chicken breasts, thinly sliced
  • oil, for frying
  • 1 bread bowl
  • 1 cup marinara sauce
  • 8 oz mozzarella cheese
  • ½ cup shredded parmesan cheese
  • 3 tablespoons butter, melted
  • 3 cloves garlic, minced
  • 1 tablespoon fresh parsley, chopped
  • 1 tablespoon parmesan cheese, grated
  • fresh basil, for serving
Instructions
  1. Preheat oven to 350°F (180˚C).
  2. In a medium bowl, combine bread crumbs, parsley garlic powder, onion powder, oregano, salt, and pepper to bread crumbs.
  3. Place flour and eggs in two other medium bowls.
  4. Roll the chicken breast in the flour, dusting off any excess. Dip the chicken into the egg, then place into the breadcrumbs, coating it completely.
  5. Heat the oil in a skillet over medium-high heat.
  6. Once the oil begins to shimmer, fry the breaded chicken strips until both sides are golden brown.
  7. Remove from heat and drain on a paper towel.
  8. Slice the cooked chicken breast into ½-inch (1 cm) thick strips.
  9. Slice the top of the bread bowl off and scoop out the insides. Save the top of the bowl.
  10. Spoon and spread some of the marinara sauce on the bottom of the bowl, then layer on mozzarella, Parmesan cheese, chicken strips, marinara, remaining mozzarella, Parmesan, chicken strips, marinara, and remaining Parmesan.
  11. Place the cap of the bread bowl on top.
  12. Wrap the bread bowl in foil, then weigh it down with a heavy object for 30 minutes.
  13. In a small bowl, mix together butter, garlic, parsley, and Parmesan cheese.
  14. Remove the foil from the bread bowl and brush the garlic butter mixture evenly over it.
  15. Bake for 30 minutes.
  16. Cool for 10 minutes and slice.
  17. Garnish with basil, if desired.
  18. Enjoy!

Watch the recipe video here:

Chicken Parmesan Bread Bowl

You need this chicken parmesan bread bowl in your life ASAP ?FULL RECIPE: https://tasty.co/recipe/chicken-parmesan-bread-bowl

Posted by Proper Tasty on Wednesday, January 24, 2018

Main dish

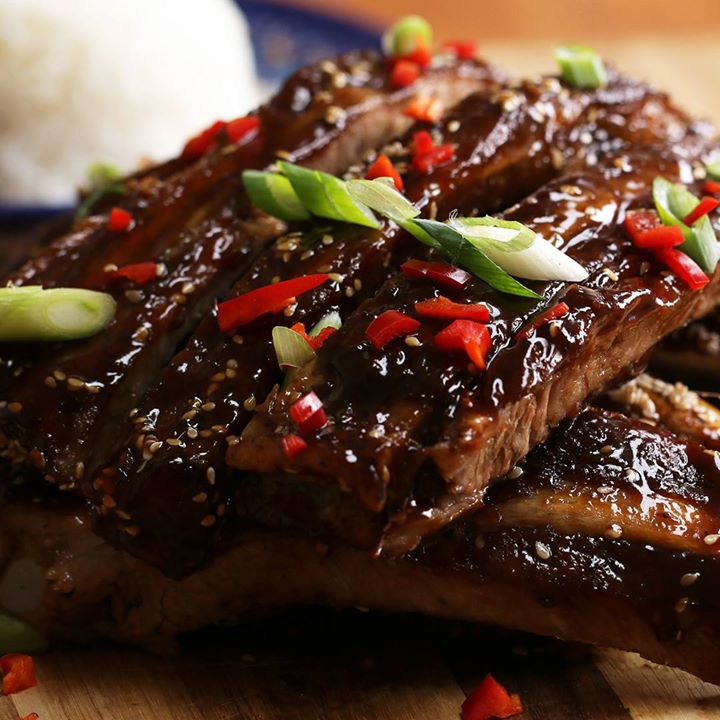
Slow-Cooker BBQ Ribs (Asian-Style)

Slow-Cooker BBQ Ribs (Asian-Style)
https://www.facebook.com/buzzfeedpropertasty/videos/2010415479171122/
Author:
Cuisine: Asia
Recipe type: Main dish
Ingredients
  • 1 rack spare ribs
  • spring onion, to garnish
  • red chili, to garnish
  • rice, to serve
SEASONING
  • 1 tablespoon salt
  • 1 tablespoon pepper
  • 1 tablespoon chinese 5 spice
MARINADE
  • 1 tablespoon garlic, minced
  • 1 tablespoon ginger, minced
  • 1 onion, chopped
  • 3 tablespoons hoisin sauce
  • 200 mL (1 cup) chicken broth
STICKY BBQ SAUCE
  • leftover slow cooker juices
  • 50 mL (¼ cup) water
  • 2 teaspoons corn flour
  • 2 tablespoons brown sugar
  • 2 tablespoons sesame seeds
Instructions
  1. Season the spare ribs with the salt, pepper, and 5 spice.
  2. Place in the slow cooker, along with the garlic, ginger, onion, hoisin sauce, and chicken broth. Mix with your hands to combine.
  3. Cook on high for 3 hours, or low for 6 hours.
  4. Preheat the oven to 325°F (170°C).
  5. Once the ribs are cooked, carefully remove them and place onto a tin foil-lined baking tray.
  6. To prepare the BBQ sauce, take the remaining cooking juices from the slow cooker and pour into a frying pan set over a medium heat.
  7. In a small bowl combine the water and corn flour, stir into the cooking juices. Add remaining BBQ sauce ingredients and reduce until a sticky BBQ sauce is achieved.
  8. Brush onto the ribs on both sides and bake for 15 minutes.
  9. Chop up the ribs and garnish with spring onion and red chili.
  10. Serve with rice.
  11. Enjoy!

Watch the recipe video here:

Slow-Cooker BBQ Ribs (Asian Style)

Slow-Cooker BBQ Ribs (Asian Style)FULL RECIPE: http://bit.ly/2hQzTib

Posted by Proper Tasty on Saturday, November 25, 2017

Burgers

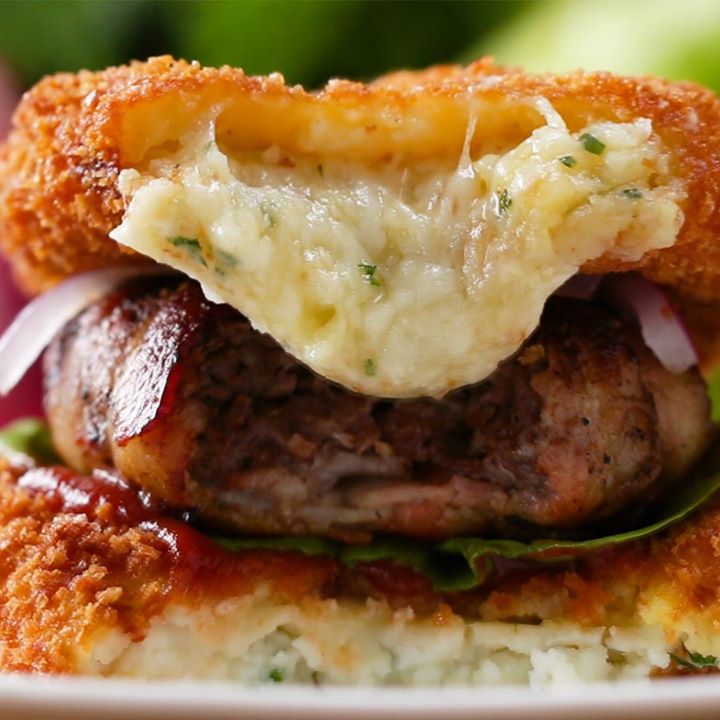
Mashed Potato Bun Bacon Burger

Mashed Potato Bun Bacon Burger
Author:
Cuisine: American
Recipe type: Burger
Ingredients
  • MASHED POTATO BUNS
  • 5 russet potatoes, peeled and cubed
  • 4 cloves garlic, peeled
  • 6 cups cold water
  • ¼ cup butter, cubed
  • ½ cup milk
  • salt, to taste
  • pepper, to taste
  • 2 tablespoons fresh parsley, chopped
  • 6 slices provolone cheese
  • 2 cups panko breadcrumb
  • 5 eggs
  • oil, for frying
  • BACON BURGERS
  • 1 lb ground beef
  • 1 teaspoon salt
  • 1 teaspoon onion powder
  • ½ teaspoon pepper
  • 12 slices bacon
  • ketchup, to serve
  • lettuce, to serve
  • red bell pepper, sliced, to serve
Instructions
  1. In a pot over high heat, add the potatoes and garlic and cover with cold water.
  2. Bring the potatoes to a boil, reduce the heat and simmer until fork tender, about 20 minutes.
  3. Drain the potatoes in a colander and return to the pot.
  4. Add the butter, milk, salt and pepper. Mash until smooth.
  5. Add in the parsley and mix until combined. Transfer the potatoes to a piping bag or ziplock bag.
  6. On a parchment paper-lined baking sheet, place the provolone slices.
  7. Pipe the mashed potatoes on top of the rounds starting from the outside to the center of the cheese.
  8. Freeze until solid, about 1 hour.
  9. Place the egg and panko in two bowls.
  10. Place the frozen potato round in the egg ensuring it’s completely submerged.
  11. Place the potato round in the panko and flip to cover completely. If necessary repeat process putting potato back into the egg and once more in the panko.
  12. In a large pot, heat oil to 350°F (180°C).
  13. Place the potato in oil and fry until both sides are golden brown, about 2 minutes per side.
  14. Set the mashed potato rounds on a wire rack to drain.
  15. In a bowl, add the ground beef, season with salt, onion powder, and pepper. Mix until combined.
  16. Form patties with your hand about the size of your palm.
  17. Lay the bacon two strips overlapping and two strips perpendicular.
  18. Place the burger patty on the bacon and fold over the bacon strips, trimming if necessary.
  19. Heat a pan over medium heat and add the bacon patties and cook until cooked through.
  20. Assemble the burger by placing one potato “bun” on the bottom. Spread with ketchup or your favorite sauce.
  21. Build with lettuce, patty, red onion and top potato bun.
  22. Enjoy!

Watch the recipe video here:

Mashed Potato Bun Bacon Burger

Calling all mashed potato lovers! ? ?FULL RECIPE: https://tasty.co/recipe/mashed-potato-bun-bacon-burger

Posted by Proper Tasty on Wednesday, January 10, 2018

Dessert

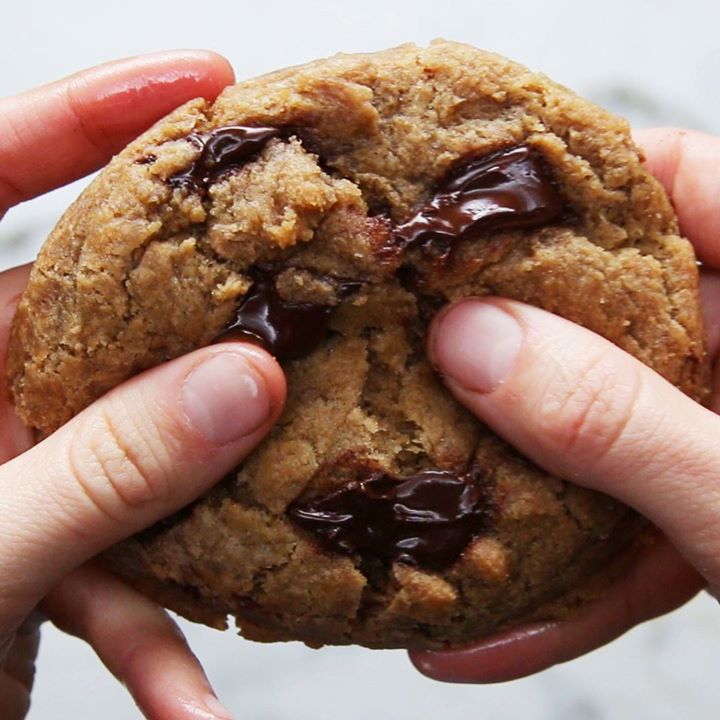
Vegan Chocolate Chip Cookies

Vegan Chocolate Chip Cookies
Author:
Cuisine: American
Recipe type: Dessert
Ingredients
  • ½ cup sugar
  • ¾ cup brown sugar, packed
  • 1 teaspoon salt
  • ½ cup coconut oil
  • ¼ cup non-dairy milk
  • 1 teaspoon vanilla extract
  • 1 ½ cups flour
  • ½ teaspoon baking soda
  • 4 oz vegan semi-sweet chocolate, chunks
  • 4 oz vegan dark chocolate, chunks
Instructions
  1. Preheat oven to 350°F (180°C).
  2. In a large bowl, whisk together the sugar, brown sugar, salt, and coconut oil until combined.
  3. Whisk in non-dairy milk and vanilla, until all sugar has dissolved and the batter is smooth.
  4. Sift in the flour and baking soda, then fold the mixture with a spatula, being careful not to overmix.
  5. Fold in the chocolate chunks evenly.
  6. Chill the dough for at least 30 minutes, or overnight.
  7. Scoop the dough with an ice cream scoop onto a parchment paper-lined baking sheet. Be sure to leave at least 2 inches of space between cookies and the edges of the pan so cookies can spread evenly.
  8. Bake for 12-15 minutes, or until cookies just begin to brown.
  9. Cool completely.
  10. Enjoy!

Watch the recipe video here:

The Best Ever Vegan Chocolate Chip Cookies

The best ever vegan chocolate chip cookies (via Tasty Vegetarian)FULL RECIPE: http://bit.ly/2iVk9XZ

Posted by Proper Tasty on Wednesday, January 17, 2018

Breakfast

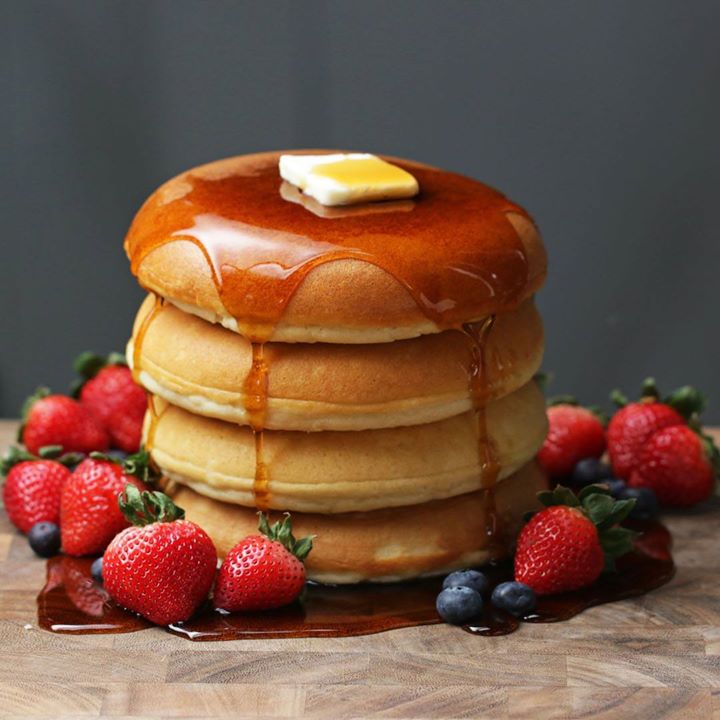
Fluffy Perfect Pancakes

Fluffy Perfect Pancakes
Author:
Cuisine: American
Recipe type: Breakfast
Ingredients
  • 4 cups flour, sifted
  • 4 tablespoons baking powder
  • 4 cups milk, warm to the touch
  • ¾ cup butter, melted
  • 3 egg yolks
  • 4 egg whites
  • maple syrup, to serve
Instructions
  1. In a bowl, add the flour and baking powder together, stirring to combine.
  2. In a separate bowl, add the butter, milk, and egg yolks, stirring to combine.
  3. In a third bowl, use a hand mixer to beat the egg whites until soft peaks form.
  4. Gently combine the bowl of flour with the butter and milk mixture, stirring until combined. Gently fold in the egg whites.
  5. Pour a large scoop of pancake batter into an 8-inch (20 cm) nonstick pan on low heat. Place the lid on top, and cook for 3 to 5 minutes, or until a toothpick comes out clean. Repeat with remaining batter.
  6. Serve with maple syrup.
  7. Enjoy!

Watch the recipe video here:

Perfect Fluffy Pancake

Watch to see how we made these pancakes SO FLUFFY! ? ? FULL RECIPE: https://tasty.co/recipe/fluffy-perfect-pancakes

Posted by Proper Tasty on Saturday, January 13, 2018