Breakfast

Ultimate Grilled Cheesy Garlic Bread

Ultimate Grilled Cheesy Garlic Bread
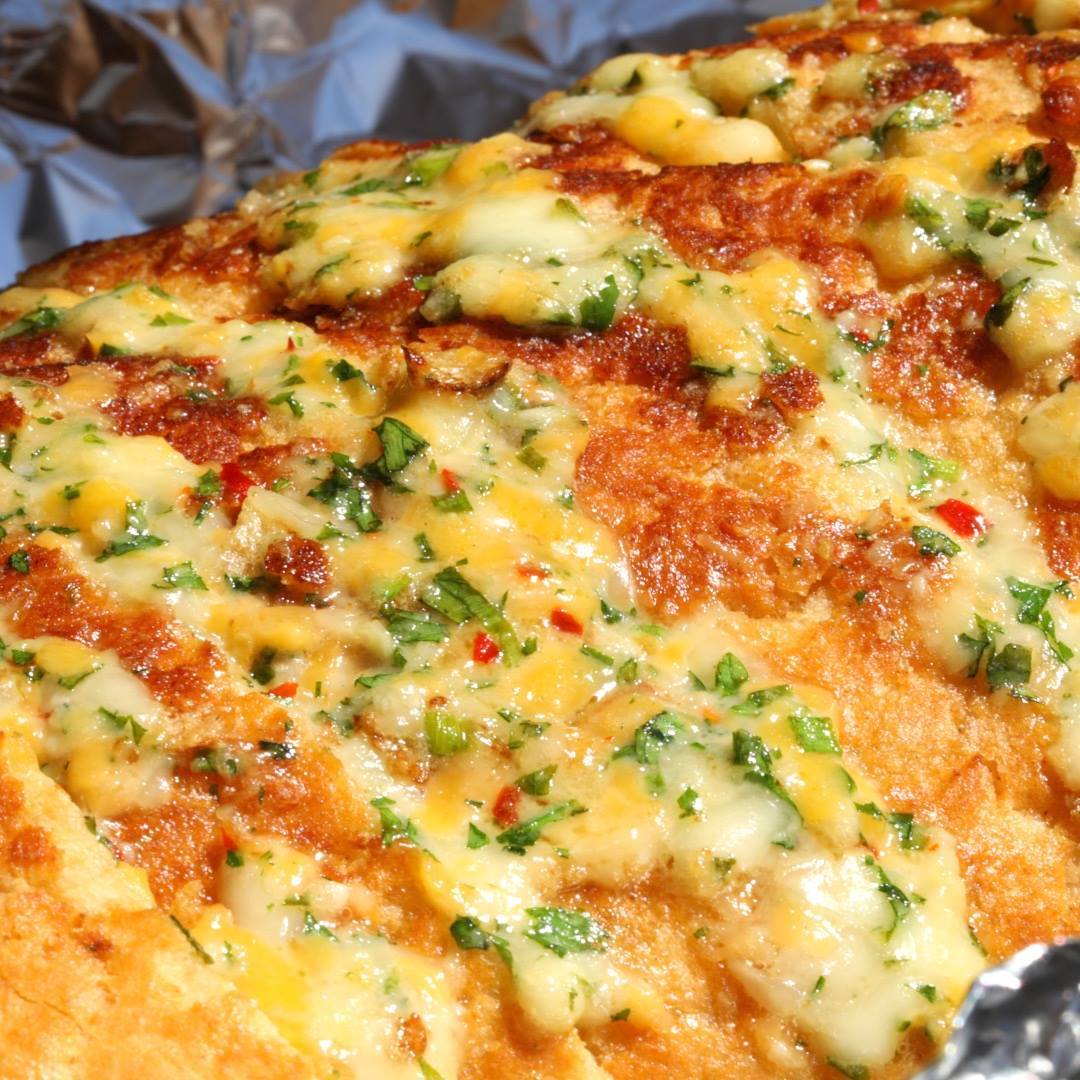
ULTIMATE GRILLED CHEESY GARLIC BREAD
Author:
Cuisine: American
Recipe type: Breakfast
Ingredients
  • 1 large bread loaf
  • 1½ cups parmesan
  • 1½ cups cheddar
  • 1 cup mozzarella, diced
  • 2 tbsp lemon juice
  • 1 tbsp chilli flakes
  • 1 tsp salt
  • 250g softened butter
  • 1 cup mayonnaise
  • 2 tbsps honey
  • ½ cup parsley, finely chopped
  • ¼ cup chives, finely chopped
Instructions
  1. Mix all of the ingredients in a large bowl (apart from the bread!)
  2. Slice your bread loaf on an angle, almost down to the base but not quite.
  3. Using a fork, stuff the mix in each of the gaps as best you can, pushing it down as far as you can.
  4. Wrap the whole loaf in tin foil, creating a large, sealed boat.
  5. Preheat the BBQ to 180°C, then pop on the bread and close the lid. After 5 minutes, open up the foil package to expose the top of the bread. Cook for a further 10 minutes - It's nice to get a little char on the bottom of the bread - so don't worry!
  6. Get stuck in!!!

Watch the recipe video here:

Ultimate Grilled Cheesy Garlic Bread

Ultimate Grilled Cheesy Garlic Bread

Posted by Twisted on Friday, June 29, 2018

Breakfast

Breaded Onion Petals

Breaded Onion Petals
Flowers aren't the only thing blooming this season... Who knew onions could be so beautiful?
Author:
Cuisine: American
Recipe type: Breakfast
Ingredients
  • 4 large onions
  • 1 egg, beaten
  • ½ cup milk
  • 1 cup flour
  • 1½ teaspoons paprika
  • 1 teaspoon salt
  • ½ teaspoon black pepper
  • ½ teaspoon garlic powder
  • 1½ teaspoons oregano
  • ½ teaspoon cumin
  • Oil, for frying
  • 2 tablespoons ketchup
  • ⅔ cup mayonnaise
  • 1 tablespoon sweet paprika
  • 2 tablespoons heavy cream
  • ¼ lime, juiced
Instructions
  1. In a mixing bowl, whisk the egg and milk. Set aside.
  2. In a separate bowl, mix the flour, paprika, salt, black pepper, garlic powder, oregano and cumin. Set aside.
  3. Cut the onion into petals and dip each petal into the milk mixture and the dry mixture twice.
  4. Fry in hot oil.
  5. Combine the ketchup with the mayonnaise, sweet paprika and heavy cream.
  6. Add the lime juice and mix again.
  7. Serve the breaded onion petals with the sauce.

Watch the recipe video here:

Breaded Onion Petals

Feel the love when picking these petals… the crispy, delicious love.Taste for Yourself: taste.md/2tvhQAG?: @Tastemade Brasil

Posted by Tastemade on Friday, June 29, 2018

Breakfast

Bacon-Wrapped Grilled Corn

Bacon-Wrapped Grilled Corn
Wrap each ear in two to three strips, then grill until charred. (If you're worried about a grease fire from the fatty bacon, you can wrap in foil first.)
Author:
Cuisine: American
Recipe type: Breakfast
Ingredients
  • 4 ears corn, husks removed
  • ¼ c. ranch dressing
  • 16 strips bacon
Instructions
  1. Heat grill to medium. Brush corn with Ranch dressing. Wrap each ear of corn in four slices of bacon.
  2. Grill corn, turning occasionally, until charred and tender, 10 minutes.

Watch the recipe video here:

How To Make Bacon Wrapped Corn

Bacon Wrapped Corn is a serious grilling game-changer.Full recipe: http://dlsh.it/WxnCGUa

Posted by Delish on Friday, June 29, 2018

Main dish

Garlic Butter Steak Bites

Garlic Butter Steak Bites
These garlic butter steak bites will make all of your friends go crazy.
Author:
Cuisine: American
Recipe type: Main dish
Ingredients
  • 2 lb. ribeye steak
  • 4 tbsp. extra-virgin olive oil
  • 4 tbsp. butter
  • 2 large garlic clove, minced
  • 1 tsp. fresh parsley leaves, minced
Instructions
  1. Cut steak into ¾-inch cubes and season with salt and pepper.
  2. Heat half of the oil in a large heavy bottomed skillet over medium-high. Add half the steak in a single layer and cook, turning a few times until golden and medium rare, about 5 minutes. Add half of the butter and half of the garlic and toss to coat. Remove steak to a serving bowl. Repeat with remaining steak.
  3. Garnish steak with parsley. Serve with toothpicks.

Watch the recipe video here:

How To Make Garlic Butter Steak Bites

Garlic Butter Steak Bites are the easiest way to serve steak at your party. Full recipe: http://dlsh.it/1j8L1qh

Posted by Delish on Tuesday, June 26, 2018

Breakfast

Pickle Sub

Pickle Sub
This has all your favorite sub flavors, minus the bread.
Author:
Cuisine: American
Recipe type: Breakfast
Ingredients
  • 3 large pickles
  • Mustard, if desired
  • Mayonnaise, if desired
  • 6 slices ham
  • 3 slices provolone
  • 1 tomato, sliced
Instructions
  1. Slice pickles in half lengthwise. Using a spoon, scoop out the seeds.
  2. Spread mustard and mayo on the bottom “bun” of the pickles. Top with ham, cheese, and tomatoes. Top with the other pickle “bun” and serve.

Watch the recipe video here:

How To Make A Pickle Sub Sandwich

Pickle lovers: JUST when you think you've seen it all…Full recipe: http://dlsh.it/Jr1Vdta

Posted by Delish on Tuesday, June 26, 2018

Breakfast

Caesar Angel Hair

Caesar Angel Hair
We used a whole bottle of Caesar dressing in this sauce and have no regrets. With bacon, lemon juice, Parmesan, and LOTS of black pepper, it's ridiculously good.
Author:
Cuisine: American
Recipe type: Breakfast
Ingredients
  • 12 oz. angel hair
  • 1 lb. boneless skinless chicken breasts
  • 1 tbsp. extra-virgin olive oil
  • kosher salt
  • Freshly ground black pepper
  • 6 slices bacon, chopped
  • 2 garlic cloves, minced
  • ½ c. chicken stock
  • 1 pint creamy Caesar dressing
  • ½ c. finely grated Parmesan, plus more for serving
  • 2 tbsp. lemon juice
  • ¼ c. finely chopped flat leaf parsley
Instructions
  1. In a large pot of salted boiling water, cook angel hair according to package directions until al dente. Drain and reserve 1 cup pasta water.
  2. Meanwhile, in a large skillet over medium-high heat, heat oil. Season both sides of chicken with salt and pepper then add to pan. Cook about 5-6 minutes per side, until the chicken is cooked through. Transfer to a cutting board and let rest for 10 minutes, then slice into strips. Wipe skillet clean.
  3. Return skillet to burner over medium heat. Add bacon and fry until crispy. Drain bacon pieces on a paper towel-lined plate. Reserve about two tablespoons of bacon fat in skillet.
  4. Add garlic and sauté until fragrant, about 1 minutes. Pour in chicken stock to deglaze pan and reduce down slightly. Stir in Caesar dressing and bring mixture to a slight simmer. If the sauce is too thick, gradually add pasta water, about ¼ cup at a time until you reach your desired consistency. Add Parmesan, lemon juice and parsley. Check for seasonings and add salt and pepper as needed.

Watch the recipe video here:

How To Make Chicken Caesar Angel Hair

Chicken Caesar Angel Hair will make you want to put caesar dressing on everything.Full recipe: http://dlsh.it/10CkrkH

Posted by Delish on Tuesday, June 26, 2018

Breakfast

Rainbow Chard Rolls

Rainbow Chard Rolls
Colorful rainbow chard is stuffed with chicken, peanuts and green onions, mixed with a tangy peanut butter sauce.
Author:
Cuisine: American
Recipe type: Breakfast
Ingredients
  • 2 bunches rainbow chard, tough ends cut off and discarded
  • ¼ cup rice wine vinegar
  • ¼ cup toasted sesame oil
  • 2 tablespoons smooth peanut butter
  • 1 tablespoon grated fresh ginger
  • 2 tablespoons low sodium soy sauce
  • 1 tablespoon honey
  • 3 cups cooked chicken, shredded
  • ¼ cup dry roasted salted peanuts
  • 2 tablespoons cilantro, finely chopped
  • 2 green onions, sliced
  • Pinch of kosher salt
  • 1 avocado, sliced
  • Cilantro and mint leaves, for garnish
  • Sesame seeds, for garnish
Quick pickled carrots:
  • 1 cup rice vinegar
  • 2 tablespoons sugar
  • 1 teaspoon salt
  • 3 medium carrots, peeled and cut into long matchsticks
Instructions
  1. Prepare carrots. Add vinegar, sugar and salt to a medium saucepan and bring to a simmer. Stir until sugar dissolves. Add carrots to a heat-proof bowl, and pour vinegar mixture over top. Allow to cool to room temperature.
  2. Bring a large pot of salted water to a boil.
  3. Remove large thick stalks at end of chard leaves. Blanch chard leaves in batches in boiling water for 10-15 seconds until just pliable. Remove from water and cool to room temperature. Pat dry with paper towels. Set aside.
  4. Whisk together the vinegar, sesame oil, peanut butter, ginger, soy sauce and honey in a medium bowl. Season with a pinch of salt. Fold in shredded chicken, peanuts, green onions and cilantro, and mix until combined.
To assemble:
  1. Lay out a chard leaf on a clean work surface. Layer a second leaf to cover any holes. Add chicken mixture, quick pickled carrots, then avocado and herbs. Sprinkle with sesame seeds. Roll up like a burrito. Slice in half on the bias to serve.

Watch the recipe video here:

Rainbow Chard Rolls

Eating healthy never tasted so good.Taste for Yourself: taste.md/2qILLSk

Posted by Tastemade on Wednesday, June 27, 2018

Breakfast

Meatball Zucchini Boats

Meatball Zucchini Boats
Want to go even MORE low-cal? Try these with ground turkey or chicken instead!
Author:
Cuisine: American
Recipe type: Breakfast
Ingredients
  • 3 -4 medium zucchini, halved lengthwise
  • 1 tbsp. extra-virgin olive oil
  • ½ tsp. Italian seasoning
  • ½ tsp. garlic powder
  • Kosher salt
  • Freshly ground black pepper
  • 1 lb. ground beef
  • ¼ c. freshly chopped parsley, plus more for garnish
  • 1 large egg
  • 2 garlic cloves, minced
  • ½ tsp. crushed red pepper flakes
  • 1 tbsp. vegetable oil
  • 2 c. marinara sauce (use sugar-free if you're keto!)
  • 1 c. shredded mozzarella
  • ½ c. freshly grated Parmesan
Instructions
  1. Preheat oven to 350°. Score zucchini (like you’re dicing an avocado) and scoop out insides into a large bowl. Place in a shallow baking dish, drizzle with olive oil, and season with Italian seasoning, garlic powder, salt, and pepper. Bake 12 to 15 minutes, until mostly tender. Remove from oven and turn broiler to high.
  2. Make meatballs: In a large bowl, mix together beef, parsley, egg, garlic, salt, and red pepper flakes. Form into 24 meatballs.
  3. In a large skillet over medium-high heat, heat vegetable oil. Add meatballs in a single layer and sear on all sides until a nice crispy crust develops, about 2 minutes per side.
  4. Pour marinara around the meatballs and stir until the meatballs are fully sauced. Simmer for 10 more minutes. Remove from heat.
  5. Fill zucchini boats with meatballs and top with mozzarella. Broil until cheese is melty, 3 to 5 minutes. Garnish with Parmesan and parsley and serve hot.

Watch the recipe video here:

How To Make Meatball Zucchini Boats

Meatball Zucchini Boats are the low-carb, high-protein way to eat a meatball sub.Full recipe: http://dlsh.it/uQjsUnQ

Posted by Delish on Wednesday, June 27, 2018

Main dish

Mini Chicken Fajita Empanadas

Mini Chicken Fajita Empanadas
Is there anything we can't do with a tortilla? We've fashioned it into vast, almost grotesque wraps. We've made it into boats. We've made little triangles out of it, sacrilegiously stuffing them with cheese steak mix and simultaneously irking the populations of Mexico, Indian and Philadelphia. As for these little beauties, they do admittedly bear a mild resemblance to dumplings, but to us they are something new entirely. Enjoy, responsibly.
Author:
Cuisine: American
Recipe type: Main dish
Ingredients
  • 3 chicken breasts
  • 1 onion, finely sliced
  • 3 mixed peppers, finely diced
  • 3 tbsp fajita seasoning
  • 1 tsp salt
  • 2 tbsp groundnut oil
  • 8 large tortilla wraps
  • ¼ cup plain flour
  • ¼ cup water
  • Grated cheddar
Dip
  • 300ml sour cream
  • 100g salsa
  • 1 tbsp chopped chives
  • 1 tbsp finely chopped coriander
  • 2 cloves garlic, finely crushed
  • 1 tsp black pepper
  • 1 tsp salt
Instructions
  1. Set the grill to high.
  2. Pop the chicken, onion and peppers on a large baking tray. Sprinkle with the seasoning and salt then add the oil and toss everything together to combine.
  3. Grill until the chicken and peppers are cooked through and slightly charred. Shred the chicken into small pieces using a pair of forks.
  4. Use a large cookie cutter to cut circles from the tortilla - the large tortillas should yield about three circles.
  5. Whisk together the flour and water and paint this around the rim of half of each of the circles.
  6. Sprinkle cheddar onto the circles and top with a spoonful of the chopped fajita mix. Fold over the circle of tortilla to enclose the filling and make a semi circular dumpling shape. Press the sides together to seal.
  7. Heat the oil to 170°C/340°F. Fry the tortilla dumplings in batches until crisp and golden. Remove to a kitchen towel lined sheet to soak up any excess oil.
  8. Whisk together the ingredients for the dip and serve them all together. Yum!

Watch the recipe video here:

Mini Chicken Fajita Empanadas

Mini Chicken Fajita Empanadas

Posted by Twisted on Wednesday, June 27, 2018

Dessert

Rainbow Piñata Cake

Rainbow Piñata Cake
Dreams really do come true with the rainbow surprise cake!
Author:
Cuisine: American
Recipe type: Dessert
Ingredients
Cake
  • 429g all-purpose flour
  • 265g caster (superfine) sugar
  • 3 tsp baking powder
  • ½ tsp salt
  • 125g unsalted butter, softened
  • 375ml of milk
  • 2 large eggs
  • 125ml vegetable oil
  • 1 tbsp vanilla extract
  • 1 cup funfetti sprinkles
Frosting
  • 2 batches Swiss meringue buttercream frosting
  • 3 drops blue food gel
  • 2 drops green food gel
  • 3 drops yellow food gel
  • 2 drops orange food gel
  • 4 drops red food gel
  • 2 drops purple food gel
Decorations
  • 1 ½ cups of your fave candy. I used peanut m&m’s, jelly beans and large round chocolate and coconut balls.
Instructions
Frosting
  1. To prepare the frosting colour 1 batch of it blue, and then split the rest up into separate bowls and colour each colour of the rainbow that’s listed in the ingredients list.
Cake
  1. Preheat a fan-forced oven to 140C (280F) or 160C (320F) for a conventional oven. Spray two 8” cake tins with oil spray and line the bottom with baking paper. Set aside.
  2. Add sugar and butter to a large mixing bowl. Use a hand mixer to beat until it goes pae in colour.
  3. Add the eggs and vanilla and mix until well combined.
  4. Add half the flour and milk, mix and then add the rest of the flour and milk and mix until everything comes together.
  5. Add the funfetti sprinkles and gently fold in. Don’t mix too much otherwise you’ll risk the colours bleeding and making the batter grey.
  6. Fill two 8” cake tins with batter. I find using an ice cream scoop to help me do this makes it easy to distribute the batter evenly so that everything bakes at the same time.
  7. Bake for 50-60 min or until a toothpick inserted comes out clean. If the pick comes out with wet batter, bake for a further 10 min at a time until fully baked. Allow the cakes to cool to room temperature inside the cake tins and then chill them in the fridge overnight. Chilling your cakes overnight makes them easier to trim and decorate. So I bake my cakes the day before I decorate them.
  8. To trim your chilled cakes, use a cake leveller or large serrated knife to carefully trim each cake in half. Then trim all cake layers in half to create half round shaped cakes. You’ll end up with 8 layers of cake.
  9. Use a large round cookie cutter to cut out a half sphere shape from 6 if the 8 cake layers. Discard the cake trimmings. This will help create the cavity in the centre of the cake where you’ll add your candy!
  10. We’re going to fill the cake with each coloured frosting. So each layer will have a different colour. Begin with the yellow frosting followed by the orange frosting on the next layer, pink, red, purple, blue and finish with the green on the final uncut layer. Chill the cake for 30 min.
  11. Take the cake out of the fridge, and carefully flip the cake around. Fill the cavity with your fave candy and place a 10” cake board on top. And slowly flip cake right side up.
  12. Add blue frosting to the outside of the cake and use a small offset spatula to spread around. Use a cake scraper to scrape away excess frosting. This is called the crumb coat and is aimed at trapping any cake crumbs so that random bits of cake crumbs don’t show up on the final layer of frosting. Chill for 30 min.
  13. Fit the end of a piping bag with a small star tip and frost the rainbow on the front and back of the cake. Fil in the gaps with blue frosting. Slice up to serve!

Watch the recipe video here:

Rainbow Piñata Cake

Dreams really do come true with the rainbow surprise cake!Taste for Yourself: taste.md/2MXZHTW

Posted by Tastemade on Wednesday, June 27, 2018