Showing 1,528 Result(s)
Main dish

Pull-Apart Crescent Meatball Sliders

Pull-Apart Crescent Meatball Sliders
These yummy pull-apart meatball sliders are easy to put together and use ingredients you probably already have in your fridge and pantry.
Author:
Cuisine: American
Recipe type: Main dish
Ingredients
  • 16 frozen Italian meatballs (1/2 oz each)
  • 1 can (8 oz) Pillsbury™ refrigerated crescent rolls
  • 1 cup shredded mozzarella cheese (4 oz)
  • ½cup tomato basil pasta sauce (from 28-oz jar)
  • 2 tablespoons butter, melted
  • 1 teaspoon Italian seasoning
  • ½ teaspoon garlic powder
  • 2 tablespoons grated Parmesan cheese
Instructions
  1. Heat oven to 350°F. Line large cookie sheet with cooking parchment paper. Make meatballs in microwave as directed on package; set aside to cool slightly. Unroll and separate dough into 2 long rectangles. Place on cookie sheet 1 inch apart. Firmly press edges and perforations to seal. Press each dough sheet into 14x4-inch rectangle.
  2. Sprinkle mozzarella cheese down center of both pieces of dough. Space 8 meatballs evenly over cheese on each piece of dough. Spoon pasta sauce over meatballs. Press ends together to seal.
  3. Starting from one end, stretch and pull both sides of dough up and between each meatball; press together to seal.
  4. With table knife, score dough between meatballs.
  5. In small bowl, mix melted butter, Italian seasoning and garlic powder. Brush evenly over dough. Sprinkle with Parmesan cheese.
  6. Bake 26 to 30 minutes or until dough is deep golden brown and meatballs are hot in center (at least 165°F). Serve with additional warmed pasta sauce for dipping.

Watch the recipe video here:

A fun twist on meatball subs perfect for a group. Pull-Apart Crescent Meatball Sliders recipe:…

Posted by Pillsbury on Saturday, July 20, 2019
Main dish

Grilled and Dilled Corn on the Cob

Grilled and Dilled Corn on the Cob
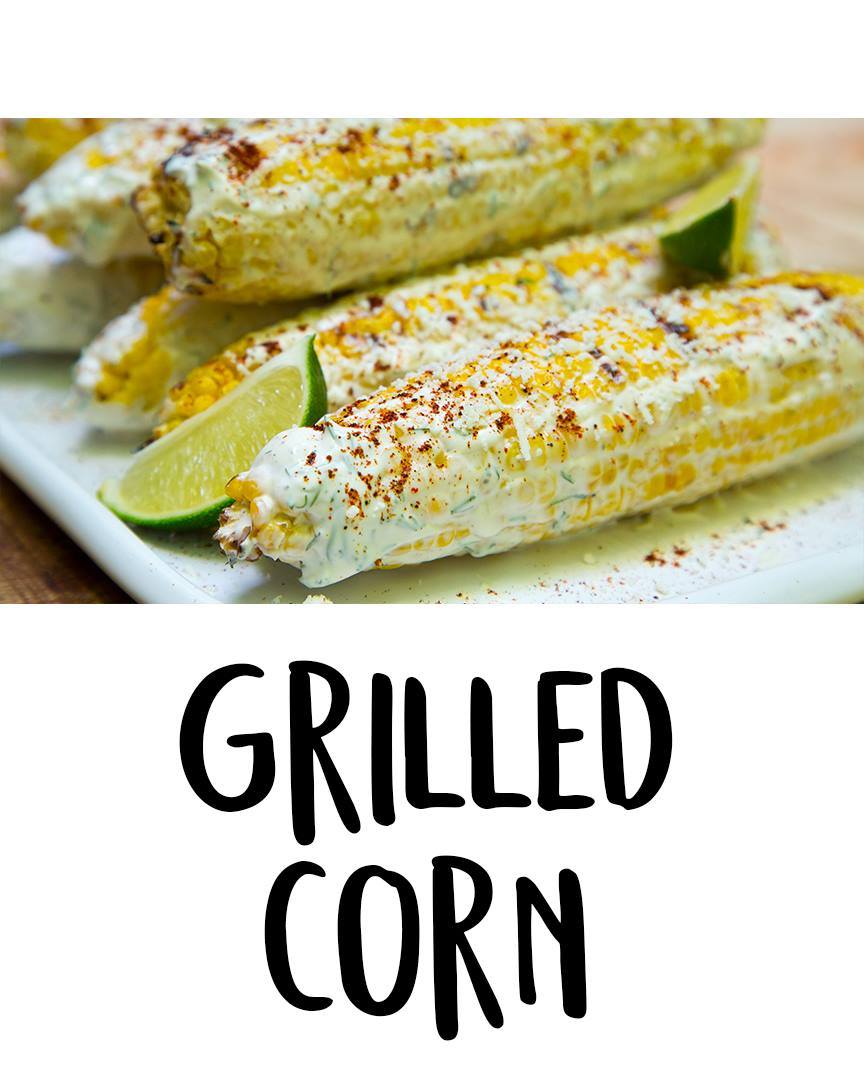
This creamy, savory topping perfectly compliments sweet corn on the cob.
Author:
Cuisine: American
Recipe type: Main dish
Ingredients
  • ½ cup canola mayonnaise
  • ½ cup light sour cream
  • ¼ cup chopped fresh dill
  • 2 tablespoons fresh lime juice
  • ¼ teaspoon kosher salt
  • ¼ teaspoon freshly ground black pepper
  • 10 ears shucked corn Cooking spray
  • 2 ounces cotija cheese, queso blanco, or feta cheese, finely grated (about ½ cup)
  • 1½ teaspoons chipotle chile powder
Instructions
  1. Preheat grill to medium-high heat.
  2. Combine first 6 ingredients in a shallow dish.
  3. Place corn on a grill rack coated with cooking spray; cover. Grill corn 12 minutes or until lightly charred, turning occasionally. Place hot corn in mayonnaise mixture; toss to coat. Place corn on a platter; sprinkle with cheese and chile powder.

Watch the recipe video here:

Take your basic corn on the cob to the next level. GET THE RECIPE: https://trib.al/Dtm6EFI (via Well Done)

Posted by MyRecipes on Friday, July 19, 2019

Main dish

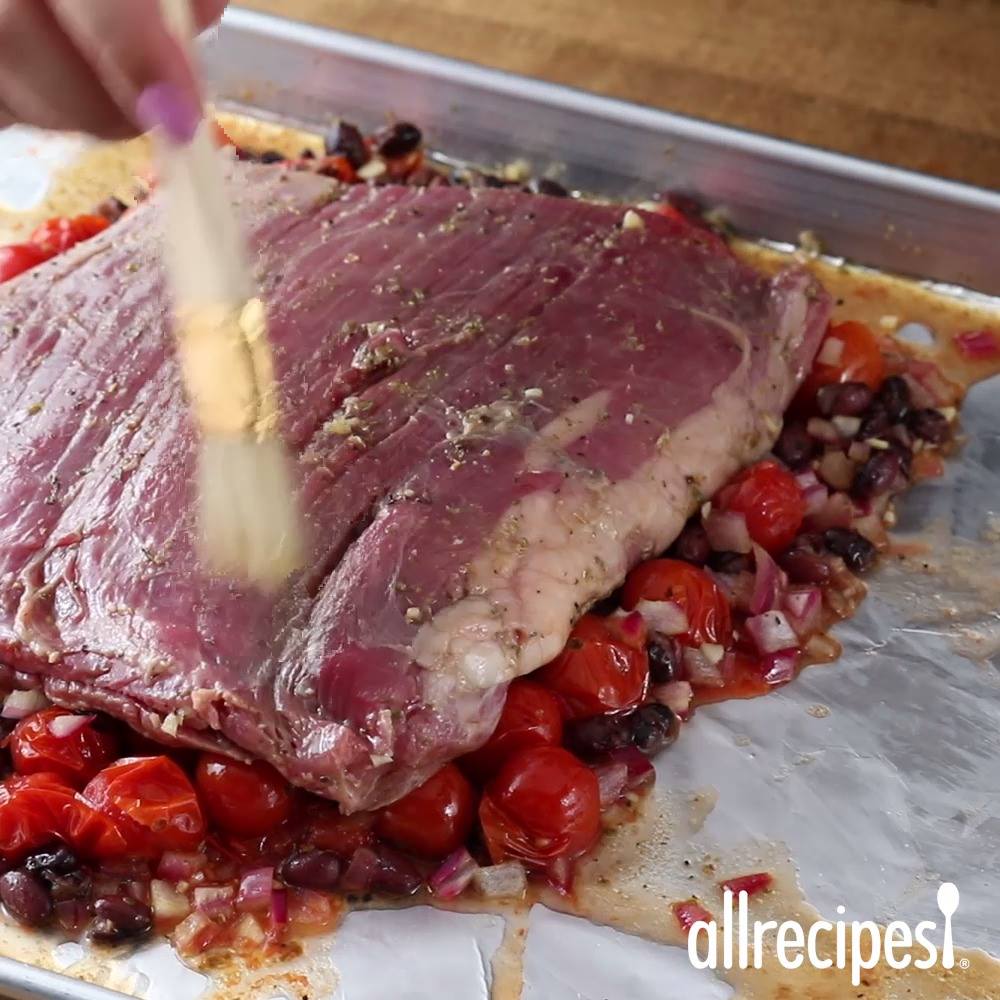
Mexican Steak and Veggie Salad

Mexican Steak and Veggie Salad
Marinated and roasted tomatoes, onion, and black beans are tossed with flank steak, cilantro, and queso fresco in this Mexican-inspired salad.
Author:
Cuisine: American
Recipe type: Main dish
Ingredients
  • 2 pounds flank steak
  • 6 tablespoons extra-virgin olive oil
  • ¼ cup lime juice
  • 2 tablespoons Worcestershire sauce
  • 4 cloves garlic, minced
  • 2 teaspoons dried oregano
  • 1 teaspoon kosher salt
  • ¼ teaspoon ground cumin
  • ¼ teaspoon ground black peppercooking spray
  • 1 (15 ounce) can black beans, rinsed and drained
  • 1½ cups cherry tomatoes
  • 1 red onion, chopped
  • 8 cups chopped romaine lettuce
  • 1 cup crumbled queso fresco
  • ¼ cup chopped fresh cilantro
Instructions
  1. Put steak in a large resealable plastic bag. Whisk olive oil, lime juice, Worcestershire sauce, garlic, oregano, salt, cumin, and black pepper in a small bowl. Reserve ½ cup marinade for vegetables; pour remainder over steak and turn to coat. Seal bag. Chill at least 2 hours or up to 12 hours.
  2. Preheat oven to 450 degrees F (230 degrees C). Place 1 rack in center position and another 4 inches from broiler. Line a baking sheet with aluminum foil and spray with cooking spray.
  3. Toss black beans, tomatoes, and onion, with reserved ½ cup marinade on the prepared baking sheet and spread in an even layer.
  4. Roast on center rack until vegetables begin to pucker and brown, 15 to 20 minutes.
  5. Remove baking sheet from oven and turn oven to broil. Push vegetables to the middle of the pan. Remove steak from marinade, allowing excess liquid to drip off, brush off garlic, and set on top of vegetables. Discard marinade.
  6. Broil steak on top rack, flipping once, until it begins to char and an instant-read thermometer inserted into thickest part registers 125 degrees F (52 degrees C) for rare or 135 degrees F (57 degrees F) for medium-rare, 3 to 5 minutes per side.
  7. Cover steak loosely with foil and let rest 10 minutes before slicing thinly across the grain. Serve warm steak and vegetables with pan juices over romaine; top with queso fresco and cilantro.

Watch the recipe video here:

Mexican Flank Steak and Veggie Salad: https://trib.al/yMgzbfJ

Posted by Allrecipes on Thursday, July 18, 2019

Main dish

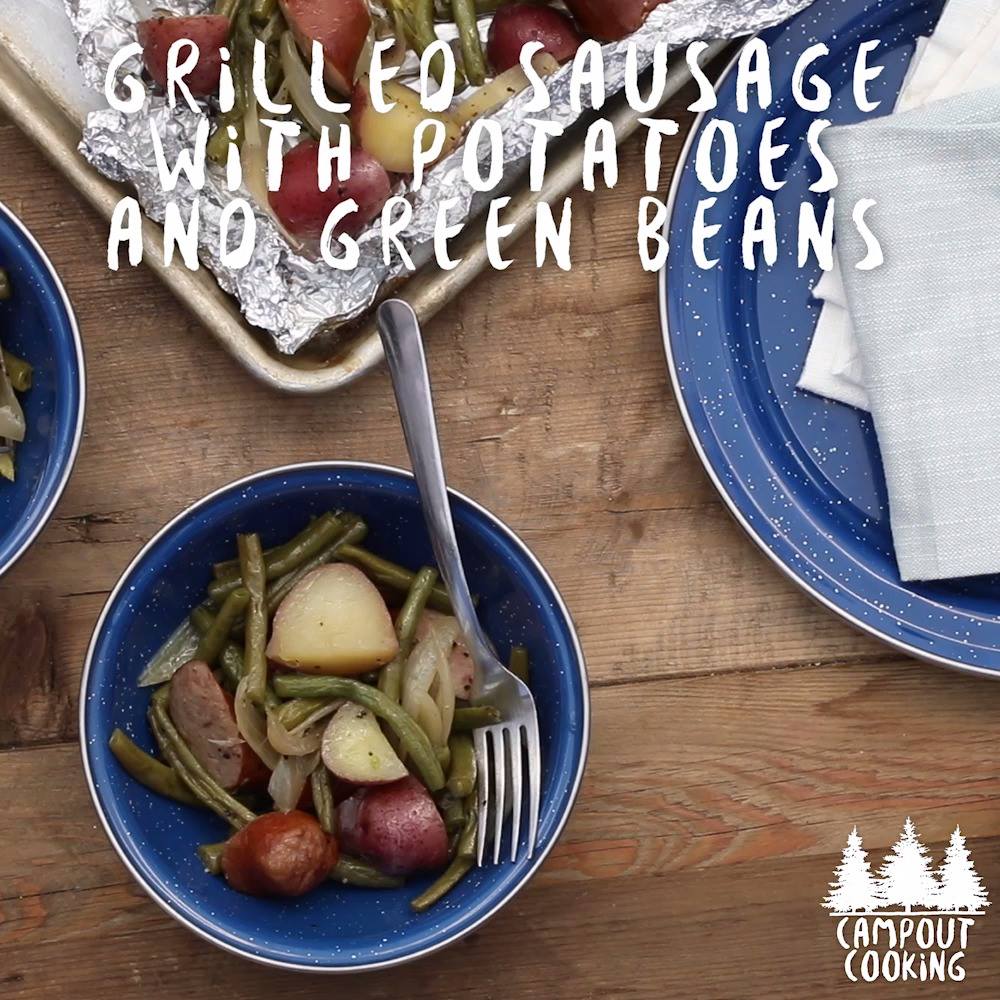
Grilled Sausage with Potatoes and Green Beans

Grilled Sausage with Potatoes and Green Beans
An old crock-pot favorite ready for the grill.
Author:
Cuisine: American
Recipe type: Main dish
Ingredients
  • ¾ pound fresh green beans, trimmed and halved
  • ½ pound red potatoes, quartered
  • 1 large onion, sliced
  • 1 pound smoked sausage, cut into 1 inch pieces
  • 1 teaspoon salt1 teaspoon ground black pepper
  • 1 teaspoon vegetable oil
  • 1 teaspoon butter
  • ⅓ cup water
Instructions
  1. Preheat an outdoor grill for high heat.
  2. On a large sheet of foil, place the green beans, red potatoes, onion, and sausage. Season with salt and pepper, sprinkle with oil, and top with butter. Tightly seal foil around the ingredients, leaving only a small opening. Pour water into the opening, and seal.
  3. Place foil packet on the prepared grill. Cook 20 to 30 minutes, turning once, until sausage is browned and vegetables are tender.

Watch the recipe video here:

Grilled Sausage with Potatoes and Green Beans: https://trib.al/1rMZQf4 #EatOutside #Campout

Posted by Allrecipes on Wednesday, July 17, 2019

Main dish

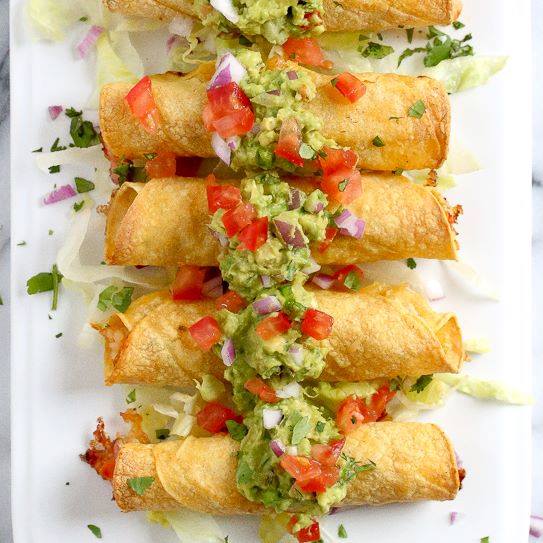
BAKED SHRIMP TAQUITOS

BAKED SHRIMP TAQUITOS
Baked Shrimp Taquitos are so much lighter and healthier than frying, and they come out perfect and crisp!
Author:
Cuisine: American
Recipe type: Main dish
Ingredients
  • ½ onion, finely chopped
  • 2 cloves garlic, minced
  • 1 jalapeno, minced
  • 1 teaspoon olive oil
  • 1 vine tomato, diced
  • 12 ounces raw, peeled and deviened shrimp, chopped
  • kosher salt
  • 2 tablespoons finely chopped cilantro
  • ¾ cup shredded pepperjack cheese
  • 12 6-inch corn tortillas
  • olive oil spray, I use my Misto
  • jarred or homemade salsa verde, optional for dipping
  • guacamole, optional for dipping
Instructions
  1. In a large skillet over medium heat, saute the onion, garlic and jalapeno in oil until soft. Add the tomatoes and cook until thickened 3 to 4 minutes. Add the shrimp and ¼ teaspoon salt and cilantro and cook medium high heat 1 minute.
  2. Preheat the oven to 400F. Line 2 large nonstick baking sheets with foil and spray with oil.
  3. Working in batches, place 3 to 4 tortillas between two paper towels and microwave 30 seconds until they are warm and pliable. Place a tortilla on a clean, dry work surface and then spread about 3 tablespoons of shrimp filling onto the bottom third of the tortilla and top with 1 tablespoon of cheese. Roll the tortilla up from the bottom to surround the filling and once it’s rolled into a tube, place it on the prepared baking sheet, seam side down. Repeat with the remaining shrimp, spray the tops with oil a pinch of salt then bake until tortillas start to get golden and crispy, about 15 minutes.

Watch the recipe video here:

Baked Shrimp Taquitos are so much lighter and healthier than frying! The shrimp filling is SO good, you’ll be tempted to…

Posted by Skinnytaste on Tuesday, July 16, 2019

Main dish

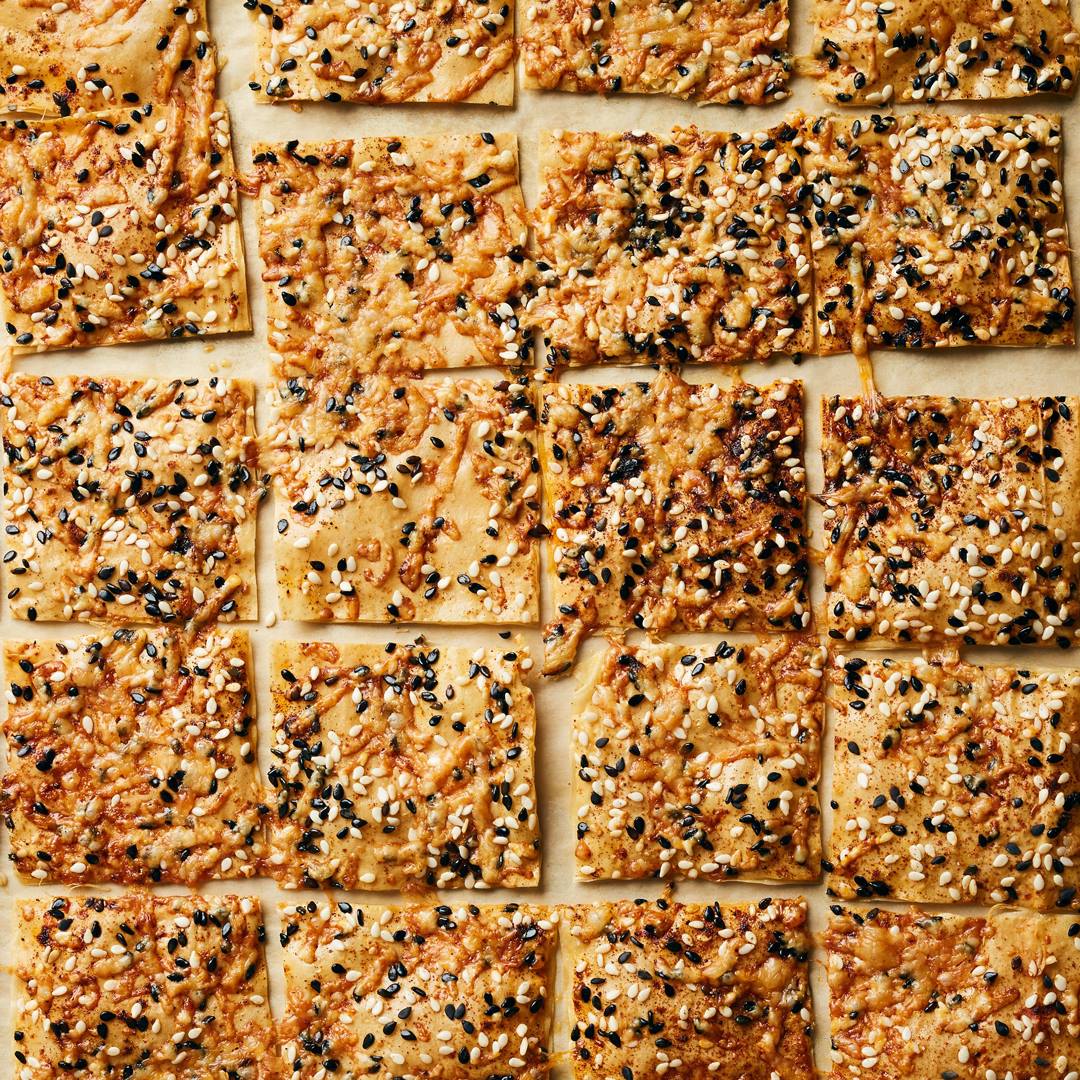
Cheesy Sesame Phyllo Bites

Cheesy Sesame Phyllo Bites
Not feeling the squares in this phyllo bites recipe? Use a pizza cutter to cut crackers into any shape you like!
Author:
Cuisine: American
Recipe type: Main dish
Ingredients
  • 6 sheets fresh phyllo pastry or frozen, thawed
  • 4 tablespoons unsalted butter, melted, slightly cooled
  • 1 large egg white, room temperature, lightly beaten
  • ⅓ cup mixed black and white sesame seeds, divided
  • ½ teaspoon smoked paprika, divided
  • Kosher salt, freshly ground pepper
  • 4 ounces Gruyère, finely grated (about 2 cups), divided
Instructions
  1. Preheat oven to 375°. Place a sheet of phyllo on a parchment-lined baking sheet. Brush lightly with butter and top with a second sheet of phyllo, pressing gently to adhere. Brush with butter and top with another sheet, pressing gently again; brush with egg white. Sprinkle half of sesame seeds and half of paprika over phyllo; season with salt and pepper. Scatter half of Gruyère over top. Using a pizza cutter or sharp knife, cut phyllo into 2" squares. Bake crackers until golden brown, 8–10 minutes. Let cool on baking sheet 3 minutes before serving. Repeat with remaining phyllo, butter, egg white, sesame seeds, paprika, Gruyère, and more salt and pepper, building on another parchment-lined baking sheet.
Do Ahead: Crackers can be made 8 hours ahead. Store airtight at room temperature.

Watch the recipe video here:

Yes, it's actually this easy to make crackers from scratch. GET THE RECIPE: http://bonap.it/6T2WjQV

Posted by Bon Appétit Magazine on Tuesday, July 16, 2019

Main dish

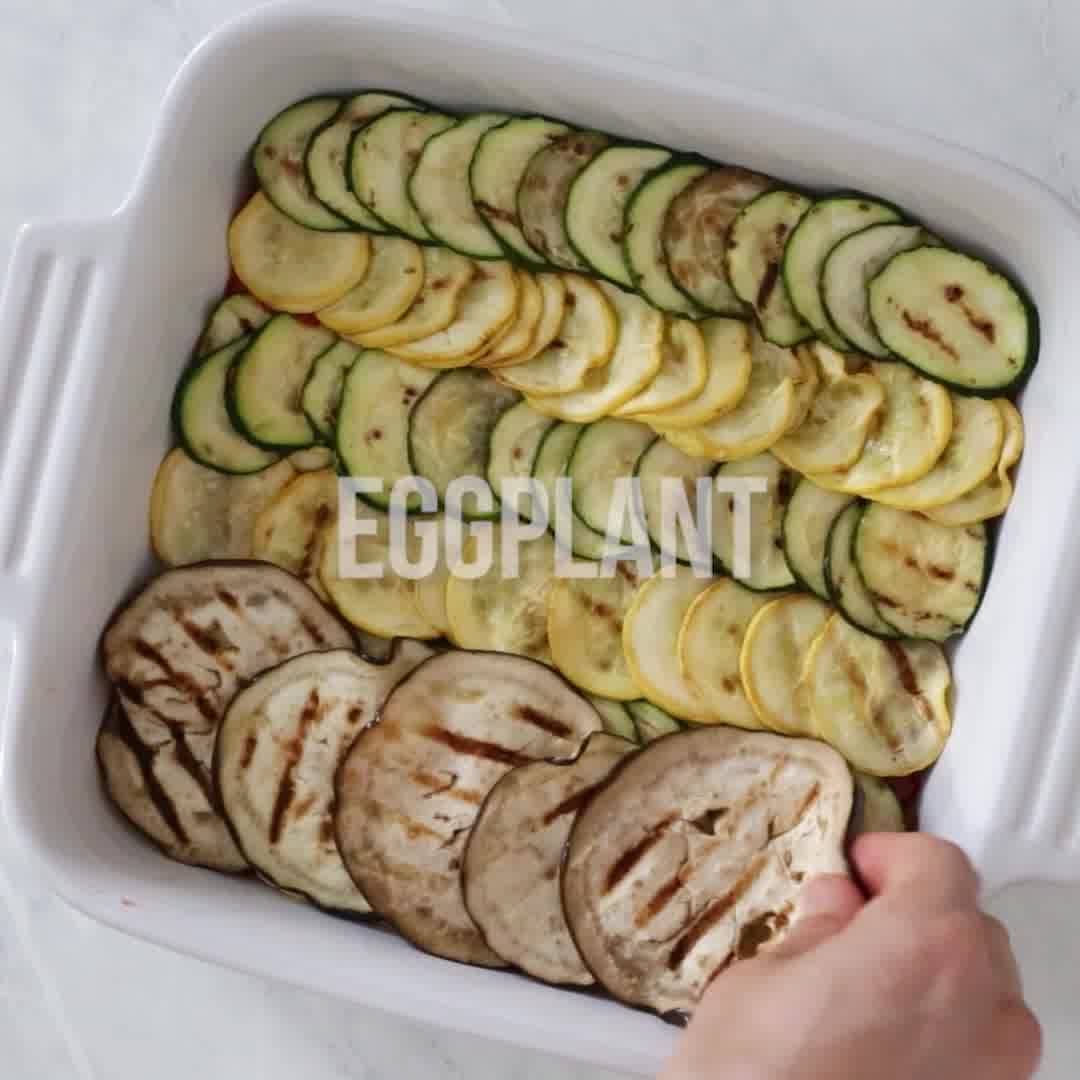
BAKED RATATOUILLE WITH HAVARTI CHEESE

BAKED RATATOUILLE WITH HAVARTI CHEESE
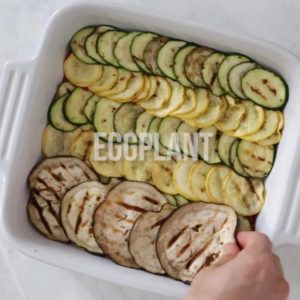
Layers of eggplant, zucchini and squash are baked in a tomato sauce with bell peppers and herbs then topped with Havarti cheese. This is a great tasting meatless main dish.
Author:
Cuisine: American
Recipe type: Main dish
Ingredients
  • 1 medium eggplant, sliced ⅛th inch thick
  • 1 tsp kosher salt
  • 1 tbsp olive oil
  • ½ small onion, diced
  • 3 garlic cloves, crushed
  • ⅛ tsp cracked black pepper
  • 2 cups crushed tomatoes
  • ⅛ tsp red pepper flakes, optional
  • 1 bay leaf
  • 1 teaspoon fresh thyme
  • 4 fresh basil leaves, finely chopped
  • 1 small red bell pepper, diced
  • 1 small yellow bell pepper, diced
  • 1 small, 6 ounce zucchini, sliced ⅛th inch thick
  • 1 smalll, 6 ounce yellow squash, sliced ⅛th inch thick
  • 3 oz light Havarti cheese, shredded
Instructions
  1. Preheat oven to 375F.
  2. In a large non-stick skillet add olive oil and sauté onions and garlic 2-3 minutes. Add 1 tsp salt, black pepper, tomato sauce, red pepper flakes if using, bay leaf, thyme, basil, red and yellow bell pepper; sauté another 5-8 minutes on medium-low heat.
  3. In a large nonstick grill pan, grill the zucchini and eggplant 2 to 3 minutes on each side.
  4. Add 1 cup of the sauce to a casserole dish. Layer the eggplant, squash and the zucchini. Pour the remaining sauce over the top and top with the cheese. Cover with foil and bake 40 minutes.

Watch the recipe video here:

Baked Ratatouille with Havarti Cheese is layered with eggplant, zucchini, bell peppers and summer squash. 3 Freestyle…

Posted by Skinnytaste on Monday, July 15, 2019

Main dish

Vegan dim sum buns

Vegan dim sum buns
Soft steamed buns stuffed with Asian-style mushrooms and hoisin sauce – people will go mad for these!
Author:
Cuisine: American
Recipe type: Main dish
Ingredients
  • 2 cloves of garlic
  • 1 thumb-sized piece of fresh ginger
  • ½ a bunch of fresh coriander , (15g)
  • groundnut oil
  • 450 g mixed mushrooms , such as shiitake and chestnut
  • 2 tablespoons rice wine vinegar
  • 2 tablespoons sweet chilli sauce
  • 2 tablespoons low-salt soy sauce
  • 4 spring onions
  • 1 fresh red chilli
  • sesame oil
  • 1 x 400 g tin of light coconut milk
  • 500 g self-raising flour , or 2 filled coconut milk tins of flour, plus extra for dusting
  • 2 tablespoons sesame seeds
  • hoisin sauce , to serve
Instructions
  1. To make the filling, peel and finely slice the garlic and ginger. Pick the coriander leaves and set aside, then finely slice the stalks. Heat a splash of groundnut oil in a large frying pan over a medium-high heat, then add the garlic, ginger and coriander stalks. Fry for around 3 minutes, or until golden. Slice the mushrooms, then add to the pan for around 5 minutes, or until lightly golden brown.
  2. Add the vinegar, chilli sauce and soy, then cook for a further 5 minutes, or until the liquid has boiled and bubbled away and the mushrooms are golden brown and starting to caramelise. Transfer to a bowl.
  3. Trim and finely slice the spring onions, then add the white part to the bowl. Deseed and finely slice the chilli, then add half to the bowl, reserving the rest for later. Stir in 1 tablespoon of sesame oil, then set aside.
  4. Add the coconut milk, 2 heaped tins’ worth of flour and a good pinch of sea salt to a food processor. Whiz to a dough, then transfer to a flour-dusted surface and roll into a thick sausage. Cut into 12 equal-sized pieces, roll into balls, then flatten into rounds, roughly ½cm thick.
  5. Equally divide the mushroom mixture between each of the 12 dough circles (you'll need roughly 1 tablespoon of filling per circle), making sure to leave a 2cm gap around the edges. Pull and fold the sides over the filling, pinching the edges together to seal. Place upside-down (so the scruffy edges are underneath) in double-layered, lightly greased muffin cases and divide between two bamboo steamer baskets.
  6. Place a wok over a high heat, then fill with 1 litre of boiling water and pop the steamer baskets on top. Reduce the heat to medium and steam for around 12 minutes, or until piping hot through and puffed up.
  7. Meanwhile, toast the sesame seeds in a small frying pan over a medium heat. Once the buns are ready, sprinkle over the seeds and the reserved spring onions and chilli. Tear the coriander leaves on top, then serve with hoisin sauce for dipping.

Watch the recipe video here:

Jamie's dim sum buns are vegan-friendly! Who needs this recipe in their life?? jamieol.com/DimSumBun

Posted by Jamie Oliver on Monday, July 15, 2019

Main dish

Instant Pot Hasselback Spiral Potatoes

Instant Pot Hasselback Spiral Potatoes
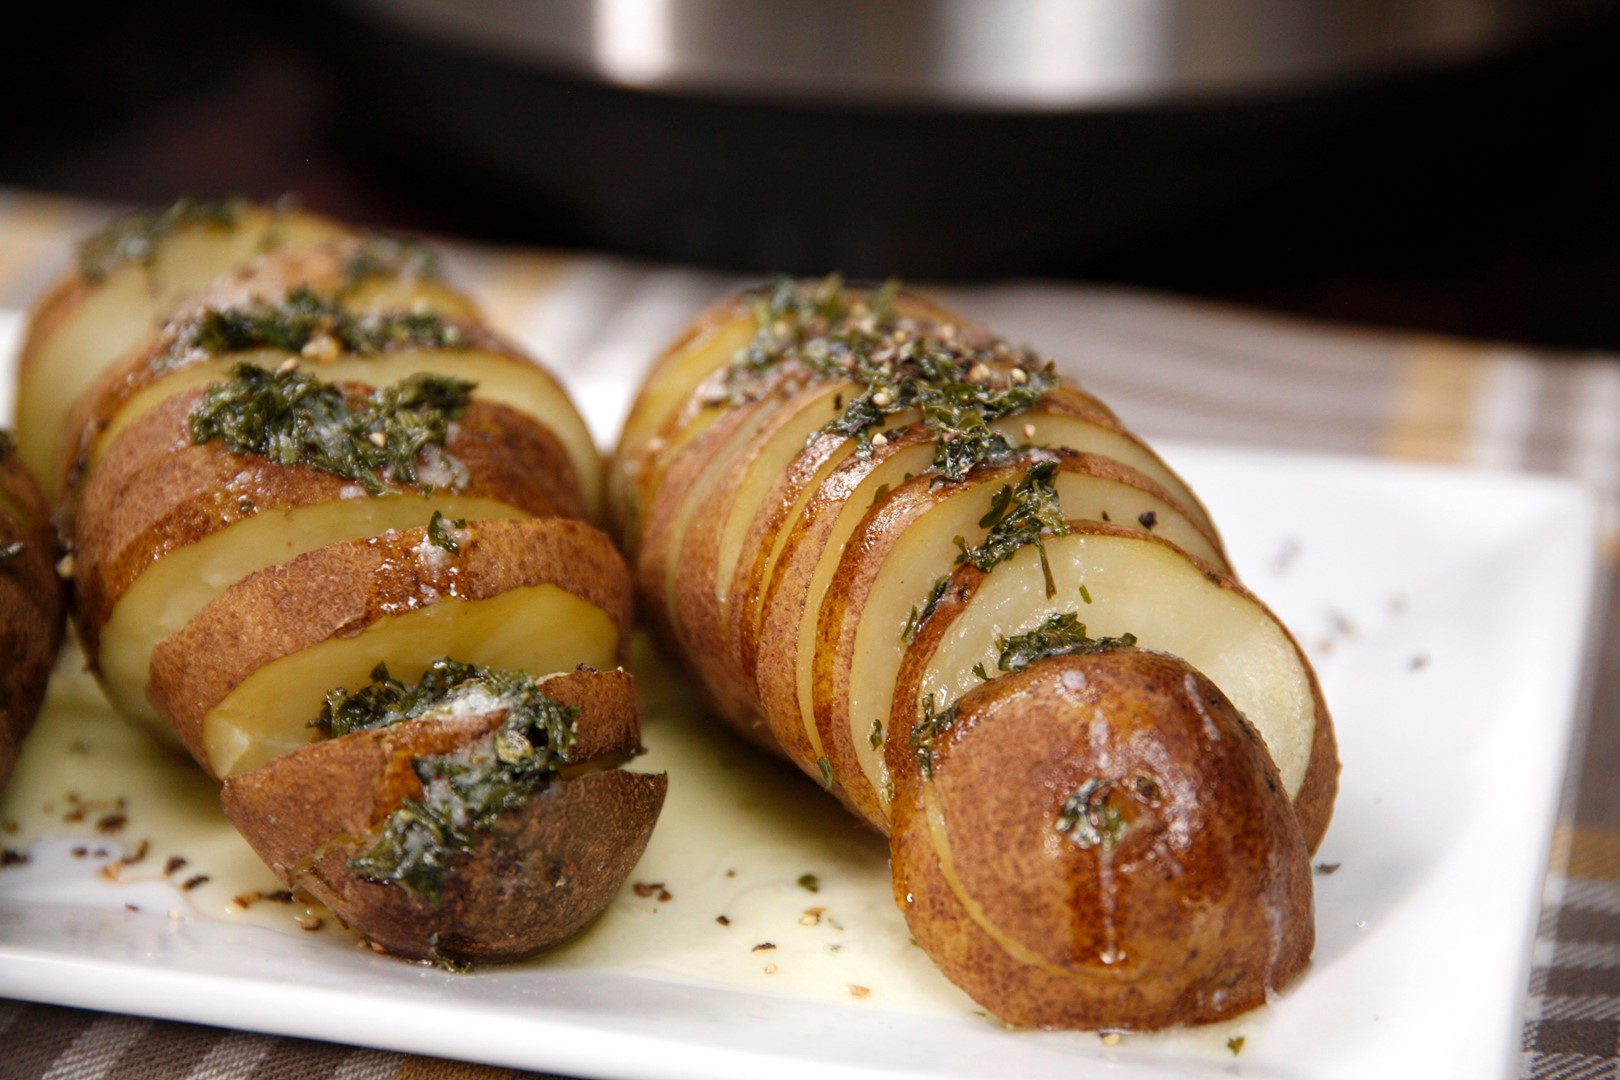
Magical hasselback-style potatoes in only 20 minutes!
Author:
Cuisine: American
Recipe type: Main dish
Ingredients
  • 1 cup water
  • 4 small (4 oz) russet potatoes
  • 3 tbsp butter, melted
  • 1 tbsp finely minced parsley
  • 1 tsp garlic salt
Instructions
  1. Insert a 6” skewer lengthwise through the center of each potato.
  2. Starting at one end, cut the potato crosswise in a ¼″ spiral pattern.
  3. Very gently spread the potatoes on the skewer so that each layer is slightly separated from its neighbors. Work carefully so as not to tear the layers.
  4. Pour one cup of water in the Instant Pot and insert the steam rack.
  5. Carefully arrange the skewers with one end in the middle of the steam rack, and the other end leaning on the side of the pot. Do not exceed the max line marked on the pot.
  6. Secure the lid, making sure the vent is closed.
  7. Using the display panel select the MANUAL function*. Use the +/- keys and program the Instant Pot for 5 minutes.
  8. Meanwhile, in a small bowl, combine the melted butter with the parsley and garlic salt.
  9. When the time is up, quick-release the pressure. Carefully remove the potatoes from the pot to a serving plate.
  10. Slide the skewer out of each potato and carefully press on an angle to separate the layers.
  11. Brush with garlic butter and serve hot.

Watch the recipe video here:

Magical hasselback-style potatoes in only 20 minutes!RECIPE: http://chopsecrets.com/instant-pot-hasselback-spiral-potatoes/

Posted by Chop Secrets on Monday, July 15, 2019

Main dish

Chicken Tikka Masala Dip

Chicken Tikka Masala Dip
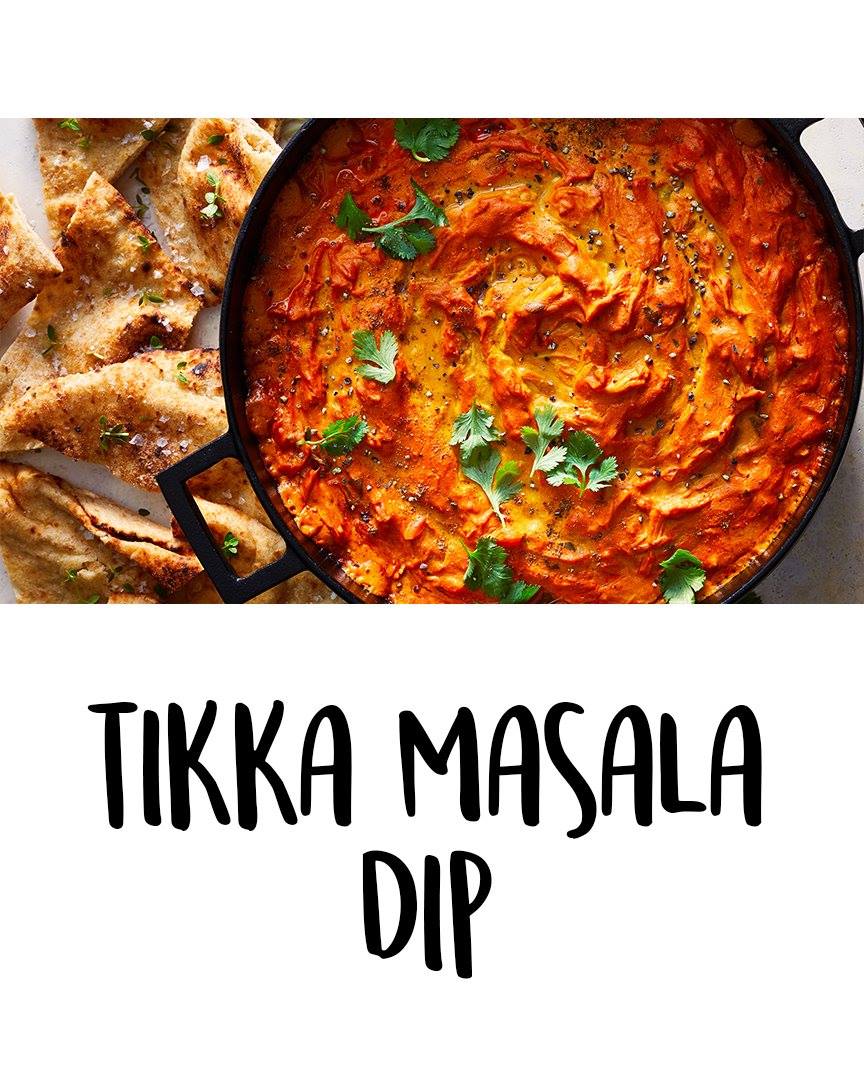
If you like buffalo chicken dip, you’ll love this super creamy version of chicken tikka masala. Thanks to the cream cheese, its tangier than traditional tikka masala. Don’t use Greek yogurt—it’s too chalky and astringent for this. Pulsing the chicken and yogurt helps tenderize everything and makes it scoopable. For a more flavorful twist, try chicken thighs instead of breasts. Serve this at your next party and blow everyone away.
Author:
Cuisine: American
Recipe type: Main dish
Ingredients
  • 3 teaspoons ground turmeric
  • 1½ teaspoons garam masala
  • 1½ teaspoons ground coriander
  • 1½ teaspoons ground cumin
  • ½ teaspoon crushed red pepper
  • 5 garlic cloves, grated (2 tsp.)
  • 1½ pounds boneless, skinless chicken breasts, cubed
  • ¾ cup plain whole-milk yogurt
  • 2 teaspoons kosher salt, divided
  • 3 tablespoons unsalted butter
  • 1 cup very finely chopped yellow onion (from 1 [4-oz.] onion)
  • 3 tablespoons tomato paste
  • 1 (15-oz.) can tomato puree
  • 2¼ cups (18 oz.) cream cheese, softened
  • ⅔ cup chopped fresh cilantro, divided Miniature rice cakes or naan chips, for serving
Instructions
  1. Preheat oven to 375°F. Stir together turmeric, garam masala, coriander, cumin, crushed red pepper, and garlic in a small bowl. Pulse chicken and yogurt in a food processor until meat is shredded, 6 to 8 times. Stir in 1 teaspoon of the salt and half of the turmeric-spice mixture. Set aside.
  2. Cook butter in a large Dutch oven over medium-high until foamy. Stir in onion, tomato paste, and remaining 1 teaspoon salt. Cook, stirring occasionally, until onion softens and tomato paste begins to brown, about 4 minutes. Stir in remaining turmeric-spice mixture; cook, stirring often, until very fragrant, 4 to 5 minutes. Add tomato puree; increase heat to high, and bring to a boil. Stir in chicken-yogurt mixture; simmer 2 minutes. Remove from heat; let cool 10 minutes. Stir in cream cheese and ½ cup of the cilantro.
  3. Transfer mixture to a 2-quart round baking dish. Bake in preheated oven until bubbly and lightly browned, 25 to 30 minutes. Let cool 10 minutes.
  4. Sprinkle with remaining cilantro. Serve with rice cakes and/or naan chips.

Watch the recipe video here:

It's a flavor explosion in this appetizer your guests will love.GET THE RECIPE: https://trib.al/QA2l0YW (via Well Done)

Posted by MyRecipes on Monday, July 15, 2019