Showing 879 Result(s)
Dessert

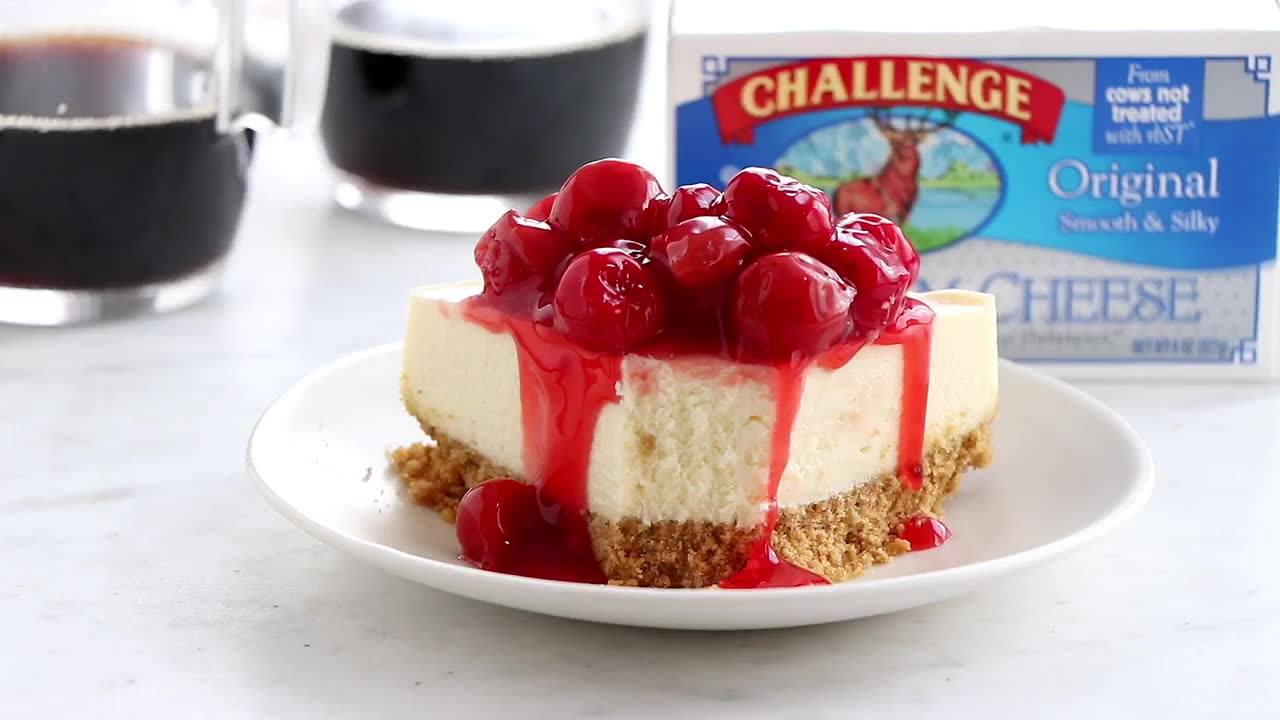
INSTANT POT CHEESECAKE
INSTANT POT CHEESECAKE
Instant Pot Cheesecake couldn’t be easier or more delicious. Serve it up with pie filling, fresh fruit, or chocolate ganache for the perfect dessert.
Author:
Cuisine: American
Recipe type: Dessert
Ingredients
  • 1 cup graham cracker crumbs
  • 2 tablespoons granulated sugar
  • 3 tablespoons Challenge Dairy Unsalted Butter, melted
  • 16 ounces Challenge Dairy Cream Cheese, room temperature
  • ½ cup granulated sugar
  • 2 large eggs, room temperature
  • 1 tablespoon all-purpose flour
  • ¼ cup heavy cream
  • 2 teaspoons pure vanilla extract
  • cherry pie filling, optional
Instructions
  1. Tightly wrap the bottom of 7-inch springform pan in foil and spray the inside of the pan with non-stick cooking spray.
  2. In a small mixing bowl, stir together the graham cracker crumbs, sugar, and melted butter. Press the crumbs into the bottom of the prepared pan.
  3. Place pan in freezer for 10-15 minutes.
  4. In the bowl of your stand mixer fitted with the paddle attachment, or in a large bowl with an electric mixer, beat the cream cheese until smooth. Add sugar and mix until combined. Add eggs, one at a time, fully incorporating each before adding the next. Making sure to scrape down the bowl in between each egg. Add in the flour, heavy cream, and vanilla and mix until smooth. Pour batter into prepared pan.
  5. Cover the top of the pan with a piece of foil.
  6. Pour 1½ cups of water into the Instant Pot and place the trivet in the bottom of the pot.
  7. Create a “foil sling” by folding a 20-inch long piece of foil in half lengthwise two times. This “sling” will allow you place and remove the springform pan with ease.
  8. Place the cheesecake pan in the center of the sling and carefully lower the pan into the Instant Pot. Fold down the excess foil from the sling to ensure the pot closes properly.
  9. Lock the lid into place and make sure the vent is closed “sealing”. Press the “Manual” button and cook on high pressure for 35 minutes.
  10. When the Instant Pot beeps, hit the “Keep Warm/Cancel” button to turn off the pressure cooker. Allow the pressure to release naturally for 10 minutes and then do a quick release to release any pressure remaining in the pot.
  11. Carefully unfold the foil sling and remove the cheesecake from the pot to a cooling rack using the foil sling “handles”.
  12. Uncover the cheesecake and allow it to cool to room temperature.
  13. Once the cheesecake has cooled, refrigerate it for at least 8 hours, or overnight.
  14. Before serving, top with pie filling and whipped cream if desired.

Watch the recipe video here:

INSTANT POT CHEESECAKE ✨ couldn’t be easier or more delicious!RECIPE HERE >> https://www.mybakingaddiction.com/instant-pot-cheesecake/

Posted by My Baking Addiction on Thursday, April 18, 2019
Dessert

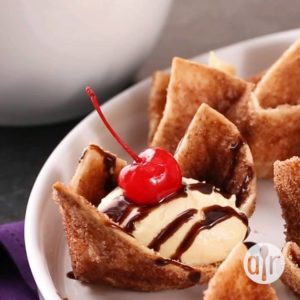
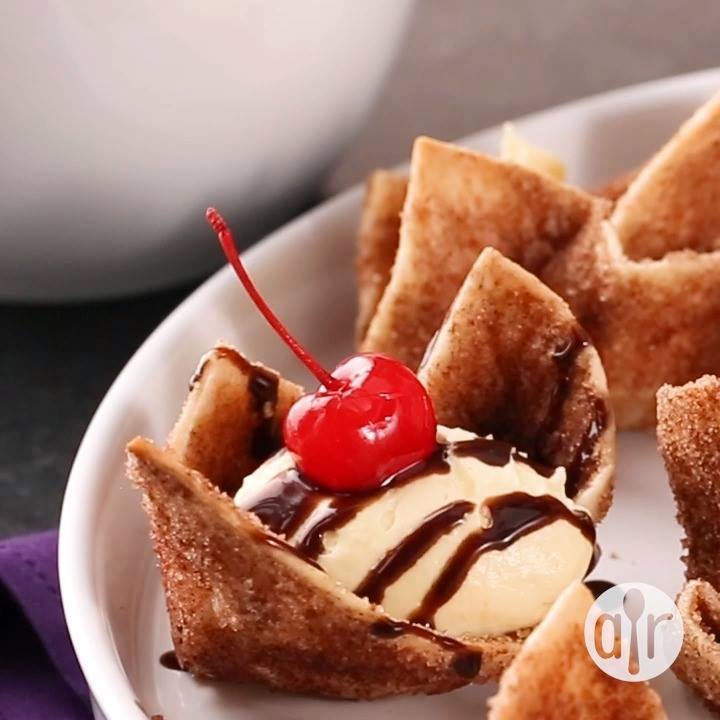
Cinnamon Tortilla Surprise

Cinnamon Tortilla Surprise
A sweet Mexican dessert I made for Spanish class.
Author:
Cuisine: American
Recipe type: Dessert
Ingredients
  • cooking spray
  • 1 cup white sugar
  • 1½ tablespoons ground cinnamon
  • 10 large flour tortillas, cut into quarters
  • ¼ cup melted butter, or as needed
  • 1 cup milk
  • 1 (8 ounce) package cream cheese, softened
  • 2 (3 ounce) packages instant vanilla pudding mix
  • 1 (16 ounce) container frozen whipped topping, thawed
  • 2 tablespoons chocolate syrup, or as needed
  • 40 maraschino cherries
Instructions
  1. Preheat oven to 350 degrees F (175 degrees C). Spray 40 muffin cups with cooking spray.
  2. Combine sugar and cinnamon together in a small bowl.
  3. Brush both sides of flour tortilla pieces with melted butter; sprinkle each with cinnamon-sugar mixture. Gently fit each tortilla piece into a prepared muffin cup, shaping the tortilla to make a shell.
  4. Bake in the preheated oven until tortilla shells are golden brown, 8 to 10 minutes.
  5. Beat milk, cream cheese, and pudding mix in a bowl using an electric mixer until smooth; fold in whipped topping. Fill each tortilla shell with about 1 tablespoon cream cheese mixture. Drizzle with chocolate syrup and top each with a maraschino cherry.

Watch the recipe video here:

Cinnamon Tortilla Surprise: https://trib.al/OQTGs6a

Posted by Allrecipes on Tuesday, April 9, 2019

Dessert

LEMON CHEESECAKE IN A JAR

LEMON CHEESECAKE IN A JAR
I’m officially done with work for the school year and I must admit, I’m pretty stoked about doing my own thing for the next few months. No alarm clock buzzing in my ear at 5:45, no last minute wardrobe changes because I’m a clutz with my morning coffee and certainly no more fitting in baking time between chores and dinner. The summer gives me the opportunity to experience what it would be like to blog full time and I must say, I’m kind of digging it.
Author:
Cuisine: American
Recipe type: Dessert
Ingredients
For the Crust
  • 12 Newtons Lemon Fruit Thins (see notes section for substitution)
  • 3 tablespoons unsalted butter, melted
For the Cheesecake
  • ½ cup plus granulated sugar
  • zest of one lemon
  • 2 packages cream cheese, 8 oz each; room temperature
  • 2 large eggs; room temperature
  • ¼ cup heavy cream
  • 1 teaspoon pure vanilla extract
For the Garnish
  • ½ cup homemade lemon curd
  • fresh whipped cream
  • fresh berries
Instructions
  1. Preheat the oven to 350°F.
  2. Place the Newtons Lemon Fruit Thins into the bowl of a food processor, attach the lid and pulse the machine until you have fine cookie crumbs.
  3. In a medium bowl, stir together cookie crumbs and melted butter. Evenly divide the crumbs between your individual serving, oven-safe dishes and lightly press the crumbs into the bottoms of each dish to form a crust layer. Place the prepared cheesecake crusts on a baking sheet and bake the crusts in preheated oven for 6 minutes, carefully remove them to a wire rack to cool.
  4. Begin to boil a large pot of water for the water bath.
  5. In the bowl of your stand mixer fitted with your paddle attachment, combine the sugar and lemon zest and mix until the sugar is moistened and fragrant. Add in the cream cheese and cream together until smooth. Add eggs, one at a time, fully incorporating each before adding the next. Make sure to scrape down the bowl in between each egg. Add heavy cream and vanilla and mix until smooth.
  6. Pour batter into serving dishes , directly onto the prebaked crusts, until about ¾ of the way full. Place jars into a larger pan with high sides and pour boiling water into the larger pan until halfway up the sides of the jars.
  7. Bake 25 to 30 minutes, the edges will appear to be set, but the center will still have a little jiggle to it.
  8. Carefully remove the cheesecake jars from the water bath and place on a cooling rack to cool completely. Once the cheesecakes are completely cooled, place them into the refrigerator for at least 5 hours. Before serving, top each cheesecake with lemon curd, fresh whipped cream and berries.

Watch the recipe video here:

Lemon Cheesecake in a Jar is the perfect summertime dessert! ?RECIPE HERE –> https://www.mybakingaddiction.com/lemon-cheesecake-in-a-jar/

Posted by My Baking Addiction on Tuesday, April 9, 2019

Dessert

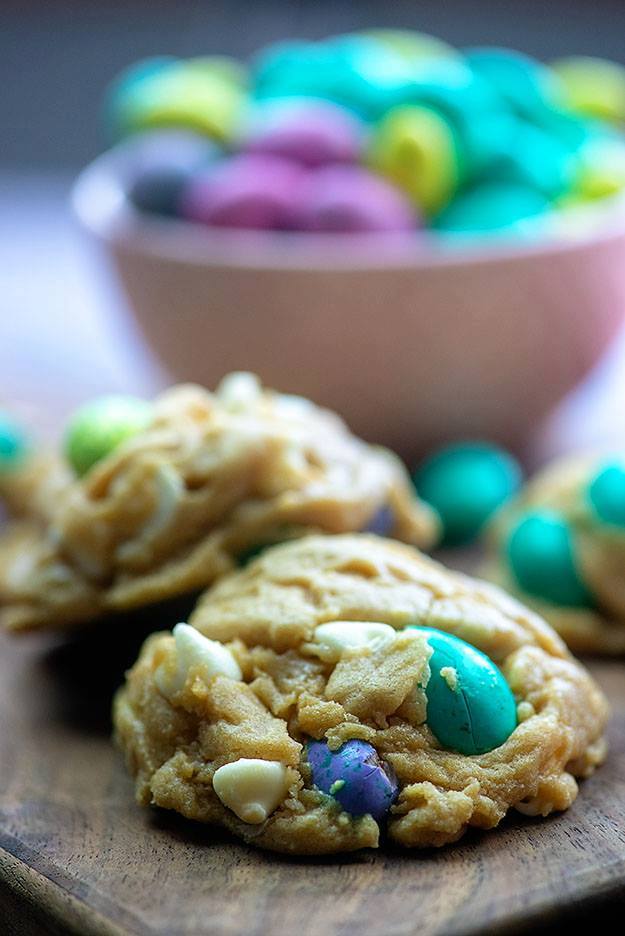
EASTER COOKIES

EASTER COOKIES
The perfect soft and chewy cookie dough sprinkled with festive M&M's!
Author:
Cuisine: American
Recipe type: Dessert
Ingredients
  • ½ cup butter
  • ½ cup brown sugar
  • ¼ cup white sugar
  • 2 teaspoons vanilla extract
  • 1 large egg
  • 1⅔ cup flour
  • ½ teaspoon baking soda
  • ½ teaspoon salt
  • ½ cup white chocolate chips
  • ½ cup pastel M&M candies
Instructions
  1. Preheat oven to 350 degrees.
  2. Add butter to a microwave dish and microwave in 20 second increments until butter is fully melted.
  3. Add the brown sugar and white sugar to a large mixing bowl with the melted butter and stir well to combine.
  4. Beat in the vanilla and egg until just combined.
  5. Pour in the flour, baking soda, and salt and mix until just combined.
  6. Stir in the chocolate chips and candies by hand, reserving a few to press onto the tops of the cookie dough, if desired.
  7. Use a large cookie scoop to scoop out 12 cookies and arrange them evenly on a large ungreased baking sheet.
  8. Bake for 10 minutes exactly. Cookies will still be slightly underdone when you remove them from the oven. Do not overbake.
  9. Let sit on baking sheet for 5 minutes before eating. Allow cookies to cool completely before storing in an air-tight container for up to 5 days.

Watch the recipe video here:

Easter Cookies!RECIPE: https://www.bunsinmyoven.com/easter-cookies/

Posted by Kitchen Fun With My 3 Sons on Tuesday, April 9, 2019

Dessert

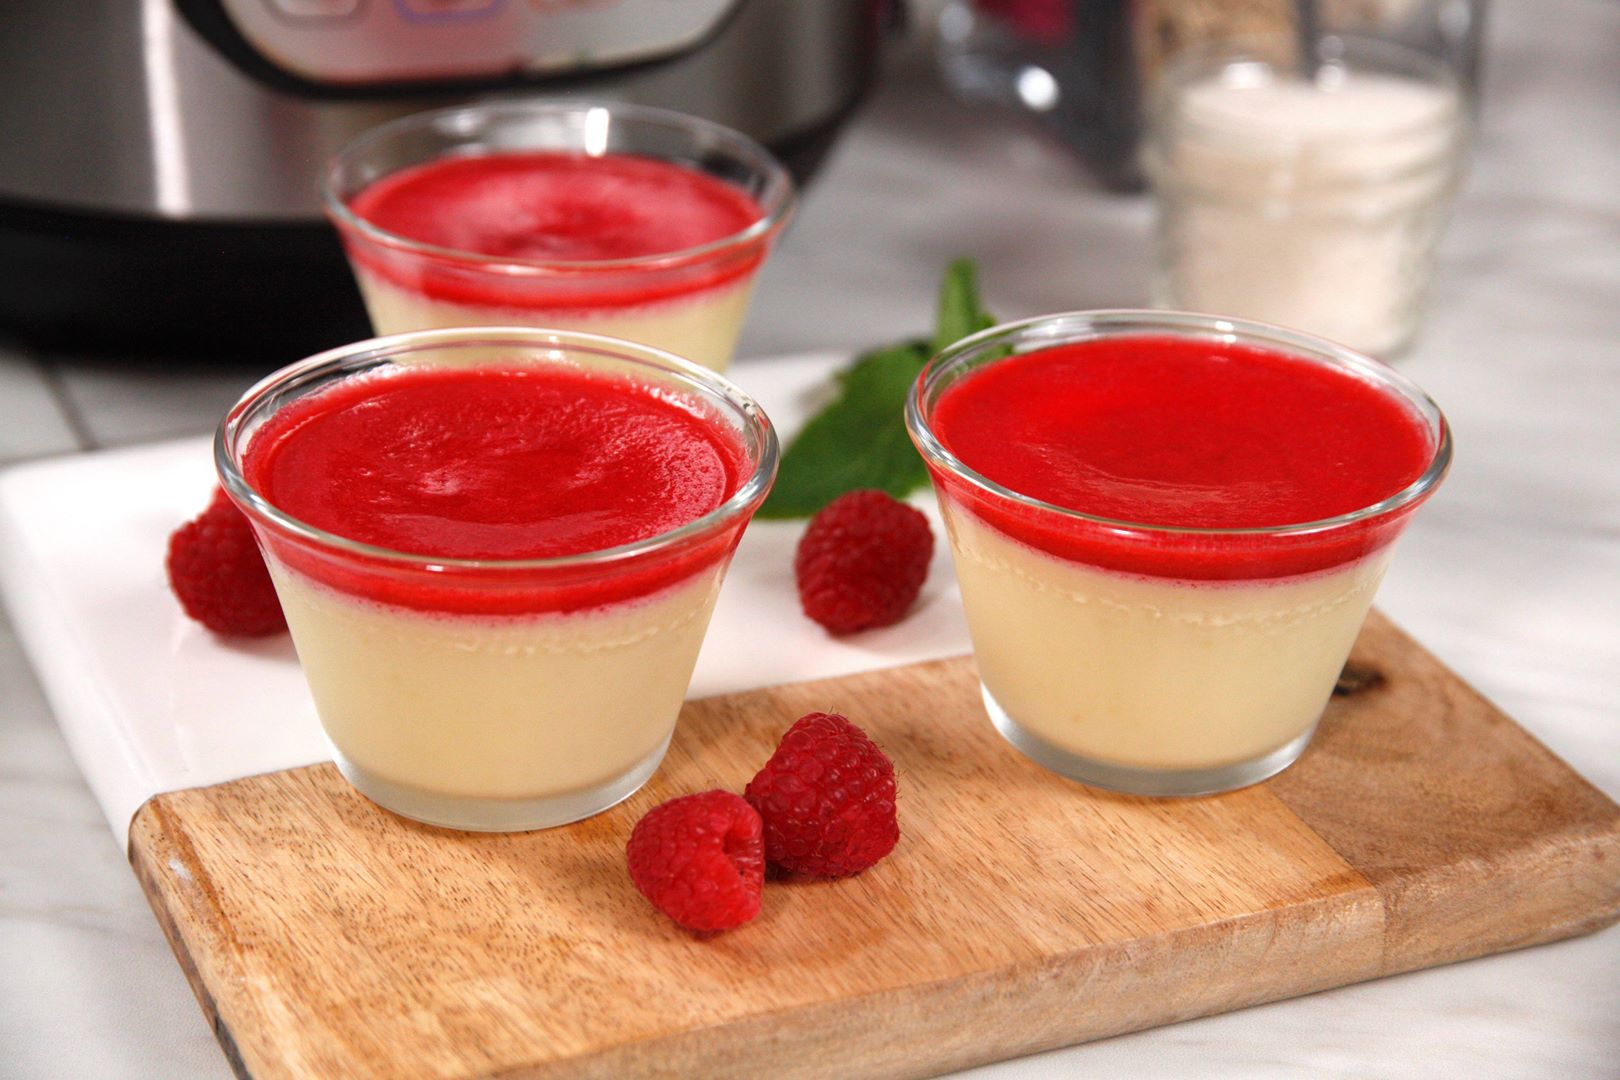
Instant Pot White Chocolate Raspberry Pots de Creme

Instant Pot White Chocolate Raspberry Pots de Creme
Lighter than a pudding, denser than a mousse and always sinfully decadent!
Author:
Cuisine: American
Recipe type: Dessert
Ingredients
  • 6 oz good-quality white chocolate, roughly chopped
  • 2 eggs, room temperature
  • 1 tsp lemon zest
  • ½ tsp lemon extract
  • ¼ tsp vanilla extract
  • Pinch of salt
  • ½ cup heavy cream
  • 1 cup water
Raspberry Mixture:
  • 1 cup raspberries
  • 2-4 tbsp water
  • 2 tsp sugar, or to taste
Instructions
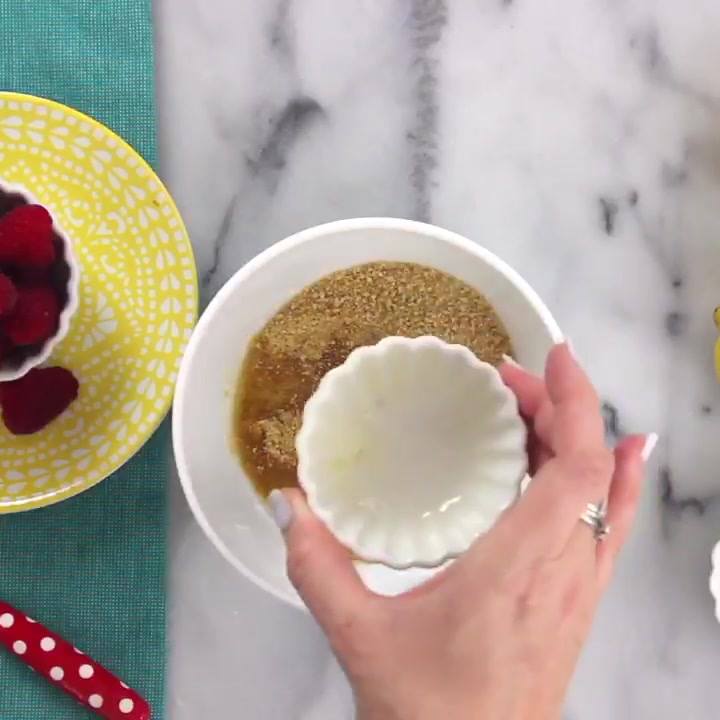
  1. Add white chocolate, eggs, lemon zest, lemon extract, vanilla and salt to a blender. Pulse until chocolate is broken into bits.
  2. In a small bowl, heat cream in the microwave in 20 second increments until just steaming (do not boil).
  3. With the blender running, slowly pour the hot cream into the chocolate mixture. Continue to blend until completely smooth.
  4. Divide custard evenly amongst 3 ramekins or custard cups.
  5. Pour 1 cup of water in the Instant Pot and insert the steam rack.
  6. Using the display panel select the MANUAL function*. Use the +/- keys and program the Instant Pot for 0 minutes.
  7. When the time is up, let the pressure naturally release for 5 minutes, then quick-release the remaining pressure.
  8. Carefully remove the ramekins from the pot to a cooling rack. When completely cool, cover with plastic wrap and refrigerate for at least 4 hours.
  9. Meanwhile, combine raspberries, 2 tbsp water and sugar in a blender. Blend until smooth, adding additional water as needed. Strain the sauce to remove seeds.
  10. At least thirty minutes before serving, top each ramekin with 1-2 tbsp of sauce and refrigerate.

Watch the recipe video here:

Lighter than a pudding, denser than a mousse and always sinfully decadent!RECIPE: http://chopsecrets.com/instant-pot-white-chocolate-raspberry-pots-de-creme/

Posted by Chop Secrets on Tuesday, April 9, 2019

Dessert

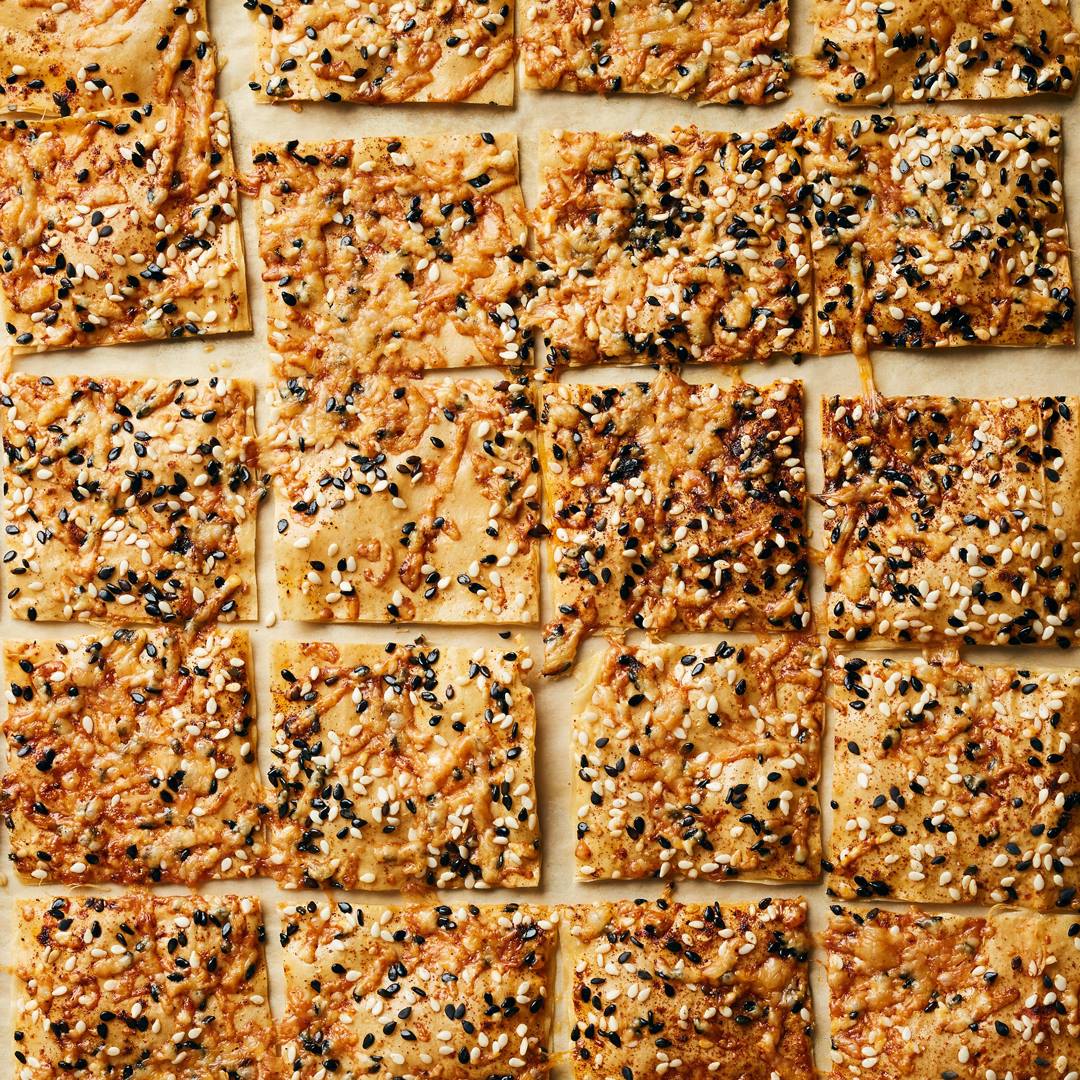
Cheesy Sesame Phyllo Bites

Cheesy Sesame Phyllo Bites
Not feeling the squares in this phyllo bites recipe? Use a pizza cutter to cut crackers into any shape you like!
Author:
Cuisine: American
Recipe type: Dessert
Ingredients
  • 6 sheets fresh phyllo pastry or frozen, thawed
  • 4 tablespoons unsalted butter, melted, slightly cooled
  • 1 large egg white, room temperature, lightly beaten
  • ⅓ cup mixed black and white sesame seeds, divided
  • ½ teaspoon smoked paprika, divided
  • Kosher salt, freshly ground pepper
  • 4 ounces Gruyère, finely grated (about 2 cups), divided
Instructions
  1. Preheat oven to 375°. Place a sheet of phyllo on a parchment-lined baking sheet. Brush lightly with butter and top with a second sheet of phyllo, pressing gently to adhere. Brush with butter and top with another sheet, pressing gently again; brush with egg white. Sprinkle half of sesame seeds and half of paprika over phyllo; season with salt and pepper. Scatter half of Gruyère over top. Using a pizza cutter or sharp knife, cut phyllo into 2" squares. Bake crackers until golden brown, 8–10 minutes. Let cool on baking sheet 3 minutes before serving. Repeat with remaining phyllo, butter, egg white, sesame seeds, paprika, Gruyère, and more salt and pepper, building on another parchment-lined baking sheet.
Do Ahead:
  1. Crackers can be made 8 hours ahead. Store airtight at room temperature.

Watch the recipe video here:

Yes, it's actually this easy to make crackers from scratch. GET THE RECIPE: http://bonap.it/6T2WjQV

Posted by Bon Appétit Magazine on Saturday, June 1, 2019

Dessert

Stuffed Churro Cookies

Stuffed Churro Cookies
Stuffed with cinnamon-cream cheese and then dunked into melted chocolate, these easy cookies have all of the flavors of the classic Mexican dessert without all of the frying fuss.
Author:
Cuisine: American
Recipe type: Dessert
Ingredients
  • 4 oz (half of 8-oz package) cream cheese, softened
  • ¼ cup sugar
  • 1½ teaspoons ground cinnamon
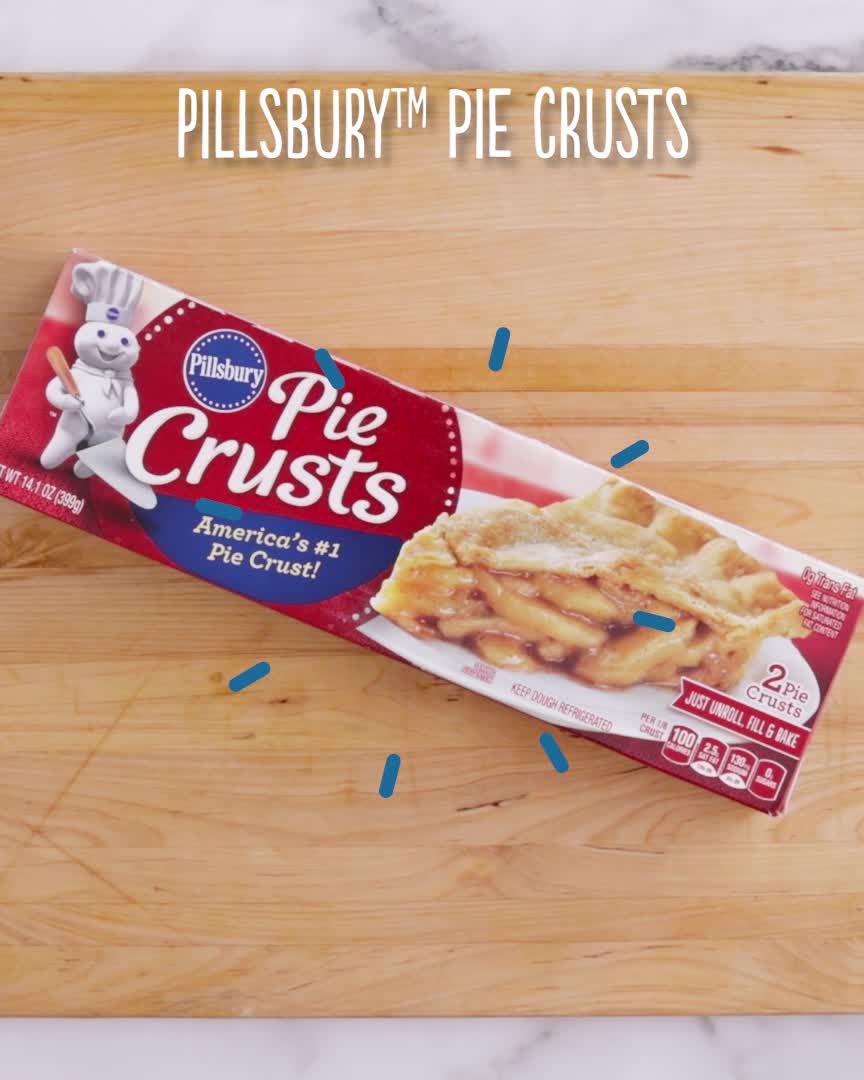
  • 1 box Pillsbury™ refrigerated pie crusts, softened as directed on box
  • 1 egg, beaten
  • 2 tablespoons butter, melted
  • 1 cup semisweet chocolate chips
  • 1 tablespoon vegetable oil
Instructions
  1. Heat oven to 375°F. Line large cookie sheets with cooking parchment paper.
  2. In small bowl, beat cream cheese, 2 tablespoons of the sugar and 1 teaspoon of the cinnamon until well blended. Spoon cream cheese mixture into small resealable food-storage plastic bag; partially seal bag. Cut off corner of bag; set aside.
  3. Unroll 1 pie crust on lightly floured work surface. Using rolling pin, roll pie crust into 12-inch round. Using 2½-inch round cookie cutter, cut out 20 rounds from pie crust, rerolling scraps if needed. Repeat rolling and cutting with second pie crust.
  4. Place 10 rounds on each cookie sheet. Pipe slightly less than 1 teaspoon cream cheese mixture in center of each round. Brush edge of rounds with beaten egg. Top each with another dough round, pressing down on outer edges with fork to seal.
  5. Brush tops of cookies with melted butter. In small bowl, mix remaining 2 tablespoons sugar and ½ teaspoon cinnamon. Sprinkle on tops of cookies.
  6. Bake 16 to 18 minutes or until golden brown around edges. Remove to cooling rack to cool completely, about 30 minutes.
  7. In small microwavable bowl, microwave chocolate chips and oil uncovered on High 1 to 2 minutes, stirring every 30 seconds, until mixture can be stirred smooth. Pick up cookie by edges, and carefully dip halfway into chocolate; gently shake off excess. Place on cooking parchment paper or waxed paper. Repeat with remaining cookies. Refrigerate dipped cookies 20 to 30 minutes or until chocolate is set. Store covered in refrigerator.

Watch the recipe video here:

Classic churro flavors without the frying fuss. Stuffed Churro Cookies recipe:…

Posted by Pillsbury on Saturday, June 1, 2019

Dessert

Chocolate Sundae Cone Cookies

Chocolate Sundae Cone Cookies
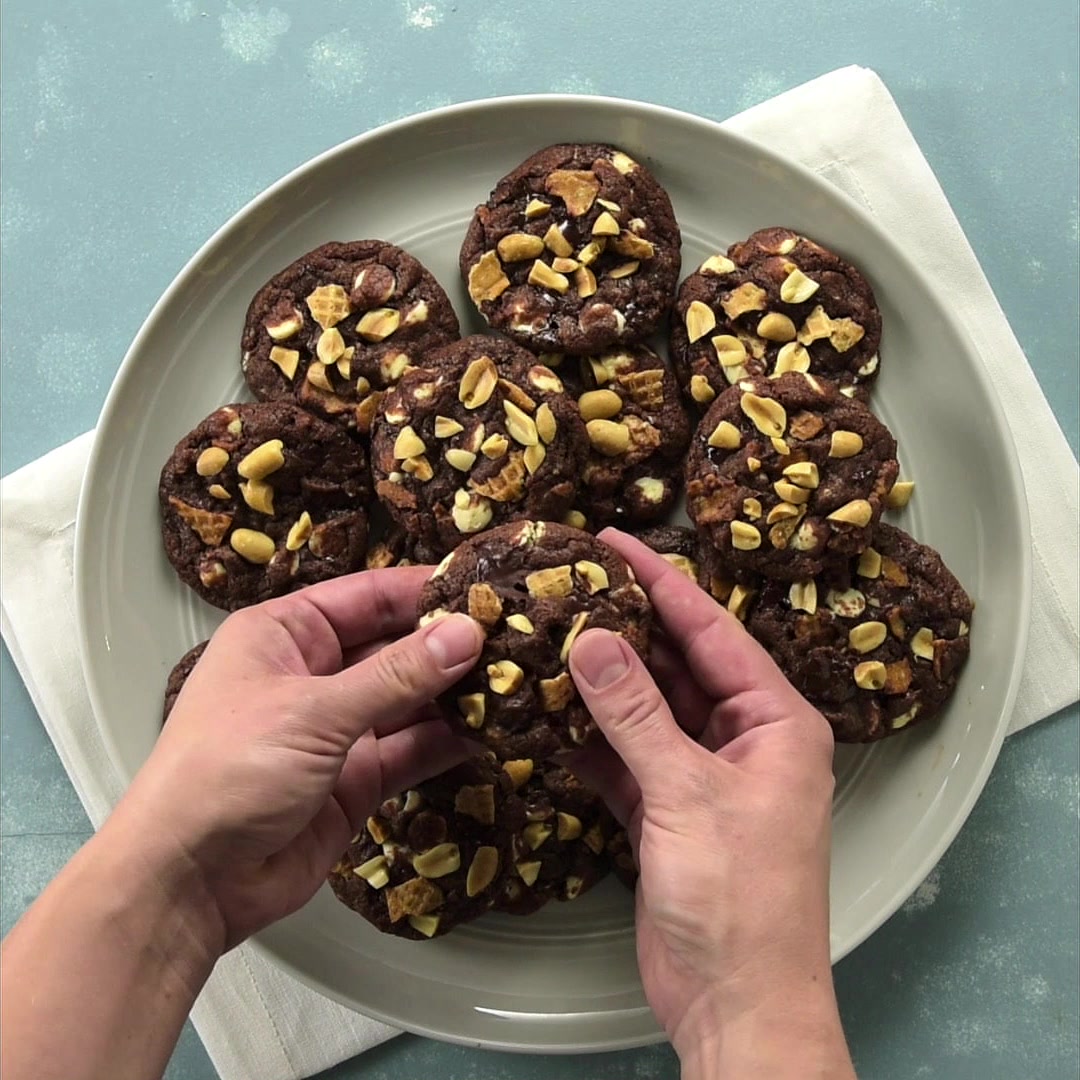
Enjoy these crunchy chocolate cookies made using Betty Crocker® cookie mix and sugar cones – perfect for dessert.
Author:
Cuisine: American
Recipe type: Dessert
Ingredients
  • 1 bag (11.5 or 12 oz) semisweet chocolate chunks (2 cups), divided
  • ½ cup butter or margarine, softened
  • 1 egg
  • 1 pouch Betty Crocker™ chocolate chip cookie mix
  • 1 cup white vanilla baking chips (6 oz)
  • 4 sugar cones, coarsely crushed (about 1¼ cups)
  • ½ cup dry-roasted peanuts, coarsely chopped
Instructions
  1. Heat oven to 350°F. In large microwavable bowl, microwave 1 cup chocolate chunks uncovered on High 1 minute to 1 minute 30 seconds, stirring every 30 seconds, until melted and smooth. Add butter; using spoon, beat until blended. Add egg; beat until combined. Add cookie mix; stir until soft dough forms. Stir in remaining 1 cup chocolate chunks and the vanilla baking chips. Gently stir in crushed cones just until combined.
  2. Onto ungreased cookie sheets, drop dough by 2 tablespoonfuls per cookie; flatten tops slightly. Sprinkle with peanuts, pressing lightly into dough. Bake 8 to 10 minutes or until puffed and dry on tops (centers will be very soft). Cool 3 minutes; remove from cookie sheets to cooling racks. Cool completely before storing in airtight container.

Watch the recipe video here:

Enjoy these crunchy chocolate cookies made using Betty Crocker® cookie mix and sugar cones!Chocolate Sundae Cone…

Posted by Betty Crocker on Saturday, June 1, 2019

Dessert

Bubble Wrap Honeycomb Cake

Bubble Wrap Honeycomb Cake
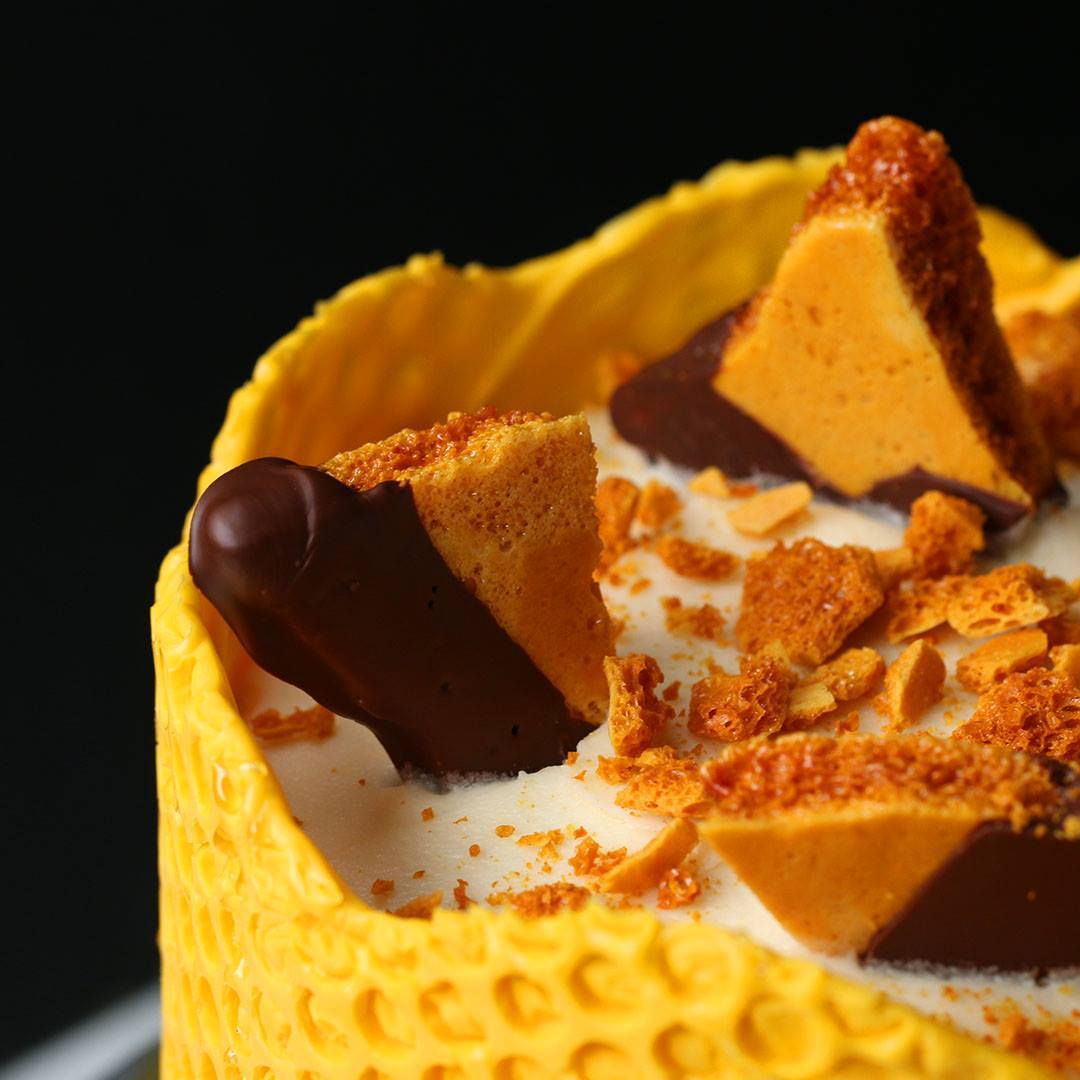
This cake is the bee’s knees! We used boxed cake mix to keep things simple, but feel free to get fancy by making your own. When melting the candy, make sure you’re on medium power. Microwaving on high power will cause the candy to seize. For a finishing touch, drizzle on extra honey and top with our homemade honeycomb. You and your guests won’t be able to stop buzzin’ about it!
Author:
Cuisine: American
Recipe type: Dessert
Ingredients
HONEY BUTTERCREAM FROSTING
  • 2 cups unsalted butter (460 g), softened
  • 1 cup cream cheese (225 g), softened
  • ½ cup honey (170 g)
  • 4 cups powdered sugar (480 g), sifted
  • 1 pinch of salt
ASSEMBLY
  • 15.25 oz yellow cake mix (430 g), baked according to package instructions in 2 8-inch round cake pans, cooled completely and trimmed level (to remove domed tops)
  • 15.25 oz chocolate cake mix (430 g), baked according to package instructions in 2 8-inch round cake pans, cooled completely and trimmed level (to remove domed tops)
  • 24 oz yellow candy melts (680 g)
  • Tasty's homemade honeycomb, to garnish
  • ⅓ cup crushed honeycomb (115 g), to garnish
  • honey, for drizzling
SPECIAL EQUIPMENT
  • cake turntable
  • cardboard cake round
  • large offset spatula
  • bubble wrap, Clean, atleast 27x7 inch (70x18 cm) piece. 5/16 inch (1 cm) thick
Instructions
  1. Make the honey buttercream frosting: In a large bowl, cream together the butter and cream cheese with an electric mixer on medium speed until well combined, scraping down the sides of the bowl as needed. Add the honey and beat to incorporate. Add the powdered sugar and a pinch of salt and beat on low until mostly combined. Increase the mixer speed to high and beat for 3-5 minutes more, until the buttercream is light and fluffy. If the frosting feels soft, you can also refrigerate it for 10-15 minutes so it stiffens slightly.
  2. Assemble the cake: Place a cardboard cake round on a cake turntable and dab a small amount of frosting in the center of the cardboard round. Center one yellow cake layer over the dab of frosting, then evenly spread about ½ cup of buttercream on top with an offset spatula. Top with a layer of chocolate cake, then another ½ cup of frosting. Repeat with the remaining cake layers and frosting. After adding the final layer, lightly frost the entire cake to create a thin crumb coat.
  3. Refrigerate the cake for 15 minutes.
  4. Cover the chilled cake with the remaining frosting in an even layer. Return the cake to the refrigerator for 15 minutes more, to allow the frosting to stiffen.
  5. Take the cake out of the refrigerator. With the bubbles facing outward so they don’t get frosting on them, wrap the sheet of bubble wrap around the perimeter of the cake. Trim the wrap to form a collar that fits loosely around the cake and comes about 2 inches over the top edge. Remove the bubble wrap. Keep the cake in the refrigerator until you’re ready to finish the assembly.
  6. Make the yellow candy honeycomb: Place the candy melts in a medium microwave-safe bowl. Microwave on medium power (not on high, which will cause the candy to seize) in 30-second intervals, stirring in between, until the candy is fully melted and smooth.
  7. Place the bubble wrap bubble-side up on a flat surface. Pour most of the melted candy along the bottom two-thirds of the bubble wrap. Working quickly, use an offset spatula to spread the candy over the bubble wrap, leaving the top third empty. Once the bottom two-thirds are evenly covered, use a spatula to spread the candy in a wave pattern along the top edge. Let sit for 5 minutes. While you wait, remove the cake from the refrigerator and position it near the bubble wrap.
  8. After 5 minutes, test the bubble wrap by lifting up a corner. If it looks like it is beginning to harden and has a sheen to it but is still pliable, it is ready to be used. If the candy is still very loose and dripping, let sit for another 1-3 minutes, checking every minute.
  9. Once the candy has set, pick it up by the top corners and quickly wrap the side with the candy around the cake. Press it onto the cake so it sticks. Once attached, try to slowly peel one corner of bubble wrap off. It it sticks, let sit for 1-3 minutes, checking every minute, until ready to peel. If it begins to peel, continue slowly peeling off the bubble wrap until entirely removed. If the candy cracks while you are peeling off the bubble wrap, either remelt and repeat the process, or break it into large shards to decorate the outside of the cake. Refrigerate until serving time.
  10. Immediately before serving, top the cake with homemade honeycomb pieces and crushed honeycomb. Drizzle honey around the edges of the yellow candy honeycomb.
  11. Carefully slice the cake. Drizzle each piece with more honey before serving.
  12. Enjoy!

Watch the recipe video here:

This cake is the bee’s knees!Get the recipe: https://tasty.co/recipe/bubble-wrap-honeycomb-cake

Posted by Tasty on Monday, April 29, 2019

Dessert

French-style Lemon Tart

French-style Lemon Tart
French-style Lemon Tart recipe.
Author:
Cuisine: American
Recipe type: Dessert
Ingredients
LEMON CURD
  • 4 egg yolks
  • 4 eggs
  • ⅔ cup sugar (150 g)
  • 1 cup lemon juice (200 mL)
  • 2 lemon zests
  • ¾ cup butter (170 g)
  • 1 pre-baked tart shell
Instructions
  1. Pre-heat the oven to 350°F (180°C).
  2. Prepare the lemon curd by whisking the egg yolks, whole eggs, sugar, lemon juice and lemon zest over a bain marie (a large bowl placed over a pan of simmering hot water).
  3. Once combined, mix in the butter and whisk the mixture for about 10 minutes, until thick.
  4. Pour into a pre-baked tart shell.
  5. Bake for 6 minutes.
  6. Whilst the tart is baking, prepare the raspberry chantilly by whipping the raspberries, sugar, vanilla extract and cream together.
  7. Leave the tart to cool before dusting with icing sugar.
  8. Serve with the raspberry chantilly, fresh raspberries and mint for garnish.
  9. Enjoy!

Watch the recipe video here:

6 terrific tarts from Proper Tasty. FULL RECIPE: https://tasty.co/recipe/french-style-lemon-tart

Posted by BuzzFeed Food on Tuesday, September 3, 2019