Showing 879 Result(s)
Dessert

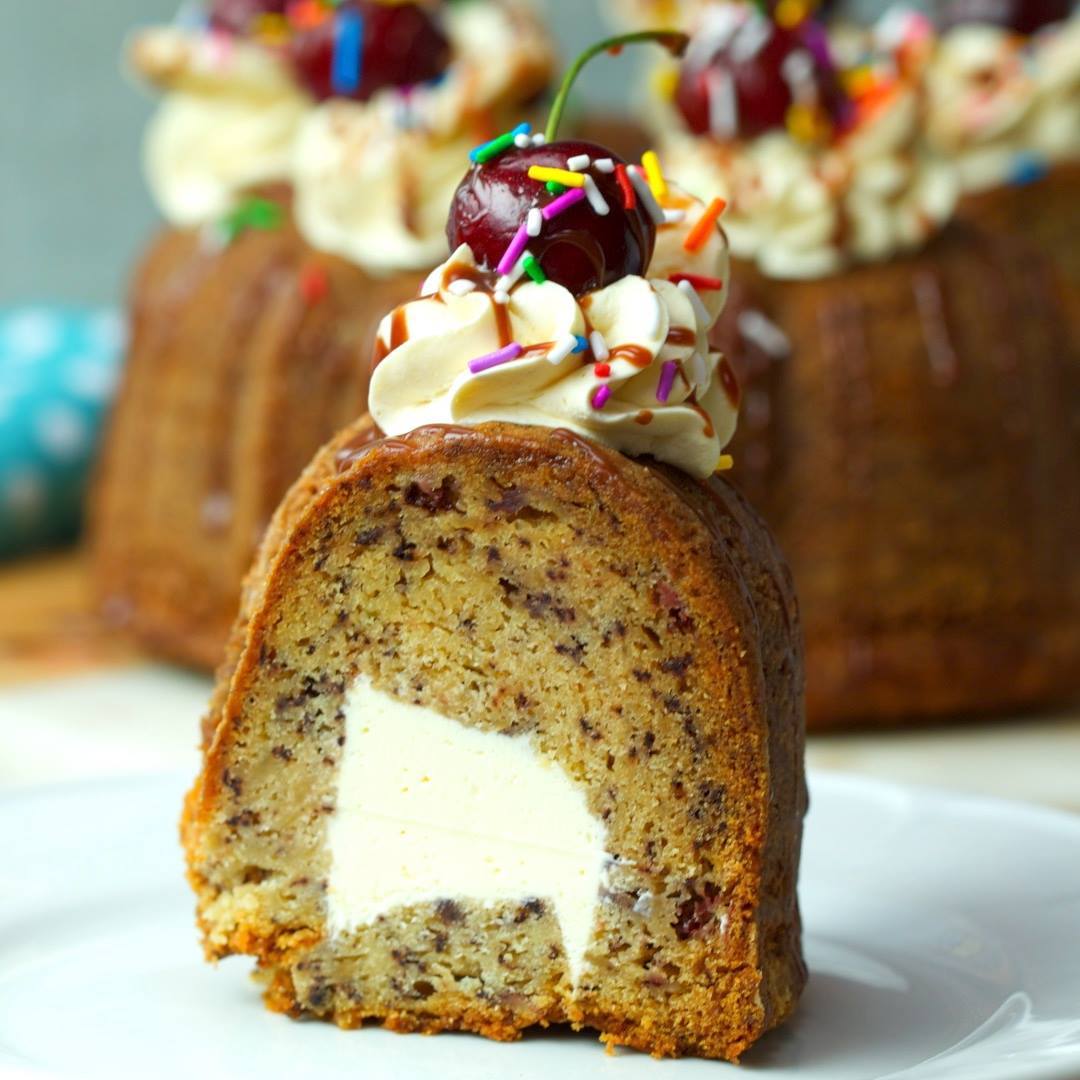
Banana Split Surprise Cake
Banana Split Surprise Cake
A classic diner treat, Banana Split is always a treat. We've filled a banana cake with no churn ice cream and topped it with traditional banana split toppings. Go wild with this one. Would be delicious filled with a chocolate or strawberry flavoured ice ream too 😉
Author:
Cuisine: American
Recipe type: Dessert
Ingredients
  • 4 ripe bananas, mashed
  • 1 cup butter, softened
  • 2 cups sugar
  • 3 cups flour
  • 2 tsp baking soda
  • ½ tsp salt
  • 2 eggs
  • 1 tsp vanilla
  • 1 cup sour cream
  • 2 cups heavy cream
  • 1 can condensed mlk
  • 2 tsp vanilla
  • Pinch of salt
  • Whipped Cream
  • Cherries
  • Sliced bananas
  • Sprinkles
  • Chocolate sauce
Instructions
  1. Make banana bundt: Grease and flour a bundt tin, set aside. Pre-heat oven to 180ÂșC (350ÂșF).
  2. In a large bowl, using a hand mixer mix butter until smooth. Add sugar and whip together until just pale in flour. Add eggs, vanilla and bananas. Whisk together to combine.
  3. In a separate bowl, whisk together flour, baking soda and salt. Fold in ½ of the flour mix to the wet mix. Then add all of the sour cream. Finish with folding in the remaining flour until combined.
  4. Pour into tin, rap tin on the table. Bake for about 1hour until a toothpick comes out clean.
  5. Remove and cool completely.
  6. Meanwhile whisk heavy cream to stiff peaks. Fold in condensed milk, vanilla and salt.
  7. While the cake is in the bundt tin, cut out the centre of the cake but keep the bottom. Scoop out about 2 inches deep to create a well.
  8. Scoop no churn ice cream into the centre and smooth. Top with the cake that was taken out. As shown in the video. Cover with cling film and freeze for 3-4 hours.
  9. Pipe rosette of whipped cream over the cake, top each with a cherry, a slice of banana, chocolate sauce and sprinkles.

Banana Split Surprise Cake

Banana Split Surprise Cake

Posted by Twisted on Friday, June 8, 2018
Dessert

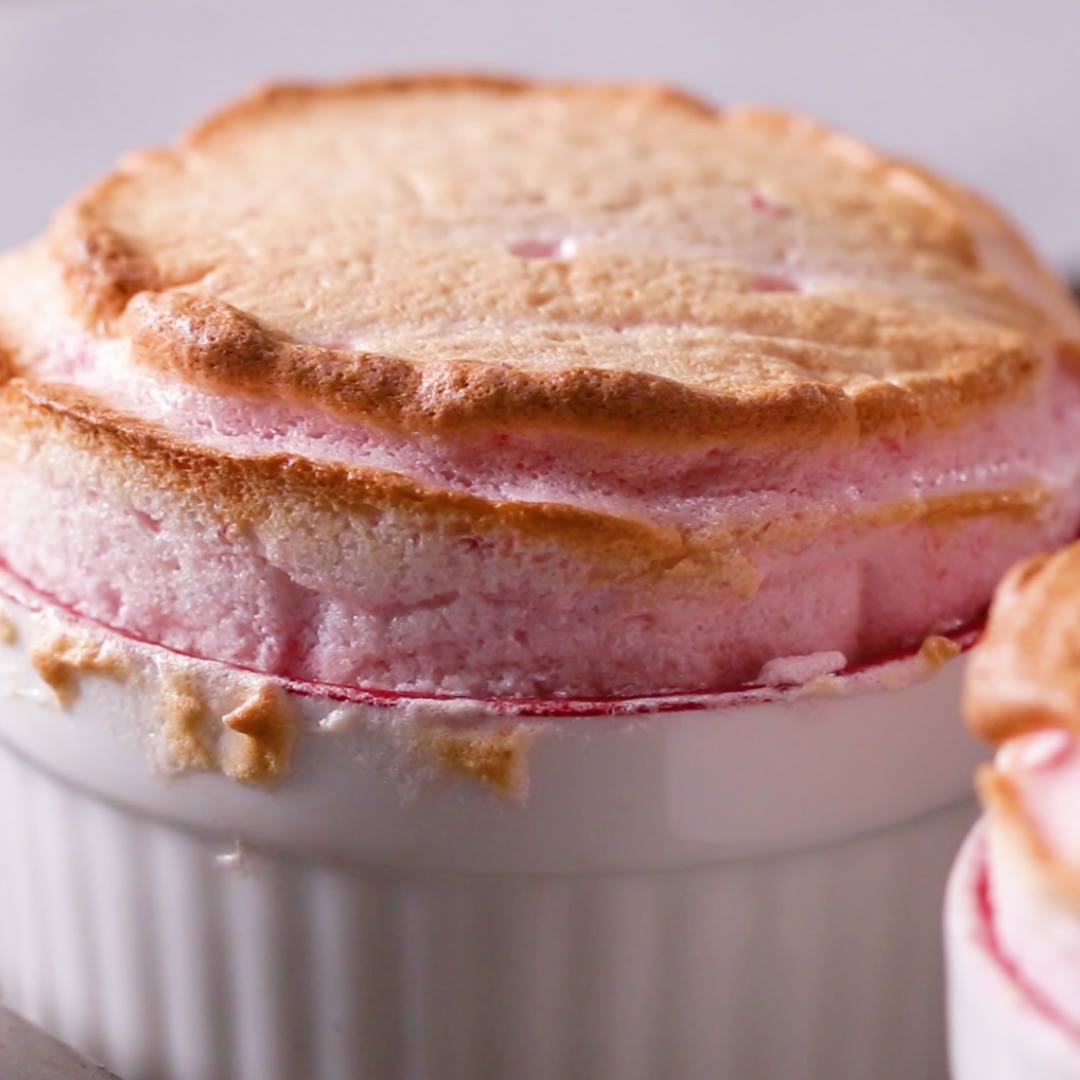
Strawberries And Cream Soufflé

Strawberries And Cream Soufflé
Watch this strawberry and cream soufflĂ© rise right up out of your dreams ✹?
Author:
Cuisine: American
Recipe type: Dessert
Ingredients
  • CRÈME ANGLAISE
  • 1 cup (240 mL) milk
  • 1 cup (240 mL) heavy cream
  • Âœ cup (100 g) sugar, divided
  • Âœ vanilla bean, slit down the middle (or 1 teaspoon vanilla extract, added while cooling)
  • 4 large egg yolks
  • 1 pinch salt
  • STRAWBERRY SOUFFLÉS
  • 1 cup (150 g) strawberry, hulled and quartered
  • ⅓ cup (65 g) sugar, plus 4 tablespoons sugar, divided
  • 1 teaspoon lemon juice
  • 1 tablespoon butter, softened
  • 4 large egg whites
  • ÂŒ teaspoon cream of tartar
  • 1 pinch salt
Instructions
  1. Preheat the oven to 400˚F (200˚C)
  2. Prepare an ice bath and place a strainer over a medium bowl. Set nearby.
  3. Make the crĂšme anglaise: In a small saucepan, heat the milk, heavy cream, ÂŒ cup (50 g) of sugar, and the vanilla bean pod over medium heat for 2-3 minutes, until it begins to steam. Remove the pan from the heat.
  4. In a medium bowl, combine the egg yolks, remaining Œ cup (50 g) of sugar, and the salt and whisk together. Continue whisking and ladle in the milk mixture. Once combined, return the saucepan to medium heat, begin to whisk the milk mixture, and slowly pour in the egg mixture.
  5. Cook the custard, continuously whisking to ensure the egg yolks don’t cook on the bottom, for about 5 minutes, until it coats the the back of a spoon.
  6. Set the bowl with the strainer in the ice bath and strain the creme into the bowl. Whisk until cooled, about 5 minutes. Cover and refrigerate until ready to serve.
  7. Add the strawberries, 2 tablespoons of sugar, and the lemon juice to a small saucepan. Cook over medium heat for about 5 minutes, stirring occasionally, until the strawberries are softened but still vibrant red. Remove the pan from the heat.
  8. Strain the strawberry mixture through a fine-mesh sieve into a medium bowl. Use a spatula to press the berries through, making a strawberry puree. Discard the pulp and set the puree in the refrigerator to cool.
  9. Set 6 ramekins on a baking sheet and coat the insides with the softened butter. Sprinkle 2 tablespoons of sugar among the ramekins and shake each to coat the bottom and sides with sugar.
  10. Add the egg whites, cream of tartar, and salt to a large bowl. Using an electric hand mixer, beat the whites on medium-high speed until foamy. Add the remaining ⅓ cup (65 g) of sugar in small increments, continuing to beat until the whites are stiff and glossy.
  11. Using a spatula, carefully fold in the strawberry puree.
  12. Fill each ramekin with the strawberry-egg white mixture and level off the tops with a butter knife. Run a clean thumb around the inside edge of each ramekin to allow the soufflés to rise properly.
  13. Bake the soufflĂ©s for 10-12 minutes, until the tops are light brown. Avoid opening the oven prematurely, so the soufflĂ©s don’t fall.
  14. Serve the soufflés immediately with the crÚme anglaise poured over the top.
  15. Enjoy!

Watch the recipe video here:

Strawberries and Cream Soufflé

Watch this strawberry and cream soufflĂ© rise right up out of your dreams ✹?FULL RECIPE: https://tasty.co/recipe/strawberries-and-cream-souffle

Posted by Tasty on Thursday, June 28, 2018

Dessert

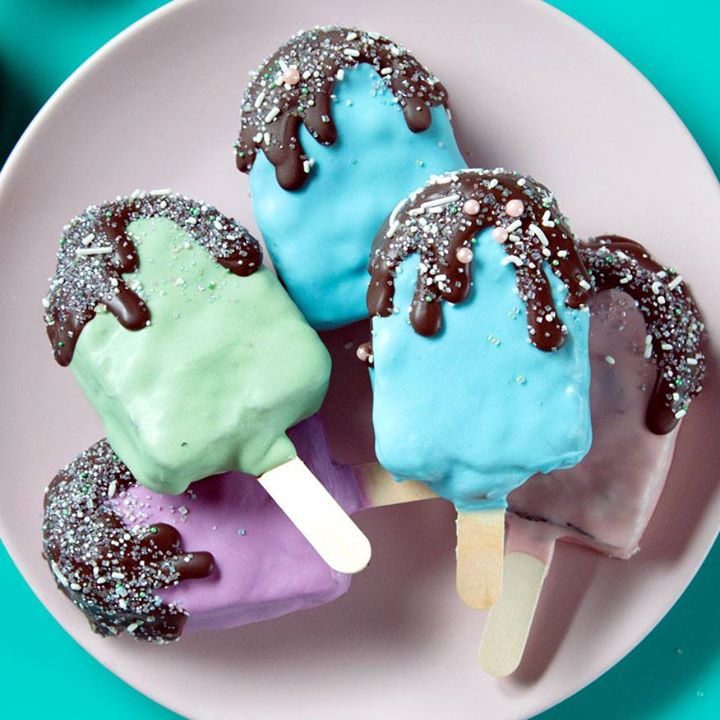
Brownie Popsicles

Brownie Popsicles
When cake pops just don't satisfy, go bigger with a rich, chocolatey brownie coated in chocolate candy melt.
Author:
Cuisine: American
Recipe type: Dessert
Ingredients
Brownies:
  • 1 cup butter
  • 1 cup unsweetened cocoa powder
  • 2 cups sugar
  • ¾ cup all-purpose flour
  • 2 cups chopped walnuts
  • 1 teaspoon large-flake sea salt
  • 4 large eggs
  • 1 tablespoon vanilla extract
  • 1 teaspoon instant espresso powder
Dipping chocolate:
  • Colored candy melts
  • Dark chocolate candy melts
  • Coconut oil
  • Sprinkles for garnish
Instructions
Bake the brownies:
  1. Preheat oven to 325 degrees. Grease and line an 11x17-inch cake pan with parchment paper.
  2. In a small pot set over low heat, melt butter and cocoa powder, stirring until smooth. Set aside to cool.
  3. In a medium bowl, mix together sugar, flour, walnuts and salt.
  4. In a large bowl, whisk eggs and cocoa mixture together, then add vanilla and espresso powder. Add the flour mixture and stir gently to combine. Pour into the prepared pan and bake for 35 to 40 minutes. Let cool completely. Chill for 15 minutes in the refrigerator, then remove from pan.
Make the popsicles:
  1. Using a 3x2-inch popsicle-shaped cookie cutter, cut out popsicles. Insert a popsicle stick coated in melted candy melts into each popsicle. Place in the freezer for about 15 minutes to set.
Decorate the brownies:
  1. In heatproof bowls set over pots of boiling water, melt the dark chocolate candy melts and candy melts in your choice of colors. Add a teaspoon of coconut oil per cup of candy melts to thin the mixture. When the candy melts ribbon off of a spoon, they’ve reached a good dipping consistency.
  2. Pour melted candy melts into wide heatproof jars and dip the chilled brownie pops into the mixture. Lay the pops on a silicone baking mat or a piece of parchment paper to set.
  3. Once the colored chocolate has set, garnish with dark chocolate candy melt drips and coat with sprinkles. Allow to set, then then serve!

Watch the recipe video here:

Brownie Popsicles

Brownie pops are the new cake pops.Save this recipe: https://taste.md/2tI1u5vHelp us be better for you! > taste.md/2Cf5XkD

Posted by Tastemade on Monday, January 8, 2018

Dessert

Chocolate Peanut Butter Swirl Cookie Pie

Chocolate Peanut Butter Swirl Cookie Pie
Eye on the pies - we're hypnotized.
Author:
Cuisine: American
Recipe type: Dessert
Ingredients
  • For the cookie crust:
  • 1½ sticks butter, softened
  • 1¾ cups sugar
  • ½ teaspoon salt
  • 2 large eggs
  • 2 teaspoons vanilla extract
  • 1 teaspoon almond extract
  • 5 cups flour
  • ¼ cup cocoa powder
  • ⅓ cup peanut butter
  • For the pie filling:
  • 1 cup heavy cream
  • 1½ cups smooth peanut butter
  • 8 ounces cream cheese, softened
  • ½ cup sugar
  • ¼ cup brown sugar
  • 1 teaspoon vanilla extract
  • ½ teaspoon salt
Instructions
  1. For the cookie crust: In a stand mixer, beat the butter and sugar until fluffy. Add the salt and eggs one at a time. Add the vanilla and almond extracts. Slowly incorporate the flour until the dough is even. Remove half of the dough and set aside. Mix the cocoa powder into the remaining dough and set aside.
  2. Wrap the chocolate dough and the vanilla almond dough separately in plastic wrap and refrigerate for about 30 minutes.
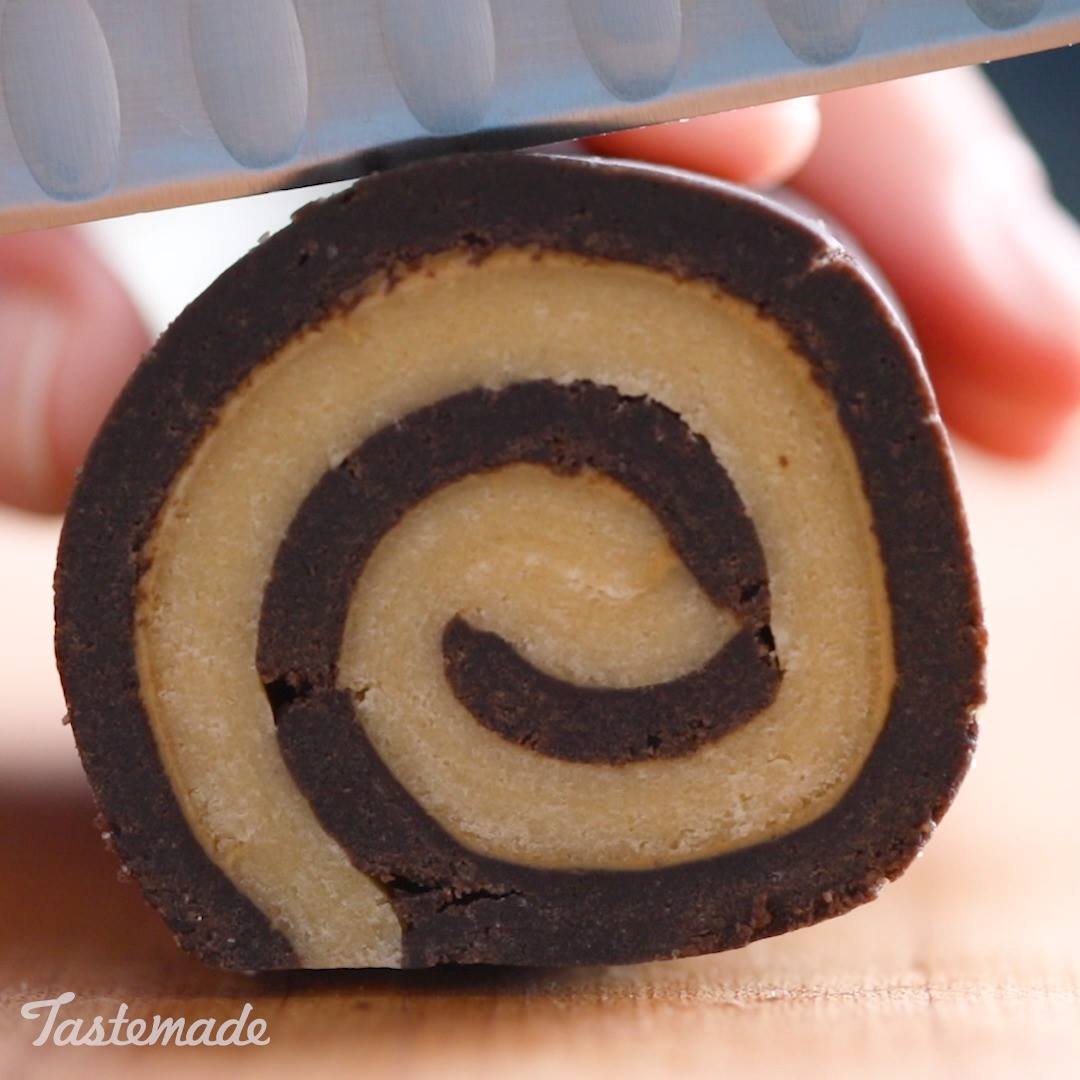
  3. Roll out the two chilled doughs and trim them to be the exact same size. Gently spread the peanut butter over the vanilla almond dough and then top with the sheet of chocolate dough. Carefully roll the two doughs together, sandwiching the peanut butter between the layers and taking care to avoid any gaps in the dough. Wrap the rolled cookie dough log in plastic wrap and refrigerate for about an hour.
  4. Line a 9-inch pie tin with parchment paper, and trace a 9-inch circle onto a sheet of parchment paper. Place on a cookie sheet.
  5. Once well chilled, gently slice the chilled log into ¼-inch slices. Place the cookies into the prepared pie tin and press gently. Overlap the cookies slightly to ensure that a crust is created without holes. Cover the 9-inch round circle with cookie slices as well. Place the crusts in the refrigerator. Preheat the oven to 350 degrees.
  6. Bake the cookie crusts for about 15 to 18 minutes. Remove from the oven and allow to cool completely.
  7. For the filling: Whip the cream to stiff peaks and set aside. Mix all other ingredients in a medium bowl until well incorporated. Fold in the whipped cream. Fill the cookie pie crust with peanut butter pie filling and top with the circle crust. Place in the refrigerator for about 4 hours. Cut and serve chilled.

Watch the recipe video here:

Swirl Cookie Pie

Eye on the pies – we're hypnotized.Taste for Yourself: taste.md/2IZ2SfcTry Tastemade TV, Free for 7 days: https://taste.md/2zcId3s

Posted by Tastemade on Thursday, July 5, 2018

Dessert

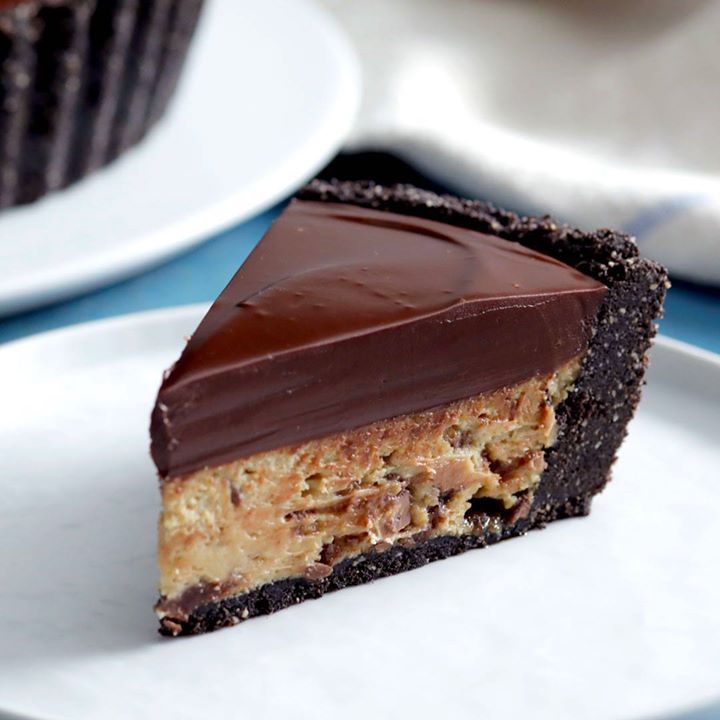
Giant Peanut Butter Cup Cheesecake

Giant Peanut Butter Cup Cheesecake
Make your sweet dreams a reality with a cake made with cream cheese peanut butter filling and topped with chocolate ganache.
Author:
Cuisine: American
Recipe type: Dessert
Ingredients
For the crust:
  • 5 cups chocolate wafer cookies
  • 1 cup peanuts, roasted and salted
  • ½ cup butter, melted and slightly cooled
For the filling:
  • 2 pounds cream cheese, softened
  • 5 eggs, room temperature
  • 1 cup dark brown sugar, packed
  • ¼ cup granulated sugar
  • 1¼ cups smooth peanut butter
  • ½ cup heavy cream
  • 1 vanilla bean, scraped
  • 12 peanut butter cups, chopped
  • ½ cup milk chocolate chips
For the ganache topping:
  • 2 cups heavy cream
  • 16 ounces chocolate, chopped
  • 1 pinch salt
  • 1 cup mini peanut butter cups
  • ½ cup peanuts, roasted, salted and roughly chopped
Instructions
For the crust:
  1. Mix all ingredients in a food processor and pulse until crumbly. Press into a 9½-inch deep-dish tart pan with removable bottom. Place in the refrigerator to chill.
For the filling:
  1. Preheat oven to 275 degrees. In the bowl of a stand mixer, cream the softened cream cheese until fluffy. Add eggs, one at a time, until well incorporated. Add sugars, peanut butter, cream and vanilla bean and mix well.
  2. Gently stir in the peanut butter cups and chocolate chips, then pour the filling into the prepared and chilled crust. Level the top gently. Place the tart pan on a large sheet of aluminum foil in a large baking pan. Pour water around the outside of the cheesecake, taking care not to allow the water to seep into the tart pan. Bake for about 1½ hours or until just firm.
  3. Allow to cool for 20 minutes, then place the cheesecake in the refrigerator for at least 4 hours.
For the ganache:
  1. In a heavy bottomed saucepan, bring cream just to boiling. Place the chopped chocolate and salt into a heatproof bowl and pour the cream over. Allow to sit without mixing for about 5 minutes. Whisk until shiny and smooth then pour over chilled cheesecake. Garnish with mini peanut butter cups and chopped peanuts. Serve immediately.

Watch the recipe video here:

https://www.facebook.com/tastemade/videos/1708245745929252/

Dessert

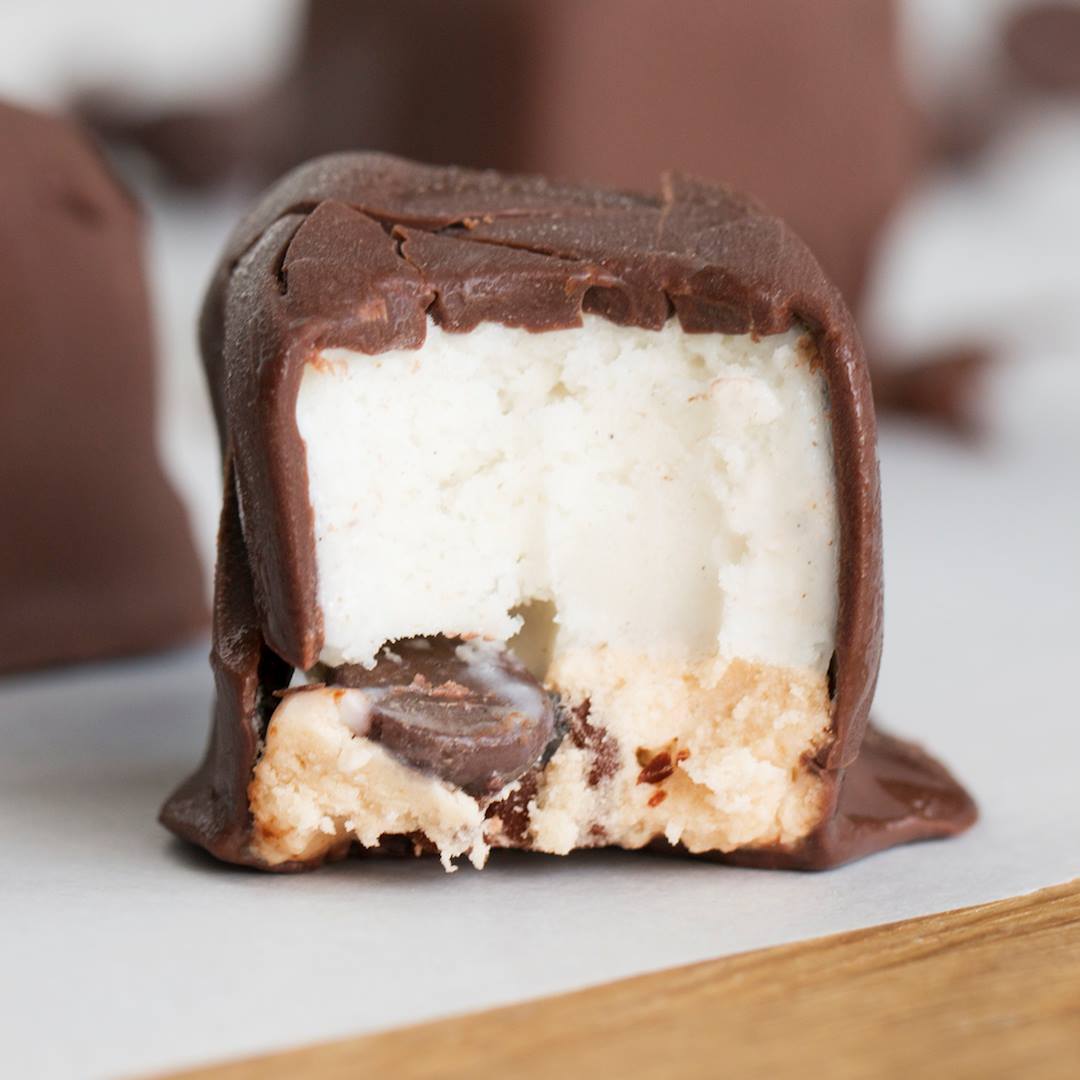
Cookie Dough Ice Cream Bites

Cookie Dough Ice Cream Bites
The cookie dough ice cream bites are a delicious summer treat ?
Author:
Cuisine: American
Recipe type: Dessert
Ingredients
  • Âœ cup (110 g) brown sugar
  • 1 pt (288 g) vanilla ice cream, softened
  • Âœ cup (120 g) butter, softened
  • Âœ teaspoon vanilla extract
  • 1 tablespoon milk
  • 1 cup (140 g) flour
  • ÂŒ teaspoon salt
  • 1 cup (175 g) Semi-Sweet Chocolate Morsels
  • ÂŒ cup (50 g) coconut oil
Instructions
  1. In a large bowl, mix together brown sugar and softened butter.
  2. Mix in vanilla extract and milk until well-combined.
  3. Add flour and salt, and continue mixing until you’ve reached a dough-like consistency.
  4. Spread the “dough” mixture evenly on the bottom of a parchment-lined 9 × 9 inch (22 x 22 cm) pan.
  5. Sprinkle about half of the chocolate morsels over the dough so that they are evenly distributed, and then press the morsels into the dough with a sheet of parchment paper.
  6. Scoop softened ice cream on top of the dough mixture, and spread evenly.
  7. Freeze overnight or until frozen.
  8. In a small bowl, melt the remaining chocolate morsels with coconut oil until smooth.
  9. Lift ice cream out using the parchment, then cut into an 8 x 8 grid.
  10. Evenly coat each piece with the melted chocolate.
  11. Place back in the freezer for 30 minutes.
  12. Enjoy!

Watch the recipe video here:

Cookie Dough Ice Cream Bites

The cookie dough ice cream bites are a delicious summer treat ?FULL RECIPE: https://tasty.co/recipe/cookie-dough-ice-cream-bitesLove Tasty? Join our exclusive research panel and help us make it better! (U.S. only)Click here: https://bzfd.it/2MNGjZN

Posted by Tasty on Thursday, June 28, 2018

Dessert

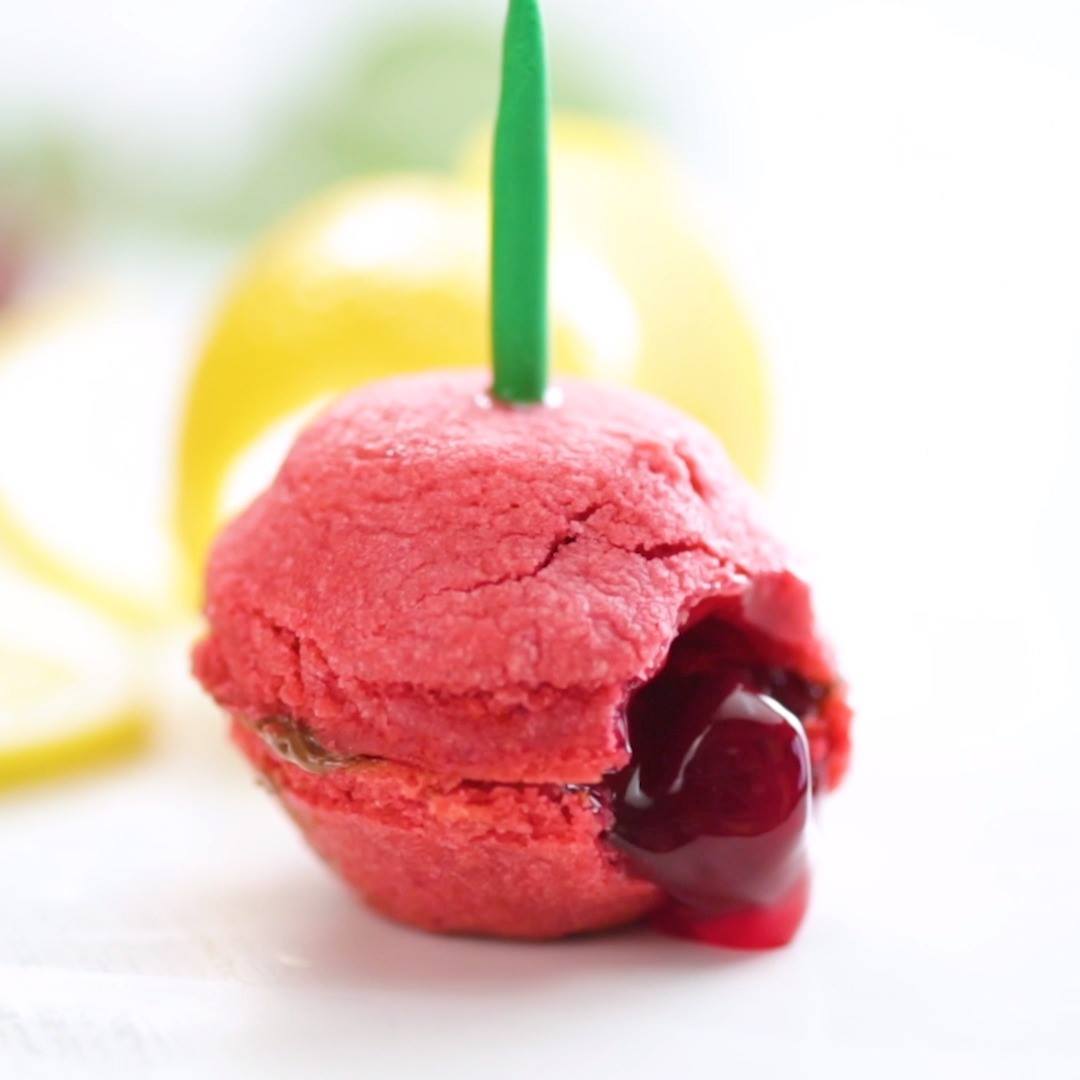
“Fruit” Pies

"Fruit" Pies
How to describe these "fruit" pies in three words: uh dor able!
Author:
Cuisine: American
Recipe type: Dessert
Ingredients
  • 1 (16-ounce) package sugar cookie dough
  • 2 tablespoons concentrated red cherry juice
  • 1 tablespoon freeze-dried cherries
  • ¼ cup all-purpose flour
  • 3 cups pitted red cherries
  • ¾ cup white sugar
  • 3 tablespoons cornstarch
  • 1 tablespoon fresh lemon juice
  • 1 vanilla bean, split
  • ½ cup chocolate chips, melted
  • Melted white chocolate, tinted green, piped into stems
  • Mint, for garnish
Instructions
  1. In a mixing bowl, combine the cookie dough, cherry juice, freeze-dried cherries and flour until well incorporated. Roll out to about ¼ inch thick. Chill the dough. Cut into 2½-inch rounds and place over the back of a mini muffin pan, staggering the cookies to make sure they don’t bake into one another. Chill the dough on the muffin pan for about 30 minutes.
  2. Preheat oven to 350 degrees. Bake the chilled cookies on the back of the tin for 8 to 10 minutes. Remove from the oven and allow them to cool completely on the back of the muffin tin, trimming any edges if necessary.
  3. While the cookies are cooling make the filling. Place the cherries in a medium saucepan over medium heat. Cover and cook, stirring occasionally, for about 10 minutes, then add the sugar, cornstarch, lemon juice and vanilla bean. Cook until all ingredients are incorporated and the juice has thickened. Set aside to cool.
  4. Fill the cookie crusts with cooled cherry pie filling. Pipe a bit of melted chocolate around the top of each mini pie and top with another cookie crust on top. Attach a piped stem and mint spring if desired. Serve immediately.

Watch the recipe video here:

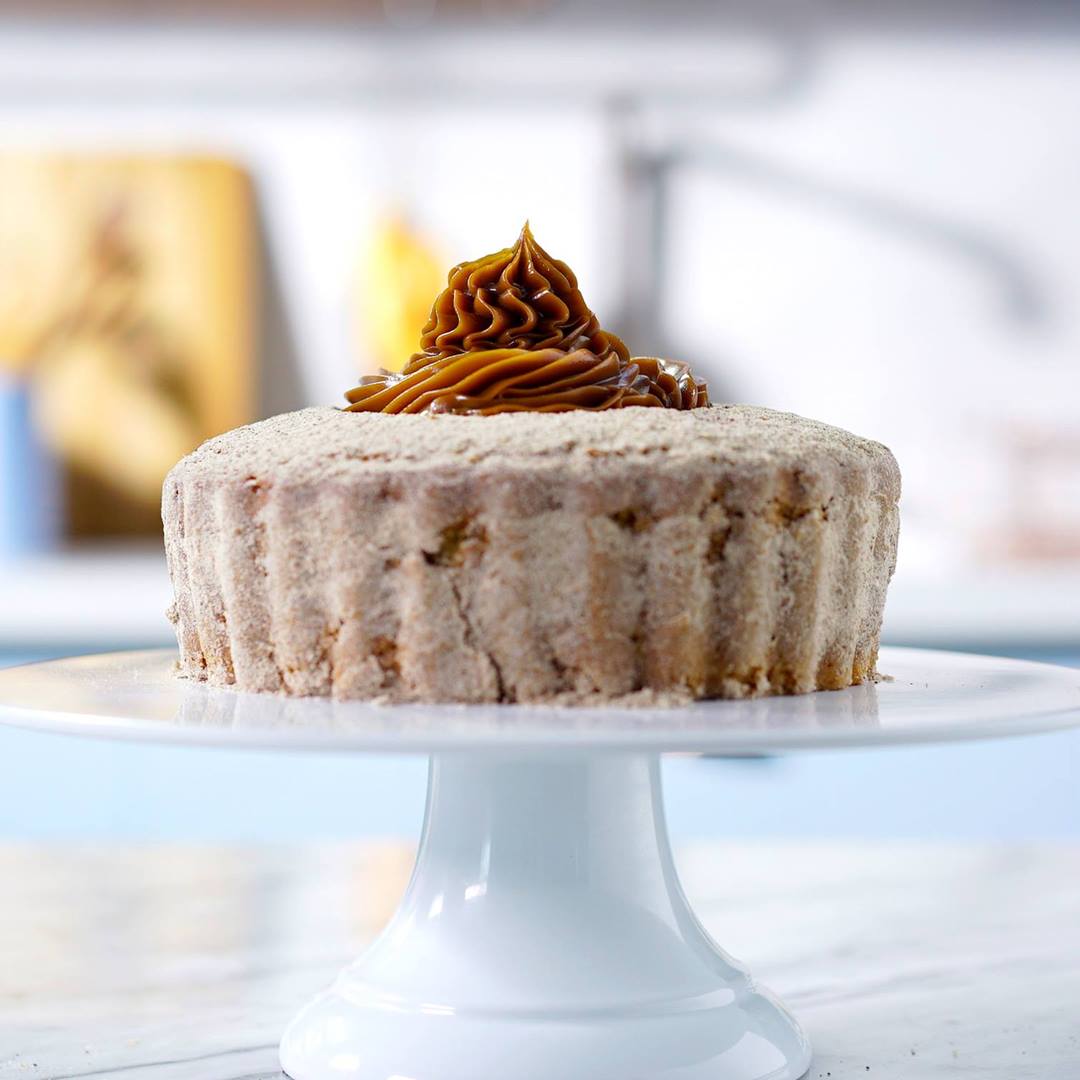
Churro Cake

Skinny people are easier to kidnap. Stay safe, eat cake.Taste for Yourself: taste.md/2yQFhte?: Tastemade Brasil

Posted by Tastemade on Wednesday, July 4, 2018

Dessert

“Fruit” Pies

"Fruit" Pies
How to describe these "fruit" pies in three words: uh dor able!
Author:
Cuisine: American
Recipe type: Dessert
Ingredients
  • 1 (16-ounce) package sugar cookie dough
  • 2 tablespoons concentrated red cherry juice
  • 1 tablespoon freeze-dried cherries
  • ¼ cup all-purpose flour
  • 3 cups pitted red cherries
  • ¾ cup white sugar
  • 3 tablespoons cornstarch
  • 1 tablespoon fresh lemon juice
  • 1 vanilla bean, split
  • ½ cup chocolate chips, melted
  • Melted white chocolate, tinted green, piped into stems
  • Mint, for garnish
Instructions
  1. In a mixing bowl, combine the cookie dough, cherry juice, freeze-dried cherries and flour until well incorporated. Roll out to about ¼ inch thick. Chill the dough. Cut into 2½-inch rounds and place over the back of a mini muffin pan, staggering the cookies to make sure they don’t bake into one another. Chill the dough on the muffin pan for about 30 minutes.
  2. Preheat oven to 350 degrees. Bake the chilled cookies on the back of the tin for 8 to 10 minutes. Remove from the oven and allow them to cool completely on the back of the muffin tin, trimming any edges if necessary.
  3. While the cookies are cooling make the filling. Place the cherries in a medium saucepan over medium heat. Cover and cook, stirring occasionally, for about 10 minutes, then add the sugar, cornstarch, lemon juice and vanilla bean. Cook until all ingredients are incorporated and the juice has thickened. Set aside to cool.
  4. Fill the cookie crusts with cooled cherry pie filling. Pipe a bit of melted chocolate around the top of each mini pie and top with another cookie crust on top. Attach a piped stem and mint spring if desired. Serve immediately.

Watch the recipe video here:

"Fruit" Pies

That ending though ??Taste for Yourself: taste.md/2lER0Sn

Posted by Tastemade on Wednesday, July 4, 2018

Dessert

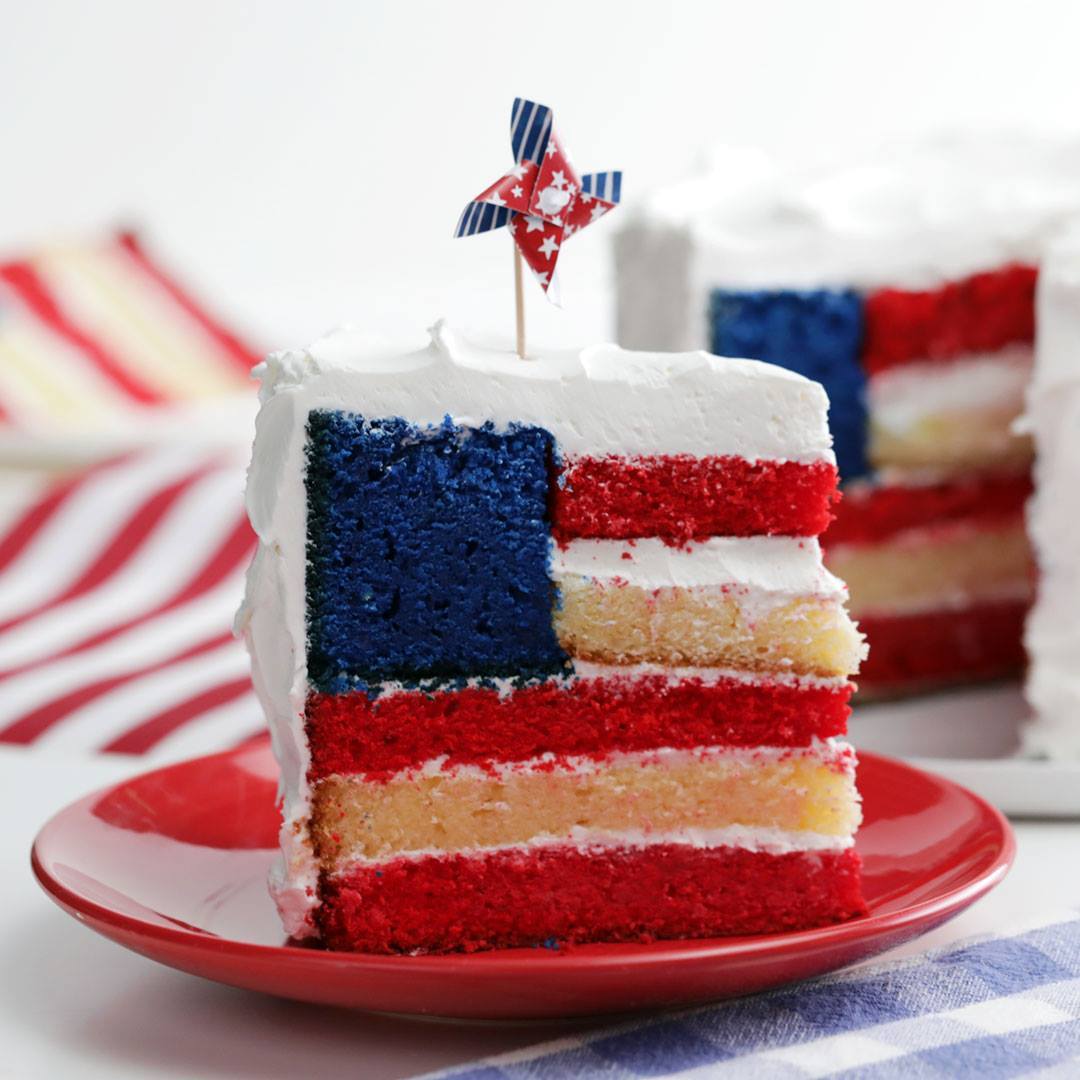
Flag Cake

Flag Cake
Serve up patriotism by the slice.
Author:
Cuisine: American
Recipe type: Dessert
Ingredients
For the blue and white cakes:
  • 5 cups cake flour
  • 1 tablespoon baking powder
  • 1 teaspoon baking soda
  • 2 teaspoon salt
  • 6 large eggs
  • 2 teaspoon vanilla
  • 1½ cups butter, softened at room temperature
  • 3 cups sugar
  • 2 cup buttermilk
  • Blue food coloring
For the red velvet cake:
  • ½ cup butter, softened at room temperature
  • 2 tablespoons cocoa powder
  • 1½ cups sugar
  • 2 large eggs
  • 2 teaspoons vanilla extract
  • 2 tablespoons red food coloring
  • 1 teaspoon salt
  • 2½ cups all-purpose flour, sifted
  • 1 cup buttermilk
  • 1 tablespoon vinegar
For the frosting:
  • 2 cups butter
  • 8 cups powdered sugar, sifted
  • ¼ cup milk
  • 1 teaspoon vanilla extract
Instructions
For the blue and white cakes:
  1. Preheat the oven to 350 degrees and line 3 9-inch pans with baking spray and parchment paper. In a medium bowl, sift together the flour, baking powder, baking soda and salt. Set aside. In a small bowl, whisk together eggs and vanilla. In a large bowl, cream butter and sugar. Add egg mixture. Alternate adding in the flour mixture and the buttermilk until completely combined. Divide batter into two bowls and dye one bowl with the blue food coloring. Pour the blue into one pan and pour the white into the two remaining pans and bake for 25 to 30 minutes until a toothpick comes out clean from the center. Set aside to cool.
For the red velvet cakes:
  1. Preheat the oven to 350 degrees and line a 9” pan and 6” pan with baking spray and parchment paper. In a small bowl, combine cocoa and red food coloring to a paste consistency. Set aside. Combine flour and salt and set aside. In a large bowl of a stand mixer fitted with the paddle attachment, cream butter and sugar. Once smooth, add in eggs one at a time. Add in vanilla and the red paste. Alternate between adding the flour mixture and the buttermilk, making sure to combine thoroughly after each addition. Add vinegar and mix until batter is smooth. Divide batter between the two prepared pans and bake for 25 to 30 minutes until a toothpick comes out clean from the center. Set aside to cool.
For the frosting:
  1. With a hand mixer, beat butter until light and fluffy. Gradually add in powdered sugar one cup at a time, scraping down the bowl as necessary. Finally, add the milk slowly until desired consistency is reached. Add in the vanilla and set aside until the cake is cool.
Assemble the cakes:
  1. Divide the 9” red and white cakes in half lengthwise. Cut a 4” circle out of the 6” red velvet cake. Repeat with the one of the white cake layers and the blue cake. The cake layers should be 2-9” red velvet layers, 1-4” red velvet layer, 1-9” white layer, 1-4” white layer and 1-9” blue layer that is double the thickness of the red and white layers.
  2. Place an 9” red velvet layer on a serving platter. Frost the top of the layer with a thin layer of frosting and place an 9” white cake layer on top, frost that, place a red velvet layer on top of that and frost the top. Place the blue cake layer on top of the cake. Next, frost the 4” white cake layer and lower it into the middle of the blue velvet layer. Lower the 4” red velvet layer onto the top of the white layer in the blue velvet circle and frost the cake with the half of the remaining white frosting. Place in the fridge to chill and set for up to 2 hours. Remove and cover the entire cake with swirls of frosting. Cut and serve to reveal the flag!

Watch the recipe video here:

Flag Cake

You're not celebrating the 4th right unless you have a flag IN your cake.Taste for Yourself: taste.md/2s8nnMB

Posted by Tastemade on Tuesday, July 3, 2018

Dessert

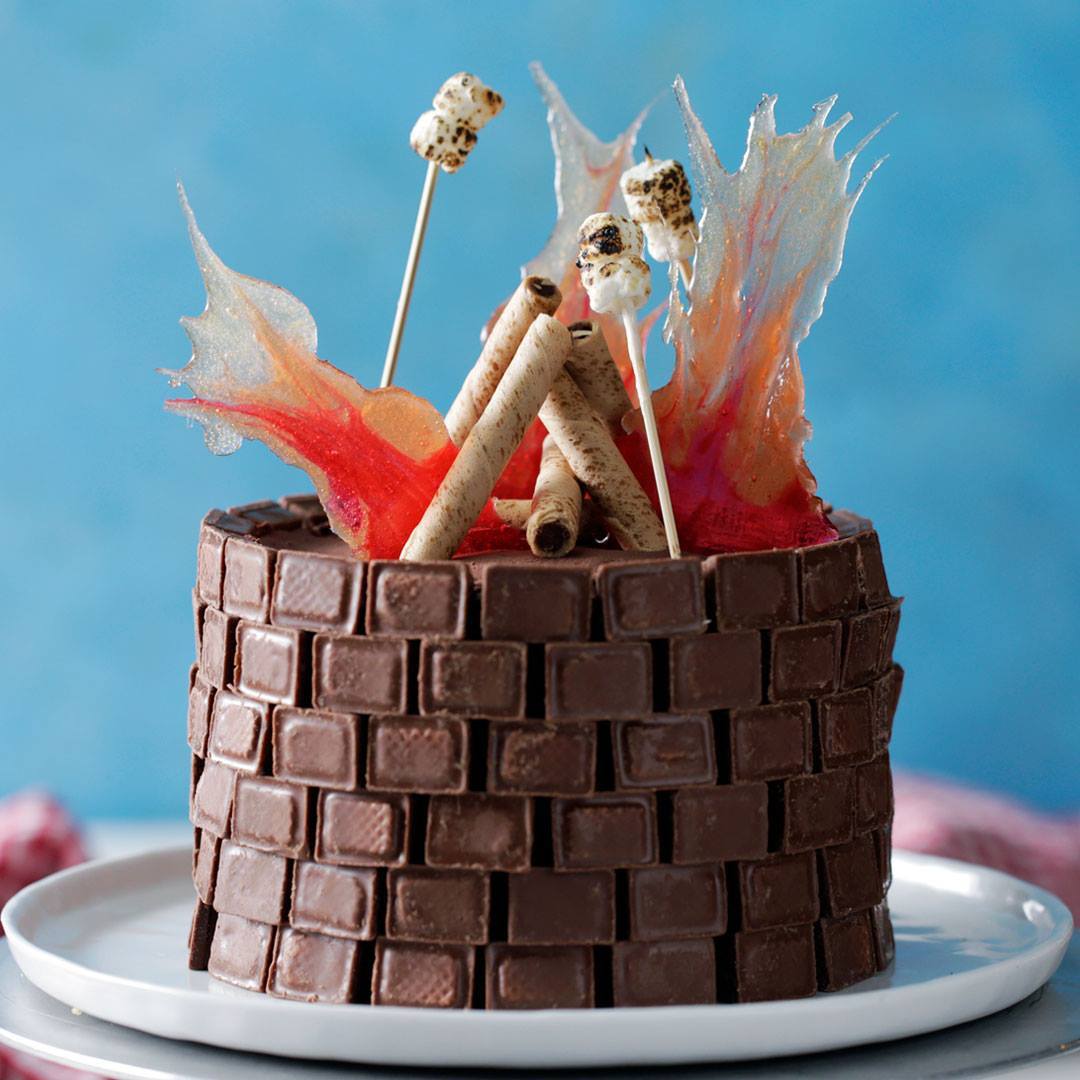
Campfire Cake

Campfire Cake
Don't bother with the bug spray, tonight we're camping in the kitchen!
Author:
Cuisine: American
Recipe type: Dessert
Ingredients
For the chocolate cake:
  • 1½ cups all-purpose flour
  • 1 cup sugar
  • 1 teaspoon baking powder
  • ½ teaspoon baking soda
  • 1 teaspoon salt
  • ⅓ cup cocoa powder
  • ¾ cup butter, softened at room temperature
  • 2 large eggs
  • 2 teaspoons vanilla extract
  • ¾ cup sour cream, room temperature
For the assembly:
  • 30 red, yellow and orange hard candies
  • 3 cups chocolate ganache
  • 1 cup ground graham crackers
  • 1 cup marshmallow fluff
  • 100 mini Kit Kats
  • 7 Pirouettes, for decorating
  • 8 small marshmallows, for decorating
Instructions
Make the chocolate cake:
  1. Preheat the oven to 350 degrees. Line two 6-inch cake pans with baking spray and parchment paper.
  2. In a large bowl, combine the flour, sugar, baking powder, baking soda, salt and cocoa. Using a hand mixer, blend the butter, eggs and vanilla into the dry mix. Fold in the sour cream. Pour the batter into the pans and bake for 25 to 30 minutes until a toothpick comes out clean. Set aside to cool completely.
Make the candy flames:
  1. Preheat the oven to 375 degrees, and line a baking sheet with a silicone baking mat. Place red, yellow and orange candies each in a separate plastic bag. Crush each candy bag into small pieces. Assemble small piles of the candies to resemble flames, and place in the oven for 3 to 4 minutes until the candy melts. Using a toothpick and working quickly, pull the candies upwards to resemble flames. Set aside to cool.
Assemble the cake:
  1. Cut each of the chocolate cakes in half lengthwise, removing the domed tops. Place one layer on a cake stand or platter and pipe a border of chocolate ganache around the outside edge of the cake. Place ½ cup of marshmallow fluff on the inside and sprinkle with ¼ cup graham cracker crumbs. Repeat this until all cake layers are used.
  2. Cover the cake completely with one cup of ganache, and begin to build the fire pit of candy bars. Stack Kit Kats around the sides of the cake with the cut side out. Top the layer of bars with ganache, and repeat until the top of the cake is reached. Fill the center of the pit with Pirouettes and melted candies to create a fire scene. Skewer marshmallows and place around the top of the cake. Cake will keep up to 4 days covered.

Watch the recipe video here:

Campfire Cake

Don't bother with the bug spray, tonight we're camping in the kitchen!Taste for Yourself: taste.md/2lAkXmm

Posted by Tastemade on Monday, July 2, 2018