Showing 59 Result(s)
Main dish

You’ll Love This Low-Carb Cheesy Tex Mex Cauli-Rice for a Deliciously Satisfying One Pan Meal!

You'll Love This Low-Carb Cheesy Tex Mex Cauli-Rice for a Deliciously Satisfying One Pan Meal!
Whether you're cutting carbs in your diet, or are just looking for the next delicious thing to eat, this recipe is for you! This Cheesy Tex Mex Cauli-Rice leaves your taste buds happy and your stomach satisfied, without feeling heavy or over-stuffed! Cauliflower is the latest food hero, as it's low-carb and the perfect substitute for rice and bread. This cheesy dish makes a great one pan dinner that'll leave you with very little mess and maximum flavor!
Author:
Cuisine: American
Recipe type: Main dish
Ingredients
  • 1 tablespoon extra-virgin olive oil
  • ½ medium onion, finely chopped
  • 2 cloves garlic, minced
  • 1 teaspoon dried oregano
  • ½ teaspoon ground cumin
  • Kosher salt
  • Freshly ground black pepper
  • 4 cups cauliflower rice
  • 1 tablespoon tomato paste
  • 2 cups shredded rotisserie chicken
  • 1 cup canned black beans, rinsed and drained
  • 1 cup frozen corn, defrosted
  • 1 cup chopped cherry tomatoes
  • 2 jalapeños, thinly sliced
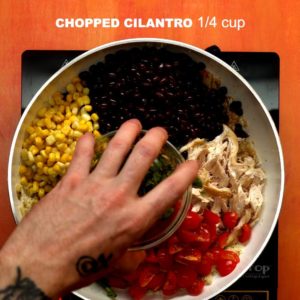
  • ¼ cup. freshly chopped cilantro
  • 1 cup shredded Cheddar
  • 1 cup shredded Monterey Jack
  • Lime wedges, for serving
Instructions
  1. In a large skillet over medium heat, heat oil. Add onion and cook until tender, about 5 minutes. Stir in garlic, oregano, and cumin and cook until fragrant, about 1 minute.
  2. Add more olive oil if the skillet seems dry, then add cauliflower rice. Season with salt and pepper and cook, stirring occasionally, until rice is tender, 3 to 5 minutes.
  3. Add tomato paste and stir until evenly combined and the cauli-rice is slightly red. Add chicken, black beans, corn, tomatoes, jalapeños, cilantro and stir until evenly combined.
  4. Top cauli-rice with both cheeses, then cover with a tight-fitting lid and cook until cheese is melted, about 3 minutes.
  5. Serve immediately with lime wedges.

Watch the recipe video here:

This is a seriously satisfying one pan meal!Recipe: http://sha.red/1ht6T

Posted by Shared Food on Friday, April 26, 2019

Uncategorized

Make Appetizers Fun with These Scrumptious Fajita Potato Bites!

Make Appetizers Fun with These Scrumptious Fajita Potato Bites!
Make appetizers fun with these scrumptious Fajita Potato Bites! These little slices of magic are packed with Mexican-inspired flavors and toppings galore! This dish makes the perfect appetizer, and if you've got a full on party going, you might want to double up on everything since they'll go fast! Serve these up with some margaritas and you've got a party to remember!
Author:
Cuisine: American
Recipe type: Main dish
Ingredients
  • 1 tablespoon olive oil
  • 3 medium Russet potatoes
  • ¼ cup sour cream
  • 1 medium onion, julienned
  • 1 red bell pepper, julienned
  • 1 yellow bell pepper, julienned
  • ¼ cup salsa
  • 3 green onions
  • 1 tablespoon fajita mix
  • salt and pepper to taste
Instructions
  1. Preheat oven to 400 degrees. Spray a baking sheet with cooking spray.
  2. Wash the potatoes and cut the end off. Slice the potatoes into slice that are about ¼ inch in thickness. Season potatoes with salt and pepper. Bake for 20 minutes, turn the slices over and bake for another 30 minutes.
  3. In the meantime, heat the olive oil in a skillet over medium heat. Add onions and cook until it's slightly translucent. Add the peppers and the fajita mix and toss. Cook until onions are golden brown and peppers are cooked through.
  4. To assemble top each potato slice with a teaspoon or so of sour cream, followed by the onion and pepper mixture, salsa, and green onions. Season with salt and pepper.

Watch the recipe video here:

Scrumptious Fajita Potato Bites ?

These little slices of magic are packed with Mexican-inspired flavors and toppings galore ?

Posted by Food Crunch on Sunday, July 16, 2017

Dessert

Reese’s Pieces Espresso Poke Cake Is The Perfect Pick-Me-Up

Reese's Pieces Espresso Poke Cake Is The Perfect Pick-Me-Up
I couldn't wait any longer for Reese's to make a coffee flavor for one of their delicious treats! So I sprang into action with one of the easiest desserts ever......Poke cake!
Author:
Cuisine: American
Recipe type: Dessert
Ingredients
  • 1 box chocolate fudge cake mix, plus ingredients required on the box
  • 3 tablespoons instant espresso powder, divided
  • 2 cups milk
  • 1 cup creamy peanut butter
  • 1 box chocolate fudge instant pudding
  • 2 cups chocolate chips
  • ¾ cup heavy cream
  • 8 ounces Cool Whip
  • 12 Reese's peanut butter cups, quartered
  • Additional instant espresso powder, to garnish
Instructions
  1. Preheat oven to 350 degrees. Prepare a 9x13 baking pan with nonstick spray.
  2. Prepare the cake mix according to box directions, stirring in 2 tablespoons instant espresso powder until well-combined.
  3. Pour batter into prepared baking dish and bake 25-30 minutes, or until a toothpick inserted comes out with a few crumbs.
  4. Remove the cake from the oven, and using the handle of a wooden spoon, poke holes all over the top.
  5. Working quickly, in a medium mixing bowl, whisk together the milk, peanut butter, and instant pudding until just-combined. Pour pudding mixture evenly over the cake, smoothing it into all the holes. Chill the cake for 4 hours.
  6. Microwave 2 cups chocolate chips, heavy cream, and 1 tablespoon of instant espresso powder on 30-second intervals, stirring in between, until smooth and well-combined, about 1 minute total. Pour chocolate mixture evenly over the cake, then chill once more until set.
  7. Top with Cool Whip, Mini Reese's Pieces and lightly dust with instant espresso powder.

Watch the recipe video here:

Reese's Coffee Poke Cake is everything you need in one dessertRecipe: http://sha.red/zDZjv

Posted by Shared Food on Saturday, May 4, 2019

Dessert

Cookie Monster Brownies Are So Cute and Ready for Your Next Themed Party

Cookie Monster Brownies Are So Cute and Ready for Your Next Themed Party
Cookie Monster is all the rage this year, and these Cookie Monster Brownies are the perfect addition for a themed party, Halloween, or really, any old day when you're craving a novelty treat to take care of that sweet tooth.
Author:
Cuisine: American
Recipe type: Dessert
Ingredients
For the brownies:
  • 16 Oreo cookies
  • 1 box brownie mix + ingredients required on the box
  • 8 ounces refrigerated chocolate chip cookie dough
For the frosting:
  • ½ cup salted butter
  • ½ teaspoon vanilla extract
  • 2 tablespoons heavy cream
  • 2 cups powdered sugar
  • 6 Oreo cookies, crushed
  • Blue food coloring
For the chocolate layer:
  • ½ cup semisweet chocolate chips
  • ¼ cup heavy cream
  • 1 tablespoon light corn syrup
  • Mini chocolate chip cookies, for garnish
  • Mini Oreo cookies, for garnish
  • Candy eyeballs
Instructions
  1. Preheat oven to 350 degrees. Prepare an 8x8 baking dish with parchment paper and nonstick spray.
  2. To make the brownie layer, spread Oreo cookies in a single layer in the bottom of the prepared baking dish.
  3. Prepare brownie mix according to box instructions in a large mixing bowl, then pour the batter evenly over the Oreo cookies.
  4. Break the cookie dough off into pieces and press randomly into the brownie mix.
  5. Bake about 30 minutes, or until a toothpick inserted comes out with chocolatey crumbs. Cool completely on a wire rack.
  6. For the frosting, beat together the butter, cream, and vanilla extract until smooth. Add the powdered sugar in slowly, then beat another couple of minutes until well-combined. Fold in the crushed Oreos, then add the blue food coloring until frosting reaches your desired shade of blue. Spread the frosting evenly on top of the cooled brownie layer.
  7. To make the chocolate layer, microwave together the chocolate chips and heavy cream on 20-second intervals, stirring in between, until smooth.
  8. Add in the light corn syrup and allow to cool and thicken.
  9. Drizzle the chocolate sauce over the frosting layer, then press mini chocolate chip and Oreo cookies, then place 2 candy eyeballs in random spots on top.
  10. Slice into bars and serve. Enjoy!

Main dish

Sheet Pan Teriyaki Chicken Is The Easiest Weeknight Meal

Sheet Pan Teriyaki Chicken Is The Easiest Weeknight Meal
This Sheet Pan Teriyaki Chicken is going to be your new favorite weeknight meal recipe. Not only is it quick and easy to whip up, but the tender, juicy chicken and fresh crunchy veggies make it absolutely irresistible! The last thing I want to do after coming home from work is spend hours making dinner. Thankfully, this recipe is so easy you can practically make it in your sleep (although we don't recommend it!). Just place everything on a baking sheet and pop it in the oven - can cooking get easier than this? I don't think so! Scroll down to see how to make this mouth watering Teriyaki Chicken.
Author:
Cuisine: American
Recipe type: Main dish
Ingredients
  • ⅓ cup soy sauce (preferably low sodium)
  • 4-5 tbsp honey
  • 4 tbsp rice wine vinegar
  • 2 tsp sesame oil
  • 3 garlic cloves, minced
  • ¾ tsp ground ginger
  • ½ tbsp cornstarch
  • 4 tbsp water
  • salt and pepper to taste
  • 3 boneless skinless chicken breasts
  • 3 cups broccoli florets
  • 1 cup carrots, sliced
  • green onions (optional)
  • sesame seeds (optional)
Instructions
  1. Whisk together the soy sauce, honey, vinegar, sesame oil, garlic, ground ginger, cornstarch and and water in a medium saucepan over medium heat.
  2. Bring the mixture to a simmer and let thicken. Make sure to stir so the sauce doesn't burn. Once thickened, remove from heat and set aside.
  3. Preheat the oven to 400 degrees and line a baking sheet with parchment paper or foil. Spray with cooking oil so the ingredients don't stick to the pan.
  4. Add the chicken to the baking sheet and season with salt and pepper. Drizzle 1-2 spoonfuls of glaze on each piece and place in preheated oven for 10 minutes. After 10 minutes remove the chicken from the oven and drizzle more glaze on each breast.
  5. Arrange the broccoli and carrots around the chicken. Season veggies with salt and pepper and drizzle more of the glaze over top.
  6. Place pan in oven for 15-20 minutes. Remove from oven and serve with remaining sauce.
  7. Enjoy the chicken and veggies as is, or you can serve them over rice or quinoa. Garnish with sliced green onions and sesame seeds if desired. Enjoy!

Watch the recipe video here:

This meal is so easy you can practically make it in your sleep!Recipe: http://sha.red/l82Ln

Posted by Shared Food on Thursday, April 18, 2019

Dessert

Vinegar Pie Sounds Weird but Wow, It’s Really Good

Vinegar Pie Sounds Weird but Wow, It's Really Good
Vinegar...pie?! I know, I know, it sounds like the wackiest "dessert" idea ever, but in reality it's a delicious vintage treat! Supposedly even Laura Ingall's mother made this in Little House in the Big Woods. This pie is very similar to a sugar pie, with a creamy custard filling baked into a classic pie crust. It's so easy to make this, so why not give this unique recipe a try?
Author:
Cuisine: American
Recipe type: Dessert
Ingredients
  • 2 refrigerated pie crusts
  • 3 cups water
  • 2 eggs
  • 1 cup sugar
  • 3 heaping tablespoons flour
  • Pinch of salt
  • 3 tablespoons cold vinegar
  • 1 teaspoon maple or vanilla extract
  • ¼ teaspoon cinnamon
Instructions
  1. Prepare, bake, and fully cool pie crusts in two pie dishes according to box instructions.
  2. In a medium pot, bring the water to a boil. While you wait, in a mixing bowl, whisk together the eggs, sugar, flour, salt, and vinegar until well-combined.
  3. Once the water has come to a boil, pour in the egg-vinegar mixture, continuing to boil, whisking constantly, until everything starts to thicken up (about 5-10 minutes or so). Mixture is ready when it thickly coats the back of a spoon. Remove from heat when thickened.
  4. Stir in the cinnamon and maple/vanilla extract, then pour the mixture through a sieve, then into each pie crust (this will ensure any lumps are removed).
  5. Chill pies in the refrigerator at least 4 hours up to overnight, or until set. Enjoy!

Watch the recipe video here:

Would you try this delicious vintage vinegar pie?Recipe: http://sha.red/60PIq

Posted by Shared Food on Tuesday, May 7, 2019

Main dish

Cheesy Breakfast Egg Bowl Leaves No Dishes Behind

Cheesy Breakfast Egg Bowl Leaves No Dishes Behind
Carbs and I, we're good friends. Dishes and I? Not so much! This Bread Bowl Breakfast makes eating and cleanup easy, and is literally what it sounds like - a breakfast in a bread bowl! Fill each bread bowl with an egg, some herbs and cheese, and you've got a breakfast that you'll want everyday!
Author:
Cuisine: American
Recipe type: Main dish
Ingredients
  • Crusty dinner rolls, as many as you choose
  • Large eggs, one for each roll
  • Mixed herbs, chopped, such as parsley, chives or tarragon, about 1 teaspoon for each roll
  • Heavy cream, 1 teaspoon for each roll
  • Salt and pepper
  • Parmesan cheese, grated, as much as you want to sprinkle on each roll
Instructions
  1. Preheat oven to 350 degrees.
  2. Slice off top of each dinner roll and gently remove some bread until there is a hole large enough to accommodate an egg.
  3. Arrange rolls on a baking sheet. Reserve tops.
  4. Crack an egg into each roll. Top each egg with some herbs and a bit of cream. Season with salt and pepper. Sprinkle with Parmesan.
  5. Bake until eggs are set and bread is toasted, about 20 to 25 minutes. After eggs have cooked for 20 minutes, place bread tops on baking sheet and bake until golden brown. Let sit 5 minutes.
  6. Place tops on rolls and serve warm.

Watch the recipe video here:

This Bread Bowl Breakfast makes eating and cleanup easyRecipe: http://sha.red/pXM2b

Posted by Shared Food on Sunday, April 28, 2019

Main dish

Easy Grilled Pizza on the BBQ Is Turning Your Classic Pizza up a Notch

Easy Grilled Pizza on the BBQ Is Turning Your Classic Pizza up a Notch
I could seriously eat pizza for breakfast, lunch, or dinner. When I discovered the art of Grilled Pizza, I couldn't believe it! Pizza on the BBQ...how could it be true?! Well, thankfully, it is true, and you can load up your dough with any toppings you like! We made a classic pepperoni and cheese pizza, but the sky's the limit for a smoky pizza like you've never had before! Try this easy trick out once, and you'll be grilling pizza the rest of the summer!
Author:
Cuisine: American
Recipe type: Main dish
Ingredients
  • Premade or homemade pizza dough
  • 1 large tomato, cut into ⅓-inch thick slices
  • 5-7 teaspoons olive oil, divided
  • 2 cloves garlic, minced
  • ½ teaspoon kosher salt
  • ¼ teaspoon red pepper flakes
  • ½-ounce grated Parmesan
  • 1½ ounces mozzarella, shredded
  • 4-6 large basil leaves, shredded
  • Pepperoni
Instructions
  1. Preheat your grill to medium-high and make sure the grill grates are clean and free of debris.
  2. In a bowl, toss the tomato with 1 tablespoon of olive oil, the garlic, salt, and red pepper flakes, then set aside.
  3. Lightly flour your work surface and flatten out your pizza dough. Use a rolling pin to roll it into a circle as best as possible, rotating and stretching as you go. Transfer the dough to a lightly floured pizza peel and stretch to reshape as needed.
  4. Oil the grill to prevent sticking, and decrease the heat to medium.
  5. Brush the rolled out dough with 1-2 teaspoons of olive oil, and flip onto one side of your hot grill, leaving some room for the tomatoes on the grate.
  6. Place the prepared tomatoes carefully on the grill, close the lid and cook until the bottom of the pizza crust is golden brown and the tomatoes are starting to soften, about 1-2 minutes.
  7. Quickly brush the raw side of the dough with 1-2 teaspoons of olive oil, then immediately flip over using the pizza peel.
  8. Top the flipped pizza dough with the grilled tomatoes, smashing and spreading the tomatoes to create a rustic sauce on the pizza crust. Sprinkle with Parmesan, mozzarella, and basil. Close the lid and continue cooking until the bottom of the crust is golden brown, and the cheese has melted, about another 1-2 minutes.
  9. Using the pizza peel, remove the pizza and let rest for 3 minutes before slicing.
  10. oes are softened, about 1 to 2 minutes. Brush the raw side of the dough with 1 to 2 teaspoons of olive oil, then immediately flip using the peel. Top with the grilled tomatoes, smashing and spreading the tomatoes to create a sauce. Sprinkle with the Parmesan, mozzarella and basil. Close the lid and cook until the bottom of crust is golden brown and the cheese has melted, another 1 to 2 minutes. Using the peel, remove the pizza to a cooling rack and let rest for 3 minutes before slicing. Season with additional salt and pepper before serving, if desired.

Watch the recipe video here:

Grilled Pizza

Take Your Classic Pizza up a Notch With This Deliciously Easy Grilled Pizza! Heres the recipe: https://www.upliftingmedia.com/take-classic-pizza-notch-deliciously-easy-grilled-pizza-bbq/

Posted by Uplifting Food on Friday, November 10, 2017

Main dish

Give Yourself A Treat, Try This Malibu Sunset Cocktail

Give Yourself A Treat, Try This Malibu Sunset Cocktail
An easy way to impress people with your bar-tending skills is to make a gorgeous layered drink like this Malibu Sunset Cocktail. The blending of the coconut, pineapple and grenadine make the perfect drink that will make you feel like you are sitting on a beach. Try it out tonight and get that vacation feel without having to spend all the money.
Author:
Cuisine: American
Recipe type: Main dish
Ingredients
  • 1 ounce Malibu rum with coconut liqueur
  • 2 ounces pineapple juice
  • 2 ounces grenadine
  • Maraschino cherries and orange slice
Instructions
  1. Add your grenadine into a glass.
  2. Add ice to fill glass.
  3. Add the rum.
  4. Pour in the pineapple juice.
  5. Garnish with maraschino cherries and an orange slice and enjoy!

Watch the recipe video here:

Be summertime ready with this Malibu Sunset Cocktail!Details: http://sha.red/XzcF0

Posted by Shared Food on Sunday, May 12, 2019

Main dish

Cucumber Lovers Will Go Crazy For These Refreshing Cucumber Subs

Cucumber Lovers Will Go Crazy For These Refreshing Cucumber Subs
Whoever said sandwiches needed to be made with bread clearly never tried these cucumber subs! They're refreshing, simple to make and easy to customize with whatever toppings you like. You can eat these subs as a snack, for lunch or cut them into bite sized pieces for a delicious and easy-to-make appetizer. Try making them with turkey, tuna, chicken or bacon to see what flavor you like best! Also, these are a great thing to make if you're eating a low carb diet. Have you ever tried making a bread-less sandwich? What ingredients did you use? Get the full list of ingredients and directions for these cucumber subs below.
Author:
Cuisine: American
Recipe type: Main dish
Ingredients
  • 1 large cucumber
  • Ham deli meat slices
  • Cream cheese
Instructions
  1. Cut the cucumber in half length-wise.
  2. Scoop out the seeds to make room for your sandwich fillers.
  3. Add the ham (or your choice of meat) and cream cheese to the inside of the cucumber.
  4. Place the two halves together and enjoy!

Watch the recipe video here: