Main dish

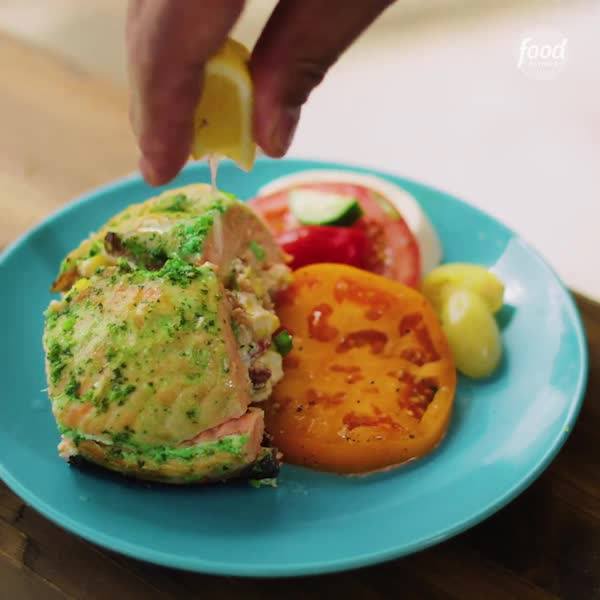
Grilled Side of Salmon Stuffed with Creamy Corn and Bacon
Grilled Side of Salmon Stuffed with Creamy Corn and Bacon
Celebrate the summer season with this grilled side of salmon, perfect for a crowd. Stuffed with creamy sweet corn and slathered with a bright green herb butter, it is as beautiful as it is delicious.
Author:
Cuisine: American
Recipe type: Main dish
Ingredients
  • 8 ounces bacon, cut into ½-inch pieces
  • 1 large shallot, finely chopped
  • 3 cups corn kernels (from about 3 ears of corn)
  • 8 ounces cream cheese, cubed, at room temperature
  • Kosher salt
  • ½ cup firmly packed fresh parsley, cilantro or basil leaves (or a mixture)
  • Zest of 1 lemon, plus lemon wedges, for serving
  • 1 stick (8 tablespoons) unsalted butter, at room temperature
  • One 3- to 4-pound side of salmon, skin on, pin bones removed
  • Nonstick cooking spray, for the foil
Instructions
Special equipment: butcher's twine; heavy-duty aluminum foil; heatproof gloves
  1. Add the bacon to a medium skillet and cook over medium-high heat until crispy, about 10 minutes. Transfer the bacon to a plate with a slotted spoon; reserve.
  2. Discard all but 1 tablespoon of fat from the skillet and reduce the heat to medium. Add half the shallots and cook, stirring often, until translucent and softened, about 5 minutes. Add the corn and continue to cook, stirring often, until heated through and translucent, about 5 minutes. Remove from the heat and stir in the cream cheese and 1 teaspoon salt until combined. Let cool to room temperature, about 45 minutes.
  3. Meanwhile, add the herbs, lemon zest and remaining shallots to a food processor and pulse until finely chopped. Add the butter and 2 teaspoons salt and pulse until well combined; set aside.
  4. Prepare a grill for medium indirect heat: For gas grills (with 3 or more burners), turn all the burners to medium-high heat; after about 15 minutes, turn off one of the middle burners and turn the remaining burners down to medium. For charcoal grills, bank one chimney starter-full of lit and ashed-over charcoal briquettes to one side of the grill. Set up a drip pan on the other side to avoid flare-ups. (Be sure to consult the grill manufacturer's guide for best results.)
  5. Set the salmon on a cutting board. Use a knife to score the salmon down the middle lengthwise, halfway through its thickness. Working from the center line out toward the edges, cut thin flaps from the score to the edge, like a gatefold, then open them up. Spread half the herb butter on the salmon and spoon the corn mixture down the middle. Sprinkle the bacon on top, then fold the sides of the salmon up to cover the filling. Tie the salmon together in 6 places with butcher's twine. Spread the remaining herb butter on top and sprinkle generously with salt.
  6. Stack 3 sheets of heavy-duty aluminum foil that are 6 inches longer than the salmon and spray the top layer generously with nonstick cooking spray. Transfer the salmon to the middle of the foil and crimp the sides so they form a rim.
  7. Transfer the salmon on the foil to the indirect-heat side of the grill and cook, covered, until the salmon is cooked through and the stuffing is hot, about 25 minutes (depending on your grill). Move the salmon to the direct-heat side for 5 minutes to crisp the skin. Using heatproof gloves, carefully transfer the foil with the salmon to a platter for serving. Serve with lemon wedges.

Watch the recipe video here:

Recipe of the Day: Grilled Side of Salmon Stuffed with Creamy Corn and Bacon??Save the recipe: https://foodtv.com/2WPUWne!

Posted by Food Network on Tuesday, July 2, 2019
Main dish

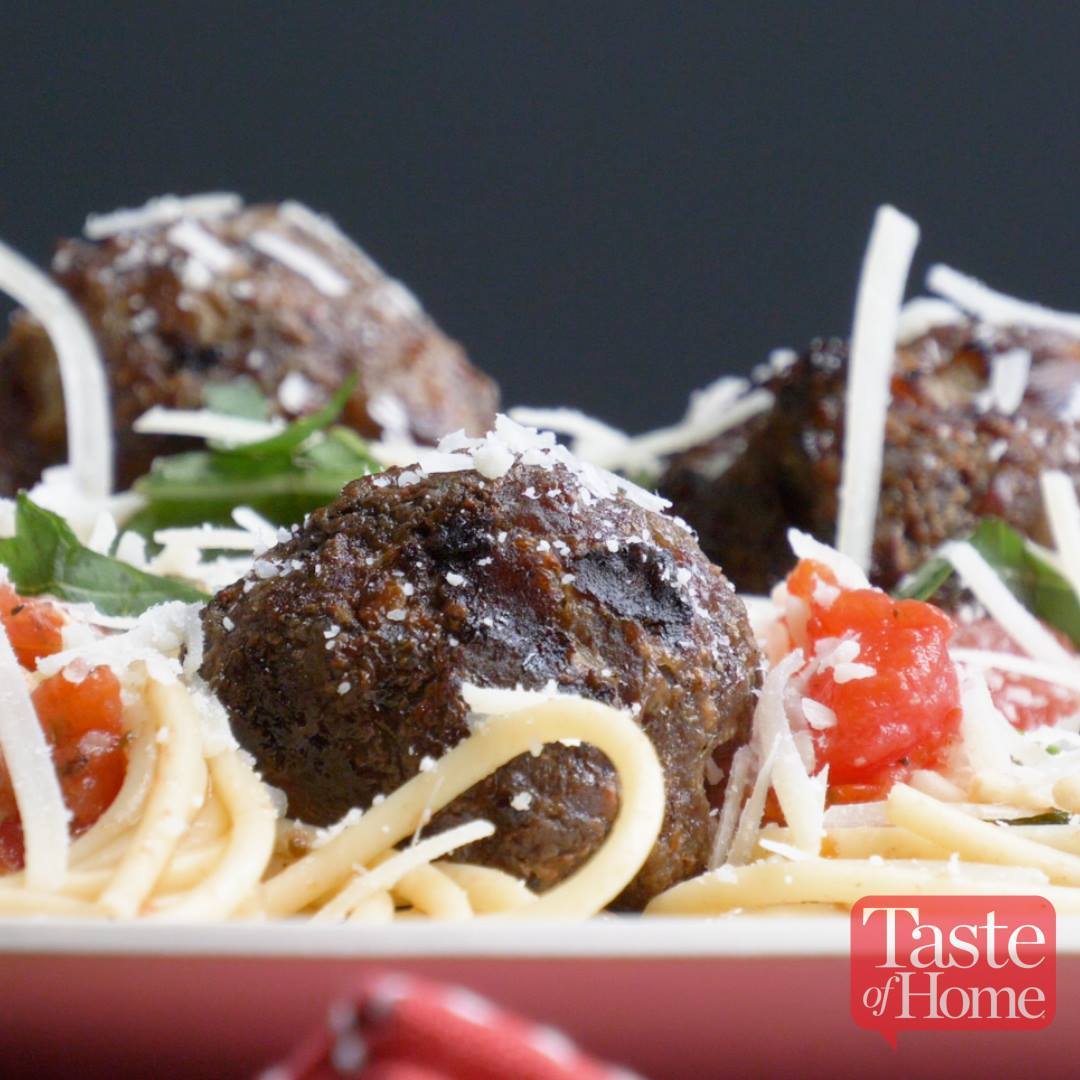
Summertime Spaghetti with Grilled Meatballs

Summertime Spaghetti with Grilled Meatballs
After Hurricane Sandy, we were without power for two weeks. I learned what you can make on a grill, such as these smoky meatballs and tomato sauce.
Author:
Cuisine: American
Recipe type: Main dish
Ingredients
  • 12 ounces uncooked spaghetti
MEATBALLS:
  • ½ cup finely chopped onion
  • ¼ cup seasoned bread crumbs
  • 1 large egg
  • 2 tablespoons grated Parmesan cheese
  • 1 tablespoon 2% milk
  • ½ teaspoon garlic powder
  • ½ teaspoon onion powder
  • 1 pound ground beef
TOMATO SAUCE:
  • 2 pounds (4 to 5) large tomatoes, chopped
  • 3 garlic cloves, minced
  • 1 tablespoon olive oil
  • 1 teaspoon sugar
  • ¾ teaspoon salt
  • ½ teaspoon dried oregano
  • ½ teaspoon pepper
  • 2 tablespoons minced fresh basil
TOPPING:
  • Shredded Parmesan cheese
Instructions
  1. Cook spaghetti according to package directions; drain.
  2. Meanwhile, combine onion, bread crumbs, egg, Parmesan, milk and seasonings. Add beef; mix lightly. With wet hands, shape into 1-1/2-in. balls. Place meatballs on greased grill rack; grill, covered, over medium heat until cooked through, about 10 minutes.
  3. For sauce, combine tomatoes, garlic, oil, sugar, salt, oregano and pepper in an 11x7x2-in. disposable foil pan. Grill over medium heat until sauce begins to simmer, about 10 minutes. Stir in basil.
  4. Serve meatballs and sauce with spaghetti; top with shredded Parmesan.

Watch the recipe video here:

Yum! Get the recipe for Summertime Spaghetti with Grilled Meatballs here–> https://trib.al/ttW3Wne

Posted by Taste of Home on Tuesday, July 2, 2019

Breakfast

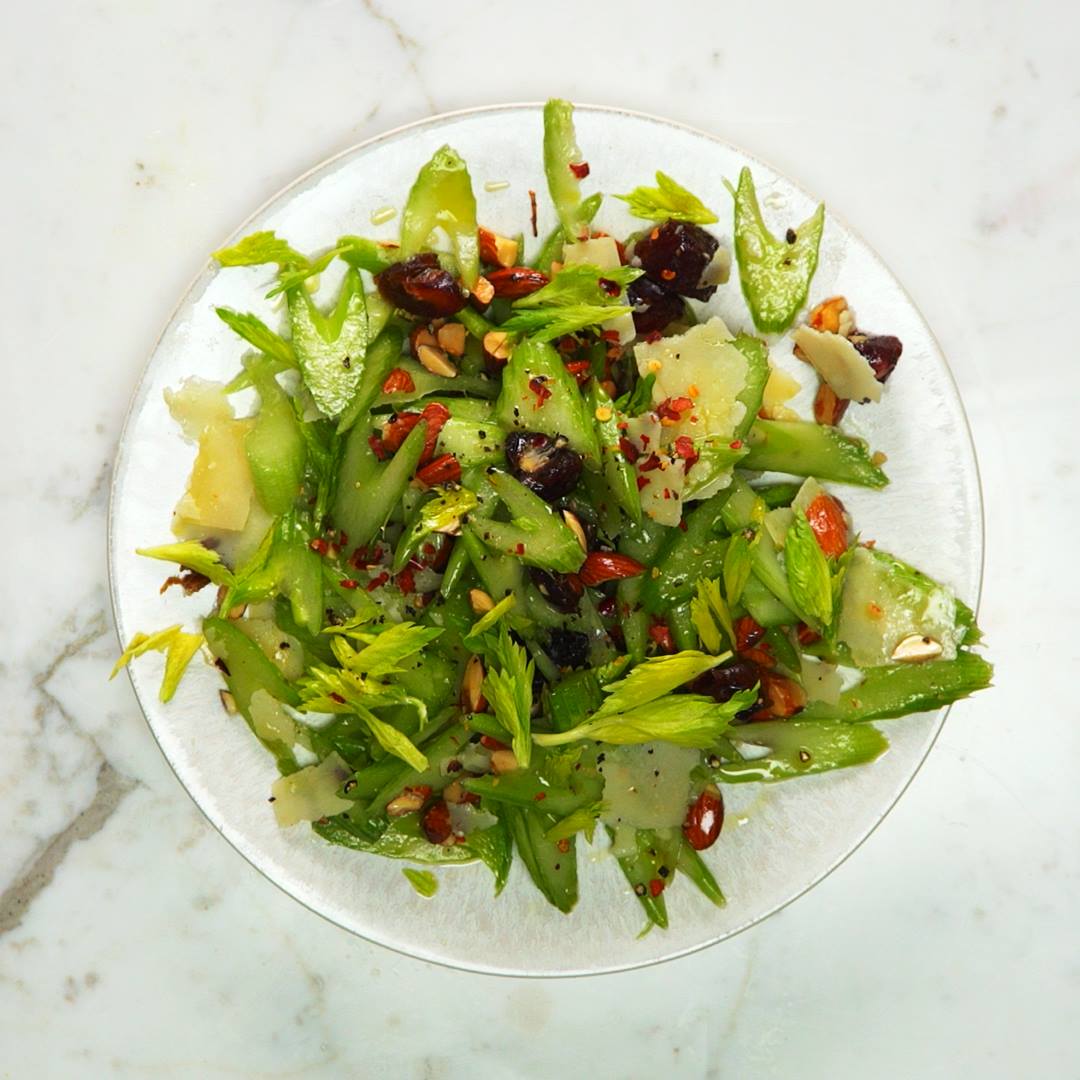
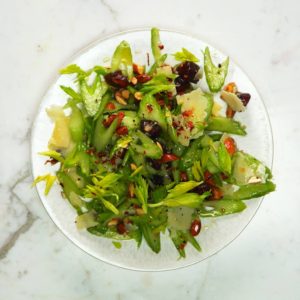
Celery Salad with Dates, Almonds, and Parmesan

Celery Salad with Dates, Almonds, and Parmesan
Sweet from dates, sour from lemon, bitter from celery, and salty from Parmesan, this humble salad manages to get all taste buds firing at once.
Author:
Cuisine: American
Recipe type: Breakfast
Ingredients
  • ½ cup raw almonds
  • 8 celery stalks, thinly sliced on a diagonal, leaves separated
  • 6 dates, pitted, coarsely chopped
  • 3 tablespoons fresh lemon juice
  • Kosher salt and freshly ground black pepper
  • 2 ounces Parmesan, shaved
  • ¼ cup extra-virgin olive oil
  • Crushed red pepper flakes
Instructions
  1. Preheat oven to 350°. Spread out almonds on a small rimmed baking sheet; toast, stirring occasionally, until golden brown, 8–10 minutes. Let cool; coarsely chop.
  2. Toss almonds, celery, celery leaves, dates, and lemon juice in a medium bowl; season with salt and pepper. Add Parmesan and oil and toss gently; season with red pepper flakes.

Watch the recipe video here:

Sweet, sour, bitter, and salty—this salad just gets it.GET THE RECIPE: http://bonap.it/Ni7C4Mp

Posted by Bon Appétit Magazine on Tuesday, July 2, 2019
Dessert

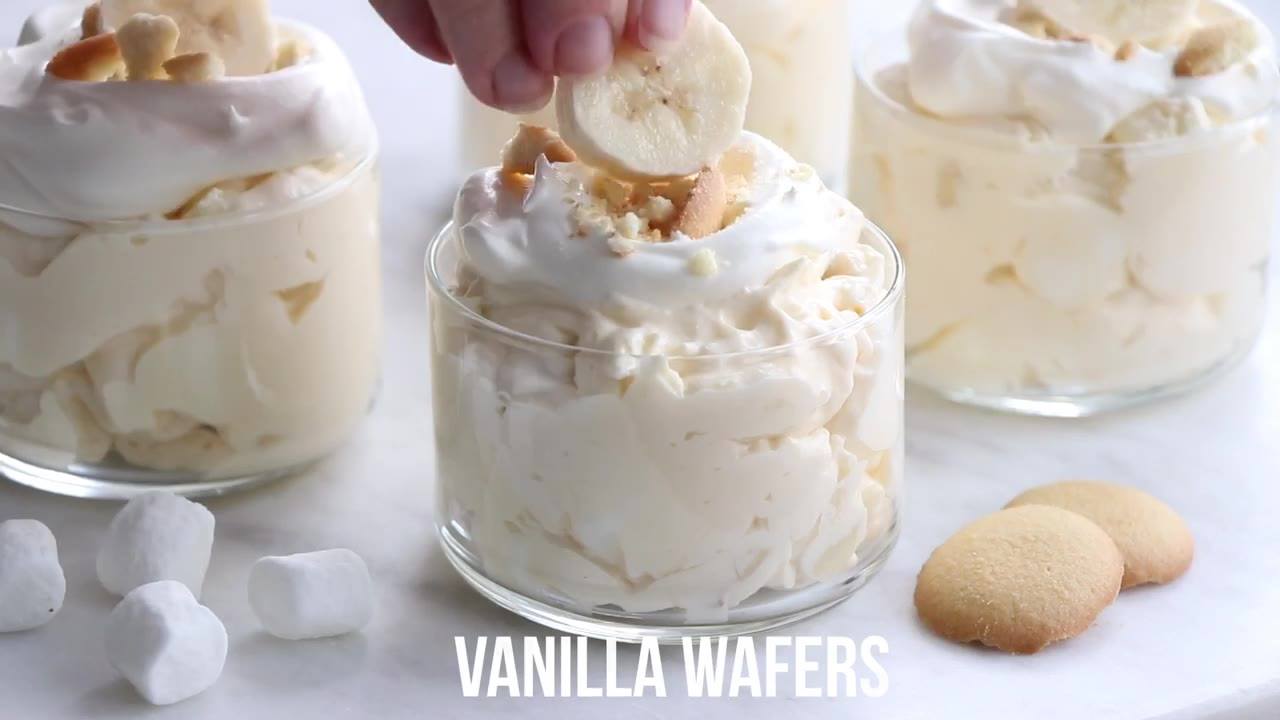
BANANA CREAM PIE FLUFF

BANANA CREAM PIE FLUFF
Banana Cream Pie Fluff is a new twist on a Southern classic. It’s wonderful for potlucks and picnics, and way easier than pie!
Author:
Cuisine: American
Recipe type: Dessert
Ingredients
  • 2 8-ounce packages cream cheese, room temperature
  • 1 cup powdered sugar
  • 2 teaspoons vanilla extract
  • 2 3.4-ounce packages Banana Cream Pudding Mix
  • 1½ cups 2% or whole milk
  • 1 12-ounce container frozen whipped topping, thawed
  • 1½ cups Campfire® Mini White Marshmallows
  • 3 large bananas, peeled and sliced
  • 30 vanilla wafers, coarsely crushed
  • additional whipped topping, vanilla wafers and sliced bananas for garnish, optional
Instructions
  1. In the bowl of a stand mixer fitted with the paddle attachment, or in a large bowl with an electric mixer, beat the cream cheese for 3 minutes. Scrape down the sides of the bowl and add in powdered sugar and vanilla and beat an additional 3 minutes.
  2. In a large bowl, whisk together the dry pudding mixes and milk. Allow pudding to set up for a few minutes.
  3. Add the pudding to the cream cheese mixture and beat until fully incorporated. Be sure to scrape down the sides of the bowl to incorporate all of the cream cheese.
  4. Fold in whipped topping until completely incorporated. Fold in the marshmallows.
  5. Cover and refrigerate for at least 2 hours.
  6. Just before serving, fold in the sliced bananas and top with crushed vanilla wafers.

Watch the recipe video here:

Banana Cream Pie Fluff ~ It’s wonderful for potlucks and picnics, and way easier than pie!RECIPE HERE –> https://www.mybakingaddiction.com/banana-cream-pie-fluff/

Posted by My Baking Addiction on Sunday, June 30, 2019

Main dish

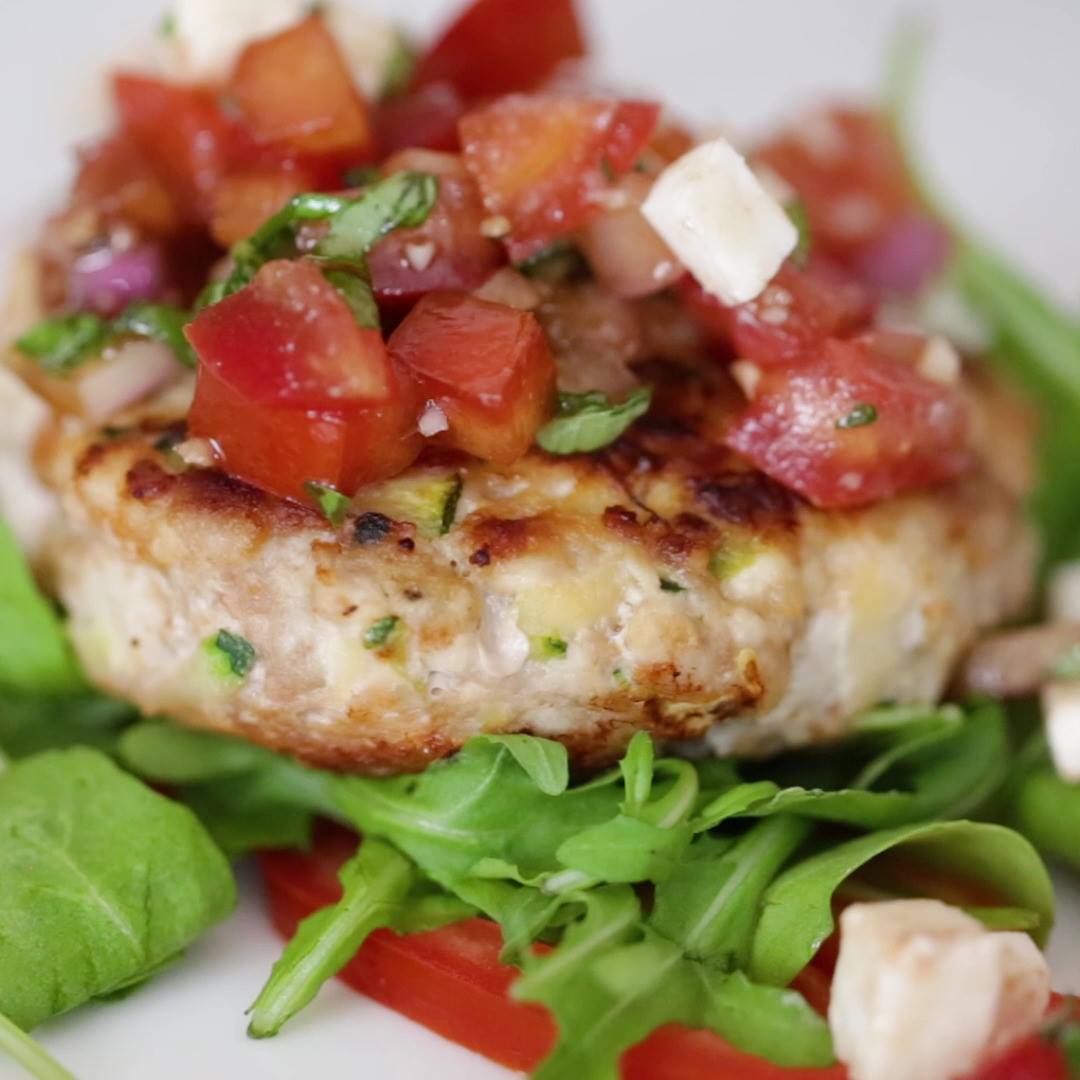
NAKED TURKEY BRUSCHETTA BURGERS

NAKED TURKEY BRUSCHETTA BURGERS
Naked Turkey Bruschetta Burger are healthy, delicious, turkey burgers made juicy thanks to added zucchini and topped with a summer garden tomato bruschetta set over a bed of baby arugula – no bun required!
Author:
Cuisine: American
Recipe type: Main dish
Ingredients
  • ¼ cup chopped red onion
  • 1 tbsp extra virgin olive oil
  • 1 tbsp balsamic vinegar
  • kosher salt and fresh cracked pepper to taste
  • 3 medium vine ripe tomatoes
  • 2 small cloves garlic, minced
  • 2 tbsp fresh basil leaves, chopped
  • 3 oz part skim mozzarella, diced
FOR THE TURKEY ZUCCHINI BURGERS:
  • 1.25 lbs 93% lean ground turkey
  • 1 small zucchini, grated (1 cup, or 5 oz)
  • ¼ cup seasoned whole wheat breadcrumbs, or GF crumbs
  • 1 clove garlic, grated
  • 1 tbsp red onion, grated
  • salt and fresh pepper
  • oil spray
FOR SERVING:
  • 2 medium tomatoes, sliced into 10 thin slices
  • 4 loose cups baby arugula
Instructions
  1. Combine the red onion, olive oil, balsamic, salt and pepper in a large bowl.
  2. Set aside a few minutes while you chop the tomatoes, then place in the bowl.
  3. Add the garlic, basil and additional salt and pepper, to taste and mix well and set aside.
  4. Toss in the cheese when ready to serve.
  5. Squeeze the excess moisture from the zucchini in a paper towel.
  6. In a large bowl, combine the ground turkey, shredded zucchini, breadcrumbs, garlic, onion, salt and pepper.
  7. Form into 5 equal sized patties about 5 oz each, forming them as flat as possible.
  8. Heat a large skillet on medium-high heat.
  9. When hot, lightly spray with oil.
  10. Add the burgers to the pan and reduce the heat to medium-low.
  11. Cook until browned, about 4 minutes, then flip and cook another 4 minutes, careful not to burn.
  12. To serve, arrange 3 slices of tomatoes on each dish, then place 1 cup arugula on top in the center, then top with the burger and finish with the bruschetta (don't forget to add the cheese), serve right away.

Watch the recipe video here:

Naked Turkey Bruschetta Burger, the PERFECT Summer Meal! 6 Freestyle Points • 288 Calories https://www.skinnytaste.com/naked-turkey-bruschetta-burger/

Posted by Skinnytaste on Sunday, June 30, 2019

Dessert

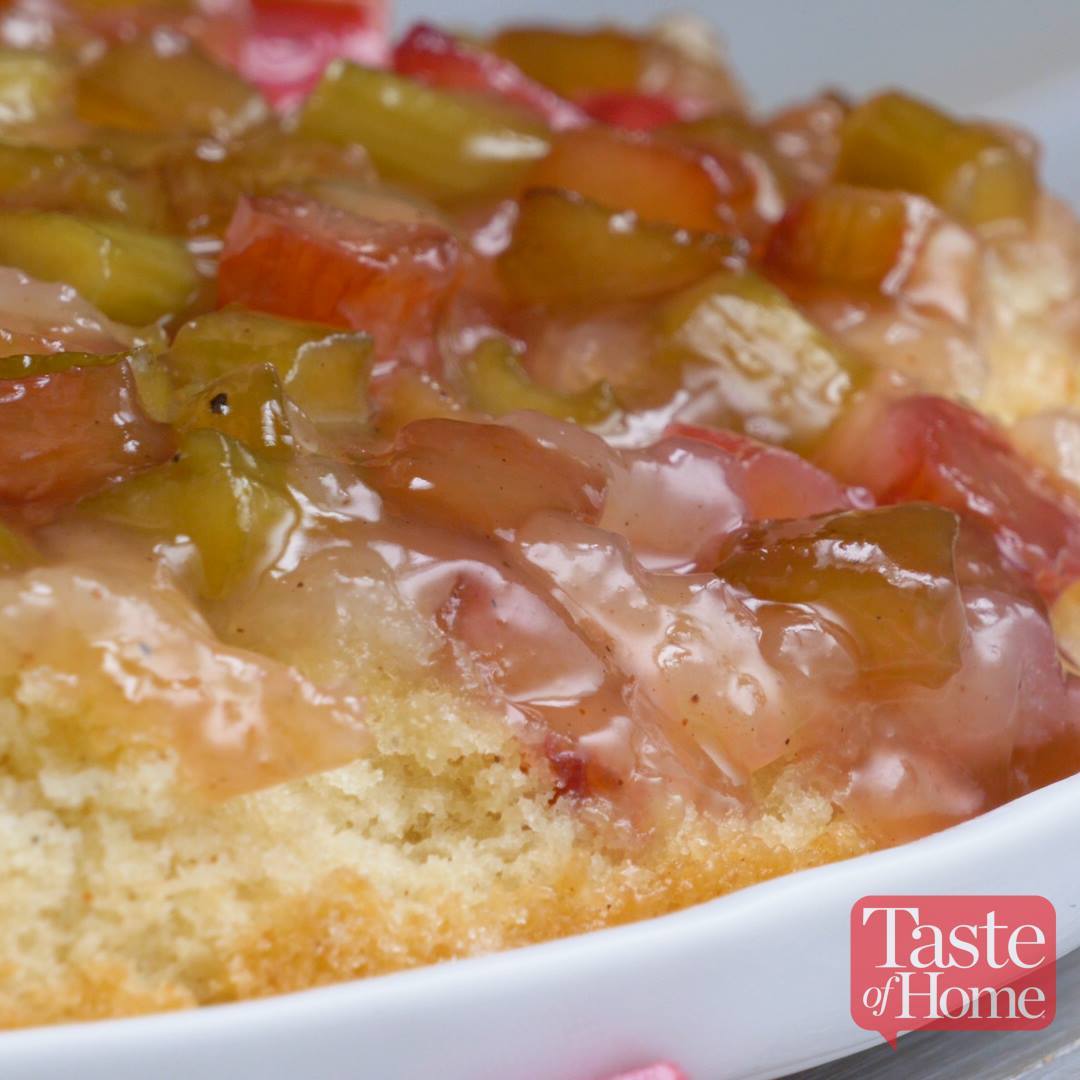
Rhubarb Upside-Down Cake

Rhubarb Upside-Down Cake
I’ve baked this cake every spring for many years, and my family loves it! At potlucks it gets eaten up quickly, even by folks who don’t normally go for rhubarb. Use your own fresh rhubarb, hit up a farmers market or find a neighbor who will trade stalks for the recipe!
Author:
Cuisine: American
Recipe type: Dessert
Ingredients
  • 3 cups sliced fresh or frozen rhubarb
  • 1 cup sugar
  • 2 tablespoons all-purpose flour
  • ¼ teaspoon ground nutmeg
  • ¼ cup butter, melted
  • BATTER
  • ¼ cup butter, melted
  • ¾ cup sugar
  • 1 large egg, room temperature
  • 1-1/2 cups all-purpose flour
  • 2 teaspoons baking powder
  • ½ teaspoon ground nutmeg
  • ¼ teaspoon salt
  • ⅔ cup whole milk
  • Sweetened whipped cream, optional
Instructions
  1. Place rhubarb in a greased 10-in. heavy ovenproof skillet. Combine sugar, flour and nutmeg; sprinkle over rhubarb. Drizzle with butter; set aside. For batter, in a large bowl, beat the butter and sugar until blended. Beat in the egg. Combine the flour, baking powder, nutmeg and salt. Gradually add to egg mixture alternately with milk, beating well after each addition.
  2. Spread over rhubarb mixture. Bake at 350° for 35 minutes or until a toothpick inserted in the center comes out clean. Loosen edges immediately and invert onto a serving dish. Serve warm. Serve with whipped cream if desired.

Watch the recipe video here:

This dessert will convert rhubarb haters into rhubarb lovers!Get the recipe for Rhubarb Upside-Down Cake here–> https://trib.al/153P6YQ

Posted by Taste of Home on Sunday, June 30, 2019

Cake Dessert

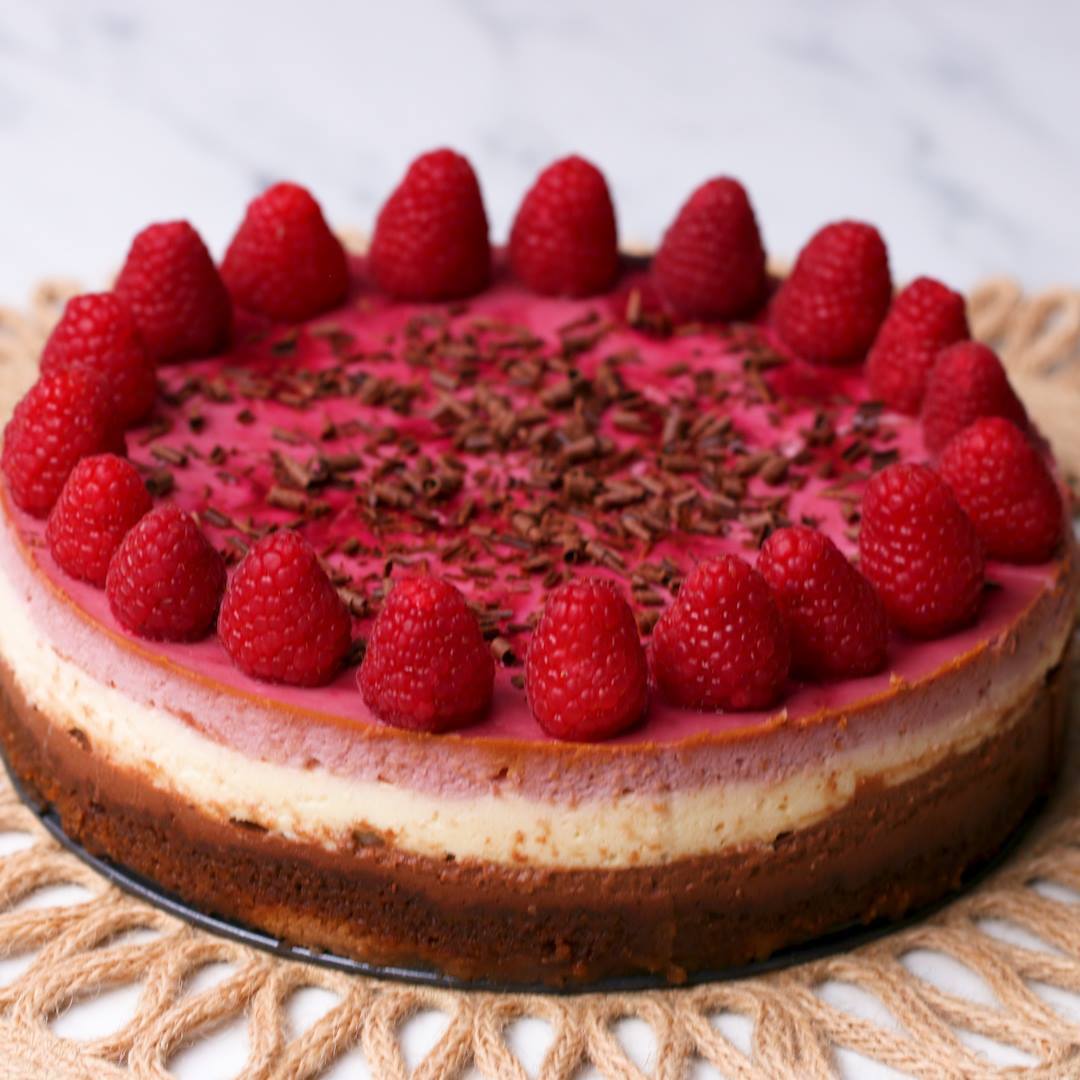
Raspberry Chocolate Greek Yogurt Cheesecake

Raspberry Chocolate Greek Yogurt Cheesecake
https://www.facebook.com/491452930867938/posts/2762993913713817/
Author:
Cuisine: American
Recipe type: Cake
Ingredients
  • 5 tablespoons melted coconut oil, plus 4 teaspoons, divided, plus more for greasing
  • 5 oz graham cracker (150 g)
  • 1 pinch kosher salt
  • 12 oz frozen raspberry, thawed (330 g)
  • ¾ cup dark chocolate chip (235 g)
  • 2 teaspoons coconut oil, solid
  • 32 oz greek yogurt (980 g)
  • 3 large eggs
  • 2 teaspoons vanilla extract
  • ½ cup organic sugar (100 g)
  • 2 tablespoons cornstarch, sifted
  • warm water, for baking
  • 6 oz fresh raspberries, for garnish (150 g)
  • chocolate shaving, for garnish
Instructions
  1. Preheat the oven to 350˚F (180˚C). Grease an 8-inch (20 cm) springform pan with melted coconut oil.
  2. Add the graham crackers and salt to food processor and process until completely broken down with a sand-like texture.
  3. Transfer the graham cracker crumbs to a medium bowl and add 5 tablespoons melted coconut oil. Stir to combine. The mixture should hold together when pressed between 2 fingers.
  4. Using the bottom of a drinking glass, press the crust into the bottom of the prepared springform pan. Bake for 10 minutes, until golden brown. Remove from the oven and let cool. Leave the oven on.
  5. Add the thawed frozen raspberries to a food processor and blend for 15 seconds, until smooth. Strain the raspberry puree through a fine-mesh sieve into a medium bowl and discard the seeds. Transfer ⅓ cup (40 grams) to a squeeze bottle to use for garnish and set the bottle and bowl aside.
  6. In a medium microwave-safe bowl, combine the chocolate and solid coconut oil. Microwave in 30-second intervals, stirring in between, until completely melted and smooth. Set aside.
  7. In a clean food processor, combine the yogurt, eggs, vanilla, sugar, and cornstarch. Process until smooth, about 20 seconds.
  8. Add 1½ cups (365 grams) of the yogurt mixture to a medium bowl. Add another 1½ cups (365 grams ) to the bowl with the melted chocolate and the remaining 1½ cups (365 grams) to the bowl with the raspberry puree. Add 2 teaspoons of melted coconut oil to the bowl with the plain yogurt mixture and the remaining 2 teaspoons melted coconut oil to the bowl with the raspberry puree. Stir each bowl to combine.
  9. To assemble the cheesecake, pour the chocolate layer over the graham cracker crust and smooth the top with a spatula. Freeze for 10 minutes.
  10. Pour the vanilla layer over the chocolate layer and smooth the top with a spatula. Freeze for another 10 minutes.
  11. Pour the raspberry layer on top of the vanilla layer and smooth with a spatula. Squeeze a few dots of the reserved raspberry puree on top and use a toothpick to swirl the puree in a decorative pattern.
  12. Wrap the bottom of the pan tightly with foil and place in a high-walled baking dish. Pour about 1 inch (2 ½ centimeters) of warm water into the baking dish.
  13. Bake the cheesecake for 35 minutes, until the edges are set but the center still jiggles slightly. If the top begins to brown, lightly cover with foil for the remaining bake time. Remove from the oven and carefully remove the springform pan from the water bath.
  14. Cool the cheesecake completely in the refrigerator for 3-4 hours, or overnight.
  15. When ready to serve, release the springform. Top the cheesecake with fresh raspberries, chocolate shavings, and raspberry puree.
  16. Enjoy!

Watch the recipe video here:

Swap out cream cheese for Greek yogurt in this chocolate raspberry cheesecake recipe!Recipe:…

Posted by BuzzFeed Food on Sunday, June 30, 2019

Main dish

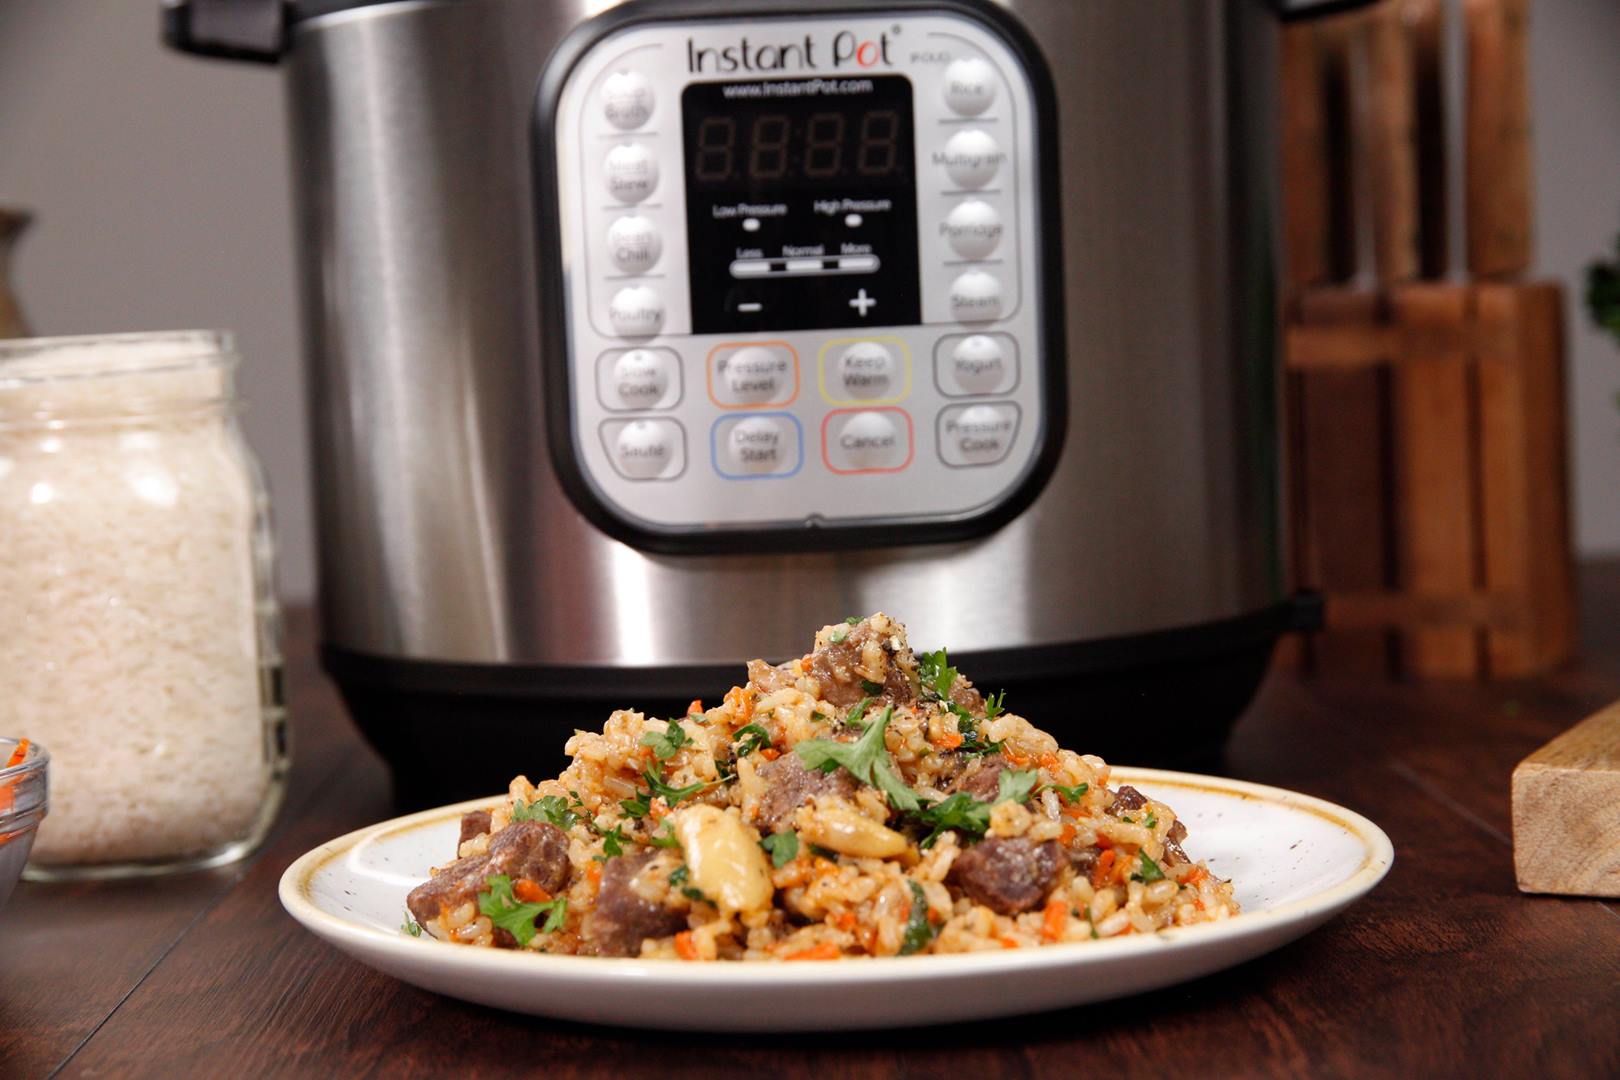
Instant Pot Russian Garlicky Beef and Rice

Instant Pot Russian Garlicky Beef and Rice
An extra helping of roasted garlic is the magic of this dish.
Author:
Cuisine: American
Recipe type: Main dish
Ingredients
  • ¼ cup olive oil
  • 1 lb beef stew meat cut into ¾″ pieces
  • 4 tbsp butter
  • 1 large onion, finely diced
  • 1½ cups shredded carrots
Seasoning Mixture:
  • 1 tbsp kosher salt
  • ½ tsp black pepper
  • ½ tsp each cumin, paprika, coriander
  • 2 bay leaves
  • 2½ cups brown rice, rinsed
  • 2 whole heads garlic, unpeeled, top ⅓ removed to expose cloves
  • 3 cups hot water
  • ½ cup chopped italian parsley (optional)
Instructions
  1. Add olive oil to the Instant Pot. Using the display panel select the SAUTE function and adjust to HIGH or MORE.
  2. When oil gets hot, brown the meat for 5 minutes.
  3. Add butter and onion to the pot and saute until onion is soft, 3-4 minutes.
  4. Add carrots and Seasoning Mixture ingredients and cook for 5 minutes more, using a wooden spoon to scrape the brown bits from the bottom of the pot.
  5. Add bay leaves, then spread rinsed rice in an even layer over the top of the vegetables–do not stir.
  6. Push garlic heads, cut side down, into the rice until they are halfway submerged.
  7. Slowly pour the hot water directly over the garlic cloves to soften.
  8. Turn the pot off by selecting CANCEL, then secure the lid, making sure the vent is closed.
  9. Using the display panel select the MANUAL function*. Use the +/- keys and program the Instant Pot for 30 minutes.
  10. When the time is up, let the pressure naturally release for 10 minutes, then quick-release the remaining pressure.
  11. Carefully remove the garlic heads and set aside. Remove bay leaves bay leaves and discard. Stir rice mixture to combine.
  12. Squeeze the garlic cloves back into the pot, add chopped parsley (optional) and stir to combine. Serve warm

Watch the recipe video here:

An extra helping of roasted garlic is the magic of this dish.RECIPE: http://chopsecrets.com/instant-pot-russian-garlicky-beef-and-rice/

Posted by Chop Secrets on Sunday, June 30, 2019

Dessert

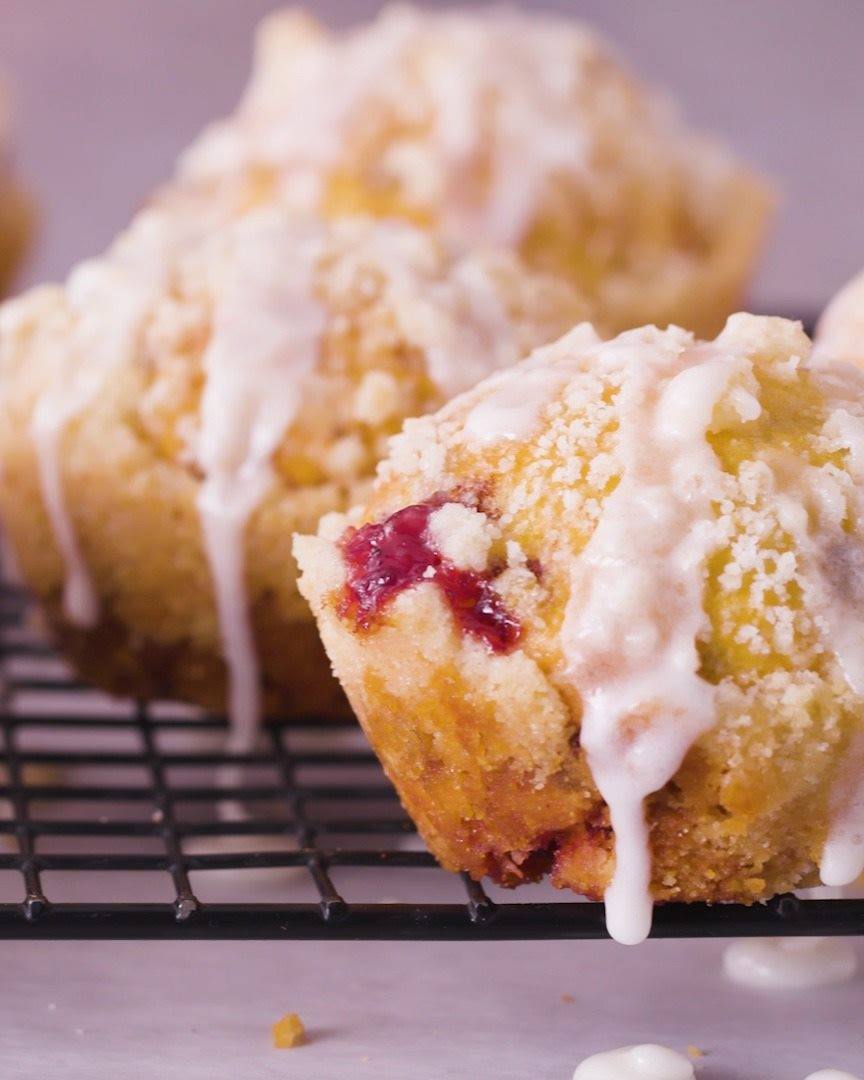
Cherry-Cream Cheese Crumb Cake Bombs

Cherry-Cream Cheese Crumb Cake Bombs
You’ve never had crumb cake like this before! These bite-sized breakfast bombs start by stuffing Pillsbury™ refrigerated cinnamon rolls with cherry preserves and cream cheese, then topping them with a homemade crumb topping for a morning treat that rivals any bakery.
Author:
Cuisine: American
Recipe type: Dessert
Ingredients
  • 2 oz (from 8-oz package) cream cheese, softened
  • 2 tablespoons powdered sugar
  • 2 tablespoons butter, melted
  • 5 tablespoons all-purpose flour
  • ¼ cup granulated sugar
  • 1 can (12.4 oz) Pillsbury™ refrigerated cinnamon rolls with icing (8 rolls)
  • 3 tablespoons cherry preserves or jam
  • 1 egg
  • 1 teaspoon water
Instructions
  1. Heat oven to 375°F. Spray 8 regular-size muffin cups with cooking spray.
  2. In small bowl, stir cream cheese and powdered sugar until smooth. Set aside. In another small bowl, using fork or pastry blender, mix melted butter, 4 tablespoons of the flour and the granulated sugar until mixture looks like coarse crumbs. Set aside.
  3. Separate dough into 8 rolls. Place remaining 1 tablespoon flour off to the side, on work surface. Dip cinnamon-coated side of each roll into flour; shake off excess. With cinnamon side up, press each roll into 3½-inch round. Spoon 1 teaspoon of the preserves in center of each roll; top with 1 rounded teaspoon of the cream cheese mixture. Bring edges of each roll up over filling; pinch edges tightly to seal. Place rolls, pinched side down, in muffin cups.
  4. In small bowl, beat egg and water with fork. Brush egg mixture over top of each roll. Sprinkle 1 rounded tablespoon of the crumb topping on each roll; slightly press into dough.
  5. Bake 16 to 18 minutes or until golden brown. Cool in pan 5 minutes. Remove cake bombs from pan; place on cooling rack.
  6. Place icing from can into 1-quart resealable food-storage plastic bag; cut small hole in bottom corner of bag. Squeeze bag to drizzle icing over cake bombs. Let stand 5 minutes. Serve warm.

Watch the recipe video here:

These crumb cake bombs will blow your tastebuds. Cherry-Cream Cheese Crumb Cake Bombs recipe:…

Posted by Pillsbury on Saturday, June 29, 2019

Breakfast

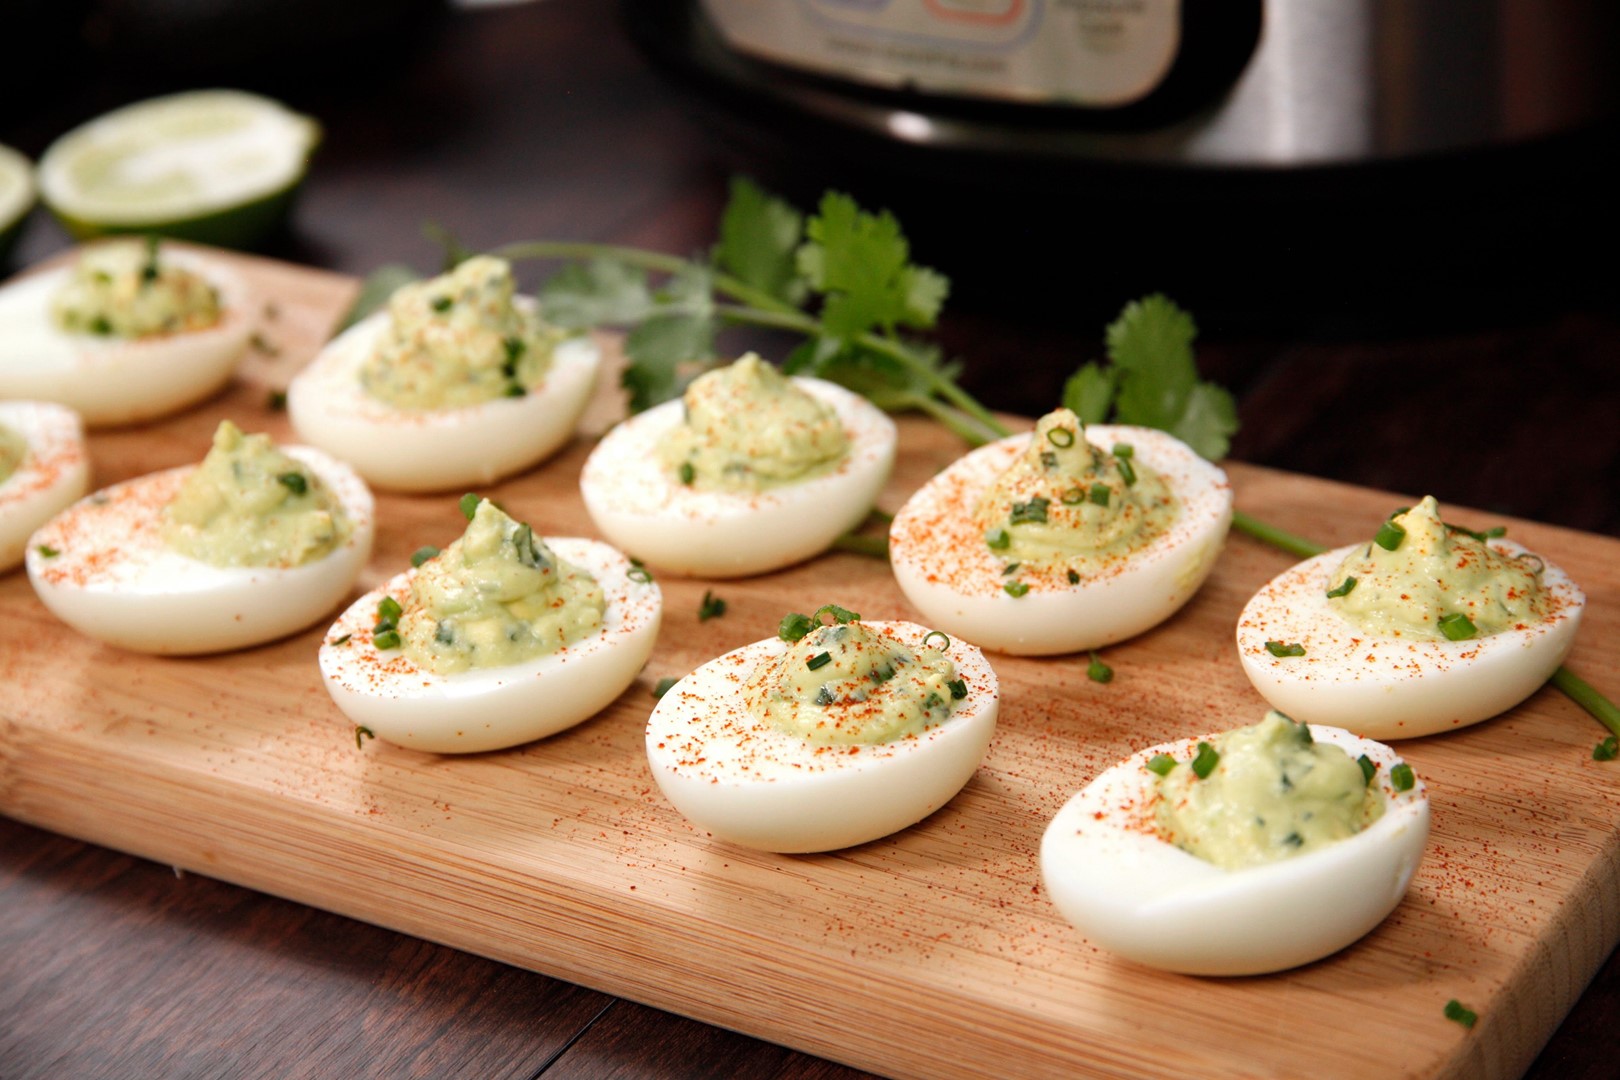
Instant Pot Guacamole Deviled Eggs

Instant Pot Guacamole Deviled Eggs
These luscious and tasty guacamole deviled eggs are the best.
Author:
Cuisine: American
Recipe type: Breakfast
Ingredients
  • 1 cup water
  • 6 eggs
  • 1 large ripe avocado
  • 1 tbsp lime juice
  • ½ tsp kosher salt
  • 1 tbsp sour cream
  • 1 tbsp finely chopped cilantro
  • 1 tbsp snipped chives
  • Additional cilantro leaves for garnish
Instructions
  1. Pour one cup of water in the Instant Pot and insert the steam rack. Arrange the eggs on the rack, then secure the lid, making sure the vent is closed.
  2. Using the display panel select the MANUAL function*. Use the +/- keys and program the Instant Pot for 5 minutes.
  3. When the time is up, let the pressure naturally release for 5 minutes, then quick-release the remaining pressure.
  4. Immediately move the eggs to an ice bath for at least 5 minutes, then peel.
  5. Cut the eggs in half lengthwise and set the yolks aside. Arrange the emptied eggs on a serving dish.
  6. In a medium bowl, roughly mash avocado with a fork, then stir in lime juice, salt, sour cream and two of the egg yolks (reserve the remaining 4 yolks for another use).
  7. Fold in chopped cilantro, chives and jalapeno (if using).
  8. Fill eggs with avocado mixture and top each with a small sprig of cilantro.

Watch the recipe video here:

These luscious and tasty guacamole deviled eggs are the best. RECIPE: http://chopsecrets.com/instant-pot-guacamole-deviled-eggs/

Posted by Chop Secrets on Saturday, June 29, 2019