Showing 3,071 Result(s)
Main dish

Who Loves Ya Baby-Back?

Who Loves Ya Baby-Back?
Author:
Cuisine: American
Recipe type: Main dish
Ingredients
  • 2 whole slabs pork baby back ribs
Dry Rub:
  • 8 tablespoons light brown sugar, tightly packed
  • 3 tablespoons kosher salt
  • 1 tablespoon chili powder
  • ½ teaspoon ground black pepper
  • ½ teaspoon cayenne pepper
  • ½ teaspoon jalapeno seasoning
  • ½ teaspoon Old Bay Seasoning
  • ½ teaspoon rubbed thyme
  • ½ teaspoon onion powder
Braising Liquid:
  • 1 cup white wine
  • 2 tablespoons white wine vinegar
  • 2 tablespoons Worcestershire sauce
  • 1 tablespoon honey
  • 2 cloves garlic, chopped
Instructions
  1. Preheat oven to 250 degrees.
  2. In a bowl, combine all dry ingredients and mix well. Place each slab of baby back ribs on a piece of heavy-duty aluminum foil, shiny side down. Sprinkle each side generously with the dry rub. Pat the dry rub into the meat. Refrigerate the ribs for a minimum of 1 hour. In a microwavable container, combine all ingredients for the braising liquid. Microwave on high for 1 minute.
  3. Place the ribs on a baking sheet. Open one end of the foil on each slab and pour half of the braising liquid into each foil packet. Tilt the baking sheet in order to equally distribute the braising liquid. Braise the ribs in the oven for 2½ hours.
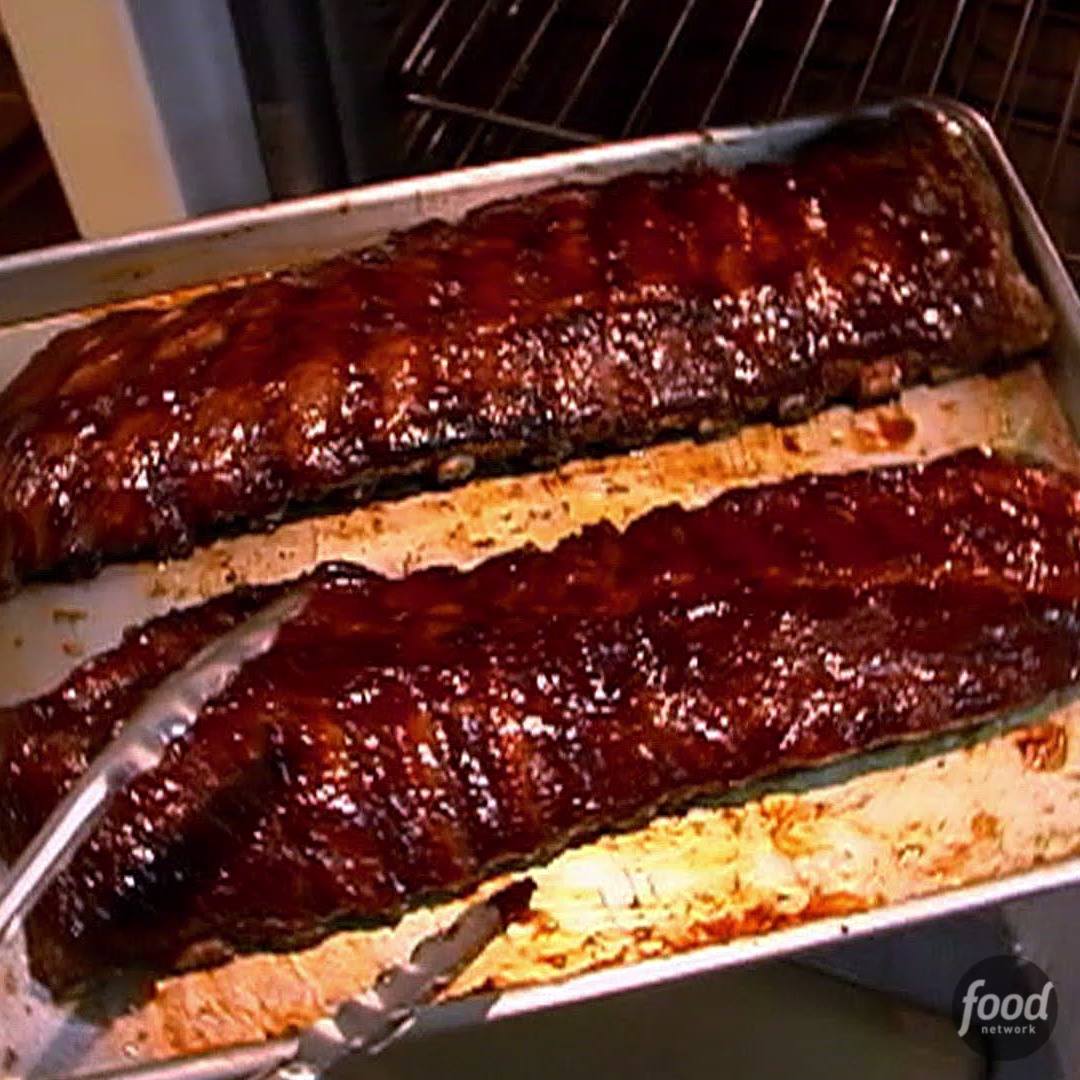
  4. Transfer the braising liquid into a medium saucepot. Bring the liquid to a simmer and reduce by half or until of a thick syrup consistency. Brush the glaze onto the ribs. Place under the broiler just until the glaze caramelizes lightly. Slice each slab into 2 rib bone portions. Place the remaining hot glaze into a bowl and toss the rib portions in the glaze.

Watch the recipe video here:

How To Make Alton's Who Loves Ya Baby Back Ribs

Recipe of the Day: Alton Brown's 5-Star Baby-Back Ribs ??Save this recipe: http://bit.ly/2jmI1Us.

Posted by Food Network on Thursday, May 24, 2018

Main dish

Easy Chicken Parm Bake

Easy Chicken Parm Bake
Your kids are going to love this parm bake you can make in no time with Tyson Crispy Chicken Strips! Pick them up at Walmart today!
Author:
Cuisine: American
Recipe type: Main dish
Ingredients
Tomato Sauce
  • 4 tablespoons olive oil
  • 1 onion, chopped
  • 3 cloves garlic, minced
  • 2 teaspoons dried oregano
  • 1 teaspoon onion powder
  • 1 teaspoon garlic powder
  • 2 (28-ounce) cans crushed tomatoes
  • 2 large sprigs fresh basil
  • Salt, to taste
  • ½ teaspoon ground black pepper, to taste
  • ¾ cup heavy cream
Assembly
  • 8 Tyson Crispy Chicken Strips
  • 1 (1 pound) box cavatappi, penne, or other short pasta
  • 8 mozzarella slices
  • ½ cup shredded parmesan cheese
  • 8 basil leaves, minced, for garnish
Instructions
  1. Preheat oven to 400ºF/205℃.
  2. Arrange Tyson Crispy Chicken Strips on a parchment-lined baking sheet. Bake
  3. according to package instructions. Remove from oven and lower temperature to 375ºF.
  4. Heat olive oil in a large saucepan. Add onion and saute until translucent, about 5
  5. minutes.
  6. Add minced garlic and saute for another minute or two. Stir in dried oregano, onion
  7. powder, garlic powder, and a large pinch of salt and pepper.
  8. Add crushed tomatoes, basil, and another big pinch of salt. Let simmer, stirring
  9. occasionally for 20 minutes.
  10. Remove basil sprigs and fold in the heavy cream. Taste sauce and add more salt and
  11. pepper if necessary.
  12. Heat a large pot of heavily salted water. Bring to a boil and cook pasta for 3 minutes less
  13. than the cooking time on the package. Drain pasta and pour into a 9x13-inch glass
  14. baking dish.
  15. Pour the creamy tomato sauce onto the pasta and mix thoroughly. Arrange the Tyson
  16. Crispy Chicken Strips on top of the pasta. Place the sliced mozzarella on the chicken
  17. strips and sprinkle with the shredded parmesan.
  18. Place in the oven and bake for 12–15 minutes until cheese is melted. Remove from oven
  19. and sprinkle with minced basil leaves.

Watch the recipe video here:

Easy Chicken Parm Bake

Easy Chicken Parm BakeYour kids are going to love this parm bake you can make in no time with Tyson Crispy Chicken Strips! Pick them up at Walmart today! [www.walmart.com]

Posted by Tasty on Thursday, May 31, 2018

Cake

The Best Gooey Salted Caramel Brownies

The Best Gooey Salted Caramel Brownies
If you love salted caramel, then these gooey brownies are the best ever! ?✨
Author:
Cuisine: American
Recipe type: Cake
Ingredients
  • nonstick cooking spray, for greasing
  • ¾ cup (175 g) unsalted butter, 1½ sticks, melted
  • 1 cup (200 g) granulated sugar
  • ½ cup (110 g) brown sugar
  • 3 large eggs
  • ¾ teaspoon vanilla extract
  • 1 ½ cups (190 g) all purpose flour
  • ¼ cup (30 g) unsweetened cocoa powder
  • 1 teaspoon salt
  • ½ cup (85 g) semi-sweet chocolate chips
  • 3 cups (985 g) soft caramel candy
TOPPING
  • 1 ½ cups (490 g) soft caramel candy
  • ¼ cup (60 mL) heavy cream
  • flaky sea salt, for sprinkling
Instructions
  1. Preheat the oven to 350°F (180°C). Grease an 8x8-inch (20x20-cm) baking pan and line with parchment paper.
  2. Make the brownies: in a large bowl, whisk together the melted butter, granulated sugar, and brown sugar. Add eggs and vanilla extract. Whisk until thoroughly combined. Sift in the flour, cocoa powder, and salt, and fold to incorporate. Fold in the chocolate chips.
  3. Pour half of the batter into the baking pan and spread to cover the bottom. Arrange the caramel candies in a single layer over the batter. Pour the rest of the batter over the caramel candies and spread to cover.
  4. Bake for 35 minutes or until center is cooked through. Remove the brownies from the oven and let cool.
  5. Make the topping: combine the caramel candies and heavy cream in a medium heat-proof bowl. Microwave for 1 minute in 30-second intervals, stirring between each until the mixture is thick and velvety.
  6. Pour the caramel topping over the brownies. Let set for 10 minutes. Sprinkle with sea salt.
  7. Slice and serve.
  8. Enjoy!

Watch the recipe video here:

The Best Gooey Salted Caramel Brownies

If you love salted caramel, then these gooey brownies are the best ever! ?✨FULL RECIPE: https://tasty.co/recipe/the-best-gooey-salted-caramel-brownies

Posted by Tasty on Thursday, May 31, 2018

Dessert

Cheesecake on a Stick

Cheesecake on a Stick
Forget cake pops - CHEESECAKE pops are your new EVERYTHING!
Author:
Cuisine: American
Recipe type: Dessert
Ingredients
  • 7 ounces vanilla crackers or graham crackers
  • ½ cup butter, melted
  • 14 ounces cream cheese
  • 1½ cups heavy cream
  • 1 cup sugar
  • ½ teaspoon vanilla extract
  • 17 ounces bittersweet chocolate, melted
  • 1 cup chocolate sprinkles
Instructions
  1. In a food processor, grind the crackers, add the butter, and mix for another 2 minutes or until it forms crumbs.
  2. Cover the bottom of a springform pan with parchment paper. Press crumb mixture into bottom and sides of pan and place in the refrigerator.
  3. In a mixing bowl add cream cheese, heavy cream, sugar and vanilla extract. Beat until combined. Pour the mixture into the pan and place in fridge for 1 hour or until hardened.
  4. Remove the cheesecake from the pan. Use a sharp knife to score the cheesecake into slices without cutting all the way through. Add the popsicle sticks, then cut the cheesecake slices. Place them in the freezer for 3 hours until frozen.
  5. Dip cheesecake slices in the melted chocolate, decorate with chocolate sprinkles and serve.

Watch the recipe video here:

Cheesecake on a Stick

What's creamy, dreamy, and now on the go?Taste for Yourself: https://taste.md/2OCQ2D4?: Tastemade Brasil

Posted by Tastemade on Thursday, August 2, 2018

Main dish

Polenta Fries

Polenta Fries
If you fry it, they will come! ?
Author:
Cuisine: American
Recipe type: Main dish
Ingredients
FRIES
  • nonstick cooking spray, for greasing
  • 2 ½ cups (600 mL) milk, of choice
  • 2 ½ cups (600 mL) vegetable broth
  • 2 cups (320 g) polenta
  • 2 tablespoons unsalted butter
  • 1 teaspoon salt
  • ½ teaspoon pepper
  • ½ teaspoon dried oregano
  • ½ teaspoon dried thyme
  • ½ teaspoon dried rosemary
  • olive oil, for brushing (if baking)
  • 4 cups (960 mL) canola oil, if frying
LEMON-HERB AIOLI
  • ½ cup (120 g) mayonnaise
  • 1 clove garlic, minced
  • 1 tablespoon fresh parsley, chopped
  • 1 tablespoon lemon juice
  • salt, to taste
  • pepper, to taste
Instructions
  1. Grease a baking sheet with nonstick spray.
  2. In a medium pot over high heat, add the milk and vegetable broth and bring to a boil.
  3. Whisk in the polenta and reduce the heat to low, whisking continuously for about 5 minutes, or until all the liquid has been absorbed and the polenta is creamy.
  4. Add the butter, salt, pepper, oregano, thyme, and rosemary and stir until well-combined.
  5. Transfer the polenta to the prepared baking sheet and spread out evenly with a spatula. Chill for at least 2 hours or up to 3 days to set.
  6. If baking, preheat the oven to 425ºF (220ºC).
  7. Make the aioli: Combine the mayonnaise, garlic, parsley, and lemon juice, salt, and pepper in a small bowl and mix until well-combined. Chill until ready to use.
  8. Carefully flip the baking sheet onto a cutting board to release the polenta. Slice in half lengthwise, and then cut into 22 equal-sized fries, each about 4 inches (10 cm) long and 1 inch (2 ½ cm) wide.
  9. If baking, use a spatula to transfer the fries onto wire racks set over 2 baking sheets. Brush each fry generously with olive oil. Bake for 30 minutes, flipping halfway through and brushing with more oil, until golden brown.
  10. If frying, heat the canola oil in a large pot until it reaches 375ºF (190ºC). Using a large spider, submerge 2 fries at a time into the oil and fry for 2-4 minutes, until golden brown and crispy. Remove from the oil and transfer to a plate lined with paper towels to cool for at least 5 minutes.
  11. Serve the fries with aioli.
  12. Enjoy!

Watch the recipe video here:

Polenta Fries

If you fry it, they will come! ?FULL RECIPE: https://tasty.co/recipe/polenta-fries

Posted by Tasty on Thursday, August 2, 2018

Main dish

BBQ Chicken Burgers with Slaw

BBQ Chicken Burgers with Slaw
Recipe of the Day: Rachael's BBQ Chicken Burgers with Slaw
Author:
Cuisine: American
Recipe type: Main dish
Ingredients
  • 1 tablespoon butter, cut into pieces
  • 1 small red onion, ½ finely chopped, ½ thinly sliced
  • 2 cloves garlic, finely chopped
  • 2 tablespoons tomato paste
  • 1 teaspoon sugar
  • 1 tablespoon Worcestershire sauce, eyeball it
  • 1 tablespoon hot sauce, eyeball it
  • 1¼ pounds ground chicken
  • 1 tablespoons grill seasoning (recommended: McCormick brand) a palm full
  • 3 tablespoons extra-virgin olive oil, divided
  • 2 tablespoons honey, eyeball it
  • 1 lemon, juiced
  • 3 rounded tablespoons sweet pickle relish
  • 2 cups shredded cabbage mix
  • Salt and pepper
  • 4 cornmeal Kaiser rolls, split
Instructions
  1. In a small skillet over medium heat, melt butter. Add chopped onions, garlic and tomato paste and sweat them for 5 minutes to soften and sweeten. Sprinkle in sugar and remove from heat. Cool in a bowl, 5 minutes. Add tomato paste mixture, Worcestershire, hot sauce to bowl and combine. Add chicken to the bowl then grill seasoning and combine the burgers well to evenly distribute the flavors and form 4 patties. Wash up.
  2. Heat 1 tablespoon extra-virgin olive oil, a turn of the pan, in a nonstick skillet over medium-high heat. Cook patties 6 minutes on each side.
  3. Combine the honey, lemon juice, and remaining extra-virgin olive oil in a bowl. Add relish, cabbage mix and sliced onions and season with salt and pepper. Toss the slaw to coat and reserve.
  4. Serve burgers on bun bottoms topped with slaw and bun tops.

Watch the recipe video here:

Rachael's BBQ Chicken Burgers with Slaw

Recipe of the Day: Rachael's BBQ Chicken Burgers with Slaw Save this recipe: http://bit.ly/2JKOlkg.

Posted by Food Network on Thursday, June 21, 2018

Cake Dessert

Crispy Rice Cereal Chocolate Cheesecake

Crispy Rice Cereal Chocolate Cheesecake
You won't believe how deliciious this crispy rice cereal chocolate cheesecake is! ???
Author:
Cuisine: American
Recipe type: Cake
Ingredients
  • ¼ cup (60 g) unsalted butter, ½ stick
  • 10 oz (285 g) mini marshmallows
  • 6 cups (180 g) crispy rice cereal
  • 8 oz (225 g) semisweet chocolate
  • ¼ cup (60 mL) heavy cream
  • 16 oz (455 g) cream cheese, softened
  • ½ cup (100 g) sugar
  • 1 teaspoon vanilla
  • 2 ½ cups (150 g) whipped cream, divided
  • chocolate bar, for shaving
Instructions
  1. In a large saucepan over medium heat, melt the butter.
  2. Add the marshmallows and stir until melted. Add the crispy rice cereal and stir to coat.
  3. While the crispy rice cereal mix is still warm, transfer them to a greased 10-inch (25 cm) springform pan.
  4. Using a greased measuring cup, press down into the cereal to form to the pan. Press the edges against the springform pan to create walls. Set aside.
  5. Place the chocolate in a small microwave-safe bowl and pour the heavy cream on top. Microwave in 30-second intervals, stirring until melted, about 1 minute.
  6. In a large bowl, mix the cream cheese, sugar, and vanilla until smooth.
  7. Pour in the melted chocolate and stir to incorporate.
  8. Add 1½ cups (90 g) of whipped cream to the chocolate mixture and fold with a spatula until combined.
  9. Pour the cheesecake mixture into the crispy rice base and smooth the top with a spatula.
  10. Refrigerate for 3-4 hours or overnight, until the cheesecake is set. Release the springform.
  11. Put the remaining cup of whipped cream in a piping bag fitted with a star tip and decorate the top of the cheesecake.
  12. Use a vegetable peeler to shave the chocolate into the middle of the cheesecake.
  13. Slice and serve.
  14. Enjoy!

Watch the recipe video here:

Crispy Rice Cereal Chocolate Cheesecake

You won't believe how deliciious this crispy rice cereal chocolate cheesecake is! ???FULL RECIPE: https://tasty.co/recipe/crispy-rice-cereal-chocolate-cheesecake

Posted by Proper Tasty on Wednesday, August 1, 2018

Main dish

Chicken Bacon Ranch Dough Balls

Chicken Bacon Ranch Dough Balls
Stuffed doughballs are incredibly delicious. These chicken bacon ranch dough balls are also topped with one of our favourites...everything bagel seasoning. It rounds them out so perfectly!
Author:
Cuisine: American
Recipe type: Main dish
Ingredients
  • 3 cups shredded cooked chicken
  • ½ cup chopped cooked crispy bacon
  • ¼ cup chopped chives
  • 1 cup cream cheese
  • 1 cup grated cheddar cheese
  • ½ cup ranch dressing
  • 500g milk bread dough
  • 2 tbsp poppy seeds
  • 1 tbsp sesame seeds
  • 1 tbsp black sesame seeds
  • 1 tbsp granulated garlic
  • 1 tbsp granulated onion
  • 2 tsp coarse salt
  • Egg wash
Instructions
  1. Mix together chicken, bacon, chives, cream cheese, ranch, and grated cheese until combined.
  2. Take 30g balls of dough and flatten into a round. Place about 2 tbsp of the chicken mix into the centre. Fold up the sides and pinch to seal.
  3. Arrange on a tray fairly close together. Cover with cling film and let proof for 30 minutes or so.
  4. Meanwhile, mix together poppy seeds, sesame seeds, garlic, onion and coarse salt.
  5. Egg wash all of the buns and then sprinkle with everything mix.
  6. Bake at 180ºC for 15-20 minutes until golden brown.
  7. Enjoy!

Watch the recipe video here:

Chicken Bacon Ranch Dough Balls

Chicken Bacon Ranch Dough Balls

Posted by Twisted on Wednesday, August 1, 2018

Breakfast

Bacon Wrapped Jalapeno Popper Chicken Roll-ups

Bacon Wrapped Jalapeno Popper Chicken Roll-ups
Spirals occur naturally throughout the universe, from the ammonite to the fern, the whirlpool to the cyclone. Something in them draws us in, much like you are drawn in to this video of a chicken breast spiralled full of cheese wrapped in bacon and lovingly grilled over a charcoal BBQ.
Author:
Cuisine: American
Recipe type: Breakfast
Ingredients
  • 3 chicken breasts
  • 300g cream cheese
  • 100g mozzarella, finely grated
  • 100g cheddar, finely grated
  • 3 tbsp pickled jalapenos, finely chopped
  • 1 tsp salt
  • 1 tsp grated black pepper
  • 18 slices streaky bacon
Instructions
  1. Mix together the cream cheese, mozzarella, cheddar, pickled jalapenos, salt and pepper.
  2. Take the chicken breasts and lay each one on a large sheet of clingfilm. Cover with more clingfilm and bash, firmly but authoritatively, with a rolling pin to flatten them evenly to about 1.5 cm thickness.
  3. Spread the mixture onto each chicken breast and roll them up lengthways. Wrap them in bacon thoroughly to make sure the filling doesn't drip out too much.
  4. Bake or grill for roughly 15 - 20 minutes (or until cooked through). Don't worry if a little cheese mixture escapes.
  5. Serve with chips.

Watch the recipe video here:

Bacon Wrapped Jalapeno Popper Chicken Roll-ups

Bacon Wrapped Jalapeno Popper Chicken Roll-ups

Posted by Twisted on Wednesday, August 1, 2018

Cake

Magic Mushroom Cake

Magic Mushroom Cake
Mushrooms are magical in more than one way. This cake, for starters.
Author:
Cuisine: American
Recipe type: Cake
Ingredients
Cake
  • 350g all-purpose flour
  • 450g caster sugar
  • 100g cocoa powder
  • 1 tsp bicarbonate of soda
  • 1 tsp salt
  • 350g unsalted butter, softened
  • 4 large eggs, at room temperature
  • 350ml milk
  • 300g chopped mint slice cookies
Frosting
  • 2 batches chocolate Swiss meringue buttercream frosting
Magic mushrooms
  • 1 batch American buttercream frosting
  • 1 tbsp cocoa powder
  • 5 drops red food gel
Grass Frosting
  • 1 batch American buttercream frosting
  • Light green Frosting: 4 drops green food gel
  • Green frosting: 4 drops green food gel + 2 drops blue food gel
  • Dark green frosting: 4 drops green food gel + 2 drops blue food gel + 3 drops purple food gel
Flowers
  • ¼ batch American buttercream frosting
  • 2 drops blue food gel
  • 2 drops pink food gel
  • 2 drops yellow food gel
  • 2 drops orange food gel
Chocolate Bark
  • 500g dark chocolate (melted)
  • 300g white chocolate + 100g dark chocolate (melted together)
Instructions
Magic mushrooms
  1. To make magic mushrooms set aside 2 tbsp of white frosting in a small bowl. Add cocoa powder to the rest of the frosting and mix until well combined. Split the frosting in half and add the red food gel into the frosting. Mix until evenly coloured.
  2. Fit the end of a piping bag with a large round tip and pipe long upright stalks of light cocoa frosting onto a baking tray lined with baking paper. Chill
  3. Fit the end of another piping bag with a large round tip and pipe low, wide bulbs of red frosting. Add little blobs of white frosting to make the little white spot details. Chill the stalks and mushroom heads for about 40 min. Get them really chilled.
  4. Once the stalks are chilled use a very sharp knife to cut off the very top, creating a nice flat surface. Add a little dab of frosting on top of the stalk and stick the mushroom head on top. Keep chilled until ready to use.
Chocolate Bark
  1. Add a long piece of baking paper on a flat work surface. Drizzle the melted dark chocolate on top and use a large offset spatula to spread out the chocolate. Give it time to completely set. Use a fork to add some grooves in the set chocolate before you add some random light chocolate on top. Use the back of a tablespoon to spread it around. Let that second layer set completely before you use a sharp knife dipped in boiling water to cut different shaped rectangles of the bark. Kind of like random sized pieces of wood flooring.
Cake
  1. Please note: this chocolate cake recipe makes 1 batch. You’ll need two batches of chocolate cake to make this 6 layered cake. All other ingredients in the recipe are measured up to make the full 6 layer cake.
  2. Preheat a fan-forced oven to 140C (280F) or 160C (320F) for a conventional oven. Spray three 8” cake tins with oil spray and line the bottom with baking paper.
  3. Add the flour, sugar, cocoa powder, bicarb soda and salt to a large mixing bowl and mix together using a hand mixer to combine.
  4. Next add the softened butter and mix on low speed until mixture reaches a crumbly sand like texture.
  5. Add the eggs and milk and mix on low speed until no dry ingredients are showing. Scrape down the bowl and mix for another 20 seconds.
  6. Fill three 8” cake tins with batter. I find using an ice cream scooper to help me do this makes it easy to distribute the batter evenly so that everything bakes at the same time.
  7. Bake for 50-60 min or until a toothpick inserted comes out clean. If the pick comes out with wet batter, bake for a further 10 min at a time until baked fully. Allow the tins to cool for 2 min and then carefully flip the cake tins over on to a cooling rack to cool completely before using. Chilling your cakes overnight before decorating means they’ll be easier to trim and decorate. So I bake my cakes the day before I trim them.
  8. To trim your chilled cake use a cake leveller or large serrated knife to carefully trim the first layer of cake by trimming it in half. Then trim the crust off the second layer so that you end up with two layers from each baked cake. When trimming make sure you aim to get both layers of cake the same height. Keep that in mind when trimming the first layer so the next layer will still be the same height as the first when trimming the crust off. Once you’re done trimming your three baked cakes you should end up with 6 layers of cake altogether.
  9. To prepare crumb coat, add a dab of chocolate Swiss meringue buttercream frosting onto an 10” cake board or serving plate. Add the first layer of cake. Pipe a ring of frosting around the first layer and fill the centre of the cake with more frosting. Use a small offset spatula to spread around a little before adding some chopped mint slice cookies. Add the second layer of cake and repeat with the remaining layers. Add more frosting around and top of the cake. Use a your small spatula to smoothen out the top and bottom of the cake before using a cake scraper (otherwise known as a bench scraper) to smoothen out the frosting. Get it as neat as you can. This should just be a neat thin layer of frosting which is aimed at trapping any cake crumbs so that random bits of cake crumbs don’t show up on the outside of the cake. Chill for 2 hours or overnight.
  10. Add a fresh layer of frosting using a small offset spatula. Use a cake scraper to smoothen out the frosting around the sides. Then smoothen out the top using the cake scraper.
  11. Stick the chocolate bark all around the cake.
Grass Frosting
  1. Split the frosting up into 3 bowls. Use the colour formulations to colour the three different shades of frosting.
  2. Fit the end of a piping bag with a grass tip. Line half of the inside of your bag with the dark green frosting. Line the other half with the green frosting. Fill the centre with the light green frosting
  3. Pipe grass on top of the cake and around the bottom.
Flowers
  1. Split the frosting up into 5 bowls. Use the colour formulations to colour the 5 different shades of frosting. Fit the end of four separate piping bags with very small round tips. For the pink flowers fit the end of a piping bag with a small star tip. Pipe random mini blobs of each colour in the grass.
  2. Add the buttercream mushrooms on top to finish.

Watch the recipe video here:

Magic Mushroom Cake

Mushrooms are magical in more than one way. ?✨Taste for Yourself: https://taste.md/2LSsqfl?: The Scran Line

Posted by Tastemade on Wednesday, August 1, 2018