Showing 879 Result(s)
Dessert

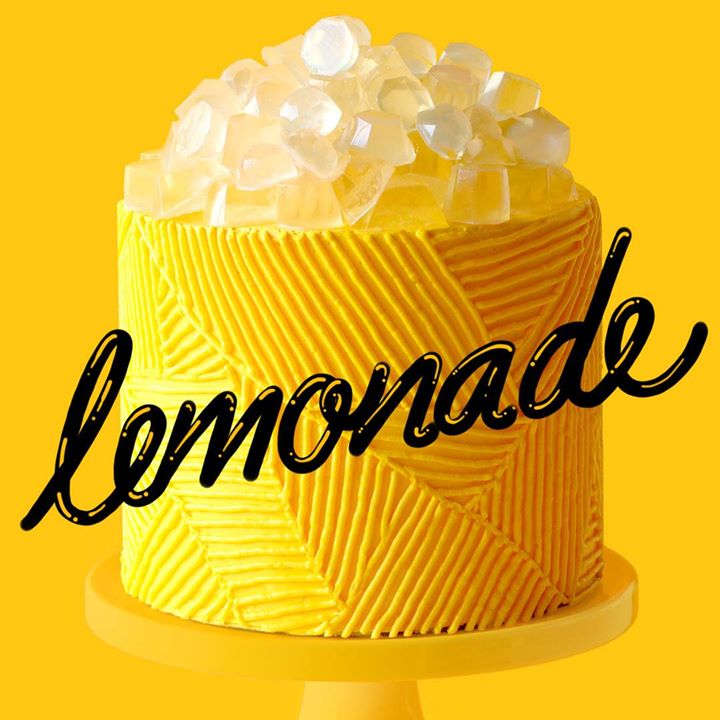
#LEMONADE Cake

#LEMONADE Cake
Lemon lovers will not sour on this lemon cake with stunning geometric pattern pipped on the outside.
Author:
Cuisine: American
Recipe type: Dessert
Ingredients
  • Cake
  • 840g all-purpose flour
  • 530g caster (superfine) sugar
  • ½ tsp salt
  • 2 tbsp baking powder
  • 750ml of milk
  • 250ml vegetable oil
  • 250g unsalted butter, softened
  • 4 tbsp Greek yogurt (can substitute with sour cream)
  • 4 tsp vanilla extract
  • 4 large eggs
  • Zest of two lemons
  • ½ cup lemon juice
  • 10 drops lemon food gel
  • Jelly Jewels
  • 6 tbsp powdered gelatin
  • 12 tbsp cold water
  • 500ml cups lemon juice
  • 125g cup caster sugar
  • Frosting
  • 3 batches Swiss meringue frosting
  • 10 drops yellow food gel
  • 3 tbsp lemon curd or 3 tsp lemon essence
Instructions
  1. Jelly Jewels
  2. Add water and gelatine to a large mixing bowl. Mix until well combined. Allow to sit for 2 min. Add lemon juice and sugar to a microwave safe bowl or jug and microwave for 3 min. Add gelatine and stir until completely dissolved. Spray jewel mold with oil and wipe exess away with a paper towel. Fill molds up with jelly mixture. Chill for 2 hours.
  3. Frosting
  4. Combine all ingredients together and mix.
  5. Cake
  6. Preheat a fan-forced oven to 160C (320F) or 180C (356F) for a conventional oven. Spray an 8” cake tin with oil spray and line the bottom with baking paper.
  7. In the bowl of a stand mixer fitted with the paddle attachment, add the flour, baking powder, caster sugar and salt. Turn mixer on low speed and allow it to mix for a couple minutes to help everything combine well (alternatively you may do this by sifting the ingredients together). Add the softened butter and mix until it resembles a fine sand like texture.
  8. Add the milk, oil, Greek yogurt, eggs, lemon zest, yellow food dye and vanilla extract into the bowl with the dry ingredients and mix on medium speed until no dry ingredients are visible. Scrape down the bowl and mix for another 20 seconds.
  9. Fill three 8” cake tins with batter.
  10. Bake for 30 min or until a toothpick inserted comes out clean. Allow the tins to cool for 2 min and then carefully flip the cake tins over on to a cooling wrack to cool completely before using.
  11. Using a large serrated knife, carefully trim the top off each layer of cake to make even and flat layers. Try to aim to get them all the same height. An easy way to do this is to find the lowest height of the cake, place a skewer or toothpick next to that point and mark it. As you go around each side of the cake cutting it, use the marked skewer to make sure each cut is at the same height.
  12. To prepare crumb coat, add a dab of frosting onto an 8” cake board or serving plate. Add first cake layer. Use a piping bag filled with frosting to frost aroud the outside permiter of the cake layer. Add a thin layer in the middle of the cake and then add dabs of lemon curd on top. Use a small offset to smoothen out and layer the frosting on each layer before adding the next layer of cake. Add more frosting around the outside to fill the grooves between each layer. This should just be a neat thin layer of frosting which is aimed at trapping any cake crumbs so that random bits of cake crumbs don’t show up on the outside of the cake.
  13. Add a fresh layer of frosting using a small offset spatula. Use a cake scraper to smoothen out the frosting around the sides. Then smoothen out the top using a the cake scraper. Chill for 2 hours.
  14. To add final layer of frosting add frosting to a piping bag and frost the sides and top of the cake. Use a cake scraper to smoothen out the top of the cake first. Then work the scraper around the sides. If there are any bubbles or any spaces that need filling, add more frosting and work the cake until it’s smooth. Smoothen out the top again and chill for 2 hours.
  15. Fit the end of a piping bag with a Wilton #5 round tip to draw large geometric shapes on the outside of the cake. Fill the shapes in with more lines. This can take a while. Put on a Beyoncé album and pipe for Yo LIFE! And Don’t F it up! #RuPaul
  16. Finish off by adding jellies on top up to an hour before serving.

Watch the recipe video here:

#LEMONADE Cake

Hold up, they don't love you like I love you. via The Scran LineFull Recipe: taste.md/2wYFWWw

Posted by Tastemade on Sunday, February 11, 2018
Dessert

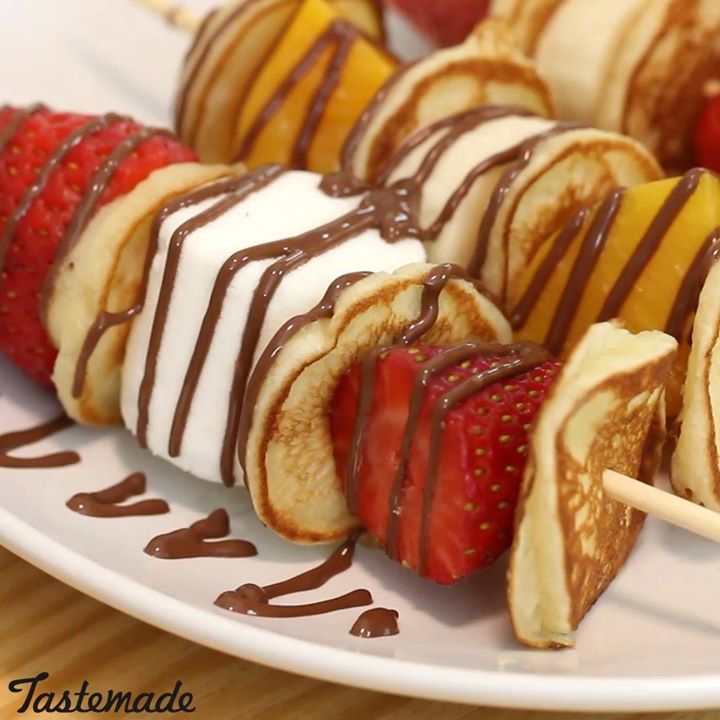
Pancake Kebabs

Pancake Kebabs
Adorable mini pancakes taste better skewered with fresh fruit and drizzled with maple syrup and chocolate.
Author:
Cuisine: American
Recipe type: Dessert
Ingredients
  • 1 cup all-purpose flour
  • 2 tbsp sugar
  • 2 tsp baking powder
  • ¼ tsp salt
  • 1 cup milk
  • 2 tbsp unsalted butter, melted
  • 1 large egg
  • cooking spray, for frying pan
  • Your desired toppings (we used fresh fruit, canned peaches and marshmallows)
  • maple syrup
  • chocolate sauce
  • skewers
Instructions
Make the pancake batter:
  1. Combine the flour, sugar, baking powder and salt in a bowl. In a larger bowl, combine the milk, butter and egg and whisk until fully combined. Add the dry ingredients and whisk together, but make sure not to overmix. Some lumps are fine!
  2. Heat a frying pan over medium heat and spray with cooking spray. Place small dollops of batter onto the frying pan. Cook until the surface of the pancakes develop some bubbles, about 1 minute. Flip and cook for an additional minute, then transfer to a plate.
  3. Skewer the pancakes onto skewers, adding some fruit between each pancake.
  4. Drizzle with maple syrup or chocolate sauce and enjoy!

Watch the recipe video here:

Pancake Kebabs

Adorable mini pancakes taste better skewered with fresh fruit and drizzled with maple syrup and chocolate.Full Recipe: taste.md/2DRS2BW

Posted by Tastemade on Wednesday, February 14, 2018

Dessert

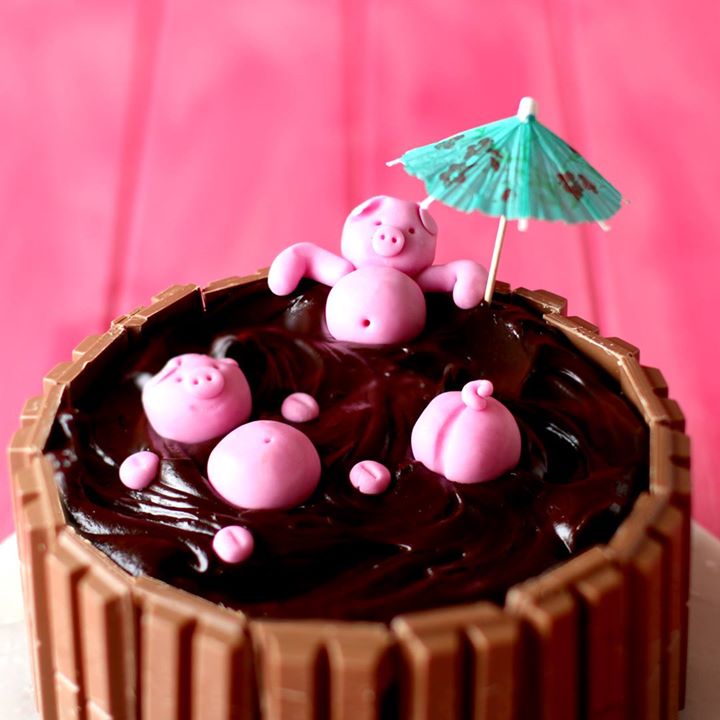
Piggy Mud Bath Cake

Piggy Mud Bath Cake
A rich, perfectly moist chocolate mud cake is made that much better with Kit Kats and piggies on top!
Author:
Cuisine: American
Recipe type: Dessert
Ingredients
Cake
  • 600g Kit Kats
  • 150g cocoa powder
  • 520g all-purpose flour
  • 1 tsp salt
  • 1 ½ tsp bicarbonate of soda
  • 675g caster sugar
  • 525g unsalted butter, softened
  • 6 large eggs, at room temperature
  • 3 tsp vanilla extract
  • 525ml milk
  • Simple syrup (see notes)
  • Chocolate ganache
  • 600g dark cooking chocolate
  • 250g thickened cream
Piggy’s
  • 400g pink fondant
  • skewer to decorate
Instructions
Ganache
  1. To make chocolate ganache add chocolate and cream into a large microwave safe bowl and microwave for 20 seconds at a time, mixing each time until smooth. Allow to chill at room temperature.
Piggy’s
  1. To make chilling piggy: roll a ball of fondant about the size of a large grape. Using your index finger and thumb pinch the top to make ears. Roll a little ball of fondant and flatten slightly. Add to face as the nose. Using a skewer poke in the eye holes and add nostrils. To make bellow roll another ball the same size and poke a hole for the belly button. To make chilling hands, roll two small logs of fondant and bend slightly when adding to cake to make him or her (cos girl piggy’s be chilling too) look like they’re leaning on the back of a spa. To make floating piggy repeat but make little balls of fondant (about the same size as the nose for the floating arms and legs.
Cake
  1. Preheat a fan-forced oven to 160C (320F) or 180C (356F) for a conventional oven. Spray 2 8” cake tin with oil spray and line the bottom with baking paper.
  2. In the bowl of a stand mixer fitted with the paddle attachment, add the flour, bicarb soda, caster sugar and salt. Turn mixer on low speed and allow it to mix for a couple minutes to help everything combine well (alternatively you may do this by sifting the ingredients together). Add the softened butter and mix until it resembles a fine sand like texture.
  3. Add the milk and eggs into the bowl with the dry ingredients and mix on medium speed until no dry ingredients are visible. Scrape down the bowl and mix for another 20 seconds.
  4. Fill two 8” cake tins with batter.
  5. Bake for 30 min or until a toothpick inserted comes out clean. Allow the tins to cool for 2 min and then carefully flip the cake tins over on to a cooling wrack to cool completely before using.
  6. Using a large serrated knife, carefully trim the top off each layer of cake to make even and flat layers. Try to aim to get them all the same height. An easy way to do this is to find the lowest height of the cake, place a skewer or toothpick next to that point and mark it. As you go around each side of the cake cutting it, use the marked skewer to make sure each cut is at the same height. Drizzle both layers with simple syrup (see below)
  7. To frost, add a dab of frosting onto an 8” cake board or serving plate. Add first cake layer. Pipe ganache on top and add the second layer. Add ganache to the side of the cake and use a small off set spatula r table knife to spread ganache on the sides. If the ganache is really hard, microwave for 10 seconds at a time, mixing each time until it reaches spreading consistency. Stick kit kats on the side.
  8. Add ganache on top and add little fondant piggy’s into the ganache mud bath.
  9. NOTE: To make simple syrup: add 100g sugar and 100g of water in a medium sized pot. DO NOT STIR! Bring to a boil and allow to cool completely before using.

Watch the recipe video here:

Piggy Mud Bath Cake

A rich, perfectly moist chocolate mud cake… we literally want to swim in it.Full Recipe: taste.md/2xtxEXe

Posted by Tastemade on Friday, February 16, 2018

Dessert

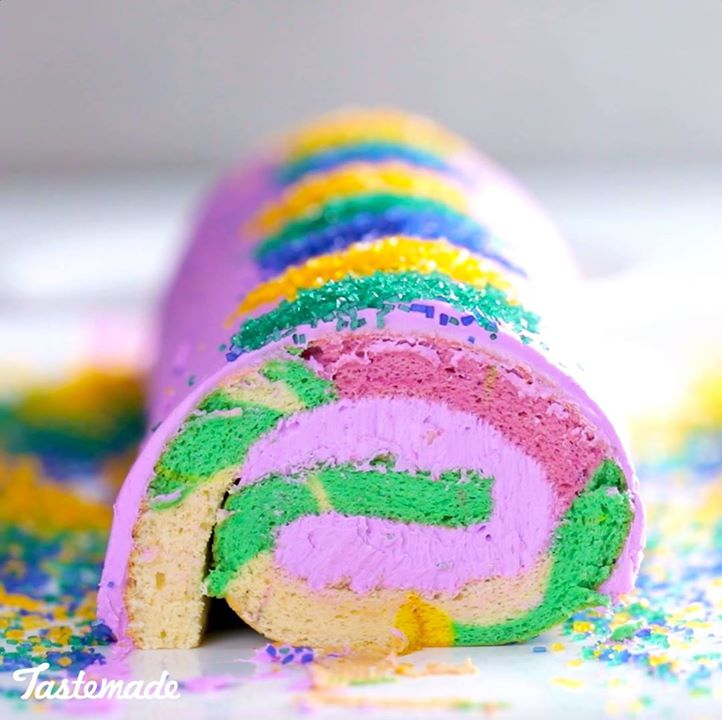
King Cake Rolls

King Cake Rolls
Get into the Mardi Gras spirit with a vibrant king cake roll filled with purple frosting and, yes, a plastic baby.
Author:
Cuisine: American
Recipe type: Dessert
Ingredients
For the sponge cake:
  • 8 eggs, divided, at room temperature
  • 11 tablespoons caster sugar, divided
  • 6 tablespoons milk, room temperature
  • 6 tablespoons vegetable oil
  • 1 teaspoon vanilla extract
  • ½ cup all-purpose flour, sifted
  • 1 teaspoon cinnamon
  • 6 tablespoons cornstarch
  • 1 teaspoon cream of tartar
  • Zest of one lemon
  • Green, yellow and purple food coloring
For the icing:
  • 2 cups butter
  • 8 cups powdered sugar, sifted
  • ¼ cup milk
  • 1 teaspoon vanilla extract
  • ½ teaspoon almond extract
  • Green, yellow and purple sprinkles
Instructions
For the cake:
  1. Preheat oven to 350 degrees. Butter a roll cake sheet pan and line with parchment paper.
  2. Whisk together yolks and 3 tablespoons sugar until the sugar is dissolved. Whisk in milk, vegetable oil and vanilla until smooth. Sift in flour, cinnamon and cornstarch and whisk until smooth.
  3. In the bowl of a stand mixer, whip egg whites until frothy, then add cream of tartar. Whip at medium-low speed for 2 minutes, then gradually add remaining sugar. Whip on medium-high until stiff peaks form. Fold the egg white mixture into the egg yolk mixture.
  4. Divide the batter into four portions and tint one purple, one yellow, and one green. Leave one portion natural colored. Pour the batters into the pan and swirl it together with a toothpick. Tap the pan on the counter to avoid air bubbles. Insert a king cake baby to be found by the lucky cake eater if desired, and bake for 20 to 25 minutes until fluffy. Cake will spring back when touched. Remove parchment paper, and cool cake on a drying rack covered with a towel.
For the icing:
  1. With a hand mixer, beat butter until light and fluffy. Gradually add in powdered sugar one cup at a time, scraping down the bowl as necessary. Finally, add the milk slowly until desired consistency is reached. Add in extracts and purple food coloring.
  2. Ice the inside of the cake with about half of the frosting, and then roll it. Ice the outside of the cake and sides with the remaining frosting. Take a piece of parchment paper and pull the edges taught. Slide the parchment paper down the length of the roll cake to smooth the frosting. Sprinkle with green, yellow and purple sprinkles. Serve immediately.

Watch the recipe video here:

King Cake Roll

This cake's secret ingredient? BABY.(During Mardis Gras, finding the baby in your cake symbolizes luck and prosperity!)Full Recipe: taste.md/2GyXYBx

Posted by Tastemade on Friday, February 2, 2018

Dessert

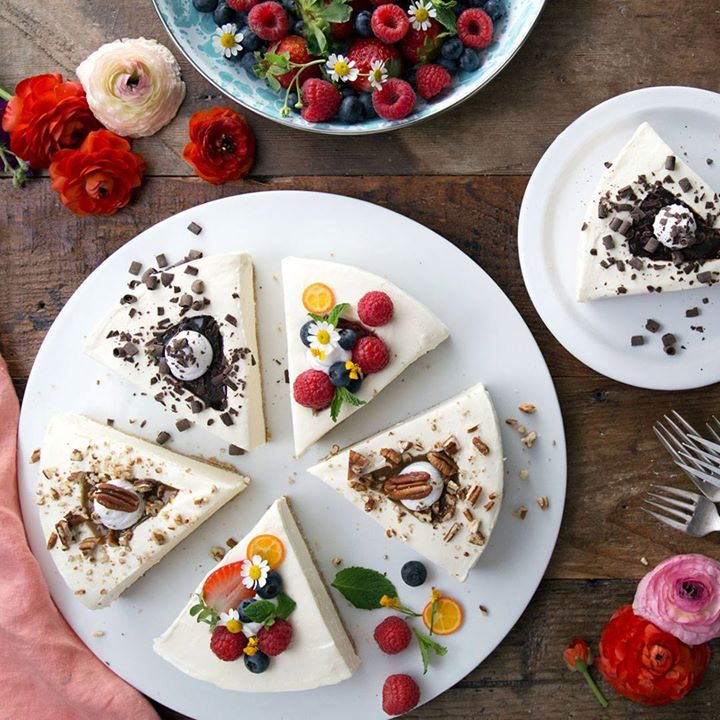
Piecake

Piecake
Life is a combination of magic, cake and pie. This recipe has all three.
Author:
Cuisine: American
Recipe type: Dessert
Ingredients
  • For the filling:
  • 6 wedges Laughing Cow cheese
  • 4 (8-ounce) packages cream cheese, softened
  • 1 (14-ounce) can sweetened condensed milk
  • 1 teaspoon vanilla extract
  • ¼ cup lemon juice
  • For the crust:
  • 1½ cups graham cracker crumbs
  • 3 tablespoons brown sugar
  • 6 tablespoons butter, melted
  • For the filling:
  • 1 cup chocolate sauce
  • Chocolate candies, for garnish
  • 1 cup raspberry jam
  • 1 cup mixed berries, for garnish
  • Mint sprigs, for garnish
  • 1 cup caramel
  • Whipped cream, for garnish
  • Toasted pecans, for garnish
Instructions
  1. Wrap the 6 wedges of cheese in plastic wrap and set aside. Grease a 9-inch springform pan and line with parchment paper.
  2. In the bowl of a food processor, place the graham crackers, brown sugar and butter. Pulse until combined then pour the crumbs into the springform pan and press them to compact the crust.
  3. In a large bowl, use a hand mixer to cream the cream cheese. Slowly add in condensed milk, vanilla and lemon juice. Pour over the crust in the springform pan. Level the top and gently press the plastic-wrapped cheeses into the top and place in the freezer to set overnight.
  4. Unmold the cake and place on a platter. Fill the indentations with the fillings in alternating order and garnish as desired and serve chilled.

Watch the recipe video here:

Piecake

Life is a combination of magic, cake and pie. This recipe has all three.Taste for Yourself: taste.md/2IRVOx1

Posted by Tastemade on Monday, April 16, 2018

Dessert

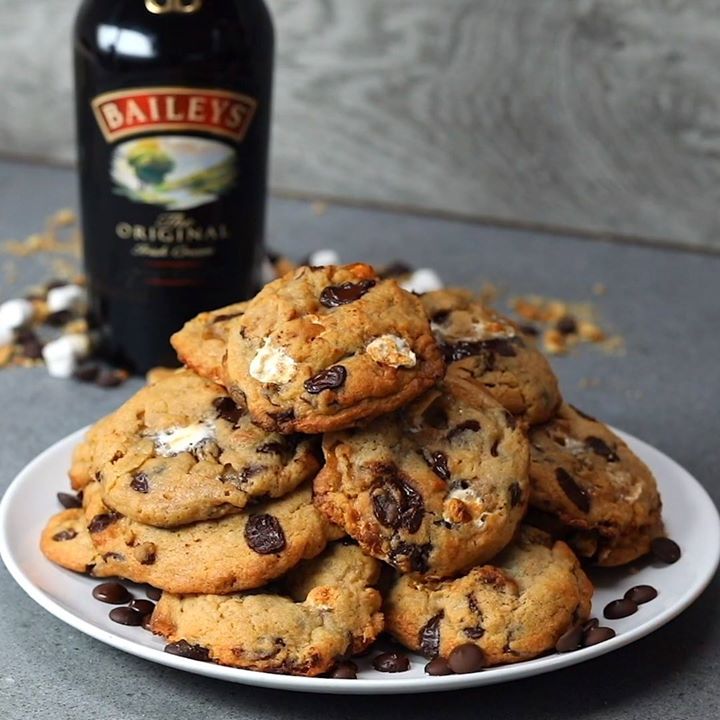
Baileys S’mores Chocolate Chip Cookies

Baileys S'mores Chocolate Chip Cookies
Stay Stylish, Drink Responsibly. Please do not share this with those under the legal purchase age of alcohol. BAILEYS Original Irish Cream Liqueur. 17% Alc/Vol. Imported by Paddington, Ltd., Norwalk, CT.
Author:
Cuisine: American
Recipe type: Dessert
Ingredients
  • 1⅓ cup unsalted butter, room temperature
  • 1 cup granulated sugar
  • 1 cup packed light brown sugar
  • 2 large eggs
  • ½ cup Baileys
  • 3¼ cups all-purpose flour
  • 1 tsp baking powder
  • 1 tsp salt
  • 1 cup dark chocolate chips
  • ½ cup graham crackers, broken
  • Mini marshmallows
Instructions
  1. Preheat the oven to 350ºF. Line 2 large baking sheets with baking paper.
  2. Sift the flour, baking powder and salt together.
  3. In a mixing bowl whisk together the butter and sugars until pale in colour. Add the eggs and whisk until smooth. Add the Baileys and whisk to just combine. Add the flour mixture and mix on low until just combined. Fold in the marshmallows, graham cookie bits and chocolate chips until combined.
  4. Use a small scoop to portion out the cookies. Chill for 15 minutes.
  5. Bake for 13-15 minutes until just golden brown.
  6. Enjoy!

Watch the recipe video here:

Baileys S'mores Chocolate Chip Cookies

Baileys S'mores Chocolate Chip Cookies

Posted by Twisted on Tuesday, May 15, 2018

Dessert

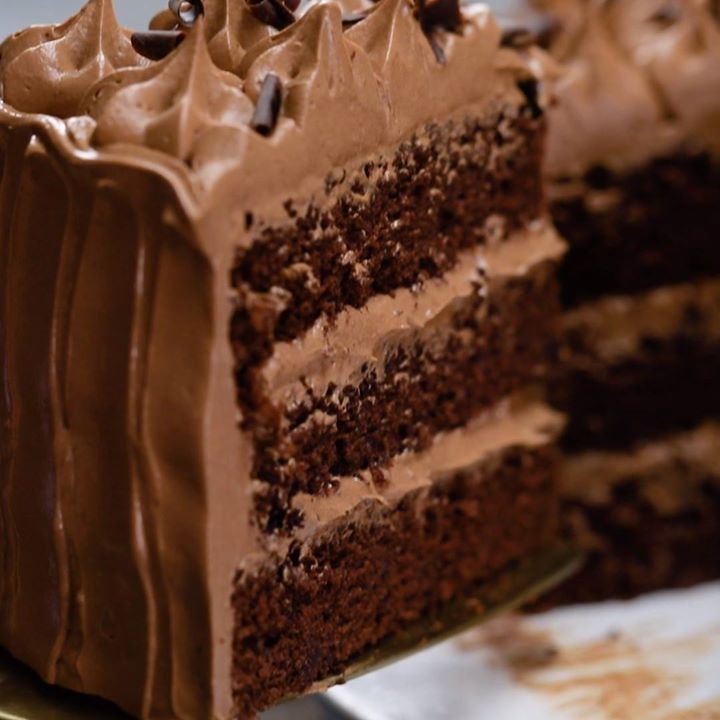
Sara Lee Chocolate Gateau

Sara Lee Chocolate Gateau
Sara Lee Chocolate Gateau - The ULTIMATE childhood chocolate cake!
Author:
Cuisine: American
Recipe type: Dessert
Ingredients
  • 6 eggs
  • 250g caster sugar
  • 100g plain flour
  • 50g cocoa
  • 150g butter, melted
  • Dark chocolate flakes, to decorate
  • For the icing
  • 6 egg whites
  • 340g caster sugar
  • 265g unsalted butter, at room temperature
  • 225g dark chocolate, melted
  • Dark chocolate flakes, to decorate
Instructions
  1. Preheat your oven to 180C/160C fan. Grease and line 3 x 20cm loose bottomed cake tins and set aside until needed.
  2. In the bowl of a stand mixer, put the eggs and caster sugar and with the whisk attachment added, whisk for about 10 minutes, or until they are thick and have nearly tripled in volume. (You can do this with a hand whisk, but doing it in a stand mixer saves your hands!)
  3. Sift over the flour and cocoa powder and fold to combine. Drizzle the melted butter over the top of the mixture and fold this is as well.
  4. Pour the mixture into your prepared cake tins and place into the oven for 20 - 25 minutes or until the cakes are springy to the touch and a skewer comes out clean. Allow to cool in the tins for 5 minutes and then remove to a cooling rack to cool completely.
  5. Whilst the cake is cooling, make the icing. Place the egg whites and sugar in a glass bowl and place over a pan of simmering water, stirring constantly until the sugar dissolves and they reach 65 C on a thermometer. Remove from the heat and place in the bowl of a stand mixer with the whisk attachment fitted. Whisk on high for about 5 minutes or until the mixture is thick, holding its shape and cooled.
  6. Add the melted chocolate and whisk to combine, then start adding the butter, one cube at a time until you have incorporated all of the butter and the icing is thick. If at this point your icing seems to loose, place in the fridge for 30 minutes to cool down.
  7. Fit a piping bag with a star nozzle and add ½ of the icing to the bag.
  8. To assemble the cake, place one cake on a cake board and top with some icing. Spread out with a palette knife and top with your second cake. Place more icing on this, spread out again, and top with your third and final cake. Cover the whole cake with a thick layer of icing and smooth with a palette knife.
  9. Once your cake is smooth, drag your palette knife upwards from the bottom to the top of the cake to create vertical lines running all around the cake. Top finish, pipe stars all over the top of the cake and finish with a sprinkling of chocolate flakes.

Watch the recipe video here:

Sara Lee Chocolate Gateau

Today will henceforth be known as the day we resurrected the Sara Lee Chocolate Gateau. Taste for Yourself: bit.ly/2L49Hdk?: Tastemade UK

Posted by Tastemade on Wednesday, May 16, 2018

Dessert

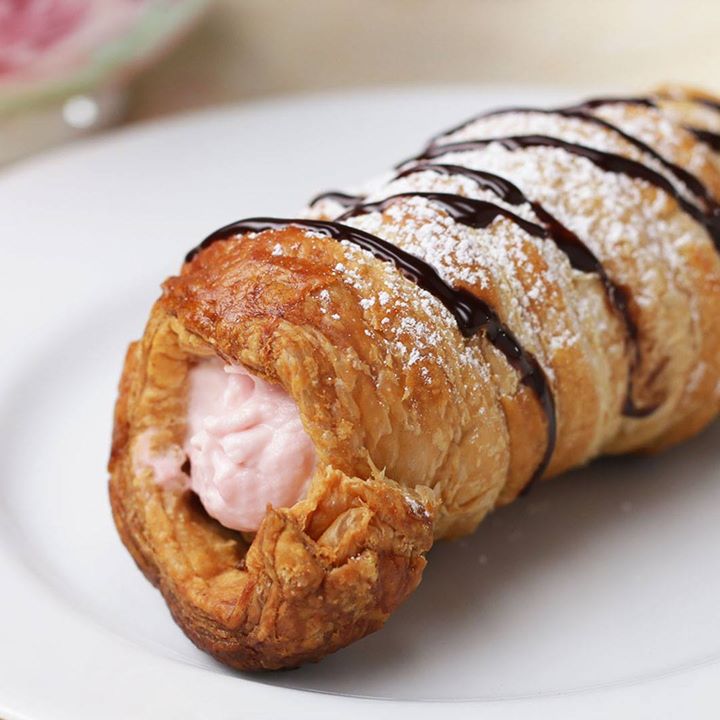
Strawberry Cream-Stuffed Pastries

Strawberry Cream-Stuffed Pastries
Author:
Cuisine: American
Recipe type: Dessert
Ingredients
  • 2 cups (300 g) strawberry, stemmed, quartered
  • 16 oz (455 g) cream cheese
  • ½ cup (80 g) powdered sugar
  • ¼ cup (60 mL) milk
  • 1 large egg
  • 1 tablespoon water
  • 11 oz (310 g) puff pastry, 1 packages, thawed
  • 2 tablespoons powdered sugar, for dusting
  • chocolate syrup, for serving
Instructions
  1. Preheat the oven to 400˚F (200˚C).
  2. In a food processor or blender, puree the strawberries until smooth.
  3. Pour the strawberry puree through a sieve into a medium bowl to remove any seeds and clumps. Chill for 15 minutes, until the puree is cold.
  4. In a separate large bowl, beat the cream cheese and ½ cup (80 g) of powdered sugar together with an electric hand mixer. Mix in the milk and strawberry puree. Set aside.
  5. In a small bowl, whisk the beaten egg and water together. Set aside.
  6. Roll a foot-long (30 cm) piece of aluminum foil into a tube. Repeat with 3 more pieces of foil to make 4 tubes total.
  7. On a cutting board, roll the puff pastry out to 13 inches (33 cm) by 13 inches (33 cm). Slice the puff pastry lengthwise into 1½ inch-wide (4 cm) strips.
  8. Wrap 2 of the strips around a foil tube, brushing the edges with egg wash and gently pressing together to adhere. Repeat with the remaining pastry strips and foil tubes.
  9. Balance the ends of the foil tubes over the edges of a roasting pan or baking sheet so the pastry isn’t touching the surface of the pan. Brush egg wash all over the pastry spirals.
  10. Bake for 25 minutes, until golden brown.
  11. Let the pastry tubes rest at room temperature for 5 minutes. Gently remove the foil tubes. Transfer the pastry tubes to a baking sheet lined with parchment paper and bake for 5 more minutes. Let cool to room temperature.
  12. Fill a piping bag or zip-top bag fitted with a round tip with the cream cheese mixture. Pipe the cream cheese filling into the pastry tubes.
  13. Dust with powdered sugar and drizzle with chocolate syrup.
  14. Enjoy!

Watch the recipe video here:

https://www.facebook.com/buzzfeedtasty/videos/2327694100816559/

Dessert

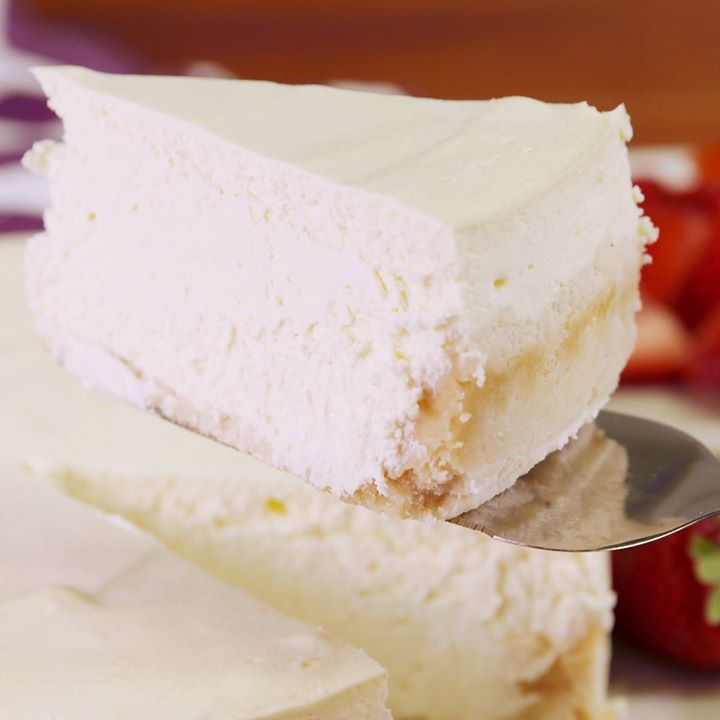
Keto Cheesecake

Keto Cheesecake
So creamy and smooth.
Author:
Cuisine: American
Recipe type: Dessert
Ingredients
  • Cooking spray, for pan
  • ½ c. almond flour
  • ½ c. coconut flour
  • ¼ c. shredded coconut
  • ½ c. (1 stick) butter, melted
  • 3 (8-oz.) blocks cream cheese, softened to room temperature
  • 16 oz. sour cream, at room temperature
  • 1 tbsp. Stevia
  • 2 tsp. pure vanilla extract
  • 3 large eggs, at room temperature
  • sliced strawberries, for serving
Instructions
  1. Preheat oven to 300°. Grease an 8 or 9-inch springform pan, and cover the bottom and edges with foil. In a medium bowl, mix together the flours, coconut, and butter. Press the crust into the bottom and a little up the sides of the prepared pan. Place the pan in the fridge while you make the filling.
  2. In a large bowl, beat the cream cheese and sour cream together, then beat in the stevia and vanilla. Add the eggs one at a time, mixing after each addition. Spread the filling evenly over the crust.
  3. Place pan in a water bath, then bake for 1 hour to 1 hour 20 minutes, until it only slightly jiggles in the center. Turn oven off, but leave the cake in the oven with the door slightly ajar to cool slowly for an hour.
  4. Remove pan from water bath and take off foil then let chill in the fridge for at least five hours or overnight. Slice and garnish with strawberries.

Watch the recipe video here:

How To Make Keto Cheesecake

Just because you're on the keto diet, doesn't mean you can't have fluffy cheesecake. Full recipe: http://dlsh.it/BthIaY8

Posted by Delish on Sunday, April 8, 2018

Dessert

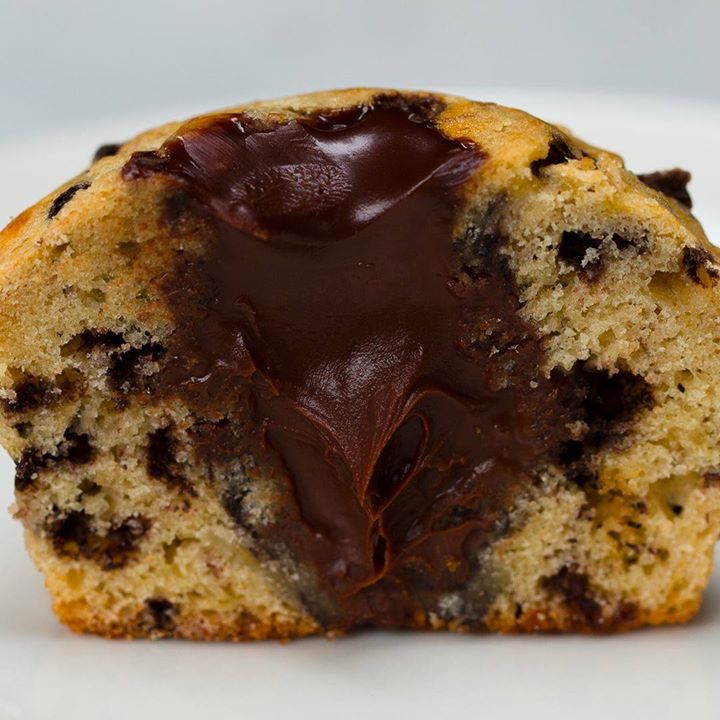
Chocolate-Filled Banana Muffins

Chocolate-Filled Banana Muffins
Author:
Cuisine: American
Recipe type: Dessert
Ingredients
  • 2 bananas
  • 1 large egg, room temperature
  • ⅓ cup (80 mL) vegetable oil
  • ½ cup (100 g) sugar
  • ¼ cup (60 mL) whole milk
  • 1 teaspoon vanilla extract
  • 1 ½ cups (185 g) all-purpose flour
  • 1 teaspoon baking powder
  • ½ teaspoon baking soda
  • ¼ teaspoon kosher salt
  • ¼ cup (45 g) chocolate sprinkles
  • nonstick cooking spray, for greasing pan
  • ½ cup (85 g) semisweet chocolate chip
  • ½ cup (120 mL) heavy whipping cream, hot
Instructions
  1. Preheat the oven to 300°F (150°C).
  2. If your bananas aren’t already very ripe, place them on a baking sheet lined with parchment paper. Bake for 15-20 minutes, until they are nearly black. Be careful to not overcook or the bananas will leak.
  3. Let the bananas cool to room temperature. Increase the oven temperature to 350°F (180°C).
  4. Peel the bananas, then place them in a large bowl. Mash bananas using a hand mixer or fork.
  5. Add the egg, vegetable oil, sugar, milk, and vanilla. Beat until combined.
  6. Sift the flour, baking powder, baking soda, and salt into the banana mixture. Beat until just combined, being careful to not overmix.
  7. Use a rubber spatula to gently fold the chocolate sprinkles into the batter.
  8. Grease a 12-cup muffin tin with nonstick spray. Divide the batter among the cups.
  9. Bake for 20-25 minutes, until the tops are lightly browned and a toothpick inserted in the center of a muffin comes out clean.
  10. Place the chocolate chips in a heatproof liquid measuring cup. Pour over the hot heavy cream. Let sit for 1 minute, then stir until the chocolate is melted and smooth.
  11. While the muffins are still warm, use the back of a wooden spoon to push down a hole into the center of each muffin. Allow to cool to room temperature.
  12. Fill the muffins with the chocolate ganache.
  13. Chill the muffins in the fridge for at least 1 hour, until the center has set.
  14. Enjoy!

Watch the recipe video here:

Chocolate-Filled Banana Muffins

If you don't have super ripe bananas on hand, here's a hack you can use so you can still make these chocolate-filled banana muffins! ?FULL RECIPE: https://tasty.co/recipe/chocolate-filled-banana-muffins

Posted by Tasty on Wednesday, April 4, 2018