Showing 879 Result(s)
Dessert

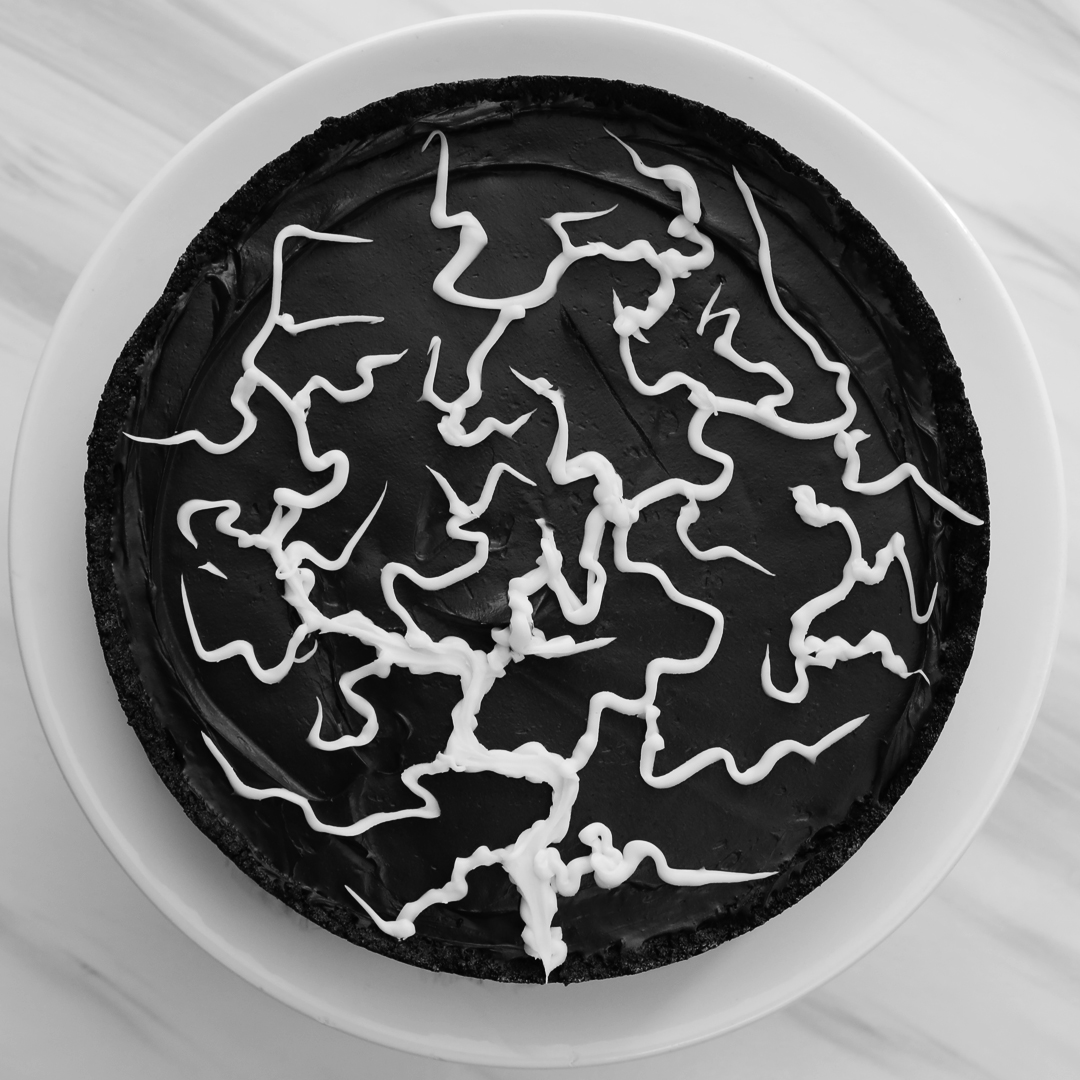
Venom Charcoal Cheesecake
Venom Charcoal Cheesecake
So many snacks, so little time... activated charcoal is the magic ingredient that transforms this cheesecake into Venom's ideal snack!
Author:
Cuisine: American
Recipe type: Dessert
Ingredients
  • Makes one 8-inch cheesecake
  • * 460 g (2 8-ounce packages) of cream cheese, softened
  • * 118 mL whipping cream
  • * 81 g powdered sugar
  • * 40 g cocoa powder
  • * 2 tablespoons vanilla extract
  • * 2 tablespoons activated charcoal
  • * 1 teaspoon salt
  • * Black food color, optional
  • * 200 g (1 package) of chocolate sandwich cookies, food processed into crumbs
  • * 2 teaspoons activated charcoal
  • * 4 tablespoons unsalted butter, melted
White Chocolate Ganash
  • * 140 g white chocolate
  • * 2 tablespoons heavy cream
Instructions
  1. In a medium bowl, combine cookie crumbs and charcoal and mix well. Add butter and mix until fully incorporated. Pour mixture into greased springform pan and press firmly and evenly to form the crust. Place in freezer until filling is ready.
  2. In another medium bowl, beat cream cheese until smooth, add powdered sugar, cocoa, charcoal, vanilla, and salt. Mix on low until the dries are incorporated. Add whipping cream, beat on medium high until mixture is light and fluffy, about 2 minutes.
  3. Pour filling into the chilled crust and gently level the top by tapping it to pop any bubbles.
  4. Refrigerate overnight or freeze for 2–3 hours until the middle is set.
  5. Make the ganache: Place white chocolate and cream in a small bowl. Microwave in 30-second intervals until melted. Wait about one minute and mix to combine. Decorate to your liking.
  6. Cut and enjoy!

Watch the recipe video here:

Venom Charcoal CheesecakeActivated charcoal is the magic ingredient that transforms this into Venom's ideal snack!

Posted by Proper Tasty on Tuesday, September 25, 2018
Dessert

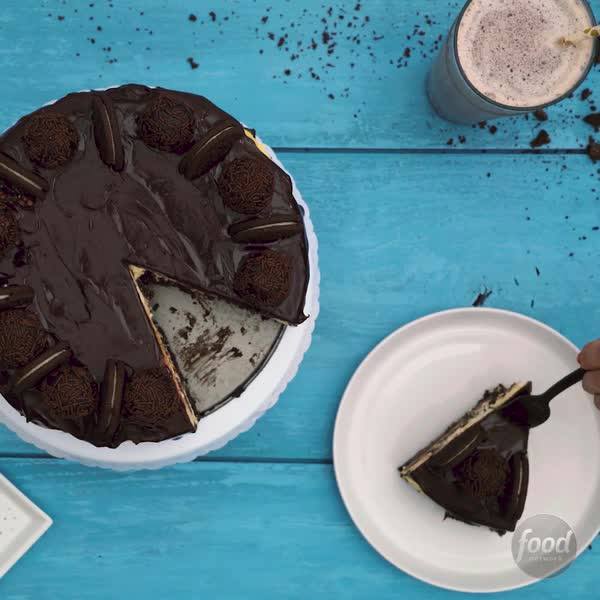
Oreo Lover’s Cheesecake

Oreo Lover's Cheesecake
Almost every square inch of this cheesecake contains an over-the-top bite of your favorite sandwich cookie. Not only are they in the crust and filling, we even make Oreo truffle balls to decorate the top.
Author:
Cuisine: American
Recipe type: Dessert
Ingredients
Crust:
  • One 14.3-ounce package chocolate sandwich cookies, such as Oreos®
  • 1 stick (8 tablespoons) unsalted butter, melted
Filling:
  • Four 8-ounce packages cream cheese, at room temperature
  • 1 cup sugar
  • 1 cup sour cream
  • 4 large eggs, at room temperature
  • 1 teaspoon pure vanilla extract
  • 2 cups chocolate sandwich cookies, such as Oreos® (about 18 cookies), roughly chopped
Topping:
  • 14 chocolate sandwich cookies, such as Oreos®
  • 2 ounces cream cheese, at room temperature
  • ½ cup chocolate sprinkles
  • ½ cup hot fudge sauce, warmed
Instructions
  1. For the crust: Position an oven rack in the middle of the oven and preheat to 325 degrees F.
  2. Place the cookies in a large resealable plastic bag and crush until fine crumbs form but there are still a few larger chunks. Pour in the butter, reseal the bag and shake until the cookies are well coated.
  3. Firmly press the cookie mixture into the bottom of a 9-inch springform pan (use the bottom of a measuring cup to help pack it in and make it even). Bake until crisp and set, 10 to 12 minutes. Let cool completely, about 30 minutes. Wrap the bottom and sides of the pan with a large piece of foil and put it in a large roasting pan.
  4. For the filling: Beat the cream cheese and sugar together in a large bowl with an electric mixer on medium speed for 1 minute. Add the sour cream and beat until just combined. Mix in the eggs by hand, one at a time. Mix in the vanilla by hand until just combined. (Take care not to overmix or the cheesecake will puff up and crack).
  5. Pour half of the batter into the springform pan. Sprinkle the chopped cookies over the top and gently press down on them so some sink into the batter. Pour the remaining batter on top. Add enough hot water to the roasting pan to come about halfway up the side of the springform pan.
  6. Bake until the outside of the cake is set but the center is still slightly loose, about 1 hour. Turn the oven off and leave the cheesecake in the oven for another hour. Remove the cheesecake from the roasting pan to a cooling rack. Run a knife around the edge and cool to room temperature. Cover and refrigerate at least 8 hours.
  7. For the topping: Pulse 9 of the cookies in a food processor until fine crumbs form. Add the cream cheese and pulse until incorporated and sticky enough to form a ball. Scoop out 1 tablespoon and form into a ball, then roll the ball in the sprinkles until completely covered. Place on a baking sheet and repeat with the remaining cookie mixture and sprinkles for 9 balls total. Refrigerate until ready to use. Cut the remaining 5 cookies in half.
  8. Run a knife around the edge of the pan once more and open the clasp to unmold the cheesecake. Transfer to a serving plate or cake stand and smooth the edges with a knife. Drizzle the hot fudge sauce all over the top and sides of the cake, and use an offset spatula to spread it evenly, letting some drip over the sides. Make a decorative ring around the edge of the cheesecake with the cookie balls. Place a cookie half cut-side down in between each ball. Serve cold.

Watch the recipe video here:

How to Make an Oreo Lover's Cheesecake

Recipe of the Day: Oreo Lover's Cheesecake ?Save the recipe: https://foodtv.com/2O0mWA4

Posted by Food Network on Sunday, September 23, 2018

Dessert

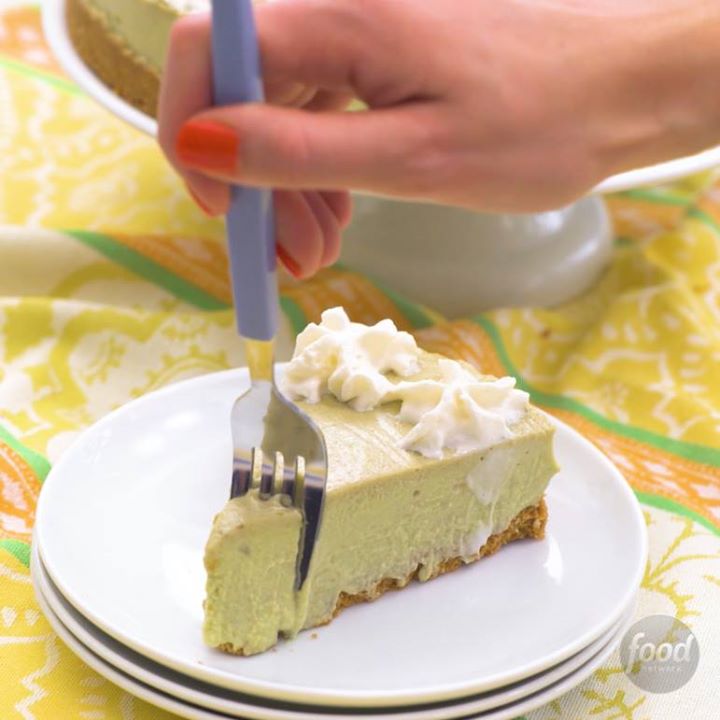
No-Bake Avocado Cheesecake

No-Bake Avocado Cheesecake
This easy no-bake dessert relies on the smooth, creamy texture of avocado to form a stiff, custardy base -- no gelatin required. Lime zest and juice add tang.
Author:
Cuisine: American
Recipe type: Dessert
Ingredients
  • Nonstick cooking spray, for spraying the pan and plastic wrap
  • 9 ounces graham crackers
  • 1 cup granulated sugar
  • 1 stick (8 tablespoons) unsalted butter, melted
  • 12 ounces cream cheese, at room temperature
  • 3 firm but ripe avocados, peeled, pitted and roughly chopped
  • Zest and juice of 1½ limes
  • One 5.4-ounce can coconut cream
  • ½ cup heavy cream
  • Whipped cream, for serving
Instructions
  1. Spray a 9-inch springform pan with cooking spray. Add the graham crackers and ¼ cup of the sugar to a food processor and pulse to fine crumbs. Drizzle in the butter and pulse until the crumbs are completely coated and moistened. Firmly press the crumb mixture into the bottom of the prepared pan. Refrigerate while you make the filling. Clean out the food processor and return it to the stand.
  2. Add the cream cheese, avocados, lime zest and juice and remaining ¾ cup sugar to the food processor and puree until completely smooth and almost no avocado lumps remain. Add the coconut cream and heavy cream and process until the mixture starts to thicken and becomes creamy, about 1 minute.
  3. Pour the mixture on top of the crust in the prepared pan. Spray a piece of plastic wrap with cooking spray and gently press it on top of the filling so no air can reach it. Refrigerate until completely set, 6 hours and up to overnight.
  4. Remove the plastic wrap and smooth out any bubbles with an offset spatula. Garnish with whipped cream around the edge and serve cold.

Watch the recipe video here:

How to Make No-Bake Avocado Cheesecake

No-Bake Avocado Cheesecake is green, gorgeous and everything you've ever wanted! (Trending on Pinterest)

Posted by Food Network on Sunday, February 11, 2018

Dessert

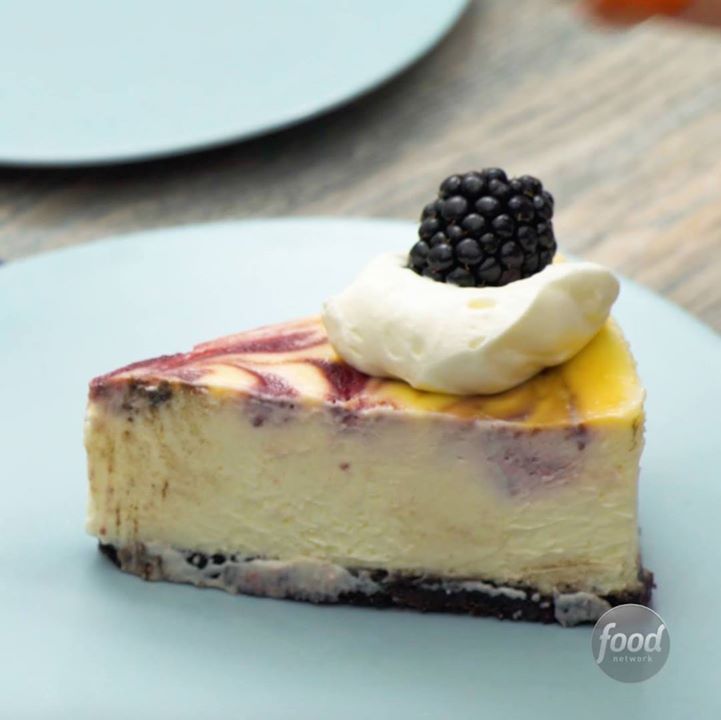
Blackberry Swirl Cheesecake

Blackberry Swirl Cheesecake
A swirl of fresh blackberries makes a big impact on this eye-catching addition to a party table.
Author:
Cuisine: American
Recipe type: Dessert
Ingredients
Crust:
  • One 9-ounce box chocolate wafer cookies
  • ¼ cup sugar
  • 1 stick (8 tablespoons) unsalted butter, melted
Filling:
  • Three 11.5-ounce containers whipped cream cheese
  • 1¼ cups sugar
  • One 16-ounce container sour cream, at room temperature
  • 1 cup heavy cream
  • 4 large eggs, at room temperature
  • 1 teaspoon pure vanilla extract
  • Two 6-ounce containers blackberries
  • Whipped cream, for serving
Instructions
Special equipment:
  1. a 10-inch springform pan and a wooden skewer
For the crust:
  1. Position a rack in the middle of the oven and preheat to 325 degrees F.
  2. Add the cookies and sugar to the bowl of a food processor and pulse to fine crumbs. Drizzle in the butter and pulse until the crumbs are completely coated with the butter.
  3. Press the crumb mixture firmly into the bottom of a 10-inch springform pan. Bake until set, 15 to 18 minutes; let cool completely on a rack, 30 minutes.
  4. Wrap the bottom and sides of the pan with a large piece of foil and put it in a large roasting pan.
For the filling:
  1. Beat together the cream cheese and sugar in a large bowl with an electric mixer on medium speed for 1 minute. Add the sour cream and beat until just combined. Add the heavy cream and beat until just combined. Mix in the eggs by hand, one at a time, until just combined. Mix in the vanilla by hand until just combined. (Take care not to overmix or the cheesecake will turn into a souffle!). Set aside.
  2. Puree half the blackberries in a blender until completely smooth. Transfer to a small bowl and ladle in ¼ cup of the cheesecake mixture. Stir to combine. Pour the remaining plain cheesecake batter into the crust.
  3. Use an ice cream scoop or large spoon to drop scoopfuls of the blackberry batter on top of the plain batter. Drag a long wooden skewer through the batter, making sure the skewer reaches down to the bottom, to marble the colors for a tie-dye effect. Add enough hot water to the roasting pan to come about halfway up the sides of the springform pan.
  4. Bake until the outside of the cheesecake is set, but the center is still slightly loose, about 1 hour 20 minutes. Turn the oven off and leave the cheesecake inside for 1 hour.
  5. Remove the cheesecake from the roasting pan to a cooling rack. Run a knife around the edge of the pan and let the cheesecake cool to room temperature, about 2 hours. Cover and refrigerate at least 8 hours and up to 12 hours.
  6. Run a knife around the edge of the pan one more time, then open the pan clasp to release the sides. Transfer the cheesecake to a serving platter or cake stand. Smooth the edges of the cheesecake with a knife. Slice and serve with whipped cream and the remaining blackberries.

Watch the recipe video here:

How to Make Blackberry Swirl Cheesecake

This beautiful Blackberry Swirl Cheesecake is a surefire way to impress any guest! ??

Posted by Food Network on Monday, February 26, 2018

Dessert

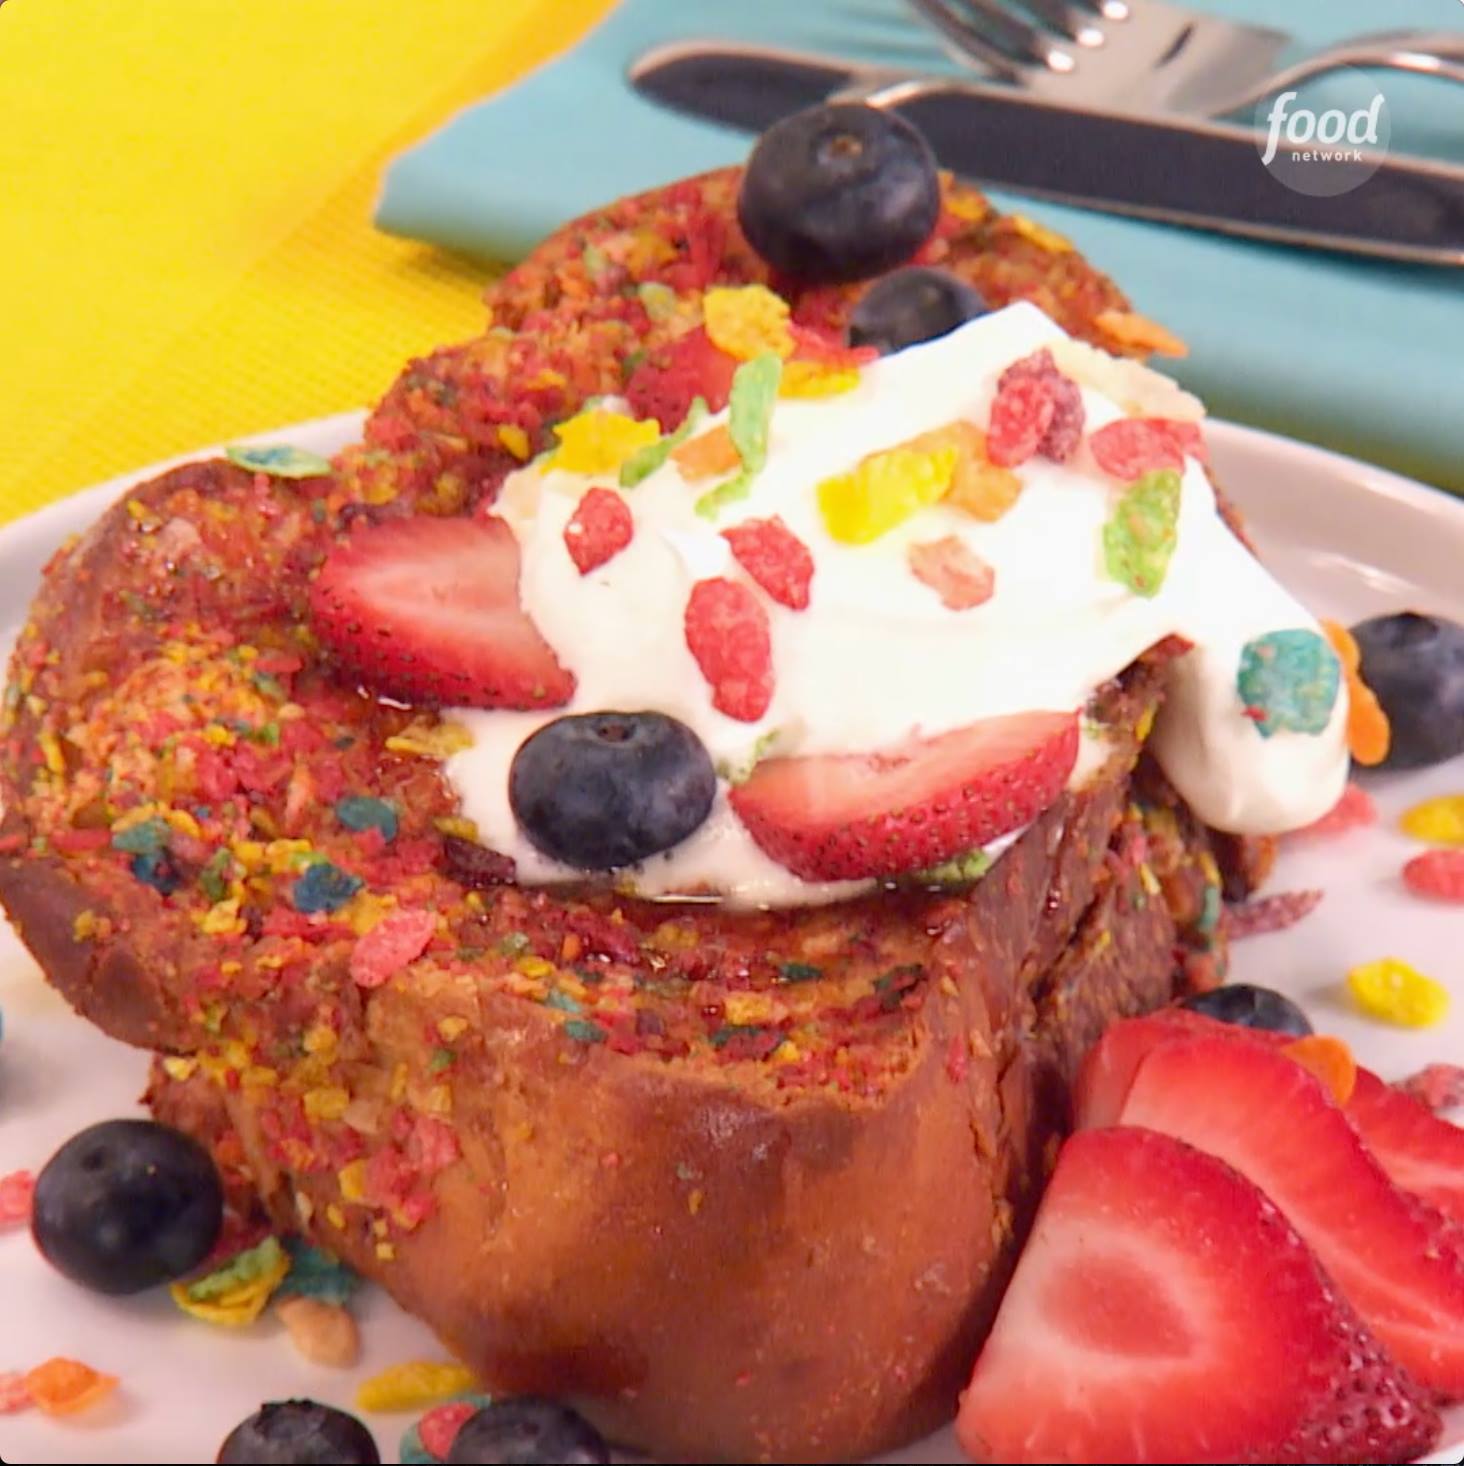
Cereal-Stuffed French Toast

Cereal-Stuffed French Toast
Cereal-Crusted French Toast... and it's stuffed with berries and cream cheese! ??
Author:
Cuisine: American
Recipe type: Dessert
Ingredients
  • 1 loaf challah bread or any tall braided bread
  • 2½ cups tropical or fruity cereal, such as Fruity Pebbles, plus more for garnish
  • 8 ounces cream cheese, softened
  • 2 tablespoons chopped strawberries, plus more for garnish
  • 2 tablespoons chopped blueberries, plus more for garnish
  • 1 cup half-and-half
  • 1½ teaspoons pure vanilla extract
  • ¼ teaspoon ground cinnamon
  • 2 large eggs, beaten
  • 4 tablespoons salted butter
  • Whipped cream, for serving
  • Maple syrup, for serving
Instructions
  1. Cut four 2-inch-thick slices of bread from the center of the loaf (save the rest for another use). Using a paring knife, make a small cut through the bottom of each slice of bread going horizontally to create a pocket for the filling.
  2. Pour the cereal into a large resealable plastic bag and seal. Using a rolling pin, crush the cereal into pieces; stop before it gets too fine. Pour 2 tablespoons of the crushed cereal into a bowl. Add the cream cheese and chopped strawberries and blueberries and mix.
  3. In a shallow baking dish, whisk together the half-and-half, vanilla, cinnamon and eggs.
  4. In a large skillet over medium-low heat, melt 1 tablespoon of the butter.
  5. Using a spoon, stuff a slice of bread with about 2 tablespoons of the filling. Close the opening and dip into the egg mixture to coat (about 5 seconds on each side). Transfer the bread to the bag filled with cereal and carefully coat each side.
  6. Cook the bread in the skillet until toasted on both sides, being careful not to burn it, 3 to 4 minutes per side. Transfer to a serving plate.
  7. Stuff, dip, coat and cook the remaining bread slices one at a time, adding an additional tablespoon of butter to the skillet when cooking each batch (see Cook's Note).
  8. Serve with whipped cream or maple syrup and garnish with berries and more cereal.

Watch the recipe video here:

How to Make Cereal-Crusted French Toast

Cereal-Crusted French Toast… and it's stuffed with berries and cream cheese! ??#LetsEat > Tomorrow at 9a|8c

Posted by Food Network on Saturday, August 25, 2018

Dessert

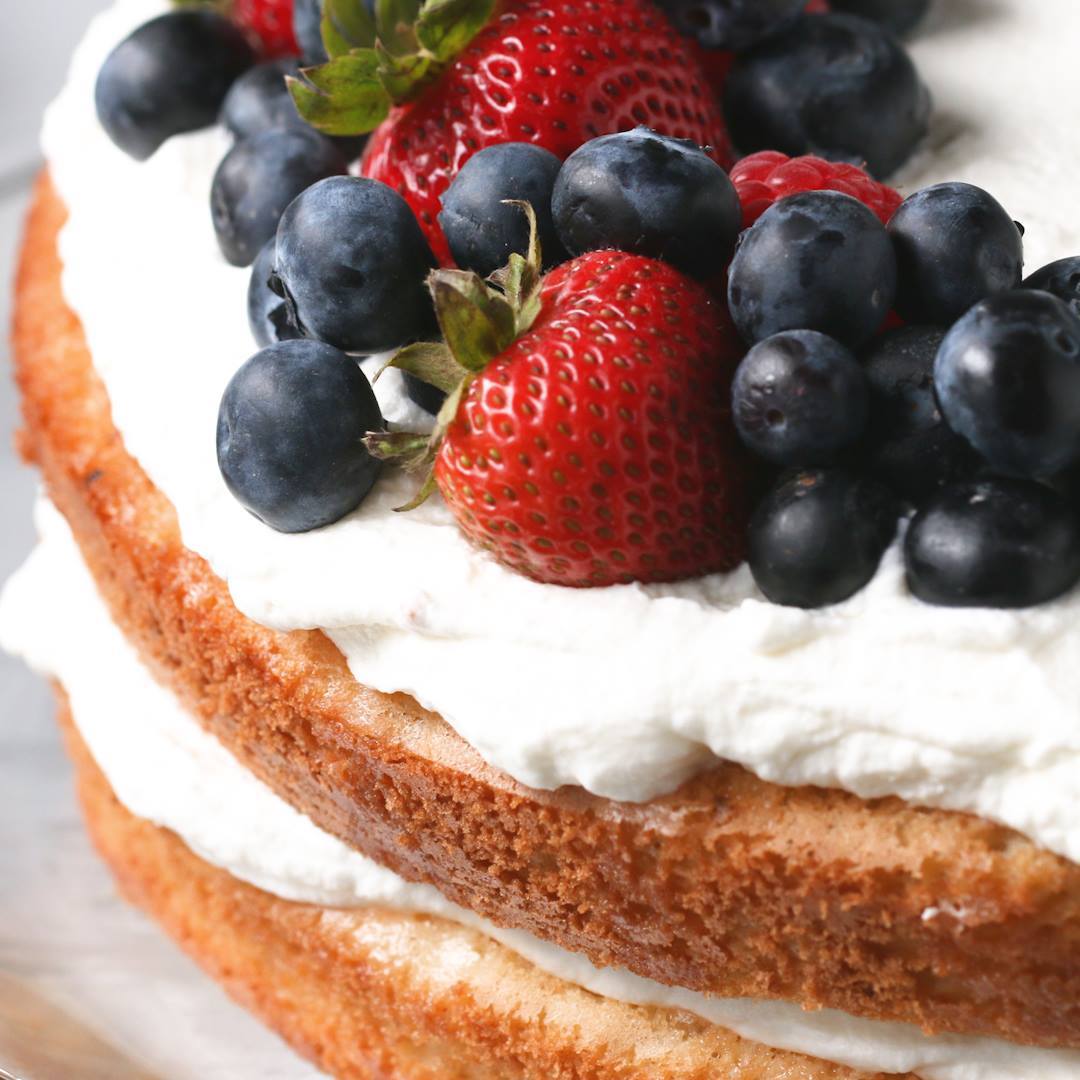
2-Layer Tres Leches Cake

2-Layer Tres Leches Cake
2-Layer Tres Leches Cake recipe.
Author:
Cuisine: American
Recipe type: Dessert
Ingredients
  • 1 ¾ cups all-purpose flour (220 g)
  • 1 tablespoon baking powder
  • ¾ teaspoon kosher salt
  • ¼ teaspoon ground cinnamon
  • 6 large eggs
  • 1 ¼ cups granulated sugar (250 g)
  • ¼ cup whole milk (60 mL)
  • ½ teaspoon vanilla extract
  • nonstick cooking spray, for greasing
  • ½ cup evaporated milk (120 mL)
  • ½ cup coconut milk (120 mL)
  • 14 oz condensed milk, 1 can (395 g)
  • 2 cups heavy whipping cream (480 mL)
  • ¼ cup powdered sugar (30 g)
  • assorted berries, for serving, optional
Instructions
  1. Whisk the flour, baking powder, salt, and cinnamon together in a medium bowl.
  2. In a separate large bowl, beat the eggs and sugar together with an electric mixer until light, fluffy, and nearly doubled in size, 6-8 minutes.
  3. Using a spatula, gently fold in the flour mixture until just combined (some streaks of flour are okay).
  4. Preheat the oven to 350°F (180°C).
  5. Combine the milk and vanilla extract in a liquid measuring cup or small bowl, then gently fold into the batter, mixing just to blend.
  6. Spray 2 9-inch (23 cm) round cake pans with nonstick cooking spray. Divide the batter between the pans.
  7. Bake until the cakes are golden brown around the edges and spring back slightly when pressed in the center, about 20-25 minutes.
  8. While the cakes are baking, combine the evaporated milk, coconut milk and condensed milk in a liquid measuring cup or small bowl and whisk to blend.
  9. Once the cakes are done, immediately remove the cakes from the pans and invert them onto a wire rack or baking sheet. Cool for 2 minutes. Then, poke the cakes all over with a fork.
  10. Return the cakes to the pans. Drizzle the condensed milk mixture over the cakes, letting it soak in. Let sit for 15 minutes.
  11. In a medium bowl, whip the heavy cream and powdered sugar with an electric hand mixer until stiff peaks form.
  12. Carefully transfer one of the cakes to a cake stand.
  13. Spread a layer of the whipped cream over the cake. Place the other cake on top and spread with the remaining whipped cream.
  14. Decorate with berries, if desired.
  15. Slice and serve.
  16. Enjoy!

Watch the recipe video here:

2-Layer Tres Leches Cake

Double the layers, double the delicious! ? Full Recipe: https://tasty.co/recipe/2-layer-tres-leches-cake

Posted by Tasty on Sunday, September 16, 2018

Dessert

Caramel Apple Pie Ice Box Cake

Caramel Apple Pie Ice Box Cake
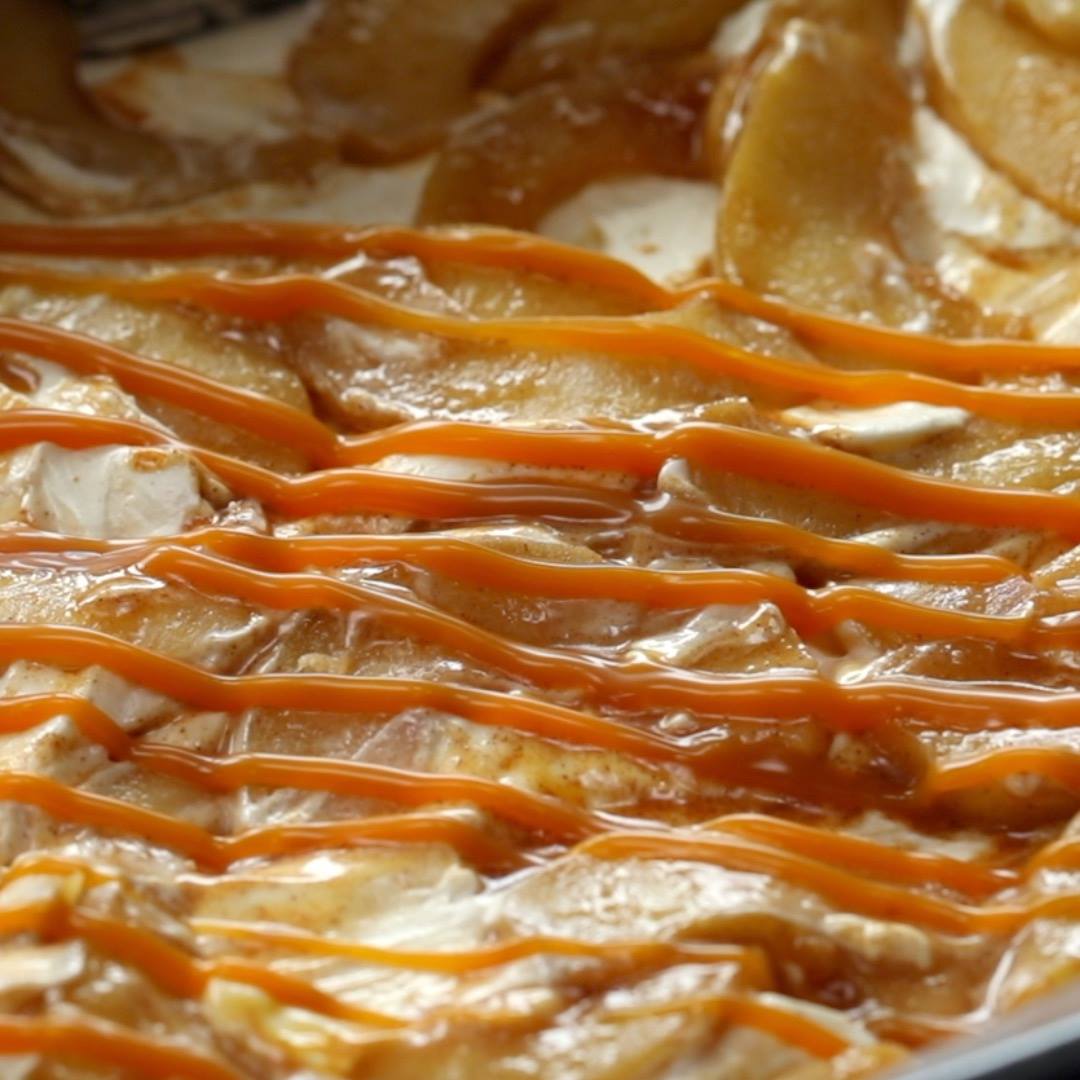
FAll is just around the corner and we're getting ready for those autumnal apple recipes. But right now, we're holding on to summer as much as we can with this no-bake caramel apple pie icebox cake. It's easy and a perfect dessert inbetween seasons!
Author:
Cuisine: American
Recipe type: Dessert
Ingredients
  • 6 apples, peeled, cored and sliced
  • 1 tsp cinnamon
  • 2 tbsp butter
  • ¼ cup brown sugar
  • 2-3 packs Malted biscuit cookies
  • 4 cups whipping cream
  • 1 cup cream cheese, softened
  • 2 tbsp icing sugar
  • 1 tsp vanilla
  • Caramel sauce
Instructions
  1. Heat butter over medium heat in a large pan. Add apples, brown sugar, and cinnamon. Stir to coat and cook until apples have softened. Set aside to cool completely
  2. Whip together cream, cream cheese, icing sugar and vanilla until stiff peaks form.
  3. Spread a thin layer of cream on the bottom of a square/ round springform pan or a deep glass dish. Top with a layer of evenly places biscuits, followed by a layer of whipped cream and then apples and a drizzle of caramel sauce. Repeat to have 2 layers of apple and three layers of biscuit in total finishing with a layer of whipped cream and drizzle with caramel sauce.
  4. Cover and chill for 4 hours - overnight.
  5. Slice and enjoy!

Watch the recipe video here:

Caramel Apple Pie Ice Box Cake

Caramel Apple Pie Ice Box Cake

Posted by Twisted on Sunday, September 16, 2018

Dessert

Triple-Decker Cheesecake Tower

Triple-Decker Cheesecake Tower
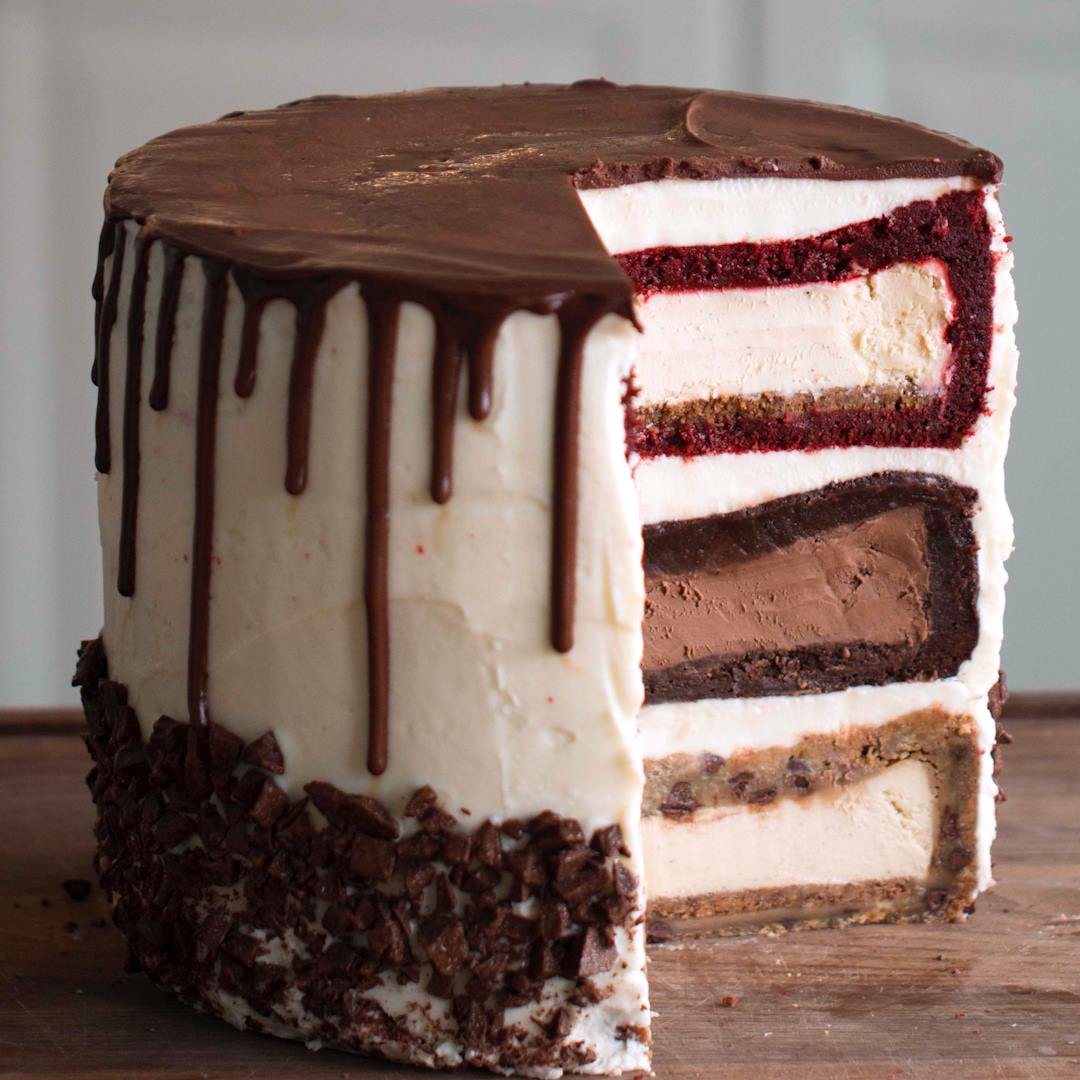
Triple-Decker Cheesecake Tower recipe.
Author:
Cuisine: American
Recipe type: Dessert
Ingredients
  • 18 oz brownie mix, 2 boxes, prepared according to package instructions (510 g)
  • 1 chocolate cheesecake, 8 inch (20 cm) prepared
  • 15 oz red velvet cake mix, 1½ boxes, prepared according to package instructions without the water (425 g)
  • 2 vanilla cheesecakes, 8 inch (20 cm) prepared
  • 40 oz chocolate chip cookie dough (1.1 kg)
  • 8 cups cream cheese icing (920 g)
  • 2 cups chocolate ganache (575 g)
  • 10 oz chocolate, chopped (285 g)
SPECIAL EQUIPMENT
  • 3 springform pans, 9 inch (23 cm)
Instructions
  1. Preheat the oven to 300°F (150°C).
  2. In a greased, 9-inch (23 cm) springform pan, spread ⅓ of the brownie batter evenly on the bottom. Lay the chocolate cheesecake in the center, then spread the rest of the batter on top. Set aside.
  3. In another greased springform pan, spread ⅓ of the cake batter evenly on the bottom, then lay the vanilla cheesecake on top. Spread the rest of the red velvet batter over the cheesecake and set aside.
  4. In a third springform pan, press ⅓ of the cookie dough evenly on the bottom, then another ⅓ of the dough around the sides of the pan to make a wall. Lay the remaining vanilla cheesecake in the center, then cover with the rest of the cookie dough and seal the edges.
  5. Bake all 3 filled cakes for 2 hours, until a toothpick inserted in the center of each comes out clean.
  6. Chill the cakes overnight in the refrigerator.
  7. Dollop a bit of of cream cheese frosting onto a serving platter and line the sides with parchment paper.
  8. Add the cookie cake to the platter and spread the top with layer of frosting.
  9. Stack the brownie cake on top, then spread another layer of frosting on top.
  10. Finally, place the red velvet cake on top, then frost the top and sides evenly.
  11. Add the chocolate ganache to a squeeze bottle, then decorate the top of the cake working your way around the top edge of the cake to make a drip pattern. Squeeze more ganache over the top of the cake and spread evenly to cover.
  12. Decorate the lower part of the cake by pressing the chocolate chunks into the sides.
  13. Slice and serve.
  14. Enjoy!

Watch the recipe video here:

Triple Decker Cheesecake Tower

3 Cheesecakes, 3 desserts, one dream.Get the full recipe: https://tasty.co/recipe/triple-decker-cheesecake-towerCheck out the featured springform pan HERE: https://bzfd.it/2MpLhdZ – We may make some $$ if you buy!

Posted by Tasty on Wednesday, September 12, 2018

Dessert

Lemon Meringue Bars

Lemon Meringue Bars
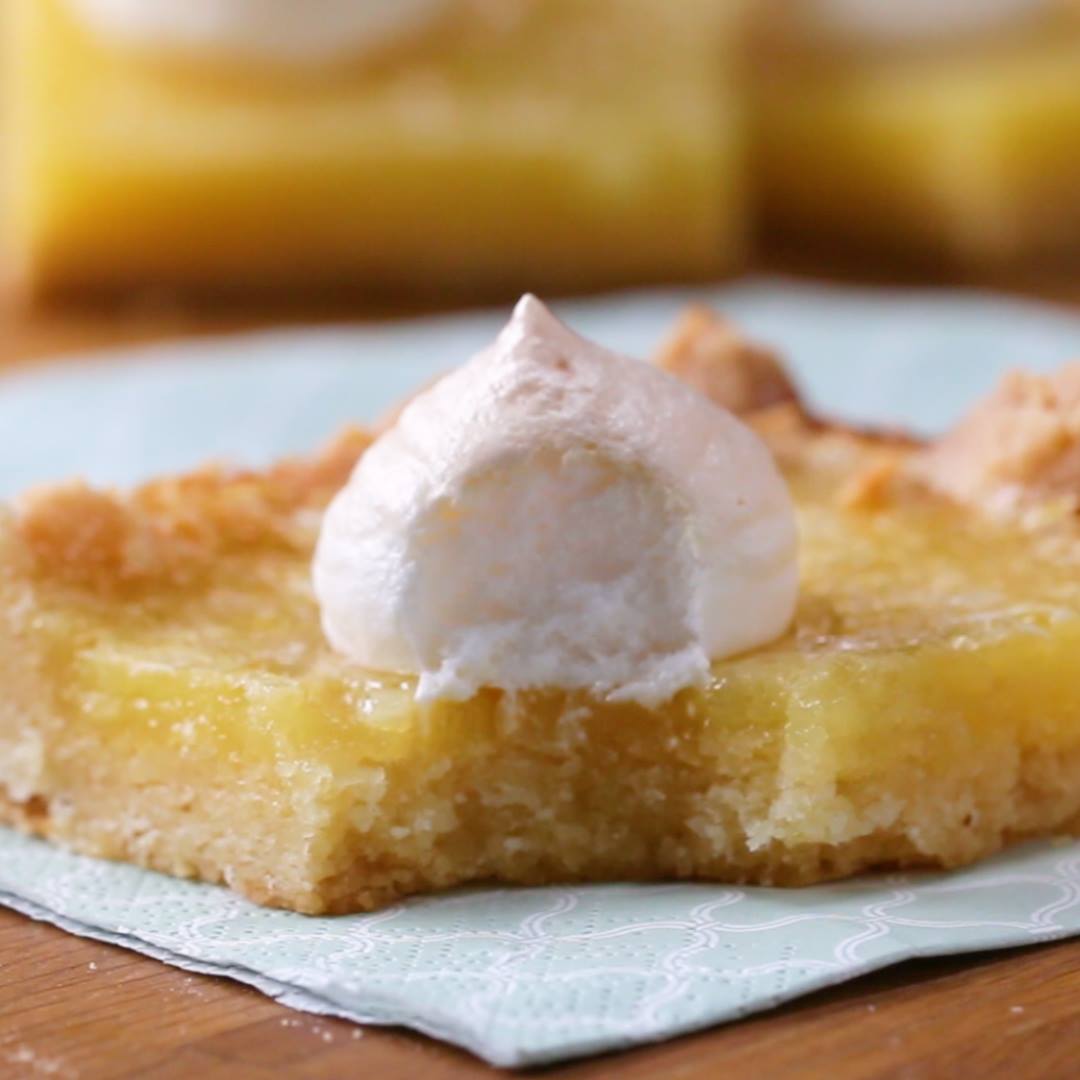
Lemon Meringue Bars recipe.
Author:
Cuisine: American
Recipe type: Dessert
Ingredients
CRUST
  • 1 ½ cups all-purpose flour (185 g)
  • ½ cup powdered sugar (60 g)
  • ½ teaspoon salt
  • ¾ cup unsalted butter, 1½ sticks, cubed, room temperature (165 g)
LEMON FILLING
  • 3 large eggs
  • 1 egg yolk, reserve white for meringue
  • 1 cup granulated sugar (200 g)
  • ½ cup lemon juice (120 mL)
  • 1 tablespoon lemon zest
  • ¼ cup all-purpose flour (30 g)
MERINGUE
  • 1 egg white
  • 1 pinch salt
  • ⅓ cup granulated sugar (65 g)
Instructions
  1. Preheat oven to 325˚F (170˚C). Grease and line a 9-inch (23 cm) square baking dish with parchment paper and place on a baking sheet.
  2. Make the crust: combine the flour, powdered sugar, salt, and butter in a medium bowl, and use your hands to mix until a crumbly dough forms.
  3. Transfer the dough to the prepared pan, and use your hands to press it against the bottom and about 1 inch (2 cm) up the sides. Poke the bottom all over with a fork.
  4. Bake for 20 minutes, until light golden brown.
  5. While the crust is baking, make the lemon filling: In a large bowl, whisk together the eggs and egg yolk. Add the granulated sugar, lemon juice, zest, and a pinch of salt, and whisk to combine. Whisk in the flour until just combined.
  6. When the crust is done baking, remove it from the oven. Pour the lemon filling over the crust and carefully return it to the oven for 25 minutes, until the filling no longer jiggles and the center is mostly set.
  7. While the filling bakes, make the meringue: In a clean, dry medium bowl, use an electric hand mixer to beat the egg white until stiff peaks form. Add about half of the sugar, whip for 30 seconds, then add the rest of the sugar and whip until combined. Transfer the meringue to a pastry bag fitted with a large tip or zip-top bag with a corner snipped off.
  8. Pipe 9 evenly-spaced dollops of meringue on top of the lemon bars.
  9. Return to the oven for 10-12 minutes, until the meringues are lightly browned.
  10. Let cool completely, then refrigerate for 1-2 hours.
  11. Slice into 9 bars. Serve chilled or at room temperature.
  12. Enjoy!

Watch the recipe video here:

Lemon Meringue Bars

When life hands you lemons, make this ?Full Recipe: https://tasty.co/recipe/lemon-meringue-bars

Posted by Tasty on Friday, September 14, 2018

Dessert

Vegan Apple Pie

Vegan Apple Pie
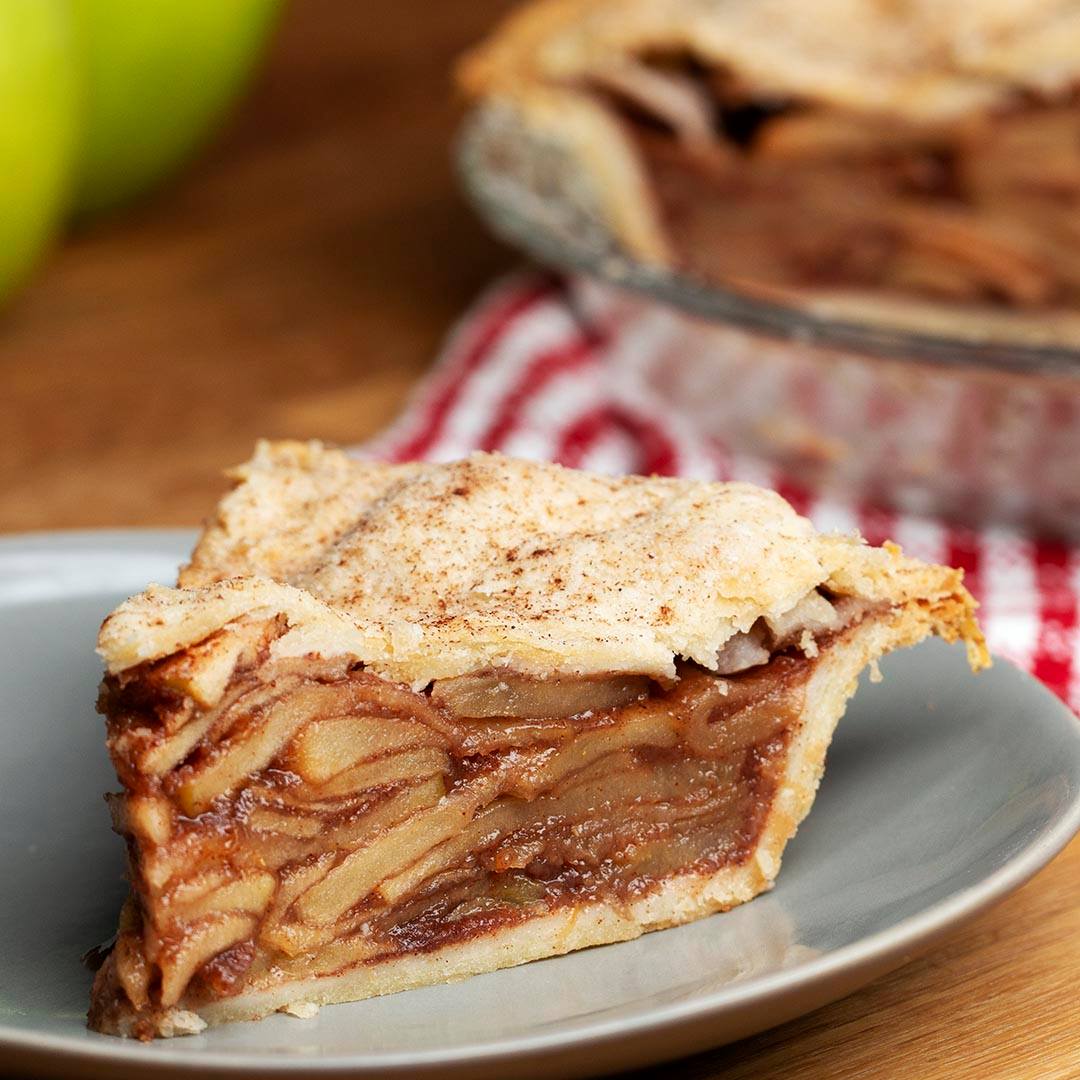
Vegan Apple Pie recipe.
Author:
Cuisine: American
Recipe type: Dessert
Ingredients
CRUST
  • 2 ½ cups all-purpose flour, plus more for dusting (310 g)
  • 1 tablespoon organic sugar
  • 1 teaspoon kosher salt
  • 1 cup vegan butter, cubed and chilled (225 g)
  • 6 tablespoons ice water
FILLING
  • 7 granny smith apples
  • 2 cups organic sugar, plus 1 teaspoon, divided (400 g)
  • 1 lemon, zested
  • 5 tablespoons cornstarch
  • ½ lemon, juiced
  • 1 tablespoon coconut oil, melted, plus 1 teaspoon, divided
  • ½ teaspoon salt
  • 4 teaspoons cinnamon, divided
Instructions
Make the crust:
  1. In a large bowl, combine the flour, sugar, and salt.
  2. Add the cubed butter, a bit at a time, and use a fork to work it into the flour with a fork until it breaks down to dime-sized pieces.
  3. Gradually add the ice water and mix just until the dough can be pressed together.
  4. Divide the dough in half and shape into discs. Wrap in plastic wrap and chill in the fridge for 1 hour.
  5. Preheat the oven to 350˚F (180˚C).
Make the filling:
  1. Peel and core apples, then thinly slice. Transfer to a large bowl and add 2 cups of sugar, the lemon zest, cornstarch, lemon juice, 1 teaspoon melted coconut oil, salt, and 3 teaspoons cinnamon. Toss until the apples are well-coated. Set aside.
  2. On a lightly floured surface, roll out both of the discs of dough to about 1 inch (2 cm) thick. Transfer one round to a greased 8-inch (20-cm) pie dish and gently press against the bottom and sides. Trim the excess dough around the edges, then prick the bottom of the pie crust all over with a fork
  3. Pour the apples into the bottom crust and cover with the top crust. Trim the excess dough around the edges, then crimp the top and bottom crusts together with a fork. Brush the top of the crust with the remaining tablespoon of melted coconut oil and sprinkle with the remaining teaspoon of sugar and cinnamon. Cut 4 vents in the top crust
  4. Bake for 1 hour, until crust is starting to turn golden brown.
  5. Let cool for 10 minutes, then slice and serve.
  6. Enjoy!

Watch the recipe video here:

We only have eyes for this vegan apple pie ?Get the recipe: https://tasty.co/recipe/vegan-apple-pie

Posted by Tasty on Wednesday, September 12, 2018