Showing 879 Result(s)
Dessert

Cookies & Cream Cheesecake Bundt ‘Box’ Cake

Cookies & Cream Cheesecake Bundt 'Box' Cake
Cookies & Cream Cheesecake Bundt 'Box' Cake recipe.
Author:
Cuisine: American
Recipe type: Dessert
Ingredients
  • 16 oz cream cheese, softened (450 g)
  • ½ cup powdered sugar (80 g)
  • 1 teaspoon vanilla extract
  • 1 box chocolate cake mix, prepared accordingly to box instructions
  • 10 chocolate sandwich cookies
GLAZE
  • 8 oz high quality chocolate, 60% cocoa content or higher, chopped finely (225 g)
  • 2 cups heavy cream (480 mL)
Instructions
  1. Preheat the oven to 350°F (180°C).
  2. In a medium bowl, whisk together the cream cheese, powdered sugar, and vanilla extract, stirring until smooth.
  3. Pour half of the cake batter into the bottom of a greased bundt cake pan, smoothing it with a spatula.
  4. With an ice cream scoop, scoop the cream cheese mixture evenly onto the cake batter, making sure that it does not touch the sides of the cake pan.
  5. Place a chocolate sandwich cookie on top of the cream cheese scoops, making a circle around the ring of the pan.
  6. Pour the rest of the cake batter on top of the cookies, smoothing it evenly.
  7. Bake for 45 minutes, then cool completely.
  8. Invert the cake onto a wire rack set on top of a baking tray.
  9. To make the glaze, microwave the chocolate and the cream together in 30-second intervals, stirring in between, until the glaze is smooth and glossy.
  10. Pour the glaze over the cake, letting the excess drip off the wire rack and onto the baking tray.
  11. Once the glaze has set, slice the cake, and serve,
  12. Enjoy!

Watch the recipe video here:

https://www.facebook.com/buzzfeedtasty/videos/2491980574387910/
Dessert

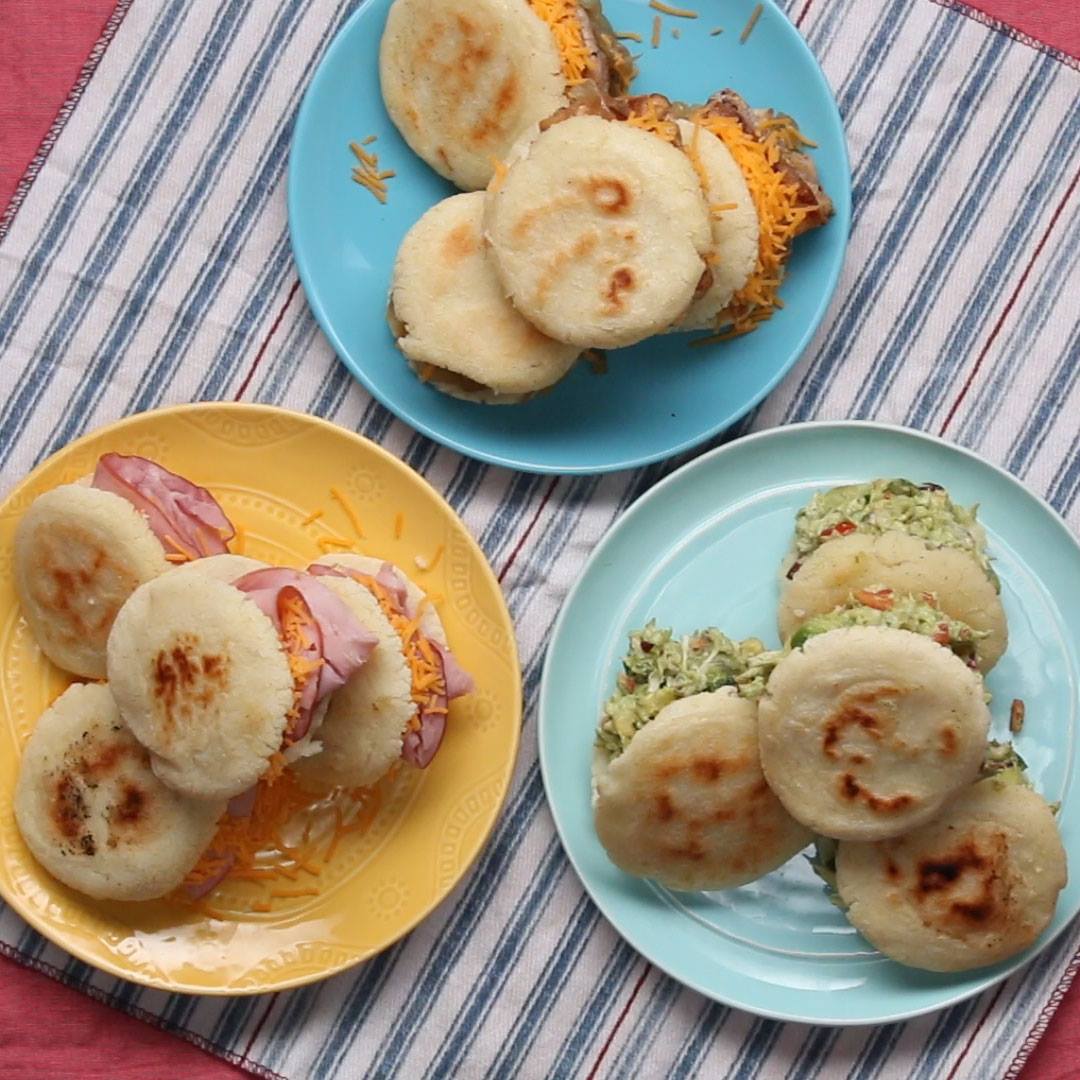
Family Arepas As Made By Cesar

Family Arepas As Made By Cesar
Family Arepas As Made By Cesar recipe.
Author:
Cuisine: American
Recipe type: Dessert
Ingredients
AREPAS
  • 3 cups warm water (720 mL)
  • 1 teaspoon salt (5 g)
  • 2 cups arepa flour (230 g)
  • 1 tablespoon canola oil
FILLINGS
CHICKEN AVOCADO SALAD
  • 1 lb rotisserie chicken, shredded (455 g)
  • 2 avocados
  • lime, juiced
  • ¼ cup red onion, chopped (40 g)
  • ¼ cup red bell pepper, chopped (45 g)
  • 1 clove garlic
  • 2 tablespoons mayonnaise
  • 3 tablespoons fresh cilantro, chopped
  • salt, to taste
  • pepper, to taste
HAM AND CHEESE
  • ham, sliced
  • shredded cheddar cheese
CHICKEN AND CHEESE
  • chicken breast, or thighs, cooked
  • onion, caramelized
  • shredded cheddar cheese
Instructions
  1. Preheat the oven to 375˚F (190˚C)
  2. In a large bowl, combine the warm water and salt. Stir until the salt is dissolved.
  3. Slowly add the arepa flour while stirring. Adjust the consistency as needed by adding more water or flour. The dough is ready when it pulls away from the sides of the bowl and doesn’t stick to your fingers.
  4. Grab a fist-sized ball of the dough and pass it from one hand to the other to pat into an even, flattened round. Pay attention to the edges so as to not leave cracks.
  5. Heat the oil in a large cast-iron skillet over medium-high heat. Cook the arepas, flipping once, until golden brown in color, 5-7 minutes on each side
  6. Transfer the arepas to the oven and cook for 15 minutes.
  7. Make the chicken avocado salad: In a medium bowl, combine the shredded rotisserie chicken, avocados, lime juice, onion, bell pepper, garlic, mayonnaise, cilantro, salt, and pepper. Mix well to combine.
  8. Cut the arepas in half and stuff with the chicken avocado salad or your favorite fillings.
  9. Enjoy!

Watch the recipe video here:

Family Arepa Recipe As Made By Cesar

Arepas are the best finger foods you'll ever eat. ?FULL RECIPE: https://tasty.co/recipe/family-arepa-recipe-as-made-by-cesar

Posted by Tasty on Monday, October 1, 2018

Dessert

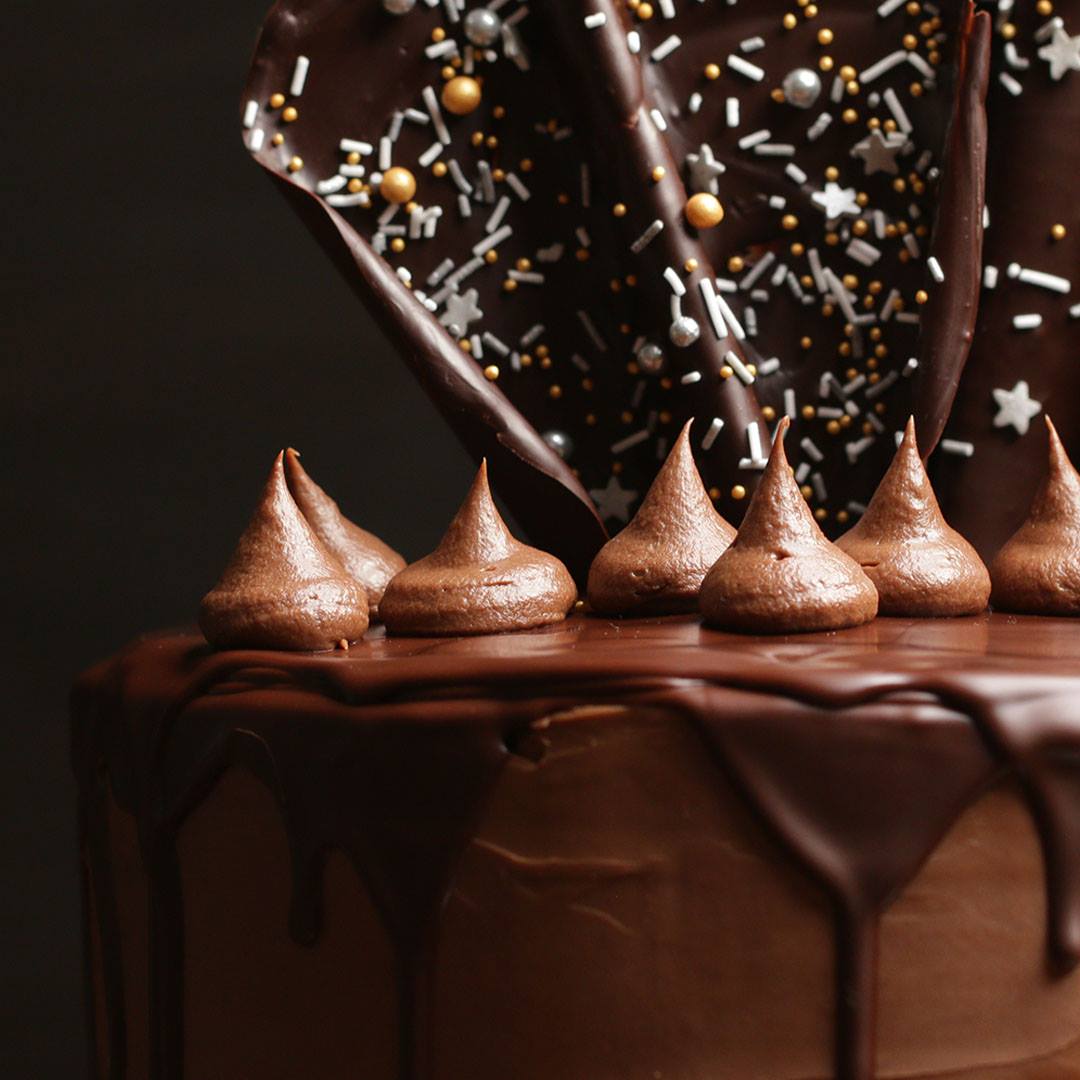
The Chocolate Cake For Chocoholics

The Chocolate Cake For Chocoholics
A chocoholics' dream comes true! Your best chocolate fix is a cake away!
Author:
Cuisine: American
Recipe type: Dessert
Ingredients
  • 300 grams self-raising flour
  • 1 teaspoon baking powder
  • 2 teaspoon bicarbonate of soda
  • 1 teaspoon salt
  • 70 grams cocoa
  • 3 teaspoon espresso powder
  • 300 millilitres hot water
  • 2 teaspoon vanilla extract
  • 150 grams Dr. Oetker extra dark baking chocolate, chopped
  • 150 grams Dr. Oetker milk chocolate baking chocolate, chopped
  • 250 grams unsalted butter
  • 300 grams brown sugar
  • 4 eggs, beaten
Chocolate ganache
  • 4 packets Dr. Oetker milk baking chocolate
  • 300 millilitres double cream
Chocolate Drip
  • 300 grams extra dark chocolate
  • 200 grams unsalted butter
To decorate
  • Sprinkles
Instructions
  1. Preheat the oven to 160°C and grease an line 4 cake tins.
  2. Start by sieving the flour, baking powder, bicarbonate of soda, salt, and cocoa powder into a large bowl and set aside.
  3. Next prepare the espresso by placing the espresso powder into a measuring jug and add the hot water and vanilla extract. Stir to combine an set aside to cool.
  4. Now make a bain-marie by placing a small pan of water over a medium heat and bring to a simmer. Place a large heatproof bowl over the top of the saucepan, making sure the bottom of the bowl does not come in contact with the water. Add 150 grams of extra dark chocolate and 150 grams of milk chocolate to the bowl and leave to melt, making sure to stir every now and then. Once it’s melted, carefully remove the bowl from the pan and set aside to cool.
  5. Meanwhile, start on your chocolate sponge by placing the butter and sugar in a large bowl. Using an electric hand whisk, cream the butter and sugar until pale and fluffy.
  6. Next add your beaten eggs in four parts, mixing well in between. (If your mixture starts to curdle, simply add a tablespoon of your dry ingredients with every addition of egg.)
  7. Add your cooled, melted chocolate and stir to combine.
  8. Next add your dry ingredients and espresso liquid in thirds alternately, starting with your dry ingredients and mixing well in between each addition.
  9. Using a spatula scrape down the sides of the bowl to make sure the mixture is fully combined and divide between your 4 cake tins. Place in the oven 18–20 minutes or until a skewer comes out clean when inserted.
  10. Once cooked, remove from the oven and leave in the tins for 10 minutes before turning out the tins. Then carefully turn out onto a wire rack and leave to cool thoroughly.
  11. Meanwhile, start to create your ganache. Chop the chocolate into small chunks and place in a large bowl. Set side.
  12. Place a small saucepan over a low-medium heat and add the cream. Heat until just starting to simmer and pour straight over the chocolate. Leave the sit with the chocolate for around 15 seconds before stirring. You may want to give the bowl a little shake to encourage the cream down into the chocolate. Then stir until all the chocolate has melted and you achieve a silky smooth ganache.
  13. Cover and place into the fridge for 10–15 minutes, as soon as your ganache starts to firm slightly you are ready to assemble your cake!
  14. Now all that’s left to do is sandwich your layers with a generous layer of ganache, and adorn the outside of the cake with the beautiful chocolate ganache. We finished ours with a white chocolate top for that extra wow factor! Serve and enjoy!
Sail instructions
  1. Take a rectangular shaped piece of greaseproof paper that resembles the size of sail you would like to achieve.
  2. Place down facing the length away from you.
  3. Fold one side into 1 inch pleats, making sure to only fold and press down halfway across the paper.
  4. Unfold the pleats and thinly spread the chocolate over the paper that has not been folded. (Make sure the chocolate is not spread too thinly but thick enough so it does not snap on removing the grease-proof paper.)
  5. Next fold the pleats back up on the one side and peg in place.
  6. Sprinkle or decorate as desired at this point and leave to dry.
  7. Once the chocolate is set, remove the peg and carefully remove the grease-proof paper.
  8. Place on your cake and enjoy your work!
Cake decoration instructions
  1. Using a palette knife spread a small amount of ganache onto the cake stand and place your first cake layer on top.
  2. Add a good dollop or ganache on top of the cake and spread into one even layer. Then place your next sponge on top. Repeat with all layers of cake.
  3. When you get to your top layer, place a generous amount of ganache on top and spread over the into one even layer. As you do this, encourage excess ganache over the sides and down the sides of the cake.
  4. Next using your palette knife take small amounts of ganache and fill in between each layer of cake, smoothing over as you go.
  5. Once you have filled any gaps over the sides of the cake, start to add more ganache over the sides and neatly smooth over using a long palette knife. (A good tip here is to have a hot jug of water and continually warm and clean off the palette knife in between each smoothing of the cake.)
  6. Once you have smoothed over the sides, neaten the top edging of the cake by bringing any untidy edges towards the centre of the top of the cake then smooth over the top of the cake.
  7. All that’s left to do is top the cake with your chosen decorations and enjoy!

Watch the recipe video here:

A chocoholics' dream comes true! Your best chocolate fix is a cake away!

Posted by Proper Tasty on Thursday, November 15, 2018

Dessert

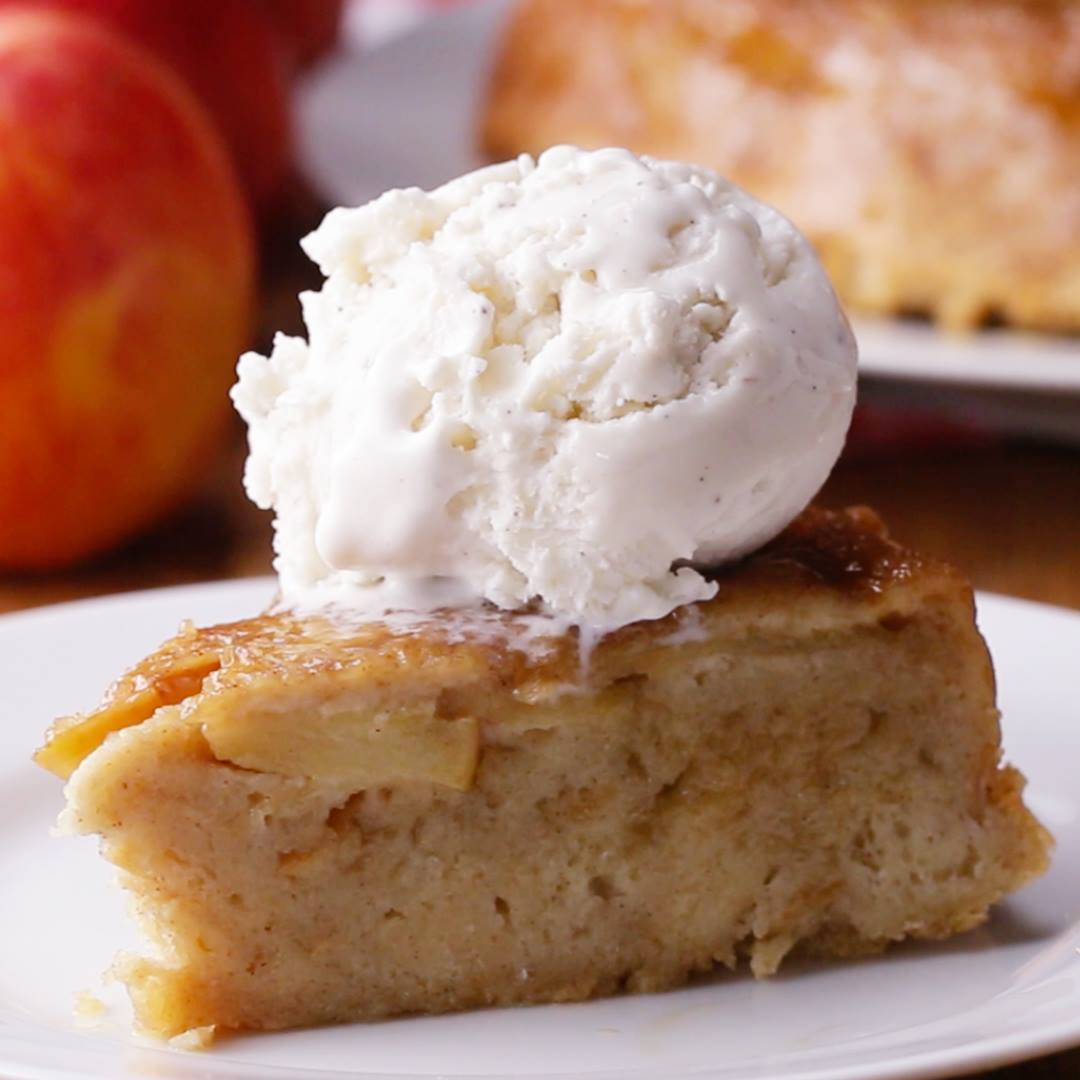
Apple Pie Bread Pudding

Apple Pie Bread Pudding
Author:
Cuisine: American
Recipe type: Dessert
Ingredients
  • 6 slices bread
  • 3 eggs
  • ½ cup milk (120 mL)
  • 1 teaspoon vanilla extract
  • 1 tablespoon cinnamon
  • 3 granny smith apples, peeled and chopped
  • 1 cup brown sugar (220 g)
  • 3 tablespoons cornstarch
  • vanilla ice cream
  • caramel sauce
Instructions
  1. Preheat oven to 350°F (175°C).
  2. Slice the bread into ½ inch (1 cm) cubes.
  3. In a large bowl, combine the eggs, milk, vanilla, and cinnamon, stirring until smooth.
  4. Add the bread and stir until the bread cubes have evenly absorbed the milk mixture.
  5. Spread the bread evenly in a 9-inch (23-cm) round baking pan.
  6. In a large bowl, combine the apples, brown sugar, and cornstarch, mixing until evenly combined.
  7. Spread the apples evenly on top of the bread.
  8. Bake for 40 minutes, until edges are brown.
  9. Cool, slice, then serve with vanilla ice cream and caramel sauce!
  10. Enjoy!

Watch the recipe video here:

Mmmm, this is a whole new take on bread pudding from Recipe for Perfection ?FULL RECIPE: https://tasty.co/recipe/apple-pie-bread-pudding

Posted by Tasty on Tuesday, November 13, 2018

Dessert

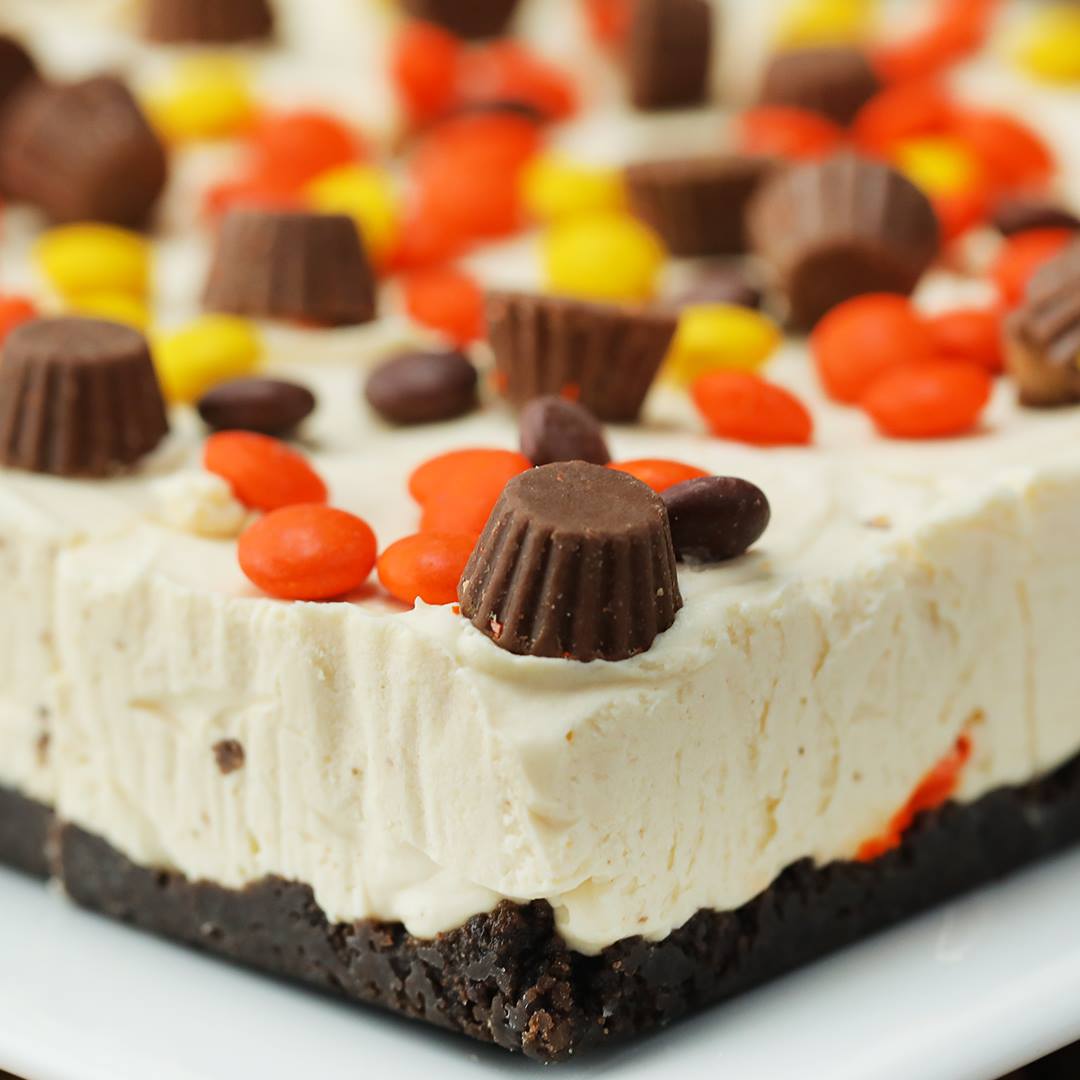
No-Bake Chocolate Peanut Butter Cheesecake Bars

No-Bake Chocolate Peanut Butter Cheesecake Bars
Make anything on your Thanksgiving dessert table even more delicious with the addition of Reese’s Baking Cups and Reese’s Pieces Candy.
Author:
Cuisine: American
Recipe type: Dessert
Ingredients
Crust
  • 1 & ½ cups chocolate cookie crumbs
  • 2 tablespoons packed brown sugar
  • 1⁄3 cup butter, melted
  • Pinch of salt
Filling
  • 2 (8-ounce) packages cream cheese, softened
  • 2 cups heavy whipping cream
  • 1⁄2 cup sugar
  • 2 teaspoons vanilla extract
  • 1⁄3 cup unsweetened peanut butter or Reese’s creamy peanut butter
  • 1⁄2 teaspoon salt
  • 1⁄2 cup Reese’s Baking Cups and Reese’s Pieces Candy
Topping
  • 1⁄2 cup Reese’s Baking Cups and Reese’s Pieces Candy
Instructions
  1. In a bowl, thoroughly mix chocolate cookie crumbs, brown sugar, butter, and salt. Press evenly into parchment-lined 8x8” baking dish. Chill dish while making the filling.
  2. In a medium bowl, place cream cheese and beat with a hand mixer until smooth. Add in cream and beat until thoroughly incorporated.
  3. Add sugar, vanilla, peanut butter, and salt. Beat until smooth, scraping down the sides as necessary. Fold in the 1⁄2 cup Reese’s Baking Cups and Reese’s Pieces Candy.
  4. Pour filling into chilled crust and smooth out the top. Top with remaining 1⁄2 cup of Reese’s Baking Cups and Reese’s Pieces Candy.
  5. Freeze for 3 hours.
  6. Allow bars to slightly soften, then slice and serve.

Watch the recipe video here:

Make anything on your Thanksgiving dessert table even more delicious with the addition of Reese’s Baking Cups and Reese’s Pieces Candy.

Posted by Tasty on Monday, November 12, 2018

Dessert

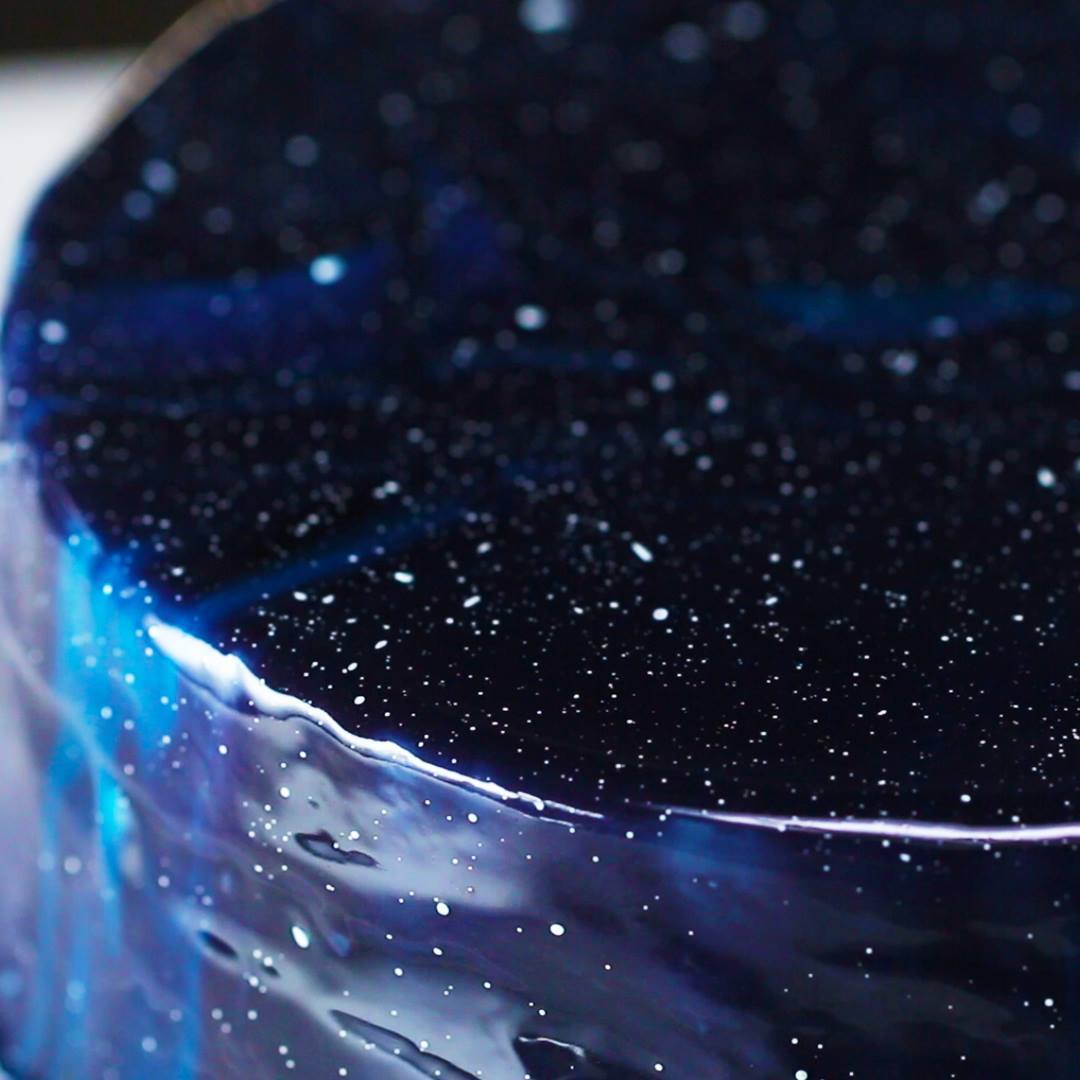
Galaxy Mirror Glazed ‘Box’ Cake

Galaxy Mirror Glazed 'Box' Cake
Author:
Cuisine: American
Recipe type: Dessert
Ingredients
CAKE
  • 2 chocolate cake mixes, 2 boxes, prepared according to package
VANILLA BUTTERCREAM
  • 2 cups butter, softened (460 g)
  • 2 teaspoons vanilla
  • 1 tablespoon milk
  • 6 cups powdered sugar (960 g)
GALAXY MIRROR GLAZE
  • 1 ¼ cups water (300 mL)
  • 1 ½ cups sugar (300 g)
  • 14 oz sweetened condensed milk, 1 can (395 g)
  • 15 sheets gelatin
  • 26 oz white chocolate, chopped, over 30% cocoa butter (740 g)
FOOD COLORING
  • black food coloring
  • navy blue food coloring
  • light blue food coloring
  • purple food coloring
  • pink food coloring
  • white food coloring
Instructions
  1. Prepare the cakes according to the package, or use your favorite cake recipe.
  2. To make the buttercream, mix the butter, vanilla, milk, and powdered sugar in a bowl with a hand mixer.
  3. Once the cakes are baked and cooled, place one cake on a turntable. If you don't have one, you can use a plate. Slice the top off the cakes to create a flat surface.
  4. Place a large dollop of the buttercream on the cake and spread to create an even middle layer of frosting.
  5. Place the second cake over the layer of buttercream.
  6. Frost the entire cake to create the crumb layer, creating a smooth surface.
  7. Place the cake in the freezer to keep cold.
  8. For the glaze, boil the water, sugar, and condensed milk in a pot for 1 minute, then remove from heat.
  9. Bloom the gelatin in 8 cups (2 liters) of cold water for 5 minutes, then wring the gelatin sheets of excess water and mix into the sugar mixture.
  10. Pour the sugar mixture over the chocolate, letting it sit for 2-3 minutes to allow the chocolate to soften.
  11. Using an immersion blender, carefully blend the chocolate and the liquid, making sure that you are not blending in air bubbles by lifting up the blender too high.
  12. Pour the glaze through a sieve into a large bowl to remove any excess bubbles.
  13. Separate the glaze into 5 different bowls (one medium-sized bowl and four smaller bowls).
  14. Color the biggest bowl of glaze with black and navy blue food coloring, stir the coloring with the glaze until the color is distributed evenly.
  15. In the next bowl, add the navy blue food coloring and stir.
  16. In the next bowl, add the lighter blue food coloring and stir.
  17. In the next bowl, add the purple food coloring and stir.
  18. In the next bowl, add the pink food coloring and stir.
  19. When you are ready to use the glaze, make sure each one is around 90-96°F (32-35°C). Microwave if necessary. Pour the colored glazes back into the biggest bowl of black and blue glaze. Swirl them gently with a spoon.
  20. Place the cake on a stand over a sheet tray to catch any excess glaze. Carefully pour the glaze over the cake.
  21. Dip a brush into the white food coloring and fling it onto the cake to create stars.
  22. Enjoy!

Watch the recipe video here:

This galaxy mirror glaze cake is INSANE! ?Make It Yourself ?: https://tasty.co/recipe/galaxy-mirror-glazed-box-cake

Posted by Tasty on Thursday, November 8, 2018

Dessert

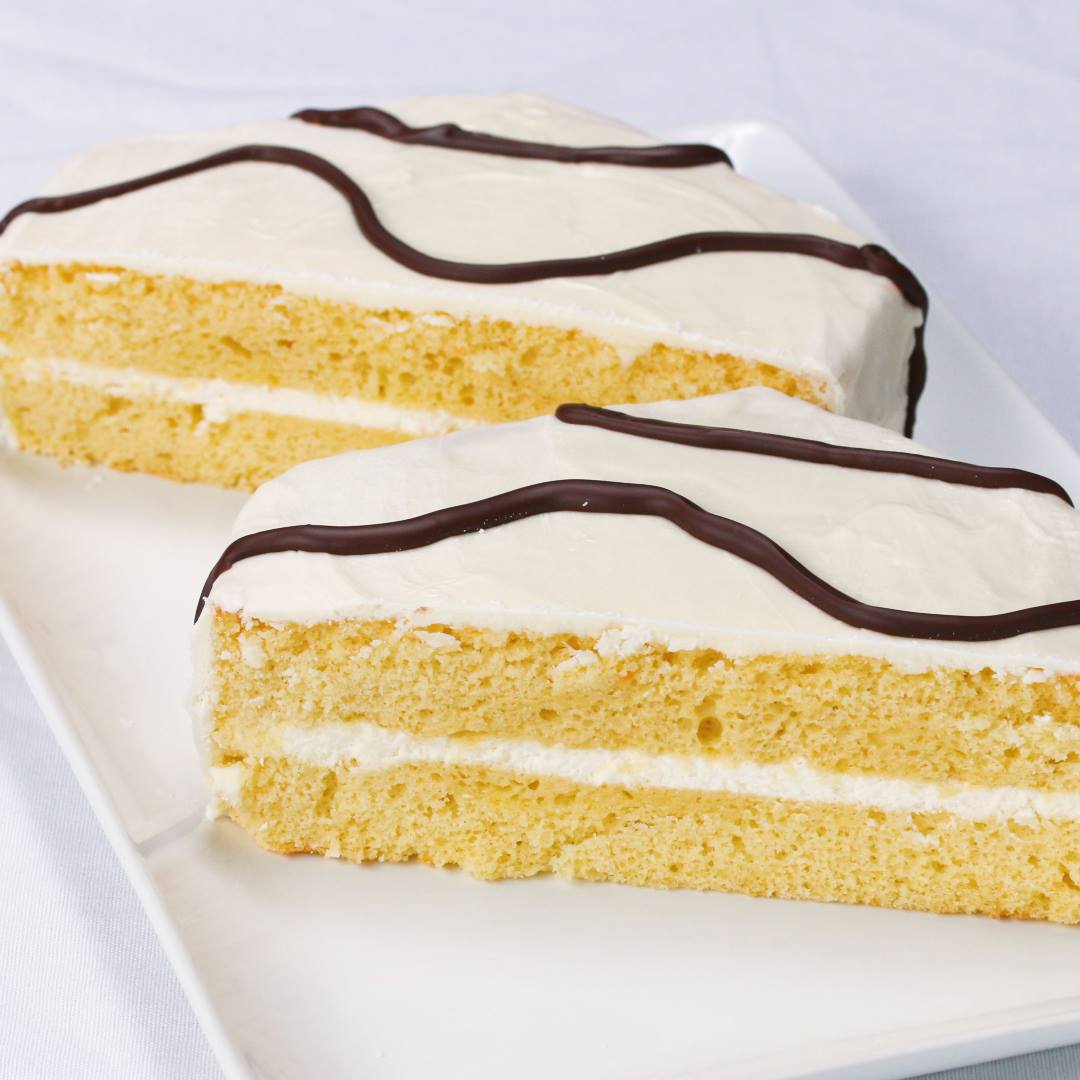
Giant Zebra ‘Box’ Cake

Giant Zebra 'Box' Cake
Author:
Cuisine: American
Recipe type: Dessert
Ingredients
FILLING
  • 1 cup whipped cream (60 g)
  • ½ cup marshmallow fluff (25 g)
CAKE
  • 1 yellow cake mix, baked according to package instructions in 2 9-inch (23 cm) cake pans and cooled completely
COATING
  • 2 cups white chocolate chip (350 g)
  • 2 tablespoons coconut oil
ICING
  • ¼ cup dark chocolate chip, melted (45 g)
SPECIAL EQUIPMENT
  • cooling rack, for glazing cake
  • pastry bag
Instructions
  1. Make the filling: In a large bowl, combine the whipped cream and marshmallow fluff. Beat with an electric hand mixer until stiff peaks form.
  2. Use a serrated knife to carefully remove the domed top from the cakes, leaving a flat, even surface. Save the scraps for later – you can eat them with leftover melted chocolate or crumbled over ice cream.
  3. Spread the filling over the bottom cake, leaving about ¾-inch (2 cm) border around the edge. Place the other cake upside down on top of the filling.
  4. Trim the cake into a hexagon. Transfer the cake to a wire rack set over a baking sheet.
  5. Make the coating: Fill a medium saucepan halfway with water. Bring to a boil, reduce the heat to medium-low. Combine the white chocolate chips and coconut oil in a medium heatproof bowl and set it over the pan (make sure the bottom of the bowl isn’t touching the water). When the white chocolate and coconut oil begin to melt, mix together until smooth. Be careful, as the bowl will be very hot.
  6. Pour the melted white chocolate mixture over the cake. Use a knife to spread to the edges and down the sides. Once smooth, run a knife under the edges of the cake so it doesn’t stick to the rack and place the cake in the refrigerator until the coating is set, 10-15 minutes.
  7. Transfer the melted dark chocolate chips to a piping bag or zip-top bag with a corner snipped off. Carefully pipe chocolate zebra stripes onto the cake. Return to the refrigerator to set for 10-15 minutes. Remove the cake once the stripes are dry.
  8. To serve, slowly and carefully slice with a serrated knife so the shell doesn’t crack. Score the slices with a paring knife before cutting to make it easier, if needed.
  9. Enjoy!

Watch the recipe video here:

A giant version of the classic zebra cakes ?Get The Recipe: https://tasty.co/recipe/giant-zebra-box-cake

Posted by Tasty on Wednesday, November 7, 2018

Dessert

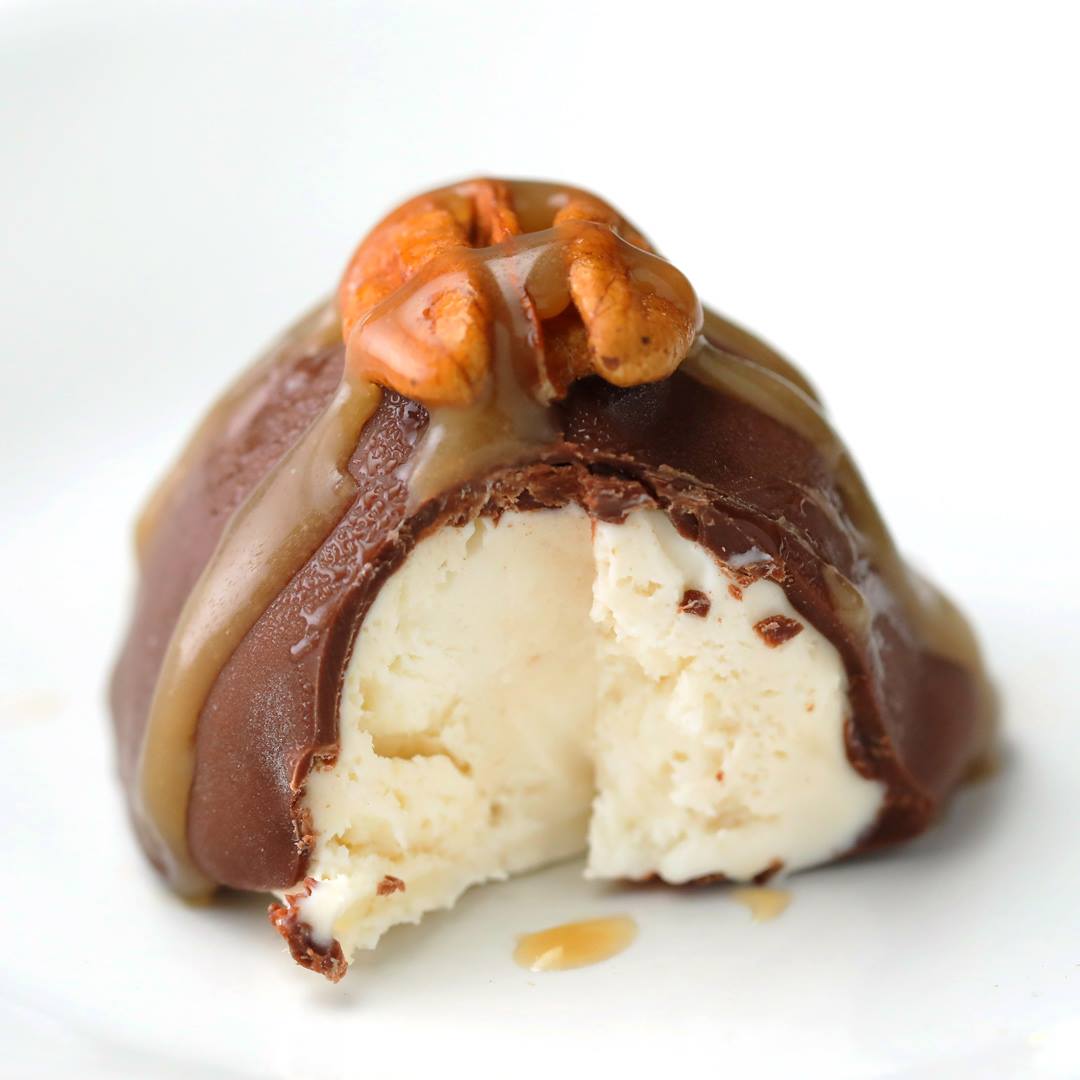
Turtle Cheesecake Bites

Turtle Cheesecake Bites
There are so many delicious treats you can make with Land O'Lakes Rich & Creamy Heavy Whipping Cream! Try these cheesecake bites!
Author:
Cuisine: American
Recipe type: Dessert
Ingredients
Caramel
  • 1⁄4 cup butter
  • 3⁄4 cup brown sugar
  • 1⁄4 cup ​Land O’Lakes Rich & Creamy Heavy Whipping Cream
  • 1 teaspoon vanilla extract
  • 1 & ½ teaspoons flaky sea salt
Cheesecake filling
  • 1 (8-ounce) package cream cheese, softened
  • 3⁄4 cups Land O’Lakes Rich & Creamy Heavy Whipping Cream
  • 1 teaspoons vanilla extract
  • 1⁄4 cup sugar
  • 1⁄2 teaspoon salt
Topping and garnish
  • 1 & ½ cups chocolate chips
  • 1 tablespoon coconut oil
  • 1 cup pecan halves
Instructions
Make caramel:
  1. ​In a medium saucepan, melt butter. Add brown sugar and whisk for a minute. Add heavy cream and vanilla extract. Continuously whisk for 1–2 minutes until the caramel comes together. Add salt, whisk, and remove from heat to let cool.
Make cheesecake filling:
  1. In a large bowl, beat the cream cheese with a hand mixer for a minute. Add in heavy cream and continue beating until smooth. Add vanilla extract, sugar, and salt, then beat for another minute.
  2. Using a silicone spatula, fold a 1⁄4 cup of the caramel into the filling. Take care to slowly fold it in, so that streaks of caramel remain. Drizzle in another tablespoon of caramel and swirl in. Filling should be lightly marbled with caramel. Place filling in freezer for 30 minutes to firm up.
  3. Remove from freezer and use a tablespoon-sized scoop to remove the filling and place on a parchment-lined sheet tray. Freeze bites for at least 2 hours.
  4. Melt chocolate chips and coconut oil together in the microwave. Use 30-second intervals, stirring in between, until the chocolate is melted and smooth.
  5. Use a fork to lower each cheesecake bite into the chocolate and coat. While the chocolate is still wet, place a pecan half on each bite. Drizzle all the bites with the remaining caramel. Let set for 10 minutes, then serve.

Watch the recipe video here:

Turtle Cheesecake Bites

Turtle Cheesecake BitesThere are so many delicious treats you can make with Land O'Lakes Rich & Creamy Heavy Whipping Cream! Try these cheesecake bites!

Posted by Tasty on Monday, November 5, 2018

Dessert

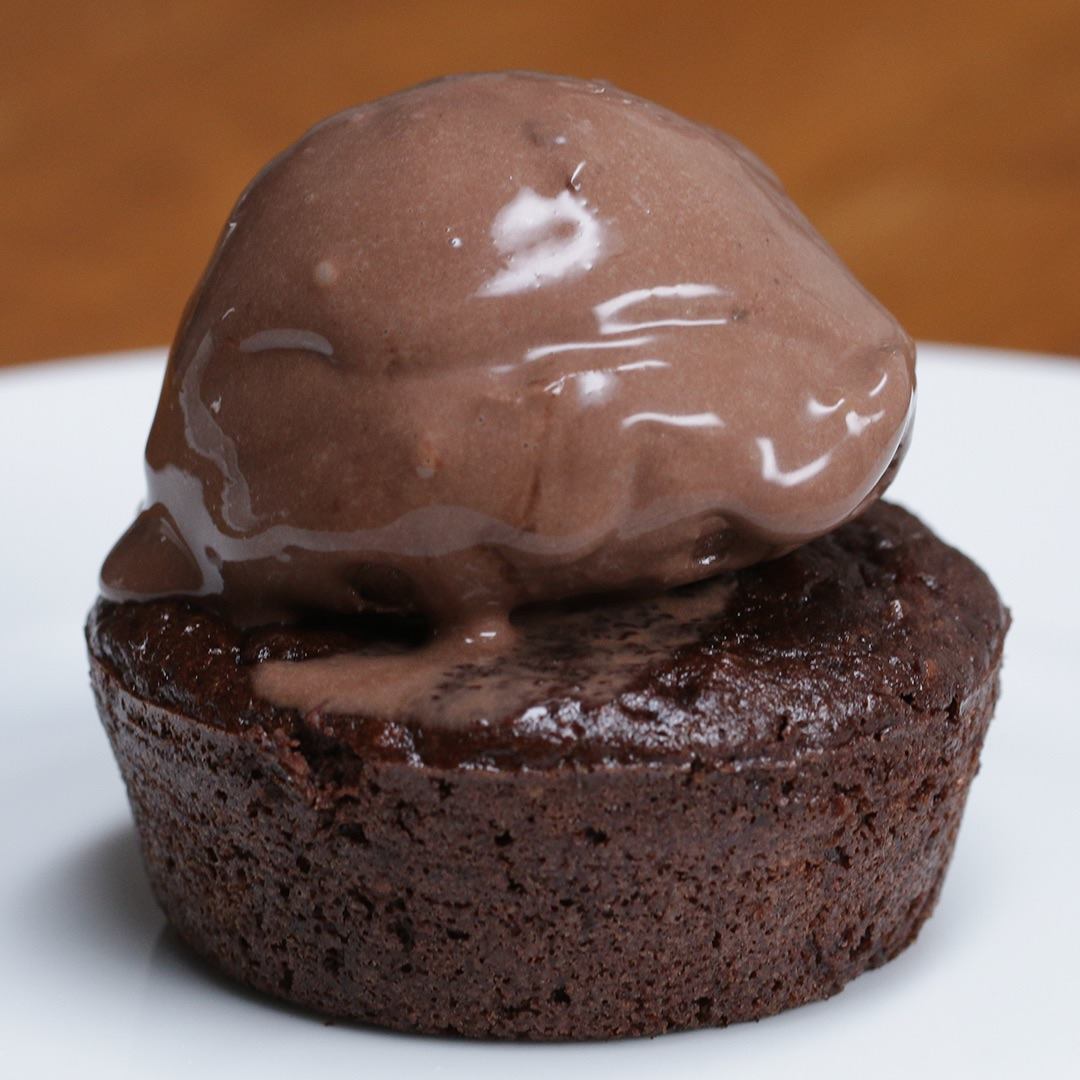
Easy Vegan Ice Cream Cupcakes

Easy Vegan Ice Cream Cupcakes
Share These Dairy Free Ice Cream Cupcakes during Vegan Week!
Author:
Cuisine: American
Recipe type: Dessert
Ingredients
  • 500 milliliters Ben & Jerry’s Non-Dairy Chocolate Brownie Ice Cream, melted
  • 180 grams self-raising flour
  • 100 grams vegan dark chocolate chunks
  • 80 grams chopped walnuts (optional)
Instructions
  1. Under 25 min
  2. Preheat the oven to 350 ̊F (180 ̊C). Grease your muffin pan with a little oil.
  3. Combine the melted ice cream, flour, dark chocolate chunks, and walnuts in a mixing
  4. bowl. Mix well until just combined (do not over-mix).
  5. Using a large spoon, scoop the mixture evenly into the muffin pan.
  6. Bake 15–18 minutes.
  7. Allow to cool before removing from muffin pan.
  8. Enjoy!

Watch the recipe video here:

Easy Vegan Ice Cream Cupcakes

Share These Dairy Free Ice Cream Cupcakes during Vegan Week!

Posted by Tasty on Saturday, November 3, 2018

Dessert

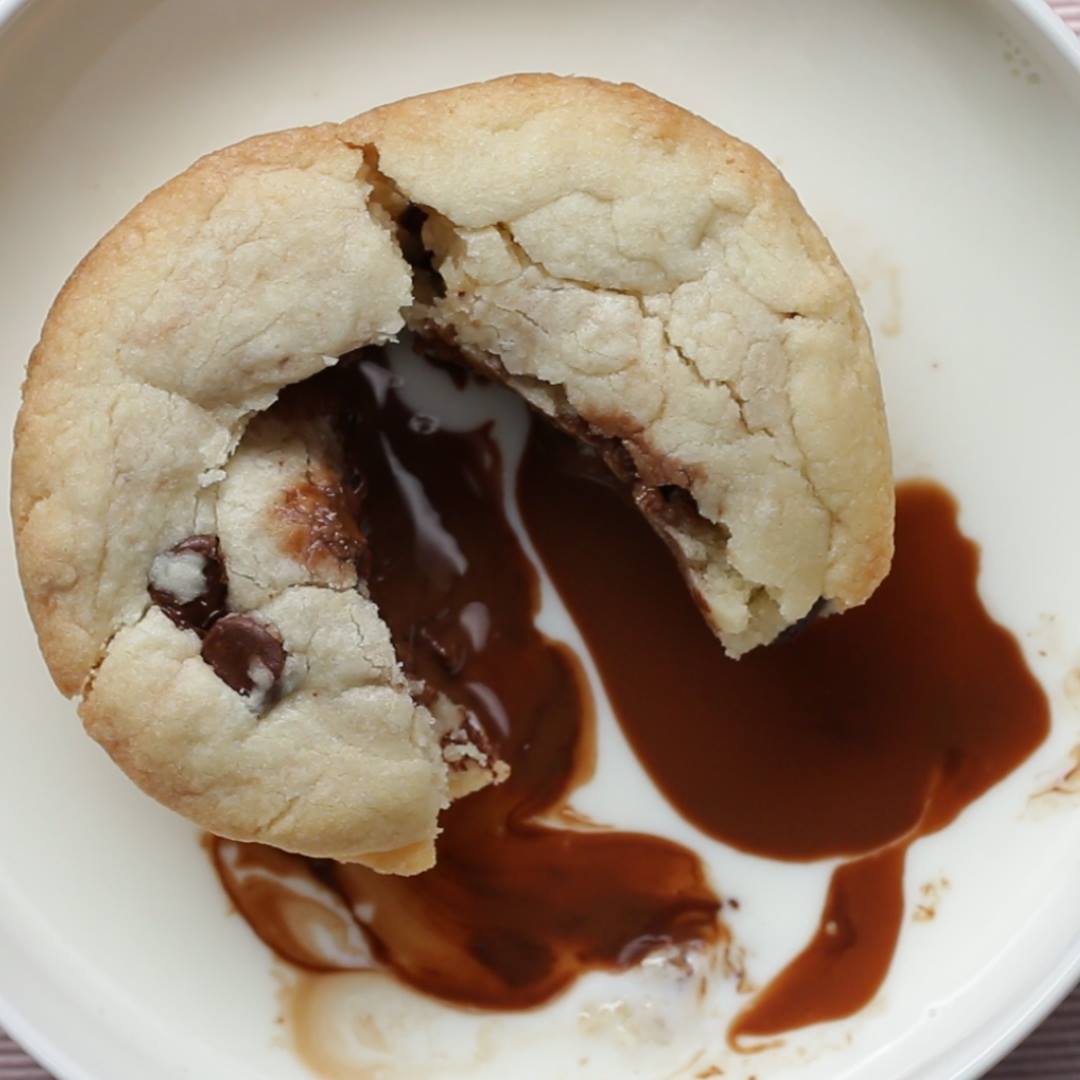
Chocolate Chip Lava Cookies

Chocolate Chip Lava Cookies
The perfect recipe when you're in urgent need of a little chocolate! ?
Author:
Cuisine: American
Recipe type: Dessert
Ingredients
  • ½ cup unsalted butter, 1 stick, softened (115 g)
  • 1 teaspoon vanilla extract
  • 1 tablespoon canola oil
  • ½ cup granulated sugar (100 g)
  • 1 pinch kosher salt
  • 1 large egg
  • ¼ cup cornstarch (30 g)
  • 1 ½ cups all-purpose flour (190 g)
  • 1 cup semi-sweet chocolate chips (175 g)
  • 6 chocolate truffles
Instructions
  1. In a large bowl, combine the butter, vanilla, canola oil, sugar, and salt and beat with a hand mixer until smooth.
  2. Add the egg and mix until well incorporated.
  3. Add the cornstarch, flour, and chocolate chips. Using a spatula, mix well until fully combined.
  4. Cover the dough with plastic and chill in the fridge at least 30 minutes to overnight
  5. Grease a 6-cup muffin tin with nonstick spray. Divide the cookie dough into 12 portions. Take one and line the base and sides of a cup. Repeat with the remaining cups.
  6. Fill each cookie cup with a chocolate truffle.
  7. Take another portion of cookie dough, flatten with your fingers to create a 2-inch (5-cm) circle. Place the circle over the top of the filling, and press down the edges to make sure it seals to the other dough. Repeat with the remaining cookies.
  8. Chill in the fridge for 30 minutes.
  9. Preheat the oven to 375˚F (190˚C).
  10. Bake for 15 minutes or until the edges are golden brown. Remove from the oven until cool to the touch, for 5 minutes.
  11. Enjoy!

Watch the recipe video here:

Muffin Tin Chocolate Chip Lava Cookies

The perfect recipe when you're in urgent need of a little chocolate! ? FULL RECIPE: https://tasty.co/recipe/chocolate-chip-lava-cookies

Posted by Tasty on Tuesday, October 30, 2018