
Caramel Apple Coffee Cake
The perfect excuse to eat cake for breakfast.
Full text & video
The perfect excuse to eat cake for breakfast.
These time-saving sheet-pan eggs will make your meal prep SO EASY! ?FULL RECIPE: https://tasty.co/recipe/time-saving-sheet-pan-eggs
Posted by Tasty on Sunday, September 24, 2017
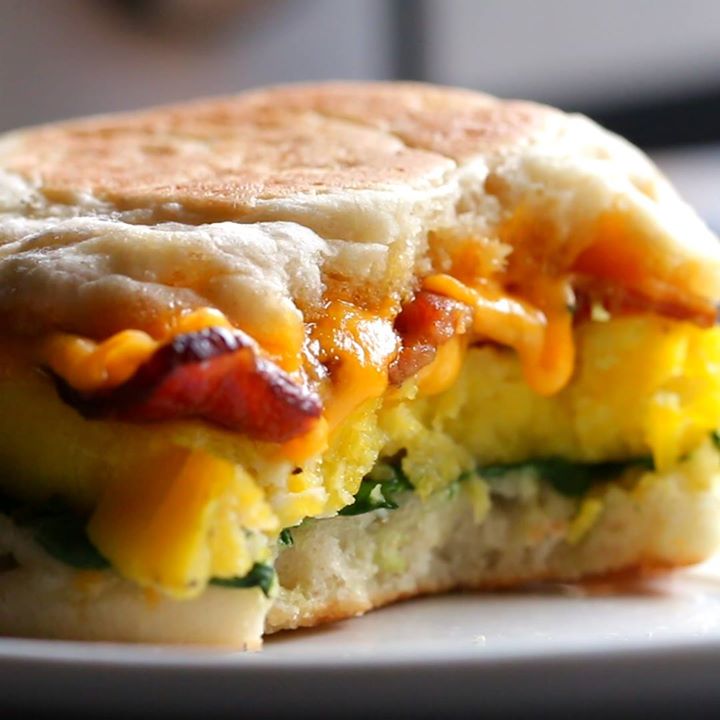
Microwave-Prep Breakfast Sandwiches
These microwave-prep breakfast sandwiches are super dorm-friendly and GREAT for busy mornings! ?FULL RECIPE: http://bit.ly/2fFO7xV
Posted by Tasty on Saturday, September 23, 2017
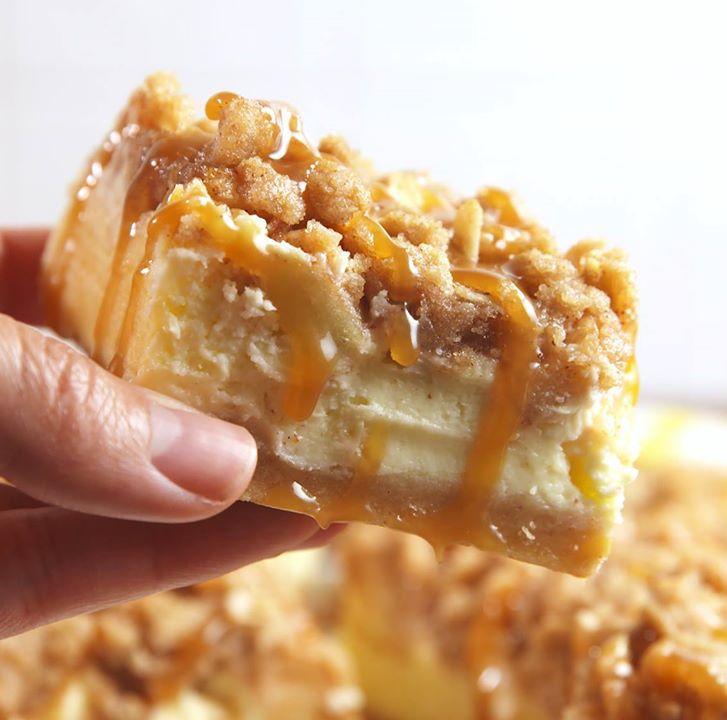
How To Make Caramel Apple Cheesecake Bars
Your friends are going to fight over these Caramel Apple Cheesecake Bars. Full recipe: http://dlsh.it/NBszBfB
Posted by Delish on Sunday, September 24, 2017
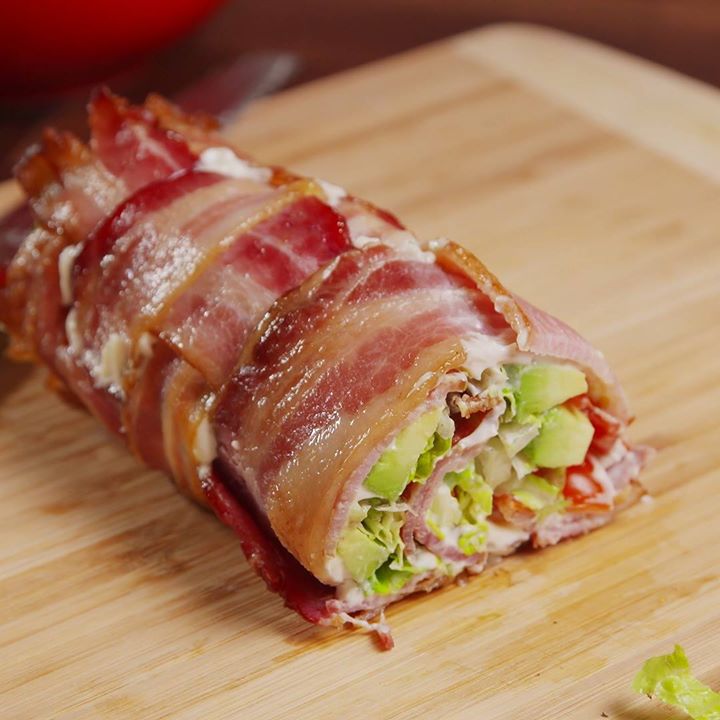
BLT Sushi is the fun way to make your favorite sandwich low-carb. Full recipe: http://dlsh.it/yGGDPjR
Posted by Delish on Sunday, September 24, 2017
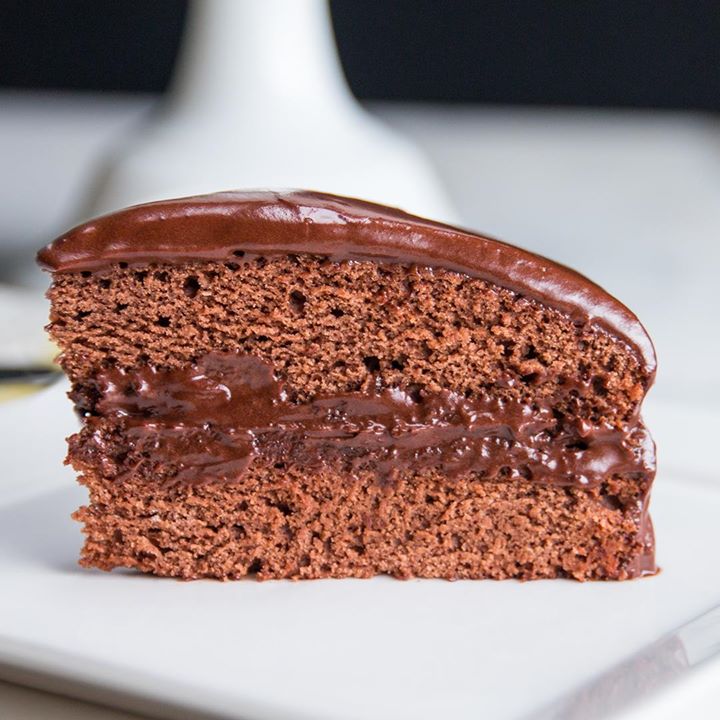
The Most Decadent Vegan Chocolate Cake
This is the most decadent egg-less chocolate cake ever ? ?!FULL RECIPE: http://bzfd.it/2vZjrjC
Posted by Tasty on Monday, September 25, 2017
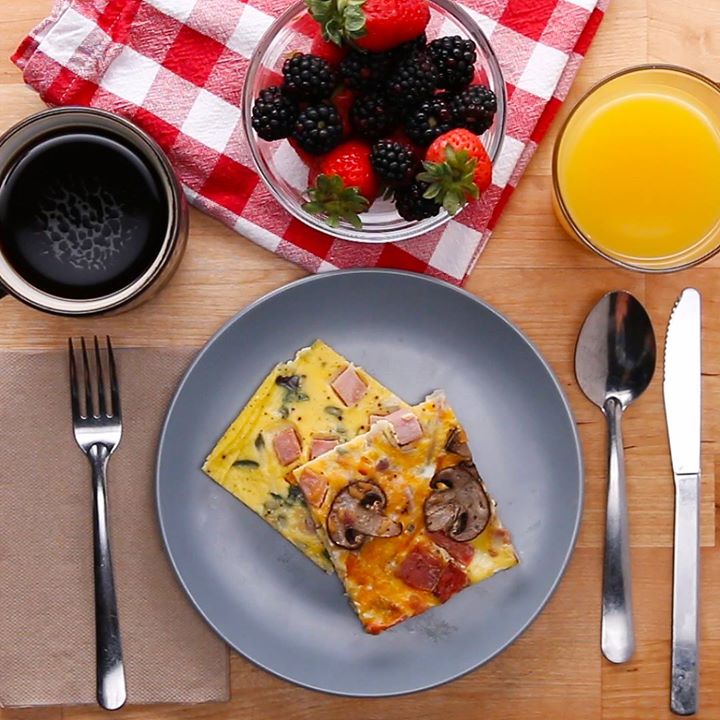
Breakfast in a blanket is everything pigs in a blanket aspires to be.
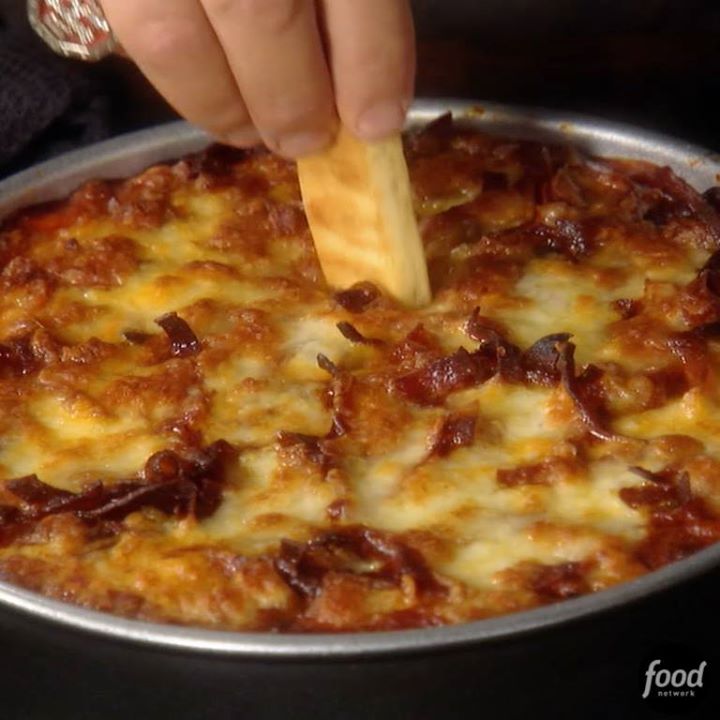
How To Make Pepperoni Pizza Dip
Everything you love about pepperoni pizza in a molten, cheesy dip.Save the recipe: https://foodtv.com/2KeJngM
Posted by Food Network on Tuesday, September 12, 2017
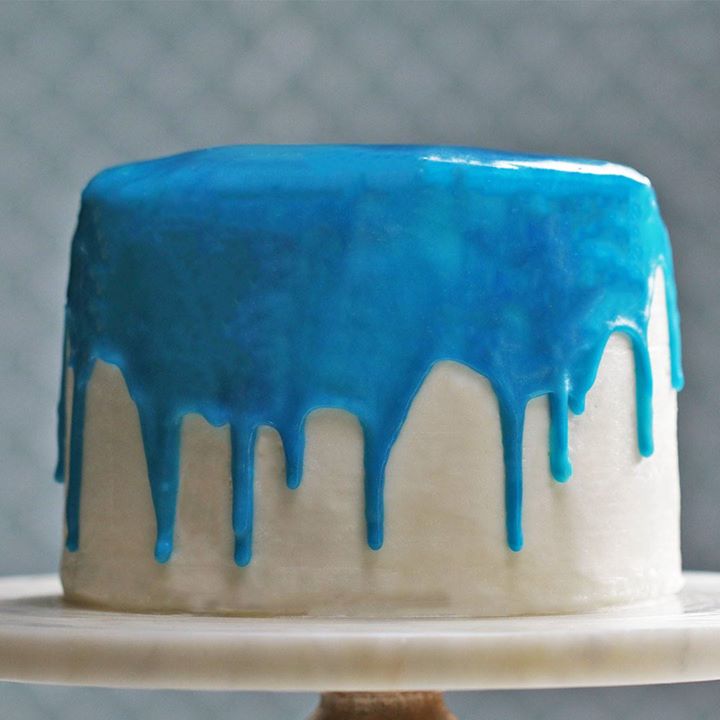
This blue drip cake is actually gonna blow your mind ? ?!FULL RECIPE: http://bzfd.it/2h99BDb
Posted by Tasty on Sunday, September 17, 2017
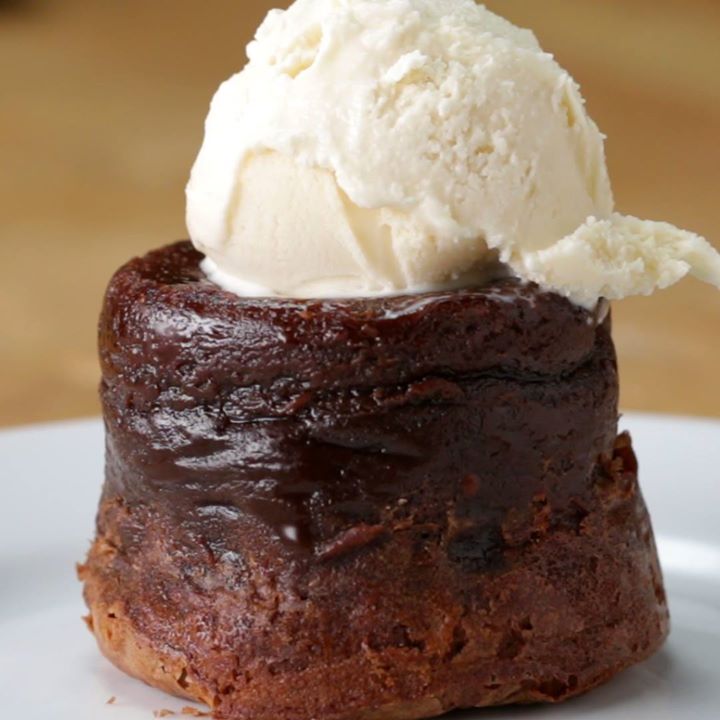
Roy's Classic Melting Hot Chocolate Soufflé
Roy's Classic Melting Hot Chocolate SouffléFULL RECIPE: http://bzfd.it/2xlhjEgWe're teaming up with the Hawaii Food & Wine Festival to send you and a friend to #Hawaii to enjoy some Tasty food and wine on us! We'll also be there, so, say Aloha! ?Enter to WIN here: http://bit.ly/2xlEdvn
Posted by Tasty on Friday, September 22, 2017