Main dish

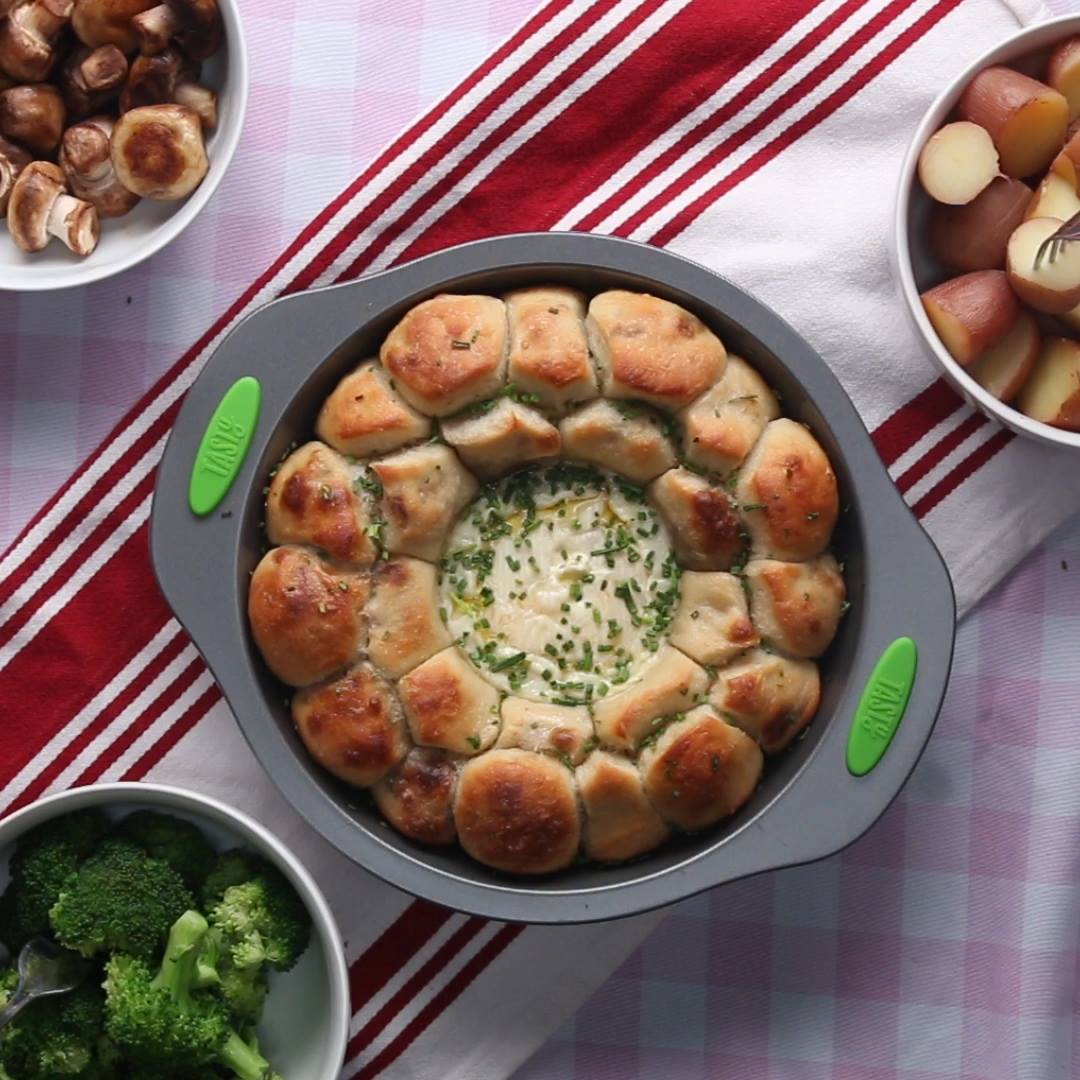
Monkey Bread Brie Fondue

Monkey Bread Brie Fondue
You'll definitely brie happy once you eat this monkey bread brie fondue ?
Author:
Cuisine: American
Recipe type: Main dish
Ingredients
  • 1 tablespoon unsalted butter
  • 1 medium white onion, thinly sliced
  • 26 oz pizza dough (735 g)
  • ½ cup bacon (110 g), chopped
  • 4 tablespoons unsalted butter, ½ stick, melted
  • 8 oz brie cheese (225 g), 1 wheel
  • 1 fresh chive, chopped, for garnish
  • broccoli floret, steamed, for serving
  • 1.5 lb baby potato (680 g), boiled, halved, for serving
  • mushroom, sauteed, for serving
Instructions
  1. Preheat the oven to 400˚F (200˚C). Prepare a 9-inch (22 cm) round cake pan with a 3½- inch (8 cm) ramekin in the center and set nearby.
  2. Melt the butter in a large pan over medium-low heat. Add the onion and sauté until caramelized, stirring occasionally for about 15 minutes. Remove the pan from the heat.
  3. Take a golf ball-sized piece of pizza dough and flatten it out with your fingers. Stuff the dough with about a teaspoon of caramelized onions and cooked bacon. Close the dough ball by pinching at the seam and roll into a ball in your hands. Repeat with the remaining dough and fillings.
  4. Dip each stuffed ball in the melted butter. Place the stuffed balls in the prepared cake pan, stacking them around the ramekin.
  5. Bake for 30 minutes, or until golden brown. Remove from the oven and reduce the oven temperature to 350˚F (180°C). Remove the ramekin with tongs (it will be hot!).
  6. Place the wheel of brie in the center. Return the pan to the oven for 10 minutes more, or until the brie is soft.
  7. Brush the monkey bread with more melted butter and sprinkle the bread and cheese with chives. Serve with vegetables like broccoli, potatoes, and mushrooms for dipping.
  8. Enjoy!

Watch the recipe video here:

You'll definitely brie happy once you eat this monkey bread brie fondue ?FULL RECIPE: https://tasty.co/recipe/monkey-bread-brie-fondue

Posted by Proper Tasty on Monday, May 6, 2019

Main dish

Winnie’s Mini Rhubarb & Strawberry Pies

Winnie’s Mini Rhubarb & Strawberry Pies
Every spring, we had strawberries and rhubarb on our farm outside Seattle. These fruity hand pies remind me of those times and of Grandma Winnie’s baking.
Author:
Cuisine: American
Recipe type: Main dish
Ingredients
  • 3 tablespoons quick-cooking tapioca
  • 4 cups sliced fresh strawberries
  • 2 cups sliced fresh rhubarb
  • ¾ cup sugar
  • 1 teaspoon grated orange zest
  • 1 teaspoon vanilla extract
  • ¼ teaspoon salt
  • ¼ teaspoon ground cinnamon
  • 3 drops red food coloring, optional
  • Pastry for double-crust pie (9 inches)
Instructions
  1. Preheat oven to 425°. Place tapioca in a small food processor or spice grinder; process until finely ground.
  2. In a large saucepan, combine strawberries, rhubarb, sugar, orange zest, vanilla, salt, cinnamon, tapioca and, if desired, food coloring; bring to a boil. Reduce heat; simmer, covered, 15-20 minutes or until strawberries are tender, stirring occasionally. Transfer to a large bowl; cover and refrigerate overnight.
  3. On a lightly floured surface, roll one half of dough to an 18-in. circle. Cut 12 circles with a 4-in. biscuit cutter, rerolling scraps as necessary; press dough onto bottom and up sides of ungreased muffin cups. Cut 6 more circles with remaining dough. Spoon strawberry mixture into muffin cups.
  4. Bake 12-15 minutes or until filling is bubbly and crust golden brown. Cool in pan 5 minutes; remove to wire racks to cool.

Watch the recipe video here:

These fruity hand pies are the perfect light dessert! ?> Get the recipe for Winnie's Mini Rhubarb & Strawberry Pies: https://trib.al/1om0MBL

Posted by Taste of Home on Monday, May 6, 2019
Main dish

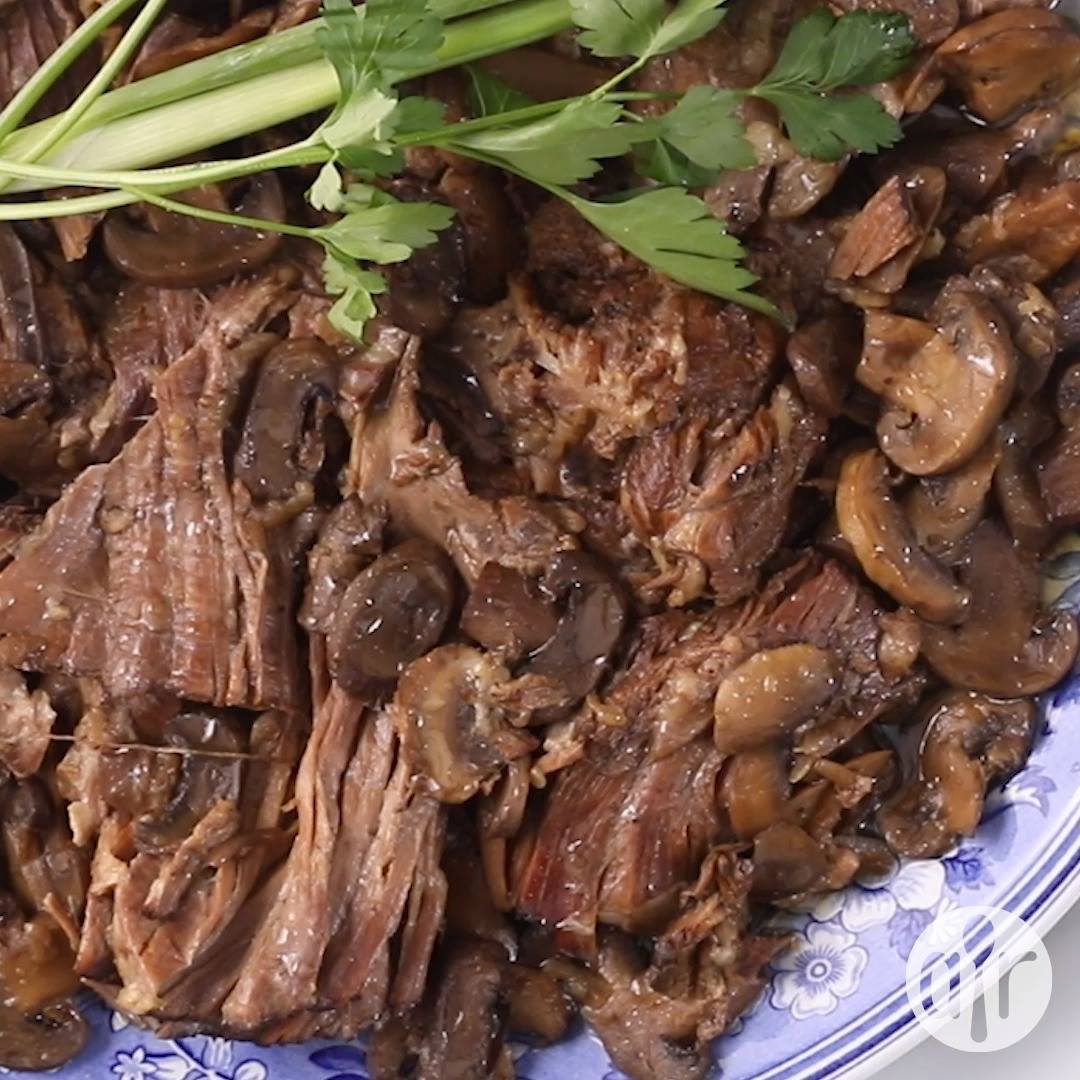
Mushroom Slow Cooker Roast Beef

Mushroom Slow Cooker Roast Beef
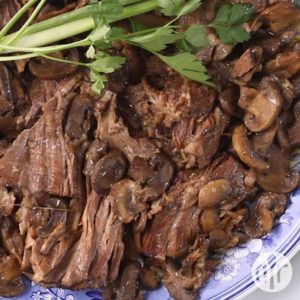
This is tender, fall-off-the-bone roast beef with mushrooms. It's perfect as-is. Shred the leftovers for cheese steak sandwiches.
Author:
Cuisine: American
Recipe type: Main dish
Ingredients
  • 1 pound sliced fresh mushrooms
  • 1 (4 pound) standing beef rib roast
  • 1 (1.25 ounce) envelope onion soup mix
  • 1 (12 fluid ounce) bottle beerground black pepper
Instructions
  1. Place the mushrooms in the bottom of a slow cooker; set the roast atop the mushrooms; sprinkle the onion soup mix over the beef and pour the beer over everything; season with black pepper. Set slow cooker to LOW; cook 9 to 10 hours until the meat is easily pulled apart with a fork.

Watch the recipe video here:

Mushroom Slow Cooker Roast Beef: https://trib.al/HuyRhjX

Posted by Allrecipes on Tuesday, June 4, 2019

Dessert

Upside-down Banana Bread

Upside-down Banana Bread
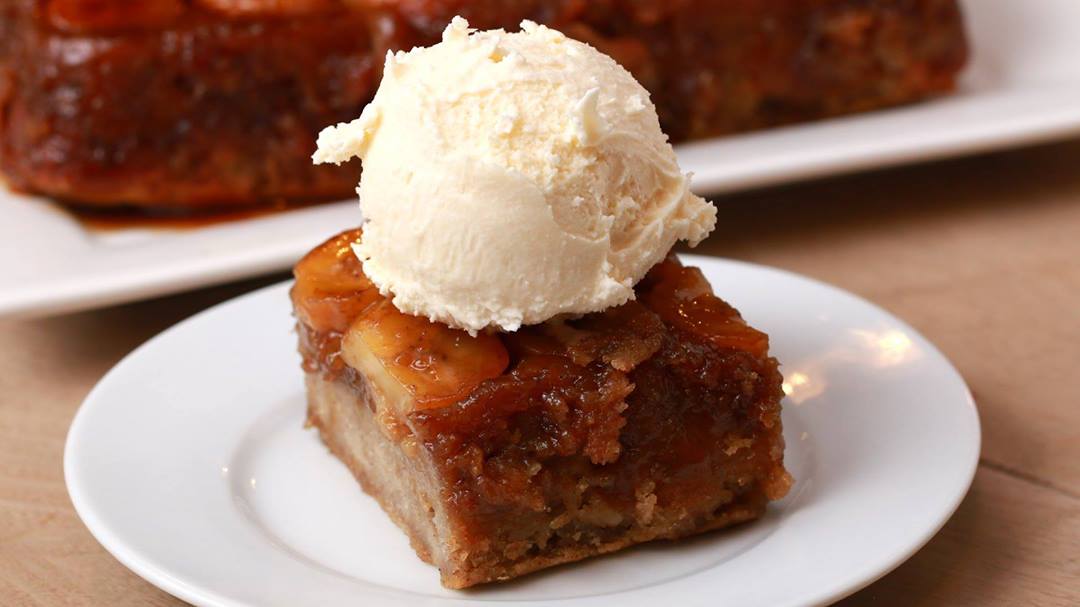
Grab a friend and try to make this upside down banana cake ?
Author:
Cuisine: American
Recipe type: Dessert
Ingredients
  • 4 ripe bananas
  • 3 eggs
  • ½ cup oil (120 mL)
  • ½ cup granulated sugar (100 g)
  • 1 tablespoon ground cinnamon
  • 2 cups all-purpose flour (250 g)
  • ½ cup butter (115 g)
  • 1 cup brown sugar (220 g)
  • 2 bananas, sliced
  • vanilla ice cream
Instructions
  1. Preheat oven to 350°F (175°C).
  2. In a large bowl, mash the ripe bananas. Add the eggs, oil, sugar, and cinnamon, mixing until evenly incorporated.
  3. Add the flour and mix until the batter has no large pockets of flour. Set aside.
  4. In a pot over medium-low heat, melt the butter, then mix in the brown sugar until dissolved.
  5. Bring up the heat to medium-high, cooking until the mixture starts bubbling and the sugar has melted.
  6. Remove the caramel from heat and pour into a greased 9x9-inch (23x23 cm) baking pan.
  7. Lay the banana slices evenly on top of the caramel.
  8. Spread the banana bread batter on top.
  9. Bake 40-50 minutes.
  10. Cool until the bottom is barely warm and use a knife to loosen the edges from the pan.
  11. Place a plate upside-down on top of the pan, then invert the pan, flipping the banana bread onto the plate.
  12. Slice, then serve with vanilla ice cream.
  13. Enjoy!

Watch the recipe video here:

Grab a friend and try to make this upside down banana cake ?FULL RECIPE: https://tasty.co/recipe/upside-down-banana-bread

Posted by Proper Tasty on Tuesday, June 4, 2019

Main dish

Roasted Eggplant and Pickle Dip

Roasted Eggplant and Pickle Dip
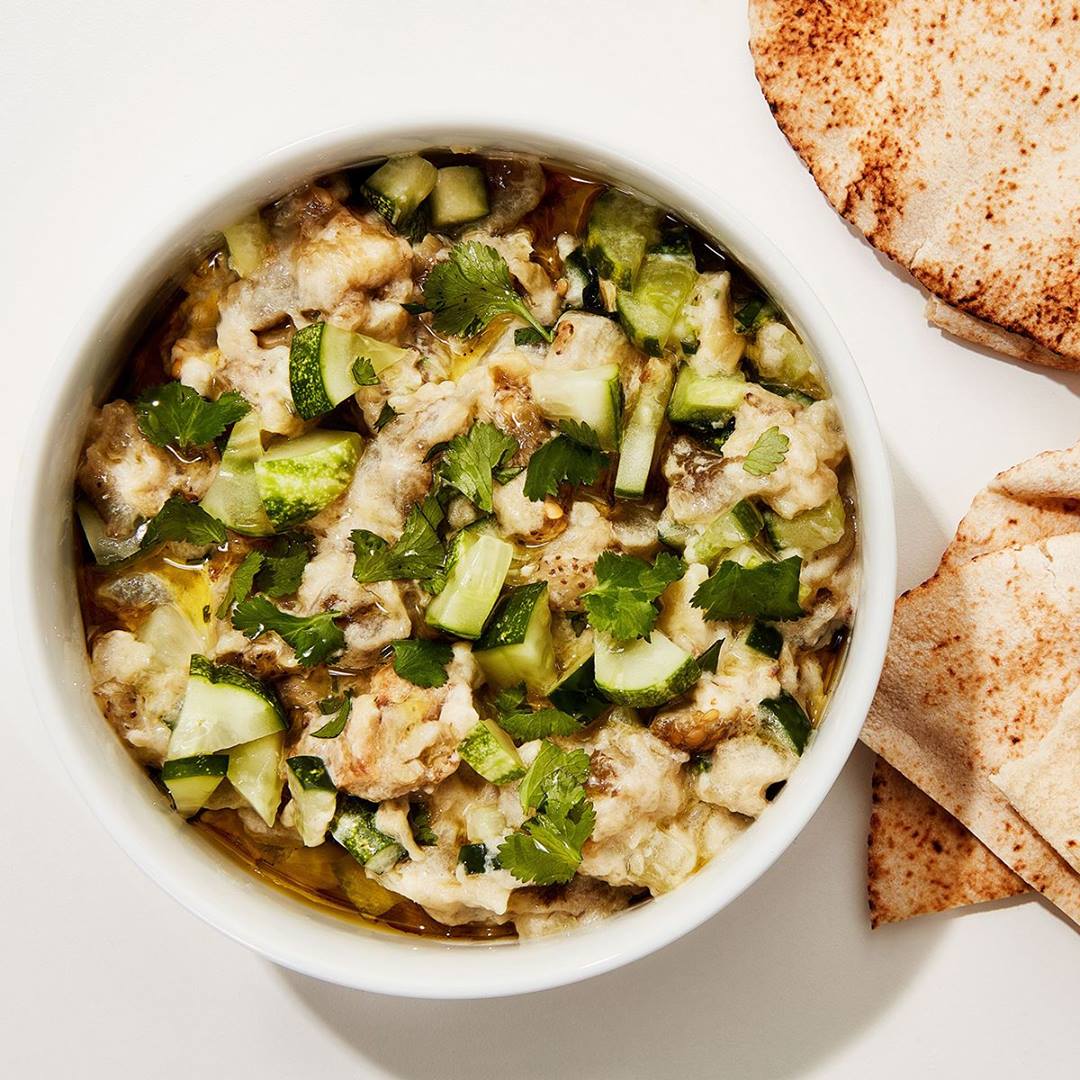
Plenty of creamy Greek yogurt keeps this baba ganoush-esque dip light and tangy. Briny half-sour pickle bits provide bright pops of contrast, but any chopped pickle-y thing—think spicy peperoncini, giardiniera, or full-sour cukes—would work great too. This recipe is presented to you by Samsung.
Author:
Cuisine: American
Recipe type: Main dish
Ingredients
  • 1 medium globe eggplant (about 1 lb.)
  • 2 Tbsp. extra-virgin olive oil, plus more for drizzling
  • Kosher salt
  • 1 half-sour pickle
  • 1 garlic clove
  • ¼ cup plain whole-milk Greek yogurt
  • 4 sprigs cilantro
  • Pita or flatbread (for serving)
Instructions
  1. Preheat oven to 450°. Slice 1 eggplant in half lengthwise, then score cut sides in a crosshatch pattern.
  2. Place eggplant on a rimmed baking sheet and drizzle all over with 2 Tbsp. oil; season with salt. Arrange cut sides down and roast until cut sides are dark golden brown and skin sides begin to collapse, 12–18 minutes. Let cool.
  3. Meanwhile, do a little prep. First, finely chop 1 pickle. Transfer half to a medium bowl; reserve remaining half for serving.
  4. Peel 1 garlic clove and finely grate with a microplane into bowl with pickle. Add ¼ cup yogurt and stir to combine.
  5. Pick cilantro leaves and tender stems from sprigs and coarsely chop; set aside for serving.
  6. When eggplant is cool enough to handle, turn cut side up and scoop flesh onto cutting board. Coarsely chop eggplant until mostly broken down, then add to bowl with pickle mixture, leaving any excess liquid behind. Season with more salt and stir to combine.
  7. Place pita directly on oven rack and toast 1 minute. Cut into quarters.
  8. Top dip with reserved pickles, cilantro, and a drizzle of oil. Serve with pita alongside.

Watch the recipe video here:

Like baba ganoush but…more pickle-y. (via Basically)Make it: http://bonap.it/uKnVnM0

Posted by Bon Appétit Magazine on Thursday, April 18, 2019

Main dish

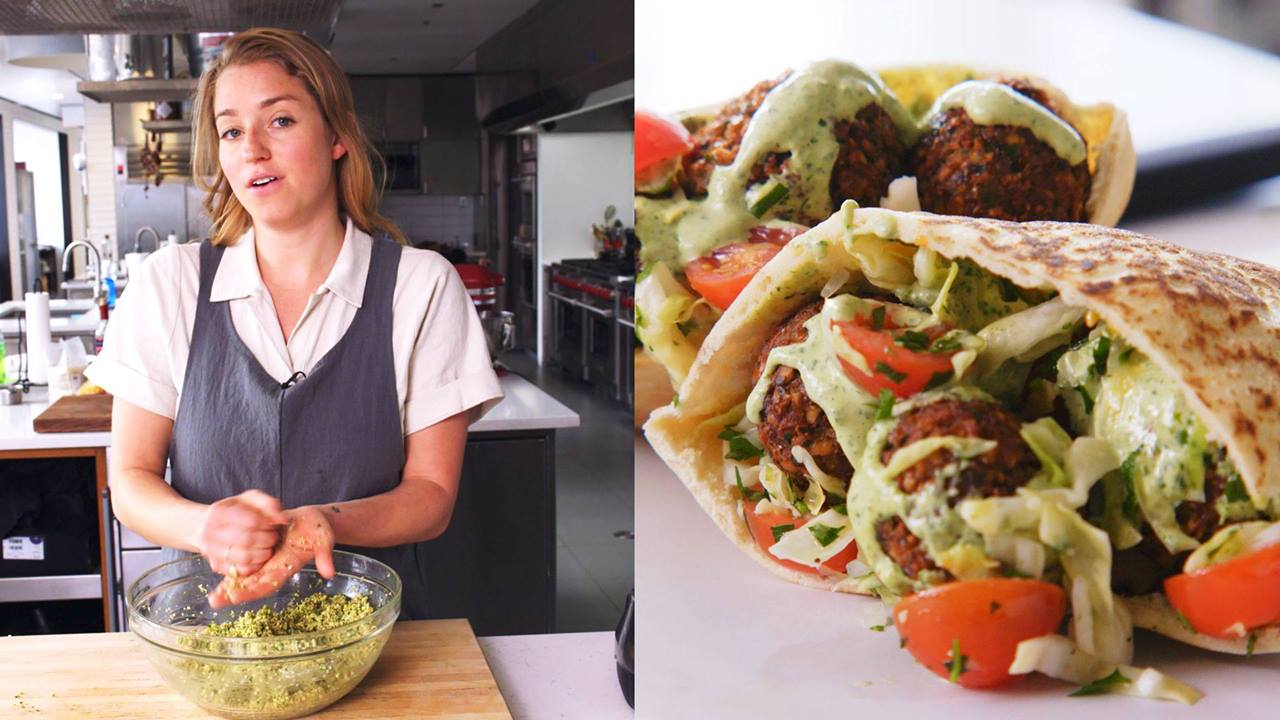
Fresh Herb Falafel

Fresh Herb Falafel
Once you make this falafel recipe, you'll never impulse buy it on the street again. A coarse texture is absolutely key; if the chickpeas are too finely chopped, the falafel will be dense.
Author:
Cuisine: American
Recipe type: Main dish
Ingredients
  • 8 ounces dried chickpeas, soaked overnight, drained
  • ½ onion, coarsely chopped
  • 1 jalapeño, coarsely chopped
  • 1 garlic clove, crushed
  • ¾ cup chopped fresh cilantro
  • ½ cup chopped fresh parsley
  • 3 tablespoons chickpea flour
  • 2½ teaspoons kosher salt
  • 1 teaspoon baking powder
  • 1 teaspoon ground cardamom
  • ½ teaspoon ground cumin
  • Vegetable oil (for frying; about 8 cups)
  • Shredded Cabbage Salad with Pomegranate and Tomatoes
  • Spiced Green Tahini Sauce
  • Warm thick pita with pockets (for serving)
Special Equipment
  • A deep-fry thermometer
Instructions
  1. Pulse chickpeas in a food processor, scraping down sides as needed, until they resemble finely chopped nuts (the texture should be uneven, with some slightly larger pieces visible), about 1 minute. Transfer to a large bowl.
  2. Pulse onion, jalapeño, garlic, cilantro, and parsley in food processor, scraping down sides as needed, until coarsely chopped, about 1 minute. Mix into chickpeas, then mix in chickpea flour, salt, baking powder, cardamom, and cumin. Form into ping-pong–size balls.
  3. Pour oil into a large heavy pot to a depth of 3". Fit pot with thermometer and heat oil over medium-high until thermometer registers 330°. Working in batches, cook falafel, turning occasionally, until deep brown and crisp, about 5 minutes. Transfer to paper towels; let sit 5 minutes. Serve falafel with salad, tahini sauce, and pita.

Watch the recipe video here:

Idea: throw a falafel party and invite all your pals. Make it: http://bonap.it/ygpRikD

Posted by Bon Appétit Magazine on Thursday, April 18, 2019

Main dish

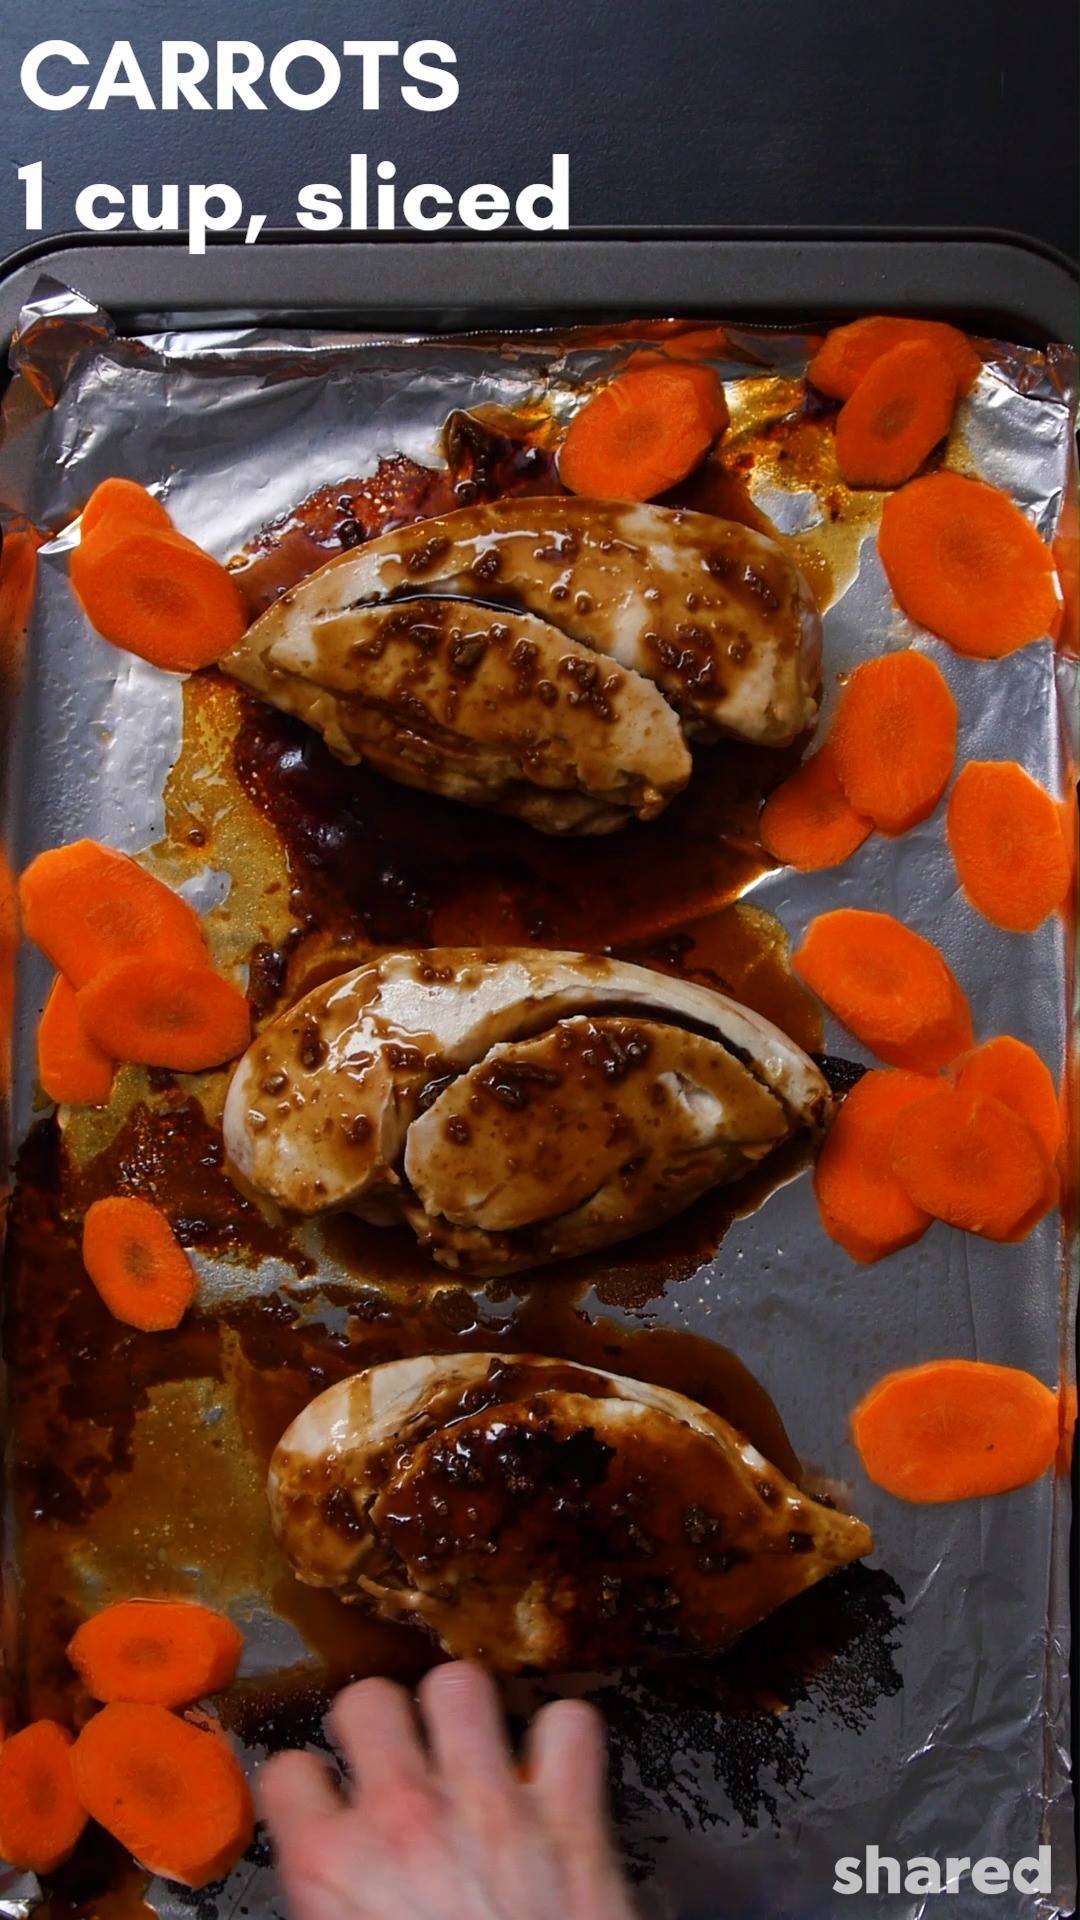
Sheet Pan Teriyaki Chicken Is The Easiest Weeknight Meal

Sheet Pan Teriyaki Chicken Is The Easiest Weeknight Meal
This Sheet Pan Teriyaki Chicken is going to be your new favorite weeknight meal recipe. Not only is it quick and easy to whip up, but the tender, juicy chicken and fresh crunchy veggies make it absolutely irresistible! The last thing I want to do after coming home from work is spend hours making dinner. Thankfully, this recipe is so easy you can practically make it in your sleep (although we don't recommend it!). Just place everything on a baking sheet and pop it in the oven - can cooking get easier than this? I don't think so! Scroll down to see how to make this mouth watering Teriyaki Chicken.
Author:
Cuisine: American
Recipe type: Main dish
Ingredients
  • ⅓ cup soy sauce (preferably low sodium)
  • 4-5 tbsp honey
  • 4 tbsp rice wine vinegar
  • 2 tsp sesame oil
  • 3 garlic cloves, minced
  • ¾ tsp ground ginger
  • ½ tbsp cornstarch
  • 4 tbsp water
  • salt and pepper to taste
  • 3 boneless skinless chicken breasts
  • 3 cups broccoli florets
  • 1 cup carrots, sliced
  • green onions (optional)
  • sesame seeds (optional)
Instructions
  1. Whisk together the soy sauce, honey, vinegar, sesame oil, garlic, ground ginger, cornstarch and and water in a medium saucepan over medium heat.
  2. Bring the mixture to a simmer and let thicken. Make sure to stir so the sauce doesn't burn. Once thickened, remove from heat and set aside.
  3. Preheat the oven to 400 degrees and line a baking sheet with parchment paper or foil. Spray with cooking oil so the ingredients don't stick to the pan.
  4. Add the chicken to the baking sheet and season with salt and pepper. Drizzle 1-2 spoonfuls of glaze on each piece and place in preheated oven for 10 minutes. After 10 minutes remove the chicken from the oven and drizzle more glaze on each breast.
  5. Arrange the broccoli and carrots around the chicken. Season veggies with salt and pepper and drizzle more of the glaze over top.
  6. Place pan in oven for 15-20 minutes. Remove from oven and serve with remaining sauce.
  7. Enjoy the chicken and veggies as is, or you can serve them over rice or quinoa. Garnish with sliced green onions and sesame seeds if desired. Enjoy!

Watch the recipe video here:

This meal is so easy you can practically make it in your sleep!Recipe: http://sha.red/l82Ln

Posted by Shared Food on Thursday, April 18, 2019

Main dish

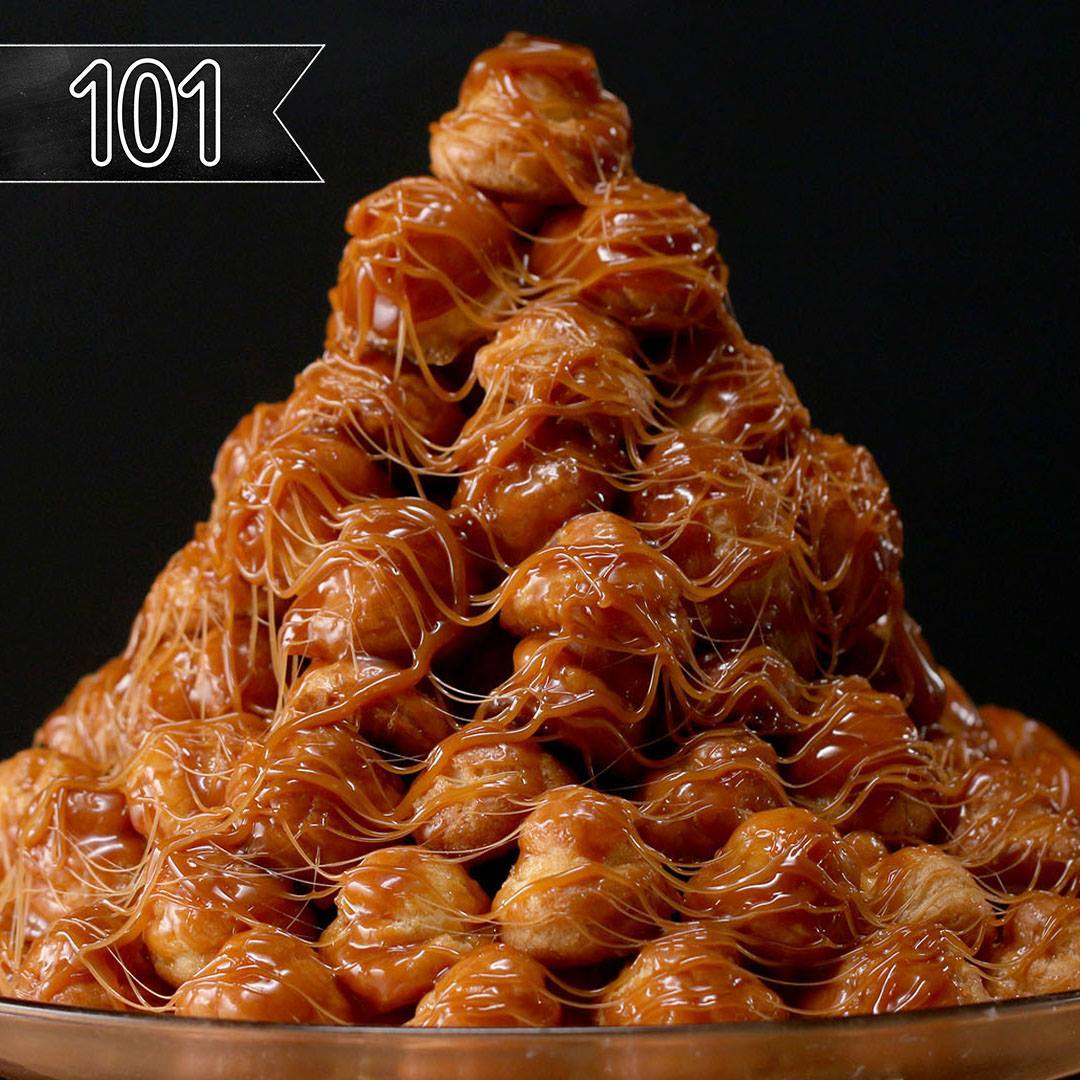
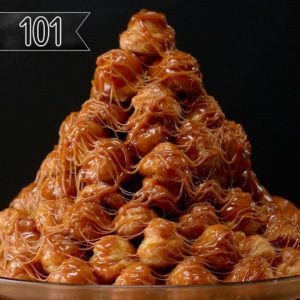
How To Make A Croquembouche (Cream Puff Tower)

How To Make A Croquembouche (Cream Puff Tower)
How To Make A Croquembouche recipe.
Author:
Cuisine: American
Recipe type: Main dish
Ingredients
CUSTARD
  • 6 cups milk (1 ½ L)
  • 2 vanilla beans, scraped
  • 18 egg yolks
  • 2 ¼ cups sugar (450 g)
  • ¾ cup cornstarch (95 g)
  • 3 tablespoons butter
PUFFS
  • 4 cups water (945 mL)
  • 4 sticks butter
  • 2 teaspoons salt
  • 6 tablespoons sugar
  • 4 cups flour (500 g)
  • 12 eggs
  • egg wash
CARAMEL
  • 2 cups sugar (400 g)
  • 2 tablespoons dark corn syrup
  • ⅔ cup water (160 mL)
  • ⅔ cup heavy cream (160 mL)
Instructions
  1. In a pot, heat the milk and vanilla bean pod and seeds over medium heat, bringing it to a boil. Once it begins to boil, turn off the heat and let steep for 15 minutes.
  2. Using a hand mixer, beat the egg yolks and sugar until light and fluffy, about 2 minutes.
  3. Add the cornstarch and mix until fully incorporated.
  4. Remove the vanilla bean pod from the milk. Add ½ cup (120 ml) of the milk to the egg yolk mixture and mix until well combined. Add the remaining milk mixture and beat until fully incorporated.
  5. Over medium heat, whisk the mixture constantly until thickened, about 7-10 minutes.
  6. Remove from the heat and add the butter, whisking to combine.
  7. Strain the custard into a bowl to ensure a creamy custard (optional). Cover the custard with plastic wrap, making sure that the plastic touches the custard, and chill for at least 2 hour.
  8. Preheat oven to 425˚F (220˚C).
  9. In a large pot, bring the water, butter, salt, and sugar to a boil over high heat.
  10. Once the water begins to boil, remove the pot from the heat and immediately add the flour, stirring constantly with a wooden spoon until the liquid is absorbed and the mixture begins to form a ball.
  11. Return the pot to the heat and cook for another 30 seconds to remove excess moisture. Remove the pot from the heat.
  12. Working quickly, add the eggs, one at a time, stirring until fully incorporated. Continue stirring until the dough starts to pull away from the sides of the pan and is thick and glossy. Alternatively, you can use a stand mixer with the paddle attachment.
  13. Using a piping bag with a standard round tip, fill the bag with the batter.
  14. Place 1-inch (2 cm) dollops on a parchment paper-lined baking sheet, spaced at least 1-inch (2 cm) apart.
  15. Use a wet fingertip to gently press down any points on the puffs. Brush the egg wash over the the puffs.
  16. Bake for 15 minutes. Reduce heat to 375˚F (190˚C), and bake for 15 minutes.
  17. Let puffs cool completely.
  18. Use the bottom of a wooden skewer to create an opening in the bottom of the cream puff shells, just big enough for a piping tip to insert.
  19. Fill a piping bag fitting with a small round tip with the custard. Gently fill the puff shells with the custard.
  20. Add the sugar, corn syrup, and water to a pan over medium heat. Bring to a boil and put the lid on, cooking for 5 minutes without moving. Remove the lid and cook for an additional 7-10 minutes, until the caramel is a deep amber color and reaches 300˚F (150˚C).
  21. Remove the pan from the heat and add the heavy cream, stirring vigorously.
  22. Working quickly, dip the cream puffs into the caramel and arrange on a serving platter in a circular pattern.
  23. Continue to stack caramel-dipped cream puffs in a tower shape.
  24. Once your tower is completed, dip a fork into the caramel sauce and drizzle it around the tower.
  25. Enjoy!

Watch the recipe video here:

One of the most beautiful things we've ever seen!! FULL RECIPE: https://tasty.co/recipe/croquembouche

Posted by BuzzFeed Food on Thursday, April 18, 2019

Main dish

NO BEAN TURKEY AND SWEET POTATO CHILI


NO BEAN TURKEY AND SWEET POTATO CHILI
This Turkey Sweet Potato Chili is so good, you might want to double the recipe!! It's made with no beans, but you can of course add them if you wish!
Author:
Cuisine: American
Recipe type: Main dish
Ingredients
  • 20 oz 93% lean ground turkey
  • kosher salt, to taste
  • ½ cup onion, chopped
  • 3 cloves garlic, crushed
  • 10 oz can Rotel mild tomatoes with green chilies
  • 8 oz can tomato sauce
  • ¾ cup water
  • ½ tsp cumin, or to taste
  • ¼ tsp chili powder
  • ¼ tsp paprika
  • 1 bay leaf
  • 1 medium sweet potato, peeled and diced into ½-inch cubes
  • fresh cilantro, for garnish
Instructions
Stove Top:
  1. In a large skillet, brown turkey over medium-high heat, breaking it up as it cooks into smaller pieces and season with salt and cumin.
  2. When meat is browned and cooked through add onion and garlic; cook 3 minutes over medium heat.
  3. Add the can of Rotel tomatoes, sweet potato, tomato sauce, water, cumin, chili powder, paprika, salt and bay leaf.
  4. Cover and simmer over medium-low heat until potatoes are soft and cooked through, about 25 minutes stirring occasionally.
  5. Add ¼ cup more water if needed. Remove bay leaf and serve.
Instant Pot:
  1. Press saute, spray the pot with oil and brown the turkey breaking it up as it cooks into smaller pieces and season with salt and cumin.
  2. When meat is browned and cooked through add onion and garlic; cook 3 minutes.
  3. Add the can of Rotel tomatoes, sweet potato, tomato sauce, water, cumin, chili powder, paprika, salt and bay leaf.
  4. Cover and cook high pressure until potatoes are soft and cooked through, about 15. Natural release.
  5. Remove bay leaf and serve.

Watch the recipe video here:

No-Bean Turkey and Sweet Potato Chili, my FAVORITE chili recipe!! Also great with butternut squash! (YOU MIGHT WANT TO…

Posted by Skinnytaste on Wednesday, September 4, 2019

Dessert

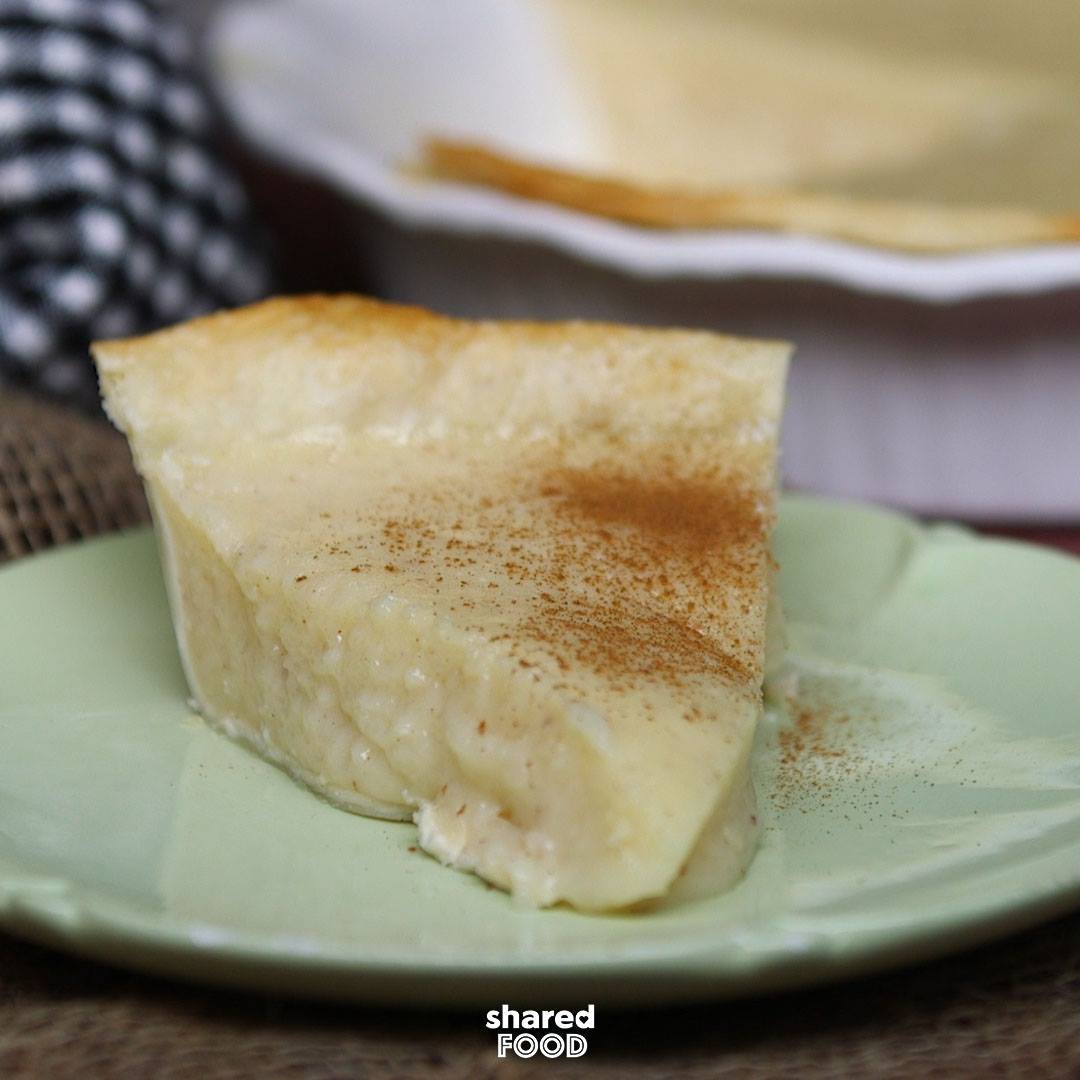
Vinegar Pie Sounds Weird but Wow, It’s Really Good

Vinegar Pie Sounds Weird but Wow, It's Really Good
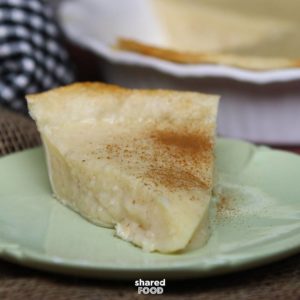
Vinegar...pie?! I know, I know, it sounds like the wackiest "dessert" idea ever, but in reality it's a delicious vintage treat! Supposedly even Laura Ingall's mother made this in Little House in the Big Woods. This pie is very similar to a sugar pie, with a creamy custard filling baked into a classic pie crust. It's so easy to make this, so why not give this unique recipe a try?
Author:
Cuisine: American
Recipe type: Dessert
Ingredients
  • 2 refrigerated pie crusts
  • 3 cups water
  • 2 eggs
  • 1 cup sugar
  • 3 heaping tablespoons flour
  • Pinch of salt
  • 3 tablespoons cold vinegar
  • 1 teaspoon maple or vanilla extract
  • ¼ teaspoon cinnamon
Instructions
  1. Prepare, bake, and fully cool pie crusts in two pie dishes according to box instructions.
  2. In a medium pot, bring the water to a boil. While you wait, in a mixing bowl, whisk together the eggs, sugar, flour, salt, and vinegar until well-combined.
  3. Once the water has come to a boil, pour in the egg-vinegar mixture, continuing to boil, whisking constantly, until everything starts to thicken up (about 5-10 minutes or so). Mixture is ready when it thickly coats the back of a spoon. Remove from heat when thickened.
  4. Stir in the cinnamon and maple/vanilla extract, then pour the mixture through a sieve, then into each pie crust (this will ensure any lumps are removed).
  5. Chill pies in the refrigerator at least 4 hours up to overnight, or until set. Enjoy!

Watch the recipe video here:

Would you try this delicious vintage vinegar pie?Recipe: http://sha.red/60PIq

Posted by Shared Food on Tuesday, May 7, 2019