Pizza

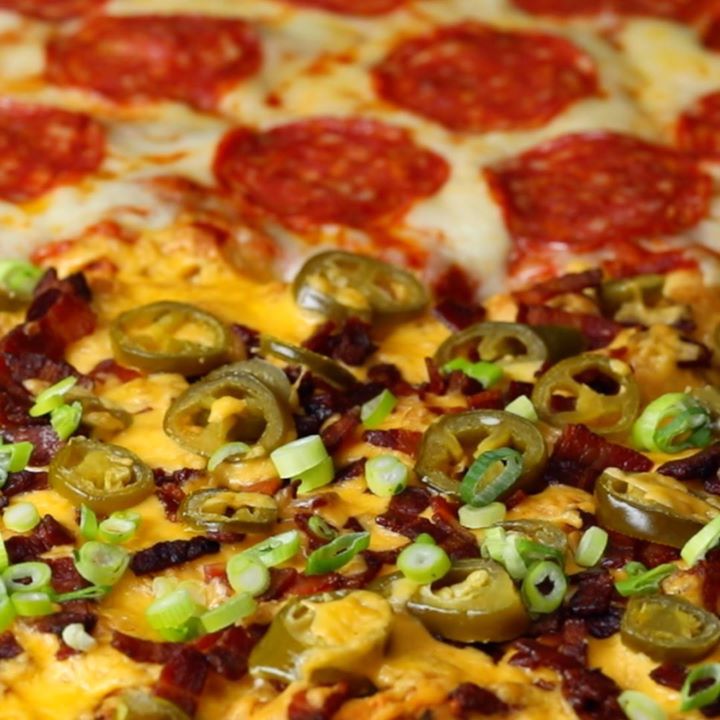
Loaded Game Day Garlic Knots
Loaded Game Day Garlic Knots
Tear and share a twist of joy with these cheesy and pizza covered garlic knots. Covering an all time favourite garlic knot with some of your favourite toppings, these are sure to satisfy!
Author:
Cuisine: American
Recipe type: Pizza
Ingredients
  • 750g pizza dough
  • ½ cup garlic butter
  • ½ cup pizza sauce
  • 2 cups mozzarella cheese
  • 10 sliced pepperoni
  • 2 cups yellow cheddar
  • 12 bacon rashers, cooked and chopped
  • ¼ cup pickled jalapeños
  • Spring onions, finely chopped
Instructions
  1. Pre-heat oven to 180ºC (350ºF).Separate dough into 30g balls. Roll each into logs and tie into a knot looping around your fingers and pulling one end through tucking the ends.
  2. Arrange knots around the sheet pan 8 across by 5 down
  3. Brush knots liberally with garlic butter. Cover and let rise for 20 minutes, bake uncovered for 30 minutes until golden brown.
  4. Top one half of the knots with yellow cheddar, bacon and jalapeños.
  5. On the other half, spread pizza sauce sprinkle grated mozzarella and pepperoni slices.
  6. Grill/ Broil fo 5 minutes until cheese is melted.
  7. Sprinkle spring onions over yellow cheddar and bacon side.
  8. Enjoy!

Watch the recipe video here:

Loaded Game Day Garlic Knots

Loaded Game Day Garlic Knots

Posted by Twisted on Tuesday, January 30, 2018
Main dish

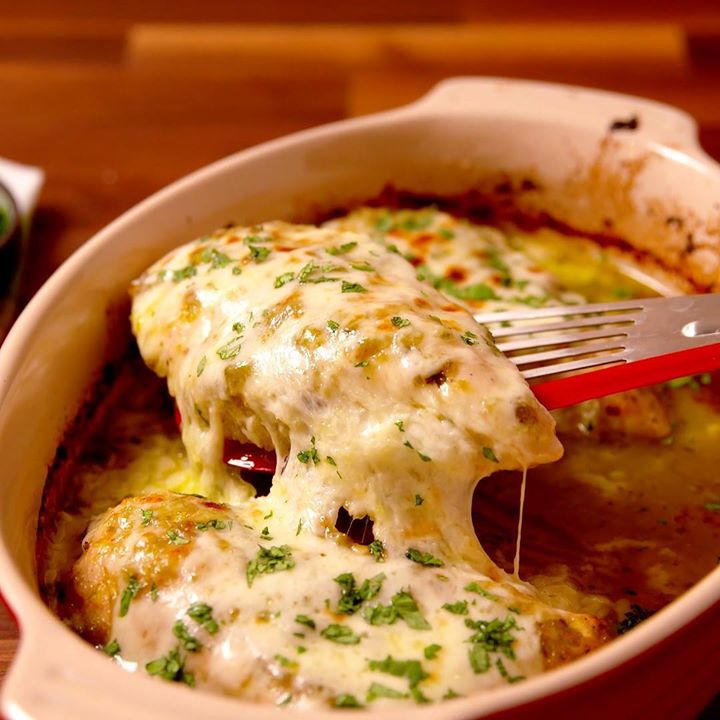
Baked Salsa Verde Chicken

Baked Salsa Verde Chicken
The perfect weeknight dinner—with a kick.
Author:
Cuisine: American
Recipe type: Main dish
Ingredients
  • 1 16-oz. jar salsa verde
  • 1 lb. boneless, skinless chicken breasts
  • 1 tbsp. extra-virgin olive oil
  • kosher salt
  • Freshly ground black pepper
  • 1 tsp. garlic salt
  • 1½ c. Shredded Monterey Jack
  • ¼ c. Chopped cilantro
  • lime, cut into wedges
  • cooked white rice, for serving
Instructions
  1. Preheat the oven to 400 degrees F. Pour salsa verde into a large baking dish.
  2. Brush chicken all over with olive oil. Season with salt, pepper and garlic powder. Nestle chicken into salsa verde and bake for 30-40 minutes, until the chicken is cooked through.
  3. Remove chicken from the oven and sprinkle cheese on top. Place it under the broiler for 1-2 minutes until the cheese is melted and bubbly. Squeeze lime over chicken and garnish with cilantro. Serve over cooked white rice.

Watch the recipe video here:

How To Make Baked Salsa Verde Chicken

Baked Salsa Verde Chicken will spice up your weeknights.Full recipe: http://dlsh.it/hylLQwc

Posted by Delish on Sunday, January 28, 2018

Lasagna

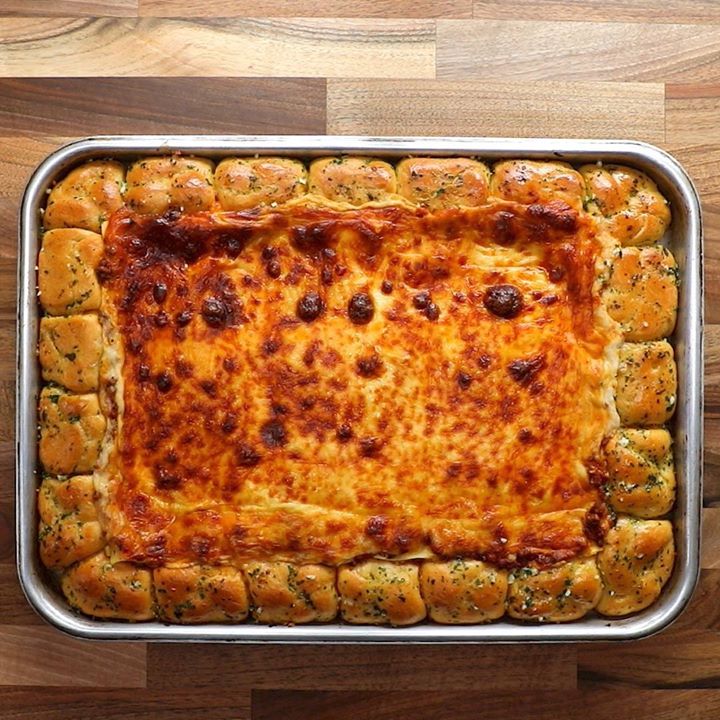
Garlic Knot Crust Lasagna

Garlic Knot Crust Lasagna
Tear and share a dollop of doughy joy this evening. Twisting two of your comfort food favourites together, this garlic knot crust lasagne is the perfect way to satisfy some carby cravings.
Author:
Cuisine: American
Recipe type: Lasagna
Ingredients
  • 4 cups beef ragu
  • 4 cups bechamel
  • 8 lasagna sheets
  • 16 slices mozzarella
  • 500g pizza dough
  • 1 cup garlic butter
Instructions
  1. Separate dough into 30g balls. Roll each into logs and tie into a knot looping around your fingers and pulling one end through tucking the ends.
  2. Arrange knots around the edge of a large deep sheet pan. Layer the middle with two scoops of ragu and béchamel sauce. Top with two lasagna noodles. Layer with ragu followed by béchamel, cheese and then more lasagna noodles. Continue with remaining fillings and noodles and last layer should be remaining béchamel and ragu and topped with cheese.
  3. Brush knots liberally with garlic butter. Cover with parchment and foil an bake at 180ºC (350ºF) for 20 minutes. Remove the cover and bake for an additional 20 minutes.
  4. If needed cover the garlic knots with foil and broil to brown cheese for 5 minutes.
  5. Enjoy!

Watch the recipe video here:

Garlic Knot Crust Lasagna

Garlic Knot Crust Lasagna

Posted by Twisted on Saturday, January 20, 2018

Main dish

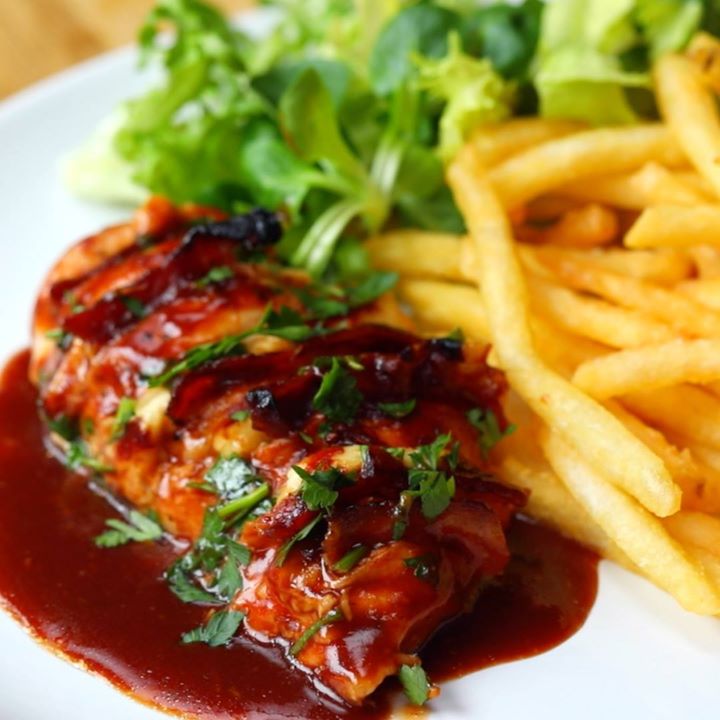
Hasselback Hunters Chicken

Hasselback Hunters Chicken
Hunters chicken is one of those classic pub dishes that has stood the test of time. It's a marvellous thing, a simple combination of the world's most ubiquitous fowl, the people's favourite cheese and the life affirming properties of BBQ sauce. Sit down with one of these bad boys, a plate of chips and a side salad if you like that sort of thing.
Author:
Cuisine: American
Recipe type: Main dish
Ingredients
  • 5 chicken breasts
  • 1 cup BBQ sauce
  • ¾ cup passata
  • 1 tbsp thyme leaves
  • Pinch of salt
  • 6 rashers cooked bacon
  • 1 small block cheddar, cut into slices
Instructions
  1. Preheat the oven to 180°C/360°F.
  2. Cut slits in the chicken all the way down and lay in a skillet.
  3. Whisk together passata, BBQ sauce, thyme and a little salt then brush all over the chicken breasts. Place a small piece of bacon and cheddar between each slit. Pour over remaining sauce if you wish.
  4. Sprinkle with more salt and bake for 30 - 40 minutes until the chicken is cooked through and the cheese has melted and gone all lovely.
  5. Serve with chips and a salad.

Watch the recipe video here:

Hasselback Hunters Chicken

Hasselback Hunters Chicken

Posted by Twisted on Sunday, January 28, 2018

Main dish

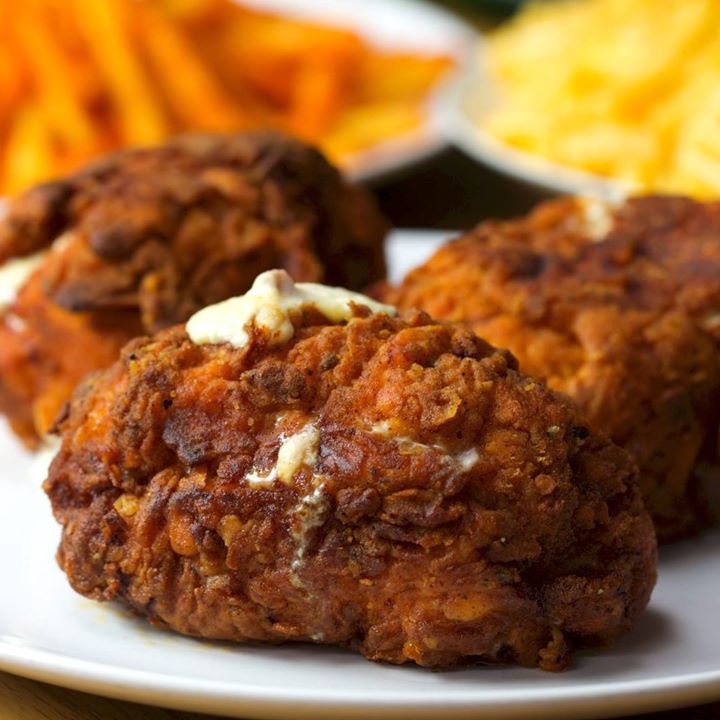
JALAPENO POPPER STUFFED FRIED CHICKEN

JALAPENO POPPER STUFFED FRIED CHICKEN
Author:
Cuisine: American
Recipe type: Main dish
Ingredients
  • 3 chicken breasts
  • 1 cup mozzarella
  • 1 cup cheddar
  • 1 cup cream cheese
  • ½ cup crispy bacon
  • ½ cup jalapenos, diced
  • black pepper
  • 2 cups buttermilk
  • 1½ cups flour
  • 1 tbsp paprika
  • 1 tbsp cayenne
  • 1 tbsp garlic powder
  • 1 tbsp salt
  • 1 tbsp black pepper
  • salt and pepper, to taste
Instructions
  1. In a bowl, mix your cream cheese, mozzarella, swiss, bacon, jalapenos and black pepper. Spoon onto a sheet of cling film, then roll into a sausage and pop into the freezer to set.
  2. In the meantime, bash out your chicken breasts between two sheets of clingfilm. Season well with salt and pepper. Cut a piece of set popper mix and place on your chicken breasts. Roll up like a burrito and pin with a toothpick.
  3. Dunk each roll in buttermilk. Season your flour with the spices, salt and pepper. Dredge your buttermilk-d roll in the seasoned flour.
  4. Fry the rolls in hot oil for 3 minutes or so. Transfer to a tray with a rack and put in the oven at 180°C for 10 minutes.
  5. Get stuck in!

Watch the recipe video here:

Jalapeno Popper Stuffed Fried Chicken

Jalapeno Popper Stuffed Fried Chicken

Posted by Twisted on Monday, January 29, 2018

Cake Dessert

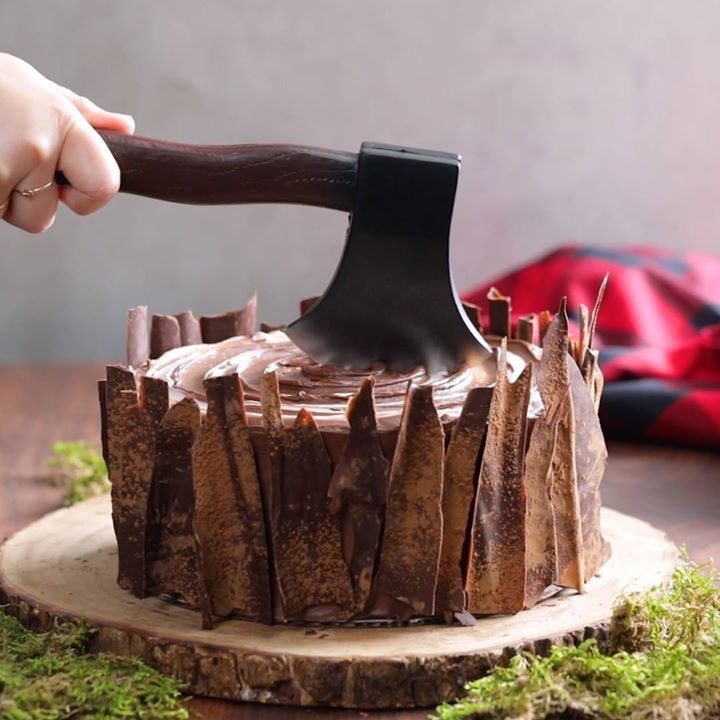
Lumberjack Cake

Lumberjack Cake
After cutting down trees and eating lunch, skip and jump your way over to this chocolate-frosted plaid red velvet cake.
Author:
Cuisine: American
Recipe type: Cake
Ingredients
Red velvet cake (dark red layer):
  • ½ cup butter, softened at room temperature
  • 2 tablespoons cocoa powder
  • 2 tablespoons red food coloring
  • 2½ cups all-purpose flour, sifted
  • 1 teaspoon salt
  • 1½ cups sugar
  • 2 large eggs
  • 2 teaspoons vanilla
  • 1 cup buttermilk
  • 1 tablespoon vinegar
White cake (red layer):
  • 2½ cups cake flour
  • 1½ teaspoons baking powder
  • ½ teaspoon baking soda
  • 1 teaspoon salt
  • 3 large eggs
  • 1 teaspoon vanilla
  • ¾ cup butter, softened at room temperature
  • 1½ cups sugar
  • 1 cup buttermilk
  • 8 tablespoons red food coloring
  • Chocolate cake layer:
  • 1½ cups all-purpose flour
  • 1 cup sugar
  • 1 teaspoon baking powder
  • ½ teaspoon baking soda
  • 1 teaspoon salt
  • ⅓ cup cocoa powder
  • ¾ cup butter, softened at room temperature
  • 2 large eggs
  • 2 teaspoons vanilla extract
  • ¾ cup sour cream, room temperature
Decorating the cakes:
  • 2 cups chocolate frosting
  • 1 cup milk chocolate frosting
For the chocolate bark:
  • 2 cups melted dark chocolate
  • 2 tablespoons cocoa powder, for dusting
For the wood cream cheese frosting:
  • 2 cups cream cheese, room temperature
  • 1 cup butter, room temperature
  • 1 cup powdered sugar, sifted
  • 2 tablespoons vanilla
  • 1 tablespoon lemon juice
Instructions
  1. Make the cakes: Preheat the oven to 350 degrees. Line two 9-inch cake pans with baking spray and parchment paper.
  2. For the red velvet layer: In a small bowl, combine cocoa powder and red food coloring to a paste consistency. Set aside. Combine flour and salt and set aside.
  3. In a large bowl of a stand mixer fitted with the paddle attachment, cream butter and sugar. Once smooth, add in eggs one at a time. Add in vanilla and the red paste. Alternate between adding the flour mixture and the buttermilk, making sure to combine thoroughly after each addition. Add vinegar and mix until batter is smooth. Divide batter between the two prepared pans and bake for 25 to 30 minutes until a toothpick comes out clean from the center. Set aside to cool.
  4. For the white cake layer: Preheat the oven to 350 degrees. Line two 9-inch cake pans with baking spray and parchment paper.
  5. In a medium bowl, sift together the flour, baking powder, baking soda and salt. Set aside. In a small bowl, whisk together eggs and vanilla.
  6. In a large bowl, cream butter and sugar. Add egg mixture. Alternate adding in the flour mixture and the buttermilk until completely combined. Stir in red food coloring. Divide batter between the two prepared pans and bake for 25 to 30 minutes until a toothpick comes out clean from the center. Set aside to cool.
  7. For the chocolate cake layer: Preheat the oven to 350 degrees. Line two 9-inch cake pans with baking spray and parchment paper.
  8. In a large bowl, combine the flour, sugar, baking powder, baking soda, salt and cocoa powder. Using a hand mixer, blend the butter, eggs and vanilla into the dry mix. Fold in the sour cream. Divide the batter between the two cake pans and bake for 25 to 30 minutes until fragrant and a toothpick comes out clean from the center of the cake. Set aside to cool.
  9. Make the wood cream cheese frosting: In a large bowl, cream together cream cheese and butter with a hand mixer until smooth. Add powdered sugar, lemon juice and vanilla. Set aside.
  10. Make the chocolate bark: Spread chocolate in a thin layer across a piece of 18 by 13-inch parchment paper. Lay another piece of parchment paper on top of the chocolate and smooth out. Roll the parchment paper lengthwise and set in the fridge to chill for up to 2 hours.
  11. Assemble the cake: When cakes are cool, cut off the tops and divide into two layers. Using a 5-inch and 2-inch cake mold, cut circles out of each layer. Stack the cake layers and add frosting. Remove chocolate bark from the fridge, dust with cocoa powder, and place around the edge of the cake to resemble bark.

Watch the recipe video here:

Lumberjack Cake

Button up your flannel, grab your axe, and hack yourself a slice.Full Recipe: taste.md/2DQDAgw

Posted by Tastemade on Friday, January 26, 2018

Cake Dessert

Purple Rain Cake

Purple Rain Cake
This magnificent blackberry-flavored cake made in honor of Prince just might taste good enough to make dove's cry.
Author:
Cuisine: American
Recipe type: Cake
Ingredients
Cake
  • You’ll need to triple this recipe
  • 429g all-purpose flour
  • 265g caster (superfine) sugar
  • ½ tsp salt
  • 3 tsp baking powder
  • 375ml of milk
  • 125ml vegetable oil
  • 125g unsalted butter, softened
  • 2 tbsp Greek yogurt (can substitute with sour cream)
  • 1 tsp vanilla extract
  • 2 large eggs
Cake extras
  • Regal purple food gel
  • Deep pink food gel
  • 3 tsp blackberry essence
Frosting
  • X3 batches Swiss meringue buttercream frosting (recipe on thescranline.com)
  • Regal purple food gel
  • Deep pink food gel
  • 2 tsp blackberry essence
Instructions
  1. Cake
  2. Before you begin
  3. You’ll need to triple this cake recipe. Not the cake extras, just the cake recipe itself. Nobody has a bowl big enough to handle all that batter so it’s just easier to make in 3 batches. I’d recommend making all the batter and then split it amongst the different cake tins.
  4. Preheat a fan-forced oven to 160C (320F) or 180C (356F) for a conventional oven. Spray three 8” cake tins with oil spray and line the bottom with baking paper. You’ll also need three 6” cake tins for the top tier. If you only have one of each sized tin you can just bake them in the oven one at a time it will just take longer. I’d recommend baking the cake the day before it’s being served to allow yourself plenty of time to make the entire cake and to allow it to cool down properly before frosting.
  5. Let’s begin!
  6. Making the batter
  7. In the bowl of a stand mixer fitted with the paddle attachment, add the flour, baking powder, caster sugar and salt. Turn mixer on low speed and allow it to mix for a couple minutes to help everything combine well (alternatively you may do this by sifting the ingredients together). Add the softened butter and mix until it resembles a fine sand like texture.
  8. Add the milk, oil, Greek yogurt, blackberry essence, eggs and vanilla extract into the bowl with the dry ingredients and mix on medium speed until no dry ingredients are visible. Scrape down the bowl and mix for another 20 seconds.
  9. Colouring the batter
  10. Once you’ve made triple the recipe split into 3 bowls evenly. To colour the batter use the following formulas:
  11. DARK PURPLE LAYER: 6 drops purple food gel + 3 drops pink food gel. Gently fold until well combined.
  12. MIDDLE PURPLE LAYER: 4 drops purple food gel + 2 drops pink food gel. Gently fold until well combined.
  13. LIGHT PURPLE LAYER: 2 drops purple food gel + 2 drops pink food gel. Gently fold until well combined.
  14. Filling the cake tins
  15. So you’re going to have fill three 8” cake tins with batter and three 6” cake tins with batter. For each colour you want to add about ⅔ of the batter into the 8” cake tin and ⅓ of the batter into the 6” cake tin.
  16. Bake the 8” cake tins for 45 min and the 6” cake tins for 30 min or until a toothpick inserted comes out clean. Allow the tins to cool for 2 min and then carefully flip the cake tins over on to a cooling rack to cool completely before using. I’d recommend chilling them overnight.
  17. Using a large serrated knife, carefully trim the top off each layer of cake to make even and flat layers. Try to aim to get them all the same height. An easy way to do this is to find the lowest height of the cake, place a skewer or toothpick next to that point and mark it. As you go around each side of the cake cutting it, use the marked skewer to make sure each cut is at the same height. I used a cake leveller in the video which is the simplest way to do it.
  18. Frosting
  19. So you’re going to colour the frosting in 5 different shades. Those shades will be used to fill the cakes but also to frost the outside of the cakes. But you’ll just use white frosting for the crumb coat. So set about ⅙ of the white frosting aside before you colour it. Split the rest of the frosting into 5 bowls. These are the colour formulas starting with the lightest:
  20. / 10 drops purple food gel + 5 drops pink food gel + a couple drops of black berry essence
  21. / 7 drops purple food gel + 4 drops pink food gel + a couple drops of black berry essence
  22. / 4 drops purple food gel + 3 drops pink food gel + a couple drops of black berry essence
  23. / 2 drops purple food gel + 2 drops pink food gel + a couple drops of black berry essence
  24. / 1 drops purple food gel + 1 drops pink food gel + a couple drops of black berry essence
  25. If you feel like you want darker shades add more purple food gel.
  26. Crumb Coat
  27. Let’s start by assembling the 8” cake. You’re going to start by adding a dab of the dark frosting on the board.
  28. Add the first dark cake layer on top of that and gently but firmly press down to make it stick to the frosting on the cake board. Add a layer of the darkest frosting on top and level off with an offset spatula. Then add the second layer of the darkest cake. Add the next lightest layer of frosting. You’re going to work your way up to the lightest cake layers and frosting.
  29. Add some white frosting around the outside of the cake. Use a small offset spatula to spread the frosting around making sure to fill in any cracks that may be showing in between each layer. Then use a cake scraper to level off the sides and top. It doesn’t have to be perfect! Just make sure everything looks neat and even.
  30. You’re going to repeat this for the 6” cake too.
  31. Chill them both for at least 3 hours.
  32. Assembling the cake!
  33. To assemble the cake, add three bubble straws into the chilled 8” cake. This is going to ensure your cake doesn’t collapse when it thaws before serving. The best way to make sure the bubble straws are even in height and don’t peak out the top is to add one straw all the way in. Lift it slightly and then marks it. Put it flush next to the other 2 straws and cut. Insert them into the cake in a triangle shape toward the middle so they support the 6” cake. Add a dab of frosting on top of the 8” cake and then carefully place the 6” cake on top. I’ve found the easiest way to do this is using a large offset spatula. Take your time it’s not a race!
  34. Ok so to finish off the cake you’re going to add the rest of your 5 different shades into two separate piping bags each. One bag will be fitted with a Wilton #32 piping tip and the other with a small round tip about the same size as the #32. And from here folks it’s about patience. You’re going to be piping blobs of frosting starting at the bottom of the cake with the dark purple and working your way up to the top using the lightest shade of purple.

Watch the recipe video here:

Purple Rain Cake

This cake tastes so good, it makes doves cry.Full Recipe: taste.md/2Dy0wxL?: The Scran Line

Posted by Tastemade on Saturday, January 27, 2018

Breakfast

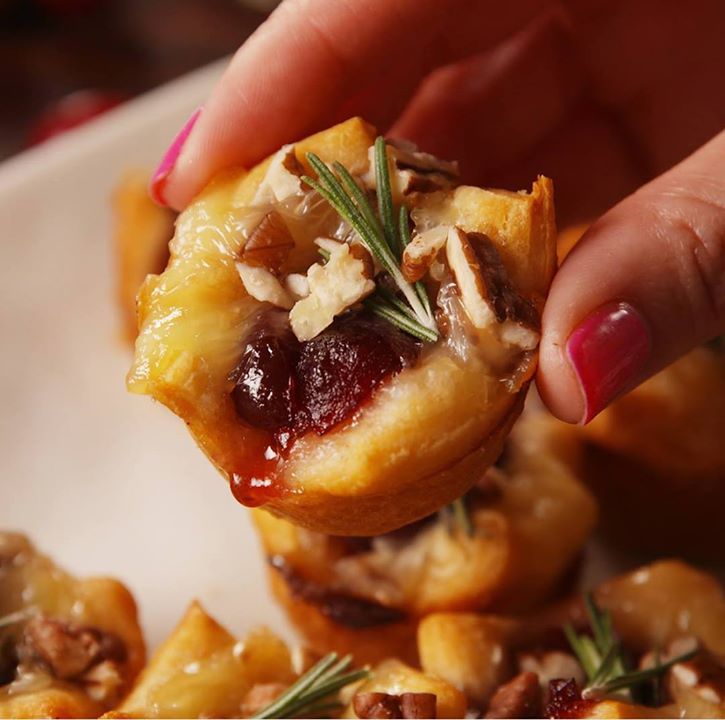
Cranberry Brie Bites

Cranberry Brie Bites
The perfect party appetizer.
Author:
Cuisine: American
Recipe type: Breakfast
Ingredients
  • 1 tube crescent dough
  • Cooking spray, for pan
  • Flour, for rolling out dough
  • 8 oz. wheel Brie
  • 1 c. whole berry cranberry sauce
  • ½ c. chopped pecans
  • 6 sprigs of rosemary, cut into 1" pieces.
Instructions
  1. Preheat oven to 375° and grease a mini muffin tin with cooking spray. On a lightly floured surface, roll out crescent dough, and pinch seams together. Cut into 24 squares. Place squares into muffin tin slots.
  2. Cut brie into small pieces and place inside the crescent dough. Top with a spoonful of cranberry sauce, some chopped pecans, and one little sprig of rosemary.
  3. Bake until the crescent is golden, about 15 minutes.
  4. Serve warm.

Watch the recipe video here:

How To Make Cranberry Brie Bites

These brie bites will be the holiday app that gets demolished in seconds.Full recipe: http://dlsh.it/tNoTlcL

Posted by Delish on Saturday, November 11, 2017

Cake Dessert

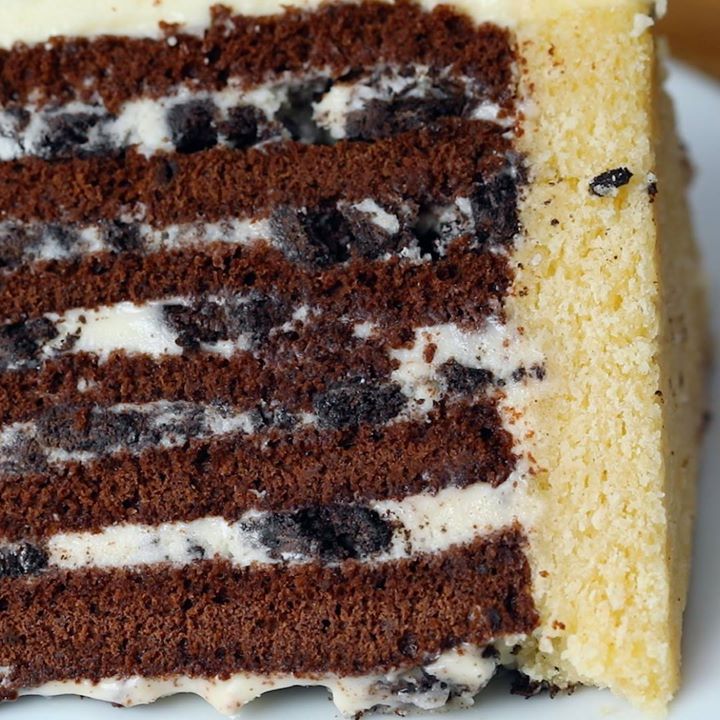
Cookies and Cream Stripe Cake

Cookies and Cream Stripe Cake
A different way to serve a cake. Rolled up and when sliced a beautiful stripped pattern inside! Making sheet cakes is easier especially when it just needs a quick roll and your favourite icing.
Author:
Cuisine: American
Recipe type: Cake
Ingredients
  • 1½ cup (3.5 oz) all-purpose flour
  • ½ cup (.75 oz) dark or dutch processed cocoa powder
  • 1 teaspoon baking powder
  • 1 teaspoon baking soda
  • 1 teaspoon kosher salt
  • 8 large eggs, room temperature
  • 1½ cup granulated sugar
  • 1 teaspoon vanilla extract
  • ½ cup unsalted butter, melted still hot
  • 4 ounces dark chocolate, finely chopped
  • 6 cups Butttercream
  • 1 cup crushed chocolate cookies
  • 1 6” vanilla cake cut in half horizontally
Instructions
  1. Pre-heat oven to 180ºC (350ºF). In a large bowl, whisk together sugar and eggs until pale and fluffy. Set aside.
  2. Add chocolate to melted butter and stir to melt chocolate. Add vanilla.
  3. Fold into egg mixture until combined.
  4. Sift all of the dry ingredients and fold in gently being careful not to break all the bubbles.
  5. Divide onto two parchment lined greased sheet pans and spread flat. Cook for 7-8 minutes until it springs back when touched.
  6. While still warm, roll with the parchment but carefully. Set aside to cool for about 30-40 minutes.
  7. Unroll each cake gently, cut i half lengthways to create 4 strips. Spread a thin layer of buttercream and then sprinkle with crushed cookies. Roll one strip and then put onto the next and continue to roll to form a large spiral.
  8. Place one half of vanilla cake on a serving platter. Top with a thin layer of buttercream, giant swirl, another thin layer of buttercream then second piece of vanilla cake.
  9. Cover entire cake in buttercream and sprinkle crushed cookies on the edge of the top.
  10. Let set and enjoy!

Watch the recipe video here:

Cookies and Cream Stripe Cake

Cookies and Cream Stripe Cake

Posted by Twisted on Thursday, January 25, 2018

Cake Dessert

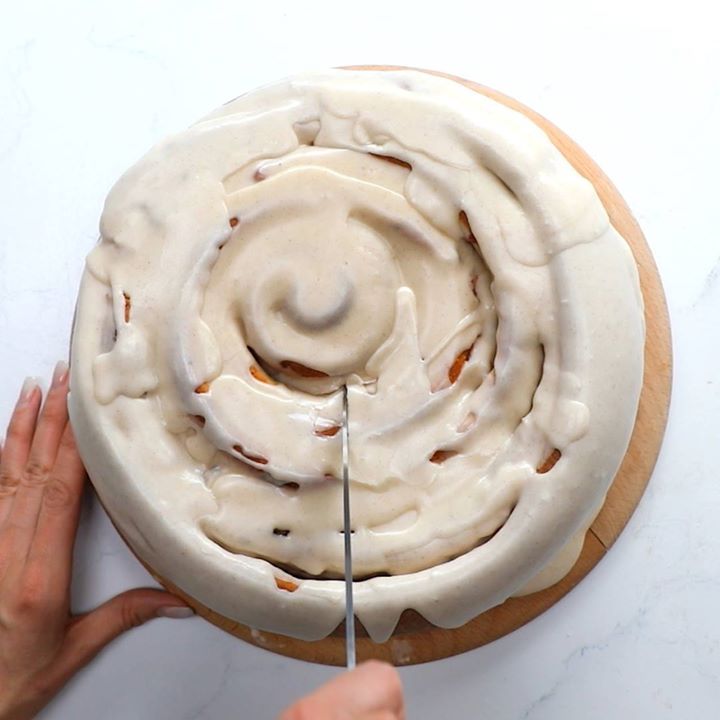
Giant Apple Pie Cinnamon Roll

Giant Apple Pie Cinnamon Roll
Get a pot of coffee on, this giant apple pie cinnamon roll with cinnamon icing is incredible. Perfect for dessert to end a lavish meal or simple for coffee time!
Author:
Cuisine: American
Recipe type: Cake
Ingredients
  • 6 cups finely chopped cooking apples
  • 2 tbsp unsalted butter
  • 2 tsp cinnamon powder
  • ½cup granulated sugar
  • ¼ cup brown sugar
  • ½ tsp salt
  • Dough:
  • 1 cup (240ml) milk, warmed
  • ½ cup (135g) granulated sugar
  • 2 tablespoons active dry yeast (2 standard size packets)
  • ½ cup (115g) unsalted butter, softened to room temperature and cut into 4 pieces
  • 2 large eggs
  • ½ teaspoon salt
  • 4 and ½ cups (562g) all-purpose flour, plus more for dusting/rolling
  • Icing:
  • 2 cups Icing sugar, sifted
  • 2 tbsp melted butter
  • 3 tbsp milk
  • 2 tsp cinnamon
  • 1 tsp vanilla
Instructions
  1. In a large saucepan over medium heat melt butter. Add apples, cinnamon and sugars. Cover and cook until softened and juices have reduced. Cool completely
  2. In a large bowl, add warm milk, sugar, and yeast. Let it sit for about 5 minutes until frothy
  3. Add softened butter, salt, eggs, and flour to the bowl and mix well.
  4. Place dough into an oiled bowl, cover and let rise in a warm place about 1 hour or until the dough has doubled in size.
  5. Pre-heat oven to 180ºC (350ºF).
  6. Roll the dough out on a lightly floured surface, until it is approx 16 inches long by 12 inches wide. It should be approx ¼ inch thick.
  7. Spread apple mixture evenly over dough. Cut into four strips. Roll each strip into each other to create a giant spiral.
  8. Place carefully into a large buttered skillet. Cover and let rest for 30 minutes.
  9. Bake for 40 minutes. Cover with foil if browning too much. Then bake for another 40 minutes. Let cool for 10 minutes. Remove from skillet.
  10. Make icing and proud over entire bun evenly. Slice and serve.
  11. Enjoy!

Watch the recipe video here:

Giant Apple Pie Cinnamon Roll

Giant Apple Pie Cinnamon Roll

Posted by Twisted on Friday, January 26, 2018