Dessert

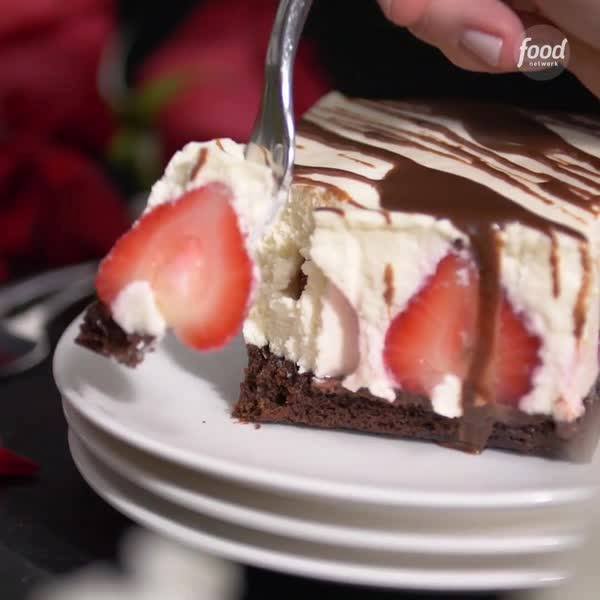
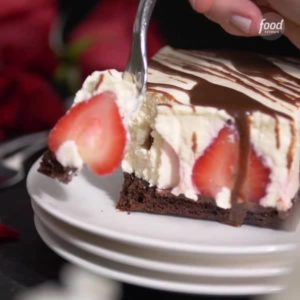
Buried Strawberry Cheesecake
Buried Strawberry Cheesecake
Author:
Cuisine: American
Recipe type: Dessert
Ingredients
  • Nonstick cooking spray, for greasing the pan
  • One 18.4-ounce box brownie mix (plus required ingredients)
  • 45 to 50 medium strawberries (about 2½ pounds), stemmed
  • Two 8-ounce packages cream cheese, at room temperature
  • 1 cup sugar
  • 4 cups heavy cream
  • 1 cup sour cream
  • 1 teaspoon pure vanilla extract
  • Two ¼-ounce packages unflavored gelatin
  • Warm chocolate fudge sauce, for drizzling
Instructions
  1. Preheat the oven to 350 degrees F. Lightly spray the bottom and sides of a 9-by-13-inch metal baking pan with cooking spray. Line the pan with parchment, leaving at least a 2-inch overhang on all sides.
  2. Prepare and bake the brownies in the prepared pan according to the package directions for a 9-by-13-inch baking pan. Let cool completely on a rack, about 1 hour.
  3. Meanwhile, slice 5 to 6 strawberries into ⅛-inch-thick slices--you will need enough to fit around the edges of the pan; set aside. Leave the remaining strawberries whole.
  4. Beat the cream cheese, sugar and 3½ cups of the heavy cream in a large bowl with an electric mixer on medium speed until stiff peaks form, 3 to 4 minutes. Fold in the sour cream and vanilla until smooth.
  5. Bring the remaining ½ cup heavy cream to a boil in a small saucepan, then whisk in the gelatin. Continue to whisk off heat until the gelatin is dissolved, 2 to 3 minutes. Fold the gelatin mixture into the cream cheese mixture until well combined.
  6. Stand the sliced strawberries upside down around the perimeter of the pan with the flat/cut sides touching the side of the pan, cutting an extra strawberry or two if needed. Pour 3 cups of the cream cheese mixture on top of the brownies and use an offset spatula to spread and smooth it out. Press the remaining whole strawberries into the cream cheese upside down (pointed ends up); you should have about 8 rows of 5. Spread the remaining cream mixture on top of the strawberries and smooth out the top with an offset spatula. Chill until set, at least 2 hours and up to overnight.
  7. When ready to serve, use the parchment overhang to remove the dessert from the pan and place onto a serving platter (trim the parchment from around the edges). Drizzle the top with chocolate fudge sauce and cut into bars.

Watch the recipe video here:

Recipe of the Day: Buried Strawberry Cheesecake?Save the recipe: https://foodtv.com/2ScQ9uG!

Posted by Food Network on Monday, February 11, 2019

Main dish

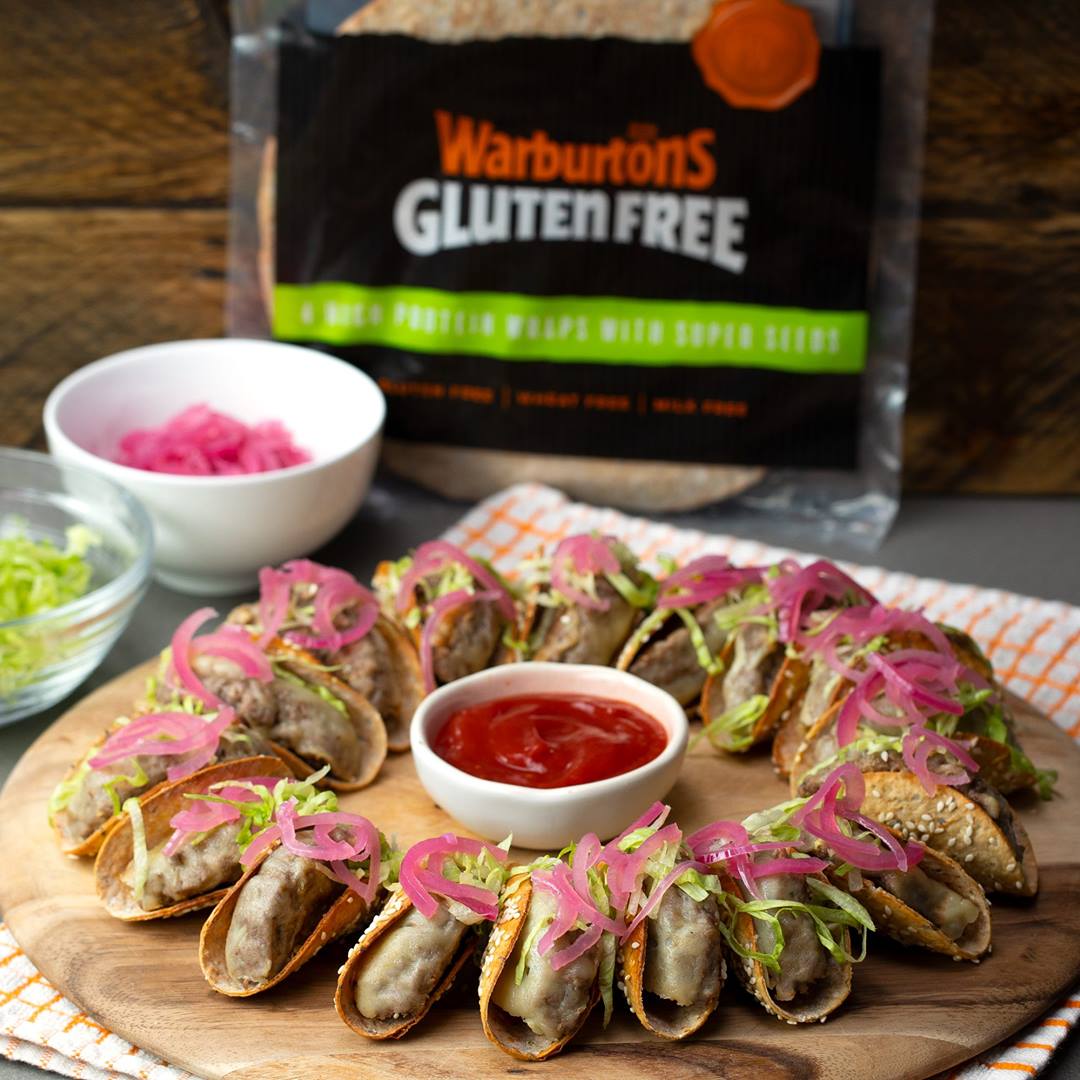
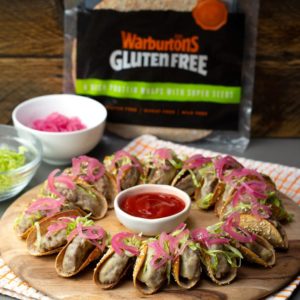
WARBURTONS GLUTEN FREE MINI CHEESEBURGER TACOS

WARBURTONS GLUTEN FREE MINI CHEESEBURGER TACOS
Make your next gluten free meal fun and family friendly with our latest twist on the awesomely indulgent Cheeseburger Taco. Perfect for all occasions to share with friends, all you need are mini burger patties, melted cheese and Warburtons Gluten Free High Protein Wraps, and you’ll have instantly upped your snack game! It’s gluten-free, made easy.
Author:
Cuisine: American
Recipe type: Main dish
Ingredients
  • 3 Warburtons Gluten Free High Protein Wraps with Super Seeds
  • 20g sesame seeds
  • 1 egg, beaten
  • 500g beef mince
  • 1 tsp salt
  • 1 tsp pepper
  • 1 tsp onion powder
  • ½ tsp garlic powder
  • 6 slices of cheddar cheese
  • Shredded iceberg lettuce, to serve
  • Pickled red onions, to serve
Instructions
  1. Cut each wrap into 3 discs using a circle cutter. Brush with beaten egg, then sprinkle with sesame seeds. Turn a muffin tray upside down and slot each disc between the trivets to create a taco shape. Bake at 170C/400F for 6-8 mins until firm and golden.
  2. Combine beef mince, onion powder, garlic powder, salt and pepper in a bowl. Shape into 6 patties and push into a metal ring the same size as the one used to cut the tacos.
  3. Heat a frying pan on a medium-high heat. Put a little oil in the pan, then fry the burgers until they are nicely caramelised on one side, about 2 mins.
  4. Flip over and cook for 1 min, then pop a slice of cheddar on each one and put a lid on the pan. Steam the burgers until the cheese is nice and melted.
  5. Slice each burger patty in half and slot into the mini taco shell. Top with shredded lettuce and pickled red onions and serve.

Watch the recipe video here:

Warburtons Gluten Free Mini Cheeseburger Tacos

Posted by Twisted on Monday, February 11, 2019
Main dish

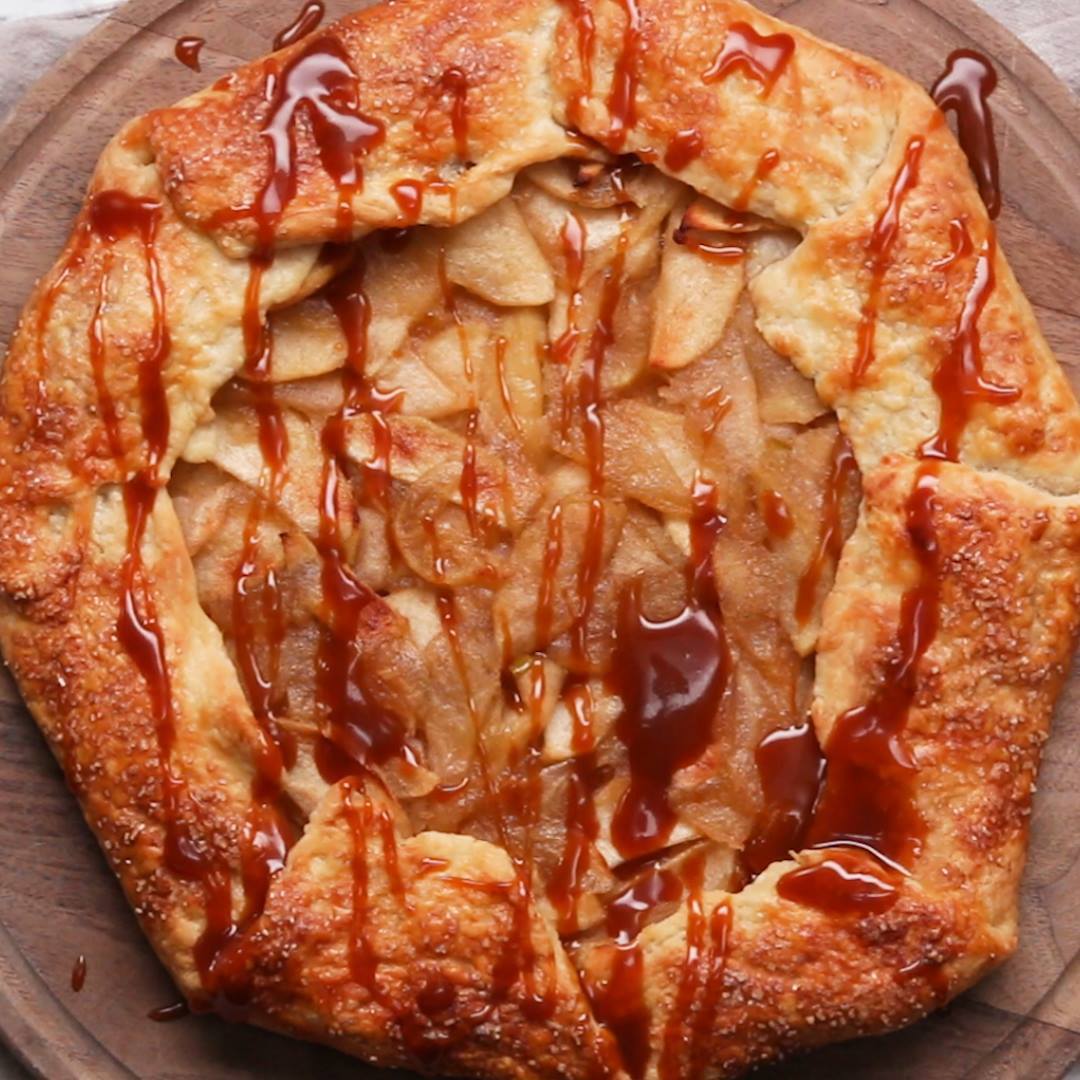
Apple Galette

Apple Galette
Apple Galette
Author:
Cuisine: American
Recipe type: Main dish
Ingredients
PIE DOUGH
  • 1 ¼ cups all purpose flour, plus more for dusting (155 g)
  • 1 tablespoon sugar
  • ¼ teaspoon kosher salt
  • 8 tablespoons unsalted butter, cubed and chilled
  • 1 tablespoon apple cider vinegar
  • ¼ cup ice water (60 mL)
  • 1 egg, beaten, for brushing
  • coarse sugar, for sprinkling
  • APPLE FILLING
  • 1 ½ lb granny smith apple, or Fuji apple, peeled, cored and sliced (680 g)
  • 1 tablespoon lemon juice
  • ¼ teaspoon ground cinnamon
  • ⅓ cup sugar (65 g)
  • 1 tablespoon unsalted butter
CARAMEL SAUCE
  • ½ cup sugar (100 g)
  • ¼ teaspoon salt
  • 1 tablespoon unsalted butter
  • ½ cup heavy cream (120 mL)
Instructions
  1. Make the pie dough: In a medium bowl, combine the flour, sugar, and salt. Mix with fork.
  2. Add the butter and work into the flour with a fork until only pea-size lumps remain.
  3. Add the apple cider vinegar and mix into the dough with your fingers. Gradually add the ice water and mix with your hands until the dough starts to come together. Add more water as needed if the dough is dry. The dough should not be very tacky or sticky. Shape the dough into a rough ball and cover with plastic wrap. Chill in the refrigerator for 30 minutes.
  4. Meanwhile, make the apple filling: In a large skillet over medium heat, combine the sliced apples, lemon juice, cinnamon, and sugar. Cook, stirring continuously, until the apples are soft, about 10 minutes. Add the butter and stir to incorporate. Remove the pan from the heat and let the filling cool.
  5. Preheat the oven to 425°F (220°C). Line a baking sheet with parchment paper.
  6. On a lightly floured surface, roll out the dough into a round that is about ⅛-inch (3 mm) thick. Roll the dough around the rolling pin and transfer to the prepared baking sheet.
  7. Spoon the apple filling into the center of the dough, leaving a 2-inch (5 cm) border around the edges. Fold the edges over the apples. Brush the egg wash over the crust and sprinkle coarse sugar all over the galette.
  8. Bake the galette for 25 minutes, until the crust is golden brown.
  9. Meanwhile, make the caramel sauce: In a small pot, combine the sugar, salt, and butter. Cook over medium heat until the sugar dissolves and turns amber in color, 2-3 minutes, swirling the pan occasionally.
  10. Pour in the heavy cream and stir with wooden spoon. Remove from the heat and let cool slightly.
  11. Drizzle the caramel sauce over the galette, then slice and serve.
  12. Enjoy!

Watch the recipe video here:

The perfect apple galette to share with your best friends ?FULL RECIPE: https://tasty.co/recipe/apple-galette

Posted by Proper Tasty on Monday, February 11, 2019
Main dish

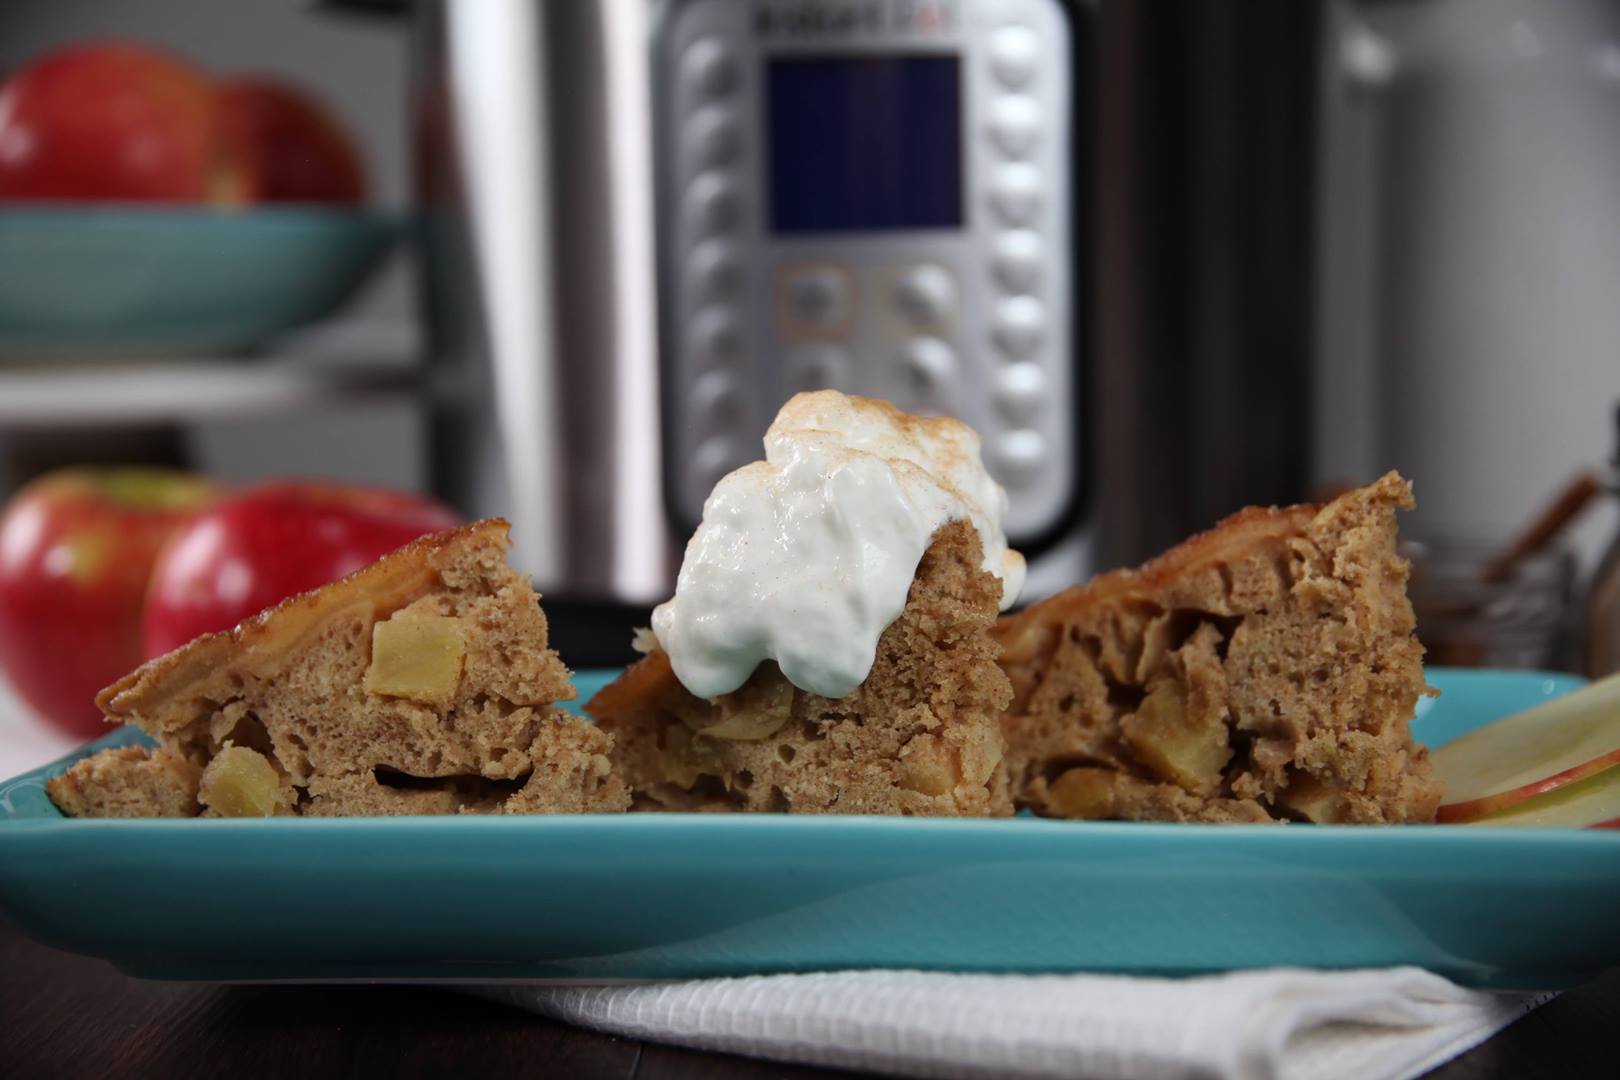
Instant Pot Apple Cake

Instant Pot Apple Cake
Cakes turn out rich and moist, never dry.
Author:
Cuisine: American
Recipe type: Main dish
Ingredients
  • 1 red apple, sliced very thin
  • 1 red apple, peeled and cut into ½″ dice
  • 7 oz white or yellow cake mix (about half a box), prepared according to package directions
  • 1 tsp cinnamon
  • ½ tsp nutmeg
  • 1½ cups water
  • 2 tbsp cinnamon sugar for topping
Instructions
  1. Coat the inside of a 7” x 3” springform or push pan with non-stick spray. (We love this pan: https://amzn.to/2xAXUOF)
  2. Layer thinly sliced apples along bottom and sides of pan.
  3. Add cinnamon, nutmeg and diced apples to the prepared cake mix. Stir to combine.
  4. Gently spoon the cake batter into the prepared pan. Cover loosely with foil – do not seal.
  5. Pour 1½ cups water into the Instant Pot, followed by the steam rack.
  6. Carefully lower the baking pan onto the steam rack, then secure the lid, making sure the vent is closed.
  7. Using the display panel select the MANUAL function*. Use the +/- keys and program the Instant Pot for 20 minutes.
  8. When the time is up, let the pressure naturally release for 10 minutes, then quick-release the remaining pressure.
  9. Carefully remove the cake pan from the pot. Place on a cooling rack and allow to set for 5-10 minutes before inverting onto a parchment-lined baking sheet.
  10. Top with cinnamon sugar and set under the broiler until sugar melts.
  11. Serve warm.

Watch the recipe video here:

Cakes turn out rich and moist, never dry.RECIPE: http://chopsecrets.com/instant-pot-apple-cake/

Posted by Chop Secrets on Sunday, February 10, 2019

Dessert

Premium Tres Leches Cake

Premium Tres Leches Cake
Sweetened condensed milk, whole milk and whipping cream are the traditional “three milks” that are mixed together and poured into “poke” holes, saturating this tres leches cake and transforming it from an everyday sheet cake into a moist, flavorful and deeply rich dessert.
Author:
Cuisine: American
Recipe type: Dessert
Ingredients
  • 1 box Betty Crocker™ Super Moist™ yellow cake mix
  • 1¼ cups water
  • 1 tablespoon vegetable oil
  • 2 teaspoons vanilla
  • 4 eggs
  • 1 can (14 oz) sweetened condensed milk (not evaporated)
  • 1 cup whole milk or evaporated milk
  • 1 cup whipping cream
  • 1 container Betty Crocker™ Whipped fluffy white frosting
Instructions
  1. Heat oven to 350°F (325°F for dark or nonstick pan). Spray bottom and sides of 13x9-inch pan with cooking spray.
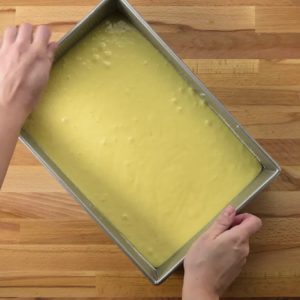
  2. In large bowl, beat cake mix, water, oil, vanilla and eggs with electric mixer on low speed 30 seconds, then on medium speed 2 minutes, scraping bowl occasionally. Pour into pan.
  3. Bake as directed on box for 13x9-inch pan. Let stand 5 minutes. Poke top of hot cake every ½ inch with long-tined fork, wiping fork occasionally to reduce sticking.
  4. In large bowl, stir together sweetened condensed milk, whole milk and whipping cream. Carefully pour evenly over top of cake. Cover; refrigerate about 1 hour or until mixture is absorbed into cake. Frost with frosting. Store covered in refrigerator.

Watch the recipe video here:

A Betty classic.Premium Tres Leches Cake recipe:…

Posted by Betty Crocker on Sunday, February 10, 2019

Main dish

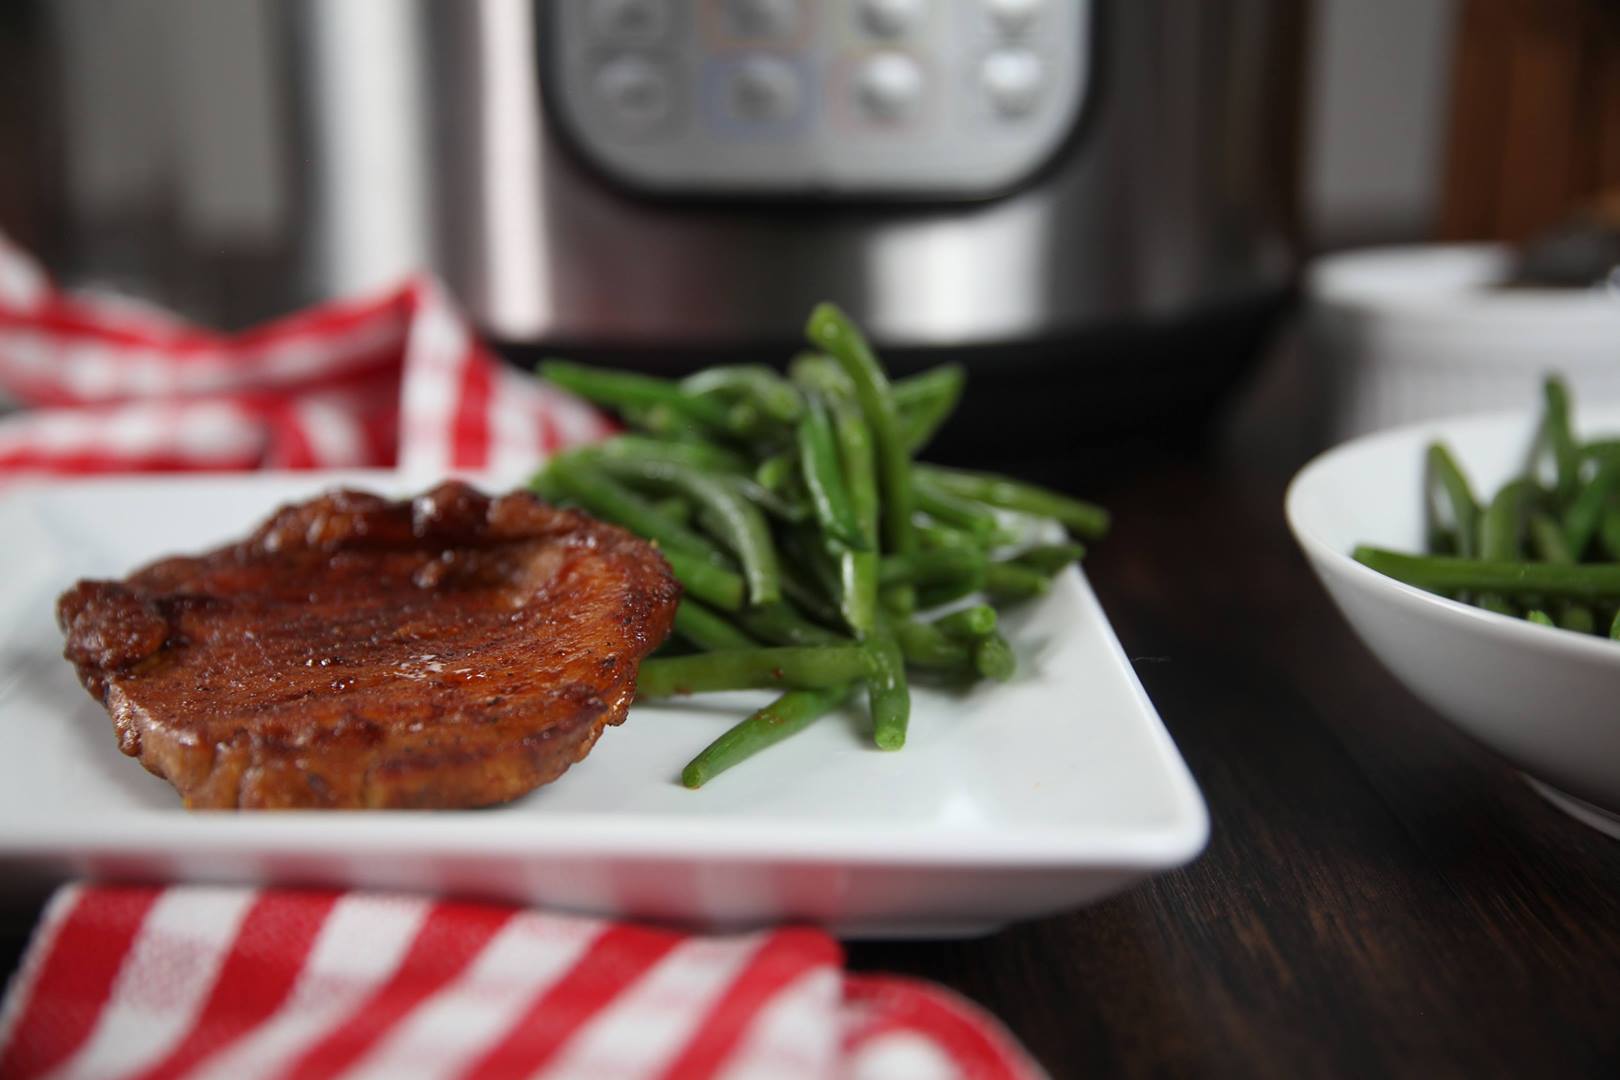
Instant Pot BBQ Pork Chops

Instant Pot BBQ Pork Chops
This savory-sweet recipe with just the right hint of spice is delicious
Author:
Cuisine: American
Recipe type: Main dish
Ingredients
  • Spice Mixture (or substitute 3 tbsp of your favorite pork rub)
  • 1 tbsp paprika
  • 2 tsp brown sugar
  • 2 tsp salt
  • ½ tsp each chili powder, garlic powder, onion powder
  • ¼ tsp pepper
  • ¼ tsp cayenne (optional)
  • 2 tbsp olive oil
  • 4 bone-in pork chops
  • 1½ cups chicken broth
  • ⅓ cup bbq sauce
Instructions
  1. In a small bowl combine the Spice Mixture ingredients and use to season both sides of the pork chops.
  2. Add olive oil to the Instant Pot. Using the display panel select the SAUTE function.
  3. When oil gets hot, brown the meat on both sides, 3-4 minutes per side. Meat will not be cooked through. Do not crowd the pot–you may have to work in batches. Transfer browned meat to a shallow dish and cover loosely with foil.
  4. Add broth to the pot and deglaze by using a wooden spoon to scrape the brown bits from the bottom of the pot.
  5. Put the meat back into the pot.
  6. Turn the pot off by selecting CANCEL, then secure the lid, making sure the vent is closed.
  7. Using the display panel select the MANUAL function*. Use the +/- keys and program the Instant Pot for 7 minutes and adjust to LOW PRESSURE.
  8. When the time is up, let the pressure naturally release for 10 minutes, then quick-release the remaining pressure.
  9. Remove the pork chops to a foil-lined baking sheet and brush with bbq sauce. Set the pan under the broiler until meat is caramelized and bubbly, 3-4 minutes. Serve immediately.

Watch the recipe video here:

This savory-sweet recipe with just the right hint of spice is delicious.RECIPE: http://chopsecrets.com/instant-pot-bbq-pork-chops/

Posted by Chop Secrets on Sunday, February 10, 2019

Main dish

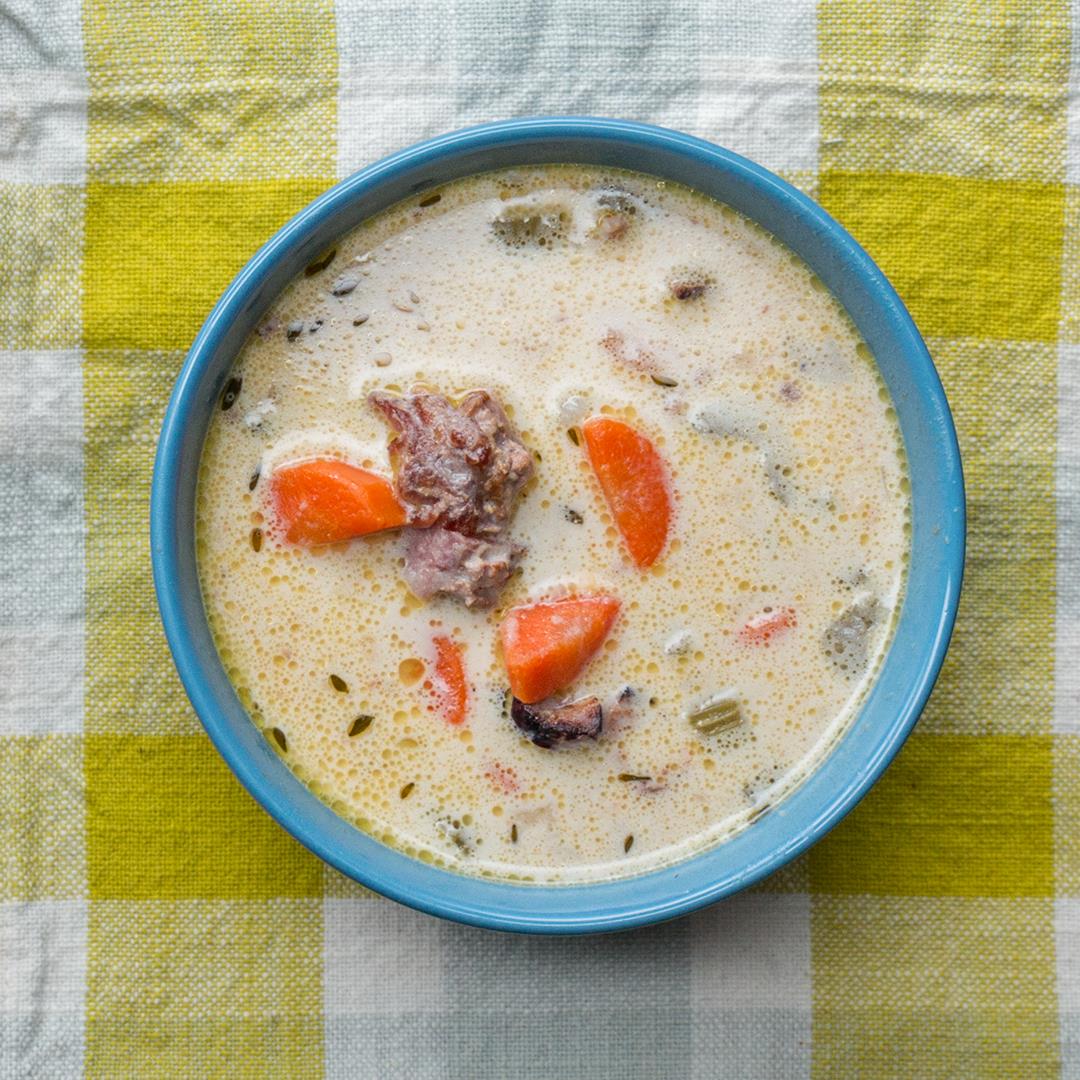
One-pot Ham & Potato Soup

One-pot Ham & Potato Soup
Author:
Cuisine: American
Recipe type: Main dish
Ingredients
  • 2 strips bacon, cut into 1-inch (2 cm) pieces
  • 1 cup onion, diced (150 g)
  • 1 cup carrot, diced (120 g)
  • 1 cup celery, diced (225 g)
  • 3 tablespoons flour
  • 2 cups ham, cooked and cubed (300 g)
  • 2 potatoes, cubed
  • 1 teaspoon fresh thyme
  • 1 teaspoon black pepper
  • 6 cups chicken broth (1.4 L)
  • 2 bay leaves
  • 2 cups heavy cream (480 mL)
Instructions
  1. In a 6-quart (5.7 liters) dutch oven, cook bacon over medium-high heat until fat is rendered out and the pieces begin to get crispy.
  2. Add onion, carrot, and celery, and cook until just tender, about 3 minutes.
  3. Reduce heat to medium and add flour, stirring constantly for 1-2 minutes to avoid lumps.
  4. Add ham, potatoes, thyme, and black pepper. Stir to coat the meat and potatoes in the roux/vegetable mix.
  5. Add the chicken broth and bay leaves.
  6. Cover and bring to a boil. Then reduce heat to medium-low and cook covered for 25-30 minutes.
  7. Remove bay leaves and stir in cream. Return to a simmer and serve.
  8. Enjoy!

Watch the recipe video here:

One-Pot Ham & Potato Soup ?FULL RECIPE: http://bzfd.it/2jGc8Vs

Posted by Proper Tasty on Sunday, February 10, 2019

Main dish

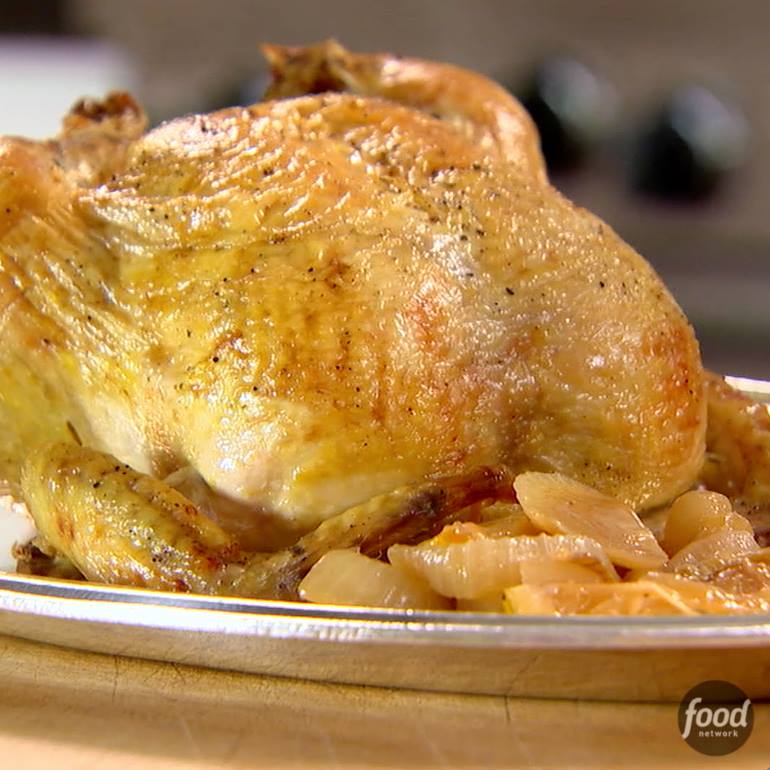
Engagement Roast Chicken

Engagement Roast Chicken
Author:
Cuisine: American
Recipe type: Main dish
Ingredients
  • 1 (4 to 5 pound) roasting chicken
  • Kosher salt and freshly ground black pepper
  • 2 lemons
  • 1 whole head garlic, cut in ½ crosswise
  • Good olive oil
  • 2 Spanish onions, peeled and thickly sliced
  • ½ cup dry white wine
  • ½ cup chicken stock, preferably homemade
  • 1 tablespoon all-purpose flour
Instructions
  1. Preheat the oven to 425 degrees F.
  2. Remove and discard the chicken giblets. Pat the outside dry. Liberally salt and pepper the inside of the chicken. Cut the lemons in quarters, place 2 quarters in the chicken along with the garlic and reserve the rest of the lemons. Brush the outside of the chicken with olive oil and sprinkle the chicken liberally with salt and pepper. Tie the legs together with kitchen string and tuck the wing tips under the body of the chicken. Place the chicken in a small (11 by 14-inch) roasting pan. (If the pan is too large, the onions will burn.) Place the reserved lemons and the sliced onions in a large bowl and toss with 2 tablespoons of olive oil, 1 teaspoon of salt, and ½ teaspoon of pepper. Pour the mixture around the chicken in the pan.
  3. Roast the chicken for about 1 hour and 15 minutes, until the juices run clear when you cut between a leg and a thigh. Remove the chicken to a platter, cover with aluminum foil, and allow to rest for 10 minutes while you prepare the sauce, leaving the lemons and onions in the pan.
  4. Place the pan on top of the stove and turn the heat to medium-high. Add the wine and stir with a wooden spoon to scrape up the brown bits. Add the stock and sprinkle on the flour, stirring constantly for a minute, until the sauce thickens. Add any juices that collect under the chicken. Carve the chicken onto a platter and serve with the lemons, onions, and warm sauce.

Watch the recipe video here:

Recipe of the Day: Ina Garten's Engagement Roast Chicken?Save the recipe: https://foodtv.com/2RHxhir!

Posted by Food Network on Sunday, February 10, 2019

Dessert

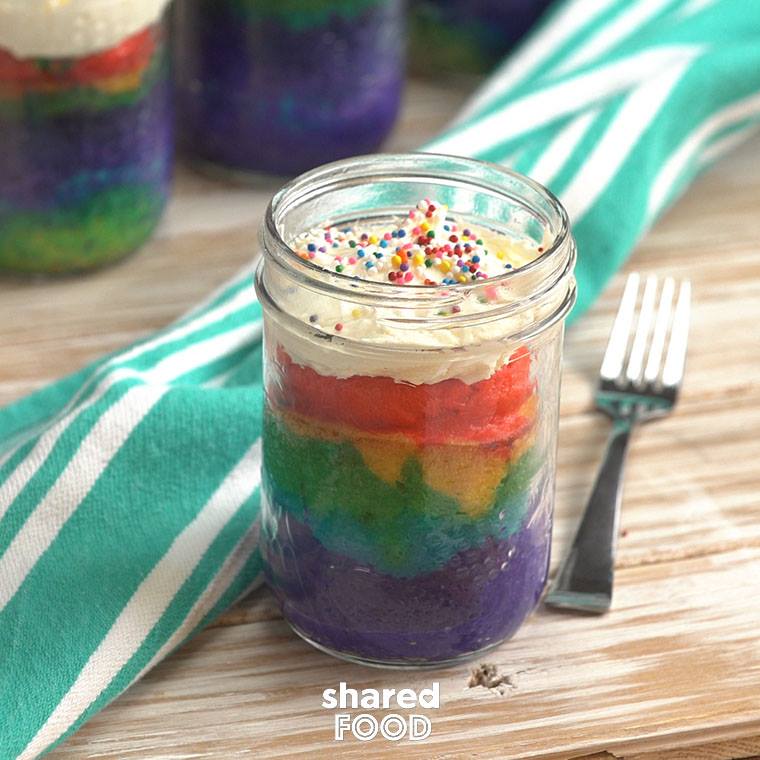
Rainbow Cake in a Mason Jar Is an Easy Way to Bake Up Every Color of the Rainbow!

Rainbow Cake
Rainbow Cake in a Mason Jar Is an Easy Way to Bake Up Every Color of the Rainbow!
Author:
Cuisine: American
Recipe type: Dessert
Ingredients
  • 1 box white cake mix, plus ingredients required on the box
  • Food coloring gel in purple, blue, green, yellow, and red
  • 1 container white frosting
  • 3 wide-mouth glass canning jars (1 pint each)
Instructions
  1. Preheat oven to 350 degrees. Prepare mason jars by first washing and drying thoroughly. Spray the inside of each jar generously with nonstick spray.
  2. Follow box directions to prepare the cake mix. Split the batter up evenly between 5 bowls, then add food coloring to each bowl and stir to blend well to the desired hue.
  3. Scoop about ¼ cup of each color batter into each jar, layering in the following order: purple (on the bottom), blue, green, yellow, red (on the top).
  4. Place the filled mason jars in a glass baking dish, then add ¼-inch of water to the bottom of the dish outside of the jars. Bake 35-40 minutes, or until the cake tops are springy to the touch.
  5. Cool the cakes completely, then frost and decorate as you like! Enjoy!

Watch the recipe video here:

Did you know you could bake cake in a mason jar?Get The Recipe: http://sha.red/CeQhm

Posted by Shared Food on Sunday, February 10, 2019

Breakfast

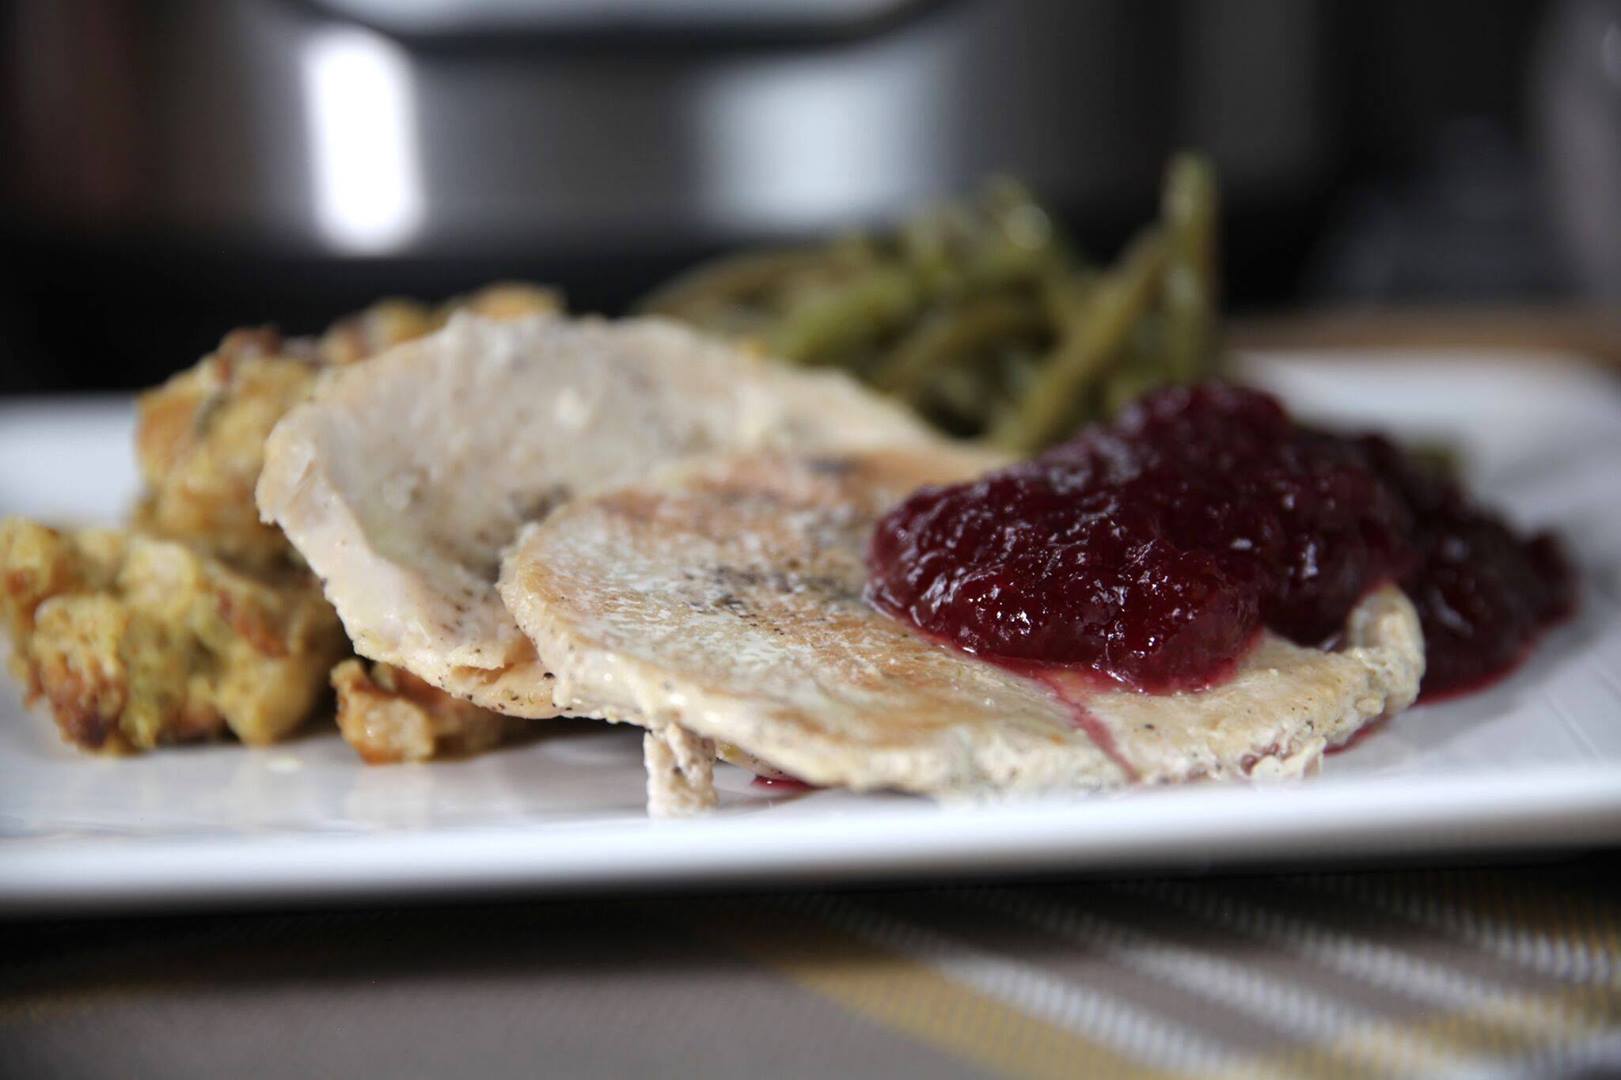
Instant Pot Turkey and Stuffing

Instant Pot Turkey and Stuffing
How amazing is it that you can make this entire dinner in one pot?
Author:
Cuisine: American
Recipe type: Breakfast
Ingredients
  • 2 lbs uncooked turkey breast
  • 1 tsp salt
  • 1 tsp pepper
  • ¾ cup chicken broth
  • 1 6 oz box stuffing mix
  • 10.5 oz can cream of chicken soup
  • 8 oz sour cream, plain greek yogurt or mayonnaise
  • 2 cups frozen green beans
Instructions
  1. Cut turkey breast into 4 pieces such that no piece is more than 1” thick. Season with salt and pepper.
  2. Add broth to the pot and arrange turkey in an even layer, then secure the lid, making sure the vent is closed.
  3. Using the display panel select the MANUAL function*. Use the +/- keys and program the Instant Pot for 7 minutes.
  4. Meanwhile, in a medium bowl, gently fold together stuffing mix, cream of chicken soup and sour cream just until combined. Do not overmix.
  5. When the time is up, quick-release the remaining pressure and check to see if the turkey is fully cooked. (If it is not, add 2 tbsp water, reseal the pot and select MANUAL for an additional 2 minutes, then quick-release again.)
  6. Place frozen green beans in an even layer on the turkey–do not stir. Reseal the pot and select MANUAL for 2 minutes, then quick-release the pressure.
  7. Place stuffing mixture in an even layer on the green beans–do not stir. Reseal the pot and select MANUAL for 4 minutes, then quick-release any pressure. (Since the stuffing absorbs liquids, you may not get a complete seal in this step–don’t worry.)
  8. Serve hot with a side of cranberry sauce.

Watch the recipe video here:

How amazing is it that you can make this entire dinner in one pot?RECIPE: http://chopsecrets.com/instant-pot-turkey-and-stuffing/

Posted by Chop Secrets on Thursday, February 7, 2019