Showing 879 Result(s)
Dessert

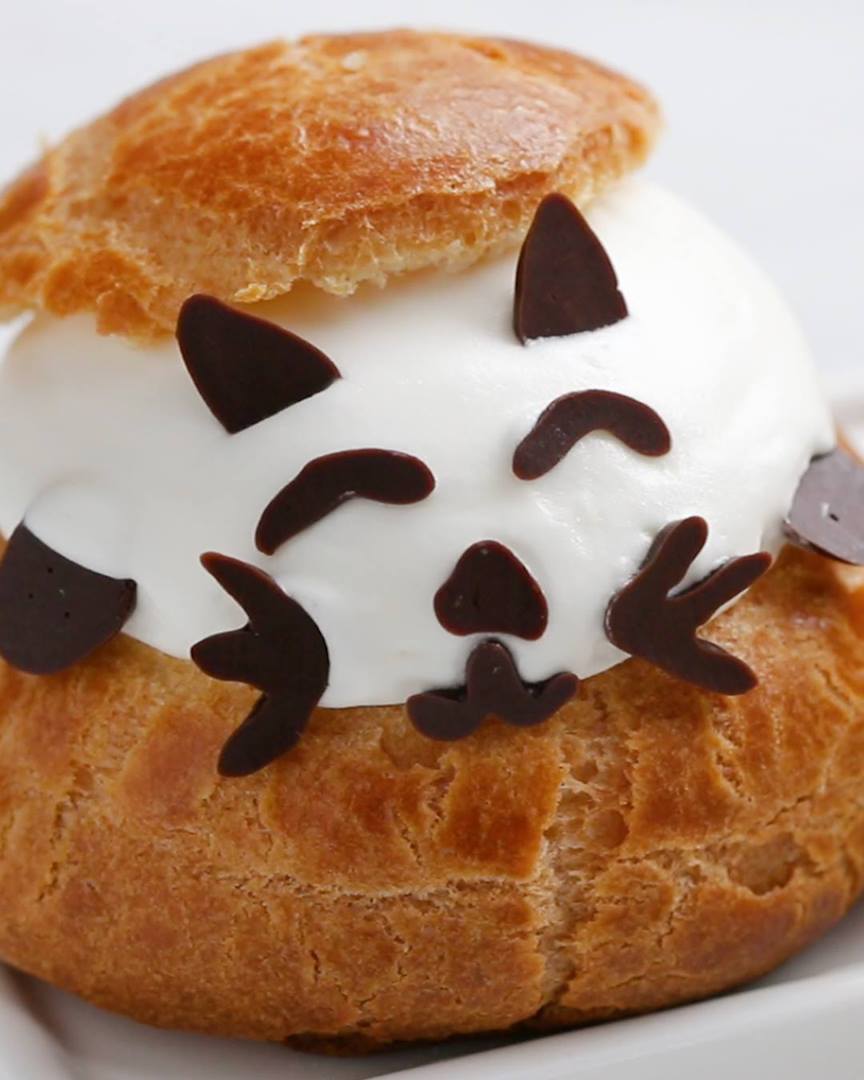
Cute Cream Puffs

Cute Cream Puffs
Cute Cream Puffs recipe
Author:
Cuisine: Korean
Recipe type: Dessert
Ingredients
  • ¼ cup dark chocolate, melted (45 g)
CUTE CREAM PUFFS
  • ½ cup unsalted butter, 1 stick (115 g)
  • ½ cup water (120 mL)
  • ½ cup milk (120 mL)
  • 3 tablespoons granulated sugar
  • 1 teaspoon salt
  • 1 cup all-purpose flour (125 g)
  • 4 large eggs
  • 1 egg, beaten, for egg wash
WHIPPED CREAM
  • 2 cups heavy cream (480 mL)
  • 3 tablespoons powdered sugar
  • 1 teaspoon vanilla extract
SPECIAL EQUIPMENT
  • 1 small piping bag, or zip-top bag
  • 2 large piping bags, or zip-top bags with standard round tips
Instructions
  1. Preheat the oven to 425˚F (220˚C). Line 2 baking sheets with parchment paper. Chill a large bowl in the freezer.
  2. Add the melted chocolate to a small piping bag or zip-top bag and cut ⅛ inch (3 mm) off the tip of the bag.
  3. Pipe 10 sets of ears, eyes, noses, mouths, and paws onto 1 of the parchment-lined baking sheets. Chill in the refrigerator until ready to use.
  4. Make the puffs: in a medium pot, bring the butter, water, milk, sugar, and salt to a boil over high heat.
  5. Once the liquid begins to boil, remove the pot from the heat and immediately add the flour, stirring constantly with a wooden spoon until the liquid is absorbed and the mixture begins to form a ball.
  6. Return the pot to the heat and cook for another 30 seconds to remove excess moisture. Remove the pot from the heat. Working quickly, add the eggs one at a time, stirring until each one is fully incorporated before adding the next. Continue stirring until the dough starts to pull away from the sides of the pan and is thick and glossy. Transfer the batter to a piping bag or zip-top bag fitted with a round tip.
  7. Pipe 1-inch (2-cm) dollops of batter on the prepared baking sheet, spacing them at least 1-inch (2-cm) apart.
  8. Dip a fingertip in the egg wash and gently press down any points, then brush the egg wash lightly all over the puffs.
  9. Bake for 10 minutes. Reduce the oven temperature to 350˚F (180˚C), and continue to bake for 20 minutes more, until golden brown.
  10. Transfer the puffs to a wire rack and cool until able to handle. Cut the tops off of the puffs with a serrated knife. Let cool completely.
  11. Make the whipped cream: add the heavy cream and powdered sugar to the chilled bowl and beat with an electric hand mixer or whisk until stiff peaks form. Transfer the whipped cream to a piping bag or zip-top bag fitted with a round tip.
  12. Pipe mounds of whipped cream into the puffs. Add the tops of the puffs and decorate with the chocolate faces.
  13. Enjoy!

Watch the recipe video here:

These cream puffs are the cutest thing you've ever seen! ?Get the recipe: https://tasty.co/recipe/cute-cream-puffs

Posted by Tasty on Thursday, July 11, 2019
Dessert

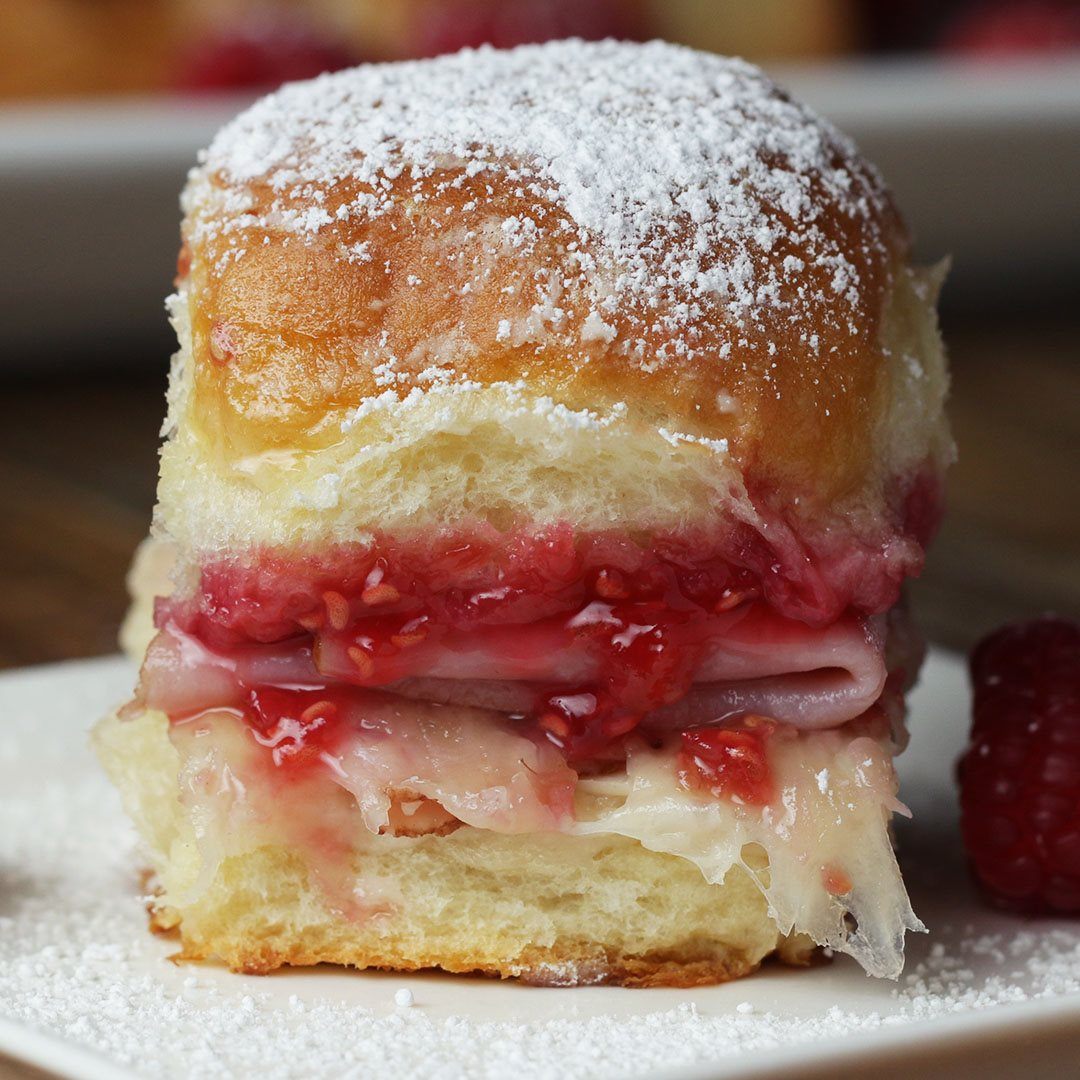
Monte Cristo Pull-Apart Sliders

Monte Cristo Pull-Apart Sliders
Author:
Cuisine: American
Recipe type: Dessert
Ingredients
  • RASPBERRY JAM
  • 2 cups raspberry (250 g)
  • ½ cup granulated sugar (100 g)
  • 2 teaspoons fresh lemon juice
  • SLIDERS
  • nonstick cooking spray, for greasing
  • 1 package sweet hawaiian dinner rolls, 12 count
  • ¼ lb roasted turkey, sliced (115 g)
  • ¼ lb honey ham, sliced (115 g)
  • ¼ lb swiss cheese, grated (110 g)
  • 1 large egg, beaten
  • 4 tablespoons unsalted butter, melted
  • powdered sugar, for dusting
Instructions
  1. Make the raspberry jam: In a medium saucepan over medium heat, cook the raspberries for about 4 minutes, until they start to burst and become very fragrant. Add the sugar and cook, stirring constantly, for 10-15 minutes, until running a spoon through the jam leaves an open trail at the bottom of the pot. Stir in the lemon juice. Remove the pot from the heat and let the jam cool completely. Transfer to the refrigerator and chill for at least 2 hours or overnight.
  2. Make the sliders: Preheat the oven to 325°F (160°C). Line a small baking sheet with foil, leaving enough overhang so the sides can be used as handles. Grease with nonstick spray.
  3. Slice the sheet of Hawaiian rolls in half horizontally, leaving the individual rolls connected. Place the bottom half in the prepared baking sheet.
  4. Layer the turkey and ham on top, making sure to fold the meat to fit inside the individual squares of the rolls, then top with the Swiss cheese.
  5. Spread the raspberry jam over the top half of the rolls and place on top of the cheese layer, pressing down lightly.
  6. In a small bowl, mix together the egg and melted butter. Liberally brush on top of the rolls.
  7. Bake the sliders until the cheese is completely melted and the buns are toasted, 25-30 minutes. If the tops begin to brown too quickly, cover loosely with foil.
  8. Remove the sliders from oven and let cool for about 10 minutes, then transfer to a serving platter. Dust lightly with powdered sugar and serve whole so the sliders can be pulled apart.
  9. Enjoy!

Watch the recipe video here:

Make your party unforgettable with these delicious Monte Cristo sliders. Easy and sooo delicious! Get the recipe: https://tasty.co/recipe/monte-cristo-pull-apart-sliders

Posted by Tasty on Wednesday, July 10, 2019

Cake Dessert

Tiramisu Toffee Dessert

Tiramisu Toffee Dessert
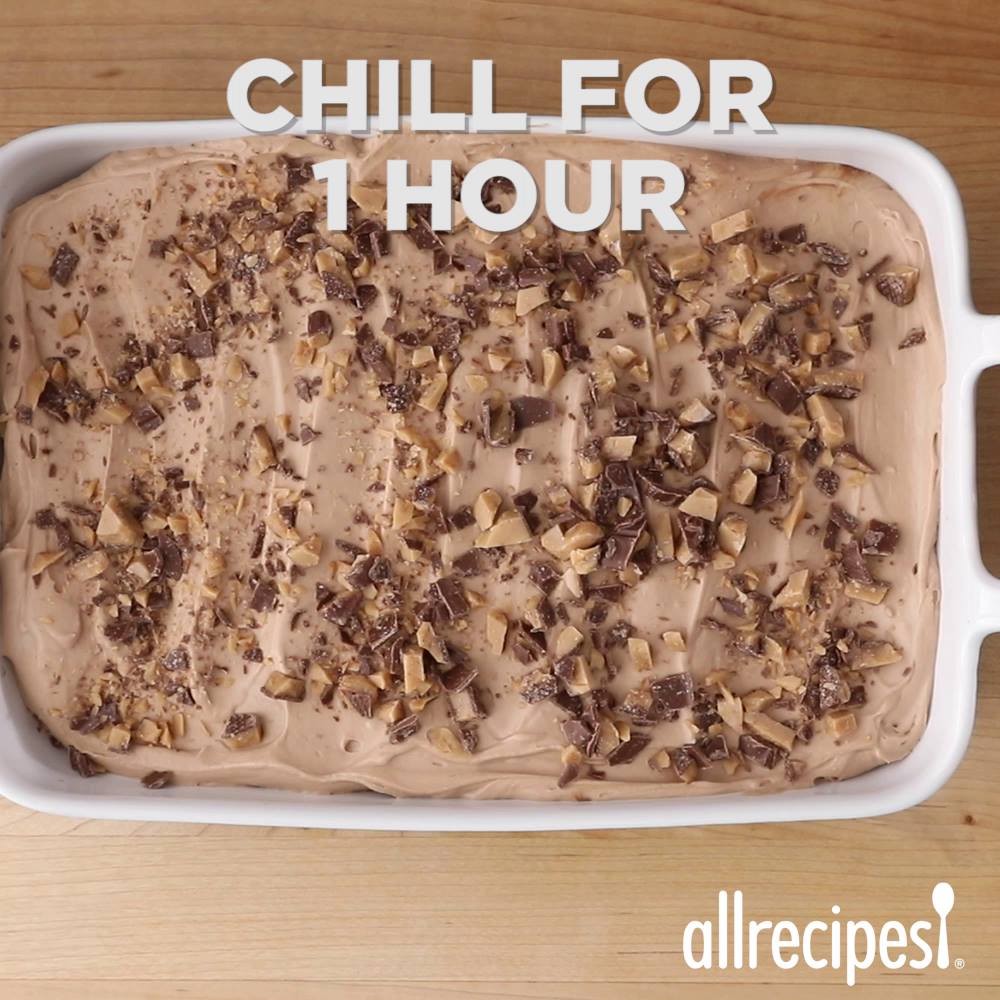
This is a nice version of the popular Italian pick-me-up dessert. The toffee candy in this recipe adds a delightful crunchiness to the smooth creamy whipped cream quality of an already perfect dessert.
Author:
Cuisine: American
Recipe type: Dessert
Ingredients
  • 1 (10.75 ounce) package frozen prepared pound cake, thawed and cut into 9 slices
  • ¾ cup strong brewed coffee
  • 1 (8 ounce) package cream cheese
  • 1 cup white sugar
  • ½ cup chocolate syrup
  • 2 cups heavy whipping cream
  • 2 (1.4 ounce) bars chocolate covered English toffee, chopped
Instructions
  1. Arrange cake slices on bottom of a rectangular 11x7 inch baking dish, cutting cake slices if necessary to fit the bottom of the dish. Drizzle coffee over cake.
  2. Beat cream cheese, sugar, and chocolate syrup, in a large bowl with an electric mixer on medium speed until smooth. Add heavy cream; beat on medium speed until light and fluffy. Spread over cake. Sprinkle with chocolate-covered toffee candy.
  3. Cover and refrigerate for at least 1 hour, but no longer than 24 hours, to set dessert and blend flavors.

Watch the recipe video here:

Tiramisu Toffee Dessert: https://trib.al/JzsdZ6m

Posted by Allrecipes on Tuesday, July 9, 2019

Cake Dessert

Blueberry Slab Pie

Blueberry Slab Pie
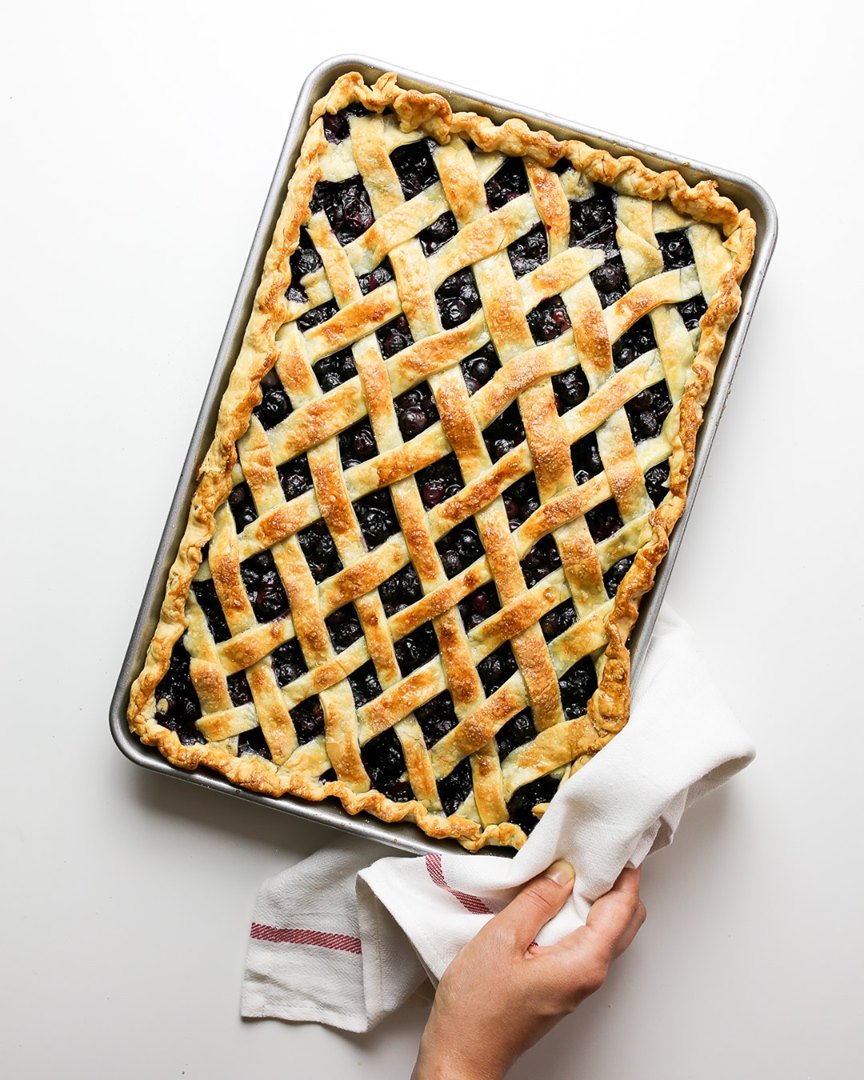
Serving a crowd? Treat your guests to this easy, delicious blueberry slab pie.
Author:
Cuisine: American
Recipe type: Dessert
Ingredients
  • 2 boxes (14.1 oz each) Pillsbury™ refrigerated pie crust, softened as directed on box
  • 4 cups fresh blueberries (2 lb)
  • ½ cup plus 2 teaspoons sugar
  • 3 tablespoons cornstarch
  • 1 teaspoon ground cinnamon
  • 1 teaspoon grated lemon peel
  • 1 egg, beaten
Instructions
  1. Heat oven to 400°F. Remove 2 of the pie crusts from pouches. Unroll and stack on lightly floured surface. Roll to 17x12-inch rectangle. Fit crust into ungreased 15x10x1-inch pan, pressing into corners. Do not trim pie crust edges.
  2. In large bowl, mix blueberries, ½ cup of the sugar, the cornstarch, cinnamon and lemon peel until well mixed. Spoon into crust-lined pan.
  3. Unroll and stack remaining 2 pie crusts on lightly floured surface. Roll to 17x12-inch rectangle. To make lattice top, cut ½-inch-wide strips with pastry cutter or knife. Place half of the strips across pan diagonally. Weave remaining strips with first strips to form lattice. Trim edges of strips even with edge of bottom crust. Pinch edges of crust together to seal, tucking under pastry crust, if necessary. Flute or crimp edges. Brush with beaten egg. Sprinkle with remaining 2 teaspoons sugar.
  4. Bake 35 to 40 minutes or until crust is deep golden brown and filling is bubbly. Cool completely, about 1 hour.

Watch the recipe video here:

Happy #NationalBlueberryDay! Raise your hand if you love blueberry pie.Blueberry Slab Pie recipe:…

Posted by Pillsbury on Monday, July 8, 2019

Dessert

BLUEBERRY DOUGHNUT MUFFINS

BLUEBERRY DOUGHNUT MUFFINS
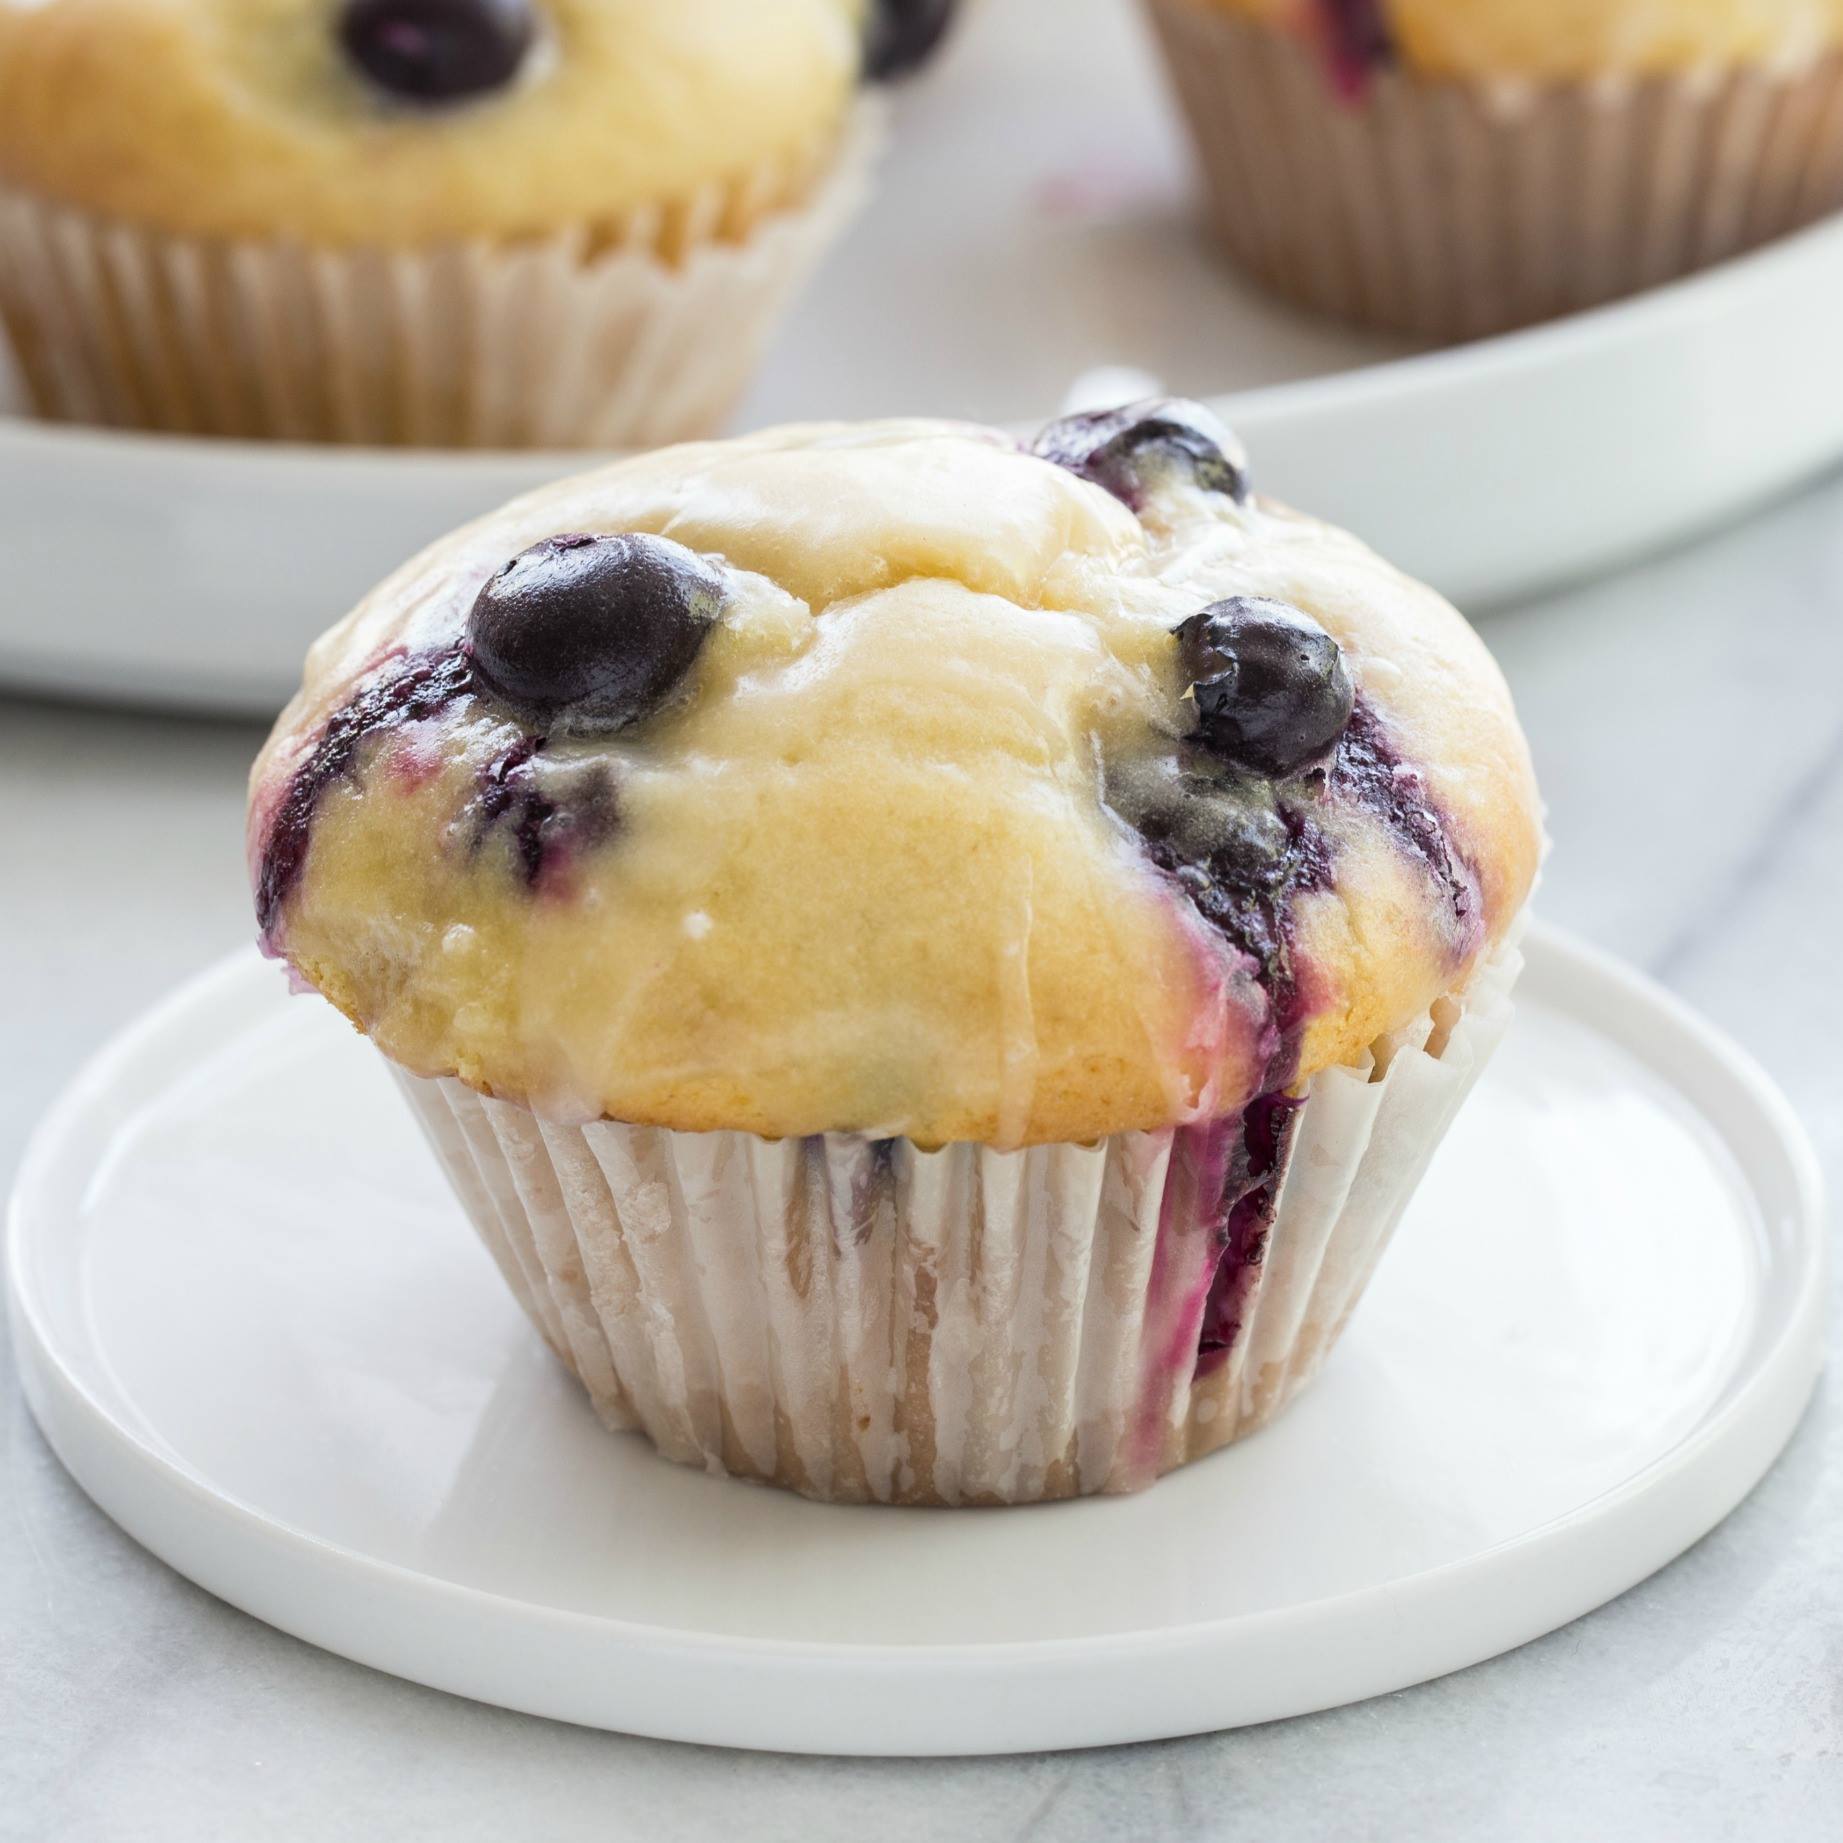
Blueberry Doughnut Muffins bake up high and mighty and are topped with a sweet and tangy lemon glaze. They’re perfect for breakfast or an afternoon snack.
Author:
Cuisine: American
Recipe type: Dessert
Ingredients
For the Muffins
  • zest of 2 lemons
  • ½ cup granulated sugar
  • ⅓ cup brown sugar
  • ¼ cup unsalted butter, softened
  • ¼ cup vegetable oil
  • 2 large eggs
  • 1 teaspoon pure vanilla extract
  • 2⅔ cups all-purpose flour
  • 1½ teaspoons baking powder
  • ¼ teaspoon baking soda
  • ¾ teaspoon salt
  • 1 cup milk
  • 1⅓ cup fresh blueberries
For the Glaze
  • 3 tablespoons unsalted butter; melted
  • 1 cup confectioners’ sugar; sifted
  • ½ teaspoon pure vanilla extract
  • 1 tablespoon freshly squeezed lemon juice
  • 1 tablespoon warm water
Instructions
  1. Preheat the oven to 425°F. Lightly grease a standard muffin tin, or line with 12 paper muffin cups.
  2. In a medium bowl, combine the lemon zest and sugars. Use your fingertips to incorporate the zest into the sugars until it is moist and fragrant.
  3. In the bowl of a stand mixer fitted with a paddle attachment or in a large mixing bowl with an electric mixer, cream together the butter, vegetable oil, and sugars until smooth. Add the eggs and vanilla, beating to combine.
  4. In a medium bowl, combine the flour, baking powder, baking soda and salt. Stir the flour mixture into the butter mixture alternately with the milk, beginning and ending with the flour and making sure everything is thoroughly combined. Fold in the blueberries.
  5. Spoon the batter evenly into the prepared pan, filling the cups nearly full.
  6. Bake the muffins for 15 to 17 minutes, or until they’re a pale golden brown and a cake tester inserted into the middle of one of the center muffins comes out clean.
  7. In a medium bowl, prepare the glaze by mixing together the melted butter, confectioners’ sugar, vanilla, lemon juice and water. Whisk until smooth.
  8. When muffins have cooled slightly, dip the muffin crown into the glaze and allow the glaze to harden. At this point, you can leave them as is or go for the double dip. I glazed my muffins twice.
  9. Serve warm, or cool on a rack and wrap airtight. Muffins will keep at room temperature for about a day.

Watch the recipe video here:

These Glazed Blueberry Doughnut Muffins are always a huge hit!PRINTABLE RECIPE: https://www.mybakingaddiction.com/blueberry-doughnut-muffins/

Posted by My Baking Addiction on Saturday, July 6, 2019

Dessert

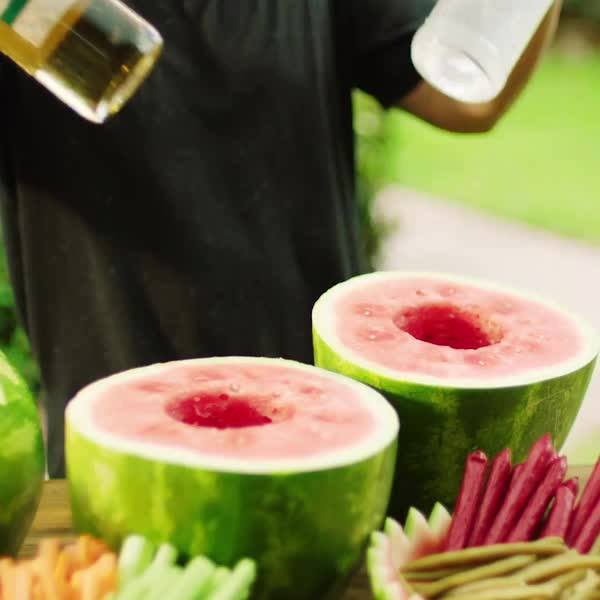
Watermelon Bloody Mary Bar

Watermelon Bloody Mary Bar
Celebrate summer with this show-stopping Bloody Mary bar. Watermelons of all sizes are turned into garnish bowls in addition to flavoring the traditional cocktail with a watermelon twist.
Author:
Cuisine: American
Recipe type: Dessert
Ingredients
Cooler Bowls:
  • One 18- to 20-pound seedless watermelon
Garnish Bowls:
  • Three 3- to 5-pound seedless watermelons
Bloody Mary Mixer:
  • One 18- to 20-pound seedless watermelon
  • ⅔ cup prepared horseradish
  • ⅔ cup Worcestershire sauce
  • ⅓ cup hot sauce
  • 2½ tablespoons celery salt
  • Kosher salt
  • Two 64-ounce bottles tomato juice, chilled
  • One 750-milliliter bottle tequila, chilled
  • One 750-milliliter bottle vodka, chilled
  • Garnish suggestions: crisp bacon, beef jerky, carrot sticks, celery sticks, lemon wedges, pickled green beans, pickled okra, cornichons, Colby Jack cubes
Instructions
Special equipment: a ratcheting pineapple corer
  1. For the cooler bowls: Set the watermelon on its side (stem end facing left or right) and cut the watermelon in half crosswise, resulting in two tall halves. Cut off a small flat piece of rind from the bottom of each half so the watermelon is stable, then stand each half flesh-side up. Use a ratcheting pineapple corer to remove the central flesh from each half; the remaining flesh will help the liquor bottles fit snugly. (Reserve the cored flesh for another use.) Use a paring knife to make zigzag cuts around the edges of the watermelon bowls. Freeze each watermelon half until solid, 6 hours or up to overnight.
  2. For the garnish bowls: Set a watermelon on its side (stem end facing left or right) and cut the watermelon in half crosswise. Cut off a small flat piece of rind from the bottom of each half so the watermelon is stable.
  3. Insert an immersion blender into the flesh. Gently push and move the immersion blender down and around in the watermelon to puree the center. As more of the watermelon becomes pureed, move the blender to the sides to puree almost all of the flesh, leaving a thin wall of flesh lining the rind. Strain the juice into a large bowl. Repeat the process with the remaining watermelons. Reserve the strained juice.
  4. Use a paring knife to make zigzag cuts around the edges of the watermelon bowls. Pat the watermelon bowls dry with paper towels and set aside.
  5. For the Bloody Mary mixer: Set the remaining 20-pound watermelon on its side (stem end facing left or right) and cut off a small flat piece of rind from the bottom so that the watermelon is stable lying on its side. Cut off a 4-inch slice from the top, exposing the flesh.
  6. Transfer the watermelon to the sink (to avoid splashes). Insert an immersion blender into the flesh. Gently push and move the immersion blender down and around in the watermelon to puree the center. As more of the watermelon becomes pureed, move the blender to the sides to puree almost all of the flesh, leaving a thin wall of flesh lining the rind. Strain the pureed juice out of the watermelon into the bowl with the reserved strained watermelon juice. Use a paring knife to make zigzag cuts around the edge of the watermelon.
  7. Add 16 cups of the watermelon juice to a large pitcher or bowl. Add the horseradish, Worcestershire sauce, hot sauce, celery salt and 1½ tablespoons salt and mix to combine.
  8. Add 1 bottle of tomato juice and 8 cups of the watermelon mixture to the hollowed watermelon. Chill the remaining watermelon mixture in the fridge.
  9. Insert the liquor bottles into the frozen cored watermelons. Fill the small watermelon bowls with your favorite garnishes. Top up the hollowed watermelon with the reserved Bloody Mary mixture and remaining bottle of tomato juice when needed.
  10. To serve, fill a glass with ice cubes. Add equal amounts liquor of choice and Bloody Mary Mixer. Top with your favorite garnishes.

Watch the recipe video here:

Recipe of the Day: Watermelon Bloody Mary Bar?Save the recipe: https://foodtv.com/2NpMMi3!

Posted by Food Network on Saturday, July 6, 2019

Dessert

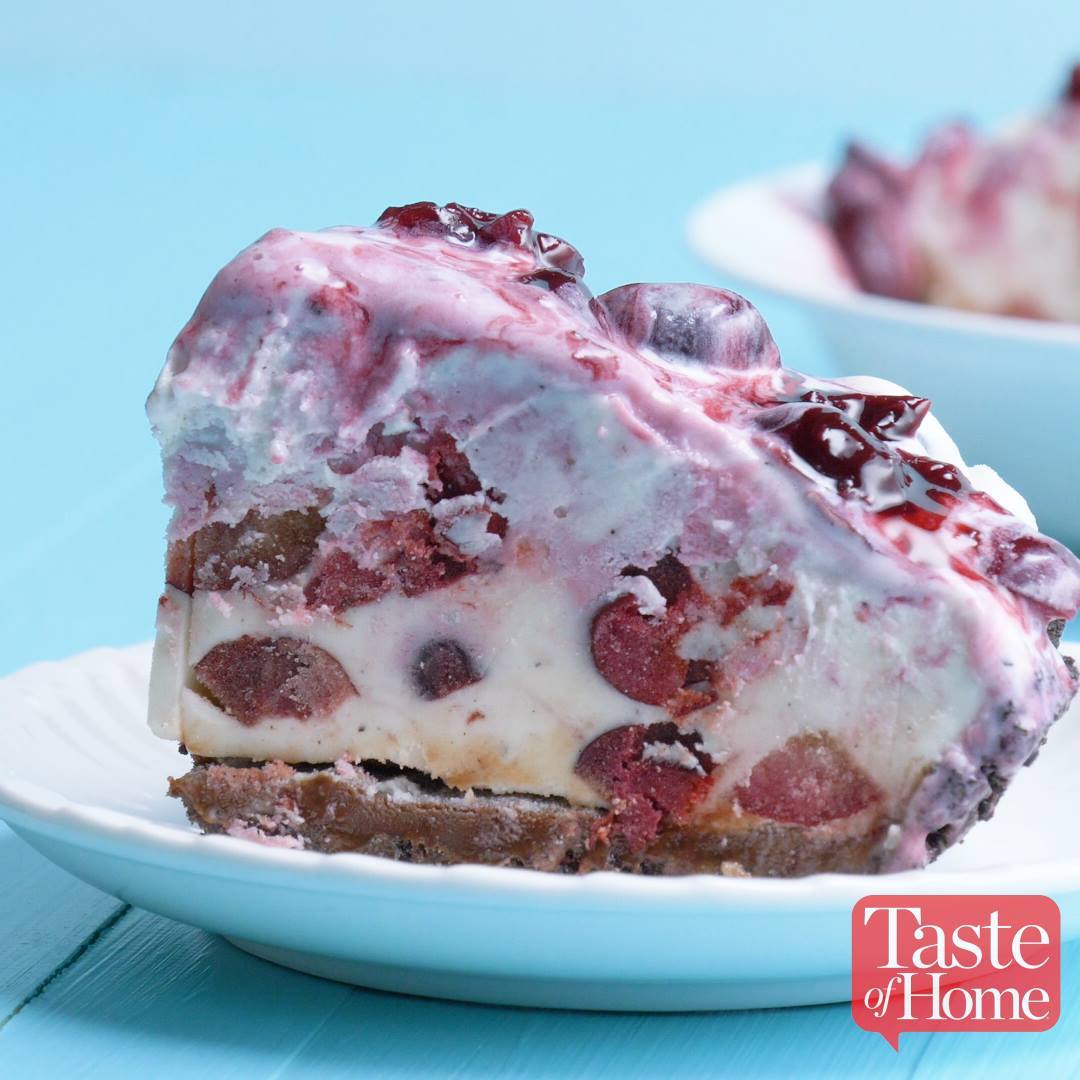
Cherry and Chocolate Ice Cream Pie

Cherry and Chocolate Ice Cream Pie
We took cherry pie to a whole new level as a frozen treat. With a luscious layer of chocolate fudge inside, this is one impressive pie.
Author:
Cuisine: American
Recipe type: Dessert
Ingredients
  • 15 Oreo cookies
  • ¼ cup butter, melted
  • ¾ cup hot fudge ice cream topping
  • 4 cups vanilla ice cream, softened
  • 3 cups fresh or frozen dark sweet cherries, pitted and quartered, divided
  • ½ cup water
  • ¼ cup sugar
  • 2 tablespoons thawed cranberry juice concentrate
  • 1 tablespoon cornstarch
  • 1 tablespoon cherry liqueur, optional
Instructions
  1. Pulse cookies in a food processor until fine crumbs form. Add butter; process until blended. Press mixture onto bottom and up sides of an ungreased 9-in. pie plate. Freeze until firm, about 15 minutes. Carefully spread hot fudge topping over bottom of crust. Freeze until firm, about 30 minutes.
  2. Combine ice cream and 1 cup cherries; spread over hot fudge. Freeze until firm, about 8 hours.
  3. Meanwhile, in a large saucepan, combine water, sugar, cranberry juice concentrate and cornstarch; bring to a boil over medium heat, stirring constantly. Stir in remaining cherries. Reduce heat; simmer, uncovered, until thickened and cherries are soft, about 5 minutes. Remove from heat; if desired, stir in liqueur. Cool completely.
  4. Remove pie from freezer 10 minutes before cutting. Serve with sauce.

Watch the recipe video here:

Take cherry pie to whole 'nother level. Get the recipe for Cherry & Chocolate Ice Cream Pie here–> https://trib.al/VvBqw7P

Posted by Taste of Home on Thursday, July 4, 2019

Dessert

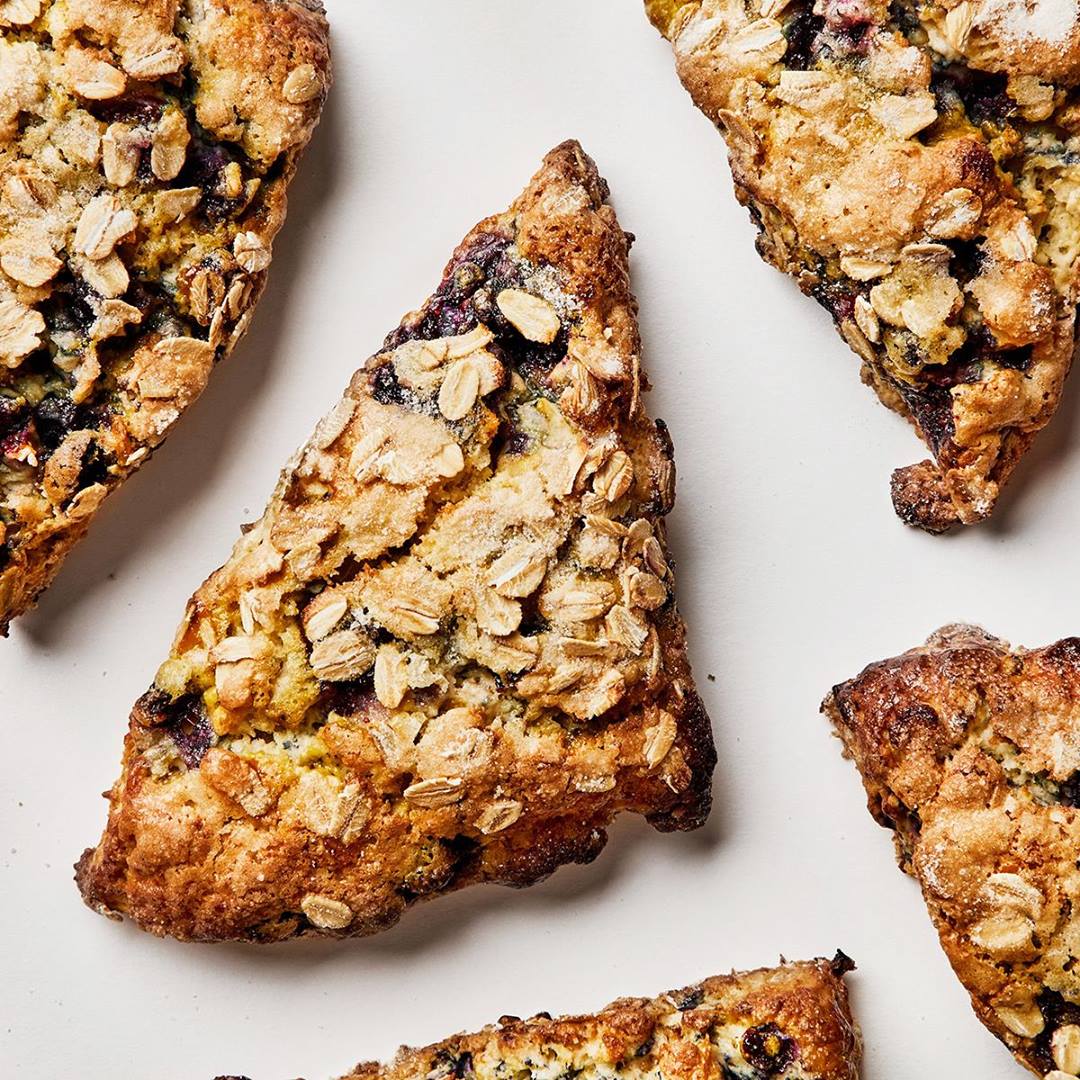
Easy Blueberry Cream Scones

Easy Blueberry Cream Scones
Think of these scones as the easier, cooler cousin of the blueberry muffin. Why cooler? Because they don't even require a muffin pan. Why easier? Because all you have do is mix heavy cream and a little honey into the dry ingredients. It's a one-bowl brunch slam dunk.
Author:
Cuisine: American
Recipe type: Dessert
Ingredients
  • 1 lemon
  • ⅓ cup plus 2 Tbsp. sugar
  • 2 cups all-purpose flour, plus more for dusting
  • 1 cup plus 2 Tbsp. old-fashioned oats
  • 2½ tsp. baking powder
  • ½ tsp. kosher salt
  • 1⅓ cups plus 1 Tbsp. chilled heavy cream
  • 2 Tbsp. honey
  • 1 cup frozen blueberries, preferably wild
  • 1 large egg yolk
Instructions
  1. Place a rack in upper third of oven; preheat to 400°. Finely grate zest of 1 lemon with a microplane into a large bowl. Add ⅓ cup sugar and massage with your fingertips until mixture looks like wet sand and is very fragrant. Set aside remaining lemon for another use.
  2. Add 2 cups flour, 1 cup oats, 2½ tsp. baking powder, and ½ tsp. salt to bowl with sugared zest. Whisk to combine.
  3. Whisk 1⅓ cups cream and 2 Tbsp. honey in a medium bowl until combined.
  4. Slowly drizzle cream mixture into flour mixture, tossing with a fork to disperse liquid and hydrate flour. Stop mixing when you still have a few dry spots.
  5. Add 1 cup blueberries and fold mixture with a rubber spatula, taking care only to mix until blueberries are distributed throughout and you have a sticky dough. It’s okay if some of the blueberries bleed or get broken up.
  6. Dust countertop liberally with more flour and turn out dough. Pat down into a 1"-thick square, flouring hands lightly to prevent sticking as you work.
  7. Mix 1 egg yolk and remaining 1 Tbsp. cream with a pastry brush in a small bowl. Brush yolk mixture all across surface of dough.
  8. Sprinkle remaining 2 Tbsp. oats and 2 Tbsp. sugar over.
  9. Using a knife or metal bench scraper, cut dough into 4 quadrants, then cut each quadrant in half diagonally so you have 8 triangles.
  10. Transfer each triangle to a large parchment-lined rimmed baking sheet, spacing evenly.
  11. Bake scones on upper rack until tops are lightly golden all over and bottoms are golden brown, 15–20 minutes. Let cool on baking sheet. Serve warm.
Do Ahead: Scones are best made the same day. Rewarm slightly in microwave or oven, if needed.

Watch the recipe video here:

A one-bowl brunch slam dunk. (via Basically)Make 'em: http://bonap.it/mJ6S1pY

Posted by Bon Appétit Magazine on Thursday, July 4, 2019

Dessert

Double Cherry Pie

Double Cherry Pie
The combination of tart canned cherries and dried cherries make this so yummy. This is the best cherry pie I have ever raised on a fork to my lips! —Jerri Gradert, Lincoln, Nebraska
Author:
Cuisine: American
Recipe type: Dessert
Ingredients
  • 3 cans (14-1/2 ounces each) pitted tart cherries, undrained
  • 1 cup dried cherries
  • ½ teaspoon almond extract
  • 1 cup sugar
  • ¼ cup cornstarch
  • ¼ teaspoon salt
  • ¼ teaspoon ground nutmeg
  • Pastry for double-crust pie (9 inches)
  • 1 tablespoon butter
Instructions
  1. Drain cherries, reserving 1 cup juice. Set cherries aside. In a small saucepan, combine dried cherries and reserved juice. Bring to a boil; let stand for 5 minutes. Drain and set aside to cool.
  2. In a large bowl, combine the tart cherries, dried cherries and extract. In a small bowl, combine the sugar, cornstarch, salt and nutmeg. Add to cherry mixture; toss to coat.
  3. Divide dough in half so that one portion is slightly larger than the other. Roll out larger portion to fit a 9-in. pie plate. Transfer pastry to pie plate. Trim pastry even with edges. Pour filling into crust. Dot with butter.
  4. Roll out remaining pastry to fit top of pie. Place over filling. Trim, seal and flute edges. Cut slits in pastry. Bake at 375° for 40-45 minutes or until crust is golden brown and filling is bubbly. Cover edges with foil during the last 30 minutes to prevent overbrowning, if necessary. Cool on a wire rack.

Watch the recipe video here:

This Double Cherry Pie is the perfect dessert for the Fourth of July! ???FULL RECIPE —> https://trib.al/ghm5xPe

Posted by Taste of Home on Wednesday, July 3, 2019

Dessert

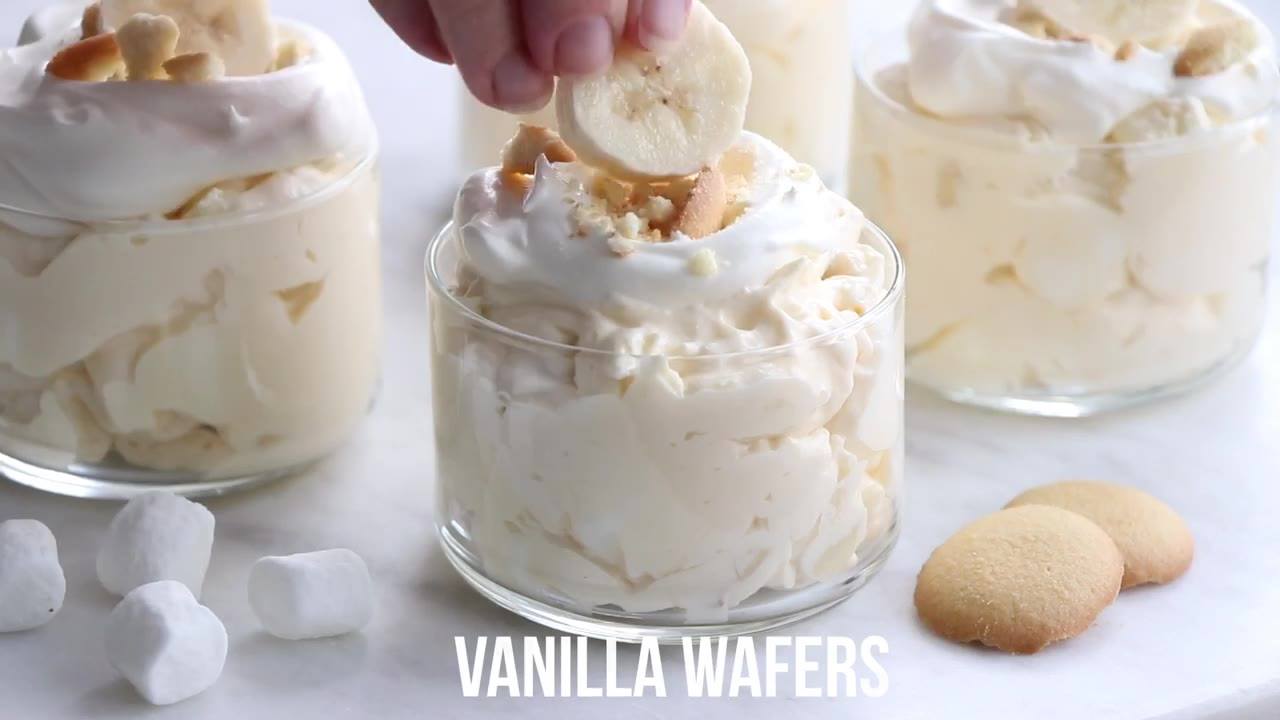
BANANA CREAM PIE FLUFF

BANANA CREAM PIE FLUFF
Banana Cream Pie Fluff is a new twist on a Southern classic. It’s wonderful for potlucks and picnics, and way easier than pie!
Author:
Cuisine: American
Recipe type: Dessert
Ingredients
  • 2 8-ounce packages cream cheese, room temperature
  • 1 cup powdered sugar
  • 2 teaspoons vanilla extract
  • 2 3.4-ounce packages Banana Cream Pudding Mix
  • 1½ cups 2% or whole milk
  • 1 12-ounce container frozen whipped topping, thawed
  • 1½ cups Campfire® Mini White Marshmallows
  • 3 large bananas, peeled and sliced
  • 30 vanilla wafers, coarsely crushed
  • additional whipped topping, vanilla wafers and sliced bananas for garnish, optional
Instructions
  1. In the bowl of a stand mixer fitted with the paddle attachment, or in a large bowl with an electric mixer, beat the cream cheese for 3 minutes. Scrape down the sides of the bowl and add in powdered sugar and vanilla and beat an additional 3 minutes.
  2. In a large bowl, whisk together the dry pudding mixes and milk. Allow pudding to set up for a few minutes.
  3. Add the pudding to the cream cheese mixture and beat until fully incorporated. Be sure to scrape down the sides of the bowl to incorporate all of the cream cheese.
  4. Fold in whipped topping until completely incorporated. Fold in the marshmallows.
  5. Cover and refrigerate for at least 2 hours.
  6. Just before serving, fold in the sliced bananas and top with crushed vanilla wafers.

Watch the recipe video here:

Banana Cream Pie Fluff ~ It’s wonderful for potlucks and picnics, and way easier than pie!RECIPE HERE –> https://www.mybakingaddiction.com/banana-cream-pie-fluff/

Posted by My Baking Addiction on Sunday, June 30, 2019