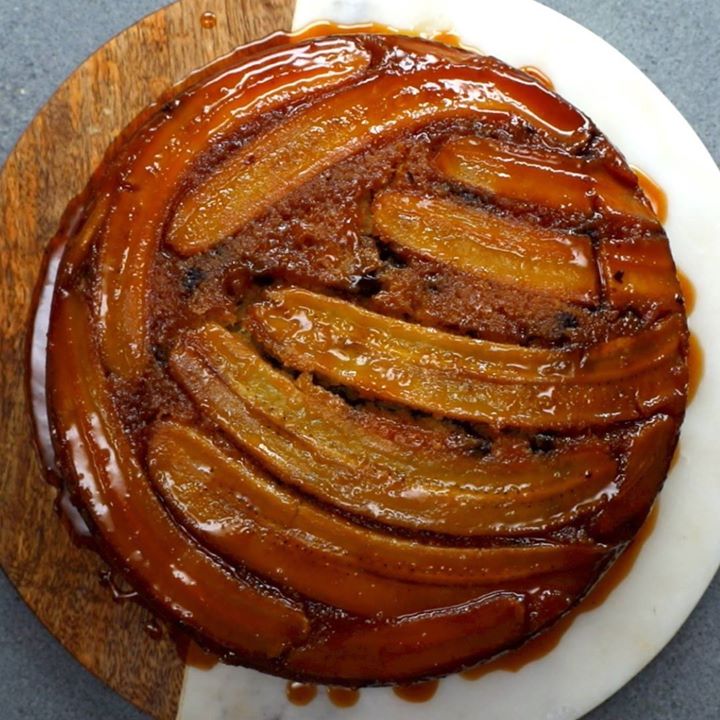
Upside Down Caramel Banana Cake
Upside Down Caramel Banana Cake
This is the ultimate banana bread, the point where the recipe has finally reached irrefutable perfection. Moist, crumbly banana sponge laced with warm chunks of dark chocolate and the smallest hint of our favourite yellow fruit topped with sticky caramel and smooth, soft banana slices. Try it now.
Author: The Chef
Cuisine: American
Recipe type: Cake
Ingredients
- 2 tbsp unsalted butter
- 3 tbsp soft light brown sugar
- 3 tbsp maple syrup
- 5 firm bananas, sliced carefully lengthways
- 200g unsalted butter
- 100g caster sugar
- 100g light muscovado sugar
- 3 medium free-range eggs
- 300g plain flour
- 1 tsp baking powder
- 3 ripe bananas, mashed
- 130g dark chocolate chips
- 150ml whole milk
Instructions
- Preheat the oven to 180°C/360°F. Put the 50g butter, brown sugar and maple syrup in a non stick saucepan. Cook until the sugar dissolves then pour the caramel into a well greased 23 cm cake tin. Arrange the sliced bananas, cut-side down, over the base of the tin - feel free to cut them up to make them fit!
- Put the 200g butter and sugar in a bowl and beat until pale and creamy. Add the eggs, one at a time, beating after each one goes in. Sift in the flour and baking powder and fold through the mixture. Fold in the mashed up bananas, chocolate chips and milk then pour on top of the bananas and caramel.
- Bake for 45-50 minutes or until golden on top and a skewer comes out clean. Leave to cool for a bit in the tin then flip over onto a serving plate. Enjoy with ice cream.
Watch the recipe video here:
Upside Down Caramel Banana Cake
Upside Down Caramel Banana Cake
Posted by Twisted on Wednesday, March 28, 2018