Showing 177 Result(s)
Drink

Fresh and Fruity Vodka Infusions
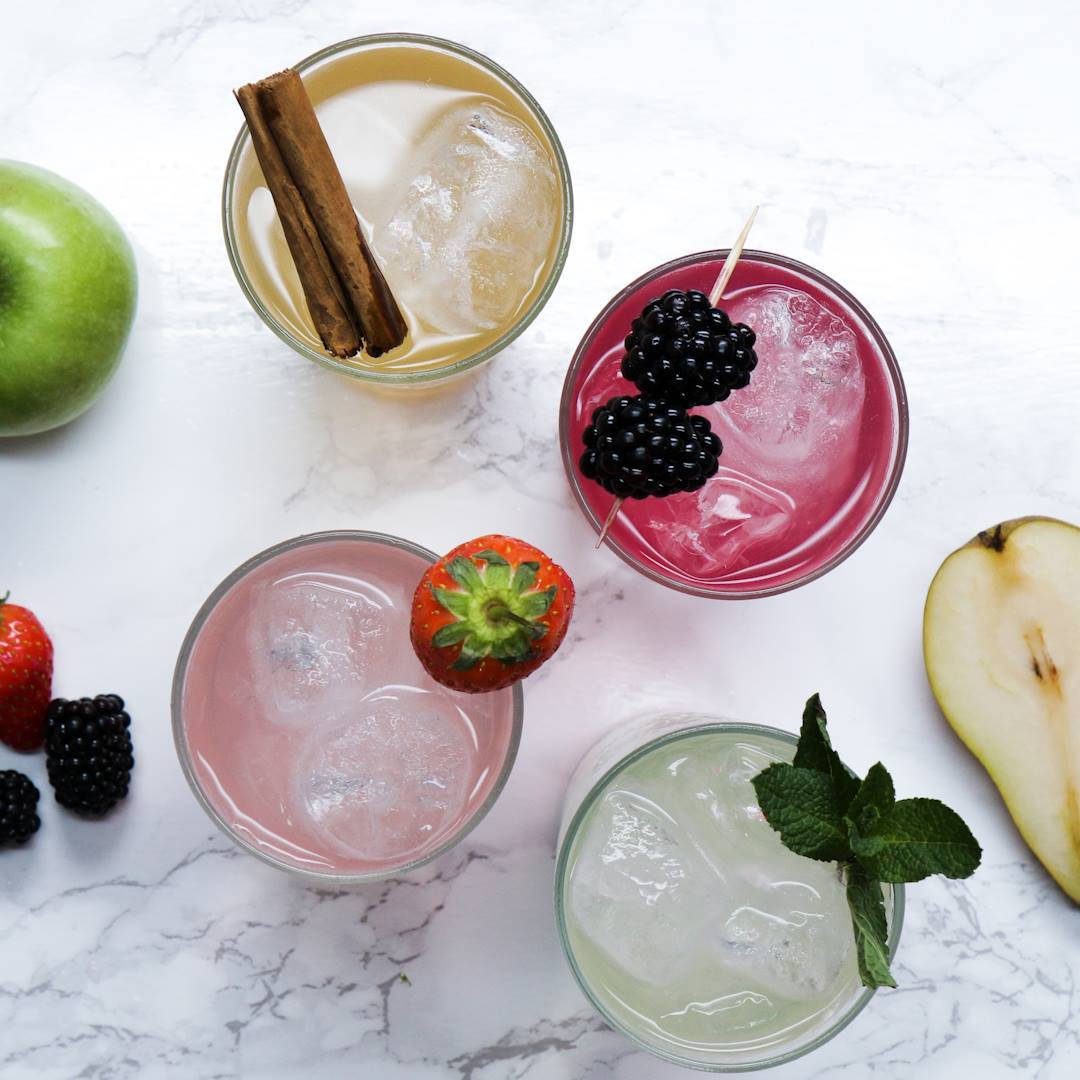
Fresh and Fruity Vodka Infusions
These fruit vodka infusions are easy and so, so pretty. What a way to impress your guests!
Author:
Cuisine: American
Recipe type: Drinks
Ingredients
Apple & Blackberry infusion
  • 50 grams granny smith apple, roughly chopped
  • 70 grams blackberries
  • 150 milliliters vodka
  • 300 milliliters soda water
Pear & Cinnamon infusion
  • 90 grams pear, roughly chopped
  • 1 cinnamon stick
  • 150 milliliters vodka
  • 300 milliliters soda water
Strawberry & Basil infusion
  • 100 grams strawberries roughly chopped
  • 6 basil leaves
  • 150 milliliters vodka
  • 300 milliliters soda water
Cucumber & Mint infusion
  • 80 grams cucumber, roughly chopped
  • 12 mint leaves
  • 150 milliliters vodka
  • |300 milliliters soda water
Instructions
Apple & Blackberry infusion
  1. Take a sterilized jam jar and add the apple and blackberries. Muddle together to release any juices.
  2. Add the Ketel vodka, place the lid on and shake to combine.
  3. Leave to infuse for 3-5 days, the longer you leave it the more intense the flavours will get!
  4. After the vodka has been infused sieve the fruits, reserving the vodka. Add 50 milliliters to a glass of ice and top with 100 milliliters soda water and enjoy!
Pear & Cinnamon infusion
  1. Take a sterilized jam jar and add the pear and cinnamon stick. Muddle together to release any juices.
  2. Add the Ketel vodka, place the lid on and shake to combine.
  3. Leave to infuse for 3-5 days, the longer you leave it the more intense the flavours will get!
  4. After the vodka has been infused sieve the fruits, reserving the vodka. Add 50 milliliters to a glass of ice and top with 100 milliliters soda water and enjoy!
Strawberry & Basil infusion
  1. Take a sterilized jam jar and add the strawberry and basil leaves. Muddle together to release any juices.
  2. Add the Ketel vodka, place the lid on and shake to combine.
  3. Leave to infuse for 3-5 days, the longer you leave it the more intense the flavours will get!
  4. After the vodka has been infused sieve the fruits, reserving the vodka. Add 50 milliliters to a glass of ice and top with 100 milliliters soda water and enjoy!
Cucumber & Mint infusion
  1. Take a sterilized jam jar and add the cucumber and mint leaves. Muddle together to release any juices.
  2. Add the Ketel vodka, place the lid on and shake to combine.
  3. Leave to infuse for 3-5 days, the longer you leave it the more intense the flavours will get!
  4. After the vodka has been infused sieve the fruits, reserving the vodka. Add 50 milliliters to a glass of ice and top with 100 milliliters soda water and enjoy!

Watch the recipe video here:

These fruit vodka infusions are easy and so, so pretty. What a way to impress your guests!

Posted by Proper Tasty on Tuesday, December 11, 2018
Main dish

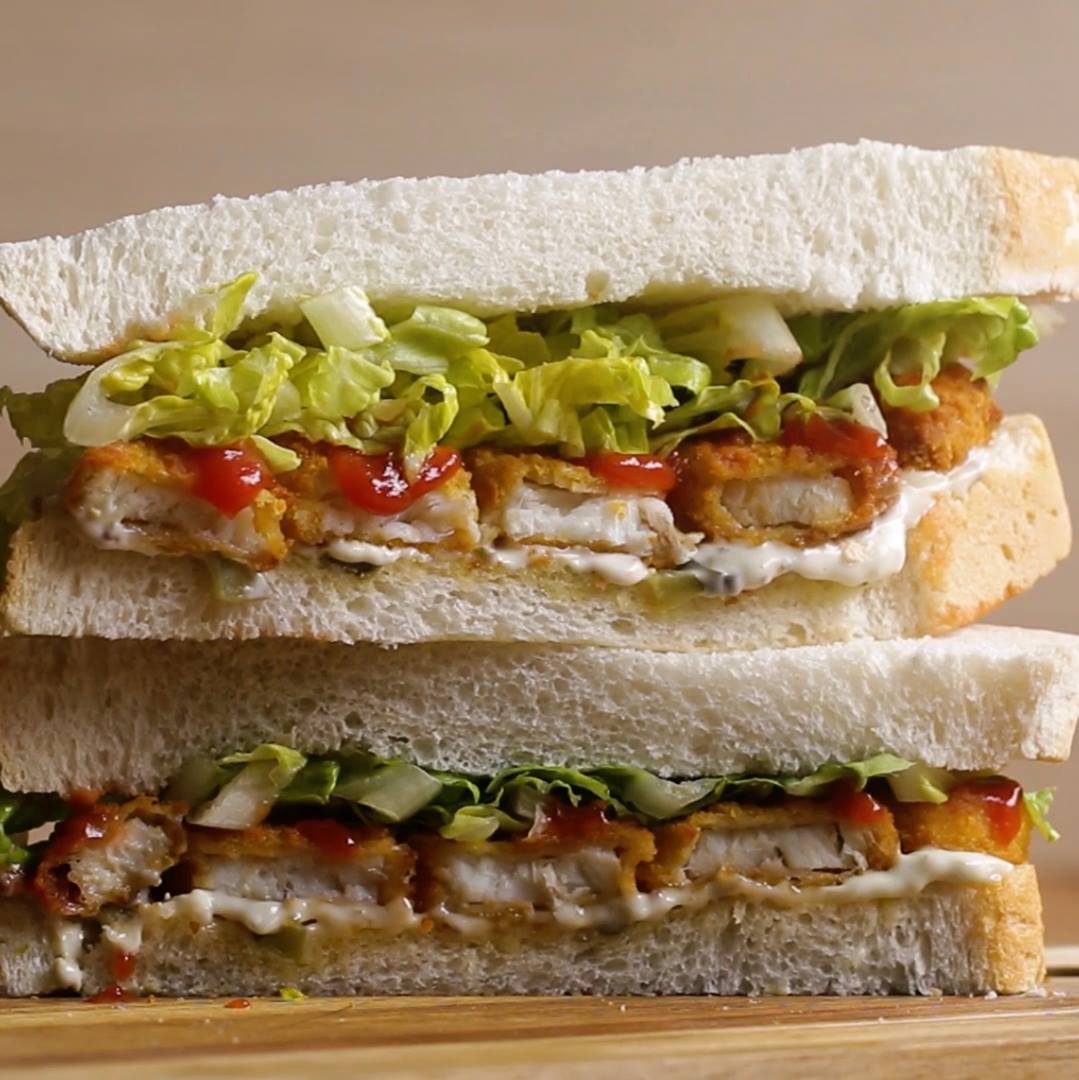
The Fancy Fish Finger Sarnie

The Fancy Fish Finger Sarnie
Fish Finger Sandwich Goals
Author:
Cuisine: American
Recipe type: Main dish
Ingredients
HOMEMADE TARTAR SAUCE
  • ½ cup mayonnaise (100 g)
  • 1 pickled gherkin, diced
  • 1 tablespoon caper, diced
  • 1 teaspoon whole grain mustard
  • ½ lemon, juiced
  • 6 Birds Eye Fish Fingers
  • 1 400 gram white bread loaf
  • Butter room temperature
  • Half a lemon
  • handful lettuce, sliced
  • 1 teaspoon ketchup
Instructions
  1. Preheat the oven to 200˚C and cook 6 finger fishers per the packet instructions.
  2. Next make the Tartar sauce by adding the mayonnaise, gherkin, capers, whole grain mustard and lemon juice in a small bowl and stir until fully combined. Cover and refrigerate until ready to serve.
  3. Take your loaf of bread and slice length ways so you get two long thick slices of bread.
  4. Once your fish fingers are cooked take your slices of bread and generously butter. Next add a good amount of tartar sauce over each slice of bread and spread.
  5. Add your fish fingers onto one slice of bread and a good squeeze of lemon and ketchup.
  6. Place a good handful of lettuce and top with the slice of bread. Slice on an angel to reveal the gorgeous white fish inside and enjoy!

Watch the recipe video here:

Fish Finger Sandwich Goals

Posted by Proper Tasty on Wednesday, December 12, 2018

Main dish

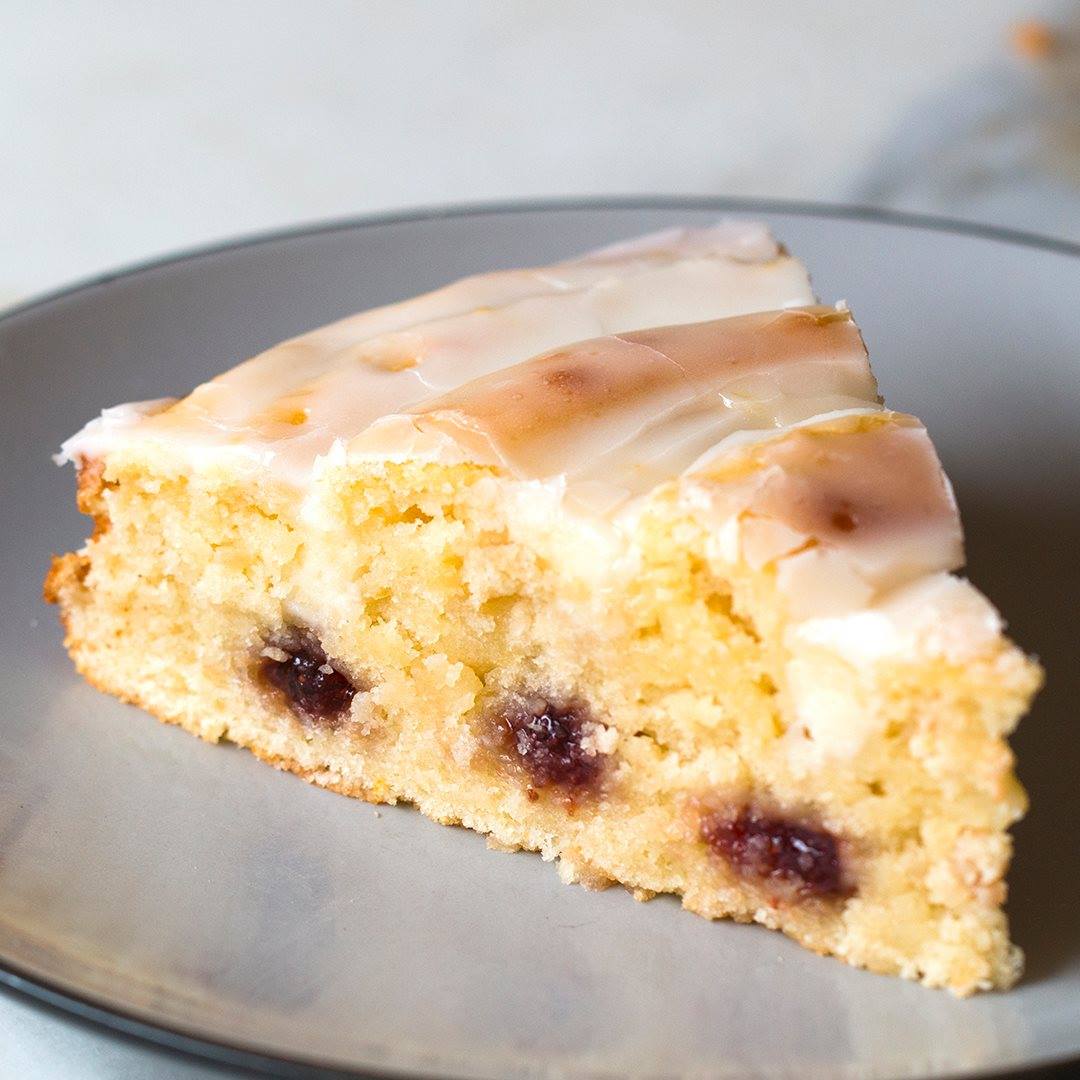
Strawberry Swirl Lemon Cake

Strawberry Swirl Lemon Cake
Author:
Cuisine: American
Recipe type: Main dish
Ingredients
CREAM CHEESE FILLING
  • 8 oz cream cheese, room temperature (225 g)
  • ½ cup powdered sugar (60 g)
  • 1 teaspoon vanilla extract
  • 18 oz strawberry jam, 1 jar (510 g)
CAKE BATTER
  • 3 cups all-purpose flour (375 g)
  • 1 cup granulated sugar (200 g)
  • 4 teaspoons baking powder
  • ¼ teaspoon salt
  • 2 large eggs
  • 1 ⅓ cups milk (320 mL)
  • ½ cup butter, melted, 1 stick (115 g)
  • 2 teaspoons vanilla extract
  • 1 lemon, zested
  • 1 lemon, juiced
LEMON GLAZE
  • 2 cups powdered sugar (240 g)
  • 1 lemon, zested
  • 1 lemon, juiced
Instructions
  1. Grease an 11-inch (25cm) round cake pan and line with parchment paper.
  2. Make the cream cheese filling: In a medium bowl, mix the cream cheese, powdered sugar, and vanilla until fully incorporated and smooth. Set aside.
  3. In a small saucepan over medium heat, cook the strawberry jam until reduced by half, about 20 minutes. Remove the pan from the heat and set aside.
  4. Make the cake batter: In a large bowl, combine the flour, sugar, baking powder, and salt and whisk to combine.
  5. Add the eggs, milk, melted butter, and vanilla and whisk until fully incorporated. Stir in the lemon zest and juice.
  6. Pour the batter into the prepared cake pan.
  7. Preheat the oven to 350˚F (180˚C).
  8. Transfer the reserved cream cheese filling and reduced jam to 2 piping bags fitted with round tips or zip-top bags with a corner cut off.
  9. Starting in the center, pipe in a layer of jam in a spiral shape, moving towards the outside of the cake. Pipe a layer of cream cheese filling on top of the jam, following the swirl as closely as possible.
  10. Bake for 30 minutes, until a toothpick inserted in the center of the cake comes out clean. Allow cake to come to room temperature before removing from cake pan.
  11. Make the lemon glaze: combine the powdered sugar, lemon zest, and lemon juice in a medium bowl and whisk until a smooth glaze forms.
  12. Remove the cooled cake from the pan and evenly pour over the glaze.
  13. Allow the glaze to set before serving.
  14. Enjoy!

Watch the recipe video here:

This strawberry swirl lemon cake will have you all twisted up! ???FULL RECIPE: https://tasty.co/recipe/strawberry-swirl-lemon-cake

Posted by Proper Tasty on Monday, December 10, 2018

Dessert

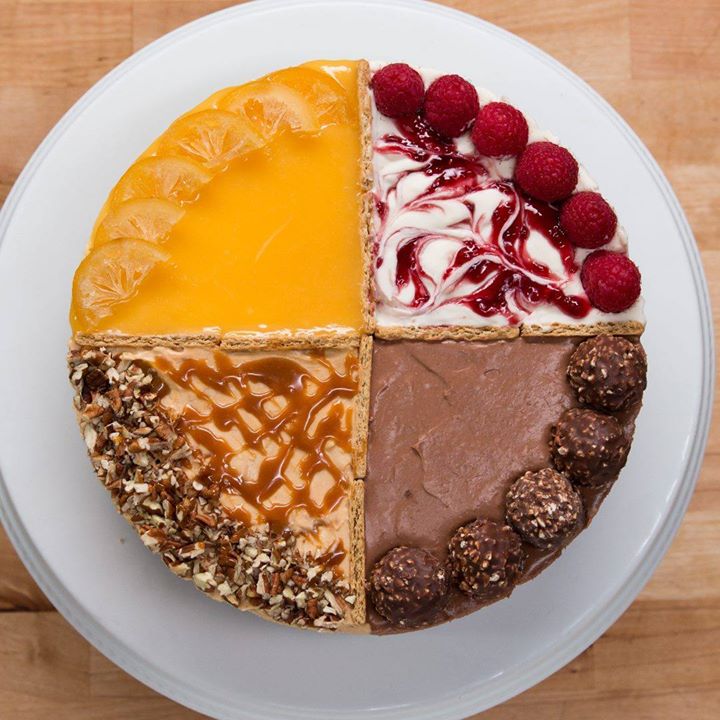
4-Flavor Cheesecake


4-Flavor Cheesecake
4-Flavor Cheesecake
Author:
Cuisine: American
Recipe type: Dessert
Ingredients
  • CRUST
  • 20 graham crackers, crushed, plus 4 whole
  • 2 tablespoons sugar
  • 10 tablespoons unsalted butter, melted
  • CHEESECAKE FILLINGS
  • 2 tablespoons gelatin powder, 2 packets
  • 4 tablespoons water
  • 24 oz cream cheese (680 mg)
  • 1 cup sugar (200 g)
  • 3 cups heavy whipping cream, divided (720 mL)
  • ½ teaspoon vanilla extract
  • ⅔ cup lemon curd, divided (165 g)
  • ½ cup dulce de leche, warmed, plus more for garnish (150 g)
  • ½ cup chocolate hazelnut spread (145 g)
  • 1 tablespoon raspberry jam
  • 8 fresh raspberries, for garnish
  • 5 chocolate hazelnut truffles, for garnish
  • 10 pecans, roughly charged, for garnish
  • 5 candied lemon slice, optional, halved, garnish
Instructions
  1. In a large bowl, mix together the graham cracker crumbs, sugar, and melted butter until combined.
  2. Pour the crust mixture into a 9-inch (23 cm) springform cake pan. Press crumbs down firmly with the bottom of a small ramekin or glass to form an even base.
  3. Carefully break the remaining graham crackers in half, so that you have 8 squares.
  4. Push the graham crackers into the crust with the split line facing upwards to form an X shape, dividing the crust into four equal sections.
  5. Press down on the crust one more time to ensure the graham crackers are secure. Cover and chill in the freezer for at least 10 minutes while preparing the fillings.
  6. In a small bowl, dissolve the gelatin in the water. Set aside to bloom.
  7. In a large bowl, beat together the cream cheese and sugar until smooth.
  8. Add 2½ cups (720 ml) whipping cream and beat until the batter is light and fluffy.
  9. Warm the gelatin in the microwave for about 15 seconds so that it’s fluid, and incorporate into the batter.
  10. Divide the cheesecake batter evenly between 4 medium bowls.
  11. In the first bowl, whisk in the vanilla extract and remaining whipping cream.
  12. In the second bowl, whisk in ⅓ cup (80 grams) lemon curd.
  13. In the third bowl, whisk in the dulce de leche.
  14. In the fourth bowl, whisk in the chocolate hazelnut spread.
  15. To assemble the cheesecake, slowly pour the contents of bowl #1 into a quarter of the pan. Repeat with remaining flavors. Use a spatula to smooth the tops.
  16. Carefully dollop the raspberry jam in small circles on top of the vanilla cheesecake. Use a toothpick or knife to carefully swirl it into the filling. Garnish the outer border with fresh raspberries.
  17. Garnish the outer border of the chocolate hazelnut cheesecake with the chocolate hazelnut truffles.
  18. Garnish the outer border of the dulce de leche cheesecake with the chopped pecans and drizzle with dulce de leche
  19. Pour the remaining lemon curd on top of the lemon cheesecake and smooth with an offset spatula or spoon. Garnish the outer border with candied lemon slices.
  20. Cover the top of the pan tightly with plastic wrap and chill for 4 hours or overnight in the fridge before slicing and serving.
  21. Enjoy!

Watch the recipe video here:

4-Flavour Cheesecake

Dinner party pending? Impress your guests with this 4-flavour cheesecake! ?FULL RECIPE: https://tasty.co/recipe/4-flavor-cheesecake

Posted by Proper Tasty on Tuesday, March 13, 2018

Dessert

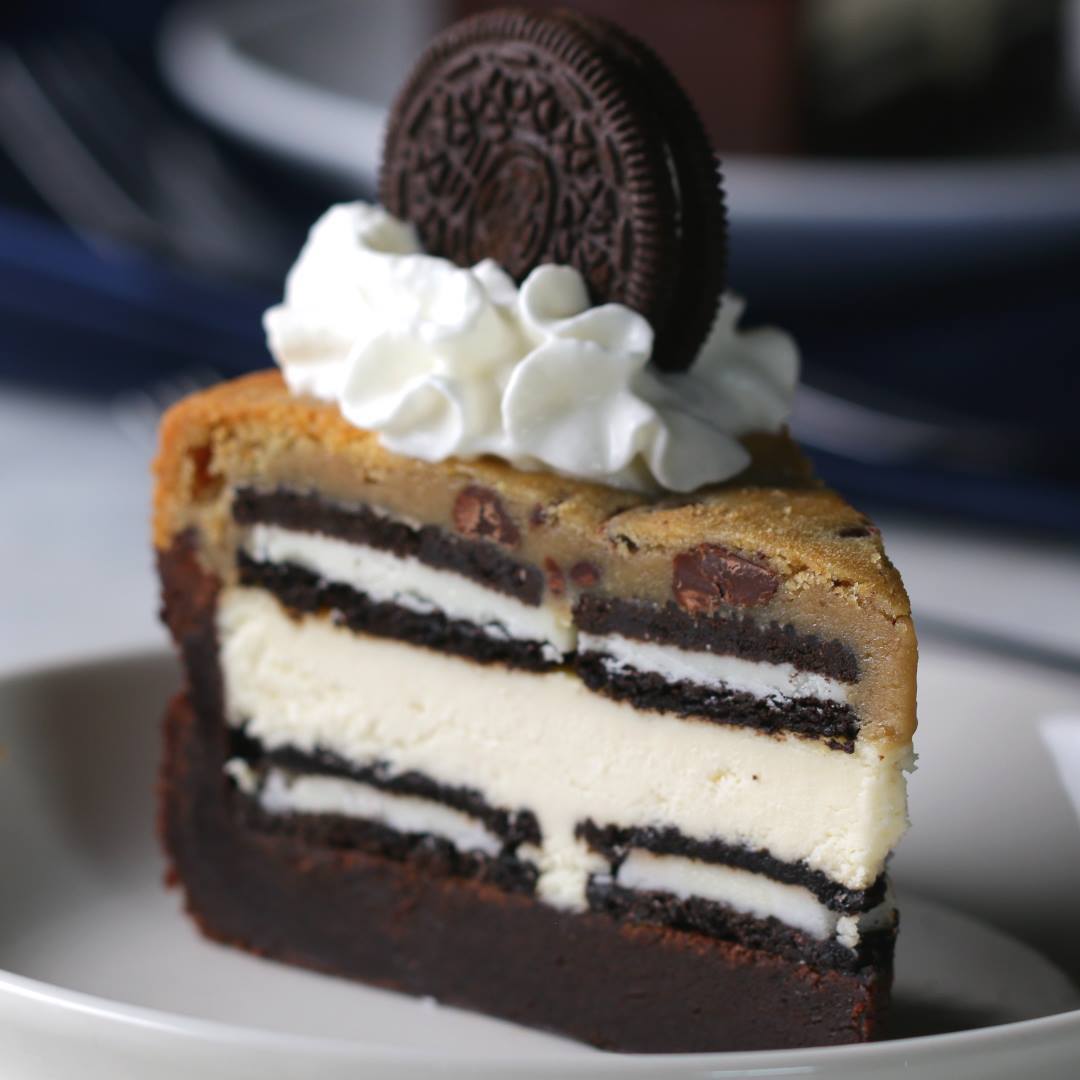
5-Layer Cookie ‘Box’ Brownie Cheesecake

5-Layer Cookie 'Box' Brownie Cheesecake
Author:
Cuisine: American
Recipe type: Dessert
Ingredients
  • 455 g chocolate chip cookie dough, 1 16-ounce tube, room temperature 455 g
  • 510 g brownie mix, 2 18-ounce boxes, batter prepared according to package instructions 510 g
  • 24 oz cream cheese, softened (680 g)
  • ½ cup sugar (100 g)
  • 1 teaspoon vanilla extract
  • 1 large egg
  • 40 double-stuffed chocolate cookie sandwiches
  • whipped cream, for serving
Instructions
  1. Preheat the oven to 350°F (180°C).
  2. Line a 10-inch (25-cm) springform pan with 2 layers of plastic wrap long enough to hang over the sides.
  3. Press the cookie dough evenly into a circle along the bottom of the pan, then fold the plastic wrap over the top.
  4. Unclasp the pan and freeze the cookie dough disk.
  5. Re-clasp the pan, then spray the bottom with cooking spray.
  6. Pour in the brownie batter.
  7. Spray the bottom and sides of a 5-inch (12-cm) or deeper, 8-inch (20-cm) wide cake pan, then press the greased cake pan into the brownie mix until the batter reaches halfway up the sides of the springform pan.
  8. Bake for 35 minutes, then cool for about 5 minutes.
  9. Reduce the oven temperature to 300°F (150°C).
  10. In a large bowl, mix together the cream cheese, sugar, vanilla, and egg until there are no lumps and the batter is smooth.
  11. While the brownie is still warm, carefully rotate and press down on the inner cake pan using oven mitts or pads to push the cooked brownie even more up the sides of the springform pan into an even ring. Chill for 30 minutes.
  12. Arrange a single layer of the sandwich cookies, roughly 14-15, on the bottom of the brownie shell as close together as possible.
  13. Pour the cheesecake batter on top of the cookies and spread evenly across the top.
  14. Tap the pan to release any large air bubbles, then bake for about 40 minutes until the cheesecake slightly jiggles in the center. Freeze until the top of the cheesecake is slightly firm, about 30 minutes.
  15. Arrange another layer of cookies on top of the cheesecake layer, then place the frozen cookie dough disk on top.
  16. Tuck in any edges, then bake for 20 minutes.
  17. Chill completely, then release the pan. Slice, and serve with a dollop of whipped cream topped with another cookie!
  18. Enjoy!

Watch the recipe video here:

5-Layer Brownie Cookie Cheesecake

This 5-layer brownie cookie cheesecake is LITERALLY what dreams are made of ?RECIPE: https://tasty.co/recipe/5-layer-cookie-box-brownie-cheesecake

Posted by Proper Tasty on Thursday, June 21, 2018

Pasta

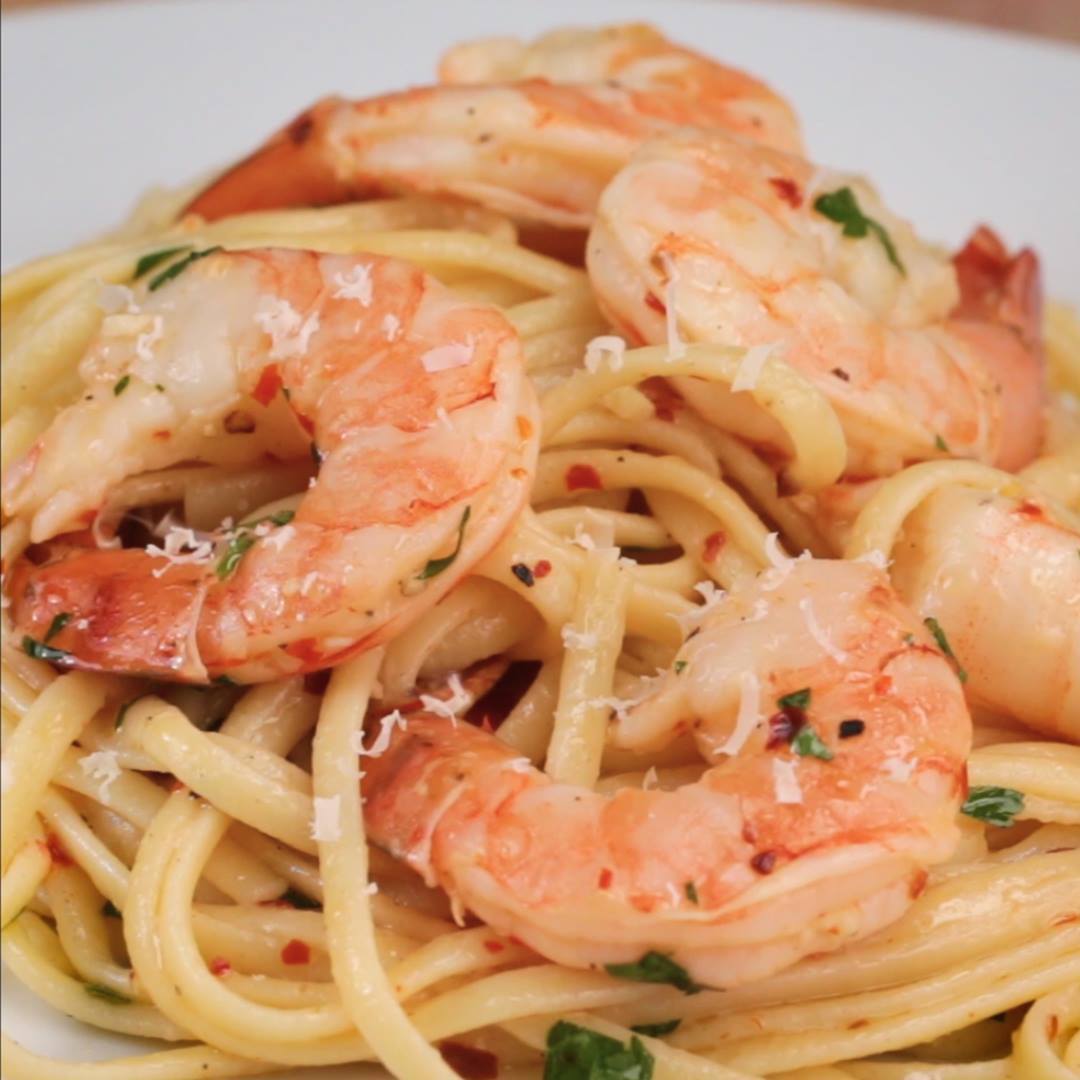
Baked Shrimp Scampi Linguine Pasta

Baked Shrimp Scampi Linguine Pasta
Baked Shrimp Scampi Linguine Pasta recipe.
Author:
Cuisine: Italian
Recipe type: Pasta
Ingredients
  • 1 lb shrimp, peeled and deveined (500 g)
  • 1 tablespoon salt
  • 1 tablespoon pepper
  • 1 tablespoon red chili flakes
  • 3 cloves garlic, minced
  • 6 oz butter, melted (180 g)
  • 1 tablespoon lemon juice
  • ½ cup white wine (120 mL)
  • 8 oz linguine (250 g)
  • fresh parsley, to garnish
  • red chili flakes, to garnish
Instructions
  1. Preheat oven to 400˚F (200˚C).
  2. In a medium-sized casserole pan, combine shrimp, salt, pepper, red chili flakes, garlic, butter, lemon juice, and white wine.
  3. Bake for 10-13 minutes, or until shrimp turns pink and is fully cooked.
  4. Bring 4 quarts of water to a boil, add salt to taste, and cook linguine pasta al dente according to package directions, stirring occasionally.
  5. Strain linguine and combine with shrimp until pasta is fully coated in white wine scampi sauce.
  6. Garnish with chopped Italian parsley.
  7. Enjoy!

Watch the recipe video here:

Baked Shrimp Linguine Scampi ?FULL RECIPE: https://tasty.co/recipe/baked-shrimp-scampi-linguine

Posted by Proper Tasty on Friday, November 30, 2018

Breakfast

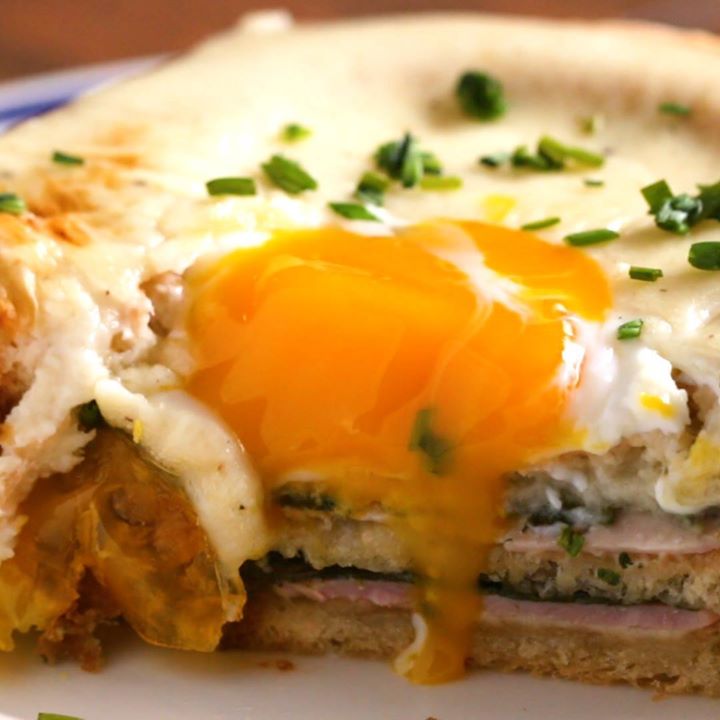
Egg-In-Hole Layered Breakfast Bake

Egg-In-Hole Layered Breakfast Bake
Author:
Cuisine: American
Recipe type: Breakfast
Ingredients
  • 18 slices bread, white sandwich bread
  • 3 tablespoons butter, softened
  • 18 slices swiss cheese
  • 12 slices ham
  • 4 cups spinach (160 g)
  • 6 eggs
  • chives, chopped, to serve
BÉCHAMEL SAUCE
  • 2 tablespoons butter
  • 3 tablespoons flour
  • 2 cups milk
  • 1 teaspoon salt
  • ½ teaspoon pepper
  • 1 pinch ground nutmeg
  • 2 cups gruyère cheese, grated (220 g)
  • 2 cups grated parmesan cheese (220 g)
Instructions
  1. Preheat the oven broiler to high. Line a baking sheet with parchment paper.
  2. On a cutting board, butter all the sandwich bread and transfer to the prepared baking sheet.
  3. Using a glass, cut out the centers of 6 slices of bread.
  4. Toast the bread under the broiler for 5 minutes, or until toasted. Keep a close eye on it so it doesn't burn.
  5. Reduce the oven temperature to 350˚F (180˚C).
  6. Make the Béchamel sauce: Melt the butter in a small saucepan over medium heat. Add the flour and whisk until it darkens slightly.
  7. Add the milk and whisk to combine. Reduce the heat to low and simmer until reduced by half.
  8. Remove the pot from the heat and add the salt, pepper, nutmeg, Gruyère, and Parmesan and stir until fully incorporated.
  9. Line a 9 x 13-inch baking dish with parchment paper.
  10. Lay 6 pieces of toast in the bottom of the dish. Top with 9 slices of Swiss cheese, 6 slices of ham, and 2 cups of spinach. Repeat to make another layer and top with the hollow-centered toast.
  11. Crack an egg into each hole. Carefully ladle the Béchamel sauce over the bake, leaving the yolks exposed.
  12. Cover and bake for 35 minutes, then uncover and bake for 10 minutes more, until the eggs are cooked to your liking and the Béchamel is starting to brown in spots.
  13. Slice and serve garnished with chives, if desired.
  14. Enjoy!

Watch the recipe video here:

Egg-In-Hole Layered Breakfast Bake

The ultimate breakfast bake ?FULL RECIPE: https://tasty.co/recipe/ham-cheese-egg-in-the-hole-layered-bake

Posted by Proper Tasty on Tuesday, January 16, 2018

Main dish

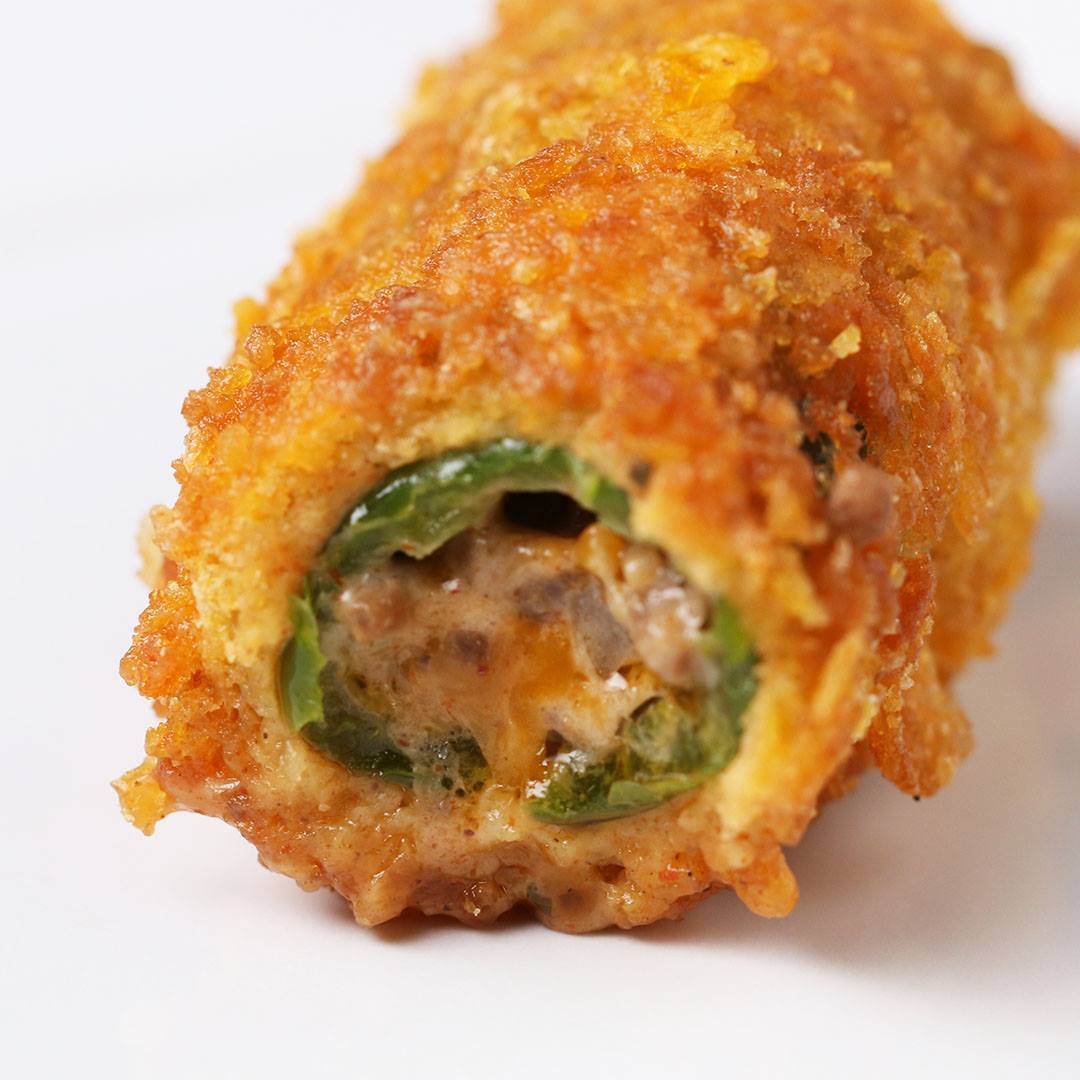
Crunchy Jalapeño Taco Poppers

Crunchy Jalapeño Taco Poppers
You can't wait to get a bite of these crunchy jalapeño taco poppers! ?
Author:
Cuisine: American
Recipe type: Main dish
Ingredients
  • 24 jalapeñoes
  • 1 lb ground beef (455 g)
  • 1 oz taco seasoning, 1 package (30 g)
  • 2 teaspoons kosher salt, plus more to taste
  • 1 teaspoon ground black pepper
  • ¼ cup fresh cilantro, chopped (10 g)
  • 2 tablespoons extra virgin olive oil
  • 1 medium white onion, diced
  • 2 cloves garlic, minced
  • 1 cup shredded cheese blend (100 g)
  • ½ cup cream cheese (110 g)
  • 4 eggs, beaten
  • 1 ½ cups flour, mixed with 1 tsp salt and 1 tsp pepper (185 g)
  • 4 cups cornflake cereal, crushed (120 g)
  • 1 cup cornflake cereal, finely ground (30 g)
  • 8 cups canola oil (1.9 L)
  • ¼ cup fresh cilantro, chopped (10 g)
  • fresh lime juice, for seasoning
  • salsa, for serving
Instructions
  1. Slice the jalapeños lengthwise down the center, taking care to cut through only one side and leaving the pepper as intact as possible. Remove the seeds.
  2. In a large bowl, combine the ground beef, taco seasoning, salt, pepper, and cilantro. Mix to combine.
  3. Heat the olive oil in a large pan over medium heat. Cook the onion for 1 minute, then add garlic and cook another minute.
  4. Add the beef mixture and cook until browned, approximately 5 minutes. Remove from the heat and let cool completely.
  5. In a clean, large bowl, combine the cooled beef mixture, shredded cheese, and cream cheese.
  6. Transfer the beef mixture to a piping bag or zip-top bag with a corner snipped off.
  7. Pipe the beef mixture into the jalapeños, then close the peppers.
  8. Heat a large pot filled with the oil until it reaches 325ºF (170ºC).
  9. Add the seasoned flour, eggs, and cornflakes to 3 separate shallow bowls. Dip the peppers in the egg, then the flour, followed by the egg again, and then the cornflakes. Dip once more in the egg and finish with a second dip in the cornflakes.
  10. Fry the peppers, in batches, for 2½ minutes until golden brown. Remove with a slotted spoon or tongs and drain on a wire cooling rack.
  11. Season the peppers well with salt and fresh lime juice.
  12. Serve warm with salsa for dipping.
  13. Enjoy!

Watch the recipe video here:

You can't wait to get a bite of these crunchy jalapeño taco poppers! ?FULL RECIPE: https://tasty.co/recipe/crunchy-jalapeno-taco-poppers

Posted by Proper Tasty on Wednesday, November 21, 2018

Dessert

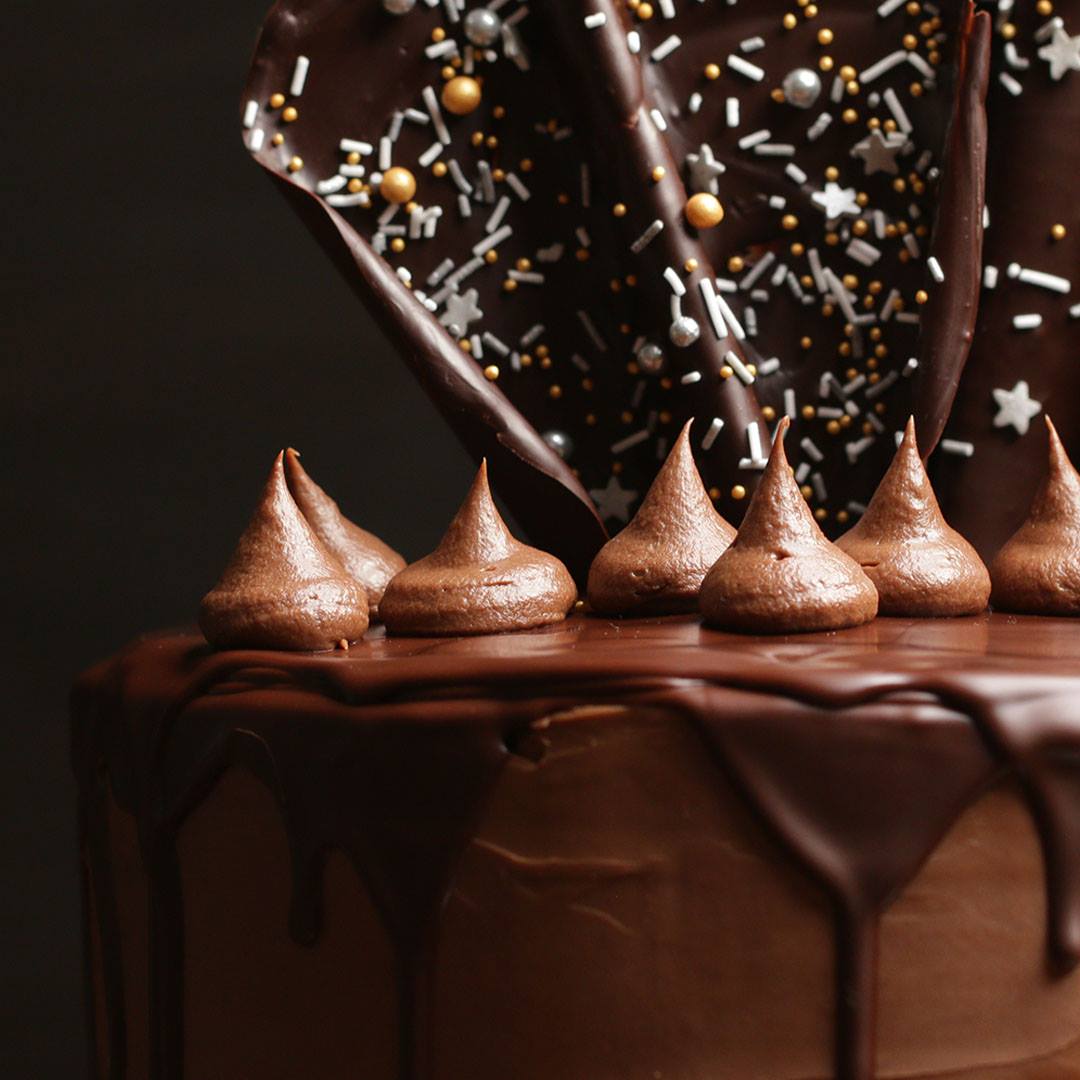
The Chocolate Cake For Chocoholics

The Chocolate Cake For Chocoholics
A chocoholics' dream comes true! Your best chocolate fix is a cake away!
Author:
Cuisine: American
Recipe type: Dessert
Ingredients
  • 300 grams self-raising flour
  • 1 teaspoon baking powder
  • 2 teaspoon bicarbonate of soda
  • 1 teaspoon salt
  • 70 grams cocoa
  • 3 teaspoon espresso powder
  • 300 millilitres hot water
  • 2 teaspoon vanilla extract
  • 150 grams Dr. Oetker extra dark baking chocolate, chopped
  • 150 grams Dr. Oetker milk chocolate baking chocolate, chopped
  • 250 grams unsalted butter
  • 300 grams brown sugar
  • 4 eggs, beaten
Chocolate ganache
  • 4 packets Dr. Oetker milk baking chocolate
  • 300 millilitres double cream
Chocolate Drip
  • 300 grams extra dark chocolate
  • 200 grams unsalted butter
To decorate
  • Sprinkles
Instructions
  1. Preheat the oven to 160°C and grease an line 4 cake tins.
  2. Start by sieving the flour, baking powder, bicarbonate of soda, salt, and cocoa powder into a large bowl and set aside.
  3. Next prepare the espresso by placing the espresso powder into a measuring jug and add the hot water and vanilla extract. Stir to combine an set aside to cool.
  4. Now make a bain-marie by placing a small pan of water over a medium heat and bring to a simmer. Place a large heatproof bowl over the top of the saucepan, making sure the bottom of the bowl does not come in contact with the water. Add 150 grams of extra dark chocolate and 150 grams of milk chocolate to the bowl and leave to melt, making sure to stir every now and then. Once it’s melted, carefully remove the bowl from the pan and set aside to cool.
  5. Meanwhile, start on your chocolate sponge by placing the butter and sugar in a large bowl. Using an electric hand whisk, cream the butter and sugar until pale and fluffy.
  6. Next add your beaten eggs in four parts, mixing well in between. (If your mixture starts to curdle, simply add a tablespoon of your dry ingredients with every addition of egg.)
  7. Add your cooled, melted chocolate and stir to combine.
  8. Next add your dry ingredients and espresso liquid in thirds alternately, starting with your dry ingredients and mixing well in between each addition.
  9. Using a spatula scrape down the sides of the bowl to make sure the mixture is fully combined and divide between your 4 cake tins. Place in the oven 18–20 minutes or until a skewer comes out clean when inserted.
  10. Once cooked, remove from the oven and leave in the tins for 10 minutes before turning out the tins. Then carefully turn out onto a wire rack and leave to cool thoroughly.
  11. Meanwhile, start to create your ganache. Chop the chocolate into small chunks and place in a large bowl. Set side.
  12. Place a small saucepan over a low-medium heat and add the cream. Heat until just starting to simmer and pour straight over the chocolate. Leave the sit with the chocolate for around 15 seconds before stirring. You may want to give the bowl a little shake to encourage the cream down into the chocolate. Then stir until all the chocolate has melted and you achieve a silky smooth ganache.
  13. Cover and place into the fridge for 10–15 minutes, as soon as your ganache starts to firm slightly you are ready to assemble your cake!
  14. Now all that’s left to do is sandwich your layers with a generous layer of ganache, and adorn the outside of the cake with the beautiful chocolate ganache. We finished ours with a white chocolate top for that extra wow factor! Serve and enjoy!
Sail instructions
  1. Take a rectangular shaped piece of greaseproof paper that resembles the size of sail you would like to achieve.
  2. Place down facing the length away from you.
  3. Fold one side into 1 inch pleats, making sure to only fold and press down halfway across the paper.
  4. Unfold the pleats and thinly spread the chocolate over the paper that has not been folded. (Make sure the chocolate is not spread too thinly but thick enough so it does not snap on removing the grease-proof paper.)
  5. Next fold the pleats back up on the one side and peg in place.
  6. Sprinkle or decorate as desired at this point and leave to dry.
  7. Once the chocolate is set, remove the peg and carefully remove the grease-proof paper.
  8. Place on your cake and enjoy your work!
Cake decoration instructions
  1. Using a palette knife spread a small amount of ganache onto the cake stand and place your first cake layer on top.
  2. Add a good dollop or ganache on top of the cake and spread into one even layer. Then place your next sponge on top. Repeat with all layers of cake.
  3. When you get to your top layer, place a generous amount of ganache on top and spread over the into one even layer. As you do this, encourage excess ganache over the sides and down the sides of the cake.
  4. Next using your palette knife take small amounts of ganache and fill in between each layer of cake, smoothing over as you go.
  5. Once you have filled any gaps over the sides of the cake, start to add more ganache over the sides and neatly smooth over using a long palette knife. (A good tip here is to have a hot jug of water and continually warm and clean off the palette knife in between each smoothing of the cake.)
  6. Once you have smoothed over the sides, neaten the top edging of the cake by bringing any untidy edges towards the centre of the top of the cake then smooth over the top of the cake.
  7. All that’s left to do is top the cake with your chosen decorations and enjoy!

Watch the recipe video here:

A chocoholics' dream comes true! Your best chocolate fix is a cake away!

Posted by Proper Tasty on Thursday, November 15, 2018

Main dish

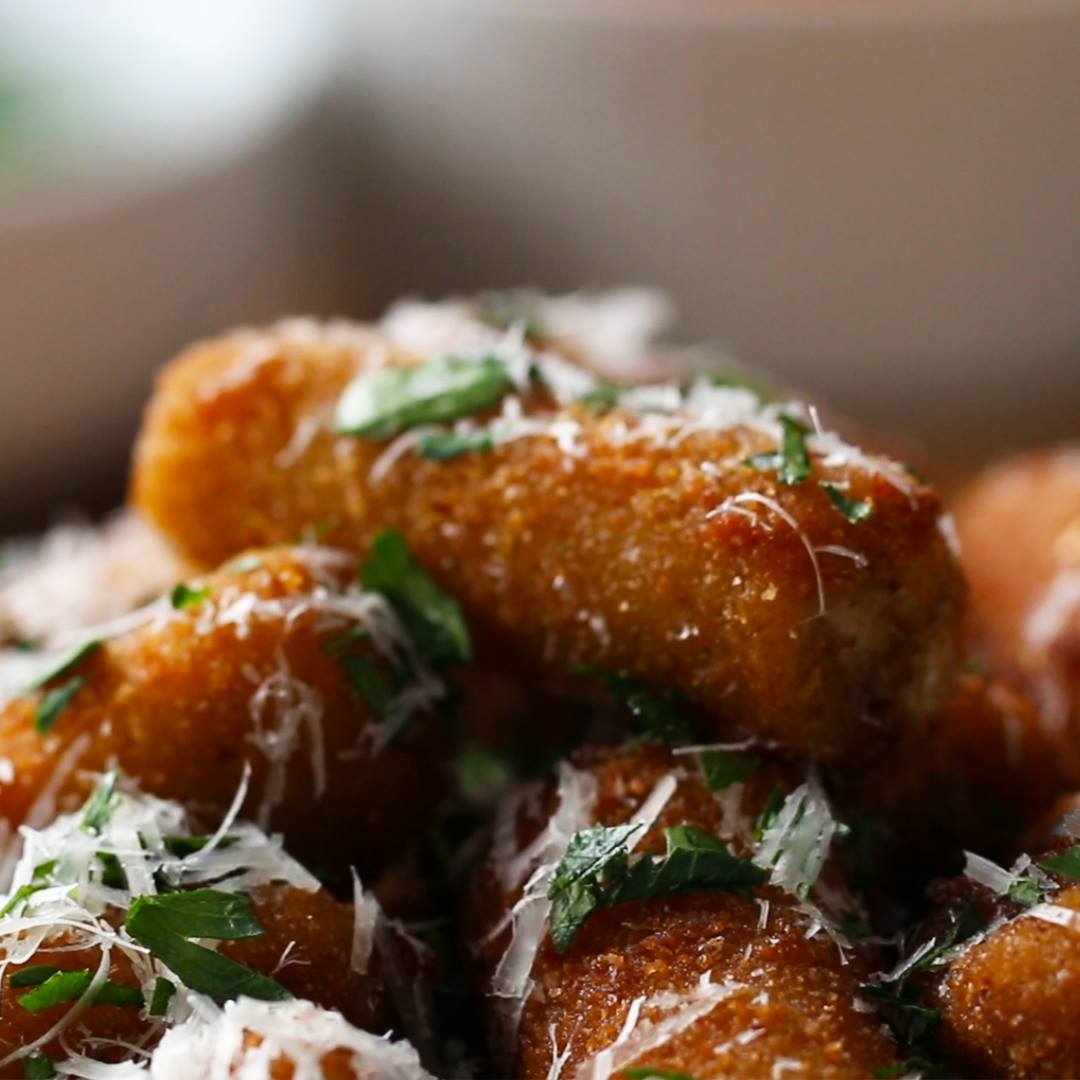
Stuffed Rigatoni Poppers

Stuffed Rigatoni Poppers
These stuffed rigatoni poppers are going to be your new favourite appetizer ?
Author:
Cuisine: American
Recipe type: Main dish
Ingredients
  • 2 teaspoons salt, divided
  • 16 oz rigatoni, 1 box (455 g)
  • 1 tablespoon olive oil
  • 1 lb ground beef (455 g)
  • ½ teaspoon pepper
  • 1 teaspoon dried oregano
  • 1 teaspoon dried parsley
  • ½ medium yellow onion, diced
  • 2 cloves garlic, minced
  • 1 cup shredded mozzarella cheese (100 g)
  • oil, for frying
  • 1 cup all-purpose flour (125 g)
  • 2 large eggs, beaten
  • 1 cup bread crumbs (115 g)
  • fresh parsley, for serving
  • shredded parmesan cheese, for serving
  • marinara sauce, warm for serving
Instructions
  1. Bring a large pot of water to boil over high heat, season with a teaspoon of salt, then add the rigatoni.
  2. Stir and cook until the pasta is al dente, about 5 minutes.
  3. Drain the pasta and transfer to a large bowl. Add the olive oil and stir to coat. Set aside to cool.
  4. In a large bowl, add the ground beef, remaining teaspoon of salt, the pepper, oregano, parsley, onion, garlic, and mozzarella. Stir until combined.
  5. Spoon the beef mixture into a zip top bag, seal the bag, and cut the corner to create a small opening.
  6. Pipe the beef mixture into one side of the rigatoni, then flip and pipe the other side to fill.
  7. Place the filled rigatoni on a baking sheet and freeze for 30 minutes.
  8. Heat the oil in a large pot until it reaches 350°F (180°C).
  9. Place the flour, eggs, and bread crumbs into 3 separate medium bowls.
  10. Take a rigatoni and roll it in the flour to coat, shake off any excess flour. Dip the rigatoni in the egg with a fork. Finally, roll the rigatoni in the bread crumbs until coated. Repeat with the remaining rigatoni.
  11. Fry the rigatoni poppers 4 at a time until golden brown, about 4 minutes.
  12. Drain on a wire rack or over paper towels.
  13. Sprinkle with fresh parsley and Parmesan.
  14. Serve with marinara sauce.
  15. Enjoy!

Watch the recipe video here:

These stuffed rigatoni poppers are going to be your new favourite appetizer ?FULL RECIPE: https://tasty.co/recipe/stuffed-rigatoni-poppers

Posted by Proper Tasty on Wednesday, November 14, 2018