Showing 17 Result(s)
Dessert

MINT CHOCOLATE CHIP CUPCAKES

MINT CHOCOLATE CHIP CUPCAKES
Author:
Cuisine: American
Recipe type: Dessert
Ingredients
For the Cupcakes
  • 1 (18.25 ounce) package devil’s food cake mix
  • 1 (3.9 ounce) package instant chocolate pudding mix
  • 1 cup sour cream
  • 1 cup vegetable oil
  • 4 eggs, lightly beaten
  • 2 teaspoons pure vanilla extract
  • ½ cup warm water
  • 1½ cups Andes Crème de Menthe baking chips
For the Frosting
  • 4 sticks (2 cups) unsalted butter, room temperature
  • 1.5 pounds (28 ounces) confectioners’ sugar, sifted
  • 2 teaspoons pure vanilla extract
  • 3-4 tablespoons heavy cream
  • green gel dye
  • ¼ teaspoon pure peppermint extract
  • 2 ounces semi sweet chocolate, melted and cooled
  • 2 tablespoons unsweetened cocoa powder
  • mini chocolate chips
Instructions
  1. Preheat oven to 350°F. Line muffin tin with paper liners or spray with non-stick cooking spray.
  2. In the bowl of a stand mixer or a large bowl with a hand mixer, add the cake and pudding mixes, sour cream, oil, eggs, vanilla and water. Mix on medium speed for about 2 minutes until all ingredients are well combined and the batter is smooth. Stir in the Andes Crème de Menthe baking chips.
  3. Using a large scoop distribute the batter between 24 muffin wells; about 3 tablespoons of batter per well.
  4. Bake in preheated oven for 18-23 minutes or until the tops of the cakes spring back when lightly touched. Allow cupcakes to cool inside muffin tins for about 10 minutes.
  5. Remove cupcakes from muffin tins and allow to fully cool on a wire rack. Once cupcakes are cool, prepare your frosting.
For the Frosting
  1. In the bowl of a stand mixer fitted with the paddle attachment, beat the butter on medium-high speed for about 5 minutes.
  2. Turn the mixture down to low speed and gradually add in the confectioners’ sugar until it is completely incorporated. Add in vanilla and heavy cream. Turn the mixer back up to medium-high speed and beat the mixture for about 3-4 minutes or until light and fluffy.
  3. Remove half of the frosting from the mixer bowl and set aside. Add a tiny amount of green gel dye to the remaining frosting (I used Wilton Leaf Green). Turn the mixer on and fully incorporate the dye. Slowly add more dye until you achieve a nice minty green color. Stir in peppermint extract.
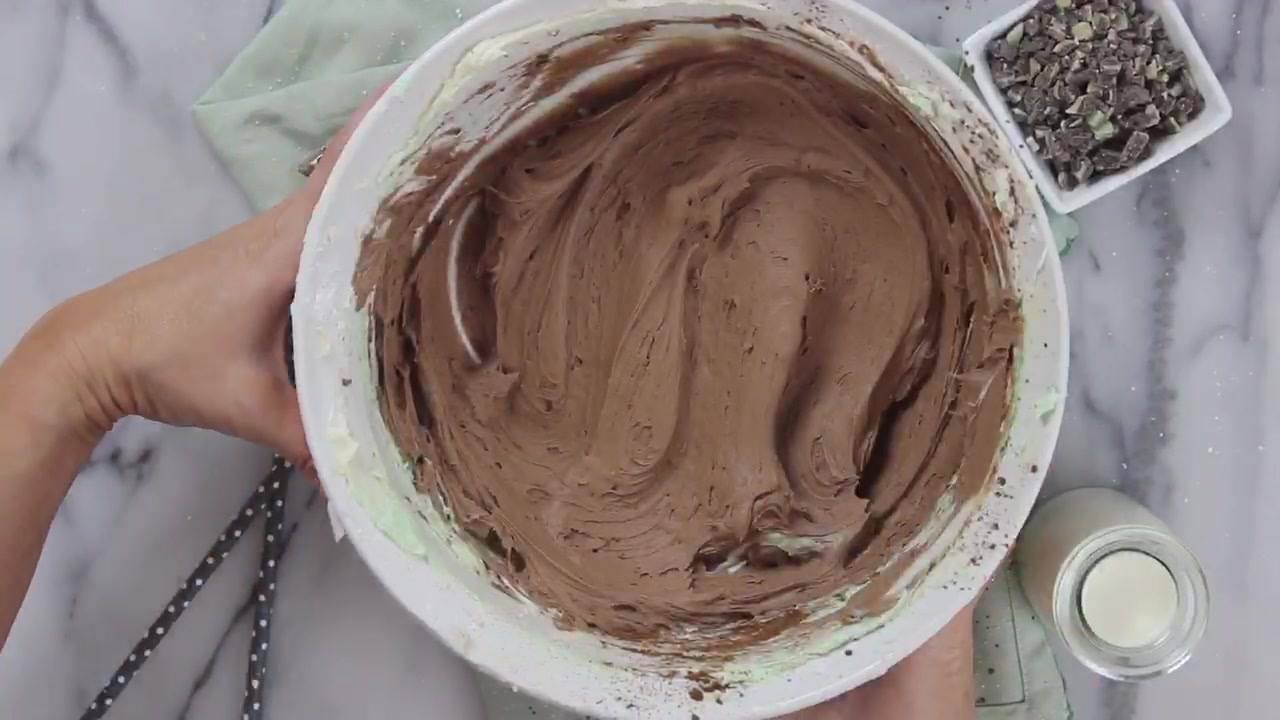
  4. Remove the mint frosting from the mixing bowl and set aside. Add the other half of the frosting back into the bowl of your stand mixer. Add in the cooled, melted chocolate and cocoa powder. Mix until fully incorporated.
  5. For the two-toned effect, I used this method from GoodLife Eats. You can also carefully layer the two colors into the piping bag, but I find Katie’s method to be much easier and cleaner.
  6. Pipe the frosting onto the cooled cupcakes and garnish with mini chocolate chips.

Watch the recipe video here:

Mint Chocolate Chip Cupcakes ?The perfect dessert for any celebration!https://www.mybakingaddiction.com/mint-chocolate-chip-cupcakes/

Posted by My Baking Addiction on Wednesday, May 1, 2019

Dessert

THE BEST CHOCOLATE CAKE RECIPE

THE BEST CHOCOLATE CAKE RECIPE
The Best Chocolate Cake combines cocoa and coffee to create a chocolate lover’s dream. The rich buttercream frosting makes it perfect! Keep reading to find out why coffee and buttermilk play important roles in this chocolate cake recipe.
Author:
Cuisine: American
Recipe type: Dessert
Ingredients
  • 2 cups sugar (400 grams)
  • 1¾ cups all-purpose flour (210 grams)
  • ¾ cup unsweetened cocoa powder (64 grams)
  • 2 tablespoons King Arthur Flour Black Cocoa, optional (11 grams)
  • 2 teaspoons baking soda (12 grams)
  • 1 teaspoon baking powder (4 grams)
  • 1 teaspoon kosher salt (6 grams)
  • 2 eggs
  • 1 cup buttermilk (240 mL)
  • 1 cup strong black coffee (I used Green Mountain Coffee’s Vermont Country Blend) (240 mL)
  • ½ cup vegetable oil (120 mL)
  • 2 teaspoons vanilla extract (4 grams)
  • Chocolate Buttercream Frosting
Instructions
  1. Heat oven to 350°F. Grease and flour two 9-inch round baking pans or one 13x9x2-inch baking pan. Set aside. In the bowl of a stand mixer fitted with the whisk attachment or in a large bowl with an electric mixer, combine the sugar, flour, cocoa(s), baking soda, baking powder and salt. Mix on low until dry ingredients are thoroughly combined.
  2. Add eggs, buttermilk, coffee, oil and vanilla. Beat on medium speed for about two minutes; the batter will be thin.
  3. Pour batter evenly into prepared pans.
  4. Bake in preheated oven for 30 to 35 minutes for round pans, 35 to 40 minutes for rectangular pan or until wooden toothpick inserted in center comes out clean.
  5. Cool 10 minutes; remove from pans to wire racks. Cool completely.
  6. Frost as desired. I used a simple and delicious Chocolate Buttercream Frosting from Savory Sweet Life. One batch was perfect for this chocolate layer cake.

Watch the recipe video here:

The Best Chocolate Cake with rich buttercream frosting! ?RECIPE: https://www.mybakingaddiction.com/the-best-chocolate-cake

Posted by My Baking Addiction on Tuesday, April 30, 2019

Dessert

LEMON CHEESECAKE IN A JAR

LEMON CHEESECAKE IN A JAR
Author:
Cuisine: American
Recipe type: Dessert
Ingredients
For the Crust
  • 12 Newtons Lemon Fruit Thins (see notes section for substitution)
  • 3 tablespoons unsalted butter, melted
For the Cheesecake
  • ½ cup plus granulated sugar
  • zest of one lemon
  • 2 packages cream cheese, 8 oz each; room temperature
  • 2 large eggs; room temperature
  • ¼ cup heavy cream
  • 1 teaspoon pure vanilla extract
For the Garnish
  • ½ cup homemade lemon curd
  • fresh whipped cream
  • fresh berries
Instructions
  1. Preheat the oven to 350°F.
  2. Place the Newtons Lemon Fruit Thins into the bowl of a food processor, attach the lid and pulse the machine until you have fine cookie crumbs.
  3. In a medium bowl, stir together cookie crumbs and melted butter. Evenly divide the crumbs between your individual serving, oven-safe dishes and lightly press the crumbs into the bottoms of each dish to form a crust layer. Place the prepared cheesecake crusts on a baking sheet and bake the crusts in preheated oven for 6 minutes, carefully remove them to a wire rack to cool.
  4. Begin to boil a large pot of water for the water bath.
  5. In the bowl of your stand mixer fitted with your paddle attachment, combine the sugar and lemon zest and mix until the sugar is moistened and fragrant. Add in the cream cheese and cream together until smooth. Add eggs, one at a time, fully incorporating each before adding the next. Make sure to scrape down the bowl in between each egg. Add heavy cream and vanilla and mix until smooth.
  6. Pour batter into serving dishes , directly onto the prebaked crusts, until about ¾ of the way full. Place jars into a larger pan with high sides and pour boiling water into the larger pan until halfway up the sides of the jars.
  7. Bake 25 to 30 minutes, the edges will appear to be set, but the center will still have a little jiggle to it.
  8. Carefully remove the cheesecake jars from the water bath and place on a cooling rack to cool completely. Once the cheesecakes are completely cooled, place them into the refrigerator for at least 5 hours. Before serving, top each cheesecake with lemon curd, fresh whipped cream and berries.

Watch the recipe video here:

Lemon Cheesecake in a Jar is the perfect summertime dessert! ?RECIPE HERE –> https://www.mybakingaddiction.com/lemon-cheesecake-in-a-jar/

Posted by My Baking Addiction on Wednesday, March 27, 2019

Breakfast

SLOW COOKER APPLE BUTTER

SLOW COOKER APPLE BUTTER
Slow Cooker Apple Butter will make your entire house smell like Autumn. It also makes a great gift for the holidays, or a hostess gift at Thanksgiving. YUMMO!
Author:
Cuisine: American
Recipe type: Breakfast
Ingredients
  • 6½ pounds apples - peeled, cored and sliced
  • 1 cup granulated sugar
  • 1 cup light brown sugar, lightly packed
  • 1 tablespoon ground cinnamon
  • ½ teaspoon freshly grated nutmeg
  • ¼ teaspoon ground cloves
  • ¼ teaspoon salt
  • 1 tablespoon pure vanilla extract
Instructions
  1. Place the apples in a slow cooker. In a medium bowl, combine sugars, cinnamon, nutmeg cloves and salt. Pour the mixture over the apples and mix well.
  2. Cook in slow cooker on low for about 10 hours, stirring occasionally, until the mixture is thickened and dark brown.
  3. Uncover, stir in vanilla and continue cooking uncovered on low for about 2 hours.
  4. Use an immersion blender to puree the apple butter until smooth.
  5. Spoon the mixture into sterile containers, cover and refrigerate for up to two weeks or freeze.
  6. Serve on breads, muffins, pork chops or just eat it with a spoon.
NOTES
  1. I used a combination of Granny Smith, Fuji and Honey Crisp apples for this recipe.
  2. The sweetness of your apples will depend on how much sugar you will need to add. Adjust according to your apples and preferences.
  3. I have not canned this recipe.

Watch the recipe video here:

Slow Cooker Apple Butter – one of my most popular recipes is now a video. You'll love this! PRINTABLE RECIPE: https://www.mybakingaddiction.com/crock-pot-slow-cooker-apple-butter-recipe/

Posted by My Baking Addiction on Thursday, March 28, 2019

Dessert

HOMEMADE CHERRY PIE FILLING

HOMEMADE CHERRY PIE FILLING
Homemade Cherry Pie Filling comes together in just a few minutes. Try a spoonful with your morning yogurt or spooned over a stack of fresh, crispy waffles for a delicious treat!
Author:
Cuisine: American
Recipe type: Dessert
Ingredients
  • 5 to 6 cups fresh pitted cherries, about 2½ to 3 pounds
  • ½ cup water
  • 2 tablespoons freshly squeezed lemon juice
  • ⅔ cup granulated sugar
  • 4 tablespoons cornstarch
  • ¼ teaspoon almond extract, optional
Instructions
  1. In a saucepan over medium heat, combine cherries, water, lemon juice, sugar and cornstarch.
  2. Bring to a boil; reduce heat to low and cook, stirring frequently, for about 10 minutes.
  3. If using, stir in almond extract. Cool slightly before using as a topping.
NOTES
  1. If using sour cherries, you will need to adjust the amount of sugar. I’d recommend starting about ¾ cup and working your way up if more sweetness is needed.
  2. Refrigerate leftover fresh cherry pie filling in a sealed container for up to 3 days.
  3. This recipe freezes beautifully.

Watch the recipe video here:

Homemade Cherry Pie Filling comes together in just a few minutes. Try a spoonful with your morning yogurt or spooned…

Posted by My Baking Addiction on Monday, March 18, 2019

Main dish

TURTLE FUDGE

TURTLE FUDGE
Turtle Fudge is rich, delicious and the perfect addition to any holiday dessert plate. The decadent layer of caramel and pecans makes it absolutely irresistible.
Author:
Cuisine: American
Recipe type: Main dish
Ingredients
For the Fudge Layer
  • ½ cup salted Challenge Butter
  • ¼ cup packed light brown sugar
  • ⅓ cup unsweetened cocoa powder
  • ¼ cup evaporated milk
  • 3 cups powdered sugar, sifted
For the Caramel Layer
  • 30 caramels, unwrapped
  • 2 tablespoons evaporated milk
  • pinch salt
  • 1 teaspoon pure vanilla extract
  • 1½ cups chopped toasted pecans
For the Topping
  • 1 cup dark chocolate chips
Instructions
  1. Line an 8-inch square baking pan with parchment or foil. Lightly spray the pan with nonstick cooking spray. Set aside.
  2. In a medium saucepan over medium heat, stir together butter, brown sugar, cocoa powder and ¼ cup of evaporated milk. Heat until mixture just comes to a boil. Remove from heat. Use a rubber spatula to stir in the powdered sugar until fully incorporated and mixture is smooth with no visible sugar lumps.
  3. Use a rubber spatula to spread the fudge into an even layer in the prepared pan.
  4. In another medium saucepan over low heat, melt caramels and 2 tablespoons of evaporated milk, stirring often until the mixture is completely melted and smooth. Remove from heat and stir in the salt, vanilla and pecans.
  5. Pour caramel mixture over the fudge layer and spread into an even layer.
  6. Bring about an inch of water to a simmer in a saucepan. Set a heatproof bowl onto the saucepan, making sure the water doesn’t touch the bottom of the heatproof bowl. Add chocolate chips to the bowl and stir occasionally. Carefully remove the bowl from the heat when there are just a few unmelted chips remaining. Stir until smooth.
  7. Use an off-set spatula to spread the melted chocolate over the caramel. Chill until firm.
NOTES:
To cut this fudge with ease, you’ll want to dip a knife in hot water for a few seconds, carefully wipe it dry with a clean towel and then get to cutting!

Watch the recipe video here:

TURTLE FUDGE is rich, delicious and absolutely irresistible.?RECIPE HERE >> https://www.mybakingaddiction.com/turtle-fudge/

Posted by My Baking Addiction on Saturday, February 2, 2019

Main dish

SIMPLE MICROWAVE LEMON CURD

SIMPLE MICROWAVE LEMON CURD
Microwave Lemon Curd couldn’t be easier, or more delicious. It’s perfect for topping yogurt, ice cream, cheesecake and so much more!
Author:
Cuisine: American
Recipe type: Main dish
Ingredients
  • 1 cup granulated sugar
  • 3 eggs (yolks and whites)
  • 1 cup fresh lemon juice (about 4-5 lemons)
  • zest of 3 lemons
  • ½ cup unsalted butter, melted
Instructions
  1. In a large microwave-safe bowl, whisk together the sugar and eggs until smooth and thoroughly combined. Whisk in lemon juice, lemon zest and melted butter.
  2. Cook in the microwave on full power for one minute intervals, stirring after each minute. This process will take about 3-5 minutes depending on the strength of your microwave. You will know the lemon curd is done cooking when it coats the back of a metal spoon.
  3. Remove from the microwave, push through a fine, mesh sieve and pour into sterile jar or container.
  4. Once the curd has cooled to room temperature, cover it with a lid and store it in the refrigerator for about 2 weeks. The curd will thicken as it cools.

Watch the recipe video here:

Simple Microwave Lemon Curd couldn’t be easier, or more delicious.???RECIPE HERE –> https://www.mybakingaddiction.com/fundamentals-simple-microwave-lemon-curd/

Posted by My Baking Addiction on Wednesday, January 23, 2019