Showing 38 Result(s)
Main dish

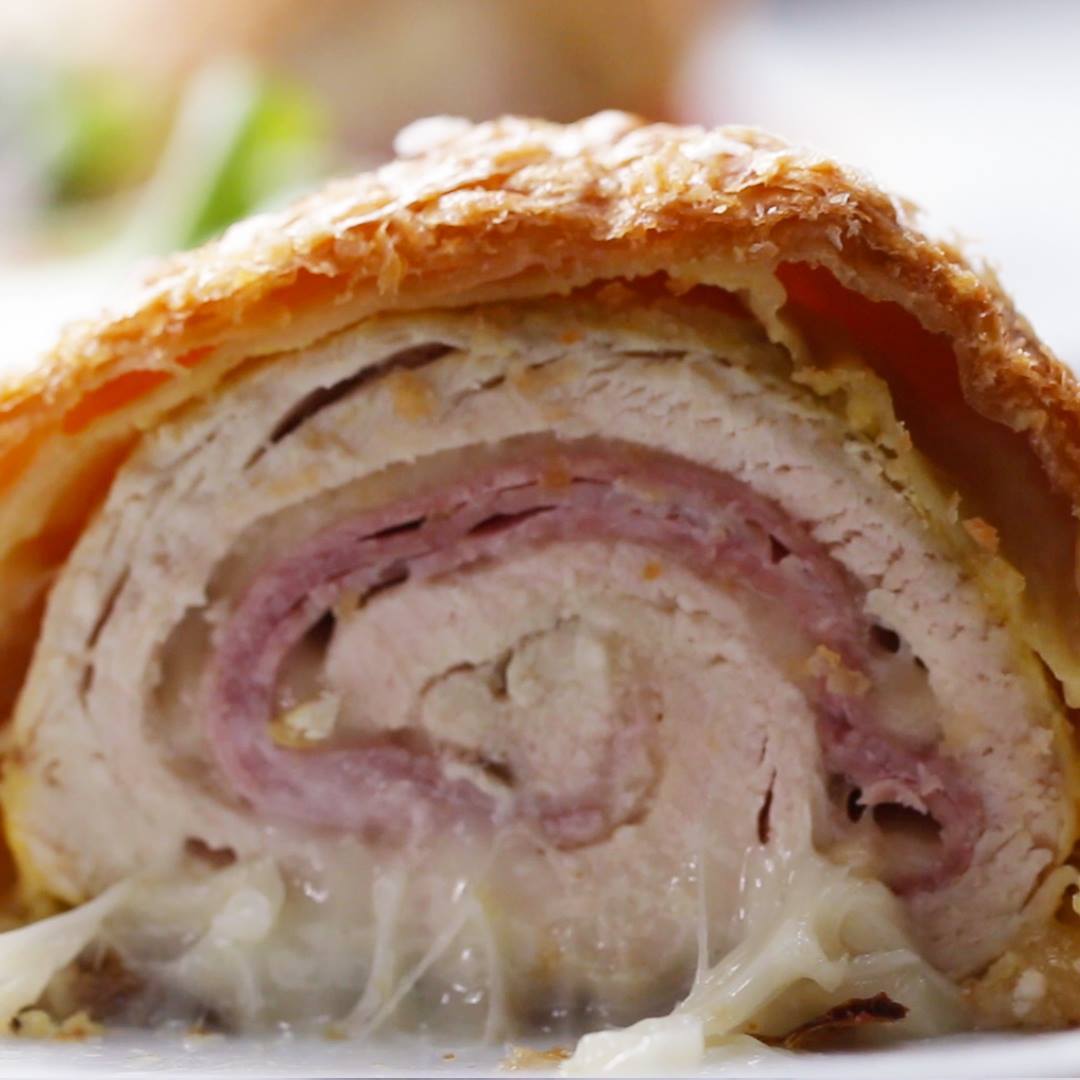
Chicken Cordon Bleu Bake

Chicken Cordon Bleu Bake
They look like little piggies.
Author:
Cuisine: American
Recipe type: Main dish
Ingredients
  • 4 boneless, skinless chicken breasts
  • 1 salt, to taste
  • 1 pepper, to taste
  • 1 tablespoon garlic powder
  • 1 tablespoon onion powder
  • 16 slices swiss cheese
  • ½ lb ham, sliced (225 g)
  • 2 sheets puff pastry, thawed if frozen
  • ¼ cup english mustard (60 g)
  • 1 egg, beaten
Instructions
  1. Sprinkle the chicken breasts with salt, pepper, garlic powder, and onion powder, tossing to coat evenly.
  2. On a cutting board, place a chicken breast between two sheets of plastic wrap and pound until about ½-inch (1 cm) thick with a meat mallet, rolling pin, or heavy pan.
  3. Remove the plastic wrap and place a layer of Swiss cheese, then ham, then one more layer of Swiss cheese.
  4. Evenly roll the chicken, and place onto a new sheet of plastic wrap.
  5. Wrap the chicken in the plastic wrap, twist the excess plastic, and roll the chicken while twisting the sides in to tighten and firm up the roll of chicken cordon bleu. Tie the excess and chill in the fridge to set for 30 minutes.
  6. Preheat oven to 400°F (200°C).
  7. Cut the puff pastry sheets in half and gently roll out width-wise.
  8. Brush the pastry with mustard and place the chicken on to the bottom edge of the pastry.
  9. Tightly roll the chicken in the puff pastry, pinching the seams together to close and folding the sides under the bottom.
  10. Place the chickens rolls on a greased baking sheet and brush all sides with egg wash.
  11. With a fork, score a decorative design onto the surface of the puff pastry.
  12. Sprinkle with salt.
  13. Bake for 35-40 minutes or until the puff pastry is a dark golden brown and the internal temperature of the chicken is 165°F (75°C).
  14. Enjoy!

Watch the recipe video here:

They look like little piggies.Get the recipe: https://tasty.co/recipe/chicken-cordon-bleu-bake

Posted by BuzzFeed Food on Wednesday, July 3, 2019
Main dish

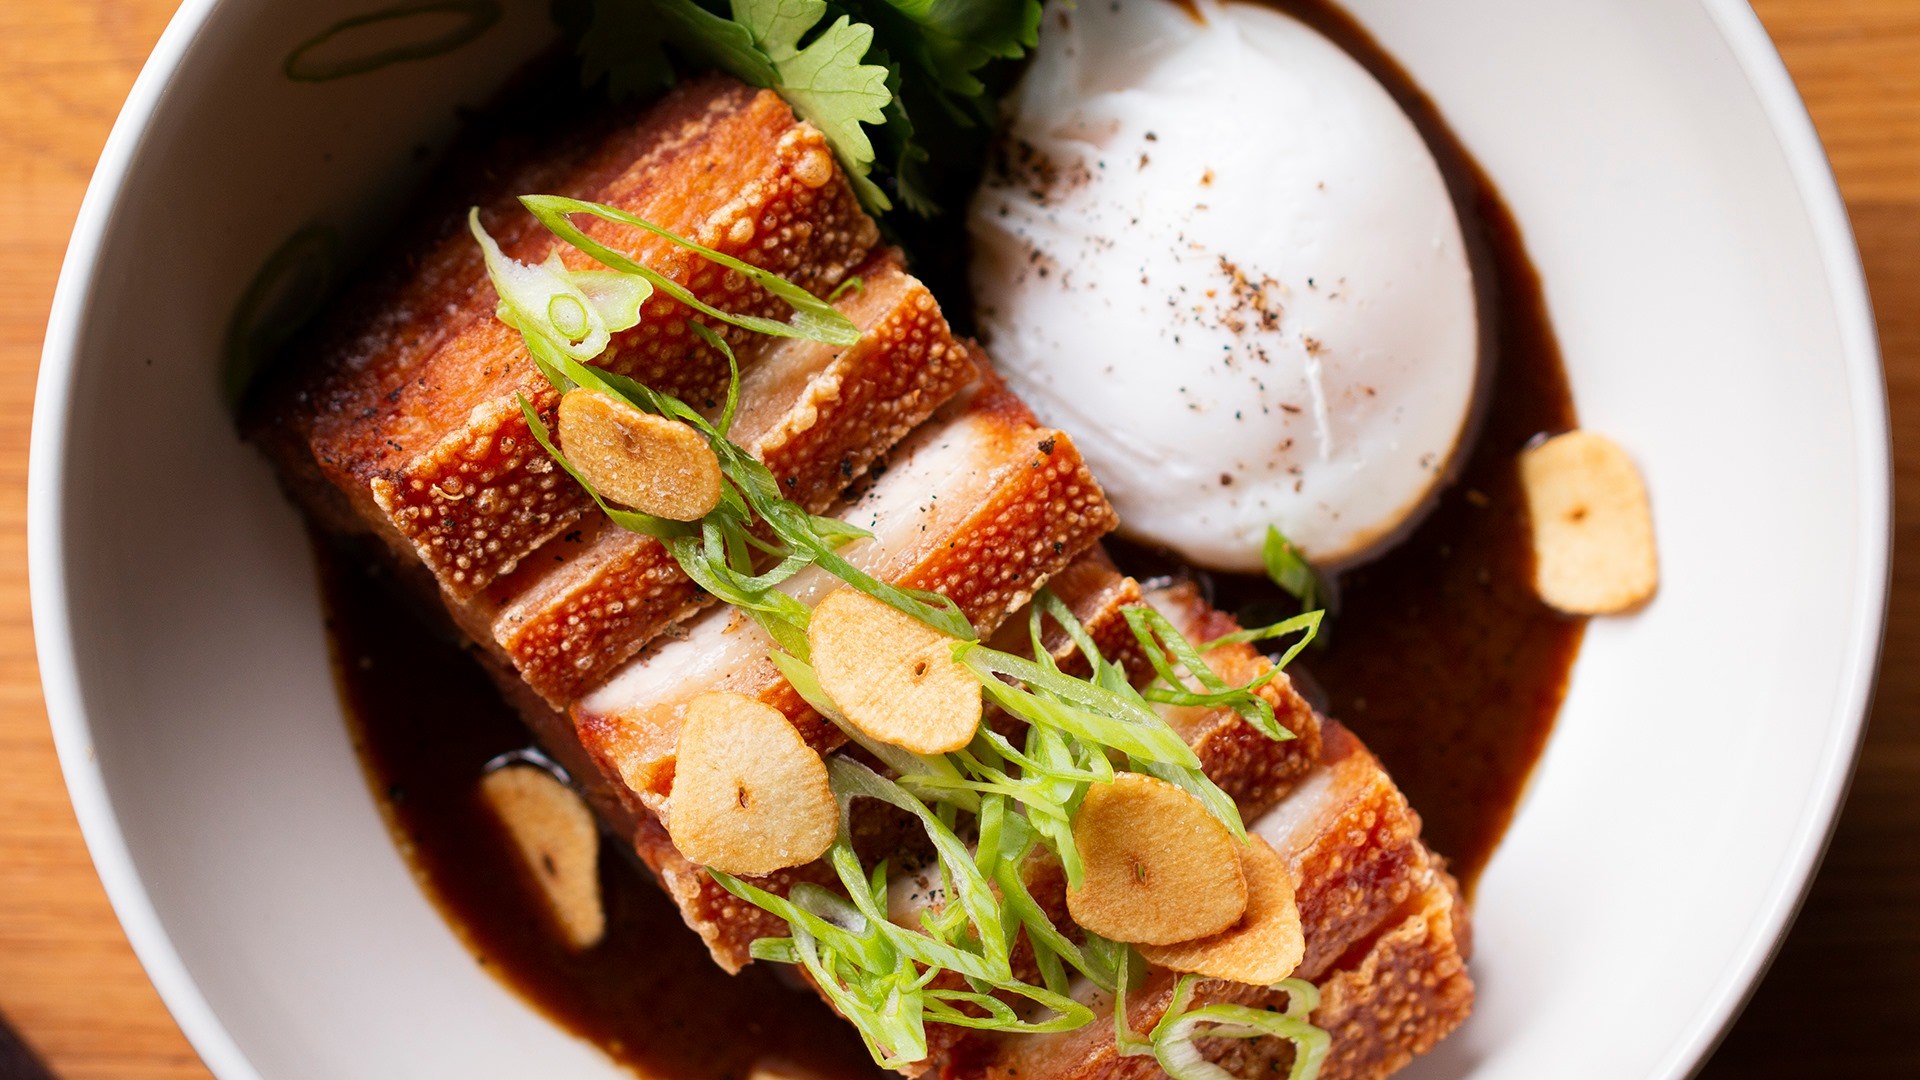
Braised Pork Belly Adobo By Chef Leah Cohen

Braised Pork Belly Adobo By Chef Leah Cohen
This pork belly adobo is AMAZING.
Author:
Cuisine: Japan
Recipe type: Main dish
Ingredients
BRAISED PORK BELLY
  • 1 ½ lb whole skin-on pork belly (680 g)
  • ¼ cup kosher salt (60 g)
  • 2 tablespoons sugar
  • 1 teaspoon ground black pepper
  • 1 pod star anise
  • 2 cloves garlic
  • 3 bay leaves
  • ⅓ cup soy sauce (80 mL)
  • 2 tablespoons apple cider vinegar
  • ½ gal water (1.9 kg)
ADOBO SAUCE
  • ⅓ cup water (80 mL)
  • 1 cup soy sauce (240 mL)
  • 2 tablespoons sugar
  • 2 tablespoons canola oil
  • ½ teaspoon bay leaf powder
  • 1 ½ teaspoons freshly ground black pepper
  • 3 cloves garlic
  • ⅓ cup coconut vinegar (80 mL)
  • ⅔ cup full-fat coconut milk (160 mL)
  • oil, for frying
ASSEMBLY
  • 4 poached eggs
  • 4 pinches ground szechuan peppercorn
  • 2 teaspoons scallion, thinly sliced, green parts only
  • 2 teaspoons garlic, fried
  • 4 teaspoons fresh cilantro
  • jasmine rice, cooked
Instructions
  1. Preheat the oven to 325˚F (160˚C).
  2. Cut the pork belly in half crosswise and place in a Dutch oven or large oven-safe pot.
  3. In a large bowl, combine the salt, sugar, pepper, star anise, garlic, bay leaves, soy sauce, apple cider vinegar, and water. Whisk until the salt and sugar have dissolved.
  4. Pour the braising liquid over the pork belly. Cover the pork belly with a sheet of parchment paper, then tightly cover the pot with a sheet of aluminum foil. Bake for 2-2½ hours, until the pork is tender but not falling apart.
  5. Remove the pork belly from the braising liquid and transfer to a wire rack set over a baking sheet. Chill uncovered in the refrigerator overnight.
  6. Make the adobo sauce: In a medium saucepan over low heat, combine the water, soy sauce, sugar, canola oil, bay leaf powder, black pepper, garlic, coconut vinegar, and coconut milk. Simmer for 15-20 minutes. Remove the sauce from the heat and reserve until ready to use.
  7. Remove the pork belly from the refrigerator and cut it into approximately 8 5-ounce (140 g) pieces. Score the pork by slicing through the fat cap, stopping once you reach the meat, in ½-inch (1 cm) sections.
  8. Fill a large pot halfway with the oil and heat until it reaches 375˚F (190˚C).
  9. Fry the pork belly until the skin is crispy and the center is hot, about 8 minutes.
  10. Slice the pork belly between the scores.
  11. To serve, ladle some adobo sauce on the bottom of a serving bowl. Arrange a portion of pork belly on top and garnish with a poached egg, Szechuan pepper, scallions, fried garlic, and cilantro. Serve with Jasmine rice alongside.
  12. Enjoy!

Watch the recipe video here:

This pork belly adobo is AMAZING.FULL RECIPE: https://tasty.co/recipe/braised-pork-belly-adobo-by-chef-leah-cohen

Posted by BuzzFeed Food on Tuesday, August 27, 2019

Main dish

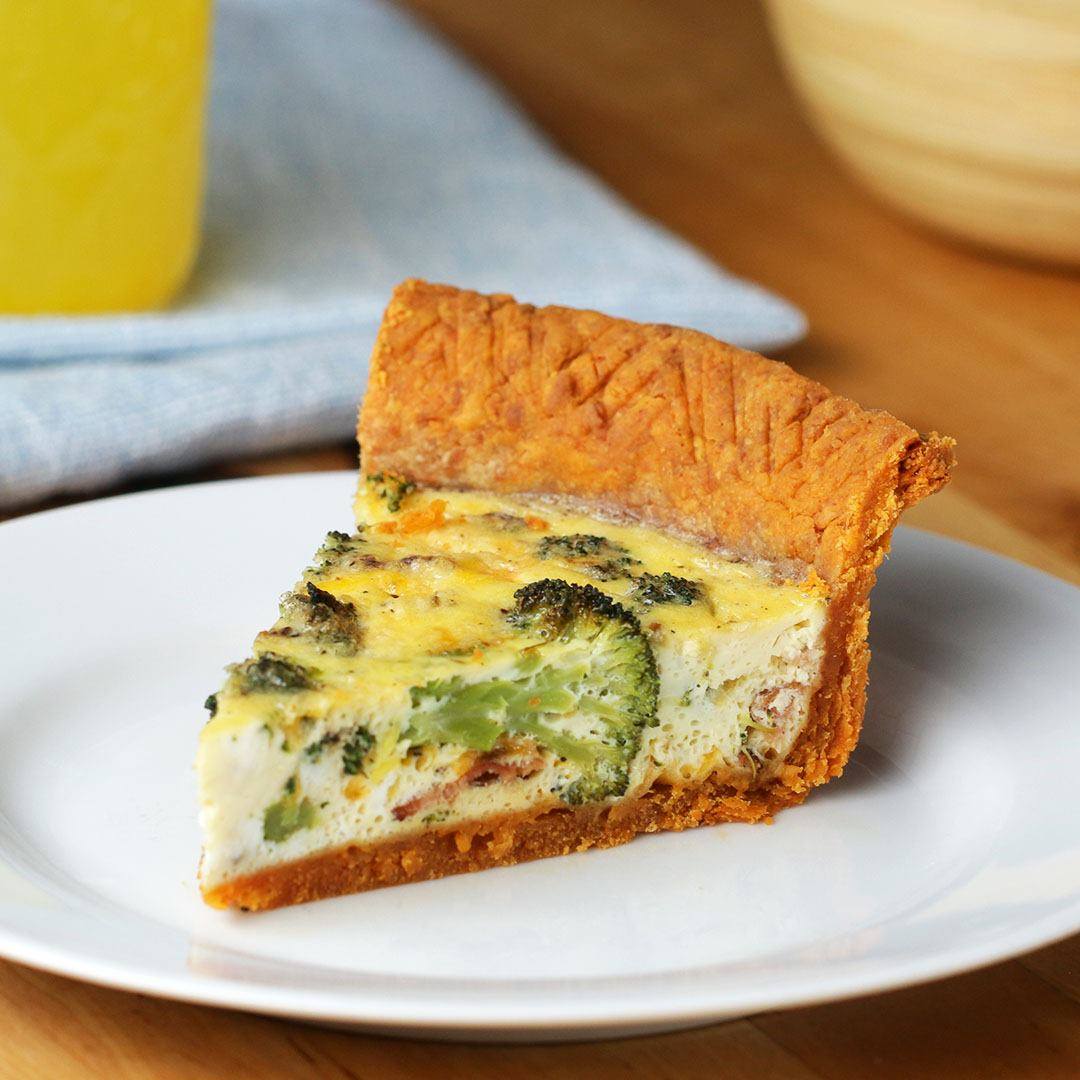
Cheddar-Crusted & Bacon Broccoli Quiche

Cheddar-Crusted & Bacon Broccoli Quiche
Saving this Cheddar-Crusted Bacon Broccoli Quiche for a perfect weekend brunch ?
Author:
Cuisine: American
Recipe type: Main dish
Ingredients
  • 2 ½ cups shredded cheddar cheese, divided (250 g)
  • 1 cup unsalted butter, 2 sticks, room temperature (230 g)
  • 2 cups all-purpose flour, plus more for dusting (250 g)
  • 1 tablespoon paprika
  • 1 tablespoon garlic powder
  • 2 ½ teaspoons salt, divided
  • 5 tablespoons ice water
  • 4 strips bacon
  • 2 cups small broccoli floret (300 g)
  • 6 large eggs
  • 1 cup milk (240 mL)
  • ½ teaspoon pepper
SPECIAL EQUIPMENT
  • pie weights, coffee beans, or dried beans
Instructions
  1. Preheat the oven to 350˚F (180˚C).
  2. Add 2 cups (200 g) of cheddar cheese and the butter to a large bowl. Mix to combine with an electric hand mixer or stand mixer.
  3. Add the flour, paprika, garlic powder, and 2 teaspoons salt and mix well. Add 3 tablespoons of ice water and mix. Add the remaining ice water 1 tablespoon at a time. The dough should hold together when pinched, but crumble apart if you break it up in your hand. If it seems too dry, add a bit more ice water.
  4. Transfer the dough to a clean surface and knead with your hands until it comes together. Shape the dough into a disc, then wrap in plastic wrap and chill in the refrigerator for 30 minutes.
  5. Lightly flour a clean surface and roll out the dough into a circle about ⅛ inch (8 mm) thick. Carefully transfer the crust to a 9½-inch (24-cm) glass pie dish.
  6. Trim the edges (save the trimmings to make crackers!). Poke holes in the bottom of the crust with a fork, then use the tines to crimp the edges. Line the dough with parchment paper and fill with pie weights.
  7. Bake for 30 minutes, until the edges are crisp.
  8. While the crust is baking, prepare the fillings. In a large skillet over medium-high heat, cook the bacon until crisp, 5-7 minutes. Using tongs, remove the bacon from the skillet and let drain on paper towels until cool enough to handle.
  9. Add the broccoli to the skillet and cook until lightly browned, about 5 minutes. Remove the pan from the heat.
  10. Chop the bacon.
  11. Remove the pie weights from the crust, then add the broccoli and chopped bacon to the center. Sprinkle with the remaining shredded cheddar cheese.
  12. In a medium bowl, lightly beat the eggs. Add the milk, remaining ½ teaspoon salt, and the pepper. Whisk to combine.
  13. Pour the egg mixture over the fillings in the crust.
  14. Bake for 35-40 minutes, or until the eggs are set and the top is lightly browned. Cover the edges with tinfoil if they are starting to burn.
  15. Let the quiche cool for 15 minutes before slicing and serving.
  16. Enjoy!

Watch the recipe video here:

Saving this Cheddar-Crusted Bacon Broccoli Quiche for a perfect weekend brunch ?Get The Recipe: https://tasty.co/recipe/cheddar-crusted-bacon-broccoli-quiche

Posted by BuzzFeed Food on Sunday, August 25, 2019

Cake Dessert

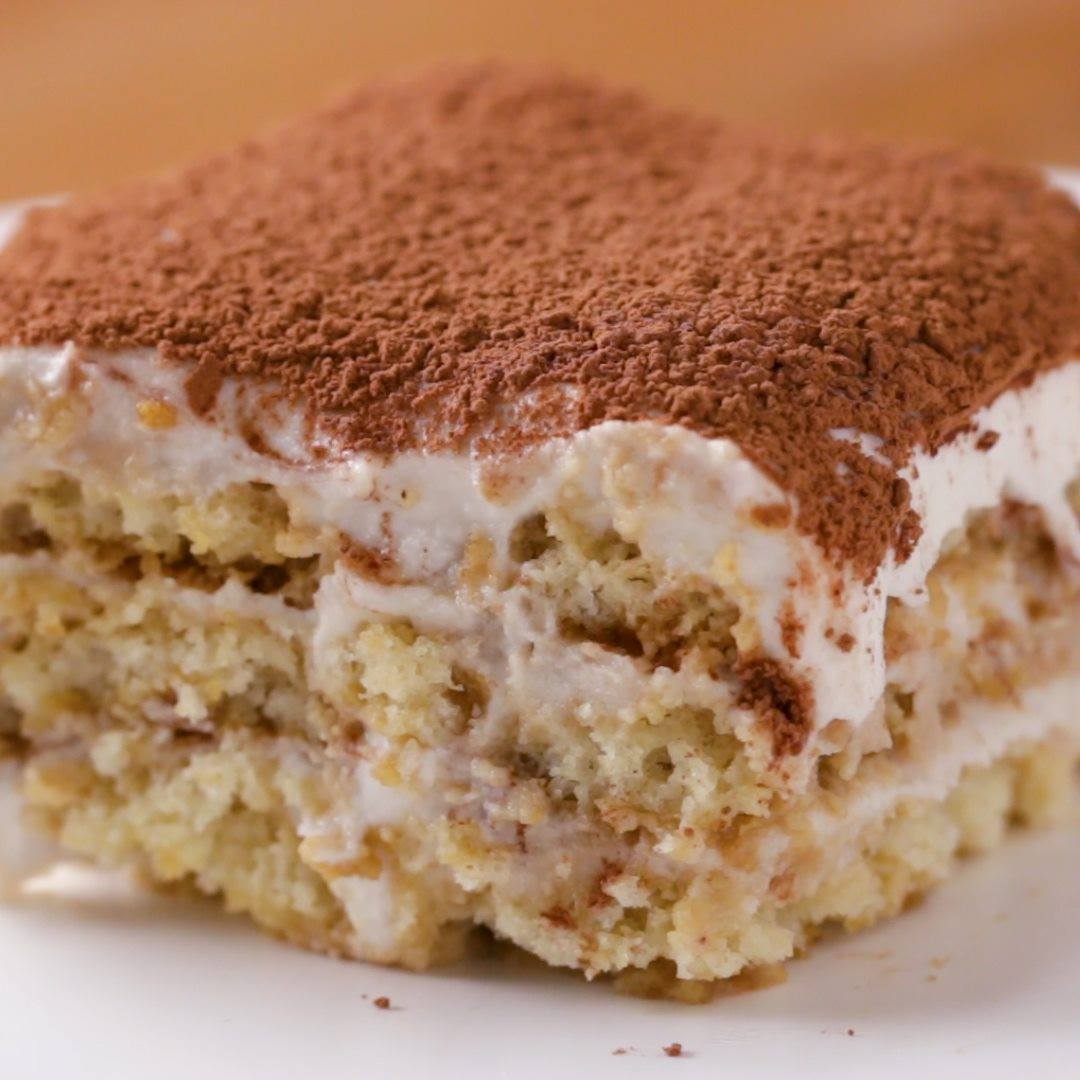
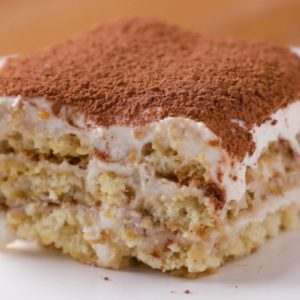
Vegan Tiramisu

Vegan Tiramisu
Wow your friends with this decadent vegan tiramisu. With velvety creamy layers and rich espresso you won’t believe this indulgent dessert is vegan.
Author:
Cuisine: American
Recipe type: Dessert
Ingredients
LADYFINGERS
  • 1 ½ cups all-purpose flour (185 g)
  • 1 ½ teaspoons cornstarch
  • 1 teaspoon baking powder
  • ½ teaspoon baking soda
  • ¼ teaspoon kosher salt
  • 6 tablespoons unsalted vegan butter, softened
  • ¾ cup vegan sugar (150 g)
  • ¼ cup aquafaba, liquid from can of chickpeas (60 mL)
  • 1 teaspoon vanilla extract
  • ¼ cup unsweetened almond milk (60 mL)
  • nonstick cooking spray, for greasing
VEGAN MASCARPONE
  • 1 ½ cups raw cashews (195 g)
  • boiling water, for soaking cashews
  • ½ cup unsweetened almond milk (120 mL)
  • ⅓ cup maple syrup (115 g)
  • ⅓ cup unrefined coconut oil, melted (65 g)
  • ¼ teaspoon kosher salt
  • ½ teaspoon vanilla extract
  • 1 teaspoon lemon juice
  • 25 oz full-fat coconut milk, chilled (740 mL)
  • 2 tablespoons powdered sugar
SOAKING LIQUID
  • 6 fl oz espresso, room teperature (175 mL)
  • ¾ cup water (180 mL)
  • 3 tablespoons dark rum
  • cocoa powder, for dusting
Instructions
  1. Make the ladyfingers: In a medium bowl, sift together the flour, cornstarch, baking powder, baking soda, and salt. Set aside.
  2. In a separate medium bowl, cream together the butter and sugar with an electric hand mixer until fully combined. Add the aquafaba and vanilla and beat for 2-3 minutes, until light and fluffy. The mixture may look broken, but will come together once the dry ingredients are added.
  3. Add ½ of the flour mixture to the wet ingredients and beat until just combined. Scrape down the sides of the bowl and add the almond milk. Beat until combined. Add the rest of the dry ingredients and beat until smooth.
  4. Line 2 baking sheets with parchment paper and grease with nonstick spray.
  5. Transfer the batter to a piping bag fitted with a ½-inch round tip or a zip-top bag with a corner snipped off. Pipe the ladyfingers onto the prepared baking sheets, spacing at least 1½ inches apart. Each cookie should be 2¼ inches long and ¾ inch wide. You should have 50-55 total.
  6. Chill the piped cookies in the refrigerator for 30 minutes.
  7. Preheat the oven to 350˚F (180˚C).
  8. Bake the ladyfingers for 13-15 minutes, until the edges are light brown. Let cool completely.
  9. Make the vegan mascarpone: Add the cashews to a medium heatproof bowl and pour in enough boiling water to cover by 1 inch (2.5 cm). Let soak until slightly plumped and softened, about 10 minutes. Drain.
  10. Add the cashews, almond milk, maple syrup, coconut oil, salt, vanilla, and lemon juice to a blender. Blend until smooth. Set aside.
  11. Scoop the solid layer from the cans of chilled coconut milk into a large bowl. Discard the liquid or save for another use. Add the powdered sugar and beat with an electric hand mixer until light and fluffy, 2-3 minutes.
  12. Using a rubber spatula, fold the blended cashew mixture into the whipped coconut milk.
  13. Make the soaking liquid: In a shallow bowl, combine the espresso, water, and rum. Alternatively, replace the espresso and water with 1½ cups (360 ml) of brewed coffee cooled to room temperature.
  14. Assemble the tiramisu: Spread about a ½ cup (65 grams) of the mascarpone in the bottom of an 8-inch square baking dish. Quickly dip a ladyfinger in the espresso mixture and place on top of the cream. Repeat with more ladyfingers to cover the cream, 16-18 total. Carefully spread about 1 cup (130 grams) of the mascarpone over the ladyfingers, then add another layer of ladyfingers, another layer of cream, and a final layer of the remaining ladyfingers. Spread the remaining mascarpone cream on top.
  15. Cover the baking dish with plastic wrap and refrigerate for at least 2 hours, or overnight.
  16. Before serving, uncover the tiramisu and lightly dust the top with cocoa powder.
  17. Slice into 9 portions and serve.
  18. Enjoy!

Watch the recipe video here:

With this delicious vegan tiramisu, dreams really DO come true ?Get the recipe: https://tasty.co/recipe/vegan-tiramisu

Posted by BuzzFeed Food on Sunday, August 18, 2019

Main dish

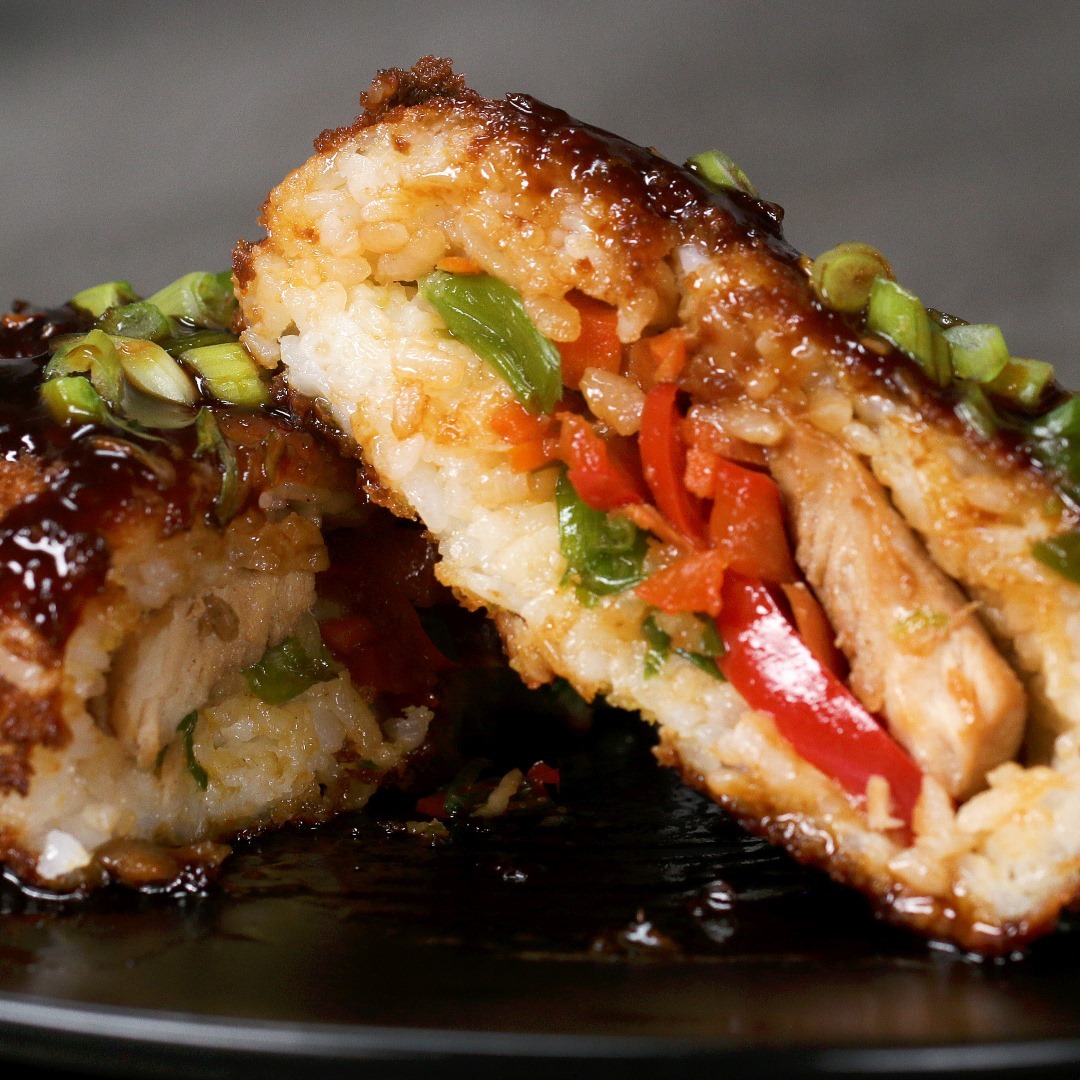
Crispy Chicken Teriyaki Rice Balls

Crispy Chicken Teriyaki Rice Balls
These crispy chicken teriyaki rice balls are seriously delicious! ??
Author:
Cuisine: American
Recipe type: Main dish
Ingredients
  • 1 lb boneless, skinless chicken breast (455 g)
  • salt, to taste
  • white pepper, to taste
  • 2 tablespoons water
  • 1 ½ teaspoons cornstarch
  • ¼ cup soy sauce (60 g)
  • 2 tablespoons brown sugar
  • 1 teaspoon fresh ginger, minced
  • 1 teaspoon garlic, minced
  • 1 tablespoon honey
  • 1 teaspoon sesame oil
  • 1 tablespoon mirin
  • 2 tablespoons cooking oil
  • 1 cup bell pepper, julienned (100 g)
  • 1 cup carrot, julienned (120 g)
  • 4 cups short grain rice, cooked (800 g)
  • 3 eggs, beaten
  • 2 cups panko breadcrumbs (100 g)
  • 1 cup scallion, thinly sliced (100 g)
Instructions
  1. In a large measuring cup, combine water and cornstarch. Stir until combined and add soy sauce, brown sugar, ginger, garlic, honey, sesame oil, and mirin. Mix well.
  2. Season sliced chicken breast with salt and pepper, then pour ¼ cup (60 ml) of the sauce over the sliced chicken just until covered, and set aside. Mix the sauce with the sliced chicken, cover, and marinate in the refrigerator for at least 30 minutes.
  3. In a large skillet over medium-high heat, pour the rest of the sauce and stir occasionally as it comes to a boil. Once boiling, reduce heat to low and simmer for 10 minutes, or until the sauce has thickened. Set aside in a bowl.
  4. In the same skillet, add 1 tablespoon cooking oil and raise heat back to medium-high. Place sliced chicken pieces in the pan and cook for 3 minutes, flip, and cook an additional 3 minutes. Pour 1 tablespoon of the reduced sauce over the chicken and stir. Remove from the pan and set aside.
  5. Add the remaining cooking oil into the skillet and add the julienned vegetables. Season with salt and white pepper, and cook 3-4 minutes or until vegetables have softened. Add back the chicken and gradually add just enough sauce to coat the chicken and vegetables.
  6. Take ⅓ cup (65 g) of cooked rice and flatten out on a piece of plastic wrap. Layer the cooked chicken and vegetables in the center of the rice and wrap the rice around the fillings. Form into a square shape and repeat with the remainder of the rice and filling. Chill rice balls in the refrigerator for 30 minutes.
  7. Dip the rice ball in beaten eggs, then coat with panko. Shake off any excess bread crumbs.
  8. Heat ½ inch (1 cm) oil in a skillet to 350˚F (180˚C) and fry for 3 minutes on each side or until golden and crispy. Move to a cooling rack, and season with salt.
  9. Cut in half and serve with the remaining sauce for dipping.
  10. Enjoy!

Watch the recipe video here:

These crispy chicken teriyaki rice balls are seriously delicious! ??FULL RECIPE: https://tasty.co/recipe/crispy-chicken-teriyaki-rice-balls

Posted by BuzzFeed Food on Wednesday, August 14, 2019

Main dish

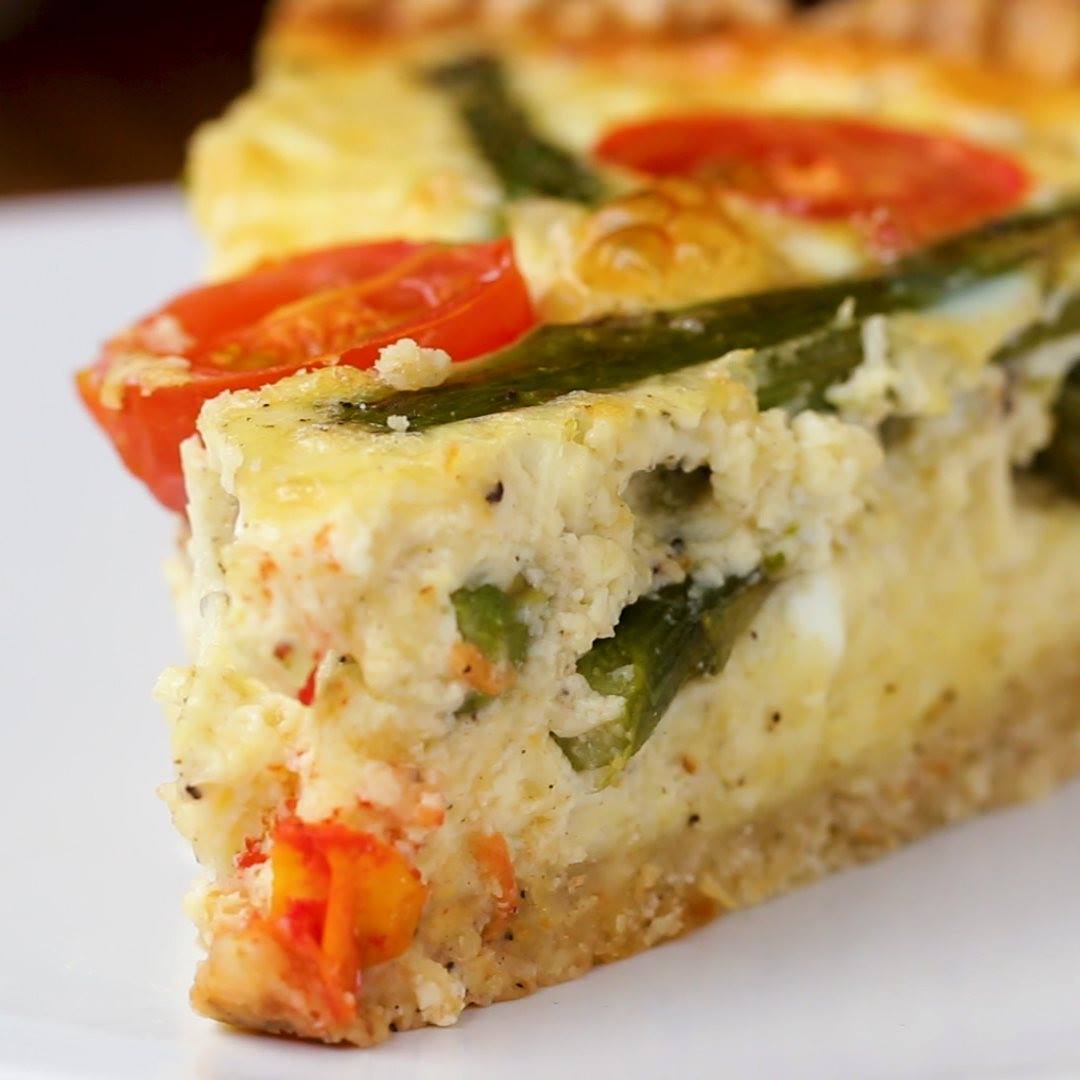
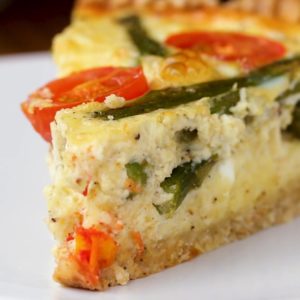
Easy Cast-Iron Cheesy Asparagus Quiche

Easy Cast-Iron Cheesy Asparagus Quiche
This cast-iron asparagus quiche recipe is a perfect easy, yet impressive breakfast. You’ll sauté the asparagus, make the crust, and assemble and bake quiche all in one pan. It’s yummy in your tummy and easy on the dishes.
Author:
Cuisine: American
Recipe type: Main dish
Ingredients
  • olive oil, to taste
  • 1 bunch asparagus, trimmed and chopped into 3-in (7 cm) pieces
  • 2 teaspoons kosher salt, divided
  • 2 teaspoons freshly ground black pepper, divided
  • 8 tablespoons unsalted butter
  • 2 cups all-purpose flour (250 g)
  • ½ teaspoon baking powder
  • ¾ cup grated parmesan cheese, divided (80 g)
  • ¼ cup cold water (60 mL)
  • 6 large eggs
  • ⅓ cup sour cream (75 g)
  • ⅔ cup half & half (160 mL)
  • 1 ½ cups shredded cheddar cheese (150 g)
  • 1 cup cherry tomato, halved (200 g)
Instructions
  1. Preheat the oven to 375˚F (190˚C).
  2. Heat a drizzle of olive oil in a 10-inch (25 cm) cast-iron skillet over medium heat. Add the asparagus, ½ teaspoon salt, and ½ teaspoon pepper. Sauté for 5-6 minutes, until the asparagus is bright green but still firm. Turn off the heat. Transfer the asparagus to a bowl and set aside to cool.
  3. Add the butter to the hot skillet and let it melt from the residual heat. Allow the pan to cool with the butter in it.
  4. Once the cast iron is mostly cooled (warm to the touch is okay), add the flour, ½ teaspoon salt, 1 teaspoon black pepper, baking powder, and ½ cup Parmesan cheese, stirring with a spatula until the texture is sandy. Add the water and stir to combine. Using your hands, press the dough evenly over the bottom and about 2 inches (5 cm) up the sides of the pan. Use a fork to crimp the edges of the dough against the side of the pan. Set aside.
  5. Add the eggs and sour cream to a medium bowl. Whisk to combine. Add the half-and-half, remaining teaspoon of salt, and remaining ½ teaspoon pepper and whisk until fully incorporated.
  6. Scatter the cheddar cheese evenly over the crust. Arrange the asparagus over the cheese. Sprinkle the remaining ¼ cup (25 G) Parmesan evenly over the asparagus. Slowly pour the egg mixture into the skillet. Do not overfill. Top with the cherry tomatoes, cut sides up.
  7. Carefully transfer the quiche to the oven and bake for 45-50 minutes, until the center is set and the edges are golden. Let cool for at least 30 minutes before serving.
  8. Serve the quiche straight from the pan. Note: Use a spatula to cut, instead of a knife, so as not to scratch your pan.
  9. Enjoy!

Watch the recipe video here:

This cast-iron asparagus quiche recipe is a perfect easy, yet impressive breakfast ?Get the recipe: https://tasty.co/recipe/easy-cast-iron-cheesy-asparagus-quiche

Posted by BuzzFeed Food on Monday, August 12, 2019

Main dish

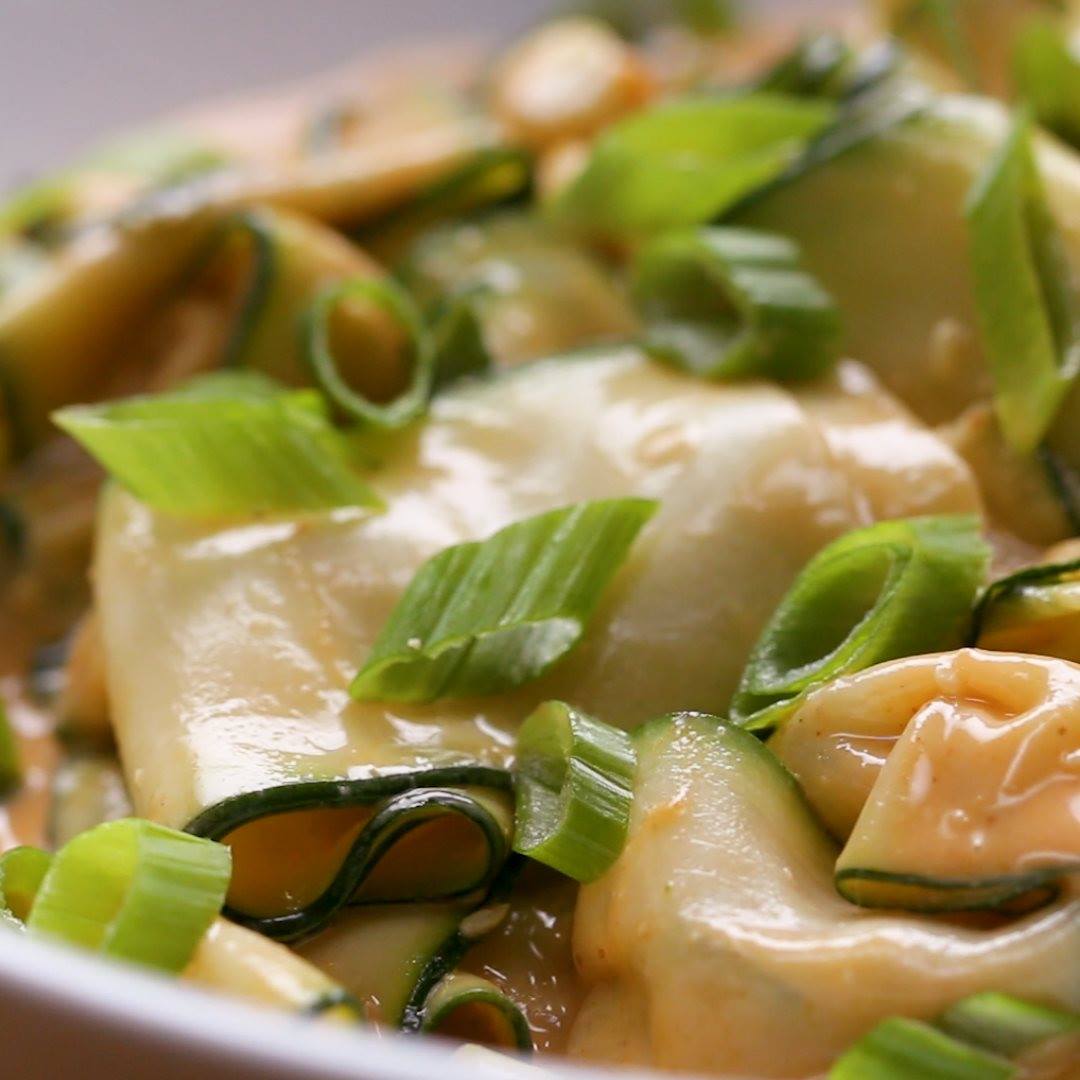
5-Ingredient Zucchini Noodles With Spicy Peanut Sauce

5-Ingredient Zucchini Noodles With Spicy Peanut Sauce
Author:
Cuisine: American
Recipe type: Main dish
Ingredients
  • ½ cup peanut butter, chunky (120 g)
  • 1 tablespoon siracha, to taste, plus more for serving
  • ½ lime, juiced
  • ¼ cup water (60 mL)
  • 4 medium zucchinis, or 2 large
  • 4 green onions, chopped, light and dark parts divided
  • kosher salt, to taste
Instructions
  1. In a large bowl, combine the peanut butter, Sriracha, lime juice, and water. Use a fork or whisk to mix until smooth.
  2. Using a vegetable peeler, shave the zucchini into wide ribbons. You should have about 8 cups (990 grams) of zucchini ribbons total.
  3. Add the zucchini ribbons and light parts of the green onions to the sauce and toss until coated. The sauce may seem thick at first, but the zucchini will release some water and thin the sauce a bit. Season with salt to taste.
  4. Divide the noodles between serving bowls. Garnish with the dark scallion parts.
  5. Enjoy!

Watch the recipe video here:

You only need 5 ingredients to make this savory peanut zucchini noodle dish!Recipe: https://tasty.co/recipe/5-ingredient-zucchini-noodles-with-spicy-peanut-sauce

Posted by BuzzFeed Food on Monday, August 12, 2019

Dessert

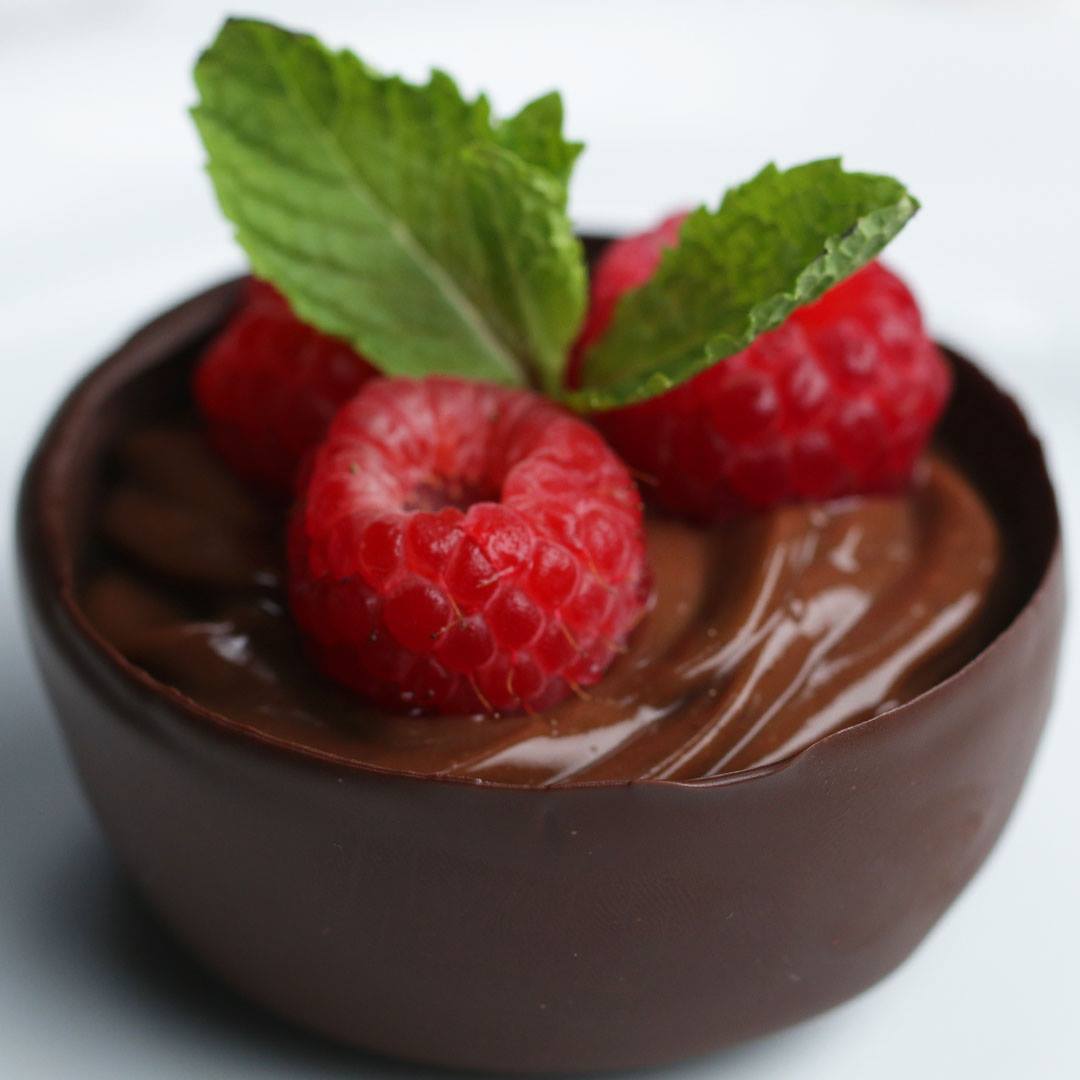
Easy Ice Cube Chocolate Cups

Easy Ice Cube Chocolate Cups
Author:
Cuisine: American
Recipe type: Dessert
Ingredients
  • water
  • 2 oz cream cheese, softened (55 g)
  • ¼ cup peanut butter (60 g)
  • 3 ½ teaspoons whole milk, divided
  • ½ teaspoon vanilla extract, divided
  • ¼ cup powdered sugar, plus 2 tablespoons, divided (40 g)
  • 1 pinch kosher salt
  • 1 ¼ cups whipped cream, divided (75 g)
  • 14 chocolate sandwich cookies, divided
  • 2.5 oz pudding mix, chocolate, 1 package (70 g)
  • 1 ½ cups whole milk, cold (360 mL)
  • 2 cups milk chocolate, melted (340 g)
  • 2 cups white chocolate, melted (340 g)
  • 2 cups dark chocolate, melted (340 g)
GARNISH
  • ¼ cup chopped nuts (30 g)
  • 4 mini peanut butter cups
  • 12 raspberries
  • fresh mint leaf
SPECIAL EQUIPMENT
  • 12 popsicle sticks
Instructions
  1. Please be aware, you have to place the ice cube right in the chocolate as soon as you're able to remove it from its slot otherwise it will start to melt and the chocolate will not adhere.
  2. Fill a 12-cup muffin tin with water.
  3. Place a popsicle stick into each muffin cup.
  4. Freeze until solid.
  5. In a medium bowl, whisk together the cream cheese, peanut butter, 1½ teaspoons milk, ¼ teaspoon vanilla, ¼ cup powdered sugar, and salt until smooth.
  6. Fold in ¼ cup of whipped cream with spatula. Set aside.
  7. Separate the cream from 12 chocolate sandwich cookies into a separate medium bowl.
  8. Add the remaining 2 tablespoons powdered sugar, remaining 2 teaspoons milk, and remaining ¼ teaspoon vanilla to the bowl with the cream filling. Whisk until well-combined.
  9. Fold in the remaining cup of whipped cream with a spatula. Set aside.
  10. Transfer the cookies to a zip-top bag and break into crumbs with a rolling pin. Set aside.
  11. In a small bowl, combine the chocolate pudding mix and cold milk. Whisk for 2 minutes, then let sit for 3 minutes, until the pudding thickens.
  12. Remove the muffin tin from the freezer. Give the ice a minute to melt down just enough to remove each ice mold from the muffin cups.
  13. Dip 4 of the ice discs into the melted milk chocolate, making sure not to fully submerge the ice disc. Set the chocolate-dipped ice discs onto a parchment-lined baking sheet or plate. Dip 4 of the ice discs in the melted white chocolate, and the remaining 4 discs in the melted dark chocolate.
  14. Once the chocolate has set, give the ice discs a minute to melt down slightly. Wiggle the ice disc out of the chocolate to reveal hollow chocolate cups.
  15. Pipe the peanut butter mousse into the milk chocolate cups. Top with chopped nuts and a mini peanut butter cup.
  16. Sprinkle chocolate sandwich cookie crumbs on the bottom of the white chocolate cups. Pipe the cookie cream filling on top of the crumbs. Garnish with more cookie crumbs and half of a chocolate sandwich cookie.
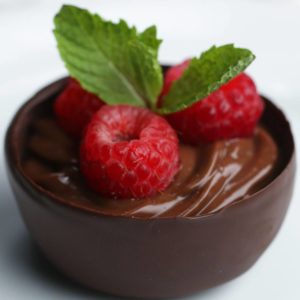
  17. Pipe the chocolate pudding mixture into the dark chocolate cups. Top each one with 3 raspberries and fresh mint leaves.
  18. Enjoy!

Watch the recipe video here:

These easy chocolate cups are like magic! ? Get the recipe: https://tasty.co/recipe/easy-ice-cube-chocolate-cups

Posted by BuzzFeed Food on Sunday, August 4, 2019

Main dish

Bacon-wrapped Mashed Potato-stuffed Meatloaf

Bacon-wrapped Mashed Potato-stuffed Meatloaf
Bacon-wrapped Mashed Potato-stuffed Meatloaf recipe.
Author:
Cuisine: American
Recipe type: Main dish
Ingredients
  • 2 lb ground beef (900 g)
  • 1 cup onion, diced, sauteed (150 g)
  • 3 cloves garlic, minced, sauteed
  • 1 ½ cups grated parmesan cheese, divided (165 g)
  • 2 eggs
  • 1 cup panko breadcrumbs (50 g)
  • 2 teaspoons salt
  • 1 ½ teaspoons pepper
  • 2 teaspoons worcestershire sauce
  • ½ cup milk (120 mL)
  • ½ cup fresh parsley, finely chopped (15 g)
GLAZE
  • 1 ½ cups ketchup (360 mL)
  • ½ cup brown sugar (110 g)
  • 2 teaspoons mustard powder
  • 2 teaspoons onion powder
  • 2 teaspoons paprika
  • ¼ cup tomato paste (55 g)
MASHED POTATOES
  • 1 lb yukon gold potato, peeled, chopped, cooked (455 g)
  • 2 tablespoons butter
  • 1 teaspoon salt
  • ½ teaspoon pepper
  • 1 cup milk (240 mL)
  • 28 slices bacon, slices
Instructions
  1. Preheat oven to 350˚F (180˚C).
  2. In a large bowl, mix together beef, cooked onions and garlic, Parmesan, eggs, panko, salt, pepper, Worcestershire, milk and parsley. Set aside.
  3. In another bowl, make the glaze by mixing ketchup, brown sugar, mustard powder, onion powder, paprika, and tomato paste. Reserve half of the glaze in a separate bowl for after the meatloaf is cooked. Set aside.
  4. In a large bowl, mash cooked potatoes, butter, salt, pepper, milk and parmesan to desired consistency. Set aside.
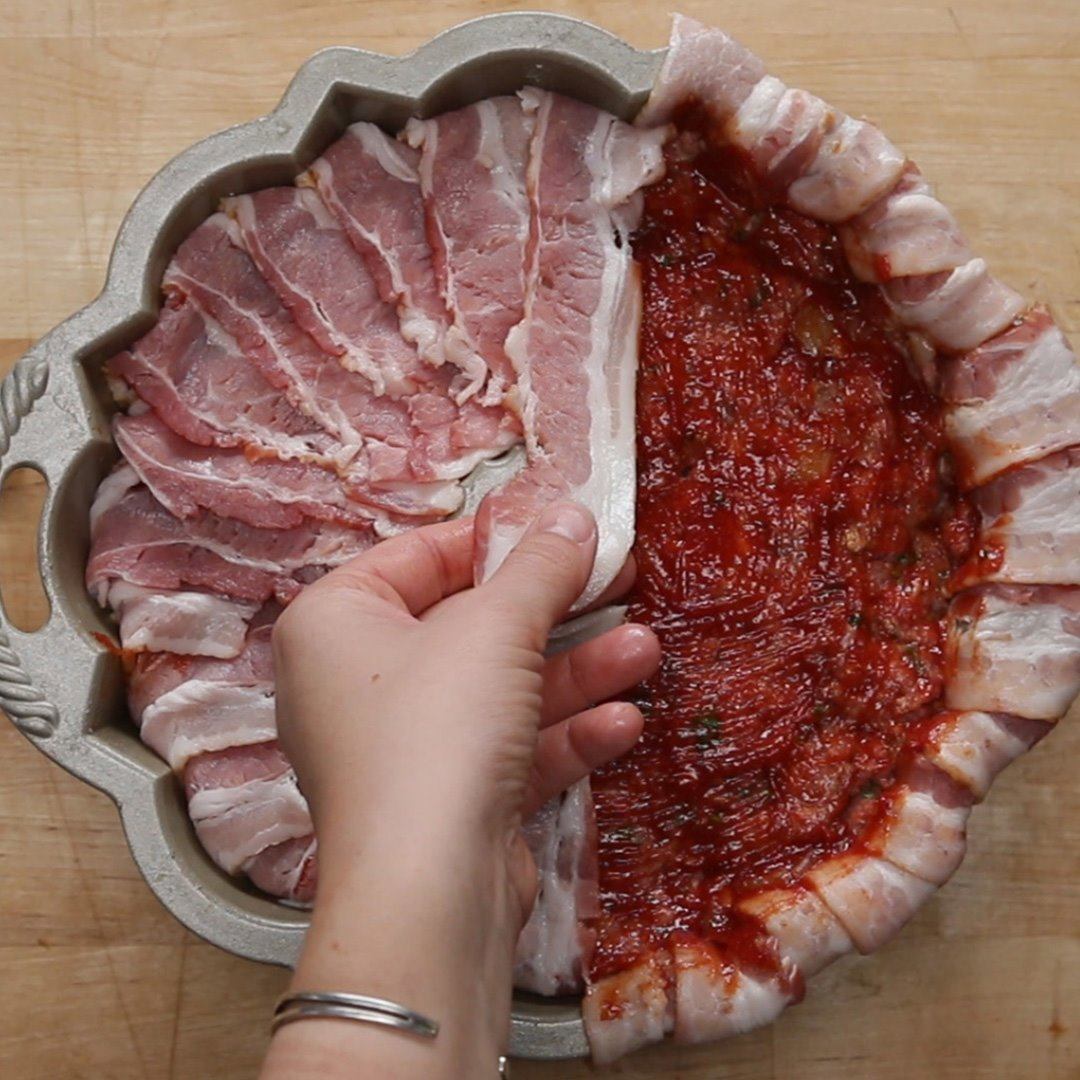
  5. Line a bundt pan with slices of bacon and use a pastry brush to spread a layer of glaze on the inside of the bacon.
  6. Add ⅔ of the meat to the bottom of the bundt pan and spread up the sides and up the middle of the pan making a “bowl” for the mashed potatoes.
  7. Add the mashed potatoes into the “bowl” and smooth out. Top the mashed potatoes with the remaining meat, smooth out, coat the top with the raw meat glaze, and fold the slices of bacon over the top of the meat. Cover with foil and bake for 1 hour, remove the foil after 30 minutes and carefully drain some of the fat before putting it back into the oven.
  8. Place a cooling rack on top of the bundt pan and flip over onto a baking sheet. Remove the bundt pan and coat the meatloaf with the reserved glaze.
  9. Broil on high for 3-5 minutes or until the glaze has caramelized.
  10. Enjoy!

Watch the recipe video here:

The ULTIMATE meatloaf!!! ?Get the recipe: https://tasty.co/recipe/bacon-wrapped-mashed-potato-stuffed-meatloaf

Posted by BuzzFeed Food on Saturday, July 6, 2019

Cake Dessert

Raspberry Chocolate Greek Yogurt Cheesecake

Raspberry Chocolate Greek Yogurt Cheesecake
https://www.facebook.com/491452930867938/posts/2762993913713817/
Author:
Cuisine: American
Recipe type: Cake
Ingredients
  • 5 tablespoons melted coconut oil, plus 4 teaspoons, divided, plus more for greasing
  • 5 oz graham cracker (150 g)
  • 1 pinch kosher salt
  • 12 oz frozen raspberry, thawed (330 g)
  • ¾ cup dark chocolate chip (235 g)
  • 2 teaspoons coconut oil, solid
  • 32 oz greek yogurt (980 g)
  • 3 large eggs
  • 2 teaspoons vanilla extract
  • ½ cup organic sugar (100 g)
  • 2 tablespoons cornstarch, sifted
  • warm water, for baking
  • 6 oz fresh raspberries, for garnish (150 g)
  • chocolate shaving, for garnish
Instructions
  1. Preheat the oven to 350˚F (180˚C). Grease an 8-inch (20 cm) springform pan with melted coconut oil.
  2. Add the graham crackers and salt to food processor and process until completely broken down with a sand-like texture.
  3. Transfer the graham cracker crumbs to a medium bowl and add 5 tablespoons melted coconut oil. Stir to combine. The mixture should hold together when pressed between 2 fingers.
  4. Using the bottom of a drinking glass, press the crust into the bottom of the prepared springform pan. Bake for 10 minutes, until golden brown. Remove from the oven and let cool. Leave the oven on.
  5. Add the thawed frozen raspberries to a food processor and blend for 15 seconds, until smooth. Strain the raspberry puree through a fine-mesh sieve into a medium bowl and discard the seeds. Transfer ⅓ cup (40 grams) to a squeeze bottle to use for garnish and set the bottle and bowl aside.
  6. In a medium microwave-safe bowl, combine the chocolate and solid coconut oil. Microwave in 30-second intervals, stirring in between, until completely melted and smooth. Set aside.
  7. In a clean food processor, combine the yogurt, eggs, vanilla, sugar, and cornstarch. Process until smooth, about 20 seconds.
  8. Add 1½ cups (365 grams) of the yogurt mixture to a medium bowl. Add another 1½ cups (365 grams ) to the bowl with the melted chocolate and the remaining 1½ cups (365 grams) to the bowl with the raspberry puree. Add 2 teaspoons of melted coconut oil to the bowl with the plain yogurt mixture and the remaining 2 teaspoons melted coconut oil to the bowl with the raspberry puree. Stir each bowl to combine.
  9. To assemble the cheesecake, pour the chocolate layer over the graham cracker crust and smooth the top with a spatula. Freeze for 10 minutes.
  10. Pour the vanilla layer over the chocolate layer and smooth the top with a spatula. Freeze for another 10 minutes.
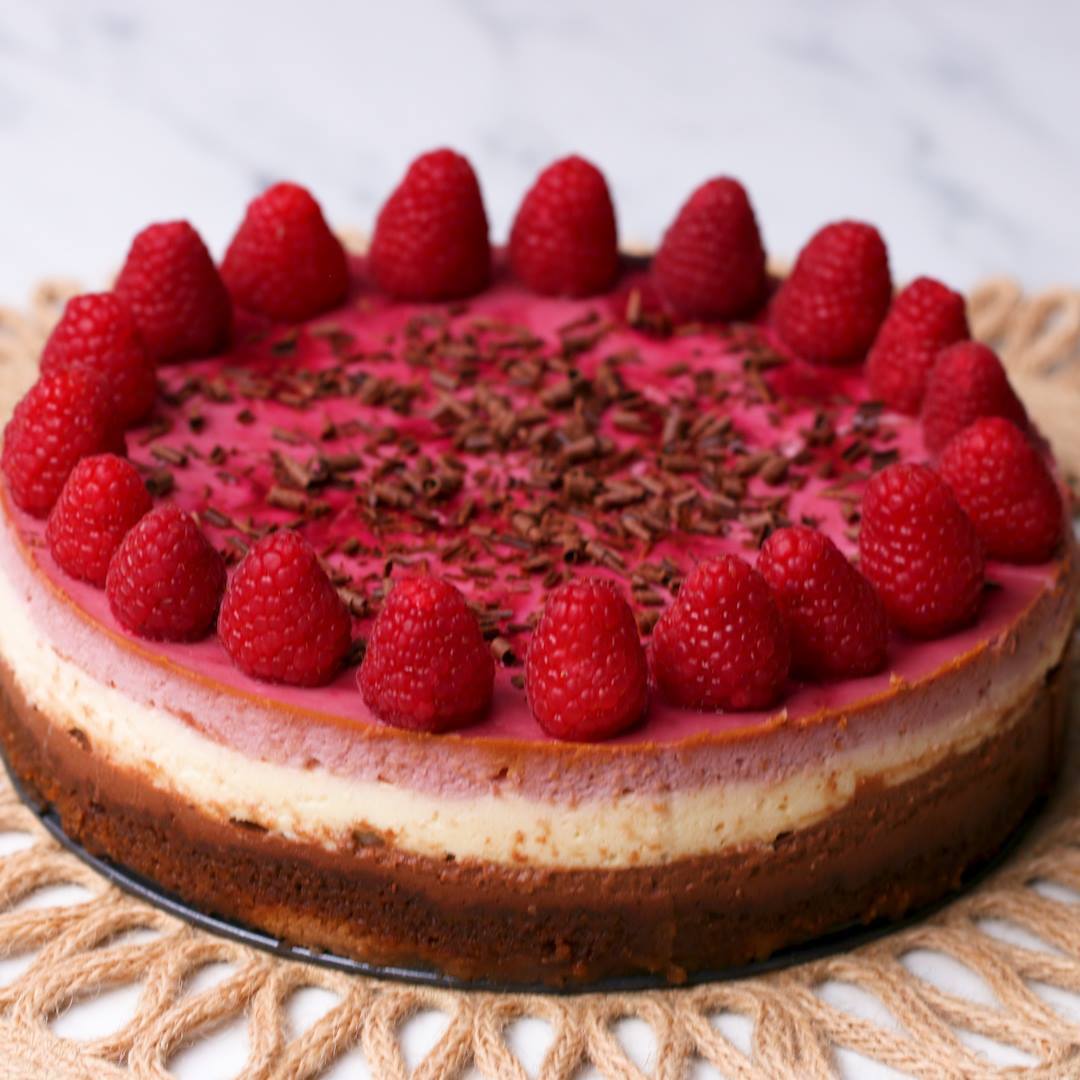
  11. Pour the raspberry layer on top of the vanilla layer and smooth with a spatula. Squeeze a few dots of the reserved raspberry puree on top and use a toothpick to swirl the puree in a decorative pattern.
  12. Wrap the bottom of the pan tightly with foil and place in a high-walled baking dish. Pour about 1 inch (2 ½ centimeters) of warm water into the baking dish.
  13. Bake the cheesecake for 35 minutes, until the edges are set but the center still jiggles slightly. If the top begins to brown, lightly cover with foil for the remaining bake time. Remove from the oven and carefully remove the springform pan from the water bath.
  14. Cool the cheesecake completely in the refrigerator for 3-4 hours, or overnight.
  15. When ready to serve, release the springform. Top the cheesecake with fresh raspberries, chocolate shavings, and raspberry puree.
  16. Enjoy!

Watch the recipe video here:

Swap out cream cheese for Greek yogurt in this chocolate raspberry cheesecake recipe!Recipe:…

Posted by BuzzFeed Food on Sunday, June 30, 2019