Showing 3,071 Result(s)
Main dish

Instant Pot Pho Chicken Noodle Soup
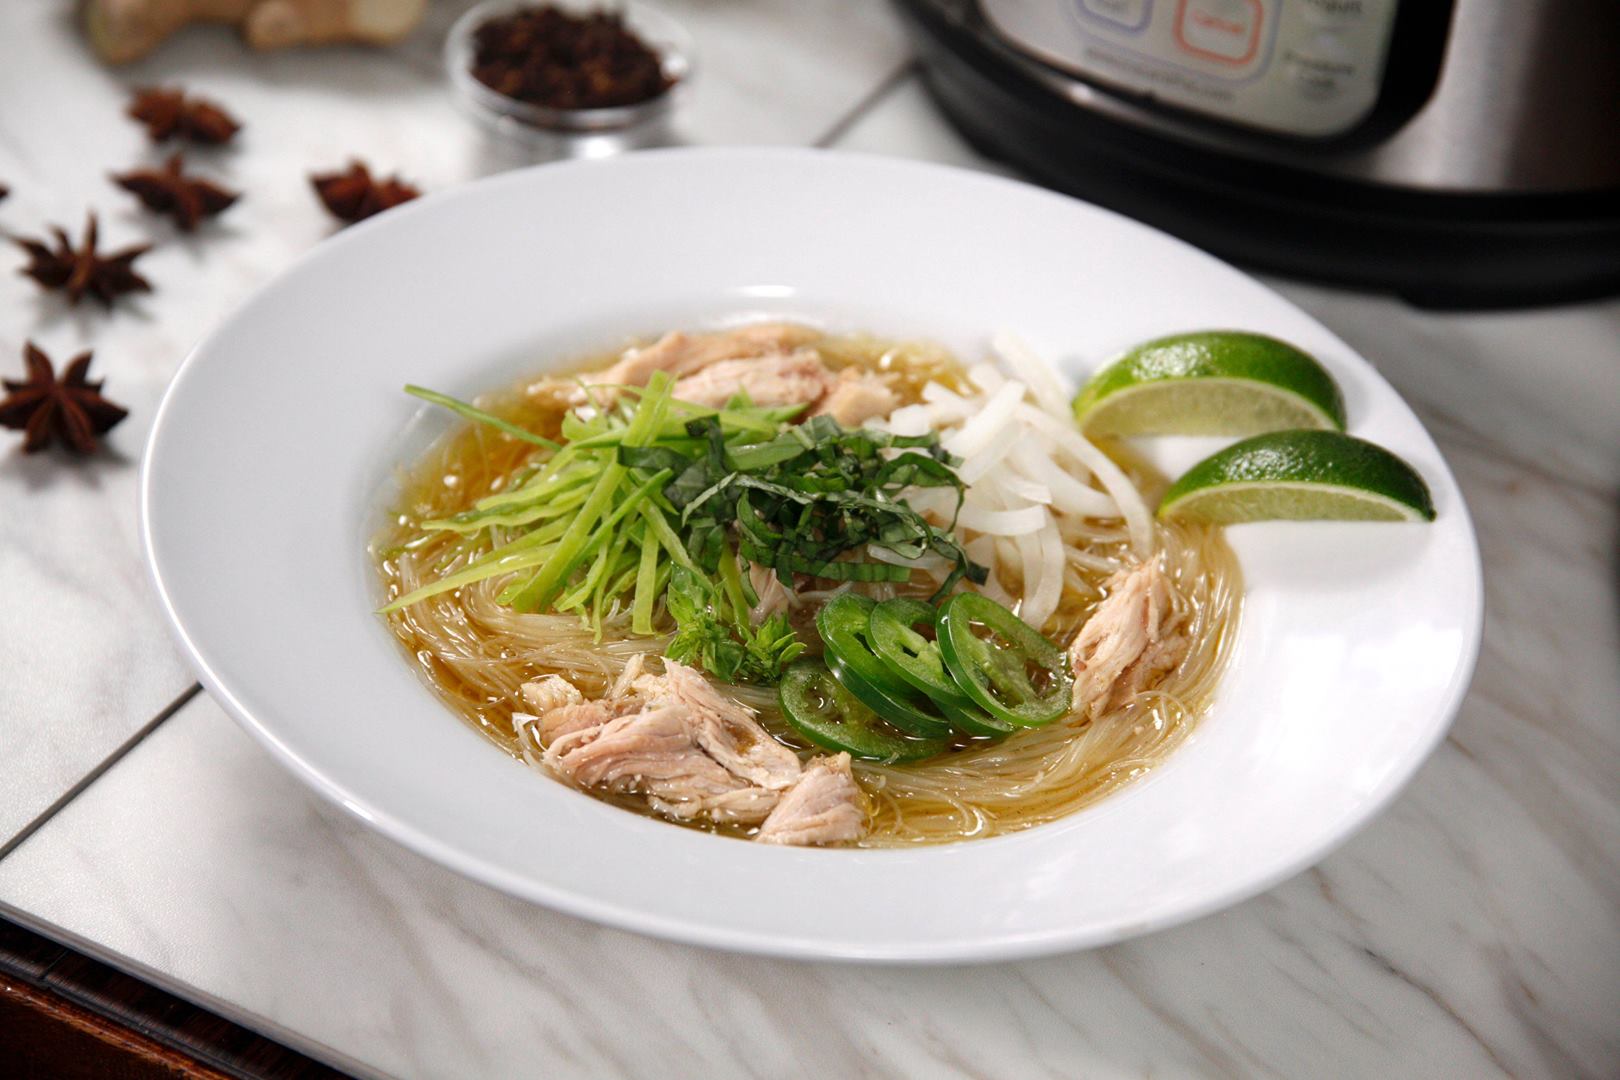
Instant Pot Pho Chicken Noodle Soup
Flavorful, fragrant pho at home is now a reality!
Author:
Cuisine: American
Recipe type: Main dish
Ingredients
  • 2 tbsp canola oil (or other high-heat oil)
  • 2 medium onions, halved
Spice Mixture:
  • 1 tbsp coriander seed
  • 1 tsp green cardamom pods
  • 3 star anise pods
  • 1 cinnamon stick
  • 5 whole cloves
Pot Mixture:
  • 8 cups water, warmed
  • ¼ cup fish sauce
  • 1 tbsp kosher salt
  • 1 inch ginger, peeled and roughly chopped (or 1 tbsp minced ginger)
  • 1 lemongrass stalk, trimmed and cut into 2” pieces (or 1 tbsp lemongrass paste)
  • 4 lbs bone-in, skin-on chicken thighs
  • 2 8 oz packages thin rice noodles
For Garnish:
  • fresh cilantro
  • fresh basil
  • lime wedges
  • mung bean sprouts
  • 2 jalapenos, thinly sliced
  • ¼ onion, thinly sliced
Instructions
  1. Add oil to the Instant Pot. Using the display panel select the SAUTE function and adjust to HIGH or MORE.
  2. When oil gets hot, put the onion in, cut side down. Cook without moving until the onions begin to char, 4-5 minutes. Remove the onions to a bowl.
  3. Add the Spice Mixture ingredients to the pot. Cook and stir for one minute or until spices are fragrant.
  4. Add warmed water to the pot and deglaze by using a wooden spoon to scrape the brown bits from the bottom of the pot.
  5. Add the remaining Pot Mixture ingredients and the reserved onions and their juices. Turn the pot off by selecting CANCEL, then secure the lid, making sure the vent is closed.
  6. Using the display panel select the MANUAL function*. Use the +/- keys and program the Instant Pot for 20 minutes.
  7. When the time is up, let the pressure naturally release for 10 minutes, then quick-release the remaining pressure.
  8. Carefully remove the meat from the pot to a cutting board. Remove skin and shred meat; discard bones and skin.
  9. Strain the broth and return to the pot. Turn the pot off by selecting CANCEL, then select the SAUTE function.
  10. Bring the broth to a simmer and cook the rice noodles in the broth according to the package directions.
  11. Serve noodles and broth over chicken. Garish as desired.

Watch the recipe video here:

Flavorful, fragrant pho at home is now a reality!RECIPE: http://chopsecrets.com/instant-pot-pho-chicken-noodle-soup/

Posted by Chop Secrets on Thursday, June 6, 2019

Salads

Layered Deviled Egg Pasta Salad

Layered Deviled Egg Pasta Salad
This layered deviled egg salad has a little taste of everything and looks divine. Use a set of tongs to serve.
Author:
Cuisine: American
Recipe type: Salad
Ingredients
Deviled Eggs:
  • 6 eggs
  • 2½ tablespoons mayonnaise
  • 2 teaspoons prepared yellow mustardsalt and ground black pepper to taste
  • 2 sprigs fresh dill
  • Pasta Salad:
  • 3 cups farfalle (bow-tie) pasta
  • 2 tablespoons mayonnaise
  • 1 pound cherry tomatoes, halved
  • 2 cups chopped celery
  • 2 cups diced cooked ham
  • 4 cups chopped lettuce
  • 4 spring onions, thinly sliced
Instructions
  1. Place eggs in a large saucepan and cover with cold water. Bring water to a boil. Remove saucepan from heat; let eggs stand in hot water for 10 minutes. Immerse eggs in a bowl of ice water and let cool, 1 to 2 minutes.
  2. Peel eggs and halve them lengthwise. Scoop yolks into a bowl. Arrange egg whites cut-side up on a plate.
  3. Mash egg yolks into a crumbly paste with a fork. Mix in 2½ tablespoons mayonnaise and mustard with the fork. Season with salt and pepper. Spoon egg yolk mixture into a small piping bag; pipe into the egg whites. Garnish with fresh dill.
  4. Bring a large pot of lightly salted water to a boil. Cook bow-tie pasta at a boil, stirring occasionally, until tender yet firm to the bite, about 12 minutes. Drain and let cool, about 15 minutes.
  5. Mix cooled pasta with 2 tablespoons mayonnaise in a bowl. Season with salt and pepper.
  6. Spoon pasta into the bottom of a large glass trifle bowl. Layer tomatoes, celery, ham, and lettuce on top. Arrange deviled eggs on top before serving. Garnish with spring onions.

Watch the recipe video here:

Layered Deviled Egg Pasta Salad: https://trib.al/cB9qf2r

Posted by Allrecipes on Monday, July 1, 2019

Dessert

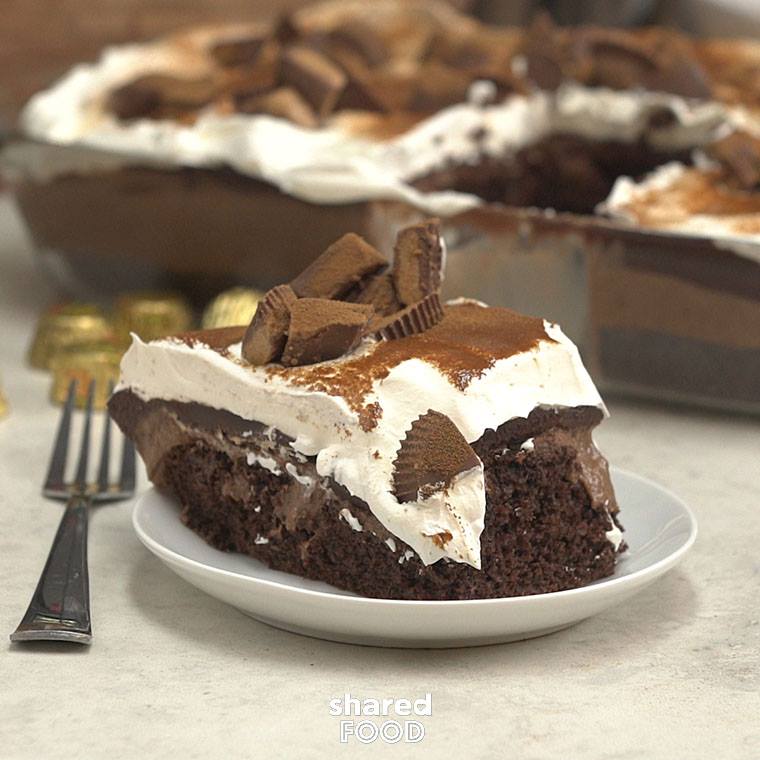
Reese’s Pieces Espresso Poke Cake Is The Perfect Pick-Me-Up

Reese's Pieces Espresso Poke Cake Is The Perfect Pick-Me-Up
I couldn't wait any longer for Reese's to make a coffee flavor for one of their delicious treats! So I sprang into action with one of the easiest desserts ever......Poke cake!
Author:
Cuisine: American
Recipe type: Dessert
Ingredients
  • 1 box chocolate fudge cake mix, plus ingredients required on the box
  • 3 tablespoons instant espresso powder, divided
  • 2 cups milk
  • 1 cup creamy peanut butter
  • 1 box chocolate fudge instant pudding
  • 2 cups chocolate chips
  • ¾ cup heavy cream
  • 8 ounces Cool Whip
  • 12 Reese's peanut butter cups, quartered
  • Additional instant espresso powder, to garnish
Instructions
  1. Preheat oven to 350 degrees. Prepare a 9x13 baking pan with nonstick spray.
  2. Prepare the cake mix according to box directions, stirring in 2 tablespoons instant espresso powder until well-combined.
  3. Pour batter into prepared baking dish and bake 25-30 minutes, or until a toothpick inserted comes out with a few crumbs.
  4. Remove the cake from the oven, and using the handle of a wooden spoon, poke holes all over the top.
  5. Working quickly, in a medium mixing bowl, whisk together the milk, peanut butter, and instant pudding until just-combined. Pour pudding mixture evenly over the cake, smoothing it into all the holes. Chill the cake for 4 hours.
  6. Microwave 2 cups chocolate chips, heavy cream, and 1 tablespoon of instant espresso powder on 30-second intervals, stirring in between, until smooth and well-combined, about 1 minute total. Pour chocolate mixture evenly over the cake, then chill once more until set.
  7. Top with Cool Whip, Mini Reese's Pieces and lightly dust with instant espresso powder.

Watch the recipe video here:

Reese's Coffee Poke Cake is everything you need in one dessertRecipe: http://sha.red/zDZjv

Posted by Shared Food on Saturday, May 4, 2019

Dessert

Cookie Monster Brownies Are So Cute and Ready for Your Next Themed Party

Cookie Monster Brownies Are So Cute and Ready for Your Next Themed Party
Cookie Monster is all the rage this year, and these Cookie Monster Brownies are the perfect addition for a themed party, Halloween, or really, any old day when you're craving a novelty treat to take care of that sweet tooth.
Author:
Cuisine: American
Recipe type: Dessert
Ingredients
For the brownies:
  • 16 Oreo cookies
  • 1 box brownie mix + ingredients required on the box
  • 8 ounces refrigerated chocolate chip cookie dough
For the frosting:
  • ½ cup salted butter
  • ½ teaspoon vanilla extract
  • 2 tablespoons heavy cream
  • 2 cups powdered sugar
  • 6 Oreo cookies, crushed
  • Blue food coloring
For the chocolate layer:
  • ½ cup semisweet chocolate chips
  • ¼ cup heavy cream
  • 1 tablespoon light corn syrup
  • Mini chocolate chip cookies, for garnish
  • Mini Oreo cookies, for garnish
  • Candy eyeballs
Instructions
  1. Preheat oven to 350 degrees. Prepare an 8x8 baking dish with parchment paper and nonstick spray.
  2. To make the brownie layer, spread Oreo cookies in a single layer in the bottom of the prepared baking dish.
  3. Prepare brownie mix according to box instructions in a large mixing bowl, then pour the batter evenly over the Oreo cookies.
  4. Break the cookie dough off into pieces and press randomly into the brownie mix.
  5. Bake about 30 minutes, or until a toothpick inserted comes out with chocolatey crumbs. Cool completely on a wire rack.
  6. For the frosting, beat together the butter, cream, and vanilla extract until smooth. Add the powdered sugar in slowly, then beat another couple of minutes until well-combined. Fold in the crushed Oreos, then add the blue food coloring until frosting reaches your desired shade of blue. Spread the frosting evenly on top of the cooled brownie layer.
  7. To make the chocolate layer, microwave together the chocolate chips and heavy cream on 20-second intervals, stirring in between, until smooth.
  8. Add in the light corn syrup and allow to cool and thicken.
  9. Drizzle the chocolate sauce over the frosting layer, then press mini chocolate chip and Oreo cookies, then place 2 candy eyeballs in random spots on top.
  10. Slice into bars and serve. Enjoy!

Main dish

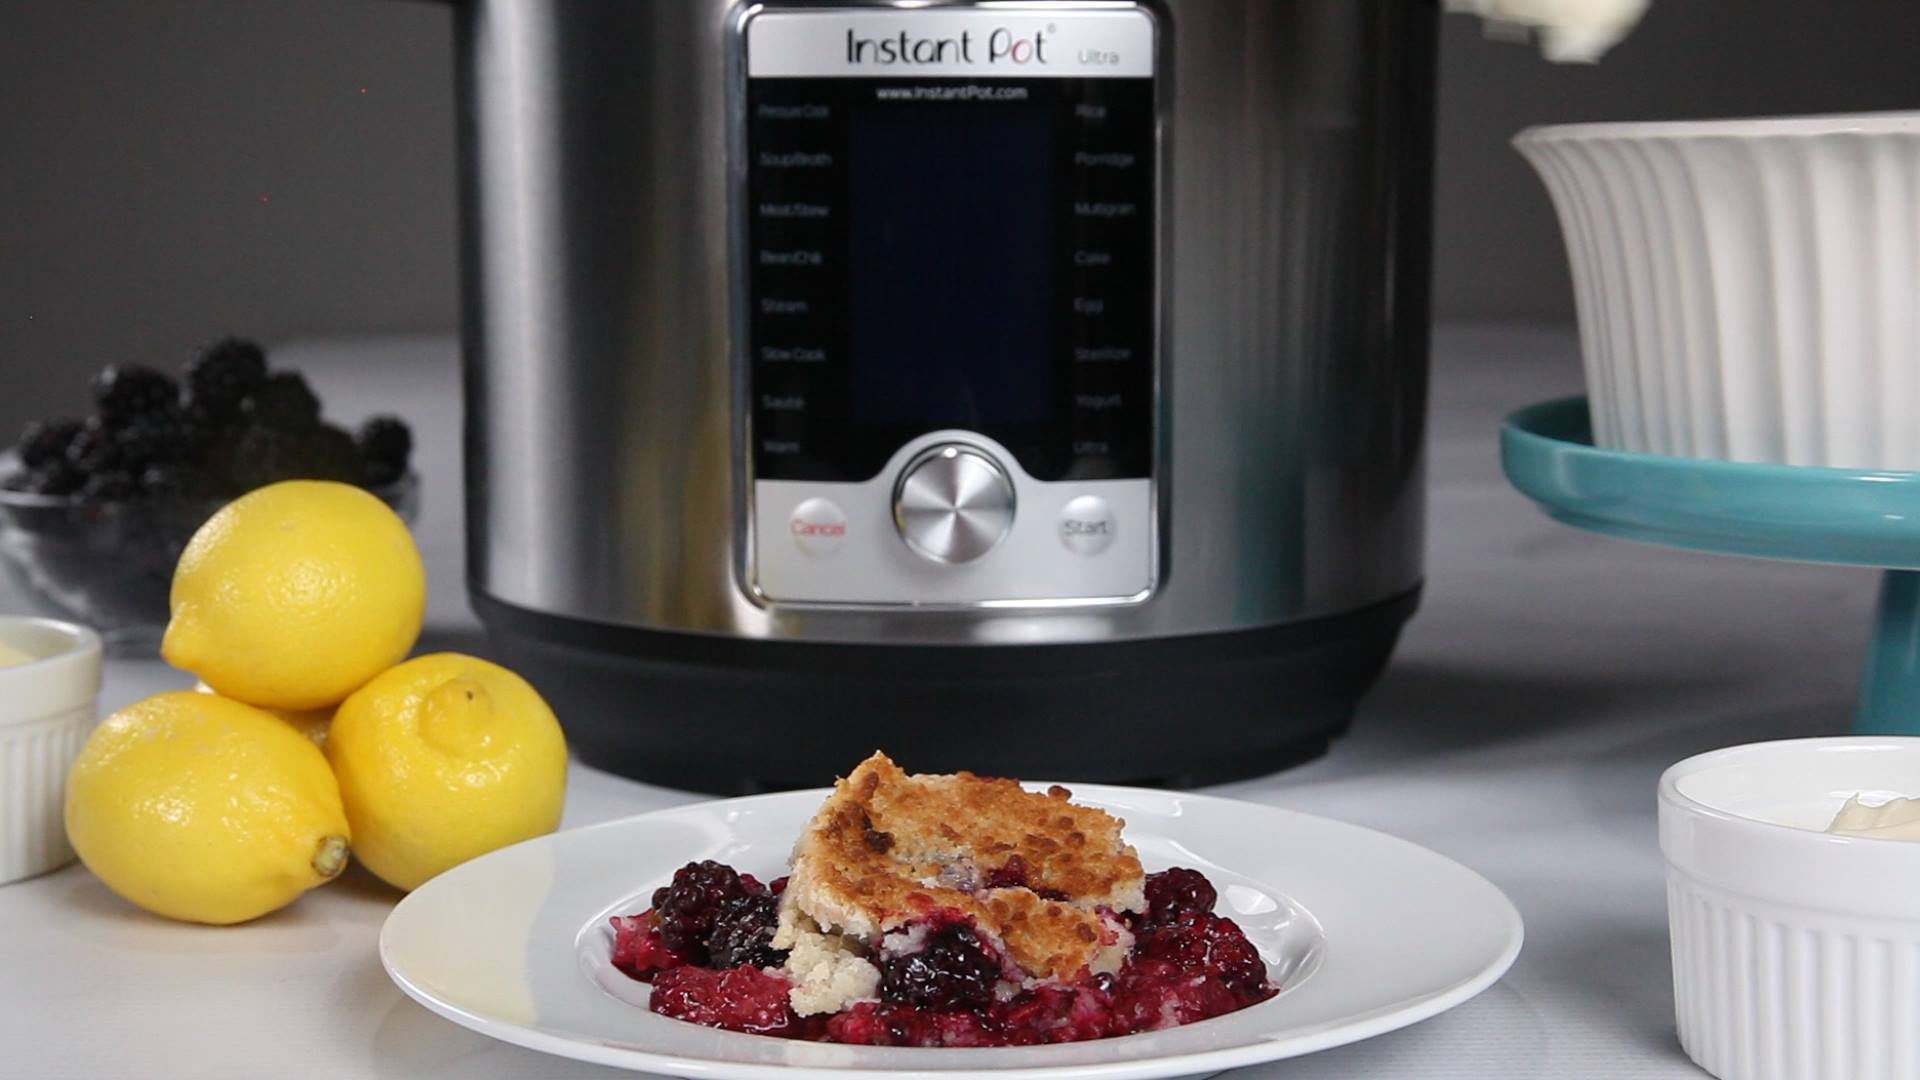
Instant Pot Blackberry Cobbler

Instant Pot Blackberry Cobbler
This tasty, easy recipe uses only five ingredients.
Author:
Cuisine: American
Recipe type: Main dish
Ingredients
  • 12 oz fresh blackberries, patted dry
  • 7 oz yellow cake mix (about half the package)
  • ¼ cup butter, softened and cut into pieces
  • 1 tsp lemon zest
  • Dash nutmeg
  • 1 cup water
Instructions
  1. Coat the inside of a 1.5 qt casserole (these fit perfectly: https://amzn.to/2DtfXM4) with non-stick spray. Place blackberries in the dish.
  2. In a medium bowl, combine cake mix, butter, lemon zest, and nutmeg. Use a pastry knife to cut the butter into the other ingredients until it resembles coarse crumbs.
  3. Spread the crumb mixture over the blackberries in an even layer. Cover the dish loosely with foil – do not seal.
  4. Pour one cup of water in the Instant Pot and insert the steam rack. Carefully lower the baking dish on to the steam rack.
  5. Secure the lid, making sure the vent is closed.
  6. Using the display panel select the MANUAL function*. Use the +/- keys and program the Instant Pot for 10 minutes.
  7. When the time is up, let the pressure naturally release for 10 minutes, then quick-release the remaining pressure.
  8. Carefully remove the dish and set it under the broiler, uncovered, until golden, 3-5 minutes.
  9. Serve warm with whipped cream or vanilla ice cream.

Watch the recipe video here:

This tasty, easy recipe uses only five ingredients.RECIPE: http://chopsecrets.com/instant-pot-blackberry-cobbler/

Posted by Chop Secrets on Thursday, May 30, 2019

Main dish

Grilled Garlic Knots

Grilled Garlic Knots
You can’t beat a garlic and butter roll, especially one that has been grilled. The cheese and parsley give them a nice Fazoli’s feel, while the charred bread adds extra flavor. Plus, they’re a cinch to grill. Prepared pizza dough can easily be found in the deli section of major grocery stores, but you can even buy it directly from a pizza shop if you ask.
Author:
Cuisine: American
Recipe type: Main dish
Ingredients
  • 1 pound fresh prepared pizza dough
  • Cooking spray
  • ¾ cup (6 oz.) salted butter
  • 1 tablespoon finely chopped garlic (about 3 garlic cloves)
  • 2 teaspoons chopped fresh thyme
  • 1 ounce Pecorino Romano cheese, grated (about ¼ cup)
  • 2 tablespoons finely chopped fresh flat-leaf parsley
Instructions
  1. Place dough on a lightly floured surface, and divide into 16 (1-ounce) pieces. Roll each piece into an 8-inch rope, and twist into a knot. Place rolls on a baking sheet lightly dusted with flour. Lightly coat rolls with cooking spray, and cover lightly with plastic wrap. Let rest in a warm area until puffed, about 1 hour.
  2. Preheat a gas grill to medium (350°F to 400°F) on 1 side, or push hot coals to 1 side of a charcoal grill. Combine butter, garlic, and thyme in a small saucepan. Place saucepan over lit side of grill; cook, stirring occasionally, until butter melts, about 6 minutes. Move pan to unlit side of grill, and cover to keep warm.
  3. Remove plastic wrap from rolls, and gently brush with melted butter mixture. Add rolls very gently to lit side of grill. Grill, covered, until lightly browned and cooked through, about 12 minutes, turning occasionally. If rolls start to get too dark, move to unlit side of grill. Place rolls on a platter, and drizzle with remaining butter mixture. Sprinkle with cheese and parsley.

Watch the recipe video here:

What's than a warm, buttery garlic knot? A GRILLED one. GET THE RECIPE: https://trib.al/BuyEiue (via Well Done)

Posted by MyRecipes on Thursday, May 30, 2019

Dessert

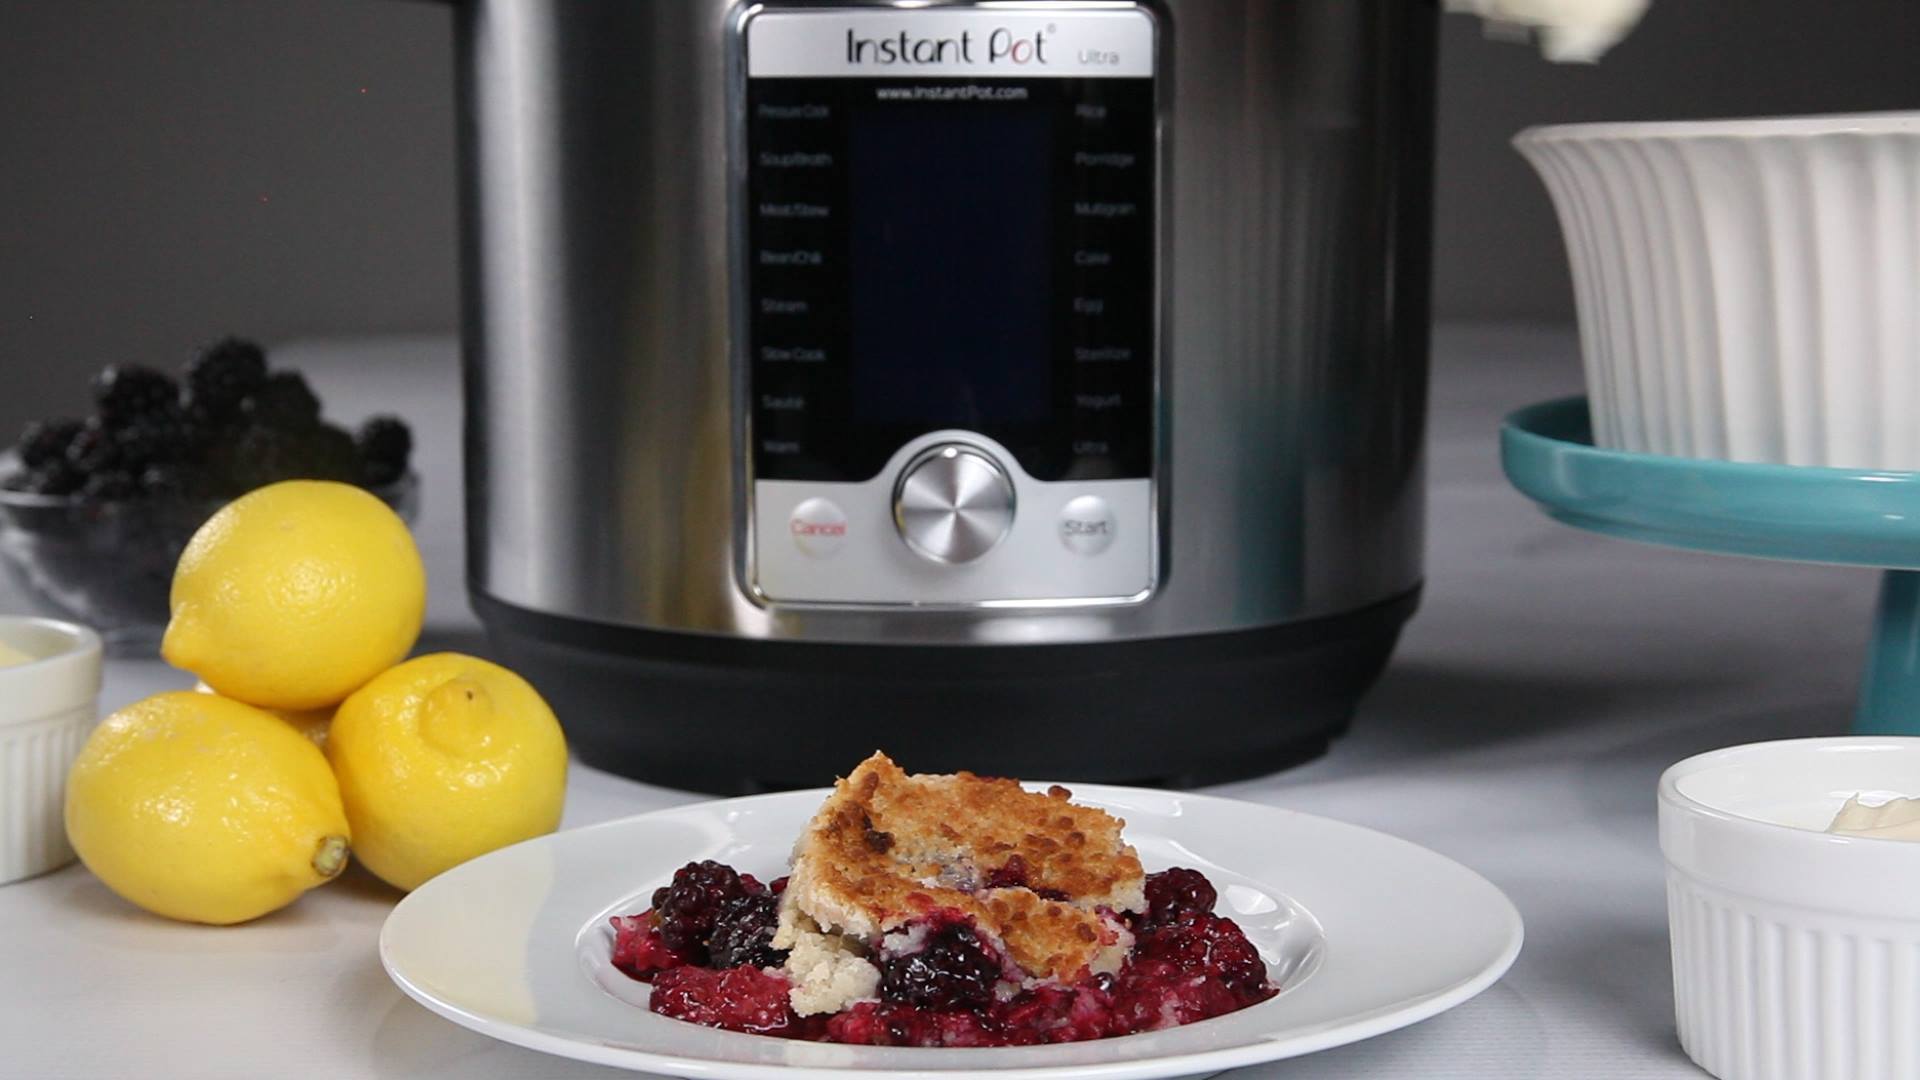
Instant Pot Blackberry Cobbler

Instant Pot Blackberry Cobbler
This tasty, easy recipe uses only five ingredients.
Author:
Cuisine: American
Recipe type: Dessert
Ingredients
  • 12 oz fresh blackberries, patted dry
  • 7 oz yellow cake mix (about half the package)
  • ¼ cup butter, softened and cut into pieces
  • 1 tsp lemon zest
  • Dash nutmeg
  • 1 cup water
Instructions
  1. Coat the inside of a 1.5 qt casserole (these fit perfectly: https://amzn.to/2DtfXM4) with non-stick spray. Place blackberries in the dish.
  2. In a medium bowl, combine cake mix, butter, lemon zest, and nutmeg. Use a pastry knife to cut the butter into the other ingredients until it resembles coarse crumbs.
  3. Spread the crumb mixture over the blackberries in an even layer. Cover the dish loosely with foil – do not seal.
  4. Pour one cup of water in the Instant Pot and insert the steam rack. Carefully lower the baking dish on to the steam rack.
  5. Secure the lid, making sure the vent is closed.
  6. Using the display panel select the MANUAL function*. Use the +/- keys and program the Instant Pot for 10 minutes.
  7. When the time is up, let the pressure naturally release for 10 minutes, then quick-release the remaining pressure.
  8. Carefully remove the dish and set it under the broiler, uncovered, until golden, 3-5 minutes.
  9. Serve warm with whipped cream or vanilla ice cream.

Watch the recipe video here:

This tasty, easy recipe uses only five ingredients.RECIPE: http://chopsecrets.com/instant-pot-blackberry-cobbler/

Posted by Chop Secrets on Saturday, August 24, 2019

Dessert

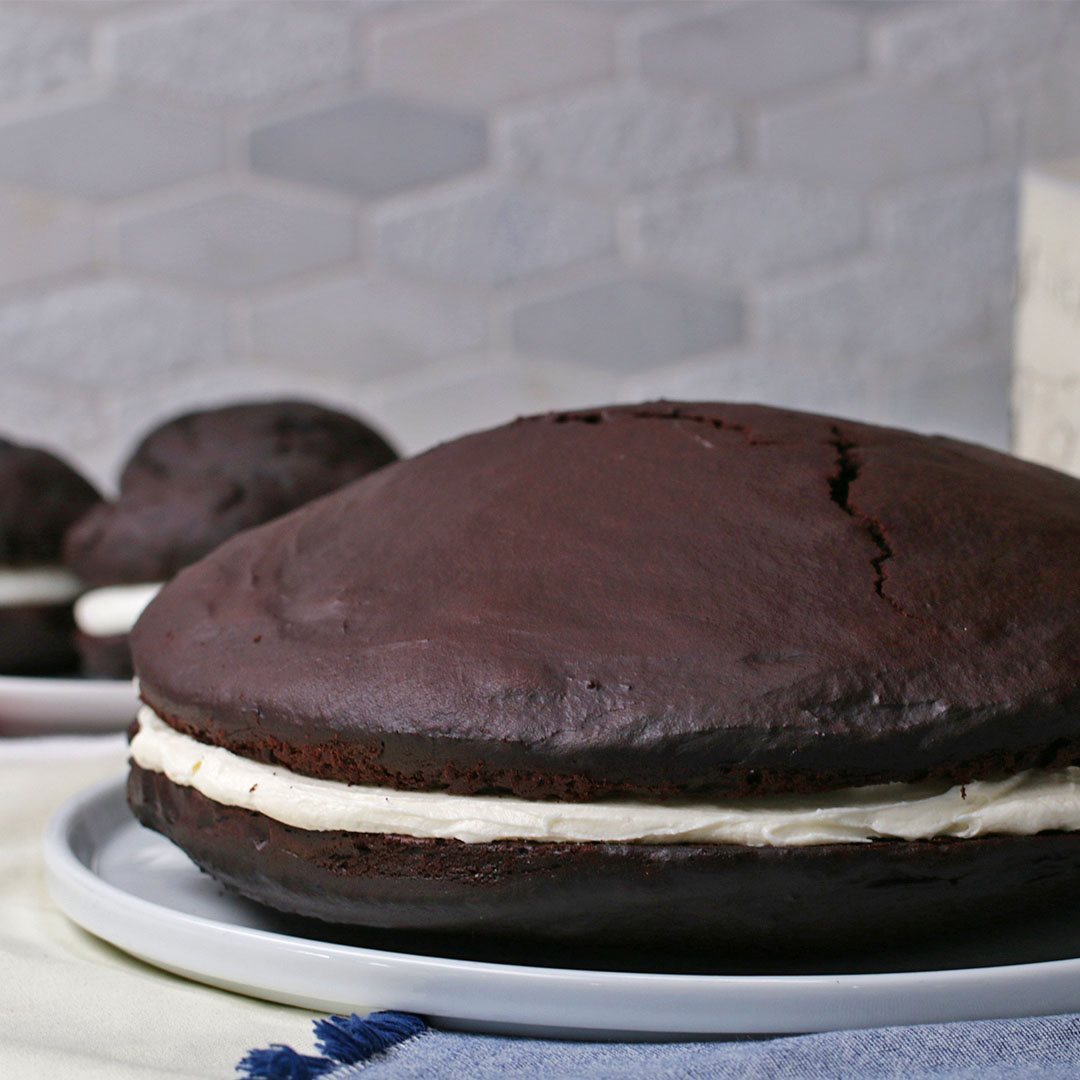
Giant Whoopie Pie

Giant Whoopie Pie
Your favorite chocolate cookie sandwich, now in giant form! When transferring the cake batter to the pans, spread a thinner layer toward the edges, keeping the center thicker. The domed tops will replicate the classic whoopie pie shape. After the pillowy cake rounds cool, sandwich with the fluffy marshmallow filling, then slice and serve!
Author:
Cuisine: American
Recipe type: Dessert
Ingredients
WHOOPIE PIE
  • nonstick cooking spray, for greasing
  • 4 ½ cups all purpose flour (560 g)
  • 1 cup cocoa powder (120 g)
  • 1 teaspoon espresso powder
  • 1 ½ teaspoons kosher salt
  • 1 tablespoon baking soda
  • 2 cups brown sugar (440 g)
  • 2 cups water (480 mL)
  • 1 tablespoon white vinegar
  • 1 tablespoon vanilla extract
  • 1 cup vegetable oil (240 mL)
MARSHMALLOW FILLING
  • 16 tablespoons unsalted butter, softened
  • 13 oz marshmallow fluff (370 g)
  • 2 cups powdered sugar (240 g)
Instructions
  1. Preheat the oven to 350˚F (180˚C). Grease and line 2 10-inch (25 cm) round cake pans with parchment paper.
  2. Make the whoopie pie: In a large bowl, whisk together the flour, cocoa powder, espresso powder, salt, baking soda, and brown sugar, making sure there are no lumps.
  3. Make a well in the center of the dry ingredients, then pour in the water, vinegar, vanilla and oil to the well. Whisk to combine, working slowly to avoid clumps.
  4. Scoop 2½ cups (600 g) of batter into the center of each cake pan. Use an offset spatula or a knife to spread the edges of the batter just to the edges of the pans. Do not level the top of the cake, to help create a domed shape.
  5. Bake for 30 minutes, or until a toothpick inserted in the center of the cakes comes out clean. Let cool in the pans for 10 minutes, then carefully transfer to a wire rack to cool completely.
  6. Make the filling: In a large bowl, combine the butter and marshmallow fluff and cream with an electric hand mixer for 2–3 minutes, until fully combined. Sift in the powdered sugar, then beat for another 2–3 minutes, until light and fluffy. Transfer the filling to a piping bag or zip-top bag. Cut a 2-inch (5 cm) wide opening on a corner.
  7. Invert a cake onto a serving platter so the domed side is facing down. Pipe a thick spiral of filling onto the cake, leaving a ¼-inch (½ cm) border around the edge, and smooth with an offset spatula. Place the remaining cake on top of the filling, domed side up, and push down slightly to attach.
  8. Slice and serve.
  9. Enjoy!

Watch the recipe video here:

Your favorite nostalgic chocolate cookie sandwich, now in giant form!Get the recipe: https://tasty.co/recipe/giant-whoopie-pie

Posted by Tasty on Friday, August 30, 2019

Main dish

Chocolate-Caramel Revel Bars

Chocolate-Caramel Revel Bars
These indulgent bars are where ooey-gooey meets chewy--with the tastiest results! Betty Crocker™ chocolate chip cookie mix (with oats added for a perfectly chewy texture) gets dolloped with fudgy chocolate and caramel, and baked into a classic bar that no one will be able to resist.
Author:
Cuisine: American
Recipe type: Main dish
Ingredients
  • 1 pouch (17.5 oz) Betty Crocker™ chocolate chip cookie mix
  • Butter and egg called for on cookie mix pouch
  • ½ cup old-fashioned oats
  • ½ cup Kraft™ caramel bits
  • 1 cup semisweet chocolate chips
  • ¾ cup canned sweetened condensed milk (not evaporated)
Instructions
  1. Heat oven to 350°F. Spray 9-inch square pan with cooking spray.
  2. In large bowl, mix cookie mix, butter and egg until soft dough forms. Stir in oats and caramel bits until blended. Remove ¾ cup of the cookie dough; set aside. Press remaining dough evenly in bottom of pan.
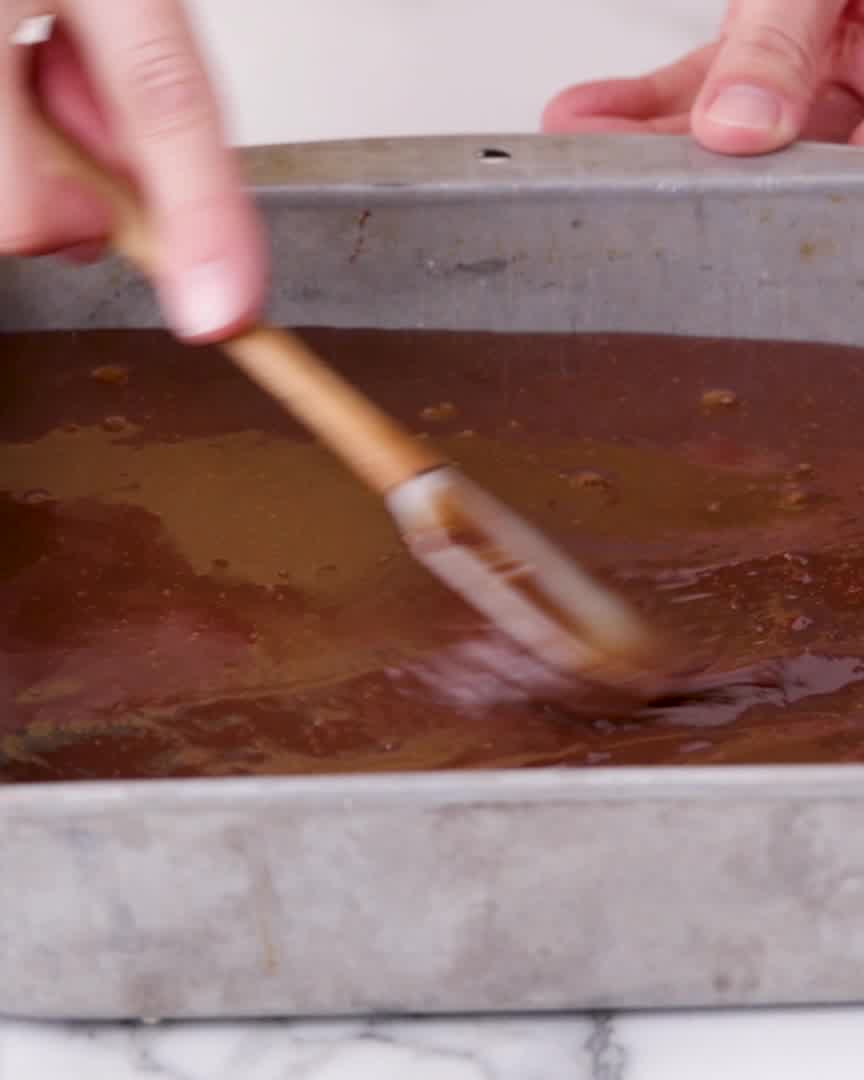
  3. In 1-quart saucepan, heat chocolate chips and condensed milk over low heat 2 minutes, stirring frequently, until chocolate is melted and mixture is smooth. Spread mixture on top of cookie base. Break remaining cookie dough into small pieces, and sprinkle over top.
  4. Bake 34 to 38 minutes or until golden brown. Cool completely, about 2½ hours.
  5. Cut into 4 rows by 4 rows. Store covered in airtight container at room temperature.

Watch the recipe video here:

These indulgent bars are where ooey-gooey meets chewy–with the tastiest results! Get the recipe:…

Posted by Betty Crocker on Friday, August 30, 2019

Dessert

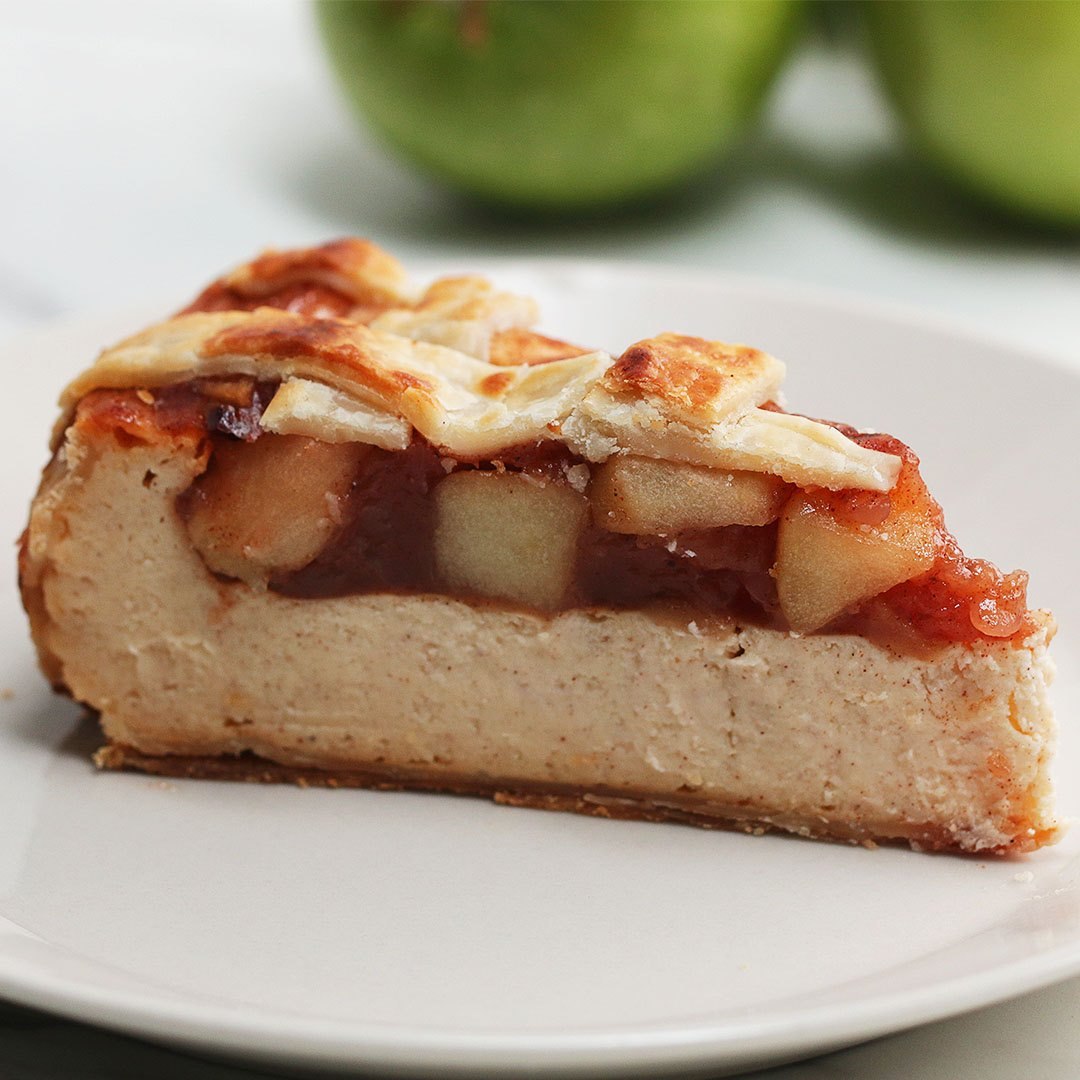
Apple Pie Cheesecake

Apple Pie Cheesecake
Apple Pie Cheesecake recipe.
Author:
Cuisine: American
Recipe type: Dessert
Ingredients
CHEESECAKE
  • 2 pie crusts
  • 24 oz cream cheese (680 g)
  • 1 cup sugar (200 g)
  • 1 cup sour cream (230 g)
  • ½ teaspoon vanilla extract
  • ½ teaspoon ground cinnamon
  • ½ teaspoon ground nutmeg
  • 3 eggs
APPLE PIE FILLING
  • 3 medium apples, peeled, cored and cubed
  • 1 cup water (240 mL)
  • ⅓ cup sugar (65 g)
  • 1 teaspoon ground cinnamon
  • ½ teaspoon ground nutmeg
  • 2 tablespoons cornstarch
Instructions
  1. Preheat oven to 300˚F (150˚C).
  2. Line a springform pan with a pie crust, pressing it around the sides of the pan until smooth.
  3. In a medium bowl, beat the cream cheese, sugar, vanilla, cinnamon, and nutmeg until smooth.
  4. Add the sour cream and mix together. Add in one egg at a time, whisking until smooth.
  5. Pour mixture into the springform pan and bake for 1 hour and 15 minutes.
  6. After baking, turn off the oven and let the cheesecake cool inside for 1 hour without opening the oven door.
  7. Turn up the oven temperature to 425˚F (220˚C).
  8. In a saucepan, add the apples, sugar, cinnamon, nutmeg, cornstarch, and water over medium-low heat. Stir occasionally until apples are soft (about 10 minutes), then remove from heat. Let cool.
  9. Once cool, spread apple pie filling over cheesecake.
  10. Cut the other pie crust in to ¼-inch (6 mm) strips and make a lattice pattern across the top.
  11. Brush with egg wash.
  12. Bake for 25 minutes, until golden brown.
  13. Chill until set then serve.
  14. Enjoy!

Watch the recipe video here:

This apple pie cheesecake is the best of both worlds ?FULL RECIPE: https://tasty.co/recipe/apple-pie-cheesecake

Posted by Proper Tasty on Tuesday, September 3, 2019