Showing 3,071 Result(s)
Main dish

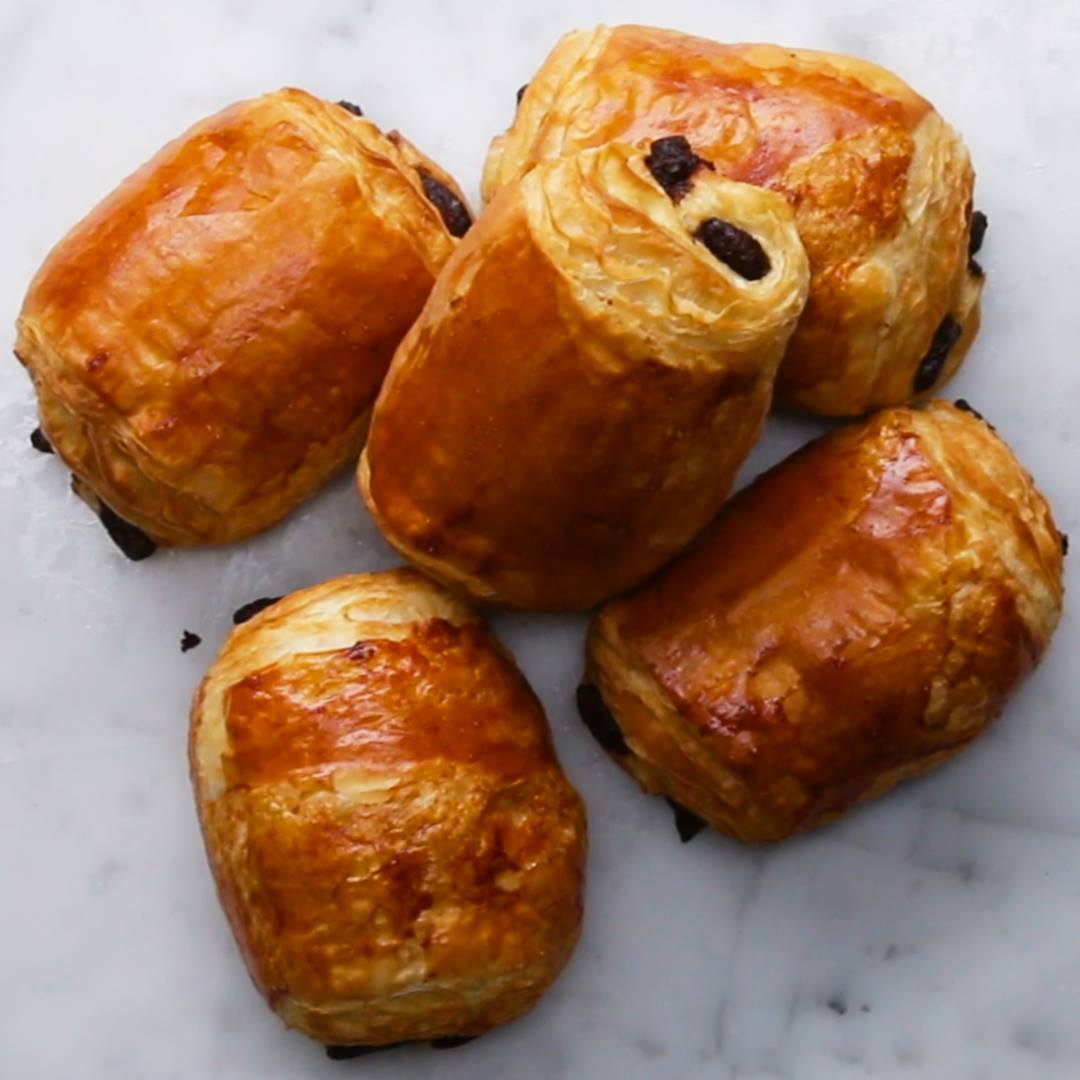
Homemade Chocolate Croissants (Pain Au Chocolate)

Homemade Chocolate Croissants (Pain Au Chocolate)
Author:
Cuisine: American
Recipe type: Main dish
Ingredients
  • 4 cups flour (500 g)
  • ½ cup water (120 mL)
  • ½ cup milk (120 mL)
  • ¼ cup sugar (50 g)
  • 2 teaspoons salt
  • 1 packet instant dry yeast
  • 3 tablespoons unsalted butter, softened
  • 1 ¼ cups cold unsalted butter, cut into ½-inch (1 cm) thick slices (285 g)
  • 1 egg, beaten
  • 2 bars sweetened chocolate bar
Instructions
  1. In a large bowl, mix the flour, water, milk, sugar, salt, yeast, and butter.
  2. Once the dough starts to clump, turn it out onto a clean counter.
  3. Lightly knead the dough and form it into a ball, making sure not to over-knead it.
  4. Cover the dough with plastic wrap and refrigerate for one hour.
  5. Slice the cold butter in thirds and place it onto a sheet of parchment paper..
  6. Place another piece of parchment on top of the butter, and beat it with a rolling pin.
  7. Keeping the parchment paper on the butter, use a rolling pin to roll the butter into a 7-inch (18 cm) square, ½-inch (1 cm) thick. If necessary, use a knife to trim the edges and place the trimmings back on top of the butter and continue to roll into a square.
  8. Transfer the butter layer to the refrigerator.
  9. To roll out the dough, lightly flour the counter. Place the dough on the counter, and push the rolling pin once vertically into the dough and once horizontally to form four quadrants.
  10. Roll out each corner and form a 10-inch (25 cm) square.
  11. Place the butter layer on top of the dough and fold the sides of the dough over the butter, enclosing it completely.
  12. Roll the dough with a rolling pin to seal the seams, making sure to lengthen the dough, rather than widening it.
  13. Transfer the dough to a baking sheet and cover with plastic wrap. Refrigerate for 1 hour.
  14. Roll out the dough on a floured surface until it’s 8x24 inches (20x61 cm).
  15. Fold the top half down to the middle, and brush off any excess flour.
  16. Fold the bottom half over the top and turn the dough clockwise to the left. This completes the first turn.
  17. Cover and refrigerate for one hour.
  18. Roll out the dough again two more times, completing three turns in total and refrigerating for 1 hour in between each turn. If at anytime the dough or butter begins to soften, stop and transfer back to the fridge.
  19. After the final turn, cover the dough with plastic wrap and refrigerate overnight.
  20. To form the croissants, cut the dough in half. Place one half in the refrigerator.
  21. Flour the surface and roll out the dough into a long narrow strip, about 8x40 inches (20x101 cm).
  22. With a knife, trim the edges of the dough.
  23. Cut the dough into 4 rectangles.
  24. Place the chocolate on the edge of the dough and roll tightly enclosing it in the dough.
  25. Place the croissants on a baking sheet, seam side down.
  26. Repeat with the other half of the dough.
  27. Brush the croissants with the beaten egg. Save the rest of the egg wash in the fridge for later.
  28. Place the croissants in a warm place to rise for 1-2 hours.
  29. Preheat oven to 400°F (200°C).
  30. Once the croissants have proofed, brush them with one more layer of egg wash.
  31. Bake for 15 minutes or until golden brown and cooked through. Serve warm.
  32. Enjoy!

Watch the recipe video here:

Homemade Chocolate CroissantsFULL RECIPE: http://bit.ly/2hxqGexSee the struggle it took to make these! Go behind the scenes here: http://bit.ly/2hvxhWN

Posted by BuzzFeed Food on Friday, May 24, 2019
Salads

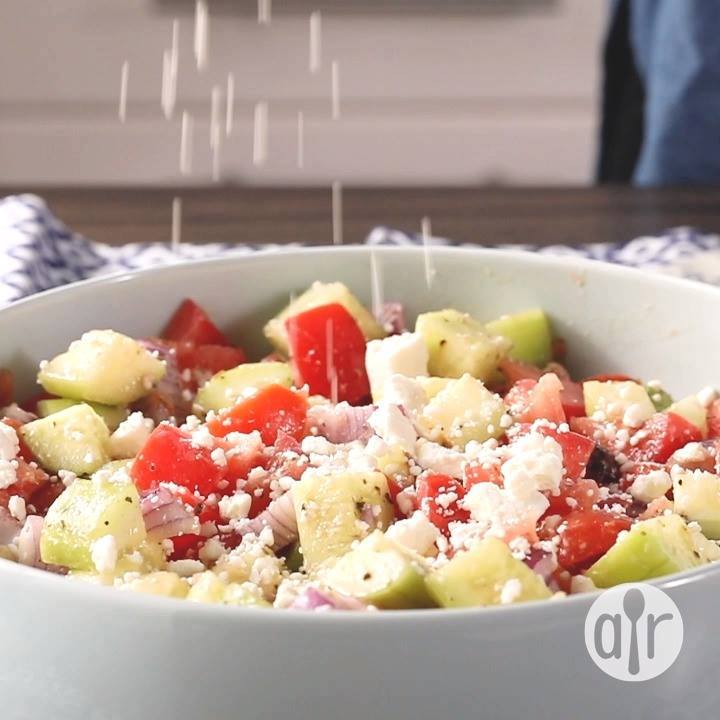
Good for You Greek Salad

Good for You Greek Salad
A yummy and low-fat Greek salad recipe. You can use two green onions instead of the small red onion, if you wish.
Author:
Cuisine: American
Recipe type: Salad
Ingredients
  • 3 large ripe tomatoes, chopped
  • 2 cucumbers, peeled and chopped
  • 1 small red onion, chopped
  • ¼ cup olive oil
  • 4 teaspoons lemon juice
  • 1½ teaspoons dried oregano
  • salt and pepper to taste
  • 1 cup crumbled feta cheese
  • 6 black Greek olives, pitted and sliced
Instructions
  1. In shallow salad bowl, or on serving platter, combine tomatoes, cucumber, and onion. Sprinkle with oil, lemon juice, oregano, and salt and pepper to taste. Sprinkle feta cheese and olives over salad. Serve.

Watch the recipe video here:

Good for You Greek Salad: https://trib.al/SiI3g7d

Posted by Allrecipes on Saturday, May 18, 2019

Dessert

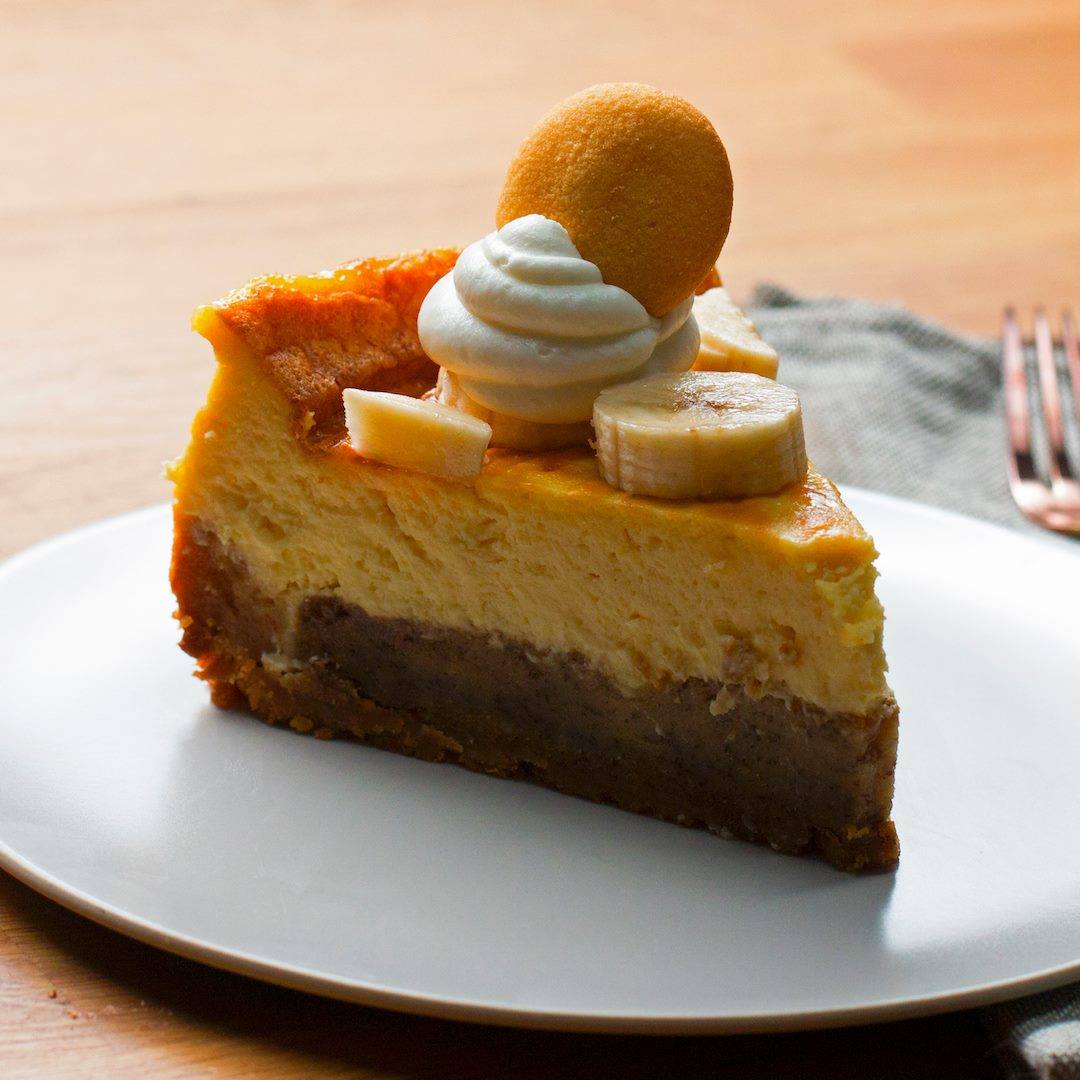
Banana Pudding Cheesecake

Banana Pudding Cheesecake
Author:
Cuisine: American
Recipe type: Dessert
Ingredients
BANANA BREAD CRUST
  • nonstick cooking spray
  • 11 oz vanilla wafer, 1 box, divided (310 g)
  • 1 cup unsalted butter, melted (230 g)
  • 2 ripe bananas
  • 1 cup sugar (200 g)
  • ½ cup vegetable oil (120 mL)
  • 1 large egg
  • 1 teaspoon vanilla extract
  • 1 teaspoon salt
  • 1 cup all-purpose flour (125 g)
  • 1 teaspoon baking powder
CHEESECAKE FILLING
  • 2 cups whole milk, hot (480 mL)
  • 2 ½ teaspoons gelatin powder
  • 3 oz banana pudding mix, 2 boxes (85 g)
  • ½ cup sugar (100 g)
  • 1 tablespoon vanilla extract
  • 32 oz cream cheese (905 g)
  • 6 large eggs
FOR DECORATION
  • 2 large bananas, sliced
  • whipped cream
  • 7 vanilla wafers
Instructions
  1. Preheat the oven to 350°F (180°C). Grease a 10-inch (25 cm) springform pan with nonstick spray.
  2. Make the banana bread crust: Set aside 7 vanilla wafers, then add the rest to a zip-top plastic bag and pound with a rolling pin into fine crumbs.
  3. Transfer the crushed wafers to a medium bowl, add the melted butter, and stir to combine.
  4. Pour the crust into the prepared pan and press against the bottom to about ¼ inch (6 mm) thick with a flat-bottomed measuring cup.
  5. In a large bowl, mash the bananas with a fork until smooth. Add the sugar, oil, egg, vanilla, salt, flour, and baking powder. Beat with an electric hand mixer until well-combined.
  6. Pour the banana bread mixture over the crust and spread evenly with a spatula.
  7. Bake for 30 minutes, or until golden brown and a toothpick inserted in the center comes out clean.
  8. Make the cheesecake filling: In a large bowl, combine the milk, gelatin, and banana pudding mix. Beat with an electric hand mixer until thick and smooth.
  9. Add the sugar, vanilla, and cream cheese, and beat again until well-combined.
  10. Add the eggs, 1 at a time, beating well after each addition.
  11. Pour the cheesecake filling over the banana bread crust.
  12. Bake for 1 hour, then turn off the oven and leave the cheesecake in the oven. Prop the oven door open slightly with a kitchen towel to let the hot air slowly escape. After 2 hours, remove the cheesecake from the oven. Refrigerate overnight.
  13. Arrange the sliced bananas on top of the cheesecake. Release the springform, then pipe whipped cream on top of 7 of the bananas. Place the reserved vanilla wafer cookies on top of the whipped cream.
  14. Slice and serve.
  15. Enjoy!

Watch the recipe video here:

Indulge a little with this banana pudding cheesecake! ??FULL RECIPE: https://tasty.co/recipe/banana-pudding-cheesecake

Posted by Proper Tasty on Sunday, May 19, 2019

Main dish

Deep-Dish Frito Pie

Deep-Dish Frito Pie
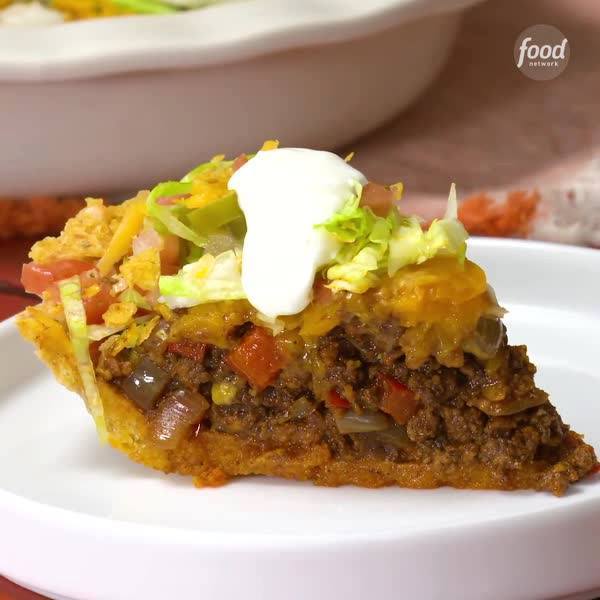
Three words: fancy Frito® pie. We love eating the classic out of the bag (who doesn't?) but this deep-dish version is packed with Frito® flavor -- in the crust, chili and topping.
Author:
Cuisine: American
Recipe type: Main dish
Ingredients
  • 6 ounces Fritos® (4½ cups), plus more for serving
  • 1 cup all-purpose flour (see Cook's Note)
  • 1 large egg, lightly beaten
  • 8 ounces sharp Cheddar, shredded
  • Kosher salt and freshly ground black pepper
  • 1 tablespoon olive oil
  • 1 pound ground beef (80/20)
  • 4 cloves garlic, finely chopped
  • 1 red bell pepper, stemmed and seeded, chopped
  • ½ medium onion, chopped
  • ¼ cup chili powder
  • 1 tablespoon tomato paste
  • 1 teaspoon ground cumin
  • 1 cup low-sodium chicken broth
  • 1 tablespoon cornstarch
For Serving:
  • Sour cream, guacamole, pico de gallo, shredded iceberg lettuce, pickled jalapeno slices, chopped onion and fresh cilantro leaves
Instructions
  1. Position a rack in the center of the oven and preheat to 350 degrees F.
  2. Pulse 4 ounces (3 cups) of Fritos® in a food processor until finely ground. Remove and reserve half of the Frito® crumbs. Add the flour, egg, 2 ounces (1/2 cup) Cheddar, 2 to 3 tablespoons of water and 1 teaspoon salt to the crumbs in the food processor. Pulse until a uniform dough forms, add an additional tablespoon of water if needed.
  3. Transfer the dough to a 9-inch pie pan and use the bottom of a measuring cup to press evenly across the bottom and up the side of the pan. Prick holes in the bottom of the dough with a fork. Bake until lightly browned, 15 to 20 minutes. Set aside while making the chili.
  4. Meanwhile, heat the oil in a large skillet over high heat. Add the beef and cook, breaking it up with a wooden spoon, until browned but not completely cooked through, 6 to 8 minutes. Transfer to a medium bowl with a slotted spoon, leaving behind as much fat in the skillet as possible. Reduce the heat to medium, add the garlic, bell pepper and onion and cook, stirring, until tender but not browned, 6 to 8 minutes. Add the chili powder, tomato paste and cumin and cook, stirring, until fragrant, about 1 minute. Add the chicken broth and reserved beef along with any accumulated juices to skillet. Bring to a simmer and cook, stirring and scraping up any brown bits from the skillet, until the liquid is almost evaporated, 6 to 8 minutes. Season to taste with salt and pepper. Add the cornstarch, reserved Frito crumbs and 2 ounces (1/2 cup) Cheddar and stir until combined.
  5. Transfer the chili to the pie crust, top with the remaining 4 ounces (1 cup) Cheddar, cover with foil and bake until the cheese is melted and the filling is bubbly, 15 to 20 minutes. Remove the foil and bake, uncovered, for 5 minutes more. Let cool 15 minutes then top with a layer of sour cream, guacamole and pico de gallo. Mound iceberg lettuce on top and sprinkle with pickled jalapeno slices, chopped onion, remaining Fritos and fresh cilantro leaves.
Cook’s Note
  1. When measuring flour, we spoon it into a dry measuring cup and level off excess. (Scooping directly from the bag compacts the flour, resulting in dry baked goods.)

Watch the recipe video here:

Recipe of the Day: Deep-Dish Frito Pie Save the recipe: https://foodtv.com/2JBe8y3!

Posted by Food Network on Sunday, May 19, 2019

Main dish

BIG MAC GYOZA

BIG MAC GYOZA
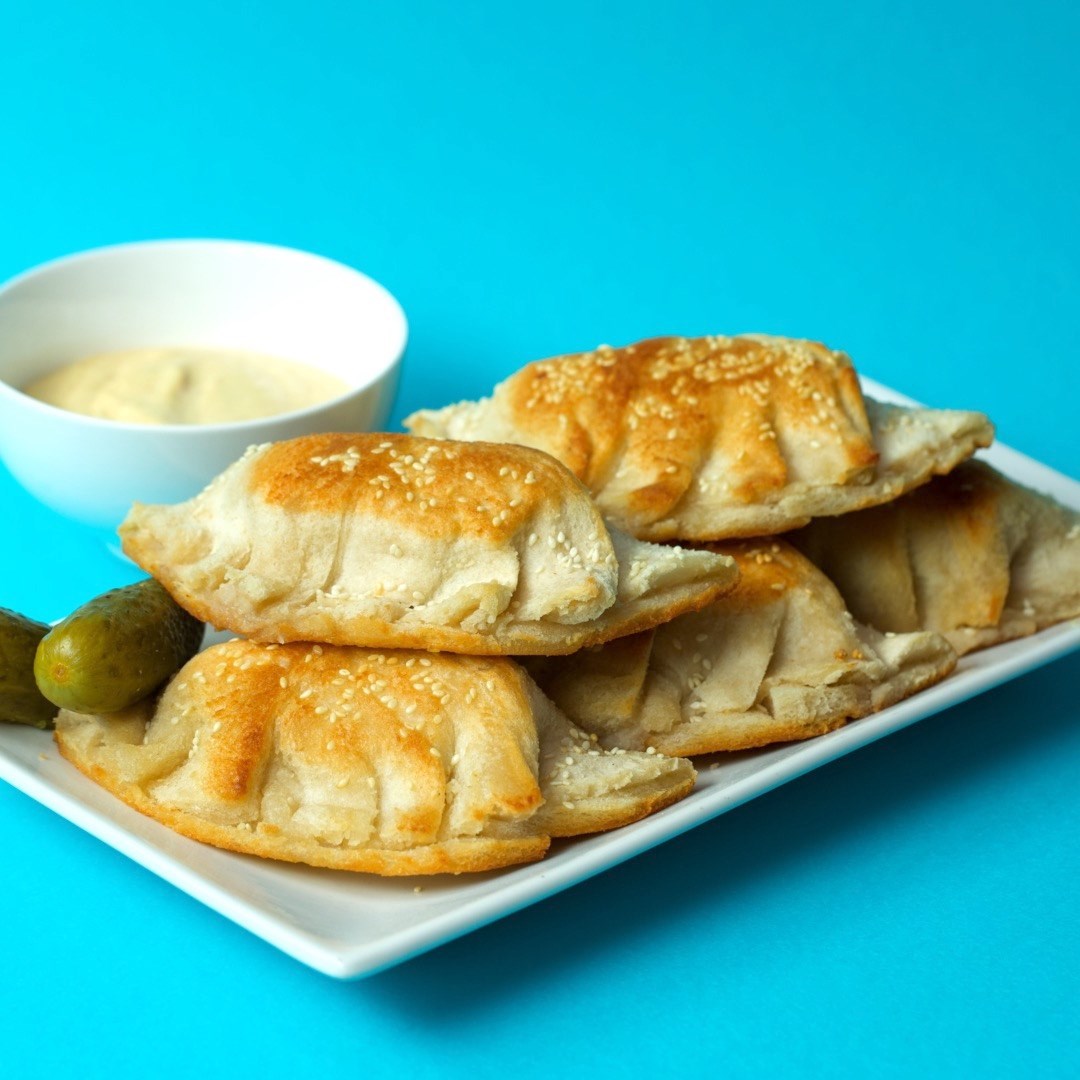
Twisted's twist on Japan's favourite dumpling - all you need is a few cold beers and some massive chopsticks.
Author:
Cuisine: American
Recipe type: Main dish
Ingredients
Gyoza
  • 800g beef mince
  • 1 tbsp sea salt
  • 1 tsp garlic powder
  • 1 tsp pepper
  • Sliced white bread
  • Sliced American-style cheese
  • Chopped white onion
  • Sesame seeds
Big Mac Sauce
  • ¾ cup mayonnaise
  • 1 tablespoon yellow mustard
  • 2 tablespoons sweet pickle relish
  • 2 teaspoons granulated sugar
  • ½ teaspoon white wine vinegar
  • ½ teaspoon paprika
  • ¼ teaspoon garlic powder
  • ¼ teaspoon onion powder
Instructions
  1. Preheat the oven to 180°C/360°F.
  2. Thoroughly mix together the beef mince, salt, garlic and pepper.
  3. Cut the crusts from the slices of white bread and, using water and a pastry brush, stick them together to make a square. Use a small plate to cut around and get a circle.
  4. Take a slice of cheese and place it in the middle followed by a small piece of burger mince. Brush one side of the circle with water and fold over, making little pleats as you go and pressing firmly together to get a gyoza shape. Brush with more water and sprinkle with sesame seeds.
  5. In a wide saucepan heat a tbsp of oil and fry the cheeseburger gyoza on both sides. Place in the oven for 10 minutes until the meat is cooked through.
  6. Meanwhile, mix together the ingredients for the sauce.
  7. Serve together & enjoy!

Watch the recipe video here:

Big up these Big Mac 'Gyoza'

Posted by Twisted on Sunday, May 19, 2019

Main dish

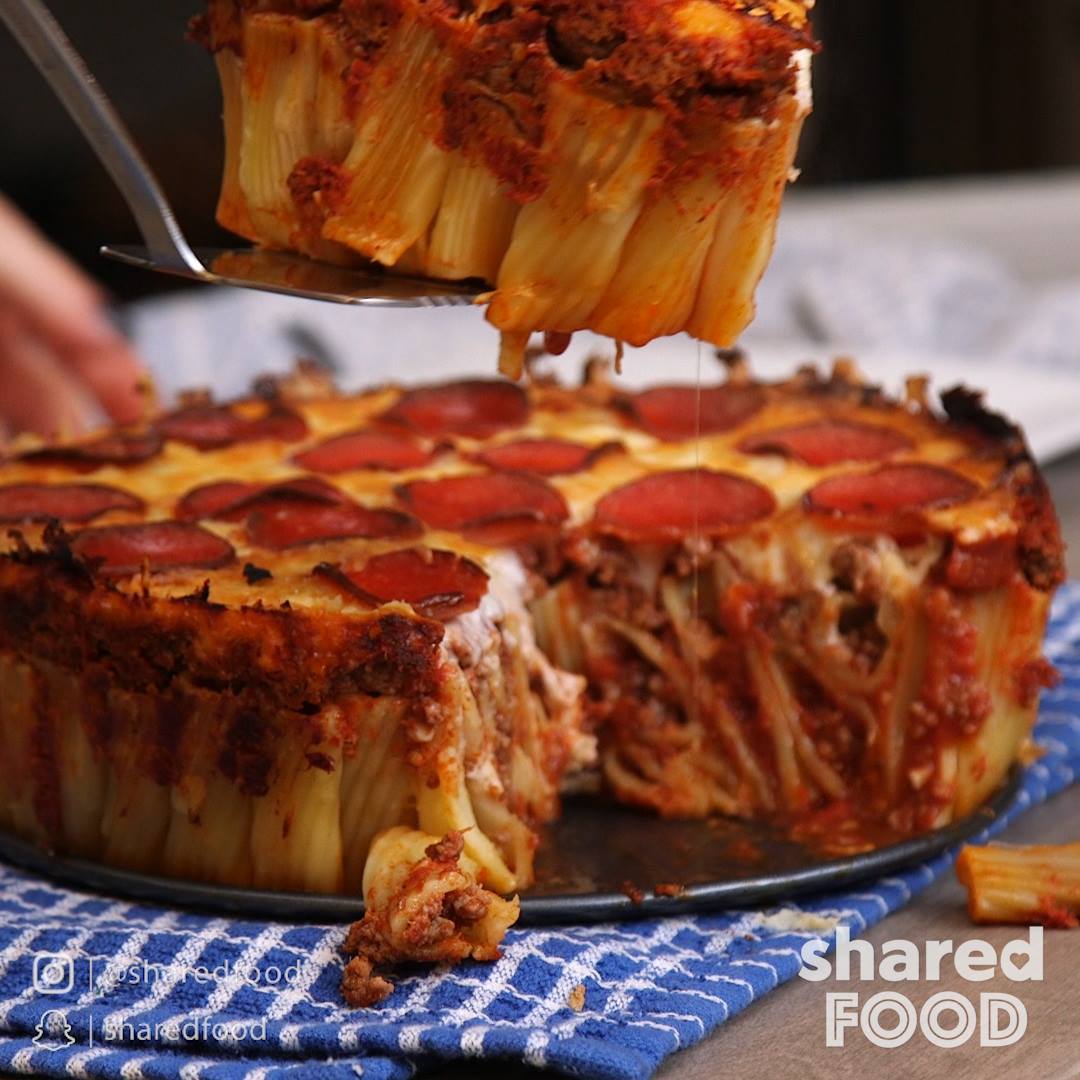
Rigatoni Pizza Pie Is the Perfect Mix of 2 Favortites

Rigatoni Pizza Pie Is the Perfect Mix of 2 Favortites
Coming from a family with a love of fresh pastas and Italian food, there was definitely no shortage big meals at my house. My grandma always loved making her pasta and dough from scratch and as much as I LOVED the way her cooking tastes, but I have 3 rambunctious boys at home that leave me NO time for that. I need the type of meal that will be quick and easy to make, that will feed 3 plus my dear husband and not leave us with a million dishes to clean up. Yes I say 'us' because if my boys want to eat the food I make, we have a rule they help contrite to dinner time in some way. I have them either clean up or help set the table and prep meals.
Author:
Cuisine: American
Recipe type: Main dish
Ingredients
  • 1 tablespoon olive oil
  • 1 lb of ground beef
  • 3 cloves minced garlic
  • ⅛ teaspoon crushed red pepper flakes
  • 1 can of crushed tomatoes
  • 1 lb rigatoni pasta
  • 1 cup freshly grated parmesan
  • 2 cups shredded mozzarella
  • 10-15 slices of pepperoni
Instructions
  1. Preheat oven to 400 degrees.
  2. Cook ground beef until browned all over.
  3. Add in the crushed red pepper flakes and a dash of salt and pepper to taste.
  4. Add crushed tomatoes and simmer on medium heat for roughly 25 minutes.
  5. In a separate pot, cook rigatoni until slightly elante, drain water and allow pasta to cool.
  6. Mix pasta with parmesan cheese and transfer to a 9 inch, greased spring form pan standing all the noodles on their ends.
  7. Pour the meat and tomato mixture atop the noodles, filling the centres when possible. Bake for 15 minutes.
  8. Top with mozzarella cheese and pepperoni and bake another 10 minutes or until cheese is slightly golden.
  9. Let the pan sit for 15 minutes prior to serving.

Watch the recipe video here:

Who says you can't have pizza and pasta at the same time?Recipe: http://sha.red/g9SfK

Posted by Shared Food on Sunday, May 19, 2019

Main dish

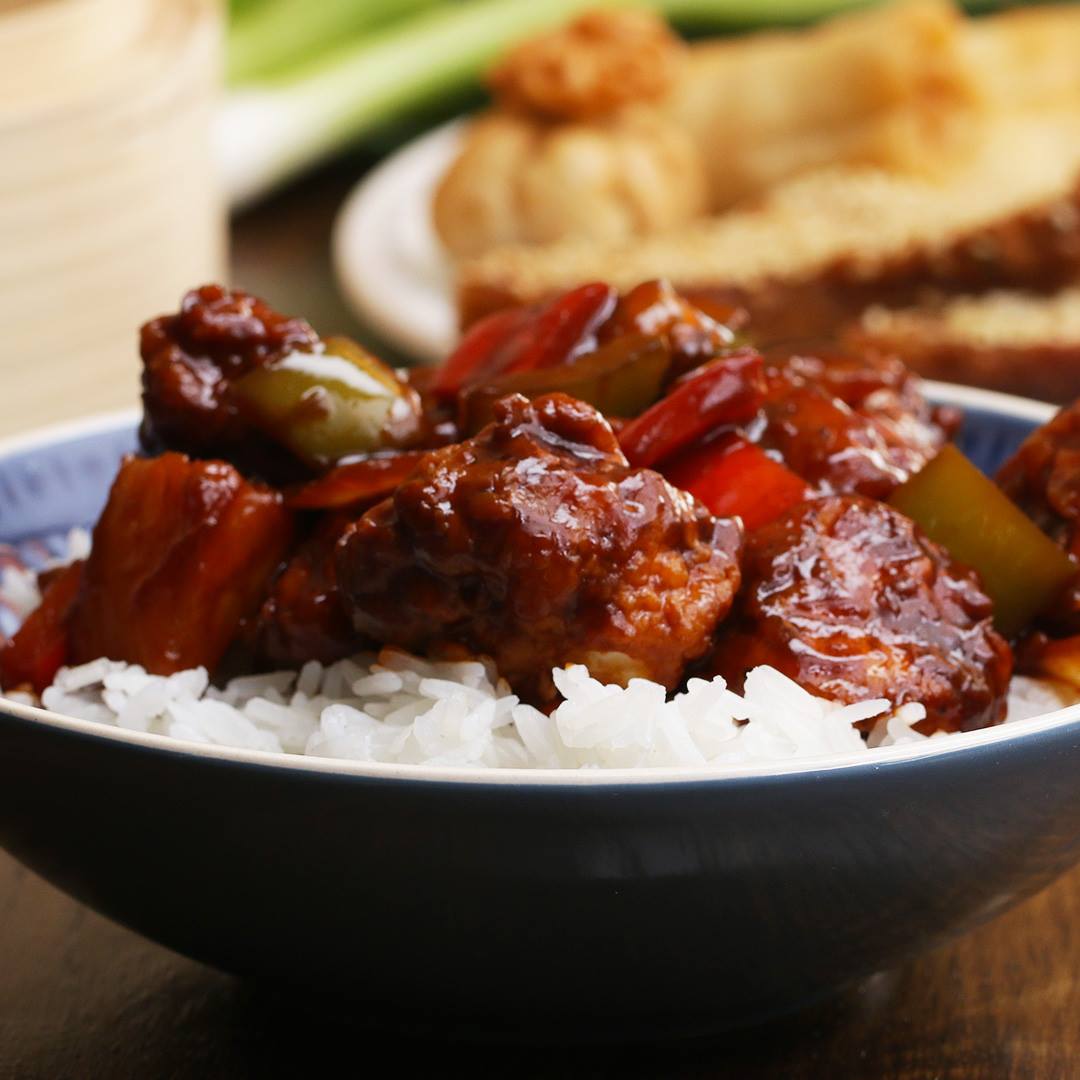
Sticky Chinese BBQ Chicken

Sticky Chinese BBQ Chicken
Author:
Cuisine: American
Recipe type: Main dish
Ingredients
  • 3 chicken breasts
  • salt, to taste
  • pepper, to taste
  • 1 cup corn flour (100 g)
  • 6 cups oil, for frying (1.4 L)
  • 1 onion
  • 2 bell peppers
  • 2 tablespoons soy sauce
  • 2 tablespoons red wine vinegar
  • 2 tablespoons tomato paste
  • 2 tablespoons sugar
  • ½ cup chicken stock (100 mL)
  • 1 ¼ cups pineapple (200 g)
CORNFLOUR PASTE
  • ¼ cup water (50 mL)
  • ¼ cup cornflour, as needed (50 mL)
EGG WASH
  • 2 egg yolks
  • milk
Instructions
  1. Season the chicken with salt and pepper.
  2. Cut into bite-size chunks.
  3. Dunk each chicken piece in the egg yolk, followed by the cornflour. Set aside.
  4. Heat the oil in a deep saucepan until it reaches 190°C (375°F).
  5. Carefully fry the chicken pieces for around 5-6 minutes, until crispy, slightly golden in colour and cooked throughout.
  6. Drain onto a plate covered in kitchen roll.
  7. In a large saucepan over a medium heat, add 1 tablespoon of oil and fry the onions and peppers for 2-3 minutes.
  8. Stir in the soy sauce, red wine vinegar, tomato paste, sugar, and chicken stock. Cook for a further 2 minutes.
  9. Add in cornflour paste.
  10. Mix until the sauce has thickened.
  11. Stir in the pineapple and chicken until evenly coated with the sauce.
  12. Serve with rice.
  13. Enjoy!

Watch the recipe video here:

Sticky Chinese BBQ Chicken ?FULL RECIPE: https://tasty.co/recipe/sticky-chinese-bbq-chicken

Posted by Proper Tasty on Friday, May 17, 2019

Main dish

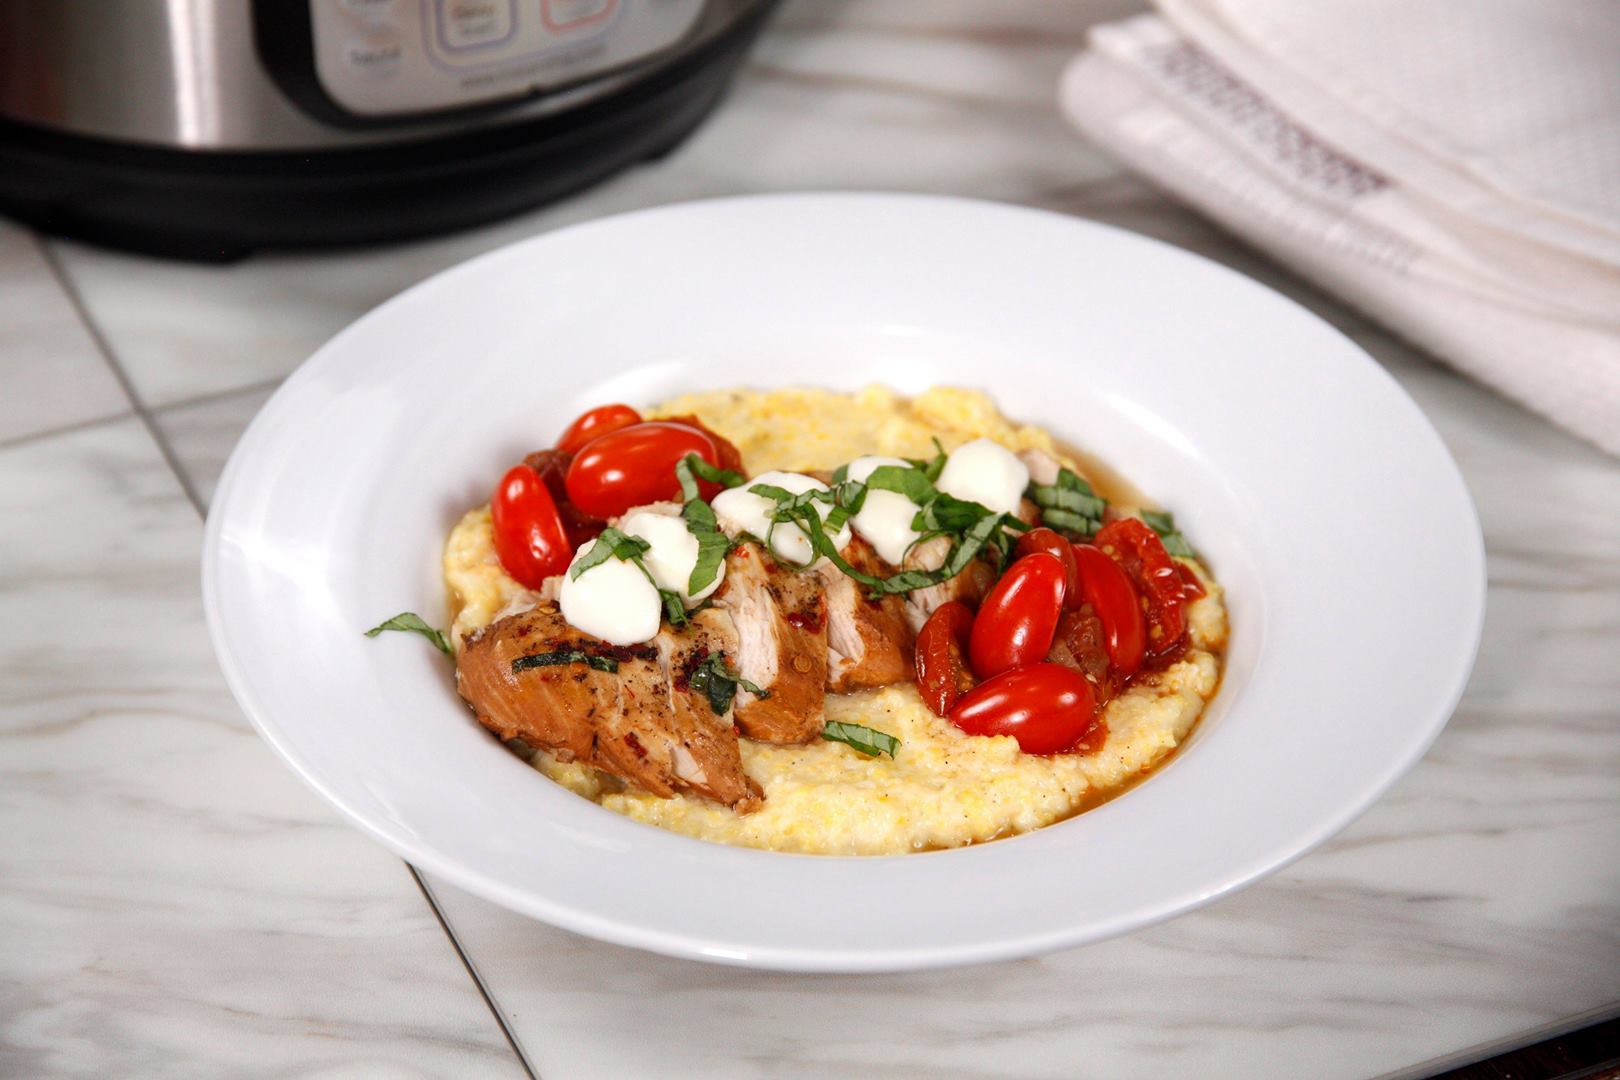
Instant Pot Delightful Caprese Chicken


Instant Pot Delightful Caprese Chicken
You’ll want to make this dish again and again.
Author:
Cuisine: American
Recipe type: Main dish
Ingredients
  • 1 tbsp olive oil
  • ½ large onion, sliced
  • 4 cloves of garlic, minced
  • ½ cup chicken broth
  • 1 lb boneless, skinless chicken breast (about 2)
  • 3½ cups cherry or grape tomatoes, halved
  • 3 tbsp balsamic vinegar
  • 1 tsp crushed red pepper (optional)
  • 2 tsp kosher salt
  • ½ tsp pepper
  • 6 oz fresh mozzarella “pearls” (or other fresh mozzarella cut to ½″ dice)
  • 2 tbsp fresh basil, cut into ribbons
Instructions
  1. Add olive oil to the Instant Pot. Using the display panel select the SAUTE function.
  2. When oil gets hot, add onion to the pot and saute until lightly browned, about 7 minutes. Add garlic and cook for 1-2 minutes more.
  3. Add broth to the pot and deglaze by using a wooden spoon to scrape the brown bits from the bottom of the pot.
  4. Add chicken in an even layer. Add tomatoes in an even layer. Drizzle with balsamic vinegar and crushed red pepper (optional). Sprinkle with kosher salt and pepper.
  5. Turn the pot off by selecting CANCEL, then secure the lid, making sure the vent is closed.
  6. Using the display panel select the MANUAL function*. Use the +/- buttons and program the Instant Pot for 12 minutes.
  7. When the time is up, quick-release the pressure. Sprinkle the mozzarella cheese and basil over the chicken, then cover 4-5 minutes until cheese melts.
  8. Serve over zoodles, quinoa, brown rice or polenta.

Watch the recipe video here:

Main dish

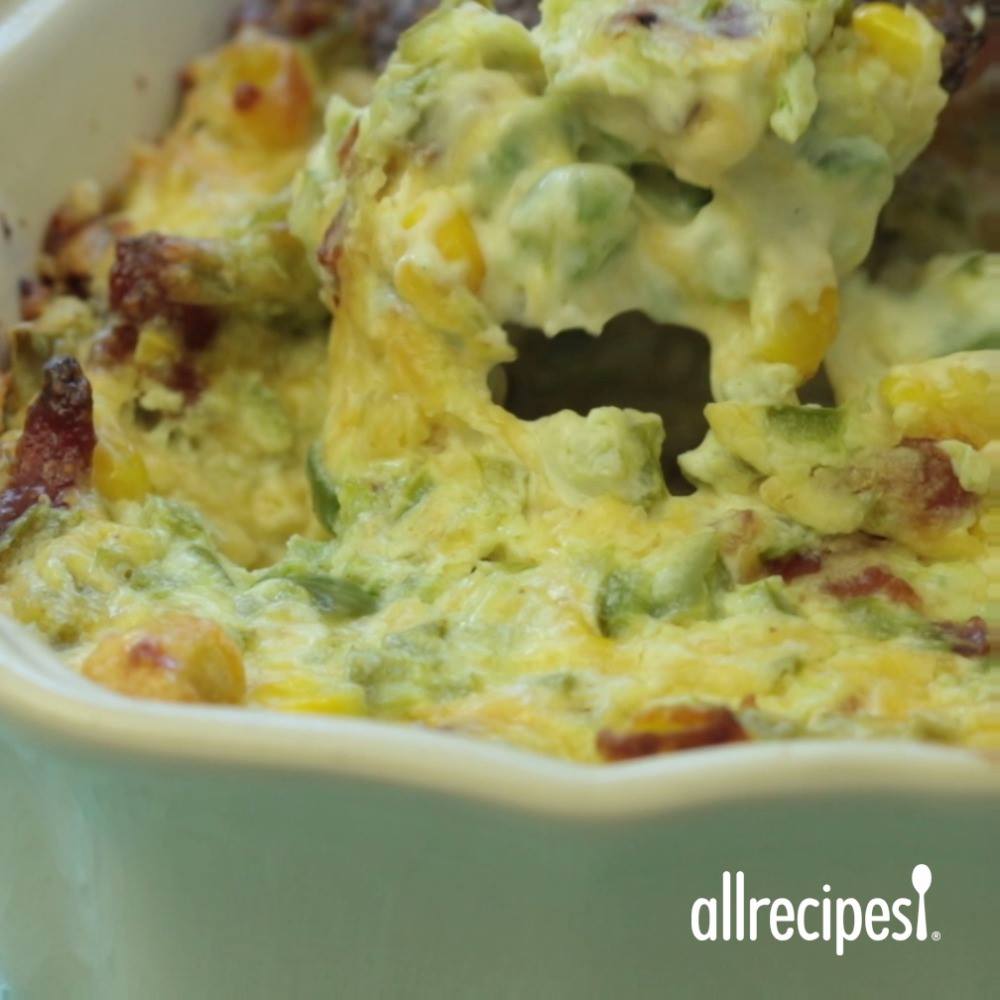
Jalapeno Popper Dip with Bacon

Jalapeno Popper Dip with Bacon
Creamy, spicy chip dip.
Author:
Cuisine: American
Recipe type: Main dish
Ingredients
  • 1 cup shredded Cheddar cheese
  • 1 (8 ounce) package cream cheese, softened
  • 8 jalapeno peppers, or more to taste, seeded and minced
  • 5 slices cooked bacon, crumbled
  • ½ cup sweet corn kernels
  • ¼ cup mayonnaise
Instructions
  1. Preheat oven to 400 degrees F (200 degrees C).
  2. Stir Cheddar cheese, cream cheese, jalapeno peppers, bacon, corn, and mayonnaise together in a small casserole dish.
  3. Bake in preheated oven until warm and bubbly, 15 to 20 minutes.

Watch the recipe video here:

Jalapeno Popper Dip with Bacon: https://trib.al/QoLmGFK

Posted by Allrecipes on Friday, May 17, 2019

Main dish

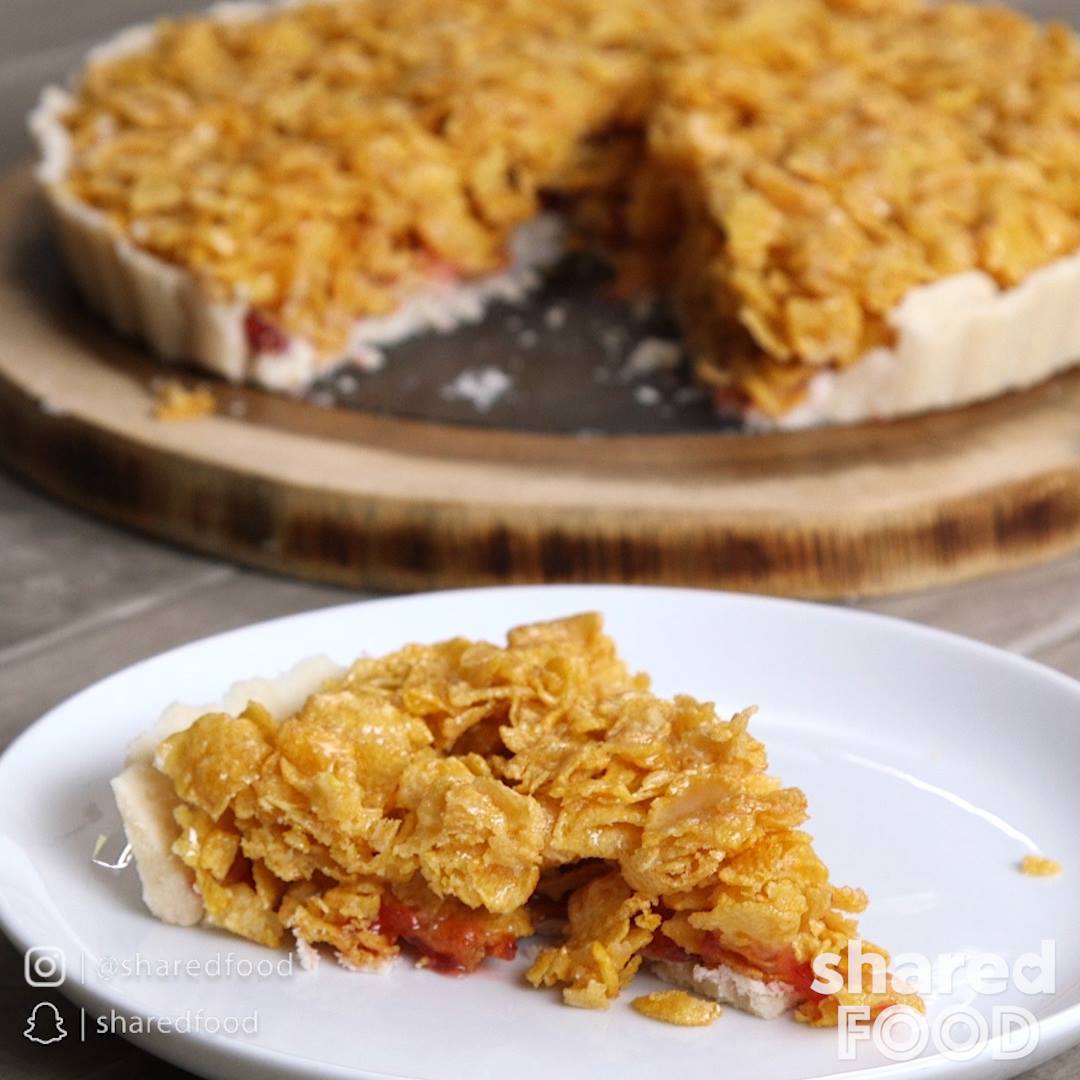
Lunch Lady Cornflake Jam Tart Will Bring You Right Back to Your Childhood

Lunch Lady Cornflake Jam Tart Will Bring You Right Back to Your Childhood
Here's a treat that will bring you right back to your childhood days! Lunch Lady Cornflake Jam Tart was something served in my school growing up, even though it wasn't the exact same as this recipe, it definitely was just as delicious! Did you have this type of dessert in your school as well?
Author:
Cuisine: American
Recipe type: Main dish
Ingredients
  • 8 ounces of flour
  • 4 ounces of butter
  • ½ cup of strawberry jam
  • 4 ounces of butter
  • 4 ounces of golden syrup
  • 4 ounces of sugar
  • 6 ounces of cornflakes
Instructions
  1. In a large bowl, combine 4 ounces of butter and the flour and begin to knead the two together until a dough forms.
  2. Once you have a dough consistency, lay it into a flan case.
  3. Bake "blind" in the oven at 200 degrees for 15-20 minutes.
  4. Remove from oven and allow to cool completely.
  5. Spread jam over the pastry crust.
  6. In a medium sized bowl, melt together the syrup, sugar, and butter. Add in the cornflakes and mix together.
  7. Pour the mixture over the jam and return to the oven for an addition 15-20 minutes.
  8. Remove and allow to cool completely.
  9. Enjoy!

Watch the recipe video here:

Do you remember eating this as a kid? This definitely brings back memories! Recipe: http://sha.red/dGwOE

Posted by Shared Food on Friday, May 17, 2019