Showing 3,071 Result(s)
Main dish

Instant Pot Keto Chicken Fajita Bowls

Instant Pot Keto Chicken Fajita Bowls
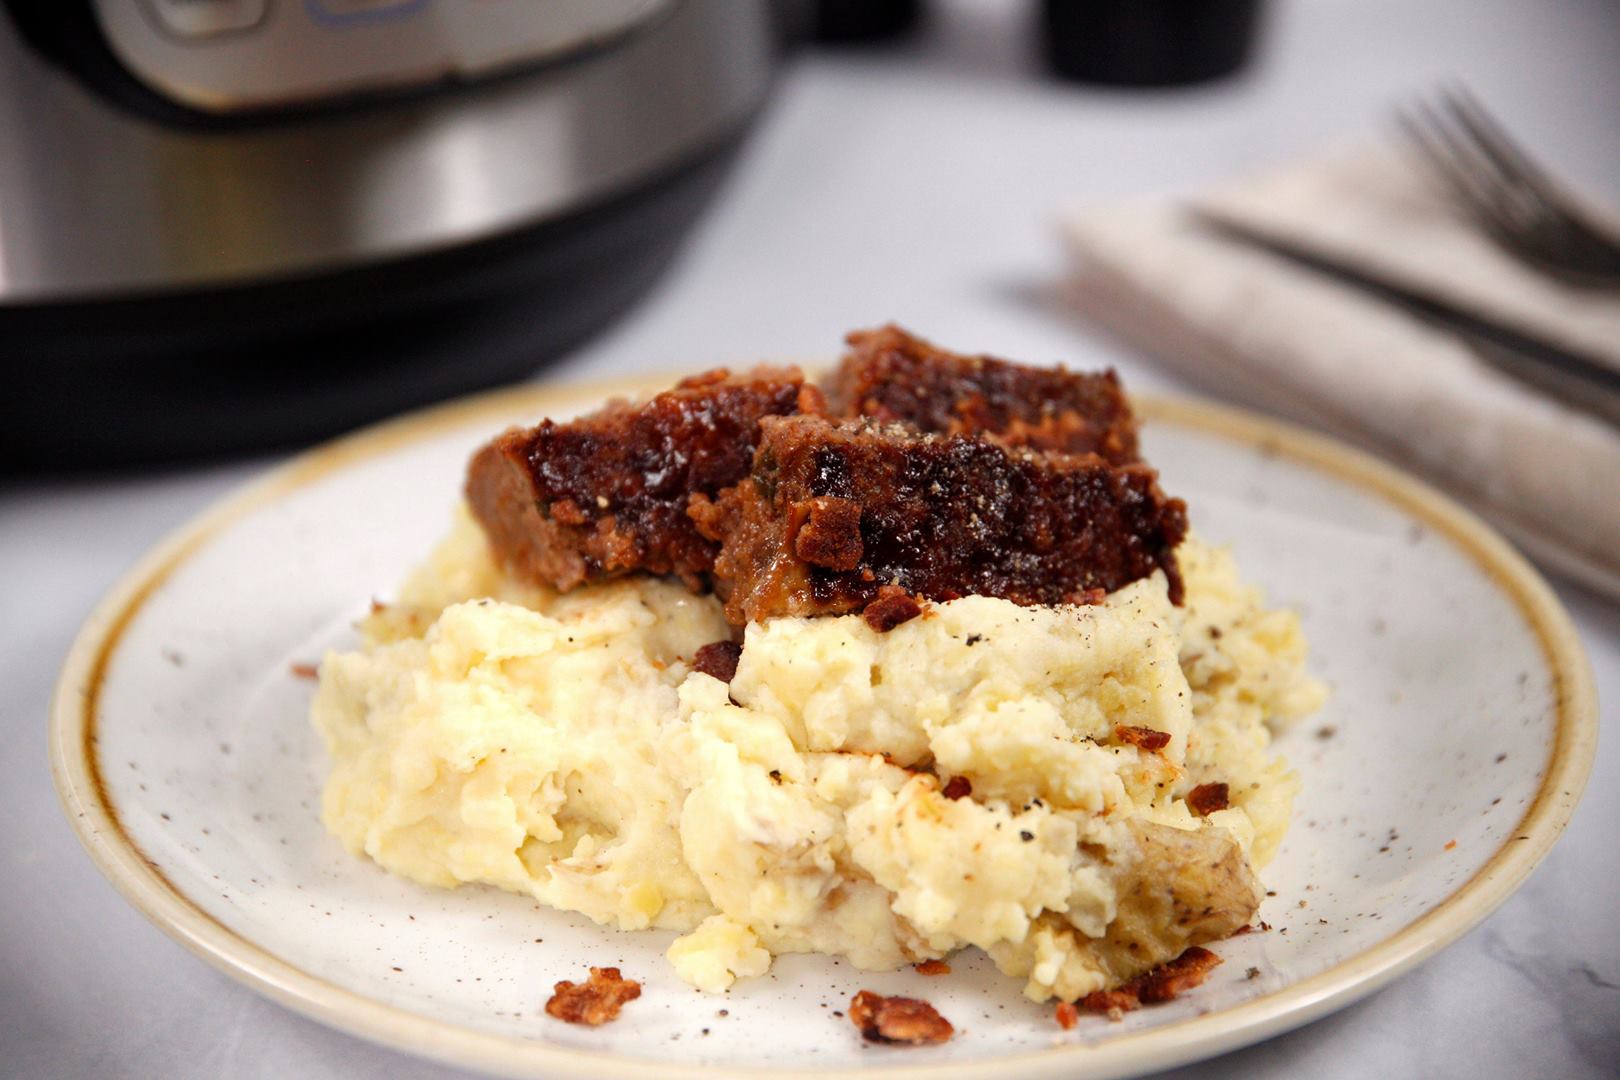
This keto-approved take on fajitas is a super satisfying low-carb meal. The chicken shreds off the bone easily, while the veggies have a slight crunch and the broth is light and flavorful. It feels indulgent, but you’re not breaking any rules.
Author:
Cuisine: American
Recipe type: Main dish
Ingredients
  • 1 tablespoon olive oil, divided
  • 1 green bell pepper, cut in strips
  • 1 medium onion, sliced
  • 2 teaspoons minced garlic
  • 2 pounds bone-in, skinless chicken breasts
  • 1¼ teaspoons kosher salt
  • 1 teaspoon chili powder
  • 1 teaspoon ground cumin
  • ½ teaspoon black pepper
  • ½ cup chicken stock Cooked cauliflower rice
  • ½ cup cherry tomatoes, quartered
  • 1½ ounces Cheddar cheese, shredded (about ⅓ cup)
  • ¼ cup sour cream
  • 1 avocado, diced Hot sauce
Instructions
  1. Set Instant Pot to “sauté” and allow it to preheat for 3 minutes. Heat 2 teaspoons of the oil until hot. Add bell pepper, onion, and garlic; stir and arrange in an even layer. Cook, undisturbed, until lightly browned around the edges, about 3 minutes. Stir, and continue to cook until tender and golden, 3 to 5 minutes. Transfer onion mixture to a plate.
  2. Stir together salt, chili powder, cumin, and pepper; sprinkle most of the spice mixture evenly on the meaty side of chicken breasts. Add remaining 1 teaspoon oil to pot. Place chicken, spice side down, in hot oil, and sear 3 minutes. Sprinkle bone side of chicken with remaining spice mix; flip. Add stock; cover and press cancel. Set cooker to high pressure for 10 minutes.
  3. Carefully release pressure and remove lid. Press “cancel”. Transfer chicken to a platter; shred chicken and discard bones. Place shredded chicken and onion mixture in hot liquid. Serve fajita mixture over cauliflower rice; top with tomatoes, cheese, sour cream, avocado, and hot sauce.

Watch the recipe video here:

Feels indulgent, but you’re not breaking any #Keto rules. GET THE RECIPE: https://trib.al/8TOXCe1 (via Well Done)

Posted by MyRecipes on Thursday, May 30, 2019

Dessert

Banana Marshmallow Pops

Banana Marshmallow Pops
Creativity in the kitchen is a must, especially when making crazy unique snacks for your kids. Not going to lie about this one, I enjoyed these banana pops so much I forgot to give them to my kids. Tropical bananas together with sticky and sweet marshmallows all enrobed in milk chocolate and covered in nuts, sprinkles and coconut! Forgot to mention that they’re all on a stick!
Author:
Cuisine: American
Recipe type: Dessert
Ingredients
  • 4 large bananas
  • 6 large marshmallows
  • 3 cups milk chocolate chips, melted
  • Sweetened coconut flakes
  • Walnut pieces, crushed
  • Sprinkles
  • 6 popsicle sticks
Instructions
  1. Peel and cut bananas into inch long chunks, cut marshmallows in half (roughly the same size as the banana pieces)
  2. Starting with marshmallow, skewer onto popsicle stick, leaving enough room to still be able to hold the popsicle stick. Then skewer banana, keep going until it reaches the top and make sure to have a marshmallow at the top.
  3. Melt chocolate in a microwave safe bowl in 30 second intervals until smooth.
  4. Gently dip the entire pop into the melted chocolate and garnish with toppings before the chocolate sets.
  5. Place onto parchment lined baking sheet and place in fridge until set.
  6. Enjoy!

Watch the recipe video here:

Banana Marshmallow Pops are mouthwateringly delicious ?Recipe: http://sha.red/tJXwO

Posted by Shared Food on Thursday, May 30, 2019

Dessert

Rubik’s Cube Cake

Rubik’s Cube Cake
We have the secret to solving the Rubik’s cube: eat it! We recommend incorporating flavors into the vanilla frosting that reflect their specific color block, but if you want to keep things simple, simply keep the frosting as is. While this cake might not make you smarter, one thing’s for sure. You’ll want to use our marshmallow fondant recipe for more fun cakes to come.
Author:
Cuisine: American
Recipe type: Dessert
Ingredients
CAKE
  • 1 pound cake, store-bought frozen
  • ½ cup vanilla frosting (55 g)
  • ½ teaspoon lemon zest
  • ½ teaspoon lime zest
  • 1 teaspoon orange marmalade
  • 1 teaspoon strawberry jam
  • 1 teaspoon blueberry jam
MARSHMALLOW FONDANT
  • 1 bag marshmallow, white
  • 1 tablespoon water, plus more as needed
  • 4 tablespoons unsalted butter, softened
  • 5 cups powdered sugar, plus more as needed (550 g)
  • nonstick cooking spray, for greasing
  • red gel food coloring
  • blue gel food coloring
  • green gel food coloring
  • yellow gel food coloring
  • orange gel food coloring
ASSEMBLY
  • 2 large chocolate bars, cut into four 3 in (7 cm) squared
SPECIAL EQUIPMENT
  • food safe plastic gloves
Instructions
  1. Line a baking sheet with parchment paper.
  2. With a sharp knife, divide the cake crosswise into thirds, about 3 inches (7 cm) each. Slice the domed tops off of each piece. Very carefully slice each piece of cake into 4 even layers. Stack the layers in sets of 2 (there should be 6 stacks) with the bottom facing up on the prepared baking sheet. Each set of stacks will be a different color cube (white, yellow, green, orange, red, and blue)--write in marker on the parchment paper to label each stack.
  3. Open each set of layers like a book. Spread a layer of vanilla frosting on each slice.
  4. For the white cubes, stack the slices, frosted sides touching. For the yellow cubes, sprinkle with the lemon zest, then stack the slices, frosted sides touching. For the green cubes, sprinkle with the lime zest, then stack the slices, frosted sides touching. For the orange cubes, spread the orange marmalade on one piece and stack the slices. For the red cubes, spread the strawberry jam on one piece and stack the slices. For the blue cubes, spread the blueberry jam on one piece and stack the slices. Freeze for at least 30 minutes.
  5. Make the marshmallow fondant: In a large microwave-safe bowl, combine the marshmallows and water. Microwave on medium power for 2-3 minutes, stirring every 30 seconds, until the marshmallows are completely melted. Add the softened butter and use a silicone spatula to stir until combined.
  6. Add 5 cups (550 G) of powdered sugar to a separate large bowl and make a well in the center. Pour in the marshmallow mixture. Stir to combine. When it is mostly combined, grease your hands with nonstick spray and knead to bring the fondant together into a ball in the bowl. Add more powdered sugar as needed if the fondant is sticking to your hands.
  7. Grease a clean work surface and your hands with more nonstick spray. Turn the fondant out onto the greased surface. If it gets too dry, add a bit more water. Use more nonstick spray if the fondant is sticking to the surface. Continue kneading for 8-10 minutes, until the fondant is smooth and holds its shape.
  8. Divide the fondant into 6 even pieces, spray with nonstick spray, and cover with plastic wrap so they don’t dry out. Using the gel food coloring, dye 5 of the pieces green, blue, orange, red, and yellow by kneading each gel color into 1 section of fondant. Leave the remaining piece white. Spray again with nonstick spray and cover with plastic wrap.
  9. Remove the cake stacks from the freezer. Using a sharp knife and a ruler to measure, slice each stack into 9 ¾-inch (22 cm) cubes. Return to the marked baking sheet and separate into individual pieces, then freeze again for at least 30 minutes.
  10. Roll the green fondant into a log, then cut into 9 equal pieces. Grease the pieces you aren’t using yet with nonstick spray and cover with plastic wrap. Sprinkle a piece of fondant with powdered sugar and roll out to a ¼-inch-thick (6 mm) square. Remove the green cake cubes from the freezer. Cover a cube with the rolled out fondant on 5 sides, removing the excess fondant with a knife. Repeat with the remaining fondant and cake cubes.
  11. To assemble the cake, stack 9 cubes of varying color on a plate, spaced about ¼ inch (6 mm) apart. Place a piece of chocolate squarely on top of the cubes. Carefully stack another 9 cubes on top of the chocolate. Place another chocolate square on top of the cubes, slightly askew. Stack 9 more cubes on top of the chocolate. Repeat to make another cake.
  12. Enjoy!

Watch the recipe video here:

If you can't solve a rubik's cube… just eat it!! ?Get the recipe: https://tasty.co/recipe/rubiks-cube-cake

Posted by BuzzFeed Food on Thursday, May 30, 2019

Main dish

Instant Pot Bacon BBQ Meatloaf and Mashed Potatoes

Instant Pot Bacon BBQ Meatloaf and Mashed Potatoes
This one-pot meal is everything you need for a hearty dinner.
Author:
Cuisine: American
Recipe type: Main dish
Ingredients
  • 3 pounds yellow potatoes, skin on, quartered
  • 1 cup chicken broth
  • 1 bay leaf
Meatloaf Mixture:
  • 1½ pounds ground beef (preferably 93% or leaner)
  • 1 cup breadcrumbs
  • 2 eggs, beaten
  • 2 tbsp parsley, finely chopped (or 2 tsp dried)
  • 2 tsp each garlic powder, onion powder
  • 1 tsp each kosher salt, pepper
  • ½ cup honey bbq sauce
  • 4 pieces bacon, cooked and crumbled
To Finish:
  • ¼ cup honey bbq sauce
  • 1 cup half and half
  • 4 tbsp butter
  • ¾ cup sour cream
  • 1 tsp garlic powder
  • Kosher salt and pepper to taste
  • Additional cooked and crumbled bacon for garnish
Instructions
  1. Place potatoes in the bottom of the pot in an even layer. Add the bay leaf and chicken broth. Place the steam rack on top of the potatoes.
  2. In a large bowl thoroughly combine the Meatloaf Mixture ingredients.
  3. Gently press the meatloaf into a 6-cup bundt pan (we love this one: https://amzn.to/2RNympZ) and cover loosely with foil–do not seal.
  4. Use a foil sling to lower the bundt pan on to the steam rack, then secure the lid, making sure the vent is closed.
  5. Using the display panel select the MANUAL function*. Use the +/- keys and program the Instant Pot for 22 minutes.
  6. When the time is up, quick-release the remaining pressure. Remove the bundt pan and brush the top with ¼ cup bbq sauce, then set under broiler for 5-7 minutes until sauce is bubbly and caramelized.
  7. Meanwhile, remove bay leaf and add half-and-half, butter, garlic powder and salt and pepper to the pot. Mash to your desired texture.
  8. Slice the meatloaf, top with additional crumbled bacon. Serve with the potatoes.

Watch the recipe video here:

This one-pot meal is everything you need for a hearty dinner. RECIPE: http://chopsecrets.com/instant-pot-bacon-bbq-meatloaf-and-mashed-potatoes/

Posted by Chop Secrets on Thursday, May 30, 2019

Breakfast

Stuffed Pickle Egg Rolls

Stuffed Pickle Egg Rolls
Crab salad meets crab rangoon in these stuffed fried pickles.
Author:
Cuisine: American
Recipe type: Breakfast
Ingredients
  • 1 (6 ounce) can fancy crabmeat, drained
  • 4 ounces cream cheese, softened
  • ½ stalk celery, diced
  • 1 green onion, chopped
  • 1 tablespoon Worcestershire sauce
  • ½ teaspoon seafood seasoning (such as Old Bay®)
  • 8 whole dill pickles, halved lengthwise
  • 8 egg roll wrappersvegetable oil for frying
Instructions
  1. Combine crabmeat, cream cheese, celery, green onion, Worcestershire sauce, and seafood seasoning in a mixing bowl. Stir until evenly combined.
  2. Use a spoon to scoop out and discard the seeds from each pickle half to create 16 boats. Spoon a tablespoon of cream cheese mixture into one pickle boat and top with the the other half of the pickle to seal. Repeat with remaining pickles and cream cheese mixture.
  3. Place an egg roll wrapper on a clean surface in diamond shape with one corner facing you. Top with a stuffed pickle. Fold up bottom half of wrapper and tightly fold in sides. Gently roll and seal with a couple drops of water. Repeat with remaining wrappers and pickles.
  4. Heat oil in a deep-fryer or large saucepan to 350 degrees F (175 degrees C). Place 4 egg rolls in the hot oil and cook until golden brown, about 5 minutes. Remove egg rolls using tongs and place on a paper towel-lined plate. Repeat with remaining egg rolls.

Watch the recipe video here:

Crab salad meets crab rangoon in these stuffed fried pickles!Stuffed Pickle Egg Rolls: https://trib.al/9AoBUv7

Posted by Allrecipes on Wednesday, May 29, 2019

Main dish

Pea and Prosciutto Salad

Pea and Prosciutto Salad
If you see great-looking snow peas, use them in combination with or in place of the sugar snaps. This recipe was reader-requested from Coltivare in Houston, TX.
Author:
Cuisine: American
Recipe type: Main dish
Ingredients
  • 1 tablespoon fresh lemon juice
  • ½ teaspoon Dijon mustard, like Maille
  • 3 tablespoons olive oil
  • Kosher salt, freshly ground pepper
  • 1¼ cups shelled fresh green peas (from about 1¼ pounds pods), or frozen peas, thawed
  • 12 ounces sugar snap peas (about 3 cups), trimmed
  • 4 ounces arugula, tough stems removed (about 6 packed cups)
  • 4 ounces prosciutto, thinly sliced
  • Knob of fresh horseradish, peeled (for serving)
Instructions
  1. Whisk lemon juice and mustard in a large bowl. Gradually add oil, whisking constantly until emulsified; season vinaigrette with salt and pepper.
  2. Working in batches, cook green peas and sugar snap peas in a large pot of boiling salted water until crisp-tender, about 2 minutes per batch. Immediately transfer to a bowl of ice water and swoosh peas around until cold; this sets their color and halts the cooking. Drain and pat dry with paper towels.
  3. Add green peas, sugar snap peas, and arugula to bowl with vinaigrette and toss until well coated with dressing; season with salt and pepper.
  4. Arrange salad on a platter and top with prosciutto. Finely grate horseradish over salad to your liking.

Watch the recipe video here:

A salad with prosciutto in it is a salad for us.RECIPE: http://bonap.it/7h1v2o4

Posted by Bon Appétit Magazine on Wednesday, May 29, 2019

Dessert

Oreo™ Slab Pie

Oreo™ Slab Pie
This easy cookies & cream slab pie is perfect for those summer backyard picnics.
Author:
Cuisine: American
Recipe type: Dessert
Ingredients
  • 1 box Pillsbury™ refrigerated pie crusts, softened as directed on box
  • 1 jar (16 oz) hot fudge topping (2 cups)
  • 1½ cups heavy whipping cream
  • 1 package (8 oz) cream cheese, softened
  • ⅓ cup sugar
  • ½ teaspoon vanilla
  • 16 Oreo™ cookies, coarsely crushed
  • 8 Oreo™ cookies, halved
Instructions
  1. Heat oven to 450°F. Remove pie crusts from pouches. Unroll and stack crusts on lightly floured surface. Roll to 17x12-inch rectangle. Fit crust into ungreased 15x10x1-inch pan, pressing into corners. Fold crust even with edges of pan. Flute or crimp edges. Prick crust several times with fork.
  2. Bake 10 to 12 minutes or until golden brown. Cool completely, about 30 minutes. Carefully spread hot fudge evenly on crust. Set aside.
  3. Meanwhile, in medium bowl, beat whipping cream with electric mixer on high speed until stiff peaks form. Set aside.
  4. In large bowl, beat cream cheese, sugar and vanilla with electric mixer on medium speed until smooth and creamy.
  5. Gently fold whipped cream into cream cheese mixture. Fold in crushed cookies.
  6. Spoon cream cheese mixture evenly over hot fudge. Refrigerate 1 hour. Garnish with halved cookies. Cover and refrigerate any remaining pie.

Watch the recipe video here:

Anything with “Oreo™” in the title is a guaranteed crowd-pleaser. Oreo™ Slab Pie recipe:…

Posted by Pillsbury on Wednesday, May 29, 2019

Main dish

Pasta with Baby Artichokes, Mascarpone, and Hazelnuts

Pasta with Baby Artichokes, Mascarpone, and Hazelnuts
The hardest part of making this recipe is trimming the artichokes, which isn’t as hard as it seems. If you can’t get your hands on baby artichokes, use the hearts of two globe artichokes.
Author:
Cuisine: American
Recipe type: Main dish
Ingredients
  • 12 ounces fresh lasagna sheets (about 8x6 inches)
  • All-purpose flour (for surface)
  • 1 lemon, halved
  • 1 pound baby artichokes (about 8)
  • 3 garlic cloves, crushed
  • 2 bay leaves
  • ¼ cup plus 3 tablespoons olive oil
  • Kosher salt
  • ¾ cup blanched hazelnuts
  • 2 tablespoons finely chopped marjoram or oregano
  • 1½ teaspoons Aleppo-style pepper
  • 1 cup mascarpone
  • 1 teaspoon finely grated lemon zest
  • 1 teaspoon fresh lemon juice
Instructions
  1. Preheat oven to 350°. Place a pasta sheet on a lightly floured work surface. Using a paring knife or a pastry wheel, cut the sheet into quarters (each piece should be about 4x3"), then cut each piece on a diagonal from corner to corner to create 4 triangles. Transfer triangles to a flour-dusted baking sheet and cover with a kitchen towel. Repeat process with remaining lasagna sheets.
  2. Squeeze juice from lemon halves into a large bowl of cold water. Working with 1 artichoke at a time, pull off all the tough dark outer leaves until mostly yellow leaves remain. Using a serrated knife, cut 1" off top of artichoke. Trim stem, leaving at least ½" intact. Using a paring knife or a vegetable peeler, remove dark green outer layer from stem. Cut artichoke in half lengthwise and then into ⅓"-thick wedges. Drop artichoke pieces in lemon water. The acid in the water will keep them from turning brown while you trim the remaining artichokes.
  3. Once all the artichokes have been trimmed, drain and place in a wide medium saucepan. Add garlic, bay leaves, and ¼ cup oil. Pour in cold water to submerge artichokes; season generously with salt. Bring to a simmer over medium heat and cook until a paring knife slides through artichokes with little to no resistance, 8–10 minutes. Let cool, then drain and set artichokes aside.
  4. While the artichokes are simmering away, toast hazelnuts on a rimmed baking sheet, tossing once, until golden brown, 10–12 minutes. Let cool, then coarsely chop. Toss in a medium bowl with marjoram, Aleppo-style pepper, and 3 Tbsp. oil; season with a generous pinch of salt. Set aside.
  5. Mix mascarpone, lemon zest, and lemon juice in a separate medium bowl; season with salt. Set aside.
  6. Cook pasta in a large pot of boiling salted water, stirring occasionally, until very al dente. Drain, reserving ½ cup pasta cooking liquid.
  7. Return pasta and ¼ cup pasta cooking liquid to pot and set over low heat. Add reserved mascarpone mixture and gently toss, adding more pasta cooking liquid as needed if sauce is too thick, until pasta is al dente and sauce coats pasta. Add reserved artichokes and half of reserved hazelnut mixture and gently stir to distribute (you want to avoid breaking up artichokes very much).
  8. Divide pasta among bowls. Top with remaining hazelnut mixture.
Do Ahead:
  1. Hazelnuts can be toasted 3 days ahead; store airtight at room temperature. Artichokes can be trimmed and cooked 1 day ahead; let cool in cooking liquid. Cover and chill. Drain just before adding to pasta.

Watch the recipe video here:

Creamy pasta lovers unite.RECIPE: http://bonap.it/tDQo4SF

Posted by Bon Appétit Magazine on Wednesday, May 29, 2019

Drink

Instant Pot Fabulous French Onion Soup

Instant Pot Fabulous French Onion Soup
This version of the classic is gorgeously cheesy with a silky texture.
Author:
Cuisine: American
Recipe type: Drinks
Ingredients
  • 3 tbsp butter
  • 1 tbsp oil
  • 1 large yellow onion, quartered and sliced onion “quarter moon” shaped slices
  • 4 smaller sweet onions, quartered and sliced onion “quarter moon” shaped slices
  • 2 tsp brown sugar
  • 3 sprigs fresh thyme
  • 2 cloves garlic, minced
  • 1 bay leaf
  • ½ cup brandy
  • ¾ cup red wine
  • 4 cups beef broth, warmed
  • Salt and pepper to taste
  • 4 thick slices of french bread, toasted (look for bread that is a big enough diameter to almost cover the opening of the crocks–or use croutons instead)
  • 4 slices gruyere (or swiss) cheese
  • 4 slices provolone cheese
  • Paprika for garnish
Instructions
  1. Add butter and oil to the Instant Pot. Using the display panel select the SAUTE function.
  2. When butter is melted, add onion, brown sugar, thyme, garlic and bay leaf to the pot.
  3. Cook and stir for 10-15 minutes until onions have cooked down by half and have a pasta-like consistency.
  4. Add brandy to the pot and deglaze by using a wooden spoon to scrape any brown bits from the bottom of the pot.
  5. Continue to cook and stir until alcohol has cooked off, then add red wine and warmed broth to the pot and stir.
  6. Turn the pot off by selecting CANCEL, then secure the lid, making sure the vent is closed.
  7. Using the display panel select the MANUAL function*. Use the +/- keys and program the Instant Pot for 8 minutes.
  8. When the time is up, quick-release the remaining pressure. Remove and discard thyme stems and bay leaf. Add salt and pepper to taste.
  9. Ladle the soup into crocks, place a slice of bread on each crock and a slice of cheese on each piece of bread. Sprinkle with paprika.
  10. Put crocks on a baking sheet lined with foil and set under the broiler until the top begins to bubble and brown, 5-7 minutes.

Watch the recipe video here:

This version of the classic is gorgeously cheesy with a silky texture.RECIPE: http://chopsecrets.com/instant-pot-fabulous-french-onion-soup/

Posted by Chop Secrets on Wednesday, May 29, 2019

Dessert

These Chocolate Peanut Butter Cups Have A Secret Ingredient You’d Never Expect

These Chocolate Peanut Butter Cups Have A Secret Ingredient You'd Never Expect
There's no way you could ever improve chocolate and peanut butter cups...or so I thought! These indulgent sweet bites have only five ingredients, and one of them is totally unexpected - Cheerios! The cereal gives just the right amount of crunch to make these treats even more of a pleasure to eat. We used plain Cheerios, but you can experiment with all the different flavors to see which one you like best. What recipes have you make before using cereal?
Author:
Cuisine: American
Recipe type: Dessert
Ingredients
  • ½ cup salted butter, melted
  • 1 cup Cheerios cereal
  • 1 cup powdered sugar
  • ¾ cup peanut butter
  • 1 cup chocolate chips
Instructions
  1. Pulse the Cheerios in a food processor until ground into small pieces.
  2. Add the ground Cheerios to a large bowl with melted butter, powdered sugar and peanut butter. Mix until everything is combined.
  3. Add spoonfuls of the mixture to a lined muffin tin (regular sized or mini - your choice!).
  4. Melt the chocolate chips in a microwave safe bowl and top each peanut butter cupcake.
  5. Chill for 3 hours or until the bites have completely firmed up. Serve and enjoy!

Watch the recipe video here:

These chocolate peanut butter cups have a secret ingredient you'd never expect!Recipe: http://sha.red/wfaux

Posted by Shared Food on Tuesday, May 28, 2019