Showing 3,071 Result(s)
Main dish

Instant Pot Jerk Chicken and Cornbread
Instant Pot Jerk Chicken and Cornbread
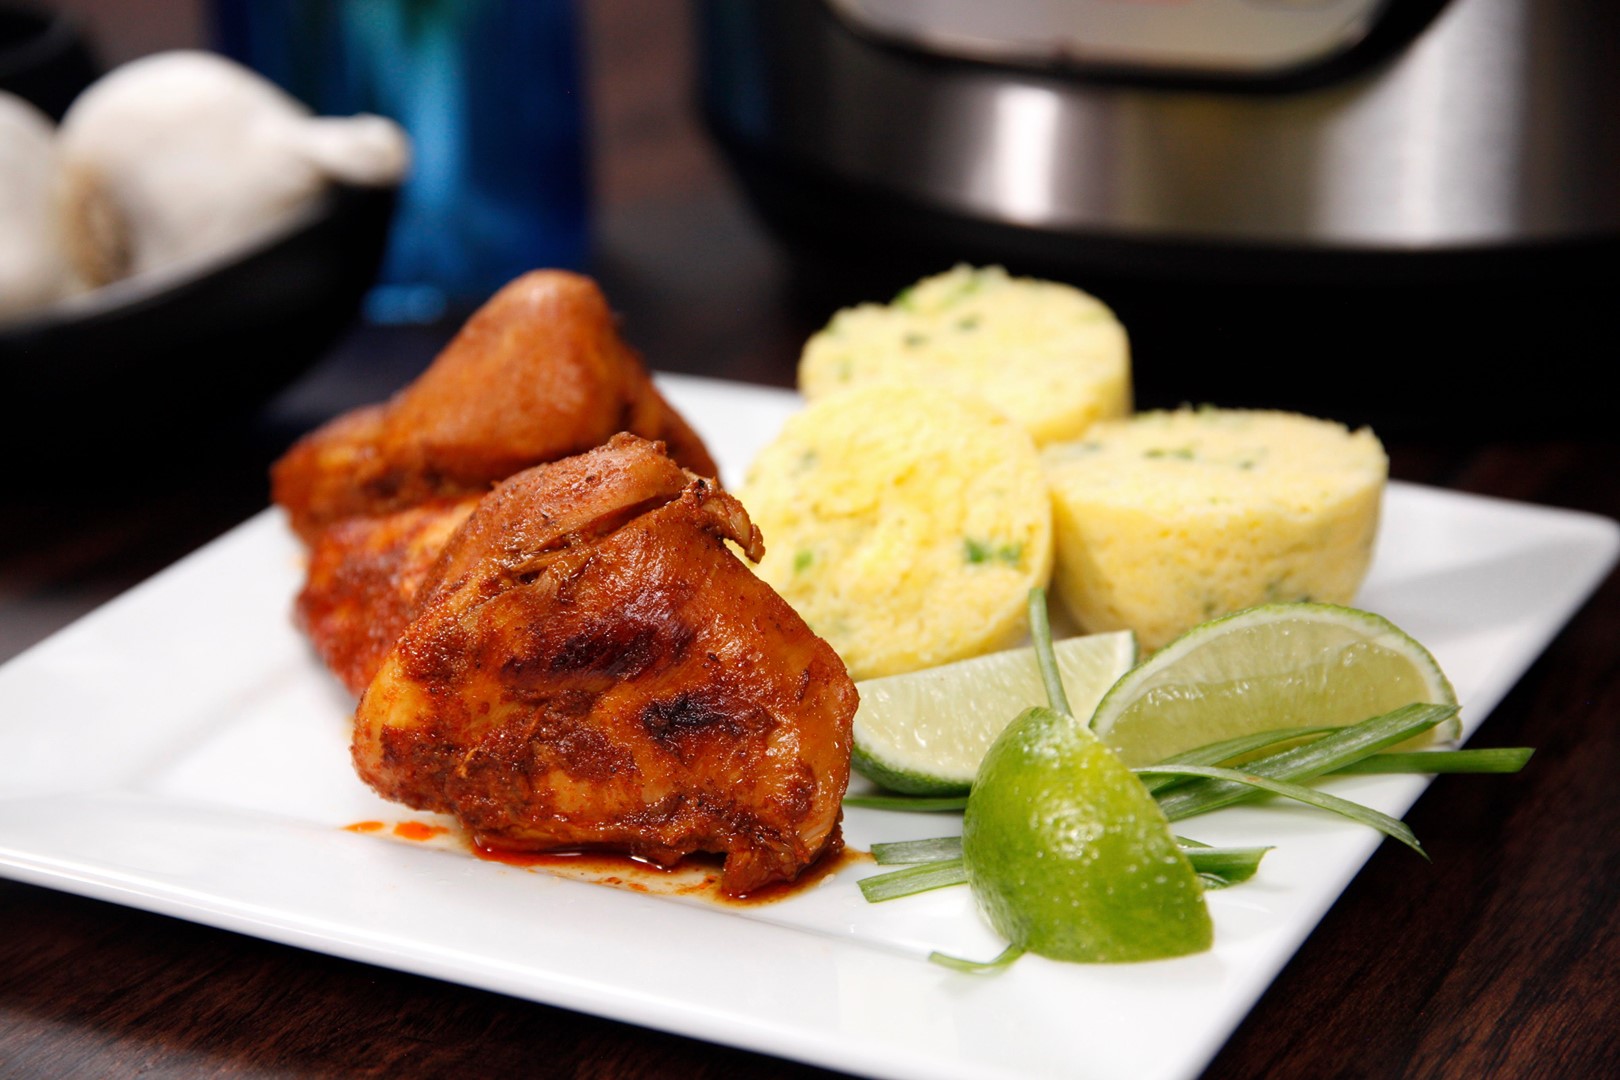
This jerk chicken is a real finger-licking treat!
Author:
Cuisine: American
Recipe type: Man dish
Ingredients
  • 1 8.5 oz box corn muffin mix, prepared according to package directions
  • 2 tbsp thinly sliced scallions
  • 1 jalapeno, seeded and minced
  • 1 tbsp olive oil
  • ⅓ cup chicken broth
  • 2 lbs boneless, skinless chicken thighs
  • Lime wedges and additional sliced scallions for garnish (optional)
Jerk Mixture
  • 2 tbsp molasses
  • 2 tbsp lime juice
  • 2 tbsp paprika
  • 1½ tbsp olive oil
  • 1½ tbsp garlic powder
  • 1½ tsp allspice
  • 1 tsp ground nutmeg
  • 1 tsp kosher salt
  • ¾ tsp cayenne, or to taste
  • ¼ tsp pepper
Instructions
  1. Prepare corn muffin mix according to package directions, then stir in sliced scallions and minced jalapeno.
  2. Coat the inside of a silicone egg bite mold with nonstick spray (we love these: https://amzn.to/2Q2dnyq).
  3. Divide corn muffin batter into the egg bite molds. Tap on the counter to even the batter and release and bubbles. Cover loosely with foil–do not seal.
  4. In a medium bowl, combine the Jerk Mixture ingredients and stir until uniform. Reserve half the jerk mixture and set aside.
  5. Add olive oil to the Instant Pot. Using the display panel select the SAUTE function.
  6. Coat the chicken thighs in the remaining jerk mixture, then brown the chicken on both sides, 3-4 minutes per side. Meat will not be cooked through. Do not crowd the pot–you may have to work in batches. Transfer browned meat to a shallow dish and cover loosely with foil.
  7. Add broth to the pot and deglaze by using a wooden spoon to scrape the brown bits from the bottom of the pot.
  8. Add chicken to the pot in an even layer, then spread remaining jerk mixture on the chicken.
  9. Insert the steam rack (for neatest results, we prefer using a riser like this one: https://amzn.to/2xTvP5g) and lower the egg bite mold onto the riser using a foil sling.
  10. Turn the pot off by selecting CANCEL, then secure the lid, making sure the vent is closed.
  11. Using the display panel select the MANUAL function*. Use the +/- keys and program the Instant Pot for 10 minutes.
  12. When the time is up, let the pressure naturally release for 5 minutes, then quick-release the remaining pressure.
  13. Serve the chicken with cornbread. Garnish with lime wedges and additional sliced scallions, if desired..

Watch the recipe video here:

This jerk chicken is a real finger-licking treat!RECIPE: http://chopsecrets.com/instant-pot-jerk-chicken-and-cornbread/

Posted by Chop Secrets on Sunday, August 18, 2019
Main dish

Old-Fashioned Cabbage Rolls

Old-Fashioned Cabbage Rolls
It was an abundance of dill in my garden that led me to try this. My family liked the taste so much that, from then on, I made my old fashioned cabbage rolls recipe with dill. This is how to make easy cabbage rolls. – Florence Krantz, Bismarck, North Dakota
Author:
Cuisine: American
Recipe type: Main dish
Ingredients
  • 1 medium head cabbage (3 pounds)
  • ½ pound uncooked ground beef
  • ½ pound uncooked ground pork
  • 1 can (15 ounces) tomato sauce, divided
  • 1 small onion, chopped
  • ½ cup uncooked long grain rice
  • 1 tablespoon dried parsley flakes
  • ½ teaspoon salt
  • ½ teaspoon snipped fresh dill or dill weed
  • ⅛ teaspoon cayenne pepper
  • 1 can (14-1/2 ounces) diced tomatoes, undrained
  • ½ teaspoon sugar
Instructions
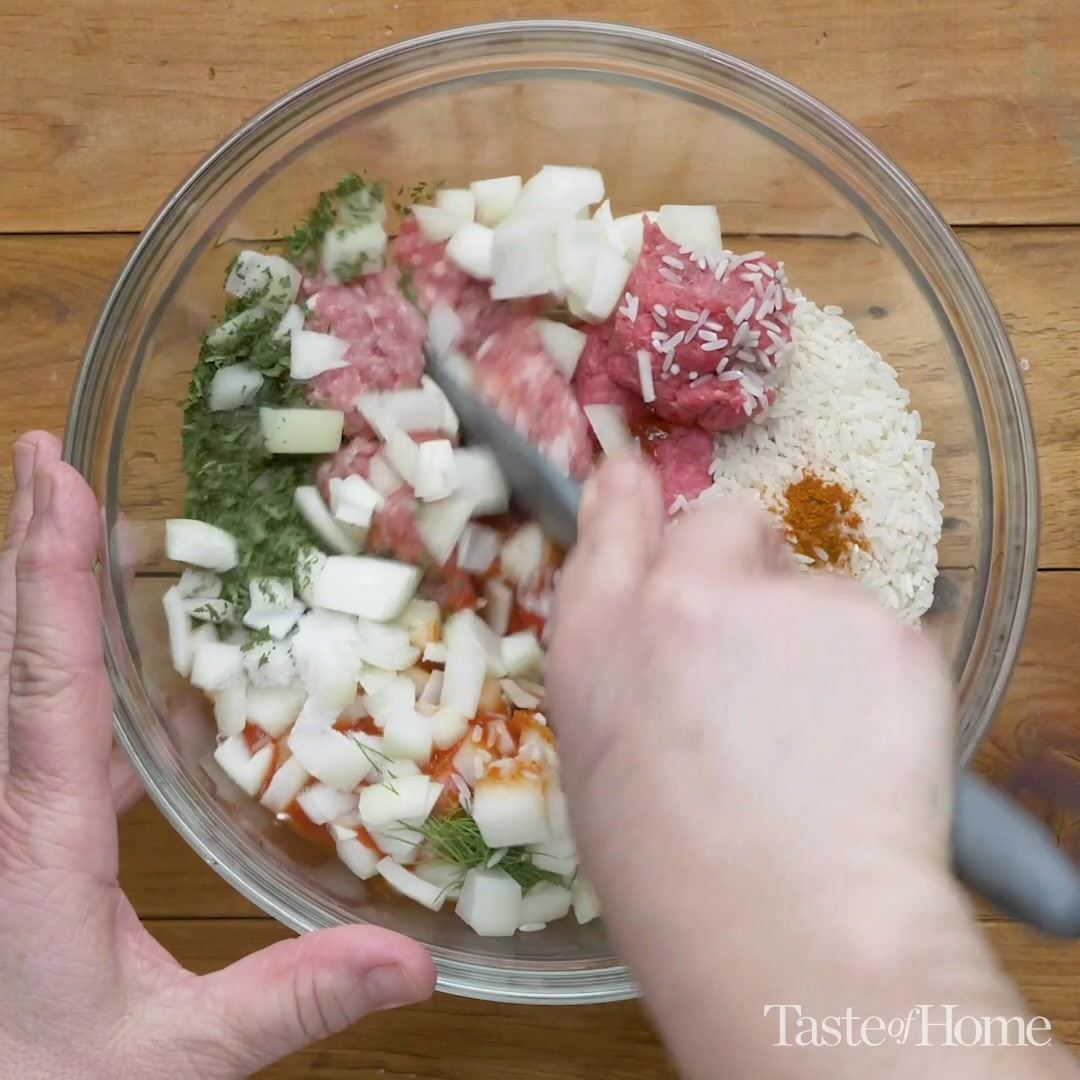
  1. Cook cabbage in boiling water just until outer leaves pull away easily from head. Set aside 12 large leaves for rolls. In a small bowl, combine the beef, pork, ½ cup tomato sauce, onion, rice, parsley, salt, dill and cayenne; mix well.
  2. Cut out the thick vein from the bottom of each leaf, making a V-shaped cut. Place about ¼ cup meat mixture on a cabbage leaf; overlap cut ends of leaf. Fold in sides. Beginning from the cut end, roll up. Repeat.
  3. Slice the remaining cabbage; place in an ovenproof Dutch oven. Arrange the cabbage rolls seam side down over sliced cabbage. Combine the tomatoes, sugar and remaining tomato sauce; pour over the rolls. Cover and bake at 350° for 1-1/2 hours or until cabbage rolls are tender.

Watch the recipe video here:

You'll love this deliciously simple recipe!Get the recipe for Old-Fashioned Cabbage Rolls here: https://trib.al/vrr3R2V

Posted by Taste of Home on Sunday, August 18, 2019

Main dish

Baked Cauliflower Tots

Baked Cauliflower Tots
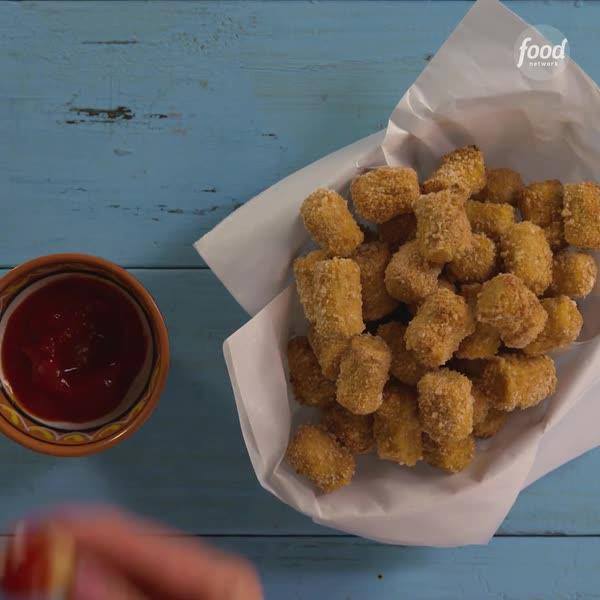
What can't cauliflower do? It's delicious as a puree, makes a great meaty steak and now, can be enjoyed as the ultimate finger food-a crunchy tot. We use crispy rice cereal as a gluten-free breading. A hot oven (and a little cooking spray) gets you a crackling exterior without deep frying.
Author:
Cuisine: American
Recipe type: Main dish
Ingredients
  • 1 tablespoon olive oil
  • ½ small onion, finely chopped
  • 2 small heads cauliflower
  • 1 cup almond meal
  • 2 large eggs, separated
  • Kosher salt
  • 2 cups crispy rice cereal
  • Cooking spray
  • Dipping sauces, such as ketchup, grainy mustard, pesto or red-pepper hummus, for serving
Instructions
Special equipment: Cheesecloth
  1. Position an oven rack in the top position of the oven, and preheat to 450 degrees F. Set a cooling rack on a rimmed baking sheet.
  2. Heat the oil in a large skillet over medium-high heat. Add the onions, and cook, stirring frequently, until browned and soft, about 5 minutes. Remove from the heat, and let cool in the skillet.
  3. Remove the outer leaves and core of the cauliflower heads. Separate the heads into large florets, and trim away most of the remaining smaller stems. In 2 batches, process the florets in a food processor until very finely chopped, almost a paste, then transfer the paste to a large bowl. Wipe out the food processor.
  4. Put the cauliflower in the middle of a double layer of cheesecloth, and gather up the sides into a bundle. Squeeze out as much liquid as you can over the sink, then put the cauliflower back in the bowl. Add the browned onion, almond meal, egg whites and 2 teaspoons salt, and work together with your hands until combined and the mixture holds together when squeezed. Scoop out even tablespoonfuls, roll each into a ball and shape into a squared-off tot shape, and line them up on a baking sheet. (The tots can be covered loosely with plastic wrap and refrigerated overnight.)
  5. Pulse the rice cereal in the food processor until finely ground, and transfer to a small dish. Whisk the egg yolks with ¼ cup water in a medium bowl. Line up the tots, egg wash, ground cereal and prepared baking sheet with the rack on your work surface. Dip the tots in the egg wash (let the excess drip off), roll them in the cereal to fully coat and place on the rack. (To avoid a mess, designate one hand for dipping and retrieving in the egg and the other for rolling in the cereal.) Spray each tot all over with the cooking spray, turning as needed. (Unsprayed breaded tots can be placed on a parchment-lined baking sheet, frozen until solid, about 2 hours, then transferred to a large freezer bag for up to 1 month. Coat with cooking spray before baking.)
  6. Bake the tots on the prepared baking sheet until golden brown outside and hot inside, 15 to 20 minutes. Let cool for a few minutes, then transfer to a serving platter. Serve with desired dipping sauces.

Watch the recipe video here:

Baked Cauli Tots ?? What CAN'T cauliflower do?! Save the recipe: https://foodtv.com/2KP2luZ!

Posted by Food Network on Monday, August 19, 2019

Breakfast

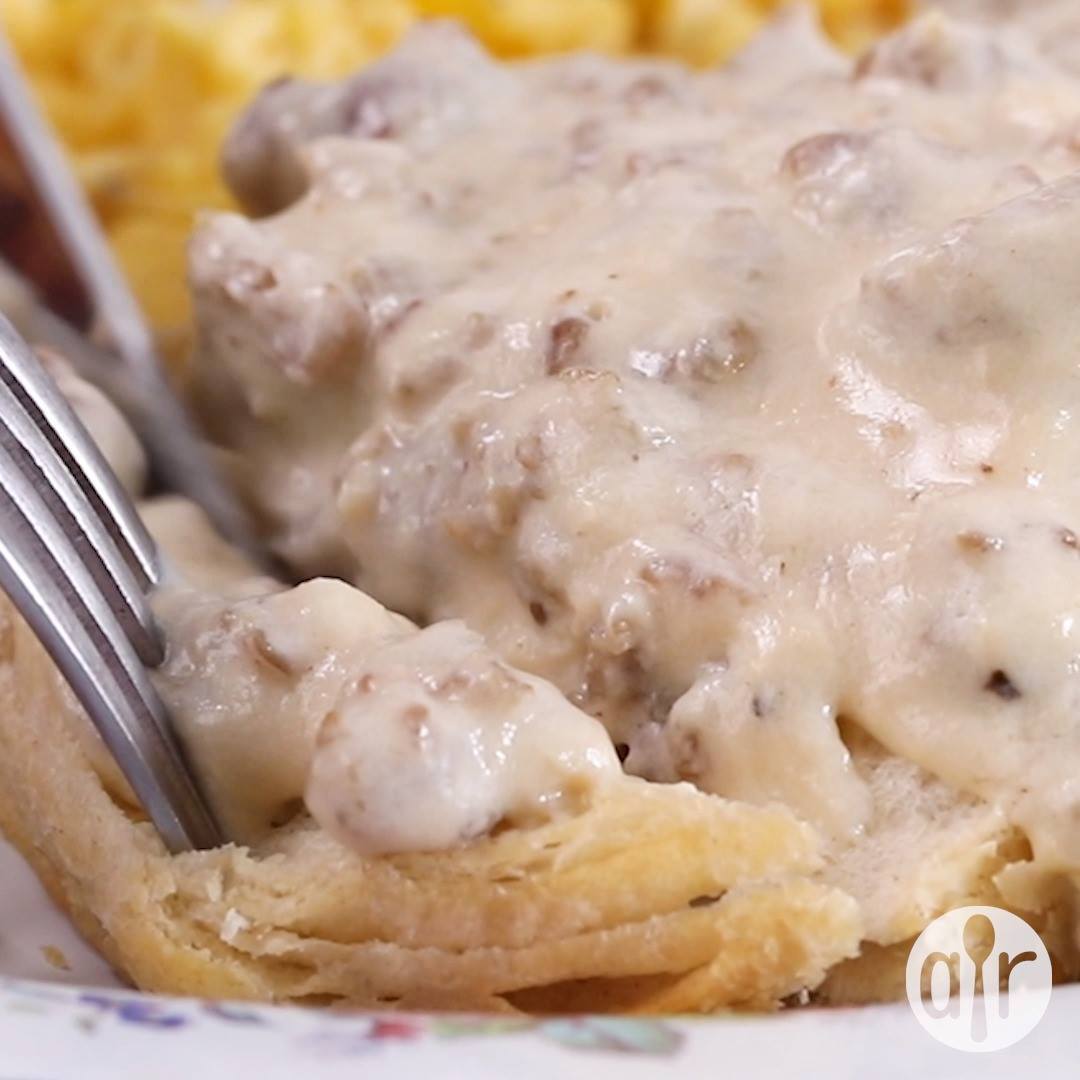
Sausage Biscuits and Gravy

Sausage Biscuits and Gravy
Often imitated, never duplicated. Just make sure that after you make this for breakfast, you have a window of opportunity to go back to bed, because you won't be able to do much after consuming this. Cast-iron skillet is preferred. I prefer the taste that the maple sausage lends to the dish, however you could easily substitute regular or sage sausage in lieu of the maple. Single ladies, sit back and wait for proposals of marriage!
Author:
Cuisine: American
Recipe type: Breakfast
Ingredients
  • 1 (19 ounce) can Southern-style flaky refrigerated biscuits (such as Pillsbury Grands®)
  • 1 (16 ounce) package maple-flavored breakfast sausage
  • 3 tablespoons all-purpose flour, or as needed
  • 1 (12 ounce) can evaporated milk
  • 1½ cups milk
  • ½ teaspoon salt
  • ¼ teaspoon ground black pepper
  • 1 teaspoon butter
Instructions
  1. Preheat oven to 350 degrees F (175 degrees C).
  2. Arrange biscuits about 1½ inches apart on a baking sheet.
  3. Bake in the preheated oven until golden brown, 13 to 17 minutes. Slice cooked biscuits in half crosswise and keep warm.
  4. While biscuits are baking, crumble sausage into a large skillet over medium heat; cook, breaking meat apart, until no longer pink inside, about 10 minutes. Sprinkle sausage and pan drippings with flour and cook and stir until sausage is coated, about 1 more minute. Reduce heat to medium-low.
  5. Pour evaporated milk into sausage mixture, followed by milk; stir until thoroughly combined. Bring to a simmer, stirring constantly, and cook until gravy is your desired thickness, 3 to 5 minutes. Season with salt and ground black pepper. Stir butter into gravy until melted. Stir in more flour if gravy isn't thick enough.
  6. Place biscuits with cut sides up on serving plates; top with sausage gravy.

Watch the recipe video here:

Sausage Biscuits and Gravy: https://trib.al/AMlWHAr

Posted by Allrecipes on Monday, August 19, 2019

Main dish

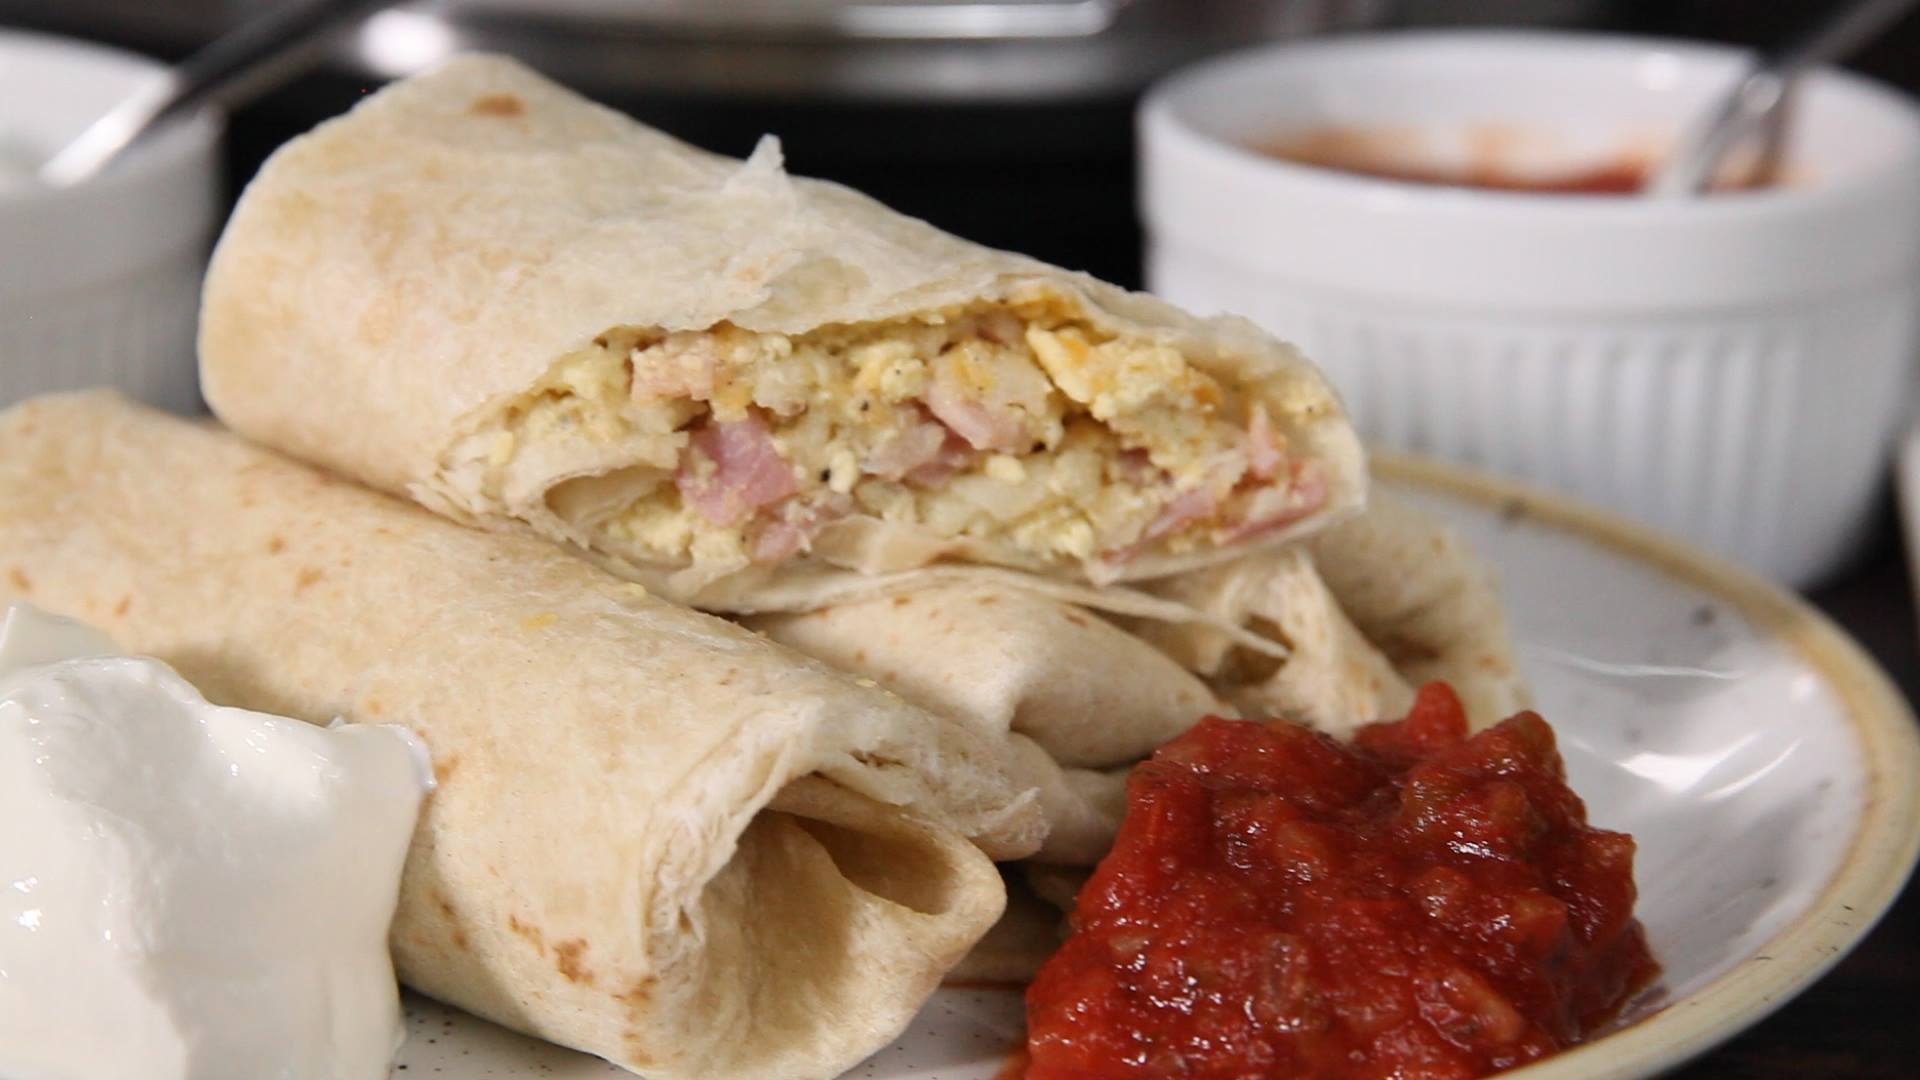
Instant Pot Miracle Mom Breakfast Burritos

Instant Pot Miracle Mom Breakfast Burritos
Breakfast for the whole week that can be heated up in only seconds!
Author:
Cuisine: American
Recipe type: Main dish
Ingredients
  • 6 eggs
  • ¼ cup milk
  • ¼ cup sour cream
  • ½ cup shredded cheddar cheese
  • 1 tsp onion salt
  • ⅛ tsp pepper
  • 2½ cups frozen hash browns
  • 1 cup diced ham
  • 1 cup fresh spinach, chopped (optional)
  • 12 6” flour tortillas (“fajita size”), warmed
Instructions
  1. In a medium bowl, whisk the Egg Mixture ingredients until thoroughly incorporated. Set aside.
  2. Coat the inside of a 1.5 qt casserole (these fit perfectly: https://amzn.to/2DtfXM4) with non-stick spray.
  3. Layer hash browns then ham in an even layer in the casserole dish. Pour egg mixture over the top. Cover with foil.
  4. Pour one cup of water in the Instant Pot and insert the steam rack. Carefully lower the casserole on to the steam rack, then secure the lid, making sure the vent is closed.
  5. Using the display panel select the MANUAL function*. Use the +/- keys and program the Instant Pot for 25 minutes.
  6. When the time is up, quick-release the remaining pressure. Open the pot and rinse the inside of the lid in cold water to help it reseal.
  7. Add the chopped fresh spinach, stir, then replace the foil. Secure the lid, making sure the vent is closed.
  8. Using the display panel select the MANUAL function*. Use the +/- keys and program the Instant Pot for 10 minutes.
  9. When the time is up, quick-release the remaining pressure.
  10. Divide the egg mixture among the tortillas, roll and serve immediately, or store for up to 4 days in the refrigerator in a tightly sealed container. Reheat for 30 seconds in the microwave for a quick on-the-go breakfast.

Watch the recipe video here:

Breakfast for the whole week that can be heated up in only seconds!RECIPE: http://chopsecrets.com/instant-pot-miracle-mom-breakfast-burritos/

Posted by Chop Secrets on Monday, August 19, 2019

Breakfast

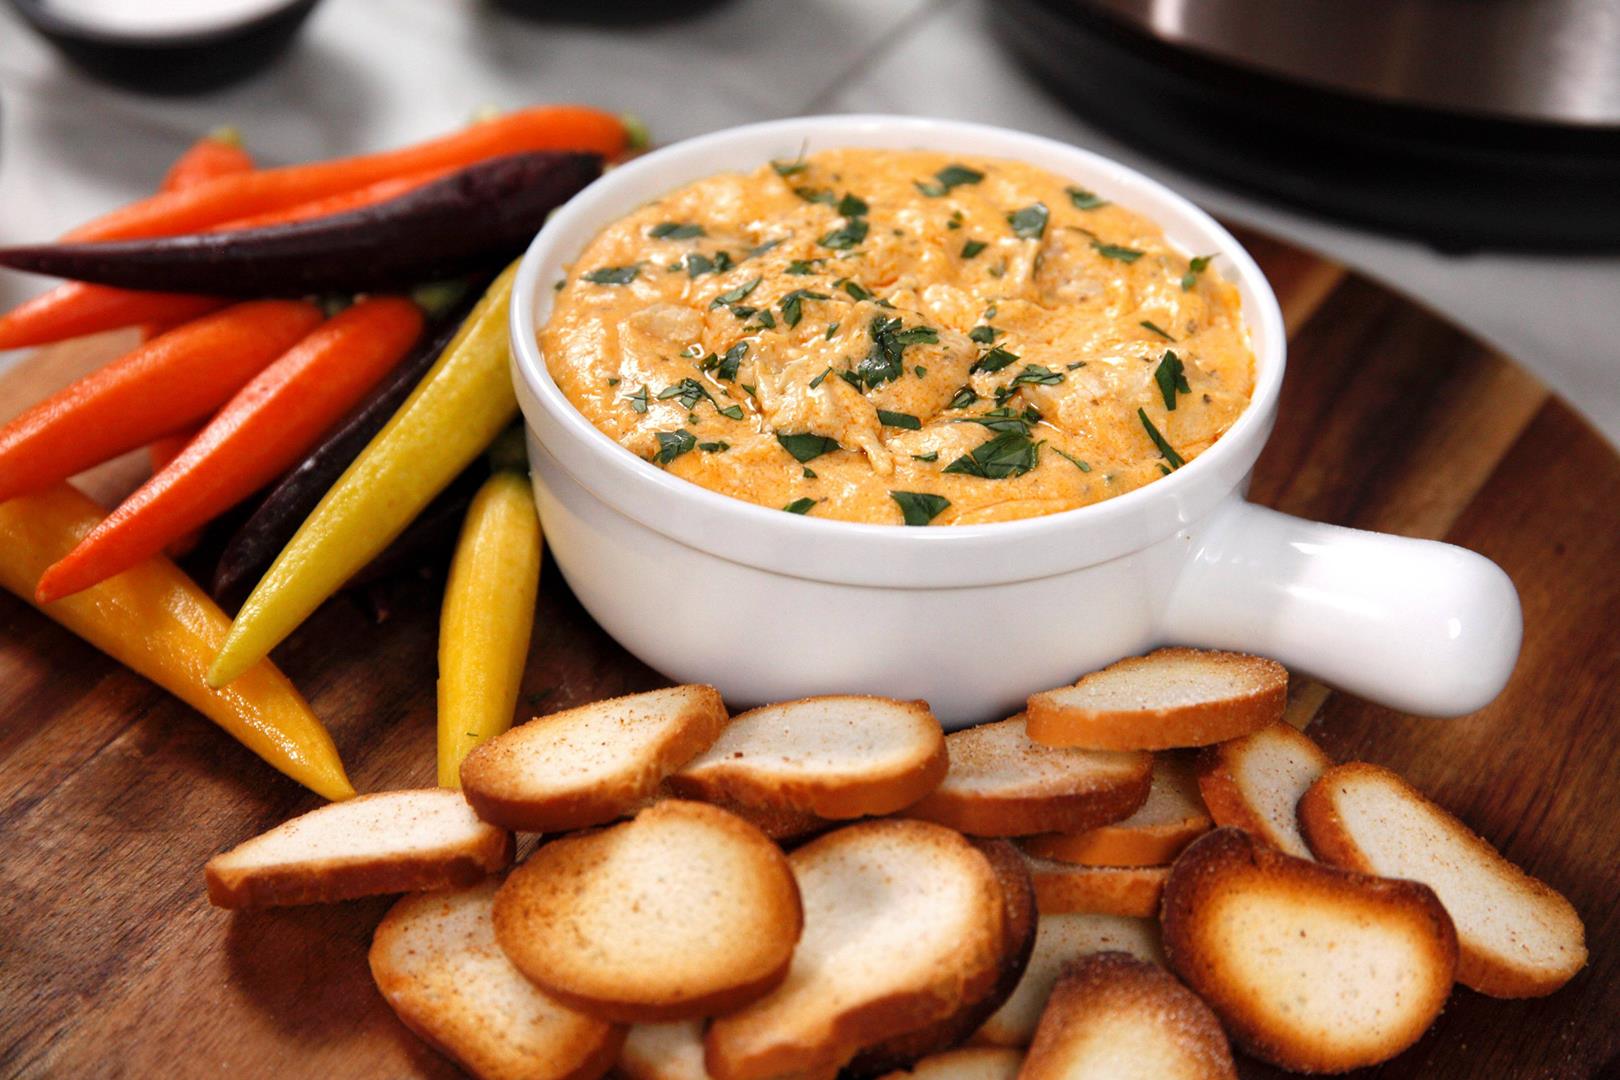
Instant Pot Buffalo Ranch Chicken Dip

Instant Pot Buffalo Ranch Chicken Dip
Buffalo Ranch Chicken Dip wows my guests, but takes only minutes to make!
Author:
Cuisine: American
Recipe type: Breakfast
Ingredients
  • 1½ lbs boneless, skinless chicken breast, cut into 6 pieces
  • ¼ cup water
  • 1 cup Buffalo-style hot sauce
  • 1 1 oz package ranch seasoning mix
  • 4 tbsp butter, cut into 4-6 pieces
  • 8 oz cream cheese, softened
  • 1 cup shredded cheddar-jack cheese
  • Additional Buffalo hot sauce for garnish
Instructions
  1. Add chicken pieces, water and Buffalo sauce to the pot and stir to coat.
  2. Sprinkle ranch dip over the top, then dot with butter–do not stir.
  3. Secure the lid, making sure the vent is closed.
  4. Using the display panel select the MANUAL function*. Use the +/- keys and program the Instant Pot for 15 minutes.
  5. When the time is up, quick-release the remaining pressure.
  6. Carefully remove the chicken from the pot to a cutting board and shred thoroughly (a hand mixer works great for this job).
  7. Return chicken to pot along with softened cream cheese and shredded cheeses. Stir until well blended, returning to SAUTE mode as needed.
  8. Serve hot garnished with a swirl of additional hot sauce alongside chips, sliced baguette or veggies.

Watch the recipe video here:

Buffalo Ranch Chicken Dip wows my guests, but takes only minutes to make!RECIPE: http://chopsecrets.com/instant-pot-buffalo-ranch-chicken-dip/

Posted by Chop Secrets on Sunday, August 18, 2019
Main dish

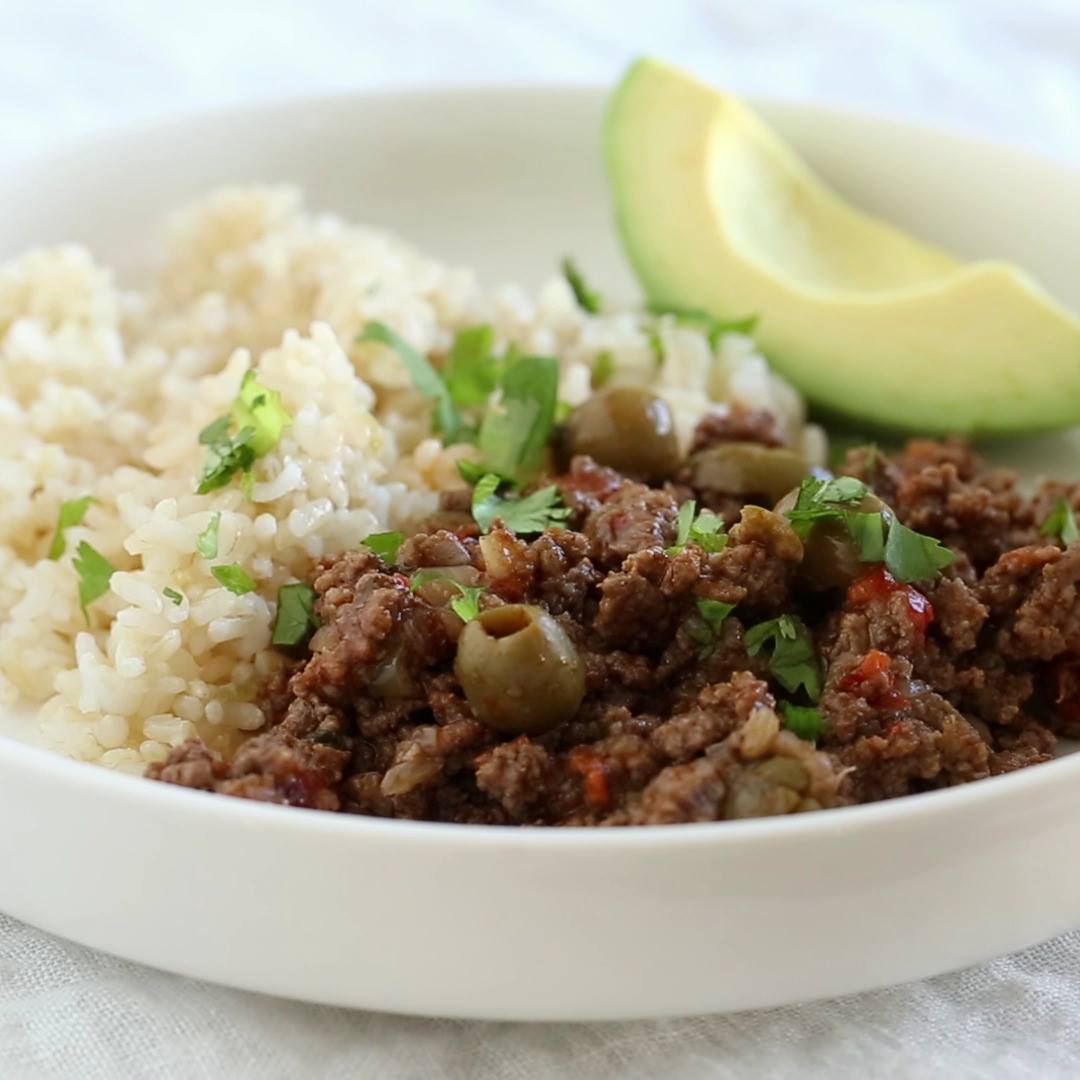
PICADILLO (INSTANT POT)

PICADILLO (INSTANT POT)
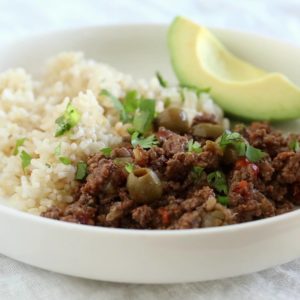
Picadillo is a Cuban recipe I grew up eating and is always on rotation in my house because it’s the most requested dish by my kids and it’s so easy to make.
Author:
Cuisine: American
Recipe type: Main dish
Ingredients
  • 1-1/2 lb 93% lean ground beef
  • ½ large chopped onion
  • 2 cloves garlic, minced
  • 1 to mato, chopped
  • 1 teaspoon kosher salt
  • ½ red bell pepper, finely chopped
  • 2 tbsp cilantro
  • 4 oz ½ can tomato sauce (I like Goya)
  • 1 tsp ground cumin
  • 1-2 bay leaf
  • 2 tbsp alcaparrado, capers or green olives would work too
Instructions
  1. Press saute button, when hot brown meat and season with salt and pepper. Use a wooden spoon to break the meat up into small pieces until no longer pink.
  2. Add onion, garlic, tomato, salt, pepper and cilantro and stir 1 minute, add alcaparrado or olives and about 2 tbsp of the brine (the juice from the olives, this adds great flavor) cumin, and bay leaf. Add tomato sauce and 3 tablespoons of water and mix well. Cover and cook high pressure 15 minutes. Natural or quick release and enjoy!

Watch the recipe video here:

Instant Pot Picadillo. I converted this popular recipe for my Instant Pot! This is my #1 requested dish in my home by my…

Posted by Skinnytaste on Sunday, August 18, 2019

Cake Dessert

Vegan Tiramisu

Vegan Tiramisu
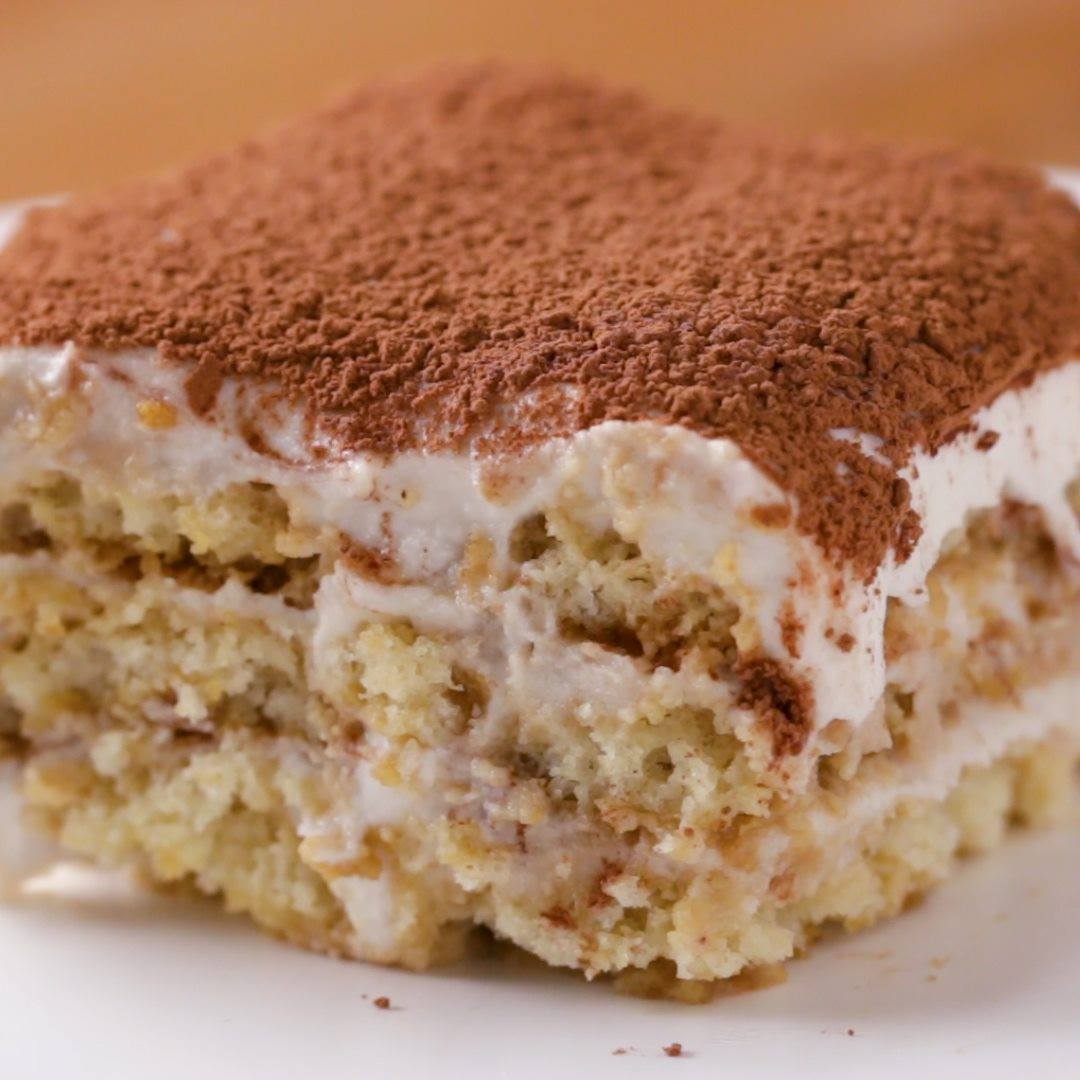
Wow your friends with this decadent vegan tiramisu. With velvety creamy layers and rich espresso you won’t believe this indulgent dessert is vegan.
Author:
Cuisine: American
Recipe type: Dessert
Ingredients
LADYFINGERS
  • 1 ½ cups all-purpose flour (185 g)
  • 1 ½ teaspoons cornstarch
  • 1 teaspoon baking powder
  • ½ teaspoon baking soda
  • ¼ teaspoon kosher salt
  • 6 tablespoons unsalted vegan butter, softened
  • ¾ cup vegan sugar (150 g)
  • ¼ cup aquafaba, liquid from can of chickpeas (60 mL)
  • 1 teaspoon vanilla extract
  • ¼ cup unsweetened almond milk (60 mL)
  • nonstick cooking spray, for greasing
VEGAN MASCARPONE
  • 1 ½ cups raw cashews (195 g)
  • boiling water, for soaking cashews
  • ½ cup unsweetened almond milk (120 mL)
  • ⅓ cup maple syrup (115 g)
  • ⅓ cup unrefined coconut oil, melted (65 g)
  • ¼ teaspoon kosher salt
  • ½ teaspoon vanilla extract
  • 1 teaspoon lemon juice
  • 25 oz full-fat coconut milk, chilled (740 mL)
  • 2 tablespoons powdered sugar
SOAKING LIQUID
  • 6 fl oz espresso, room teperature (175 mL)
  • ¾ cup water (180 mL)
  • 3 tablespoons dark rum
  • cocoa powder, for dusting
Instructions
  1. Make the ladyfingers: In a medium bowl, sift together the flour, cornstarch, baking powder, baking soda, and salt. Set aside.
  2. In a separate medium bowl, cream together the butter and sugar with an electric hand mixer until fully combined. Add the aquafaba and vanilla and beat for 2-3 minutes, until light and fluffy. The mixture may look broken, but will come together once the dry ingredients are added.
  3. Add ½ of the flour mixture to the wet ingredients and beat until just combined. Scrape down the sides of the bowl and add the almond milk. Beat until combined. Add the rest of the dry ingredients and beat until smooth.
  4. Line 2 baking sheets with parchment paper and grease with nonstick spray.
  5. Transfer the batter to a piping bag fitted with a ½-inch round tip or a zip-top bag with a corner snipped off. Pipe the ladyfingers onto the prepared baking sheets, spacing at least 1½ inches apart. Each cookie should be 2¼ inches long and ¾ inch wide. You should have 50-55 total.
  6. Chill the piped cookies in the refrigerator for 30 minutes.
  7. Preheat the oven to 350˚F (180˚C).
  8. Bake the ladyfingers for 13-15 minutes, until the edges are light brown. Let cool completely.
  9. Make the vegan mascarpone: Add the cashews to a medium heatproof bowl and pour in enough boiling water to cover by 1 inch (2.5 cm). Let soak until slightly plumped and softened, about 10 minutes. Drain.
  10. Add the cashews, almond milk, maple syrup, coconut oil, salt, vanilla, and lemon juice to a blender. Blend until smooth. Set aside.
  11. Scoop the solid layer from the cans of chilled coconut milk into a large bowl. Discard the liquid or save for another use. Add the powdered sugar and beat with an electric hand mixer until light and fluffy, 2-3 minutes.
  12. Using a rubber spatula, fold the blended cashew mixture into the whipped coconut milk.
  13. Make the soaking liquid: In a shallow bowl, combine the espresso, water, and rum. Alternatively, replace the espresso and water with 1½ cups (360 ml) of brewed coffee cooled to room temperature.
  14. Assemble the tiramisu: Spread about a ½ cup (65 grams) of the mascarpone in the bottom of an 8-inch square baking dish. Quickly dip a ladyfinger in the espresso mixture and place on top of the cream. Repeat with more ladyfingers to cover the cream, 16-18 total. Carefully spread about 1 cup (130 grams) of the mascarpone over the ladyfingers, then add another layer of ladyfingers, another layer of cream, and a final layer of the remaining ladyfingers. Spread the remaining mascarpone cream on top.
  15. Cover the baking dish with plastic wrap and refrigerate for at least 2 hours, or overnight.
  16. Before serving, uncover the tiramisu and lightly dust the top with cocoa powder.
  17. Slice into 9 portions and serve.
  18. Enjoy!

Watch the recipe video here:

With this delicious vegan tiramisu, dreams really DO come true ?Get the recipe: https://tasty.co/recipe/vegan-tiramisu

Posted by BuzzFeed Food on Sunday, August 18, 2019

Main dish

Instant Pot Churro Bites

Instant Pot Churro Bites
Skip the oil and make these two-bite pressure cooker churros in just 30 minutes.
Author:
Cuisine: American
Recipe type: Main dish
Ingredients
  • 7 oz white or yellow cake mix (about half a box), prepared according to package directions
  • 1 tsp cinnamon
  • ½ tsp nutmeg
  • 1 cup water
To Finish:
  • ⅓ cup brown sugar
  • 1 tbsp cinnamon
Instructions
  1. Coat the inside of 2 silicone egg bite molds with non-stick spray. (We love this one: https://amzn.to/2Q2dnyq)
  2. Add cinnamon and nutmeg to the prepared cake mix. Stir to combine.
  3. Gently spoon the cake batter into the prepared molds until they are ¾ full.
  4. Tap the mold on the counter to settle batter and remove any bubbles, then cover with foil, sealing edges.
  5. Pour 1 cup water into the Instant Pot, followed by the steam rack.
  6. Carefully lower the egg molds onto the steam rack, then secure the lid, making sure the vent is closed.
  7. Using the display panel select the MANUAL function*. Use the +/- keys and program the Instant Pot for 12 minutes.
  8. When the time is up, let the pressure naturally release for 10 minutes, then quick-release the remaining pressure.
  9. Carefully remove the mold from the pot. Place on a cooling rack and allow to set for 5 minutes before unmolding.
  10. In a shallow bowl, mix together brown sugar and 1 tbsp cinnamon. While still warm, roll each cake bite in sugar-cinnamon mix.

Watch the recipe video here:

Skip the oil and make these two-bite pressure cooker churros in just 30 minutes.RECIPE: http://chopsecrets.com/instant-pot-churro-bites/

Posted by Chop Secrets on Sunday, August 18, 2019
Main dish

Two-Berry Pavlova

Two-Berry Pavlova
Here's a light and airy dessert that I first tried in Ireland. When I got home, I made it for my kids, who loved to build their own with their favorite fruits. The whipped cream makes for icing on the cake!
Author:
Cuisine: American
Recipe type: Main dish
Ingredients
  • 4 large egg whites, room temperature
  • ½ teaspoon cream of tartar
  • 1 cup sugar
  • 1 tablespoon cornstarch
  • 1 teaspoon lemon juice
TOPPINGS:
  • 2 cups fresh blackberries
  • 2 cups sliced fresh strawberries
  • ¼ cup plus 3 tablespoons sugar, divided
  • 1-1/4 cups heavy whipping cream
Instructions
  1. Place egg whites in a large bowl. Line a baking sheet with parchment; draw a 10-in. circle on paper. Invert paper.
  2. Preheat oven to 300°. Add cream of tartar to egg whites; beat on medium speed until soft peaks form. Gradually add sugar, 1 tablespoon at a time, beating on high after each addition until sugar is dissolved. Continue beating until stiff glossy peaks form. Fold in cornstarch and lemon juice.
  3. Spoon meringue onto prepared pan; with the back of a spoon, shape into a 10-in. circle, forming a shallow well in the center. Bake until meringue is set and dry, 45-55 minutes. Turn off oven (do not open oven door); leave meringue in oven 1 hour. Remove from oven; cool completely on baking sheet.
  4. To serve, toss berries with ¼ cup sugar in a small bowl; let stand 10 minutes. Meanwhile, in a large bowl, beat cream until it begins to thicken. Add remaining sugar; beat until soft peaks form.
  5. Remove meringue from parchment; place on a serving plate. Spoon whipped cream over top, forming a slight well in the center. Top with berries.
Health Tip:
  1. Anthocyanins are a group of compounds that give berries their vibrant red-violet color. They may help protect against cardiovascular disease and cancer.

Watch the recipe video here:

So light! So airy dessert!Get the recipe for Two-Berry Pavlova: https://trib.al/RzYKlIe

Posted by Taste of Home on Saturday, August 17, 2019