Main dish

Crispy Chicken with Creamy Bacon & Mushroom Pasta

Crispy Chicken with Creamy Bacon & Mushroom Pasta
CRISPY CHICKEN WITH CREAMY BACON & MUSHROOM PASTA recipe.
Author:
Cuisine: American
Recipe type: Main dish
Ingredients
  • 3 chicken breasts
  • 1 ½ cups plain flour
  • ½ cup grated parmesan
  • ½ tsp garlic powder
  • 1 tsp salt
  • 1 tsp pepper
  • 2 tbsp chopped parsley
  • 2 cups buttermilk
  • 2 eggs, whisked
  • 8 rashers bacon, chopped
  • 1 tbsp butter
  • 1 onion, diced
  • 3 cloves garlic, minced
  • 2 cups, sliced mushrooms
  • ½ cup chicken stock
  • 3 cups heavy cream
  • 4 cups baby spinach
  • ½ cup grated parmesan cheese
  • 400g cooked linguine
  • Salt and pepper to taste
Instructions
  1. Add flour, parmesan, salt, pepper and parsley to a bowl. Mix to combine. In a separate bowl, whisk buttermilk and eggs together. Coat each chicken breast in flour, then into the buttermilk then back into the flour mixture.
  2. Heat oil in a large pan over medium heat. Sear the chicken breasts on both sides until golden brown. Transfer to a baking pan and bake for 10 minutes or until cooked through. Keep warm.
  3. Heat a pan over medium heat. Add bacon and fry until just crispy. Add butter, mushrooms and onions. Cook until softened, adding a lid to help. Add garlic and cook until aromatic.
  4. Pour in the chicken stock and cream. Stir to combine and bring to a simmer. Cook for 15 minutes until reduced and thickened.
  5. Add the spinach and cook until wilted. Add in the cooked pasta, parmesan and season with salt and pepper.
  6. Serve pasta in bowls. Slice the chicken and serve on top.
  7. Garnish with pasta, enjoy!

Watch the recipe video here:

Crispy Chicken with Creamy Bacon & Mushroom Pasta

Posted by Twisted on Sunday, June 30, 2019

Main dish

Instant Pot Corndog Minis

Instant Pot Corndog Minis
I love that these bite-size corn dog minis aren’t fried, and are totally delicious.
Author:
Cuisine: American
Recipe type: Main dish
Ingredients
  • 8.5 oz box cornbread mix, prepared
  • 2-3 hot dog weiners, cut into 1.5” lengths
  • (optional) 7 popsicle sticks, cut in half with any jagged edges removed
  • 1 cup water
  • Ketchup, mustard or other condiments for serving
Instructions
  1. Prepare cornbread mix according to package directions.
  2. Coat the inside of a silicone egg bite mold with nonstick spray (we love this one: https://amzn.to/2Q2dnyq).
  3. (Optional) Insert a halved popsicle stick into the cut end of each hot dog segment.
  4. Place a hot dog segment in each egg bite mold.
  5. Divide cornbread batter amongst the egg bite molds. Tap the mold on the counter to settle the batter and remove any air pockets.
  6. Pour one cup of water in the Instant Pot and insert the steam rack. Carefully lower the egg bite mold on to the steam rack.
  7. Cover loosely with foil, then secure the lid, making sure the vent is closed.
  8. Using the display panel select the MANUAL function*. Use the +/- keys and program the Instant Pot for 5 minutes.
  9. When the time is up, let the pressure naturally release for 5 minutes, then quick-release the remaining pressure.
  10. Unmold the corn dog bites and serve with ketchup, mustard or other condiments of your choice.

Watch the recipe video here:

I love that these bite-size corn dog minis aren’t fried, and are totally delicious.RECIPE: http://chopsecrets.com/instant-pot-corndog-minis/

Posted by Chop Secrets on Wednesday, June 19, 2019

Main dish

Butter Chicken Meatballs

Butter Chicken Meatballs
Butter Chicken Meatballs recipe.
Author:
Cuisine: American
Recipe type: Main dish
Ingredients
  • MEATBALLS
  • ½ cup bread crumbs (60 g)
  • ½ cup milk (120 mL)
  • 1 clove garlic, minced
  • 1 egg
  • 2 teaspoons salt
  • ½ teaspoon pepper
  • 1 lb ground chicken (455 g)
  • 1 tablespoon vegetable oil
  • SAUCE
  • 1 tablespoon vegetable oil
  • 2 tablespoons butter
  • 1 yellow onion, diced
  • 3 garlics, minced
  • 1 tablespoon ginger, minced
  • 1 ½ teaspoons McCormick ® Ground Cumin
  • 1 teaspoon McCormick ® Paprika
  • 2 ½ teaspoons garam masala, divided
  • ½ teaspoon cayenne pepper
  • 1 ½ teaspoons salt
  • 14 oz crushed tomato (390 g)
  • 3 tablespoons butter
  • ½ cup heavy cream (120 mL)
  • fresh cilantro, minced, for garnish
  • lime wedge, for serving
  • rice, for serving
Instructions
  1. Meatballs: In a medium bowl, stir together bread crumbs and milk. Let sit for 5 minutes. Add in garlic, egg, salt, and pepper, then stir until well-combined. Stir in ground chicken. Combine well, but do not overmix. With oiled hands, roll the meat into golf-size balls.
  2. Pour 1 tablespoon vegetable oil into a skillet over medium heat. Add meatballs and brown on all sides. Remove meatballs from the pan (meatballs will not be fully cooked through at this time). Wipe the pan out to make the sauce.
  3. Sauce: Heat vegetable oil and butter in the same skillet over medium heat. Add onions and sauté until translucent, about 5 minutes. Add garlic and ginger, then let sizzle for a minute or two.
  4. Stir in McCormick Ground Cumin, McCormick Paprika, 1½ teaspoons garam masala, cayenne, and salt. Let spices heat through until fragrant, about 2 minutes. Add crushed tomatoes and bring sauce to a simmer, then take off the heat.
  5. Let the sauce cool for 5–10 minutes. Blend sauce until smooth, adding a tablespoon or two of water if it is too thick to blend.
  6. Pour the sauce back into the skillet. Whisk in the butter, cream, and 1 teaspoon garam masala. Add the meatballs to the sauce and stir to coat. Cover and cook for 5 minutes, or until meatballs are fully cooked through.
  7. Garnish with cilantro. Serve with rice and lime wedges.
  8. Enjoy!

Watch the recipe video here:

These delicious Butter Chicken Meatballs are fantastic for dinner.Get the recipe: https://tasty.co/recipe/butter-chicken-meatballs

Posted by Tasty on Wednesday, June 19, 2019

Main dish

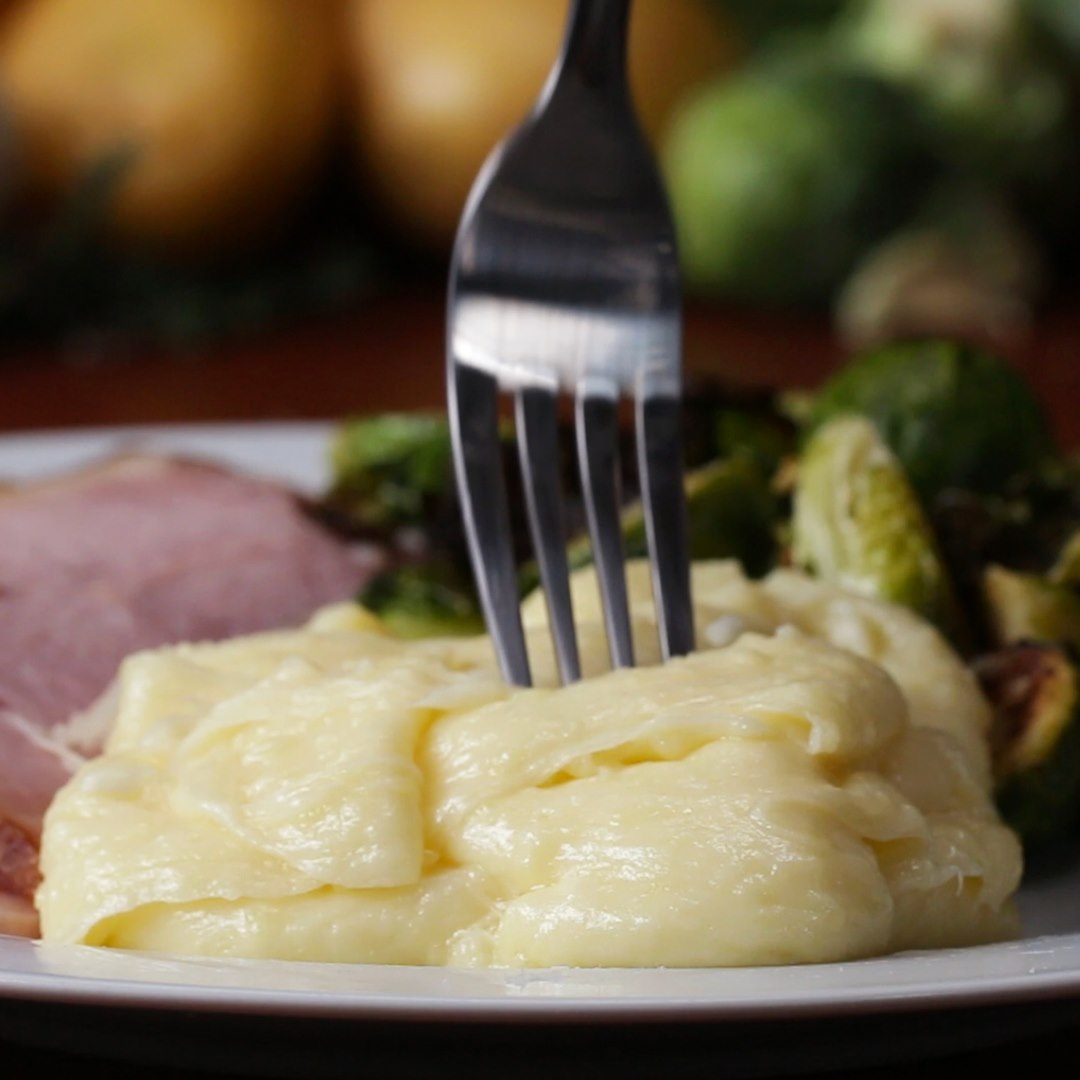
Aligot (Cheesy Potatoes)

Aligot (Cheesy Potatoes)
Author:
Cuisine: American
Recipe type: Main dish
Ingredients
  • 1 ½ lb yukon gold potato (680 g), peeled and cut into 1-inch (2 cm) pieces
  • 2 cloves garlic, peeled
  • 5 cups cold water (1.18 L)
  • salt, to taste
  • ½ cup butter (115 g), cubed
  • 1 cup heavy cream (240 mL)
  • 2 ½ cups shredded cheese (250 g), such as Swiss, Comté, Fontina or Gruyère
Instructions
  1. In a large pot over medium-high heat, add the potatoes, garlic, and cover with cold water. Add a big pinch of salt.
  2. Bring to a boil, reduce the heat to medium-low and simmer until the potatoes are fork-tender, about 20 minutes.
  3. Drain potatoes and garlic in a colander and press them through the holes of the colander with a metal spoon back into the pot. Alternatively, use a potato ricer.
  4. Add the butter and one clove of garlic to the potatoes and stir over medium-low heat with a rubber spatula until melted and smooth.
  5. Pour in the heavy cream and stir again until combined.
  6. Gradually add in the cheese, stirring between each addition, until completely melted.
  7. Continue stirring the potatoes until smooth, thick, and elastic.
  8. Begin to stretch the potatoes upwards with the spatula. If the mixture is breaking, add in more cheese. If the mixture is too thick add in more cream.
  9. Serve immediately as a side with roasted veggies or a meat of choice, or alone with fresh chopped garlic!
  10. Enjoy!

Watch the recipe video here:

Just look at how mesmerizing these cheesy potatoes are ?!Get the recipe: https://tasty.co/recipe/aligot-cheesy-potatoes

Posted by Tasty on Thursday, June 20, 2019

Dessert

Cereal Cake

Cereal Cake
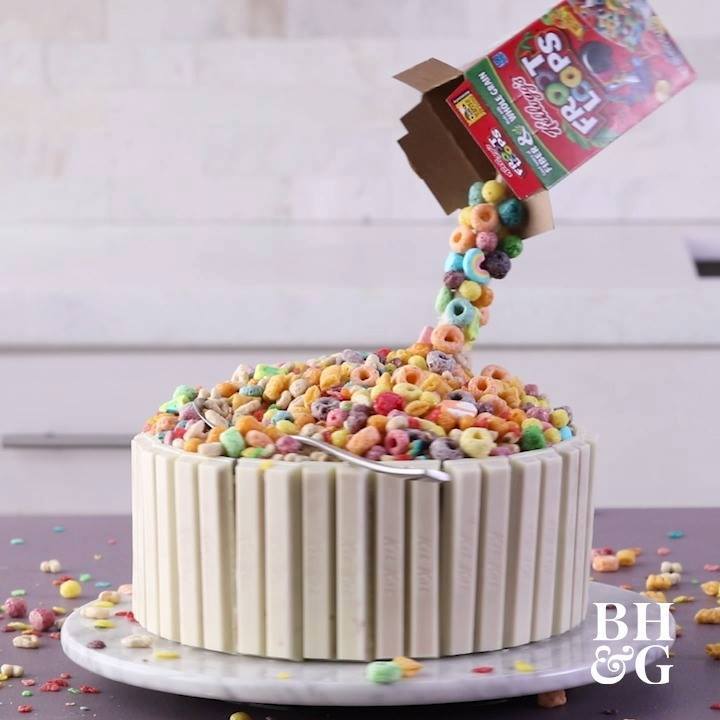
Bring your favorite cereal from breakfast to dessert with this towering cake masterpiece. Once all the decorations are in place, you might just mistake it for your morning cereal bowl.
Author:
Cuisine: American
Recipe type: Dessert
Ingredients
  • 1 ¾ cups milk, warmed
  • 4 cups desired cereal
  • 1 cup butter
  • 1 package 2-layer-size white cake mix
  • 4 eggs
  • 5 cups powdered sugar
  • Pinch salt
  • ¼ teaspoon almond extract (optional)
  • 10 1.5 ounces packages white chocolate-covered crisp wafers (Kit Kat White®; 4 per package)
  • Serving spoon
  • 1 12 inch long, thick wooden skewer or dowel
  • 1 empty single serving-size cereal box*
  • 2 ounces white baking chocolate, melted
Instructions
  1. In a small bowl combine milk and 1¾ cups cereal; let stand 15 minutes. Strain; discarding cereal.
  2. Preheat oven to 350°F. Grease two 8-inch round cake pans. Line bottoms with waxed paper or parchment paper; grease paper. Flour insides of pans. Set aside.
  3. Melt ¼ cup butter. Set aside remaining butter to soften. In a large bowl beat cake mix, 1 cup of the reserved cereal milk, eggs, and melted butter with a mixer on medium for 2 minutes. Divide batter between prepared pans.
  4. Bake 30 minutes or until a toothpick inserted near centers comes out clean. Let cool in pans on wire rack 15 minutes. Remove cakes from pans and let cool completely on wire racks.
  5. In a large bowl beat softened butter, alternately add powdered sugar, and 2 to 3 tablespoons of the remaining cereal milk until desired consistency, beating well between additions. Beat in salt and, if desired, almond extract. Continue beating mixture for 5 minutes or until light and fluffy.
  6. Stack cake layers on a cake stand or serving dish with frosting between the layers. Frost the top and the sides of the cake. Attach wafers vertically to cover the sides of the cake. Top cake with 2 cups cereal to look like a cereal bowl. Insert serving spoon into cake to look like a cereal spoon.
  7. Tape a wooden dowel to the inside of the cereal box. Spoon white chocolate over dowel to coat. Sprinkle some of the remaining cereal over the dowel to coat. Let stand until chocolate is set or chill to quickly set. Insert dowel into cake.

Watch the recipe video here:

No bowl required! Layered Cereal Cake recipe GET THE RECIPE: http://ow.ly/sAbM30iHGY3 (via Better Homes & Gardens)

Posted by MyRecipes on Tuesday, March 12, 2019

Main dish

Avocado Breakfast Sandwich

Avocado Breakfast Sandwich
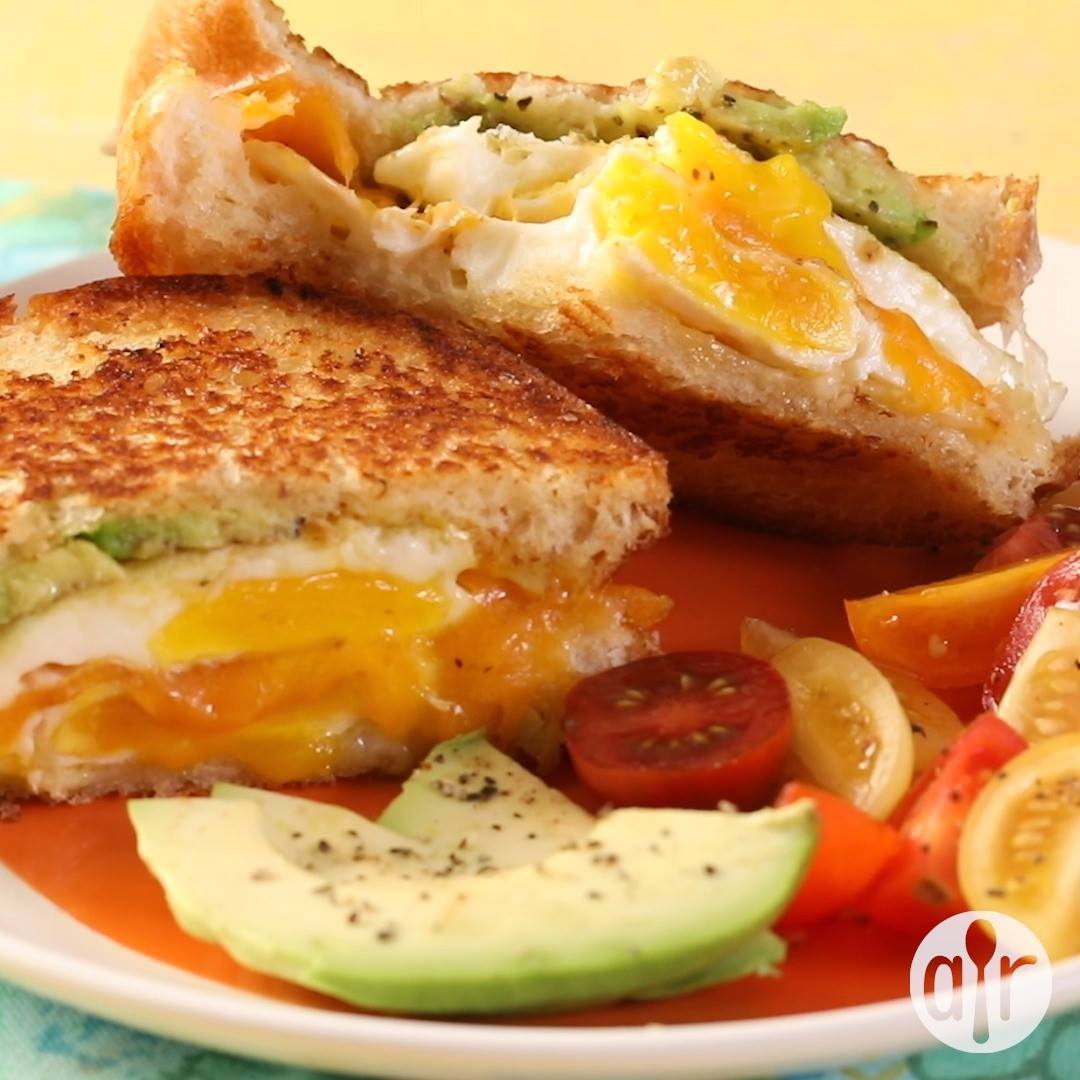
Restaurant-style breakfast sandwich at home! It's quick, easy and delicious! The sliced avocado is what makes this sandwich pop and gives it a unique flavor. It is chock-full of protein, as well, so this sandwich will keep you full until lunchtime.
Author:
Cuisine: American
Recipe type: Main dish
Ingredients
  • 1 tablespoon olive oil
  • 2 large eggssalt and ground black pepper to taste (optional)
  • 1 tablespoon butter, softened
  • 2 slices Italian bread
  • 1 ounce Swiss cheese, sliced
  • 1 ounce Cheddar cheese, sliced
  • ½ ripe avocado, sliced
Instructions
  1. Heat olive oil in a skillet over medium heat. Crack eggs into skillet; cook for 1 to 2 minutes. Flip and cook egg until done, 2 to 5 minutes more. Transfer eggs to a plate and season with salt and pepper.
  2. Spread butter onto 1 side of each bread slice.
  3. Heat a skillet over medium heat. Lay bread slices in the hot skillet, butter-side down. Quickly layer Swiss cheese, 1 fried egg, Cheddar cheese, 1 fried egg, avocado, and remaining bread slice, butter-side up. Carefully flip sandwich to grill other side until golden brown, 3 to 4 minutes.

Watch the recipe video here:

Avocado Breakfast Sandwich: https://trib.al/evjlQIr

Posted by Allrecipes on Tuesday, March 12, 2019

Dessert

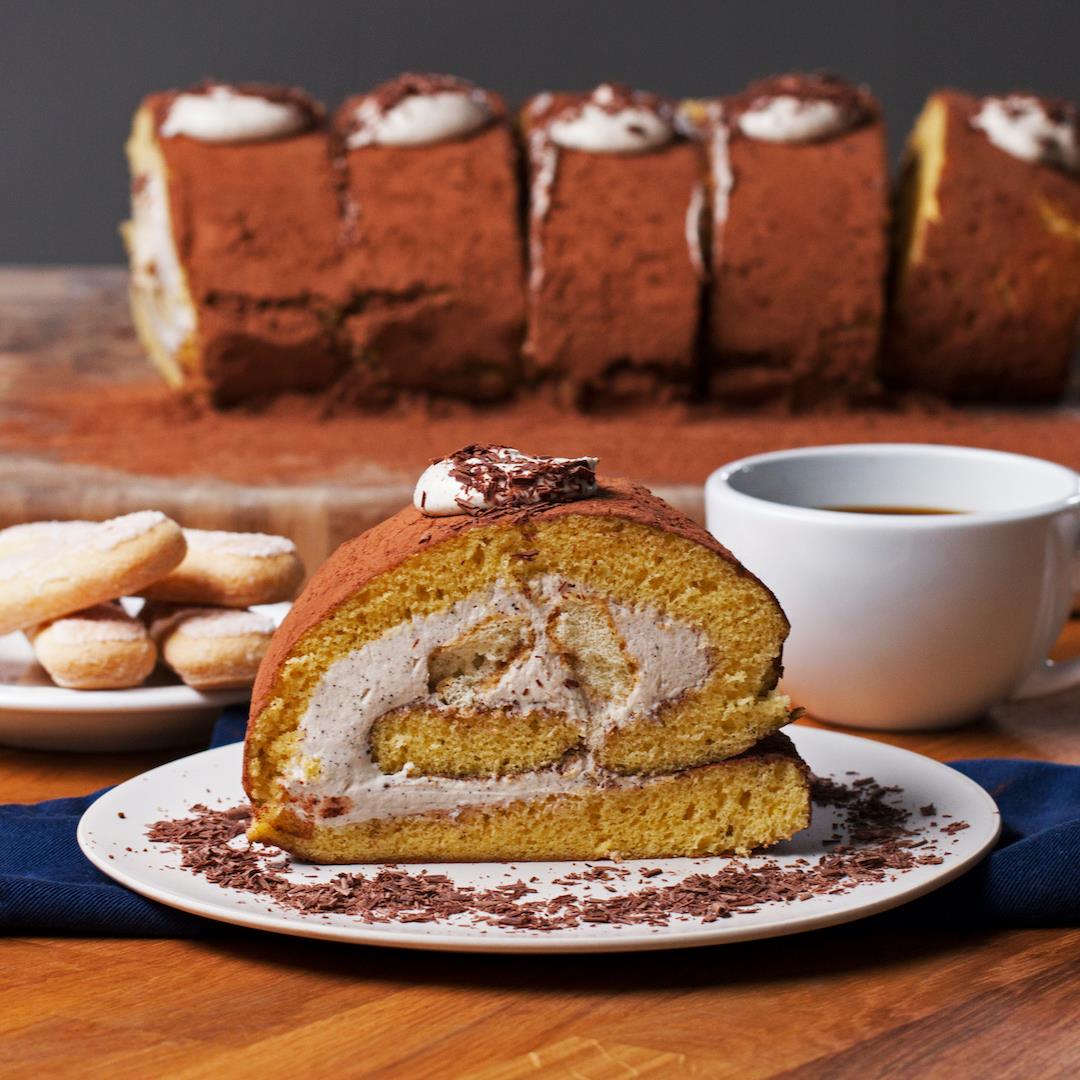
Tiramisu Swiss Roll

Tiramisu Swiss Roll
Tiramisu Swiss Roll recipe.
Author:
Cuisine: American
Recipe type: Dessert
Ingredients
  • 6 large eggs
  • 16 oz vanilla cake mix (455 g), 1 box
  • ½ cup vegetable oil (120 mL)
  • ½ cup water (120 mL)
  • ½ cup cocoa powder (60 g)
  • 1 cup heavy cream (240 mL)
  • 1 tablespoon espresso powder
  • 16 oz mascarpone cheese (455 g), whipped
  • ½ cup sugar (100 g)
  • 1 tablespoon vanilla extract
  • 5 ladyfingers
  • ½ cup espresso (120 mL), chilled
  • ½ cup chocolate shaving (85 g)
Instructions
  1. Preheat the oven to 350°F (180°C). Line a baking sheet with parchment paper.
  2. In a large bowl, combine the eggs, vanilla cake mix, vegetable oil, and water. Beat with an electric hand mixer to combine.
  3. Pour the cake batter onto the prepared baking sheet and spread with a spatula into an even layer.
  4. Bake for 8 minutes, or until golden brown.
  5. Sift the cocoa powder through a fine-mesh sieve all over a clean kitchen towel.
  6. Flip the cake onto the cocoa powder-dusted towel and remove the parchment paper. Starting with a short end, roll up the cake with the towel.
  7. Refrigerate for 1 hour.
  8. In a medium bowl, whip the heavy cream and espresso powder with an electric hand mixer until fluffy.
  9. Add the mascarpone, sugar, and vanilla to the espresso cream and beat until smooth.
  10. Unroll the cake and spread with the espresso cream in an even layer, leaving 1½ inches (4 cm) from the top empty and reserving 1 cup (225 g) of espresso cream for decoration.
  11. Arrange the ladyfingers on the cake horizontally, 2 inches (5 cm) from the bottom. Brush the ladyfingers with the chilled espresso.
  12. Roll the cake back up, using the towel as a guide but not rolling it inside the cake.
  13. Refrigerate for another hour, then unwrap the cake.
  14. Transfer the remaining espresso cream to a piping bag.
  15. Pipe 6 espresso cream dollops on top of the tiramisu roll. Sprinkle chocolate shavings on top.
  16. Slice and serve.
  17. Enjoy!

Watch the recipe video here:

This tiramisu swiss roll will have you doing cartwheels! ? ??‍♀️FULL RECIPE: https://tasty.co/recipe/tiramisu-swiss-roll

Posted by Tasty on Friday, April 19, 2019

Dessert

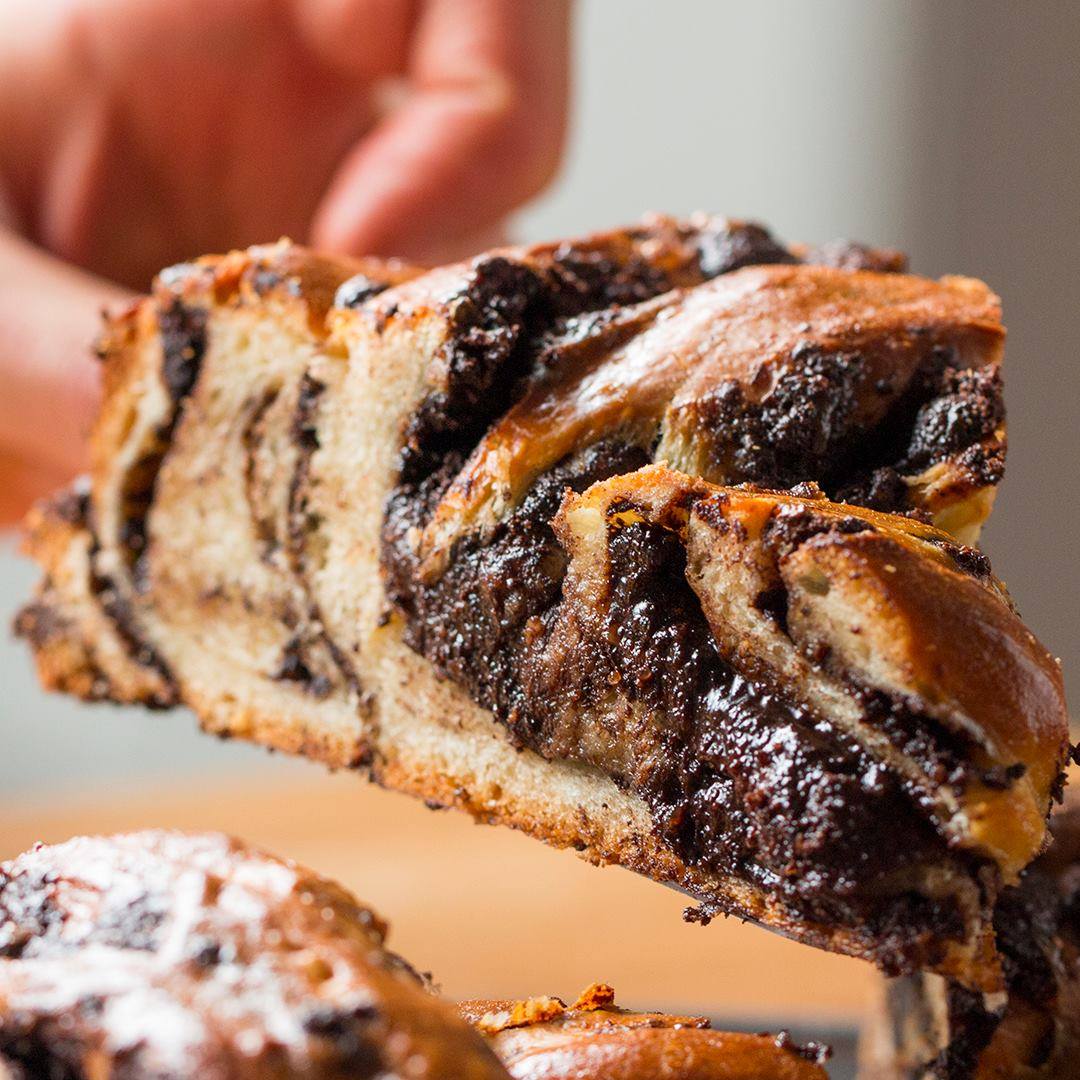
Chocolate Braided Swirl Bread (Babka)

Chocolate Braided Swirl Bread (Babka)
Chocolate Braided Swirl Bread (Babka) recipe.
Author:
Cuisine: American
Recipe type: Dessert
Ingredients
DOUGH
  • 4 cups flour (500 g)
  • 2 ¼ teaspoons yeast
  • 1 cup whole milk (240 mL), warm to the touch
  • 1 teaspoon salt
  • 1 ½ teaspoons vanilla
  • ¼ cup sugar (50 g)
  • ¼ cup honey (85 g)
  • 1 egg
  • 2 egg yolks
  • 10 tablespoons butter, softened
CHOCOLATE SAUCE
  • 12 oz bittersweet chocolate (340 g)
  • ¾ cup butter (170 g)
  • ½ cup sugar (100 g)
  • ¼ cup cocoa powder (30 g)
  • 1 tablespoon ground cinnamon
  • 2 tablespoons espresso powder
  • ½ cup turbinado sugar (100 g)
  • 1 egg wash
Instructions
  1. Combine the yeast and warm milk and let sit until foamy, about 5 minutes.
  2. In large mixing bowl, add the egg, egg yolks, vanilla, sugar, and honey and whisk to combine.
  3. Add in the milk and yeast mixture and whisk until fully incorporated.
  4. Gradually add in the flour and mix until fully incorporated.
  5. Gradually add in the butter and mix until fully incorporated.
  6. Cover with a towel and let rest for 30 minutes.
  7. Bring out the dough onto floured work surface and knead until smooth.
  8. Divide the dough into two equal parts and place in bowls and cover each with plastic wrap. Let the dough sit at room temperature for at least two hours, or when it has doubled in size.
  9. Preheat oven to 375˚F (190˚C).
  10. For the chocolate sauce, combine bittersweet chocolate, butter, sugar, cocoa powder, cinnamon, espresso powder, and turbinado sugar in a medium sized mixing bowl and microwave for 1-2 minutes. Stir to combine and set aside.
  11. Once the dough has doubled in size, transfer to a floured work surface and roll both pieces of dough into a rectangle roughly 10x15-inches.
  12. Cover the dough with half of the chocolate sauce leaving an ½ inch - 1 inch of room on all sides.
  13. Gently roll the dough up and repeat with second piece of dough and remaining chocolate sauce.
  14. Using a bench scraper or a knife, carefully cut each log vertically in half making sure the seam is side down.
  15. Lay one piece of dough horizontally and lay another piece over it vertically so you have a rough ‘plus sign’.
  16. Lay another piece horizontally over the vertical piece and above the other horizontal piece.
  17. Lay the final piece vertically on the right of the other vertical piece having it go over the top horizontal piece but weaving it under the lower horizontal piece.
  18. Starting with the bottom vertical piece on the right side, bring it to the left layering it over the other vertical lower piece.
  19. Follow this method around the dough clockwise.
  20. Once returned to the bottom lower vertical pieces. Take the original piece you crossed over (the lower left vertical piece) and cross that over to the right layering it over the last piece you used. Continue this counterclockwise until back at the bottom or you are unable to layer the dough anymore.
  21. Tuck in the excess pieces of dough under the bread.
  22. Transfer the bread into a parchment paper-lined baking sheet and brush with egg wash.
  23. Bake for 35-45 minutes, until lightly browned and cooked through.
  24. Enjoy!

Watch the recipe video here:

Just look at that swirl ?…FULL RECIPE: https://tasty.co/recipe/chocolate-braided-swirl-bread-babka

Posted by BuzzFeed Food on Saturday, April 20, 2019

Soup

Instant Pot Buffalo Ranch Chicken Dip

Instant Pot Buffalo Ranch Chicken Dip
Buffalo Ranch Chicken Dip wows my guests, but takes only minutes to make!
Author:
Cuisine: American
Recipe type: Soup
Ingredients
  • 1½ lbs boneless, skinless chicken breast, cut into 6 pieces
  • ¼ cup water
  • 1 cup Buffalo-style hot sauce
  • 1 1 oz package ranch seasoning mix
  • 4 tbsp butter, cut into 4-6 pieces
  • 8 oz cream cheese, softened
  • 1 cup shredded cheddar-jack cheese
  • Additional Buffalo hot sauce for garnish
Instructions
  1. Add chicken pieces, water and Buffalo sauce to the pot and stir to coat.
  2. Sprinkle ranch dip over the top, then dot with butter–do not stir.
  3. Secure the lid, making sure the vent is closed.
  4. Using the display panel select the MANUAL function*. Use the +/- keys and program the Instant Pot for 15 minutes.
  5. When the time is up, quick-release the remaining pressure.
  6. Carefully remove the chicken from the pot to a cutting board and shred thoroughly (a hand mixer works great for this job).
  7. Return chicken to pot along with softened cream cheese and shredded cheeses. Stir until well blended, returning to SAUTE mode as needed.
  8. Serve hot garnished with a swirl of additional hot sauce alongside chips, sliced baguette or veggies.

Watch the recipe video here:

Buffalo Ranch Chicken Dip wows my guests, but takes only minutes to make!RECIPE: http://chopsecrets.com/instant-pot-buffalo-ranch-chicken-dip/

Posted by Chop Secrets on Saturday, April 20, 2019