Main dish

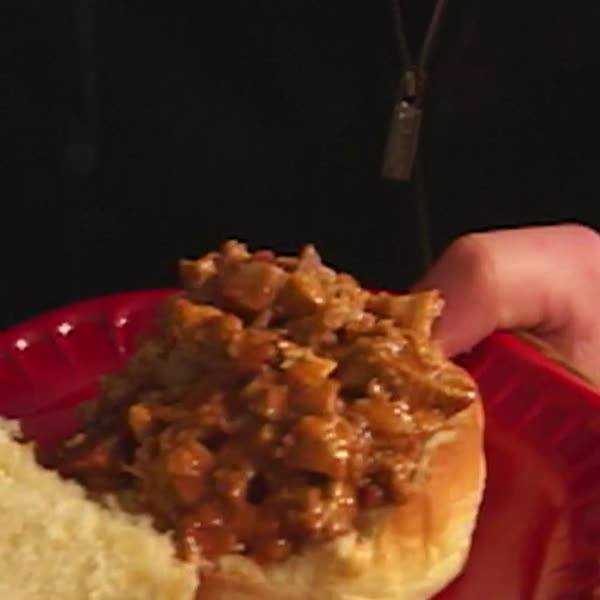
Oven-Roasted Pulled Pork Sandwiches
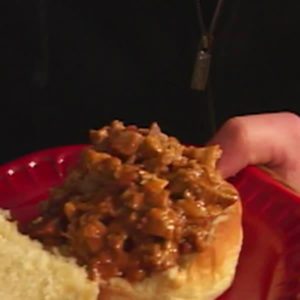
Oven-Roasted Pulled Pork Sandwiches
Need an easy dish that will serve a crowd? Look no further than Oven-Roasted Pulled Pork Sandwiches!
Author:
Cuisine: American
Recipe type: Main dish
Ingredients
Dry Rub:
  • 3 tablespoons paprika
  • 1 tablespoon garlic powder
  • 1 tablespoon brown sugar
  • 1 tablespoon dry mustard
  • 3 tablespoons coarse salt
  • 1 (5 to 7 pound) pork roast, preferably shoulder or Boston butt
Cider Vinegar Barbecue Sauce:
  • 1½ cups cider vinegar
  • 1 cup yellow or brown mustard
  • ½ cup ketchup
  • ⅓ cup packed brown sugar
  • 2 garlic cloves, smashed
  • 1 teaspoon salt
  • 1 teaspoon cayenne
  • ½ teaspoon freshly ground black pepper
Serving:
  • 12 hamburger buns
  • 1 recipe Spicy Slaw, recipe follows
  • Pickle spears
Spicy Slaw
  • 1 head green cabbage, shredded
  • 2 carrots, grated
  • 1 red onion, thinly sliced
  • 2 green onions, chopped
  • 1 red chile, sliced
  • 1½ cups mayonnaise
  • ¼ cup Creole mustard
  • 1 tablespoon cider vinegar
  • 1 lemon, juiced
  • Pinch sugar
  • ½ teaspoon celery seed
  • Several dashes hot sauce
  • Kosher salt and freshly ground black pepper
Instructions
  1. Mix the paprika, garlic power, brown sugar, dry mustard, and salt together in a small bowl. Rub the spice blend all over the pork and marinate for as long as you have time for, as little as 1 hour or up to overnight, covered, in the refrigerator.
  2. Preheat the oven to 300 degrees F.
  3. Put the pork in a roasting pan and bake for about 6 hours. Basically, roast the pork until it's falling apart and an instant-read thermometer inserted into the thickest part registers 170 degrees F.
  4. To make the barbecue sauce: combine the vinegar, mustard, ketchup, brown sugar, garlic, salt, cayenne, and black pepper in a saucepan over medium heat. Simmer gently, stirring, for 10 minutes until the sugar dissolves.
  5. Remove the pork roast from the oven and transfer to a large platter. Allow the meat to rest for about 10 minutes. While still warm, take 2 forks and "pull" the meat to form shreds. Using 2 forks, shred the pork by steadying the meat with 1 fork and pulling it away with the other. Put the shredded pork in a bowl. Pour ½ of the sauce on the shredded pork and mix well to coat.
  6. To serve, spoon the pulled pork mixture onto the bottom ½ of the hamburger bun, and top with the spicy slaw. Serve with pickle spears and the remaining sauce on the side.
Spicy Slaw
  1. Combine the cabbage, carrot, red onion, green onions, and chile in a large bowl. In another bowl, mix the mayonnaise, mustard, vinegar, lemon juice, and sugar; stirring to incorporate. Pour the dressing over the cabbage mixture and toss gently to mix. Season the cole slaw with celery seed, hot sauce, salt, and pepper. Chill for 2 hours in refrigerator before serving.

Watch the recipe video here:

Need an easy dish that will serve a crowd? Look no further than Oven-Roasted Pulled Pork Sandwiches! See Tyler Florence on #WorstCooks > Sundays at 9|8cSave the recipe: http://bit.ly/2TynMnu!

Posted by Food Network on Tuesday, February 12, 2019
Main dish

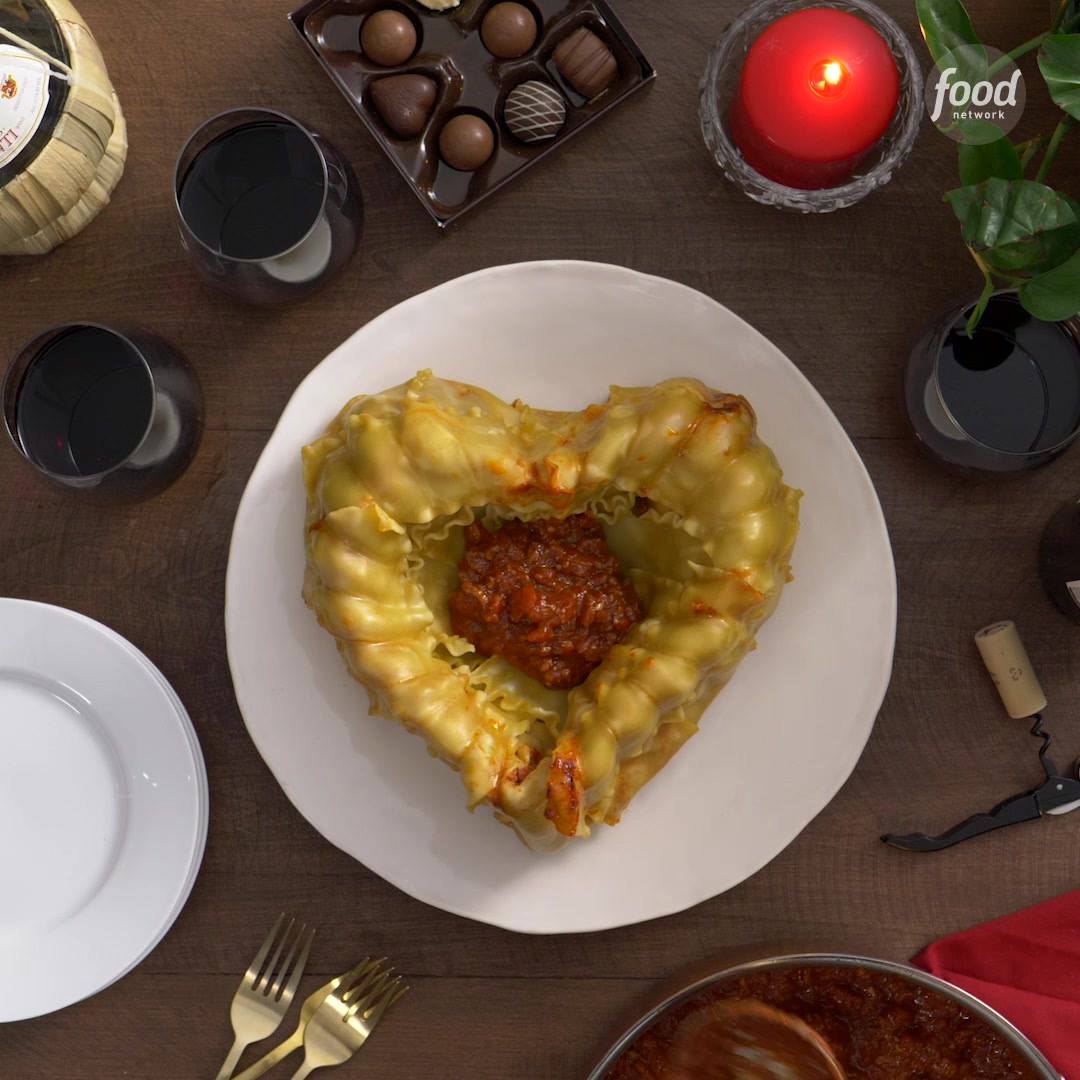
Heart-Shaped Lasagna Bundt

Heart-Shaped Lasagna Bundt
This heart-shaped lasagna is filled with red meat sauce that oozes out when you slice into it, making it the perfect Valentine's Day supper whether you love the holiday -- or hate it.
Author:
Cuisine: American
Recipe type: Main dish
Ingredients
  • Kosher salt and freshly ground black pepper
  • One 16-ounce box lasagna noodles
  • 2 tablespoons olive oil
  • 1 medium onion, chopped
  • 3 cloves garlic, minced
  • 1½ teaspoons dried oregano
  • 1½ pounds ground beef
  • One 6-ounce can tomato paste
  • One 28-ounce can crushed tomatoes
  • 2 teaspoons sugar
  • 12 ounces ricotta
  • 8 ounces shredded mozzarella (2 cups)
  • 2 large eggs
  • ½ cup grated Parmesan
  • ¼ cup chopped fresh flat-leaf parsley
Instructions
Special equipment: a 10-cup heart-shaped Bundt pan
  1. Preheat the oven to 375 degrees F.
  2. Bring a large pot of salted water to a boil and cook the lasagna noodles to al dente according to the package directions. Line a baking sheet with a clean kitchen towel or paper towels. Drain the noodles and spread them flat on the baking sheet to dry them completely (you may need to create 2 to 3 layers to fit all of the noodles; put paper towels between each layer).
  3. Meanwhile, heat the oil in a large pot over medium-high heat. Add the onions and cook, stirring occasionally, until softened and just beginning to brown, 7 to 8 minutes. Stir in the garlic and oregano and cook until the garlic is fragrant, about 1 minute. Add the beef, 2 teaspoons salt and a generous amount of black pepper, and cook, breaking up the meat with a spoon and stirring occasionally, until the beef is just cooked through, 7 to 8 minutes. Stir in the tomato paste and cook until well incorporated and heated through, 1 to 2 minutes. Pour in the tomatoes, sugar, 1 cup water, 1 teaspoon salt and a generous amount of black pepper and bring to a boil. Reduce the heat to low and simmer until the sauce is slightly thickened, about 20 minutes.
  4. Meanwhile, mix the ricotta, mozzarella, eggs, Parmesan, parsley, ½ teaspoon salt and a few grinds of black pepper in a medium bowl.
  5. Cut six noodles in half crosswise.
  6. Line the bottom of a 10-cup heart-shaped Bundt pan with 4 of the half noodles (2 along the straight lines of the heart and 2 along the arches). Lay 12 whole noodles in the bottom of the pan, slightly overlapping and directly on top of the half noodles, making sure that one side of each noodle hangs 2 to 3 inches over the edge of the pan and the other side of the noodle runs up the center of the pan.
  7. Pour 1 cup meat sauce on top of the noodles, then spread 1 cup of the ricotta mixture over the sauce. Top with 4 noodle halves. Repeat the layering 1 more time. Pour 1 cup meat sauce and spread the remaining ricotta mixture over the top (the ricotta mixture will be less than the 1 cup used in previous layers).
  8. Fold the edges of the overhanging lasagna noodles the lasagna towards the center, covering the filling and the hole in the center completely. Bake until the noodles on top are turning golden brown and are starting to crisp up, 45 to 50 minutes. Let sit for 10 minutes. Invert the pan onto a cutting board. Reheat the remaining sauce if necessary and pour into the center of the heart. Slice and serve immediately.

Watch the recipe video here:

Recipe of the Day: Heart-Shaped Lasagna Bundt ❤️Save the recipe: https://foodtv.com/2HXSeWx

Posted by Food Network on Tuesday, February 12, 2019

Dessert

Brownie Truffle-Stuffed Strawberries

Brownie Truffle-Stuffed Strawberries
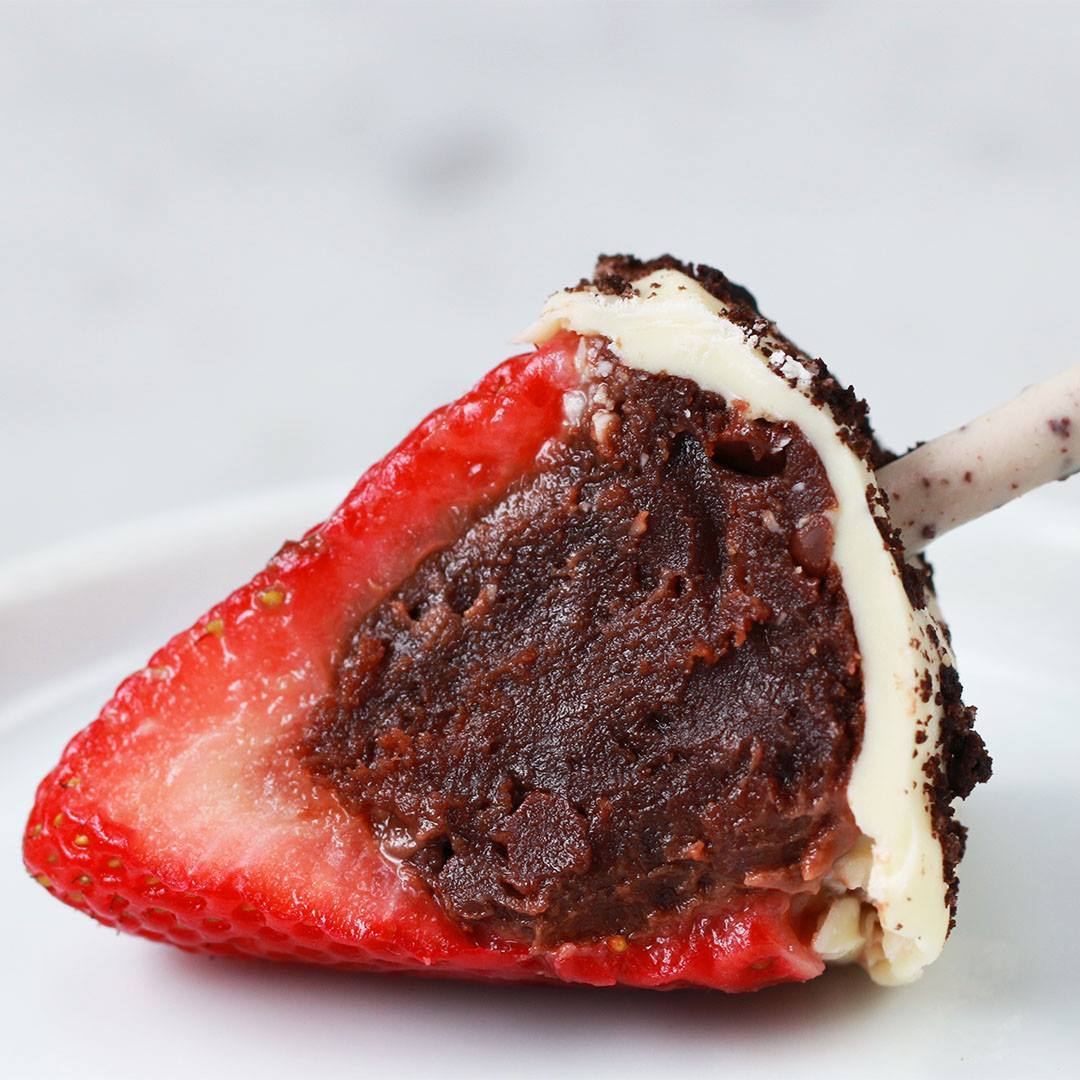
Whether you need a Valentine’s Day dessert or a baby shower treat, these Truffle Brownie-Stuffed Strawberries are perfect for any celebration. The rich chocolate center pairs perfectly with the light, fresh strawberry. Top with melted chocolate, your favorite toppings, and a cookie stick for easy serving, and you’re ready to go!
Author:
Cuisine: American
Recipe type: Dessert
Ingredients
  • 18 oz chocolate fudge brownie mix, 1 box, prepared according to package instructions (515 g)
  • 24 large strawberries
  • 4 oz cream cheese (115 g)
  • ½ cup mini chocolate chips (85 g)
  • ½ teaspoon vanilla extract
  • 1 cup high quality dark chocolate (170 g)
  • 1 cup high quality white chocolate (170 g)
  • 8 cookies and cream dipped cookie sticks
  • 8 chocolate dipped cookie sticks
  • 8 strawberry dipped cookie sticks
  • 4 chocolate sandwich cookies, crushed
  • 3 tablespoons red sprinkles
  • 3 tablespoons freeze-dried strawberry, crushed
Instructions
  1. Prepare the brownies according to the package instructions, then remove from the oven and let cool in the refrigerator for about 20 minutes.
  2. While the brownies cool, use a melon baller or teaspoon to scoop out the tops and centers of each strawberry. Set each strawberry in the cup of a mini muffin tin.
  3. In a large bowl, beat the cream cheese with an electric hand mixer until soft. Add the mini chocolate chips, vanilla, and cooled brownies and stir until mixture has a thick, dough-like texture.
  4. Take 1 tablespoon of the brownie mixture in your hands and roll it into a ball. Place the brownie truffle inside a strawberry. Repeating with remaining ingredients.
  5. Chill the strawberries in the refrigerator for 30 minutes.
  6. Add the dark chocolate and white chocolate to 2 separate small bowl. Microwave each bowl separately in 30-second intervals, stirring between each, until melted, about 1 minute total.
  7. Dip the top of 1 strawberry in the melted white chocolate, poke a cookies and cream-dipped cookie stick through the top, and sprinkle with chocolate sandwich cookie crumbs. Repeat with 7 more strawberries.
  8. Dip the top of another strawberry in the melted dark chocolate, poke a chocolate-dipped cookie stick through the top, and sprinkle with red sprinkles. Repeat with 7 more strawberries.
  9. Dip the top of another strawberry in the melted white chocolate, poke a strawberry-dipped cookie stick through the top, and sprinkle with freeze-dried strawberries. Repeat with the remaining strawberries.
  10. Let the chocolate set, about 5 minutes, then serve.
  11. Enjoy!

Watch the recipe video here:

Share these brownie stuffed strawberries with your girlfriends this Valentine's day ?? Just pair with wine ??‍♀️Full…

Posted by Tasty on Tuesday, February 12, 2019

Main dish

Pizza Dip Three Ways

Pizza Dip Three Ways
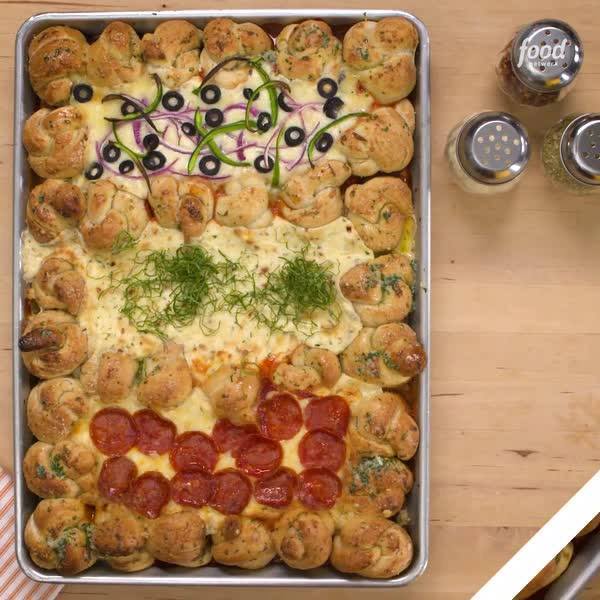
Perfect for serving during the big game, this pizza dip will satisfy all your friends, is endlessly customizable -- and it's fun to eat, too.
Author:
Cuisine: American
Recipe type: Main dish
Ingredients
  • All-purpose flour, for dusting
  • Three 1-pound balls pizza dough
  • 6 tablespoons unsalted butter, melted
  • 6 tablespoons extra-virgin olive oil
  • ¼ cup minced fresh parsley
  • 1 teaspoon garlic powder
  • 6 cloves garlic, minced
  • Kosher salt
  • ½ cup plus 2 tablespoons grated Parmesan
  • 8 ounces cream cheese
  • 1 cup whole milk ricotta
  • ½ cup heavy cream
  • 1 teaspoon crushed red pepper flakes
  • One 8-ounce bag shredded mozzarella
  • 2 cups jarred marinara sauce
  • 1 cup mini pepperoni
  • ½ green bell pepper, cut into matchsticks
  • ½ red onion, cut into matchsticks
  • ¼ cup sliced black olives
  • 4 leaves fresh basil, sliced thinly
Instructions
  1. Preheat the oven to 375 degrees F.
  2. Dust a work surface with flour to keep the dough from sticking. Divide each dough ball into 12 equal-size pieces. Roll each piece into an 8-inch rope and twist into a knot. Arrange the knots around the edge of a 13-by-18-inch sheet pan, leaving ¼ inch between each. Use the remaining knots to form 2 lines to divide the pan into 3 sections widthwise. Cover the pan with a clean kitchen towel and let the dough rise, about 15 minutes.
  3. Meanwhile, make the garlic oil. Combine the butter, olive oil, parsley, garlic powder, fresh garlic and 2 teaspoons salt in a medium bowl. Stir to combine.
  4. Brush the knots with about ¼ cup of the garlic oil and sprinkle with 2 tablespoons Parmesan. Bake until just starting to brown, about 20 minutes. (The knots won't be fully baked.) Reduce the oven temperature to 350 degrees F.
  5. Meanwhile, combine the cream cheese, ricotta, heavy cream, red pepper flakes, 1 cup mozzarella, the remaining ½ cup Parmesan and 6 tablespoons of the garlic oil in a large bowl. Beat with an electric mixer until fluffy and combined, about 3 minutes.
  6. Make the dips in the pan of half-baked knots. Divide the marinara sauce evenly between the far left and far right sections. Sprinkle half of the pepperoni over the right-hand section. Sprinkle half of the peppers and onions over the left-hand section. Then dollop and spread two-thirds of the ricotta mixture in the center section. Divide the remaining ricotta mixture between the right and left sections, dolloping it over the sauce and gently spreading with the back of a spoon or small offset spatula. Divide the remaining cup mozzarella between the far right and far left sections, sprinkling it on. Top the far right section with the remaining pepperoni and the far left section with the remaining peppers, onions and olives. Bake until the knots are golden and the dips are bubbling and lightly browned, 20 to 25 more minutes.
  7. Brush the knots with the remaining garlic oil and sprinkle the fresh basil over the center section.

Watch the recipe video here:

What We're Loving: Pizza Dip Three WaysSave the recipe: https://foodtv.com/2HMO7MX!

Posted by Food Network on Tuesday, February 12, 2019
Main dish

Best-Ever Barbecued Ribs

Best-Ever Barbecued Ribs
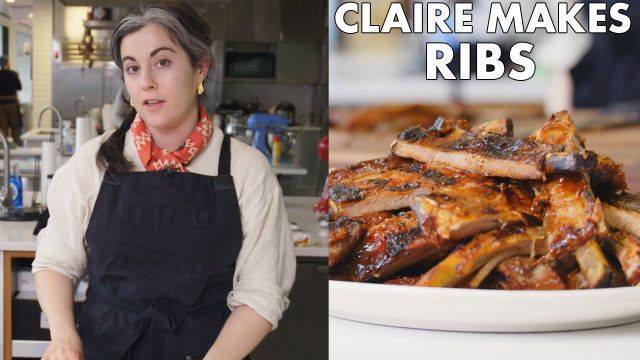
Got nothing but time on your hands? Cook these really low and slow. Set the oven at 300° and start checking the ribs after 3 hours. But don’t sweat it; they’ll be super-tender either way. Watch the step-by-step video here.
Author:
Cuisine: American
Recipe type: Main dish
Ingredients
  • 2½ tablespoons kosher salt
  • 1 tablespoon dry mustard
  • 1 tablespoon paprika
  • ½ teaspoon cayenne pepper
  • ½ teaspoon freshly ground black pepper
  • 8 pounds baby back pork ribs (8 racks) or St. Louis-style spareribs (4 racks)
  • Low-salt chicken broth (optional)
  • 1½ cups store-bought or homemade barbecue sauce plus more
Instructions
  1. Preheat oven to 350°. Combine first 5 ingredients in a small bowl. Place each rack of ribs on a double layer of foil; sprinkle rub all over ribs. Wrap racks individually and divide between 2 baking sheets.
  2. Bake ribs until very tender but not falling apart, about 2 hours for baby backs and 3 hours for spareribs. Carefully unwrap ribs; pour any juices from foil into a 4-cup heatproof measuring cup; reserve juices. Let ribs cool completely. DO AHEAD: Ribs can be baked up to 3 days ahead (the flavor will be more developed, and the cold ribs will hold together better on the grill as they heat through). Cover and chill juices. Rewrap ribs in foil and chill.
  3. Build a medium-hot fire in a charcoal grill, or heat a gas grill to high. Add broth or water to rib juices, if needed, to measure 1½ cups. Whisk in barbecue sauce to blend.
  4. Grill ribs, basting with barbecue sauce mixture and turning frequently, until lacquered and charred in places and heated through, 7-10 minutes. Transfer to a cutting board; cut between ribs to separate. Transfer to a platter and serve with additional barbecue sauce.

Watch the recipe video here:

Yeah, you're going to be making these ribs all summer long. Make them: http://bonap.it/vf3WcjS

Posted by Bon Appétit Magazine on Tuesday, February 12, 2019

Main dish

Omelet With Bacon, Mushrooms, and Ricotta

Omelet With Bacon, Mushrooms, and Ricotta
Author:
Cuisine: American
Recipe type: Main dish
Ingredients
  • Omelet
  • 3 slices thick-cut bacon
  • 4 ounces button mushrooms
  • Kosher salt, freshly ground pepper
  • 4 ounces fresh ricotta or cream cheese (about ½ cup)
  • ¼ ounce Parmesan, finely grated (about ¼ cup)
  • 6 large eggs
  • Salad
  • 2 tablespoons olive oil
  • 2 tablespoons white wine vinegar
  • 1 teaspoon Dijon or other mustard
  • 2 heads of Boston or Bibb lettuce, leaves separated
  • Handful of chopped chives
Instructions
Omelet
  1. Cut bacon crosswise into ½”-wide pieces. Cook in a large nonstick skillet over medium, stirring and turning occasionally, until starting to brown and crisp but not all of the fat is rendered, 6–8 minutes. Transfer to a small plate or bowl with a slotted spoon.
  2. While the bacon is cooking, finely chop the mushrooms.
  3. Add mushrooms to skillet with bacon drippings, season with salt and pepper, and increase heat to medium-high. Cook, tossing often, until browned and any liquid from mushrooms has cooked off, about 5 minutes. Use a slotted spoon to transfer to a small bowl; let skillet cool slightly. Add ricotta and Parmesan to mushrooms and stir well to combine; season with salt and pepper.
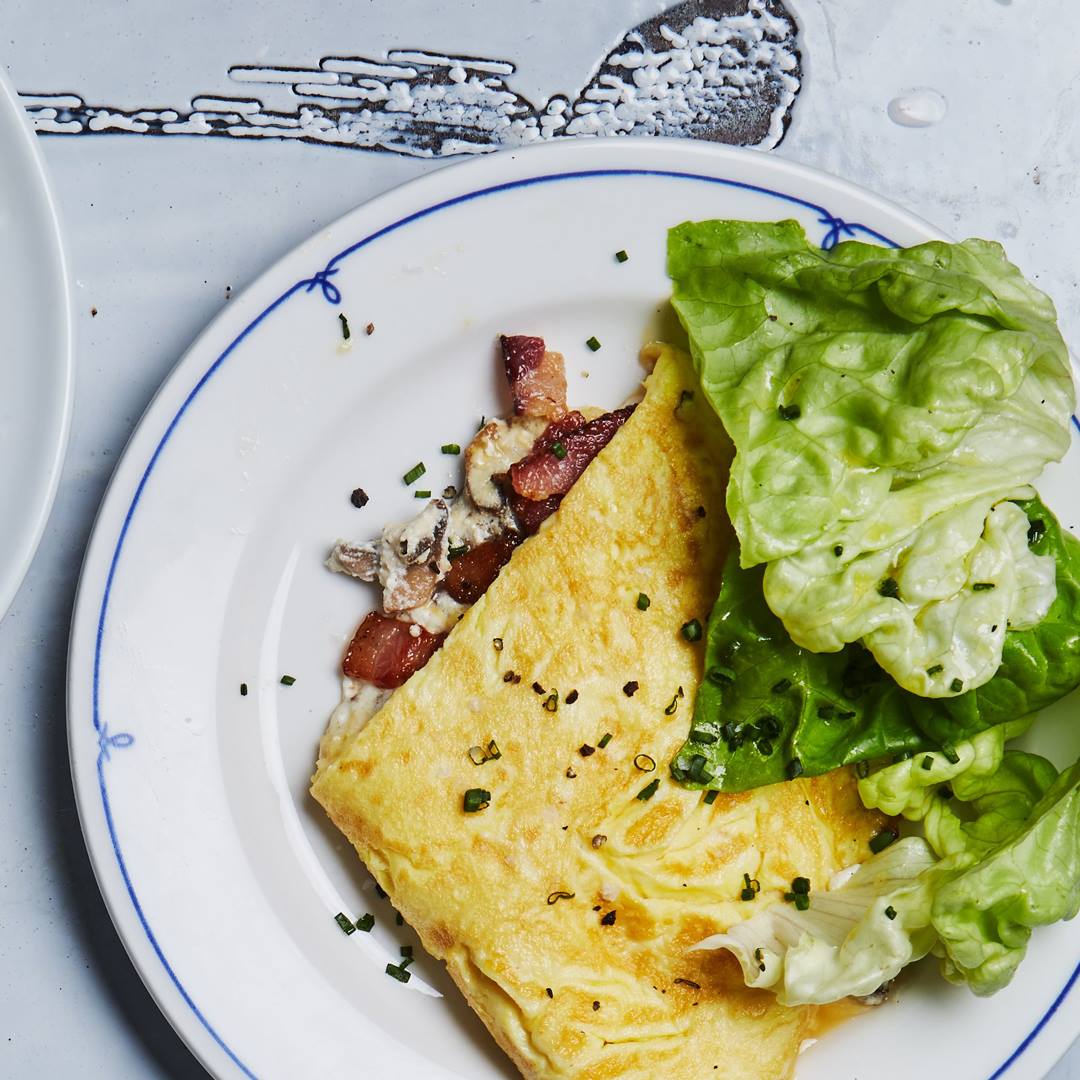
  4. Whisk eggs in a medium bowl until very smooth and a little frothy, about 1 minute; season with salt and pepper. Cook eggs in reserved skillet over medium, stirring constantly and making sure to scrape up eggs from bottom and around edge of pan, until large folded curds form. Shake pan to distribute uncooked eggs over surface and spoon mushroom mixture slightly off center. Top with bacon and cook until bottom of omelet takes on a light golden-brown color but surface is still slightly wet. Fold one side of omelet over filling (like a taco); slide omelet onto a cutting board or large plate.
  5. Salad and Assembly
  6. Whisk oil, vinegar, and mustard in a large bowl to combine; season with salt and pepper. Add lettuce and half of chives and toss to coat.
  7. Top omelet with remaining chives cut in half and serve with salad.
Salad and Assembly
  1. Whisk oil, vinegar, and mustard in a large bowl to combine; season with salt and pepper. Add lettuce and half of chives and toss to coat.
  2. Top omelet with remaining chives cut in half and serve with salad.

Watch the recipe video here:

This is what brunch dreams are made of.Recipe: http://bonap.it/DWS0Zss

Posted by Bon Appétit Magazine on Sunday, February 10, 2019

Dessert

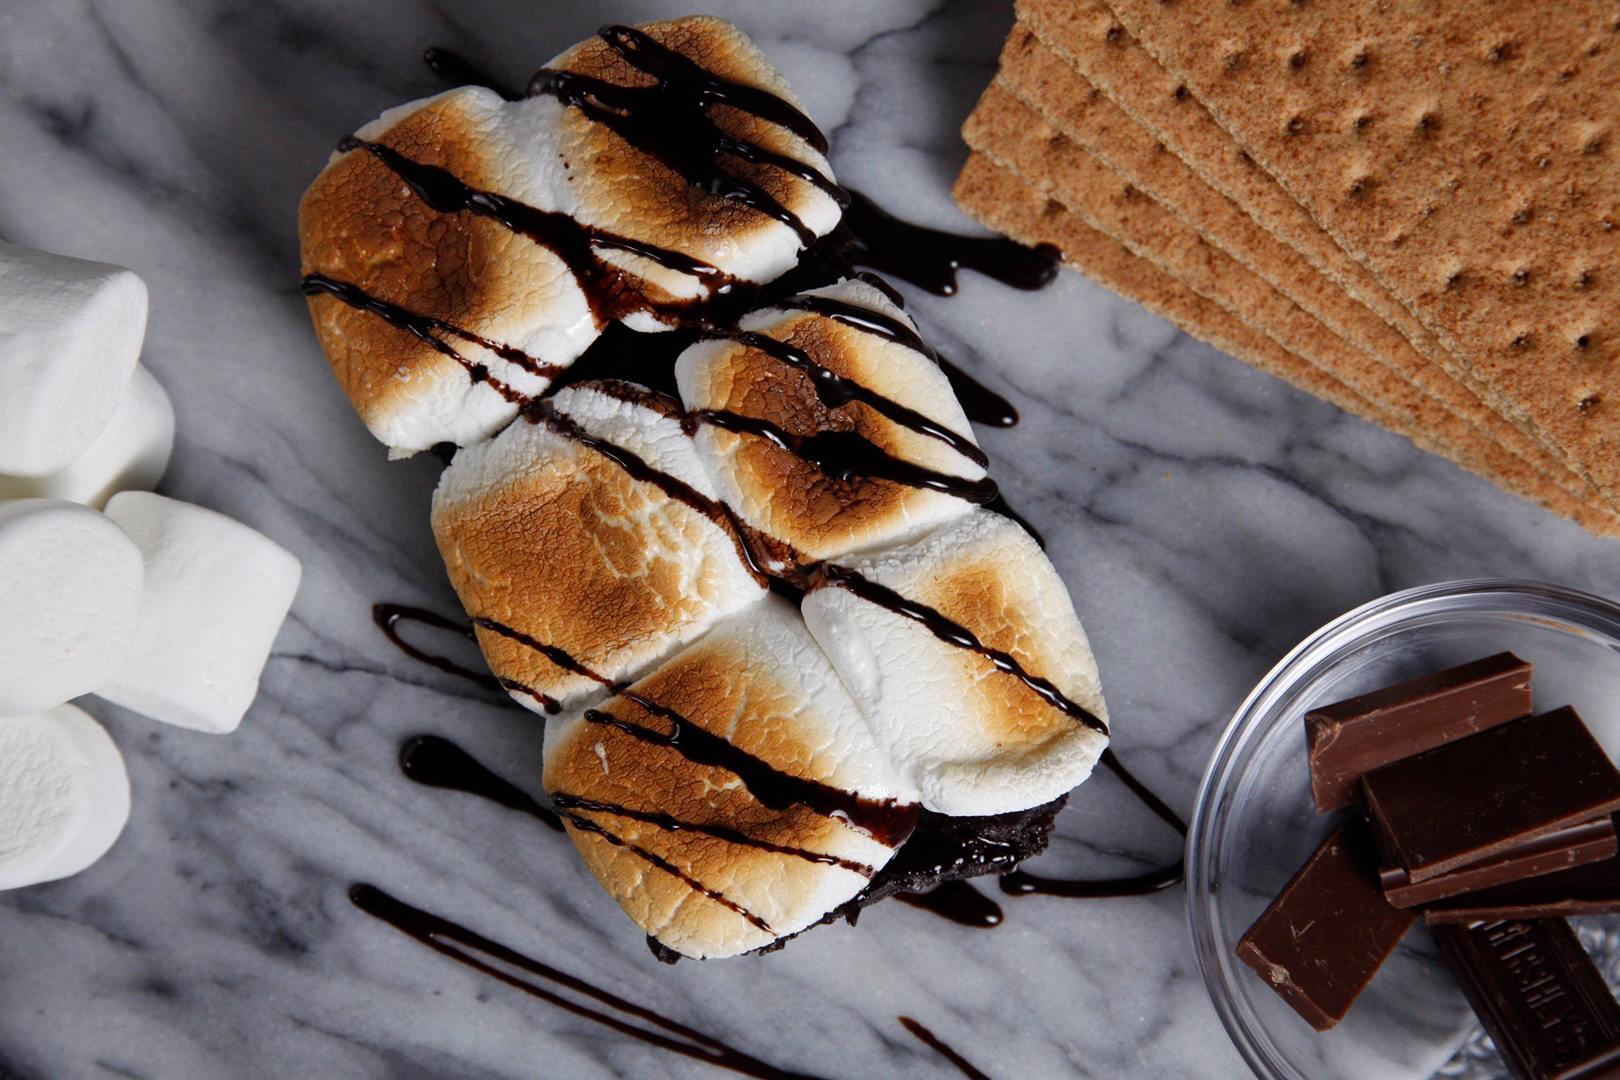
Instant Pot I NEED S’MORE S’Mores Brownies

Instant Pot I NEED S’MORE S’Mores Brownies
All you need to satisfy that campfire chocolatey craving!
Author:
Cuisine: American
Recipe type: Dessert
Ingredients
  • 1 graham cracker
  • ⅔ cup prepared brownie batter
  • ¼ of a 1.55 oz Hershey bar (3 rectangles), roughly chopped
  • 1 cup water
  • 6 marshmallows (not miniature)
Instructions
  1. Cut a rectangle of parchment paper to fit the bottom of a 2-cup loaf pan (these work great: https://amzn.to/2D9OYEC)
  2. Place graham cracker in pan on top of parchment paper.
  3. Spread ⅓ cup prepared brownie batter over the graham cracker. Sprinkle chopped chocolate over batter.
  4. Top with remaining ⅓ cup prepared brownie batter. Cover loosely with foil–do not seal.
  5. Pour 1 cup of water into the Instant Pot, followed by the steam rack.
  6. Carefully lower the loaf pan onto the steam rack, then secure the lid, making sure the vent is closed.
  7. Using the display panel select the MANUAL function*. Use the +/- keys and program the Instant Pot for 35 minutes.
  8. When the time is up, let the pressure naturally release for 10 minutes, then quick-release the remaining pressure.
  9. Remove the loaf pan and top with 6 marshmallows. Set under the broiler 2-3 minutes until golden brown (watch carefully!).
  10. Lightly flatten the marshmallows with a fork to help them spread.
  11. Cool at least 10 minutes, then run a knife around the edge of the pan to loosen. Remove from pan and cut into 6 pieces.

Watch the recipe video here:

All you need to satisfy that campfire chocolatey craving!RECIPE: http://chopsecrets.com/instant-pot-i-need-smore-smores-brownies/

Posted by Chop Secrets on Monday, February 11, 2019

Main dish

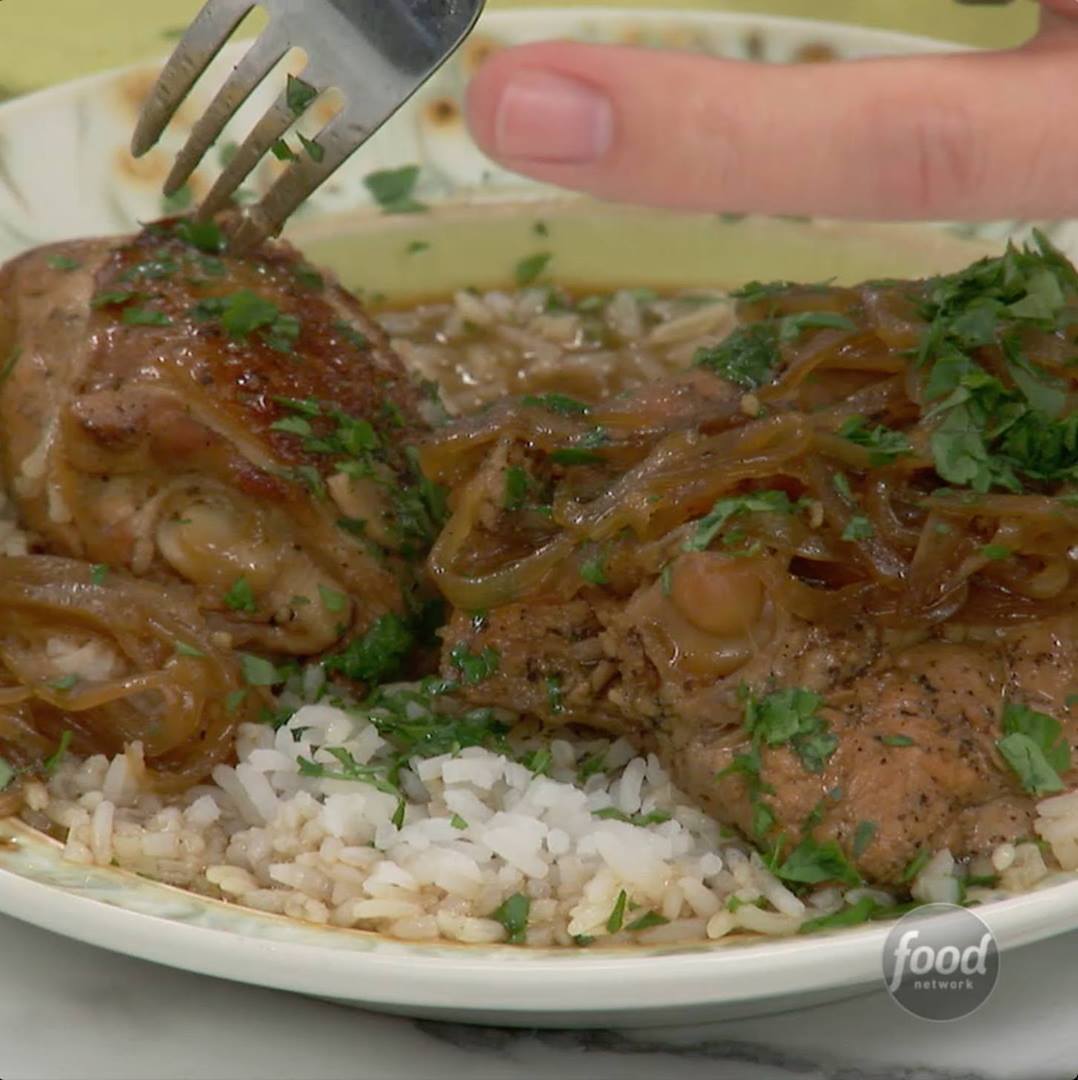
Filipino Adobo Chicken

Filipino Adobo Chicken
Author:
Cuisine: American
Recipe type: Main dish
Ingredients
  • 8 bone-in, skin-on chicken thighs
  • ¼ cup low-sodium soy sauce
  • ¼ cup distilled vinegar
  • 2 tablespoons brown sugar
  • 1 tablespoon freshly ground black pepper
  • ½ habanero, thinly sliced
  • 1 tablespoon olive oil
  • 2 cups thinly sliced onions
  • 2 cloves garlic, thinly sliced
  • 2 bay leaves
  • 1 cup fresh parsley, finely chopped
  • 4 cups steamed jasmine rice
  • 4 lime wedges
Instructions
  1. Combine the chicken with the soy sauce, vinegar, sugar, black pepper and habanero in a resealable plastic bag. Marinate overnight, refrigerated.
  2. Remove the chicken from the bag and pat dry (reserve the marinade).
  3. Heat a Dutch oven over medium-high heat and add the olive oil. Add the chicken skin-side down and cook until brown, about 4 minutes. Remove the chicken and set aside. Add the onion and garlic and cook until the onions soften and are slightly translucent, about 5 minutes. Strain the marinade and add it to the Dutch oven along with 4 cups water. Return the chicken to the pan and bring to a slow simmer. Add the bay leaves and cook until the chicken is tender and the sauce has reduced, about 20 minutes. Finish with the fresh parsley.
  4. Serve with jasmine rice and lime wedges.

Watch the recipe video here:

Have you tried Geoffrey Zakarian's Filipino Adobo Chicken yet? Here's your chance: https://foodtv.com/2RlUXNW

Posted by Food Network on Sunday, February 10, 2019

Breakfast

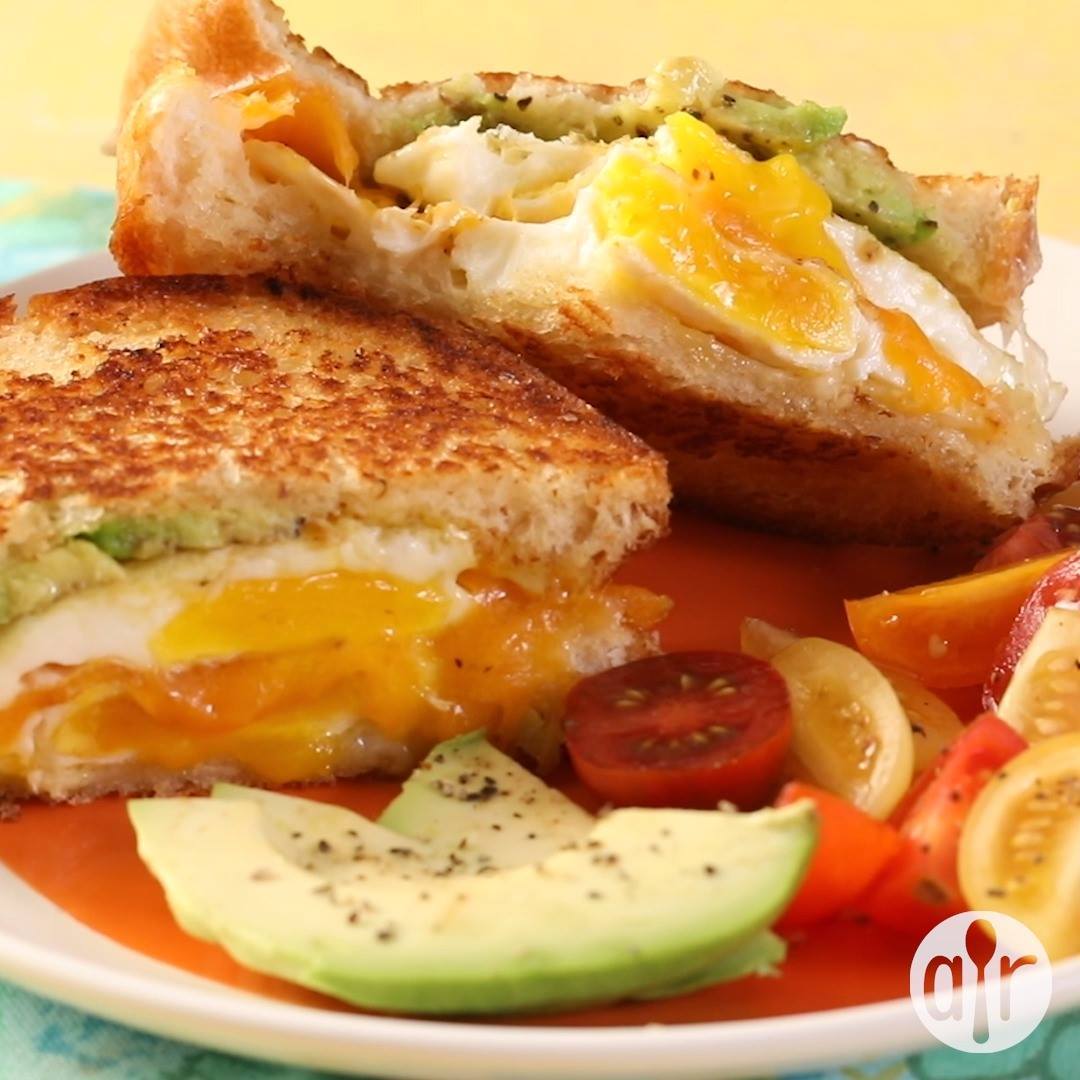
Avocado Breakfast Sandwich

Avocado Breakfast Sandwich
Restaurant-style breakfast sandwich at home! It's quick, easy and delicious! The sliced avocado is what makes this sandwich pop and gives it a unique flavor. It is chock-full of protein, as well, so this sandwich will keep you full until lunchtime.
Author:
Cuisine: American
Recipe type: Breakfast
Ingredients
  • 1 tablespoon olive oil
  • 2 large eggs
  • salt and ground black pepper to taste (optional)
  • 1 tablespoon butter, softened
  • 2 slices Italian bread
  • 1 ounce Swiss cheese, sliced
  • 1 ounce Cheddar cheese, sliced
  • ½ ripe avocado, sliced
Instructions
  1. Heat olive oil in a skillet over medium heat. Crack eggs into skillet; cook for 1 to 2 minutes. Flip and cook egg until done, 2 to 5 minutes more. Transfer eggs to a plate and season with salt and pepper.
  2. Spread butter onto 1 side of each bread slice.
  3. Heat a skillet over medium heat. Lay bread slices in the hot skillet, butter-side down. Quickly layer Swiss cheese, 1 fried egg, Cheddar cheese, 1 fried egg, avocado, and remaining bread slice, butter-side up. Carefully flip sandwich to grill other side until golden brown, 3 to 4 minutes.
  4. Remove sandwich from skillet and cut in half.

Watch the recipe video here:

Avocado Breakfast Sandwich: https://trib.al/OHEpAcM

Posted by Allrecipes on Sunday, February 10, 2019

Main dish

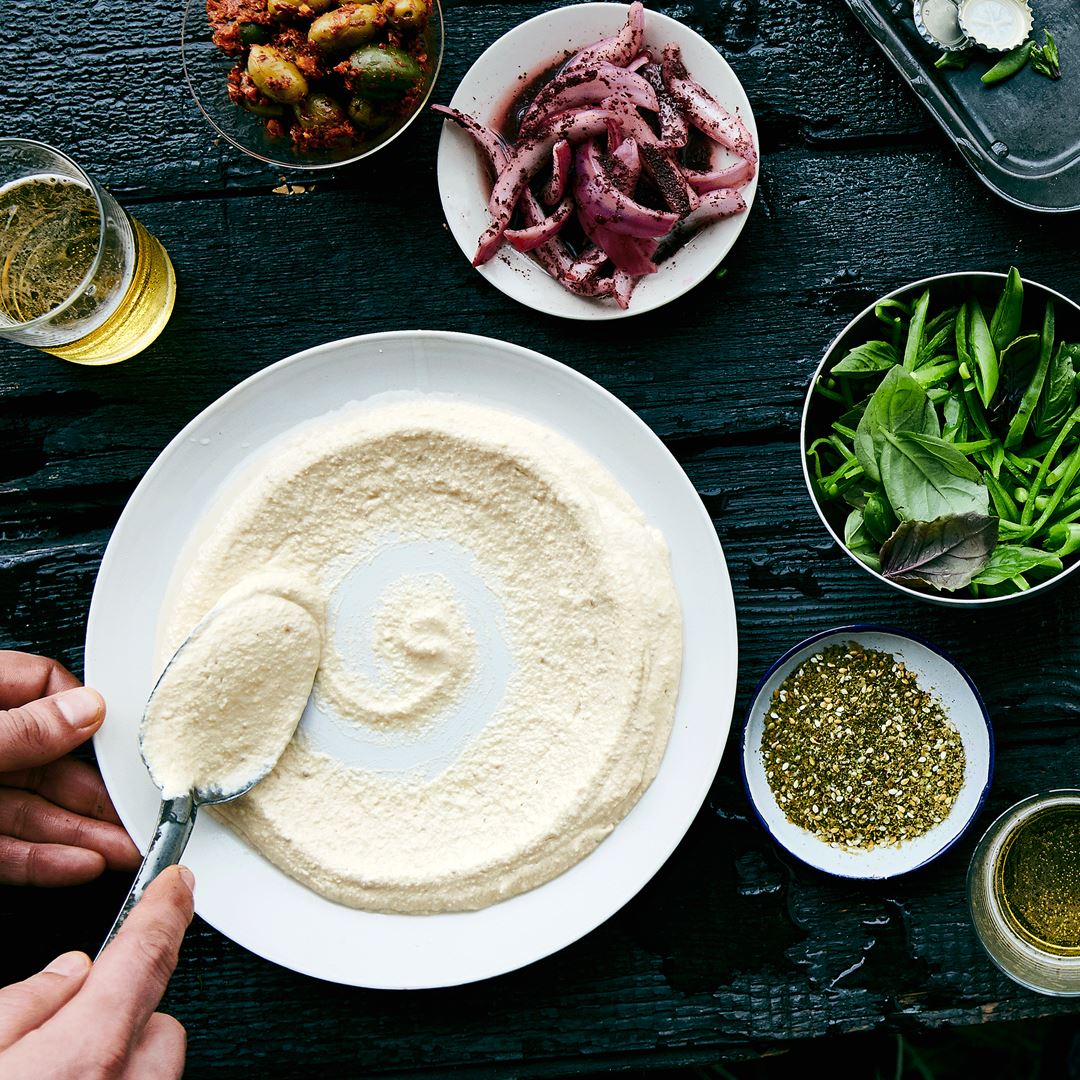
Creamy Hummus with Cumin

Creamy Hummus with Cumin
Don’t be afraid to let the food processor run the full 2 minutes. It’s one of the keys to supersmooth, aerated hummus. This recipe is from Tusk in Portland, OR.
Author:
Cuisine: American
Recipe type: Main dish
Ingredients
  • ¾ cup dried chickpeas
  • ½ teaspoon baking soda
  • 3 garlic cloves, 2 smashed, 1 finely grated
  • 1 dried red chile (such as chile de árbol)
  • 1 bay leaf
  • ⅓ cup (or more) fresh lemon juice
  • Kosher salt
  • 1 cup tahini
  • ⅓ cup olive oil
  • 1 teaspoon ground cumin
Instructions
  1. Combine chickpeas and baking soda in a medium bowl and pour in cold water to cover by 2". Cover and let sit 8–12 hours.
  2. Drain chickpeas, rinse, and place in a large saucepan along with smashed garlic, chile, and bay leaf. Pour in cold water to cover by 2". Bring to a boil over medium-high heat; reduce heat and simmer gently, skimming foam occasionally from surface, until chickpeas are falling apart, 35–45 minutes. Drain, reserving about 1 cup cooking liquid. Pluck out and discard garlic, chile, and bay leaf.
  3. Combine grated garlic, lemon juice, and a pinch of salt in a food processor and let sit until the bite in garlic mellows, about 5 minutes. Add tahini and ½ cup ice water and process until smooth. With the motor running, slowly stream in oil. Season with another large pinch of salt. Add chickpeas and cumin and process until hummus is very smooth, light, and creamy, about 2 minutes. It will tighten up as it cools, so it should be loose to the point of being pourable at this stage. If it looks thick, thin with chickpea cooking liquid, pulsing in by the tablespoonful until you reach the right consistency. Taste hummus and season with salt and more lemon juice if needed.
Do Ahead: Hummus can be made 1 week ahead. Cover and chill. Bring to room temperature before serving.

Watch the recipe video here:

What's your hummus swooshing strategy? RECIPE: http://bonap.it/KMuBfvx

Posted by Bon Appétit Magazine on Sunday, February 10, 2019