Mama Pat’s Chocolate Brownie Pie
Mama Pat's Chocolate Brownie Pie
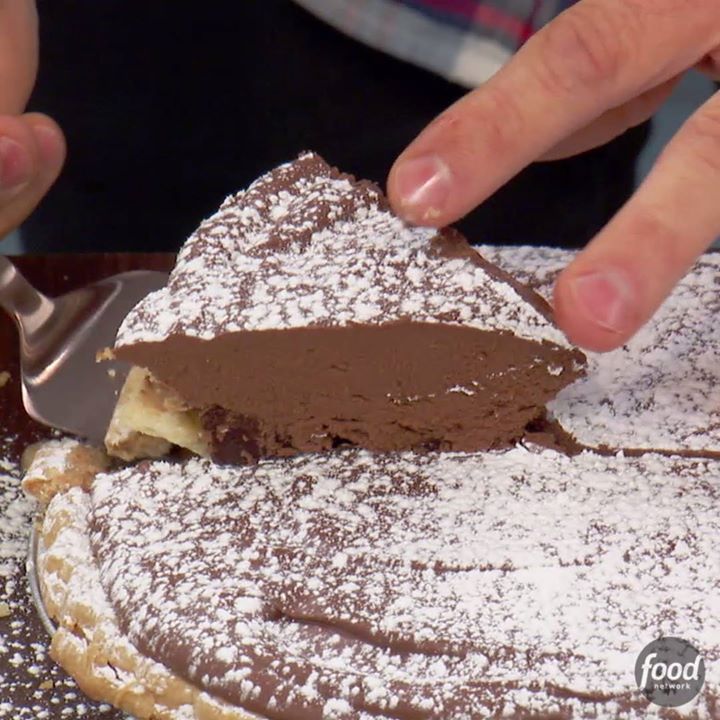
This Brownie Pie is a chocolate-lover's dream ??
Author: The Chef
Cuisine: American
Recipe type: Dessert
Ingredients
- 1 (9-inch) frozen unbaked piecrust shell
- Ryan's Quick Chocolate Ganache, recipe follows
- 1 cup store-bought brownies, cut into ½-inch cubes (2 to 3 brownies)
- ½ cup store-bought caramel sauce
- 1 cup heavy cream
- 2 teaspoons instant espresso
- Confectioners' sugar, for dusting
Ryan's Quick Chocolate Ganache:
- 2½ cups semisweet chocolate chips
- 1 cup heavy cream
- 1 tablespoon light corn syrup
- 1 teaspoon vanilla extract
- ⅛ teaspoon kosher salt
Instructions
- Preheat the oven to 375 degrees F. Line the piecrust shell with parchment paper, and fill it with pie weights, dried beans, or uncooked rice. Bake for 15 minutes. Remove the pie weights and parchment paper. Return the pie crust to the oven, and bake until lightly browned, about 5 minutes more. Remove to a wire rack, and cool for 30 minutes.
- Meanwhile, let the prepared ganache stand at room temperature 30 minutes.
- Sprinkle the brownie cubes on the bottom of the pie crust; top with the caramel sauce, drizzling it evenly. Beat the ganache, heavy cream, and espresso with an electric mixer on medium-high speed until fluffy. Using a spatula, spread the ganache mixture evenly over the top of the pie.
- Chill the pie, uncovered, for 2 hours. Dust with the confectioners' sugar just before serving.
Ryan's Quick Chocolate Ganache:
- Put the chocolate chips in a heatproof mixing bowl. Stir together the cream, corn syrup, vanilla, and salt in a small saucepan; bring to a boil over medium-high. Pour the hot cream mixture over the chocolate chips, making sure all the chips are submerged. (Do not stir or touch the chocolate mixture.) Cover the bowl with plastic wrap, and let it stand for 5 minutes.
- Using a spatula and starting from the bottom of the bowl, gently move the mixture from side to side to begin combining the chocolate with the cream mixture. Gradually and slowly stir from the middle until smooth and blended, 2 to 3 minutes.
Watch the recipe video here:
How To Make Mama Pat's Chocolate Brownie Pie
This Brownie Pie is a chocolate-lover's dream ??
Posted by Food Network on Friday, October 6, 2017