Showing 879 Result(s)
Dessert

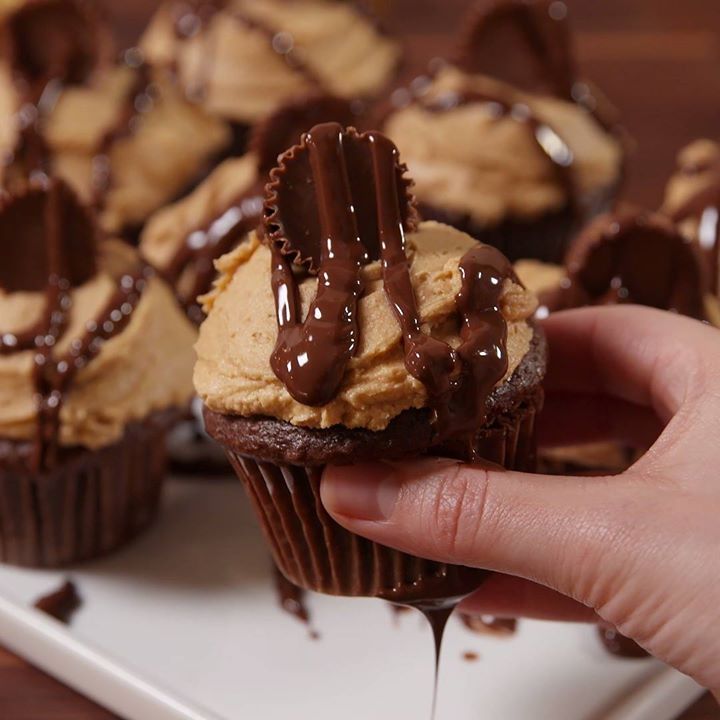
Reese’s Stuffed Cupcakes
Reese's Stuffed Cupcakes
Everyone likes surprises when Reese's cups are involved.
Author:
Cuisine: American
Recipe type: Dessert
Ingredients
  • 24 Reese's miniatures, unwrapped, divided
  • Devil’s food cake mix, prepared according to package instructions
  • 2 c. creamy peanut butter
  • 10 tbsp. unsalted butter, softened to room temperature
  • 2 c. powdered sugar
  • 2 tsp. pure vanilla extract
  • ¼ tsp. kosher salt
  • 1-2 tbsp. heavy cream
  • ¼ c. melted chocolate
Instructions
  1. Preheat oven to 350°. Line a 12-cup muffin pan with cupcake liners.
  2. Prepare cake mix according to package instructions then fill each cupcake liner about three-quarters full with batter. Place a Reese’s into the center of each unbaked cup. Bake for 25-30 minutes. Let cool.
  3. Meanwhile, make peanut butter frosting. In a large bowl, cream together peanut butter and butter until light and fluffy. Add powdered sugar, vanilla and salt and beat until evenly combined. Gradually add heavy cream and beat until smooth and creamy.
  4. Frost cooled cupcakes. Top each cupcake with a Reese’s, then drizzle with melted chocolate.

Watch the recipe video here:

How To Make Reese's​ Stuffed Cupcakes

You have to see what these Reese's Stuffed Cupcakes look like inside.Full recipe: http://dlsh.it/P36DMr9

Posted by Delish on Saturday, February 3, 2018
Dessert

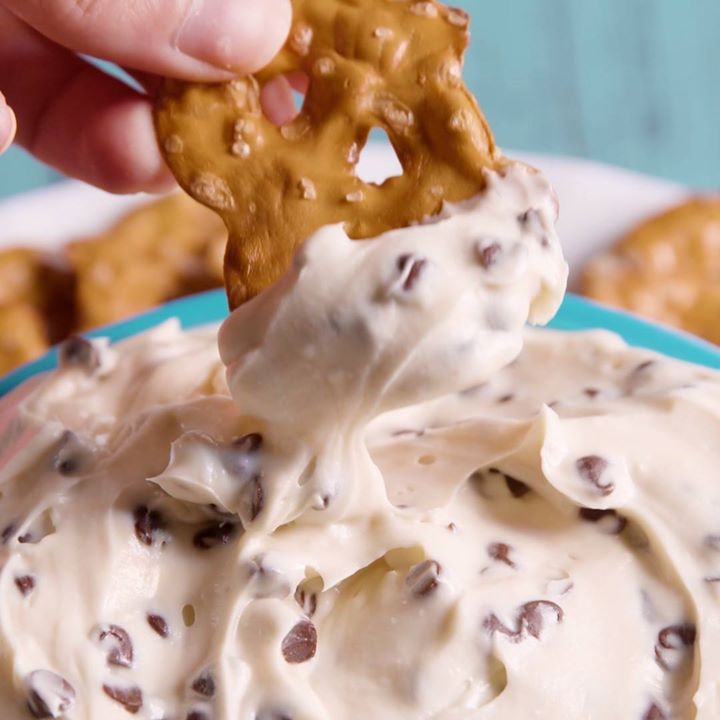
Cookie Dough Dip

Cookie Dough Dip
Ultra creamy and sweet, this party appetizer goes best with something salty.
Author:
Cuisine: American
Recipe type: Cookie
Ingredients
  • 12 oz. cream cheese, softened
  • ¼ c. butter, softened
  • ¼ c. powdered sugar
  • ¼ c. brown sugar
  • 1 tsp. pure vanilla extract
  • pinch of kosher salt
  • ½ c. mini chocolate chips
  • Pretzel crisps, for serving
Instructions
  1. Add cream cheese and butter to a large bowl and beat with a hand mixer until creamy. Add powdered sugar and brown sugar and beat until combined, then add vanilla.
  2. Season with salt and fold in mini chocolate chips until combined.
  3. Serve with pretzels chips.

Watch the recipe video here:

How To Make Cookie Dough Dip:

Cookie Dough Dip is the party food your friends will fight over.Full recipe: http://dlsh.it/zNyAhUW

Posted by Delish on Saturday, February 3, 2018
Dessert

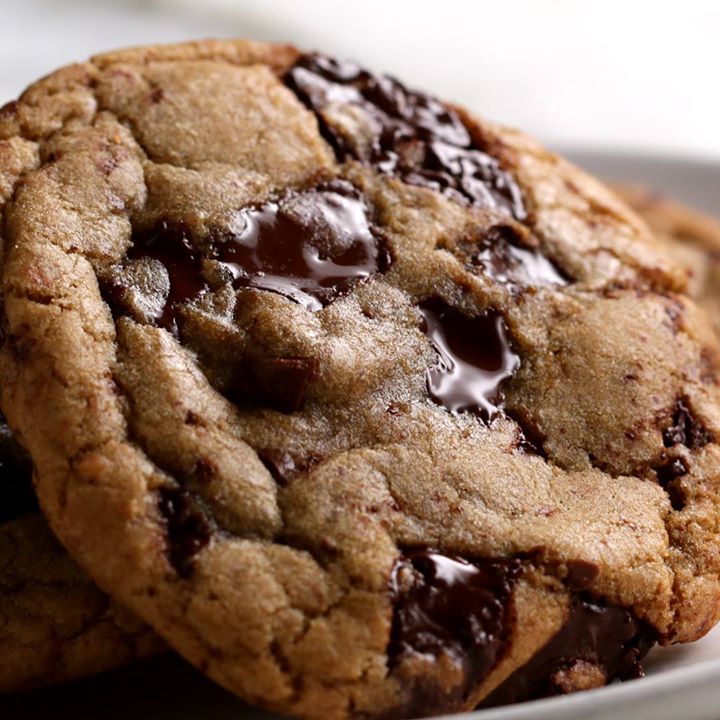
The Best Chewy Chocolate Chip Cookies

The Best Chewy Chocolate Chip Cookies
The Best Chewy Chocolate Chip Cookies recipe.
Author:
Cuisine: American
Recipe type: Dessert
Ingredients
  • ½ cup sugar
  • ¾ cup brown sugar, packed
  • 1 teaspoon salt
  • ½ cup butter, melted
  • 1 egg
  • 1 teaspoon vanilla extract
  • 1 ¼ cups all-purpose flour
  • ½ teaspoon baking soda
  • 4 oz semi-sweet chocolate chunk, or milk chocolate
  • 4 oz dark chocolate chunk, or you preference
  • whole milk, to drink, optional
Instructions
  1. Preheat oven to 350°F (180°C).
  2. In a large bowl, whisk together the sugars, salt, and butter until a paste has formed with no lumps.
  3. Whisk in the egg and vanilla, beating until light ribbons fall off the whisk.
  4. Sift in the flour and baking soda, then fold the mixture with a spatula, being careful not to overmix too much. This will cause the gluten in the flour to toughen which will result in cakier cookies.
  5. Fold in the chocolate chunks evenly, then chill the dough for at least 30 minutes. For a more intense toffee-like flavor and deeper color, chill the dough overnight. The longer the dough rests, the more complex its flavor will be.
  6. Scoop the dough with an ice-cream scoop onto a parchment paper-lined baking sheet, leaving at least 4 inches (10 cm) of space between cookies and 2 inches (5 cm) of space from the edges of the pan so that the cookies can spread evenly.
  7. Bake for 12-15 minutes, or until the edges have started to barely brown.
  8. Cool completely, and serve yourself a glass of milk.
  9. Enjoy!

Watch the recipe video here:

The Best Chewy Chocolate Chip Cookies

These are the best chewy chocolate chip cookies ever ? ?!FULL RECIPE: https://tasty.co/recipe/the-best-chewy-chocolate-chip-cookies

Posted by Tasty on Thursday, February 1, 2018

Dessert

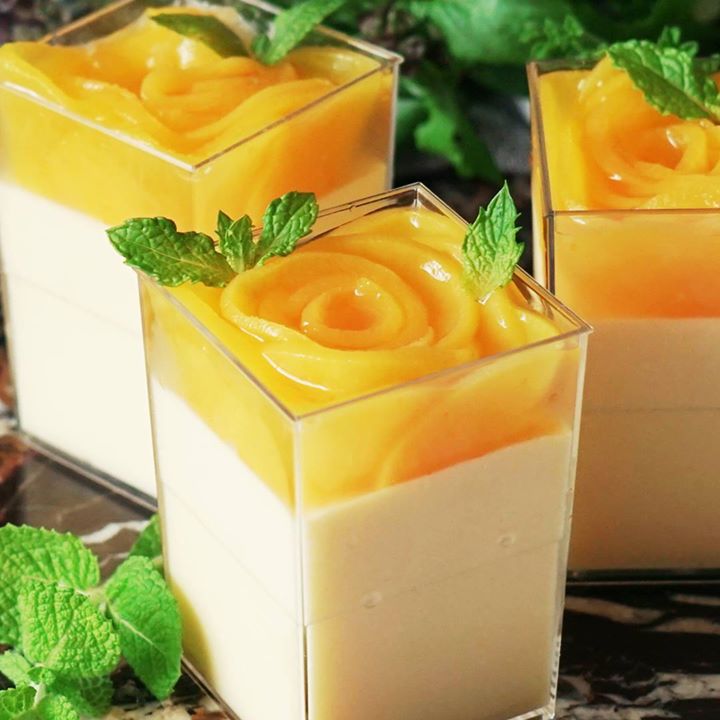
Peach Rose Jelly

Peach Rose Jelly
Feeling extra peachy? Try this peach mousse topped with a lovely rose blossom-shaped peach jelly.
Author:
Cuisine: American
Recipe type: Dessert
Ingredients
  • 2 cans yellow peaches
Peach mousse:
  • 3½ tablespoons peach syrup
  • ½ cup milk
  • ¼ cup heavy cream
  • ½ tablespoon gelatin, soaked in 2 tablespoons water
Peach jelly:
  • 2¾ tablespoons peach syrup
  • 1½ tablespoons water
  • ¼ tablespoon gelatin, soaked in 1 tablespoon water
Instructions
  1. Dissolve each gelatin in the microwave before mixing.
  2. Separate canned peaches from their syrup, and thinly slice two of the peaches.
  3. In a blender, add the remaining peaches, 3½ tablespoons of the syrup, milk and heavy cream. Blend until smooth. Add the dissolved gelatin and blend again.
  4. Pour into a container and chill in the refrigerator until mixture sets.
  5. Once set, arrange the sliced peaches in the shape of a rose blossom, starting from the outside.
  6. In a small bowl, add peach jelly ingredients and mix to combine. Pour on top of the peach mousse.
  7. Chill in the refrigerator until set. Enjoy!

Watch the recipe video here:

Peach Rose Jelly

Feeling a lil peachy? Have a shot of something sweet!Full Recipe: taste.md/2nDt3eF?: Tastemade Japan

Posted by Tastemade on Friday, February 2, 2018

Dessert

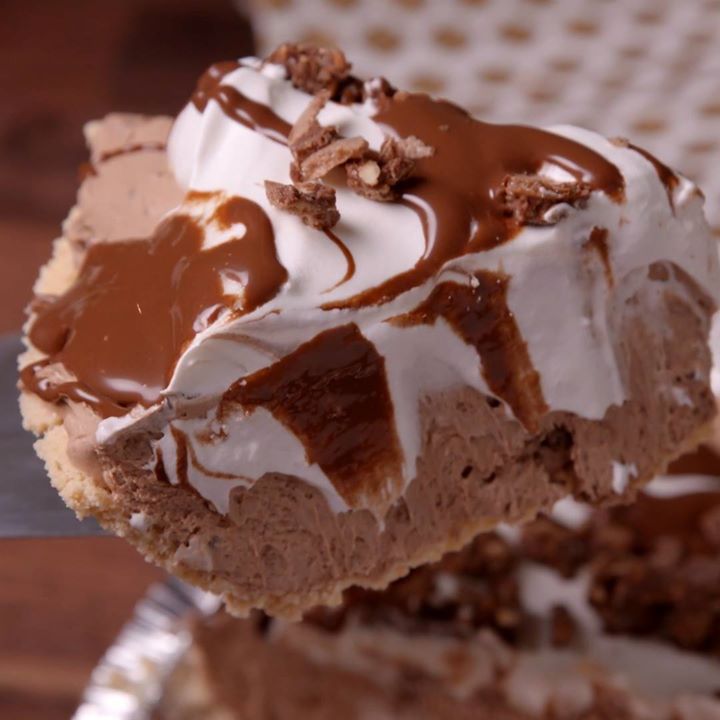
Nutella Cool Whip Pie

Nutella Cool Whip Pie
Author:
Cuisine: American
Recipe type: Dessert
Ingredients
  • 1 shortbread crust
  • 8 oz. cream cheese, softened
  • ¼ c. powdered sugar
  • 1 c. Nutella, plus more for garnish
  • 12 oz. Cool Whip, divided
  • 8 Ferrero Rocher chocolates, finely chopped, divided
Instructions
  1. In a large bowl, beat cream cheese, powdered sugar, and Nutella until light and fluffy. Fold in 8 oz. (one container) Cool Whip until fully combined. Add six chopped Ferrero Rocher chocolates and mix to incorporate.
  2. Fill the pie crust with mixture and smooth top. Freeze for 1 hour to set.
  3. To serve, top with remaining Cool Whip. Drizzle with Nutella, then sprinkle over remaining chopped Ferrero Rocher chocolates.

Watch the recipe video here:

How To Make A Nutella Cool Whip Pie

This pie is for true Nutella lovers ONLY.Full recipe: http://dlsh.it/eeeXLlq

Posted by Delish on Friday, February 2, 2018

Dessert

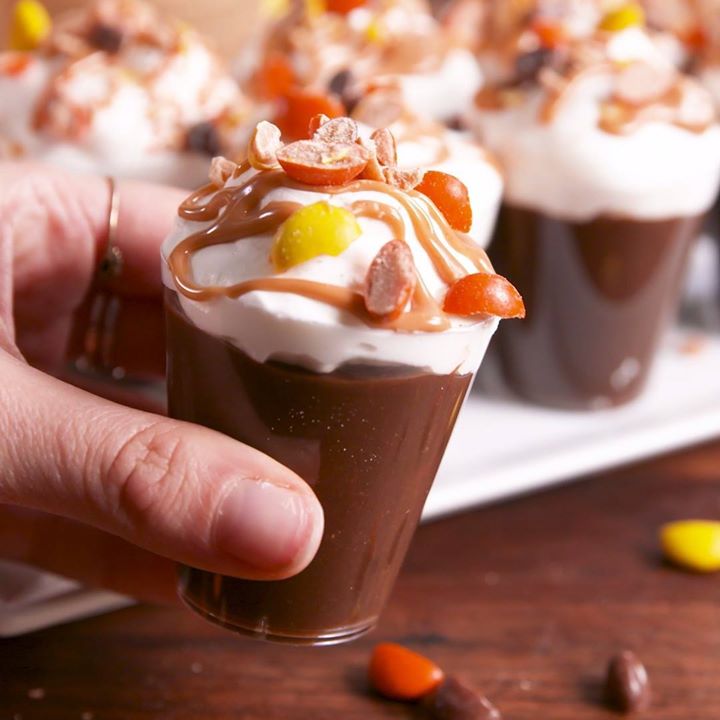
Reese’s Cup Pudding Shots

Reese's Cup Pudding Shots
The only thing better than a Reese's is a boozy Reese's pudding!
Author:
Cuisine: American
Recipe type: Dessert
Ingredients
  • 2 packages instant chocolate pudding
  • 1½ c. milk
  • ½ c. vodka
  • Cool whip, for topping
  • ¼ c. peanut butter, microwaved until pourable (about 15 seconds)
  • 2 tbsp. chopped Reese's pieces
Instructions
  1. In a large bowl, combine chocolate pudding mixes with milk and whisk to combine. Add vodka and whisk again until fully combined. Pour into shot glasses and refrigerate until firm, 1 to 2 hours.
  2. When set, top with cool whip, a drizzle of melted peanut butter, and a sprinkling of Reese’s Pieces. Serve.

Watch the recipe video here:

How To Make Reese's Pudding Shots

Reese's lovers, these boozy shots are what dreams are made of. Full recipe: http://dlsh.it/YNv58EB

Posted by Delish on Tuesday, January 30, 2018

Dessert

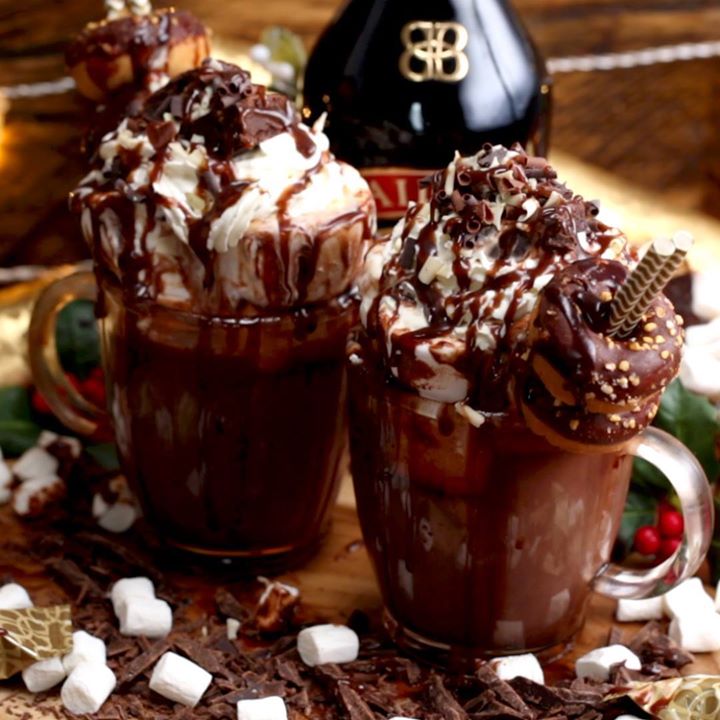
Baileys Hot Chocolate Freakshake

Baileys Hot Chocolate Freakshake
BAILEYS HOT CHOCOLATE FREAKSHAKE
Author:
Cuisine: American
Recipe type: Dessert
Ingredients
  • 2 tbsp Brown Sugar
  • 2 tbsp Cocoa Powder
  • 2 tbsp Hazelnut Spread
  • 500ml Milk
  • 75g Milk Chocolate
  • 100 ml Baileys Original
Instructions
  1. Put all ingredients except for Baileys on hob and stir until nice and creamy.
  2. Take pan off fire and add Baileys.
  3. Add marshmallows, whipped cream, doughnuts, brownies and chocolate sauce.
  4. Enjoy!

Watch the recipe video here:

Baileys Hot Chocolate Freakshake

Baileys Hot Chocolate Freakshake

Posted by Twisted on Monday, January 15, 2018

Dessert

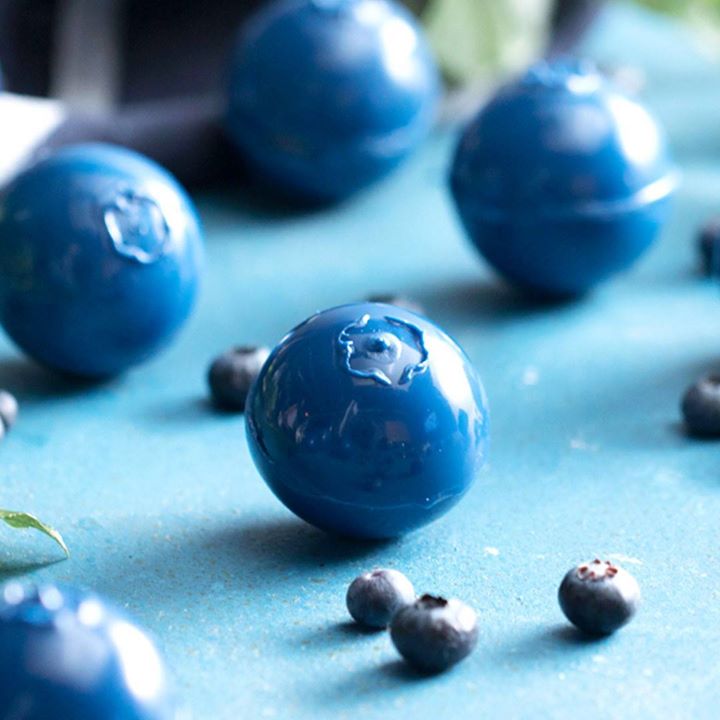
Blueberry Bombs

Blueberry Bombs
A blue chocolate shell encases a sweet blueberry and whipped cream surprise.
Author:
Cuisine: American
Recipe type: Dessert
Ingredients
For the blueberry gelee:
  • 1 (1/4-ounce) packet powdered gelatin
  • ¼ cup water
  • 1½ cups blueberries
  • 1 tablespoon honey
  • 2 tablespoons sugar
  • 2 teaspoons fresh lemon juice
For the blueberry shell:
  • 3 cups blue tinted chocolate wafers
For the whipped cream:
  • 2 cups heavy cream
  • 1 cup powdered sugar
  • 1 teaspoon vanilla
Instructions
  1. Sprinkle the powdered gelatin over the water and let stand for 5 minutes.
  2. In a small saucepan, bring the blueberries, honey, sugar and lemon juice to a boil over medium heat. Reduce heat and simmer until the sugar is dissolved. Add the gelatin water and stir until dissolved, about 3 minutes. Let cool slightly then pour into ¾-inch round silicone half sphere molds. Refrigerate for one hour.
  3. Melt the blue chocolate wafers and pour into the bottom and sides of 2-inch round silicone molds. Allow to set slightly then tip molds upside down to pour out excess. Place in the refrigerator for about 10 minutes to set.
  4. Meanwhile, mix the heavy cream and sugar in the bowl of a stand mixer, starting with low speed and working up to medium-high. Whip the cream until stiff peaks form then fold in vanilla.
  5. Fill the chocolate shells two-thirds of the way with the whipped cream and top with a mini round of blueberry gelee. Place in the freezer to set for about 1 hour.
  6. Unmold the halves. Pipe a ring of blue chocolate around the outer shell and attach two halves then press them together. Dip a tiny flower cookie cutter into some melted blue chocolate and create the top of the blueberry shape by pressing gently on the center top of the blueberry. Let them rest at room temperature for 15 minutes then serve.

Watch the recipe video here:

Blueberry Bombs

These blueberries are ripe for the eating.Full Recipe: taste.md/2GsqSTN

Posted by Tastemade on Tuesday, January 30, 2018

Cake Dessert

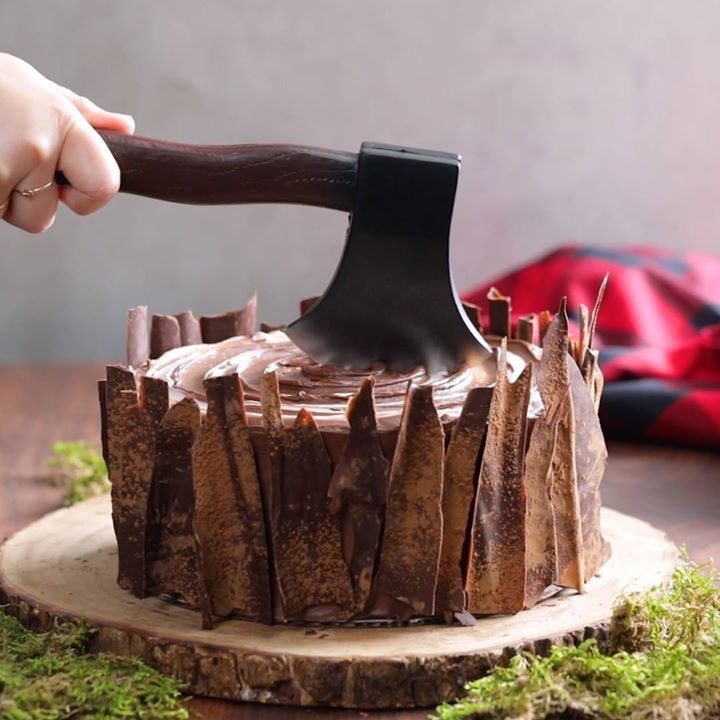
Lumberjack Cake

Lumberjack Cake
After cutting down trees and eating lunch, skip and jump your way over to this chocolate-frosted plaid red velvet cake.
Author:
Cuisine: American
Recipe type: Cake
Ingredients
Red velvet cake (dark red layer):
  • ½ cup butter, softened at room temperature
  • 2 tablespoons cocoa powder
  • 2 tablespoons red food coloring
  • 2½ cups all-purpose flour, sifted
  • 1 teaspoon salt
  • 1½ cups sugar
  • 2 large eggs
  • 2 teaspoons vanilla
  • 1 cup buttermilk
  • 1 tablespoon vinegar
White cake (red layer):
  • 2½ cups cake flour
  • 1½ teaspoons baking powder
  • ½ teaspoon baking soda
  • 1 teaspoon salt
  • 3 large eggs
  • 1 teaspoon vanilla
  • ¾ cup butter, softened at room temperature
  • 1½ cups sugar
  • 1 cup buttermilk
  • 8 tablespoons red food coloring
  • Chocolate cake layer:
  • 1½ cups all-purpose flour
  • 1 cup sugar
  • 1 teaspoon baking powder
  • ½ teaspoon baking soda
  • 1 teaspoon salt
  • ⅓ cup cocoa powder
  • ¾ cup butter, softened at room temperature
  • 2 large eggs
  • 2 teaspoons vanilla extract
  • ¾ cup sour cream, room temperature
Decorating the cakes:
  • 2 cups chocolate frosting
  • 1 cup milk chocolate frosting
For the chocolate bark:
  • 2 cups melted dark chocolate
  • 2 tablespoons cocoa powder, for dusting
For the wood cream cheese frosting:
  • 2 cups cream cheese, room temperature
  • 1 cup butter, room temperature
  • 1 cup powdered sugar, sifted
  • 2 tablespoons vanilla
  • 1 tablespoon lemon juice
Instructions
  1. Make the cakes: Preheat the oven to 350 degrees. Line two 9-inch cake pans with baking spray and parchment paper.
  2. For the red velvet layer: In a small bowl, combine cocoa powder and red food coloring to a paste consistency. Set aside. Combine flour and salt and set aside.
  3. In a large bowl of a stand mixer fitted with the paddle attachment, cream butter and sugar. Once smooth, add in eggs one at a time. Add in vanilla and the red paste. Alternate between adding the flour mixture and the buttermilk, making sure to combine thoroughly after each addition. Add vinegar and mix until batter is smooth. Divide batter between the two prepared pans and bake for 25 to 30 minutes until a toothpick comes out clean from the center. Set aside to cool.
  4. For the white cake layer: Preheat the oven to 350 degrees. Line two 9-inch cake pans with baking spray and parchment paper.
  5. In a medium bowl, sift together the flour, baking powder, baking soda and salt. Set aside. In a small bowl, whisk together eggs and vanilla.
  6. In a large bowl, cream butter and sugar. Add egg mixture. Alternate adding in the flour mixture and the buttermilk until completely combined. Stir in red food coloring. Divide batter between the two prepared pans and bake for 25 to 30 minutes until a toothpick comes out clean from the center. Set aside to cool.
  7. For the chocolate cake layer: Preheat the oven to 350 degrees. Line two 9-inch cake pans with baking spray and parchment paper.
  8. In a large bowl, combine the flour, sugar, baking powder, baking soda, salt and cocoa powder. Using a hand mixer, blend the butter, eggs and vanilla into the dry mix. Fold in the sour cream. Divide the batter between the two cake pans and bake for 25 to 30 minutes until fragrant and a toothpick comes out clean from the center of the cake. Set aside to cool.
  9. Make the wood cream cheese frosting: In a large bowl, cream together cream cheese and butter with a hand mixer until smooth. Add powdered sugar, lemon juice and vanilla. Set aside.
  10. Make the chocolate bark: Spread chocolate in a thin layer across a piece of 18 by 13-inch parchment paper. Lay another piece of parchment paper on top of the chocolate and smooth out. Roll the parchment paper lengthwise and set in the fridge to chill for up to 2 hours.
  11. Assemble the cake: When cakes are cool, cut off the tops and divide into two layers. Using a 5-inch and 2-inch cake mold, cut circles out of each layer. Stack the cake layers and add frosting. Remove chocolate bark from the fridge, dust with cocoa powder, and place around the edge of the cake to resemble bark.

Watch the recipe video here:

Lumberjack Cake

Button up your flannel, grab your axe, and hack yourself a slice.Full Recipe: taste.md/2DQDAgw

Posted by Tastemade on Friday, January 26, 2018

Cake Dessert

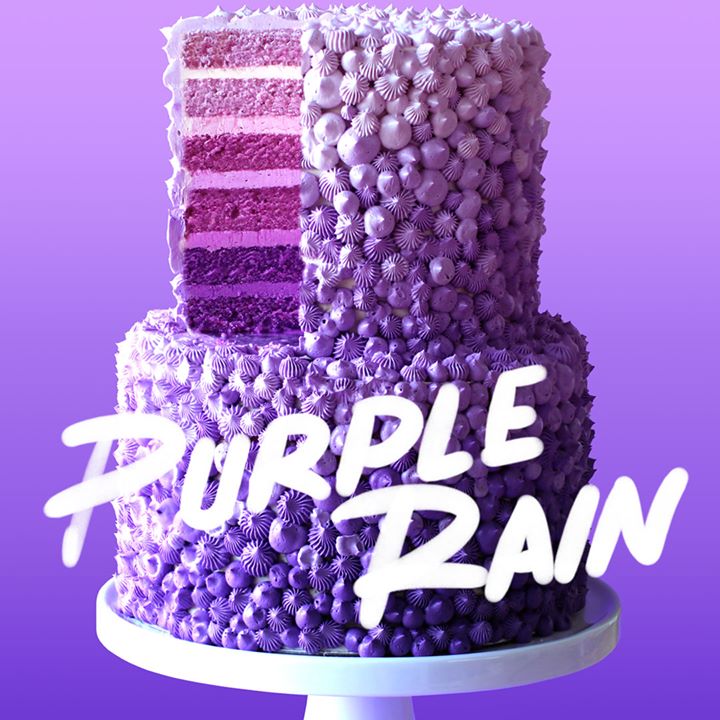
Purple Rain Cake

Purple Rain Cake
This magnificent blackberry-flavored cake made in honor of Prince just might taste good enough to make dove's cry.
Author:
Cuisine: American
Recipe type: Cake
Ingredients
Cake
  • You’ll need to triple this recipe
  • 429g all-purpose flour
  • 265g caster (superfine) sugar
  • ½ tsp salt
  • 3 tsp baking powder
  • 375ml of milk
  • 125ml vegetable oil
  • 125g unsalted butter, softened
  • 2 tbsp Greek yogurt (can substitute with sour cream)
  • 1 tsp vanilla extract
  • 2 large eggs
Cake extras
  • Regal purple food gel
  • Deep pink food gel
  • 3 tsp blackberry essence
Frosting
  • X3 batches Swiss meringue buttercream frosting (recipe on thescranline.com)
  • Regal purple food gel
  • Deep pink food gel
  • 2 tsp blackberry essence
Instructions
  1. Cake
  2. Before you begin
  3. You’ll need to triple this cake recipe. Not the cake extras, just the cake recipe itself. Nobody has a bowl big enough to handle all that batter so it’s just easier to make in 3 batches. I’d recommend making all the batter and then split it amongst the different cake tins.
  4. Preheat a fan-forced oven to 160C (320F) or 180C (356F) for a conventional oven. Spray three 8” cake tins with oil spray and line the bottom with baking paper. You’ll also need three 6” cake tins for the top tier. If you only have one of each sized tin you can just bake them in the oven one at a time it will just take longer. I’d recommend baking the cake the day before it’s being served to allow yourself plenty of time to make the entire cake and to allow it to cool down properly before frosting.
  5. Let’s begin!
  6. Making the batter
  7. In the bowl of a stand mixer fitted with the paddle attachment, add the flour, baking powder, caster sugar and salt. Turn mixer on low speed and allow it to mix for a couple minutes to help everything combine well (alternatively you may do this by sifting the ingredients together). Add the softened butter and mix until it resembles a fine sand like texture.
  8. Add the milk, oil, Greek yogurt, blackberry essence, eggs and vanilla extract into the bowl with the dry ingredients and mix on medium speed until no dry ingredients are visible. Scrape down the bowl and mix for another 20 seconds.
  9. Colouring the batter
  10. Once you’ve made triple the recipe split into 3 bowls evenly. To colour the batter use the following formulas:
  11. DARK PURPLE LAYER: 6 drops purple food gel + 3 drops pink food gel. Gently fold until well combined.
  12. MIDDLE PURPLE LAYER: 4 drops purple food gel + 2 drops pink food gel. Gently fold until well combined.
  13. LIGHT PURPLE LAYER: 2 drops purple food gel + 2 drops pink food gel. Gently fold until well combined.
  14. Filling the cake tins
  15. So you’re going to have fill three 8” cake tins with batter and three 6” cake tins with batter. For each colour you want to add about ⅔ of the batter into the 8” cake tin and ⅓ of the batter into the 6” cake tin.
  16. Bake the 8” cake tins for 45 min and the 6” cake tins for 30 min or until a toothpick inserted comes out clean. Allow the tins to cool for 2 min and then carefully flip the cake tins over on to a cooling rack to cool completely before using. I’d recommend chilling them overnight.
  17. Using a large serrated knife, carefully trim the top off each layer of cake to make even and flat layers. Try to aim to get them all the same height. An easy way to do this is to find the lowest height of the cake, place a skewer or toothpick next to that point and mark it. As you go around each side of the cake cutting it, use the marked skewer to make sure each cut is at the same height. I used a cake leveller in the video which is the simplest way to do it.
  18. Frosting
  19. So you’re going to colour the frosting in 5 different shades. Those shades will be used to fill the cakes but also to frost the outside of the cakes. But you’ll just use white frosting for the crumb coat. So set about ⅙ of the white frosting aside before you colour it. Split the rest of the frosting into 5 bowls. These are the colour formulas starting with the lightest:
  20. / 10 drops purple food gel + 5 drops pink food gel + a couple drops of black berry essence
  21. / 7 drops purple food gel + 4 drops pink food gel + a couple drops of black berry essence
  22. / 4 drops purple food gel + 3 drops pink food gel + a couple drops of black berry essence
  23. / 2 drops purple food gel + 2 drops pink food gel + a couple drops of black berry essence
  24. / 1 drops purple food gel + 1 drops pink food gel + a couple drops of black berry essence
  25. If you feel like you want darker shades add more purple food gel.
  26. Crumb Coat
  27. Let’s start by assembling the 8” cake. You’re going to start by adding a dab of the dark frosting on the board.
  28. Add the first dark cake layer on top of that and gently but firmly press down to make it stick to the frosting on the cake board. Add a layer of the darkest frosting on top and level off with an offset spatula. Then add the second layer of the darkest cake. Add the next lightest layer of frosting. You’re going to work your way up to the lightest cake layers and frosting.
  29. Add some white frosting around the outside of the cake. Use a small offset spatula to spread the frosting around making sure to fill in any cracks that may be showing in between each layer. Then use a cake scraper to level off the sides and top. It doesn’t have to be perfect! Just make sure everything looks neat and even.
  30. You’re going to repeat this for the 6” cake too.
  31. Chill them both for at least 3 hours.
  32. Assembling the cake!
  33. To assemble the cake, add three bubble straws into the chilled 8” cake. This is going to ensure your cake doesn’t collapse when it thaws before serving. The best way to make sure the bubble straws are even in height and don’t peak out the top is to add one straw all the way in. Lift it slightly and then marks it. Put it flush next to the other 2 straws and cut. Insert them into the cake in a triangle shape toward the middle so they support the 6” cake. Add a dab of frosting on top of the 8” cake and then carefully place the 6” cake on top. I’ve found the easiest way to do this is using a large offset spatula. Take your time it’s not a race!
  34. Ok so to finish off the cake you’re going to add the rest of your 5 different shades into two separate piping bags each. One bag will be fitted with a Wilton #32 piping tip and the other with a small round tip about the same size as the #32. And from here folks it’s about patience. You’re going to be piping blobs of frosting starting at the bottom of the cake with the dark purple and working your way up to the top using the lightest shade of purple.

Watch the recipe video here:

Purple Rain Cake

This cake tastes so good, it makes doves cry.Full Recipe: taste.md/2Dy0wxL?: The Scran Line

Posted by Tastemade on Saturday, January 27, 2018