Showing 879 Result(s)
Cake Dessert

Oreo Cheesecake

Oreo Cheesecake
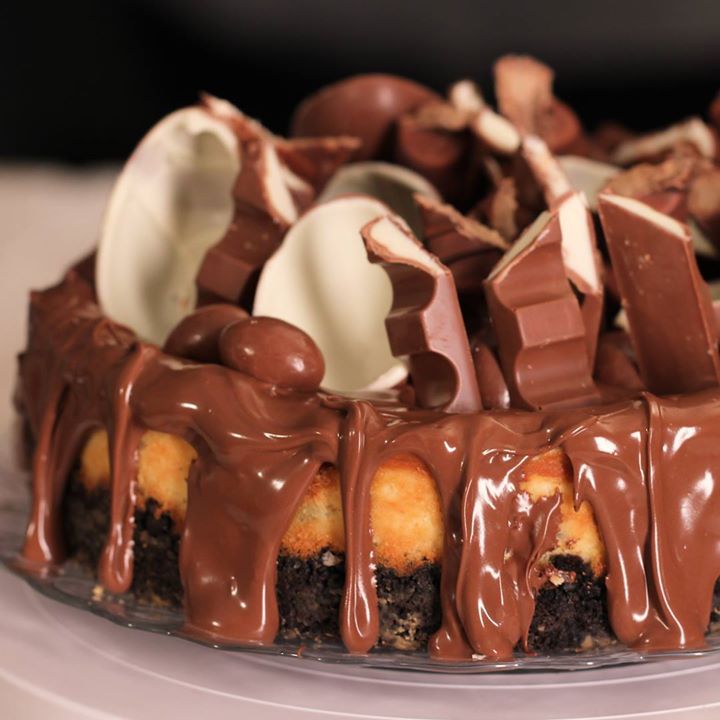
Two of your favorite desserts combine in this decadent white chocolate Oreo cheesecake. Top it off with bits of candy for an added crunch!
Author:
Cuisine: American
Recipe type: Dessert
Ingredients
  • 1 (14-ounce package) Oreos, crushed
  • ½ cup unsalted butter, melted
  • ¾ cup sugar
  • 3 cups cream cheese
  • ½ cup heavy cream
  • 3 eggs
  • 1 teaspoon vanilla extract
  • 10½ ounces white chocolate, melted
  • 8 to 10 Oreos, broken in pieces
  • 1 cup Nutella or chocolate sauce
  • Chocolate candies, to garnish
Instructions
  1. Preheat oven to 350 degrees.
  2. In a mixing bowl, combine the crushed Oreos and melted butter. Press firmly into the bottom of a springform pan. Bake for 15 minutes. Remove crust and reduce heat to 325 degrees.
  3. In a large bowl, add the sugar, cream cheese and heavy cream. Beat with an electric mixer. Add the eggs, vanilla extract and melted white chocolate and continue to mix. Stir in the broken Oreos. Pour filling on top of Oreo crust. Bake for 60 minutes, until edges begin to turn golden.
  4. Allow cake to cool in the oven with the oven door open, then cool at room temperature for at least 4 hours. Remove from pan and top with chocolate sauce and chocolate candies.

Watch the recipe video here:

Oreo Cheesecake

This cake is so extra, & we're loving it.Taste for Yourself: taste.md/2J7L1A2?: @Tastemade France

Posted by Tastemade on Friday, April 20, 2018
Dessert

Fireball Pineapple

Fireball Pineapple
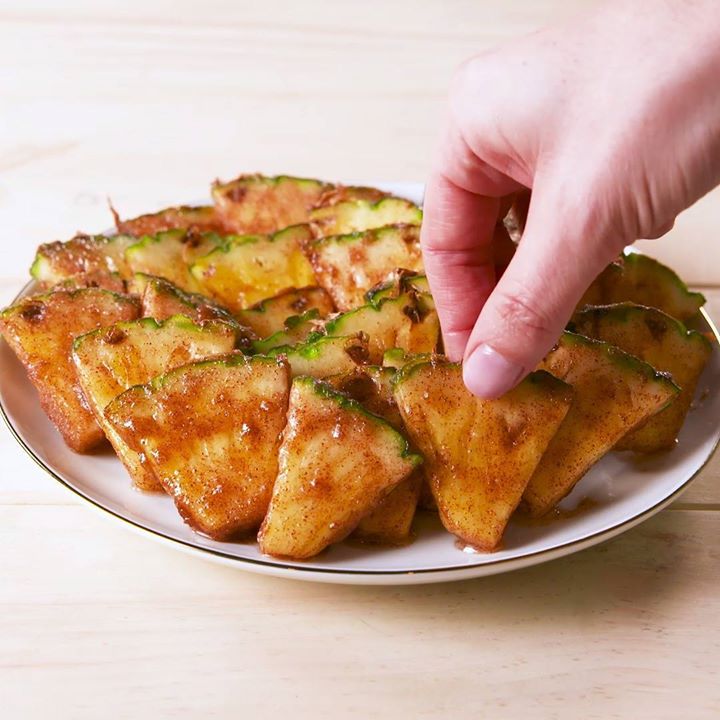
This pineapple is on fire.
Author:
Cuisine: American
Recipe type: Dessert
Ingredients
  • 1 pineapple, cut into small triangles
  • 1½ c. Fireball Whisky
  • ½ c. cinnamon sugar
Instructions
  1. In a large bowl, soak pineapple in Fireball, 1 hour.
  2. Drain, reserving Fireball for cocktails.
  3. Toss pineapple in cinnamon sugar and serve.

Watch the recipe video here:

How To Make Fireball Pineapple

BEWARE: Fireball Pineapple will get you beyond tipsy this summer. Full recipe: http://dlsh.it/jNEjIen

Posted by Delish on Saturday, April 21, 2018

Dessert

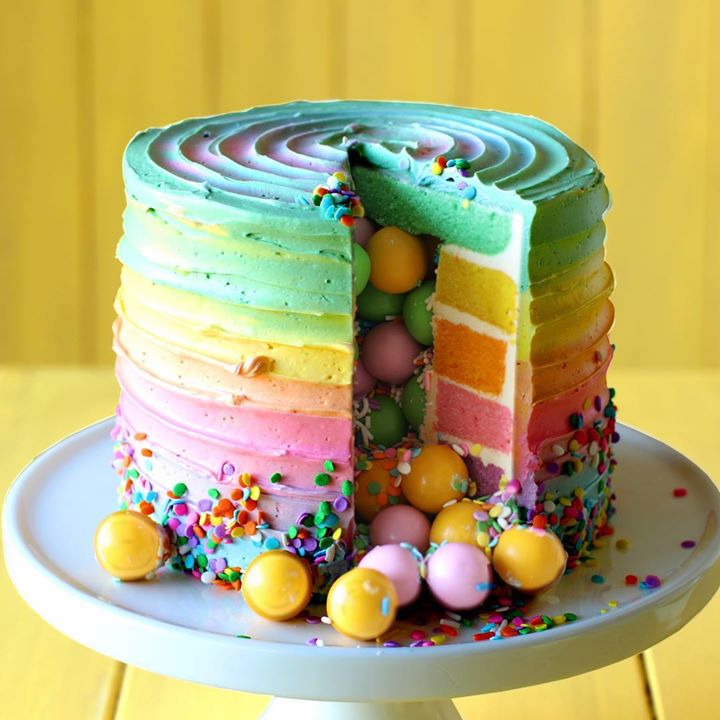
Rainbow Candy Surprise Cake

Rainbow Candy Surprise Cake
This coconut rainbow cake is low key filled with surprise candy - kind of like an edible piñata.
Author:
Cuisine: American
Recipe type: Dessert
Ingredients
  • 850g all-purpose flour
  • 530g caster (superfine) sugar
  • 1 tsp salt
  • 2 tbsp baking powder
  • 750 ml of milk
  • 250ml vegetable oil
  • 250g unsalted butter, softened
  • 4 tbsp Greek yogurt (can substitute with sour cream)
  • 2 tsp vanilla extract
  • 4 large eggs
  • 1 tsp coconut essence
  • 1 drop blue food gel
  • 1 drop green food gel
  • 1 drop yellow food gel
  • 1 drop orange food gel
  • 1 drop pink food gel
  • 1 drop purple food gel
  • 2-3 packets of Assorted candy
  • Coloured sprinkles
  • Frosting
  • 1 batch Swiss meringue buttercream frosting (recipe:thescranline.com You can also use regular canned buttercream frosting.)
  • 1 tsp coconut essence
  • 1 drop blue food gel
  • 1 drop green food gel
  • 1 drop yellow food gel
  • 1 drop orange food gel
  • 1 drop pink food gel
  • 1 drop purple food gel
Instructions
Cake
  1. Preheat a fan-forced oven to 160C (320F) or 180C (356F) for a conventional oven. Spray an 8” cake tin with oil spray and line the bottom with baking paper.
  2. In the bowl of a stand mixer fitted with the paddle attachment, add the flour, baking powder, caster sugar and salt. Turn mixer on low speed and allow it to mix for a couple minutes to help everything combine well (alternatively you may do this by sifting the ingredients together). Add the softened butter and mix until it resembles a fine sand like texture.
  3. Add the milk, oil, greek yogurt, eggs and coconut essence into the bowl with the dry ingredients and mix on medium speed until no dry ingredients are visible. Scrape down the bowl and mix for another 20 seconds.
  4. Separate batter into 6 bowls and colour in colours of the rainbow. Mix until well combined.
  5. You’ll need to bake each layer in separate cake tins. If you have one cake, it’ll take a little longer but it’s doable.
  6. Bake for 30 min or until a toothpick inserted comes out clean. Allow the tins to cool for 2 min and then carefully flip the cake tins over on to a cooling wrack to cool completely before using.
  7. Using a large serrated knife, carefully trim the top off each layer of cake to make even and flat layers. Try to aim to get them all the same height. An easy way to do this is to find the lowest height of the cake, place a skewer or toothpick next to that point and mark it. As you go around each side of the cake cutting it, use the marked skewer to make sure each cut is at the same height.
  8. Use a 12cm round cookie cutter to cut out the middle of each layer of cake except for the green and blue layers. That will form the cavity for the candy.
Frosting
  1. To prepare frosting add coconut essence to frosting. Mix until well combined. You’re going to use that to crumb coat the frosting and then once you’ve crumb coated the cake you’ll colour it in the 6 different colours to frost on the outside of the cake.
  2. To prepare crumb coat, add a dab of frosting onto an 8” cake board or serving plate. Add blue cake layer. Pipe frosting on top. Use an offset spatula to spread evenly. Then add the purple layer which will have a hole in the centre. Pipe frosting around the top of the cake and spread evenly on top. You also want to frost the inside cavity as best you can as demonstrated In the video.
  3. Next you’ll want to add the pink layer, frost, followed by the orange and yellow layer. Fill the middle of the cake with candy and sprinkles. Then add the green layer on top. Frost the outside of the cake. Use a cake scraper to go around the cake to scrape away excess frosting.
  4. Chill for 2 hours.
  5. Add each coloured frosting to a separate piping bag and frost at the bottom starting with the blue, working your way up the green. Use a small offset spatula to go around the cake to create a ridge effect in the frosting. Do the same on top. Using a lazy Suzan cake turner will make this really easy.
  6. Add sprinkles to the bottom before serving. This would make an excellent kids birthday cake!

Watch the recipe video here:

Rainbow Candy Surprise Cake

That moment when you realize your party is missing an edible piñata.Taste for Yourself: taste.md/2EUIOEs

Posted by Tastemade on Wednesday, April 18, 2018

Cake Dessert

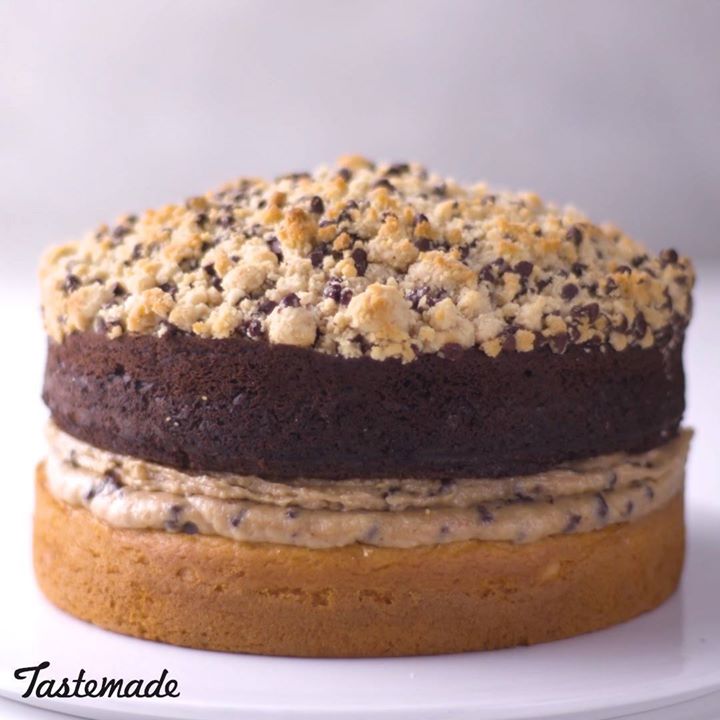
Chocolate Chip Cookie Dough Crumb Cake

Chocolate Chip Cookie Dough Crumb Cake
From the "more is more" files we present this cake and cookie monster!
Author:
Cuisine: American
Recipe type: Dessert
Ingredients
For the milk cake:
  • ½ cup butter
  • 1 cup whole milk
  • 1 tablespoon vanilla extract
  • 4 large eggs
  • 1 cup sugar
  • 2 cups all-purpose flour
  • 2 teaspoons baking powder
  • 1 teaspoon salt
For the chocolate chip frosting:
  • 1½ cups brown sugar
  • 1 cup butter, room temperature
  • 2 teaspoons vanilla extract
  • 2½ cups all-purpose flour
  • 1 teaspoon salt
  • ½ cup heavy cream
  • 1 cup mini chocolate chips
For the chocolate chip cookie crumb:
  • ¼ cup sugar
  • ¼ cup brown sugar
  • ½ cup butter, melted
  • 1½ cups all-purpose flour
  • ¼ cup mini chocolate chips, for topping
For the chocolate cake:
  • 1½ cups all-purpose flour
  • 1 cup sugar
  • 1 teaspoon baking powder
  • ½ teaspoon baking soda
  • 1 teaspoon salt
  • ⅓ cup cocoa powder
  • ¾ cup butter, softened at room temperature
  • 2 large eggs
  • 2 teaspoons vanilla extract
  • ¾ cup sour cream, room temperature
Instructions
Make the milk cake:
  1. Preheat oven to 350 degrees, and line a 9-inch cake pan with baking spray and parchment paper.
  2. In a small saucepan, melt butter and add milk and vanilla. Bring to a near boil and then reduce to a simmer. In a large bowl, cream eggs and sugar until light and fluffy. Slowly pour in warm milk mixture and stir to combine. Add in flour, baking powder and salt. Pour into prepared cake pan and bake for 30 to 35 minutes until a cake tester comes out clean. Allow the cake to cool completely.
Make the chocolate chip frosting:
  1. In a bowl, beat the brown sugar and butter with an electric mixer until fluffy. Beat in the vanilla extract. Add the flour and salt and mix until combined. Add cream a little at a time until the mixture is spreading consistency (you may not have to use all of the cream). Fold in chocolate chips.
Make the chocolate chip cookie crumb:
  1. In a medium bowl, combine sugar, brown sugar and butter. Add flour and chocolate chips and mix until combined. Set aside while you make the chocolate cake.
Make the chocolate cake:
  1. Preheat the oven to 350 degrees. Line a 9-inch cake pan with baking spray and parchment paper.
  2. In a large bowl, combine the flour, sugar, baking powder, baking soda, salt and cocoa. Using a hand mixer, blend the butter, eggs and vanilla into the dry mix. Fold in the sour cream. Pour the batter into the pan and bake for 20 to 25 minutes until the cake has set slightly. Top with the chocolate cookie crumb and return to the oven for another 15 to 20 minutes. Set aside to cool completely.
Assemble the cake:
  1. Place the vanilla milk cake on a serving platter and top with chocolate chip frosting. Place chocolate cake with crumb on top. Cake will keep up to 5 days covered.

Watch the recipe video here:

Cookie Dough Crumb Cake

Cake doesn't ask silly questions. Cake understands.Taste for Yourself: taste.md/2EYwkfm

Posted by Tastemade on Wednesday, April 18, 2018

Dessert

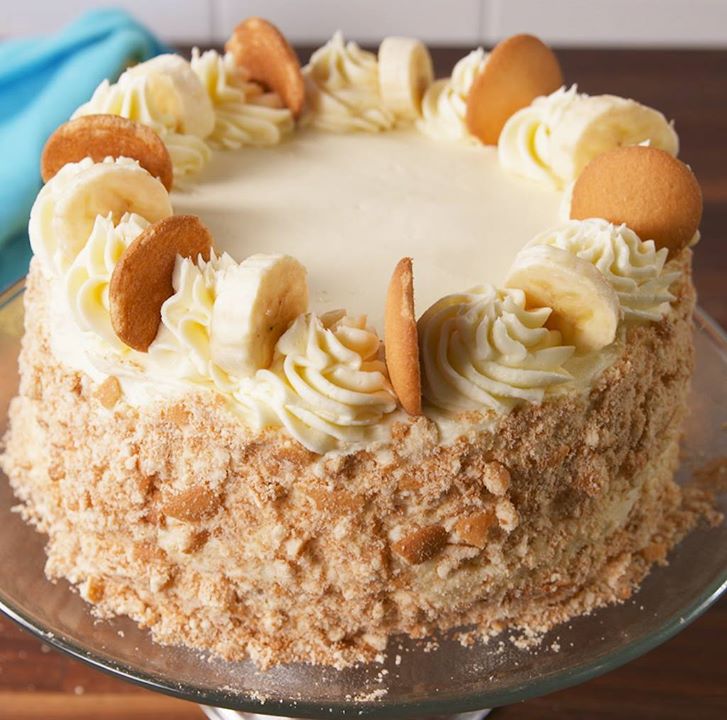
Banana Pudding Cake

Banana Pudding Cake
This one is a stunner.
Author:
Cuisine: American
Recipe type: Dessert
Ingredients
  • 1 box vanilla cake mix, plus ingredients called for on box
  • 1 (3.4 oz) box vanilla pudding
  • 2 c. cold milk
  • ½ c. cool whip
  • 2 Bananas, sliced
  • 1½ c. butter, softened
  • 5 c. powdered sugar
  • 2 tsp. pure vanilla extract
  • ¼ c. plus 2 tbsp. heavy cream
  • 1 c. crushed Nilla wafers
  • Whole Nilla Wafers, for garnish
Instructions
  1. Preheat oven to 350°. Line two round 9" cake pans with parchment paper and grease with cooking spray. Prepare cake mix according to package instructions. Divide batter between cake pans and bake until a toothpick inserted into the center comes out clean, 25 to 30 minutes. Let cakes cool for 10 minutes in pans then invert onto wire racks to cool completely.
  2. Make pudding: In a large bowl, combine milk and pudding mix and stir until thickened, about 5 minutes. Fold in Cool Whip.
  3. Make butterceam: In a large bowl using a hand mixer, combine butter, 3 cups powdered sugar, and vanilla. Beat until light and fluffy. Add remaining sugar and heavy cream and beat until smooth.
  4. Assemble cake: Using a serrated knife, cut off the rounded top of each cake to level. Top one cake with a thick layer of pudding then top with most banana slices. (Reserve some to garnish.) Place second cake on top and frost entire cake with buttercream, reserving about 1 cup to pipe on top. Press crushed Nilla wafers around the sides of the cake.
  5. Transfer remaining buttercream to a piping bag fitted with a large star tip and pipe large swirls around the top of the cake. Decorate with Nilla wafers and more banana slices.

Watch the recipe video here:

How To Make Banana Pudding Cake

Banana Pudding Cake is the birthday cake you'll request year after year AFTER YEAR.Full recipe: http://dlsh.it/8ZwD3wJ

Posted by Delish on Monday, April 16, 2018

Dessert

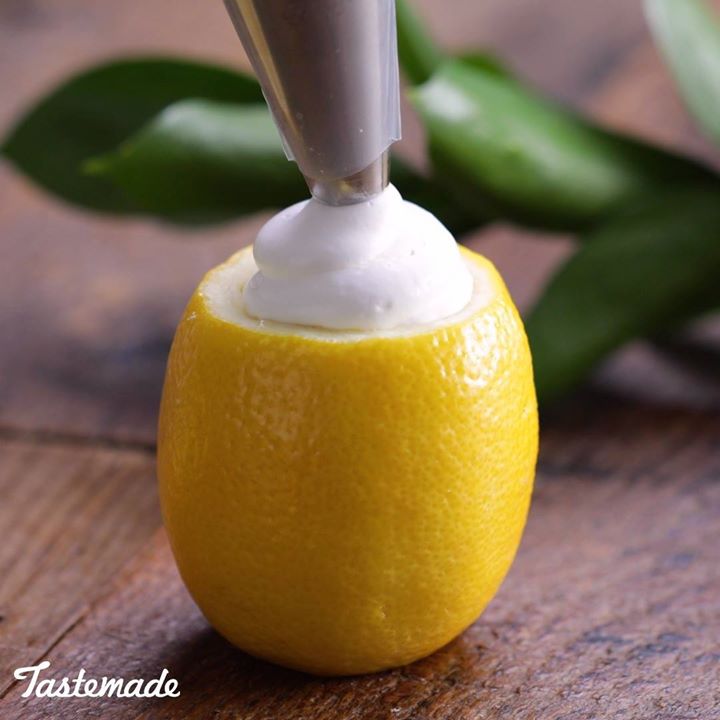
Lemon Cheesecake Souffles

Lemon Cheesecake Souffles
[Insert overused "when life hands you lemons" phrase here.]
Author:
Cuisine: American
Recipe type: Dessert
Ingredients
  • 12 lemons
  • 1½ cups lemon juice
  • ¾ cup water, chilled
  • 1½ tablespoons gelatin
  • 1½ cups sugar
  • 1 pinch salt
  • 3 cups heavy cream, chilled
  • Blueberries, to garnish
  • Mint leaves, to garnish
Instructions
  1. Using a melon baller and a paring knife, hollow out the lemons, reserving the insides in a large bowl.
  2. Cut a small piece off the bottom of each hollowed lemon to allow it to sit flat, and place the lemons on a sheet tray.
  3. Pour the reserved lemon slices and pith into a mesh strainer placed over a medium bowl. Press gently with a spatula to press the juice out of the lemon pieces.
  4. To the lemon juice, add the chilled water and sprinkle the gelatin over the top. Allow to sit for a few minutes then transfer the mixture to a heavy-bottomed saucepan. Add the sugar and salt and cook over medium-low heat until the sugar is completely dissolved. Set aside and allow mixture to cool to room temperature.
  5. In a medium bowl, whip heavy cream until it reaches soft peaks. Add the lemon juice mixture and use a hand mixer to combine. Transfer filling to a pastry bag, and pipe some into each hollowed out lemon.
  6. Garnish with blueberries and mint, and enjoy.

Watch the recipe video here:

Lemon Cheesecake Souffles

[Insert overused "when life hands you lemons" phrase here]Taste for Yourself: taste.md/2qDFyck

Posted by Tastemade on Tuesday, April 17, 2018

Dessert

Sugar Cookie “Pizza”

Sugar Cookie “Pizza”
Author:
Cuisine: American
Recipe type: Dessert
Ingredients
  • ½ cup (115 g) unsalted butter, 1 stick, softened
  • 1 ½ teaspoons vanilla extract, divided
  • ½ cup (100 g) granulated sugar
  • 3 tablespoons light brown sugar
  • 1 large egg, room temperature
  • 1 ½ cups (60 g) all-purpose flour
  • 1 teaspoon cream of tartar
  • ½ teaspoon baking soda
  • 1 pinch salt
  • 6 oz (170 g) cream cheese, room temperature
  • ⅓ cup (50 g) powdered sugar
  • ⅓ cup (95 g) chocolate hazelnut spread
OPTIONAL TOPPINGS
  • fresh berries
  • peanut butter
  • mini pretzel
  • fruit cereal
  • mini marshmallows
  • graham cracker, chopped
  • chocolate chunk
Instructions
  1. Preheat the oven to 350˚F (180˚C). Line a 10-inch (25-cm) cast iron pan with parchment paper.
  2. In a large bowl, mix the butter with 1 teaspoon of vanilla extract until light and fluffy.
  3. Add the granulated sugar, then the brown sugar, and mix until well incorporated.
  4. Add the egg and stir until thoroughly incorporated.
  5. Using a fine mesh sieve, sift the flour, cream of tartar, baking soda, and salt into the dough. Combine with a spatula until evenly mixed.
  6. Spread the cookie dough in an even layer in the prepared pan. Chill in the fridge for 30 minutes, then bake for 15-18 minutes until lightly golden. Let cool.
  7. In a medium bowl, combine the cream cheese, powdered sugar, and remaining ½ teaspoon of vanilla extract until well incorporated.
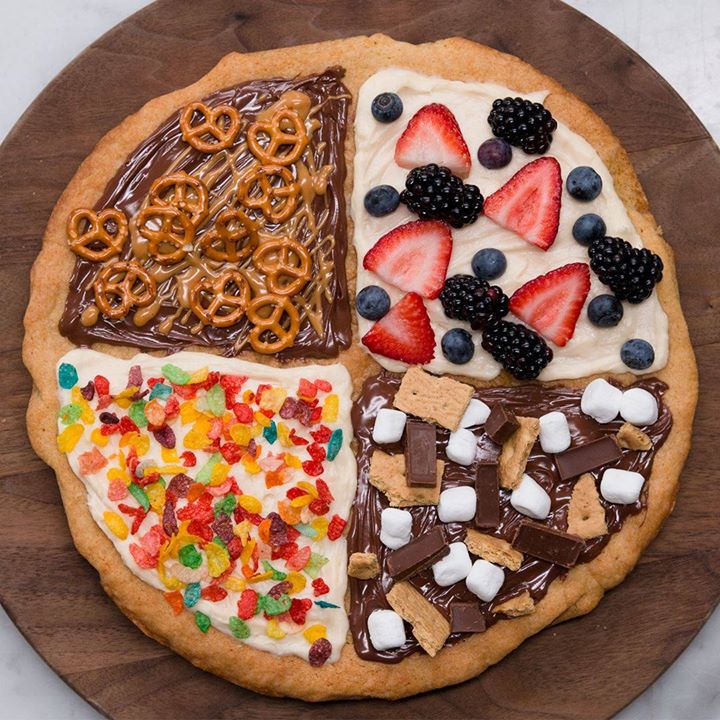
  8. Spread half of the frosting onto a quarter of the cooled cookie and the other half on the diagonally opposite corner.
  9. Frost the other quarters with the chocolate hazelnut spread.
  10. Decorate with your favorite toppings.
  11. Enjoy!

Watch the recipe video here:

Sugar Cookie "Pizza"

How would you top your sugar cookie "pizza"?! ❤️FULL RECIPE: https://tasty.co/recipe/sugar-cookie-pizza

Posted by Tasty on Tuesday, April 17, 2018

Dessert

Sea Kween Cupcakes

Sea Kween Cupcakes
These mermaid Inspired cupcakes made with a bit of royal gold luster dust are perfect for any party.
Author:
Cuisine: American
Recipe type: Dessert
Ingredients
  • Cupcakes
  • 429g all-purpose flour
  • 265g caster (superfine) sugar
  • ½ tsp salt
  • 3 tsp baking powder
  • 375ml of milk
  • 125ml vegetable oil
  • 125g unsalted butter, softened
  • 2 tbsp Greek yogurt (can substitute with sour cream)
  • 1 tsp vanilla extract
  • 2 large eggs
  • 1 drop purple food gel
  • 1 drop blue food gel
  • 1 drop pink food gel
  • 1 drop green
  • sprinkles of your choice
  • 1 tsp strawberry essence
  • Gold Drizzle
  • 2 tsp gold lustre dust
  • 3 tbsp vodka or vanilla extract
  • Frosting
  • 1 batch fluffy vanilla buttercream frosting
  • 1 drop purple food gel
  • 1 drop blue food gel
  • 1 drop pink food gel
  • 1 drop green
Instructions
  1. Preheat a fan-forced oven to 160C (320F) or 180C (356F) for a conventional oven. Line a cupcake tin with cupcake liners.
  2. In the bowl of a stand mixer fitted with the paddle attachment, add the flour, baking powder, caster sugar and salt. Turn mixer on low speed and allow it to mix for a couple minutes to help everything combine well (alternatively you may do this by sifting the ingredients together). Add the softened butter and let it mix until it resembles a fine sand like texture.
  3. Next, add milk, eggs, yogurt, oil, strawberry essence and vanilla extract in a large jug and whisk well.
  4. Add wet ingredients to dry ingredients in a slow and steady stream until no dry ingredients are visible. Scrape down the bowl and mix for another 20 seconds.
  5. Fill each cupcake liner ¾ of the way (using an ice cream scoop to transfer the batter into the cupcake liners makes this a quick and easy process otherwise you can use two tablespoons).
  6. Bake for 20-25 min or until a toothpick inserted comes out clean. Allow them to cool completely on a wire cooling rack before frosting.
  7. Gold Drizzle
  8. Add gold lustre dust to a small mixing bowl and mix until well combined
  9. Frosting
  10. To prepare frosting, split into 4 bowls and colour each one blue, green, pink and purple using food gel. Add each one to a piping bag. Lay out a large square piece of plastic wrap on your work bench. Pipe small stripes of each coloured frosting in the following order: pink, green, purple, blue. Roll up as demonstrated and twist each end. Snip off one of the ends using scissors. Fit the end of a piping bag with a Wilton 8B piping tip and frost four blobs of frosting on top of each other making each one smaller as you go up. Finish off with a drizzle of gold.

Watch the recipe video here:

Sea Kween Cupcakes

?Unda the sea…?Taste for Yourself: taste.md/2qAl4kQ?: The Scran Line

Posted by Tastemade on Tuesday, April 17, 2018

Dessert

Creme Brulee Cone

Creme Brulee Cone
Take a crack at this sweet snack featuring creamy creme brulee in a colorful, chocolate-coated cone.
Author:
Cuisine: American
Recipe type: Dessert
Ingredients
For the custard:
  • 1 cup heavy whipping cream
  • ½ cup whole milk
  • ½ cup granulated sugar
  • 1 vanilla bean, seeded
  • 4 large egg yolks
  • 2 tablespoons cornstarch
  • Granulated or fine turbinado sugar, for bruleeing
For the cones:
  • 1 pack waffle or sugar cones
  • 1 (12-ounce) bag dark chocolate chips
  • 1 (12-ounce) bag white chocolate chips
  • Sprinkles, for cone rim
Instructions
Make the cones:
  1. Using the microwave or double boiler, melt each chocolate in separate bowls. Pour dark chocolate in each cone to coat the inside. Dip the rim of each cone in white chocolate and then in the sprinkles. Let chocolate completely firm at room temperature or in the refrigerator.
Make the custard:
  1. In a medium saucepan over low heat, combine the cream, milk, sugar and vanilla seeds. Heat until just simmering. Do not boil.
  2. In a medium bowl, whisk together egg yolks and cornstarch. Ladle a small amount of the warmed milk mixture into the egg yolks and whisk so no clumps form. Carefully add yolk mixture to warmed milk and whisk constantly for about 5 minutes. Once the mixture is thick and slightly bubbling, remove from heat and pass through a fine mesh sieve. Let custard cool completely to room temperature.
  3. Once custard has cooled but not completely set, carefully pour into each chocolate-lined waffle cone. Refrigerate for 2 hours. Just before serving, sprinkle granulated sugar on top of the custard and carefully use a torch to caramelize the sugar. The sugar will harden as it sits. Crack the top with the back of a spoon and enjoy!

Watch the recipe video here:

Creme Brulee Cone

Give us the creme brulee & nobody gets hurt.Taste for Yourself: taste.md/2quJY5g

Posted by Tastemade on Monday, April 16, 2018

Dessert

giant raspberry macaron

giant raspberry macaron
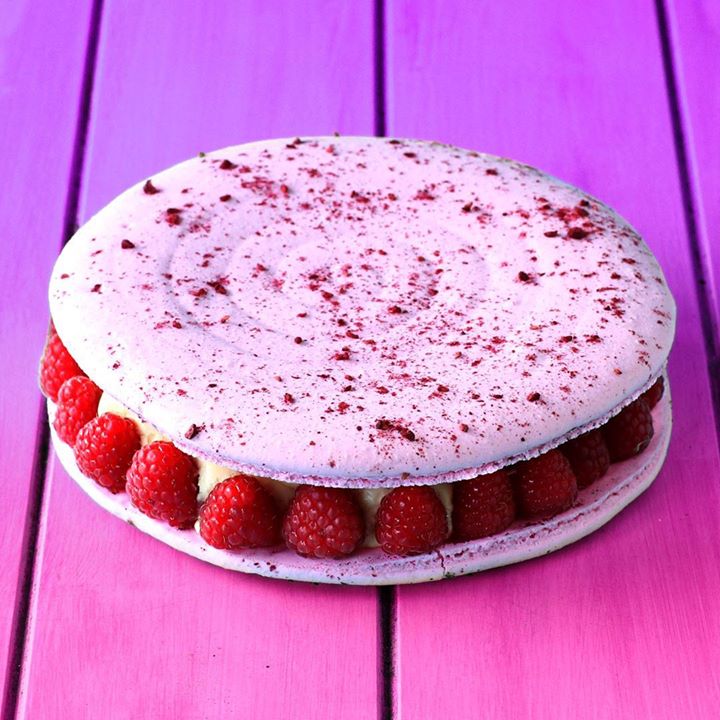
This giant version of a classic French macaron, filled with raspberries and sweet cream, is sure to satisfy your sweet tooth.
Author:
Cuisine: American
Recipe type: Dessert
Ingredients
For the macaron shells:
  • 150g almond flour
  • 150g powdered sugar
  • 55g liquefied egg whites (see below)
  • 150g caster sugar
  • 38g water (yes grams not mls)
  • 55g liquefied egg whites
  • crushed freeze dried raspberries
  • 2 drops pink food gel
  • Fresh raspberries
  • Pastry cream
  • 3tbsp sugar
  • 2 tbsp all purpose flour
  • 6 egg yolks
  • 1 cup milk
  • 1 cup whipping/thickened cream
  • 2 tbsp powdered gelatine + 3 tbsp cold water
  • 1 tsp vanilla extract
  • 200g unsalted butter
Instructions
  1. Pastry cream
  2. To prepare pastry cream begin by adding sugar and flour to a large microwave safe bowl. Whisk together until well combined. Next add the egg yolks, whisk and then add cream and milk. Whisk everything together until well combined.
  3. Microwave for 1 minute at a time, whisking each time until thickened. It may take up to 15 minutes.
  4. Add gelatin and water to a mixing bowl and mix together. Allow to sit for 5 minutes.
  5. Add vanilla butter to the thickened custard and whisk until melted. Then add gelatin mixture and whisk until well combined. Lastly add vanilla extract and whisk until well combined. Cover with plastic wrap and chill until set.
  6. Macarons
  7. Add half the icing sugar and almond flour into a food processor and process until well combined. Repeat with the other half. This will help get rid of any lumps in the sugar. Alternatively you may sift the two together. This must be done at least 3 times.
  8. Empty the almond mixture into a large mixing bowl, add the first portion of egg whites and mix until it forms a paste. Cover with plastic wrap and set aside.
  9. Add the sugar and water into a small saucepan. Give them a very gentle stir to get them mixed together. Bring to a boil on medium high heat, then turn down to a simmer. Add a candy thermometer to the pot to help you measure the temp of the syrup. As the syrup bubbles away it will splatter small bubbles of sugared water on the sides of the pot. Use a pastry brush dabbed in a little water to brush those back into the syrup. This will help prevent the syrup from crystallising. When the syrup reaches 115C, add the second portion of egg whites to the bowl of a stand mixer and start whisking them on medium/high speed to help break them apart and get them a little frothy.
  10. When the syrup reaches 118C, pour it over the egg whites in a slow and steady stream. Whisk to stiff peaks for about 6 min. Add the pink food gel and vanilla extract at about the 3 min point, whisk into the meringue for a couple of minutes. Stop the mixer and scrape down, then whisk for an extra couple of minutes. When you can turn the bowl over and the meringue doesn’t fall out, you know you’ve reached stiff peaks.
  11. Grab a spatula full of the meringue and fold it into the almond-sugar mixture, mix until well combined. This allows the mixture to thin out a little before you add the rest of the mixture. Fold everything together by going around the bowl with a spatula then through the middle (as demonstrated in the video). Continue folding until the batter gets thin enough that it drips off the spatula and falls in a ribbon. It should take about 10 seconds for the ribbon to disappear into the rest of the batter. That’s when you know the batter is ready to pipe.
  12. Spoon the batter into a piping bag with a round tip.
  13. Use a medium sized snack plate (measuring about 15cm in width.) use a food safe marker to draw a circle on to some baking paper. Turn the paper around so they marker side is down. Pipe a circle of batter around the circle using your drawing as a guide. Then pipe a snail of macaron batter to fill the perimeter. Sprinkle with crushed freeze dried raspberries. You’ll need two of these.
  14. Gently tap the tray on the work surface covered with a kitchen cloth. Leave to stand for at least 30 minutes, until a skin forms on the shells. They shouldn’t be sticky when you touch them. It’s at this point that you can preheat a fan forced oven to 140C (280F)
  15. Bake for 20 minutes. If you feel your oven is causing the macarons to brown on one side (usually the side closest to the fan) turn the tray around about half way through baking. Once they’re baked, let them cool completely.
  16. Once the macarons are baked and cooled, very carefully turn then upside down on to the palm of your hand and peel the paper away from the bottom of the macaron.
  17. Pipe blobs of pastry cream on one of the macarons. Don’t pipe all the way to edge because you’re going to add raspberries to the sides of the macaron.
  18. Once you’ve piped the pastry cream, add some raspberries on top and pipe a second layer of pastry cream on top but not as high as the first layer. Add the fresh raspberries around the perimeter of the macaron and sandwich with the other macaron.

Watch the recipe video here:

Giant Raspberry Macaron

The big-mac of macarons!Taste for Yourself: taste.md/2quNVHk

Posted by Tastemade on Sunday, April 15, 2018