Showing 879 Result(s)
Dessert

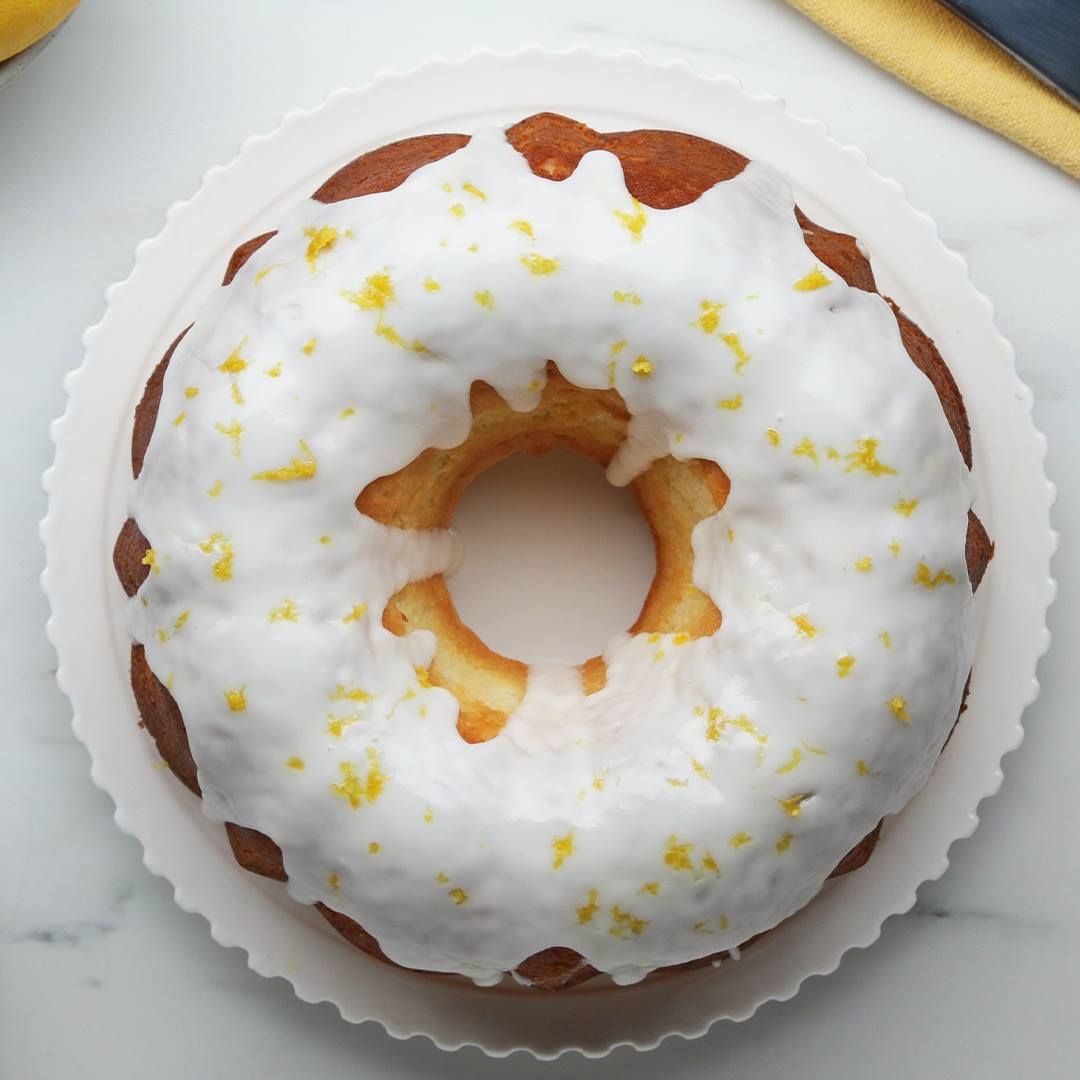
Lemon Bundt Cake

Lemon Bundt Cake
We love lemon bundts and we can not lie! Our non-stick bundt pan makes baking and clean-up easy breezy, ? squeezy.
Author:
Cuisine: American
Recipe type: Dessert
Ingredients
LEMON CAKE
  • 3 cups all-purpose flour (375 g)
  • 2 teaspoons baking powder
  • 2 cups unsalted butter, 2 sticks, room temperature (230 g)
  • 2 cups granulated sugar (400 g)
  • 1 teaspoon kosher salt
  • 3 large eggs, room temperature
  • 2 tablespoons lemon zest
  • ¼ cup lemon juice (60 mL)
  • 1 teaspoon vanilla extract
  • 1 cup whole milk (240 mL)
  • nonstick cooking spray, for greasing
LEMON GLAZE
  • ½ cup granulated sugar (100 g)
  • ¼ cup lemon juice (60 mL)
LEMON ICING
  • 2 cups powdered sugar, sifted (240 g)
  • 3 tablespoons lemon juice
  • 1 lemon, zested
Instructions
  1. Preheat the oven to 350˚F (180˚C).
  2. Make the cake: In a medium bowl, whisk together the flour and baking powder.
  3. In a large bowl, cream the butter, sugar, and salt with an electric hand mixer until fluffy, about 3 minutes. Add the eggs, one at a time, beating until fully incorporated before adding the next. Add the lemon zest, lemon juice, and vanilla and beat to combine.
  4. Add half the flour and beat to combine, then beat in the milk, then add the rest of the flour and beat just until incorporated. Scrape down the sides of the bowl with a rubber spatula and make sure any floury spots are incorporated.
  5. Grease a 10-inch (25-cm) bundt pan with nonstick spray. Spoon the batter into the pan and smooth the top. Gently tap the pan against the counter to release any air bubbles.
  6. Bake the cake for 50 minutes, until a toothpick inserted in the center comes out clean.
  7. While the cake is baking, make the lemon glaze: In a small microwave-safe bowl, combine the sugar and lemon juice. Microwave for 1 minute, stirring halfway through, until the sugar is completely dissolved. Set aside.
  8. Make the lemon icing: Sift the powdered sugar into a medium bowl. Add the lemon juice and whisk until smooth.
  9. After the cake is done baking, let cool in the pan for 10 minutes, then invert onto a wire rack set over a baking sheet and remove the bundt pan. Use a knife to loosen the cake around the edges, if needed.
  10. Use a skewer or fork to poke holes all over the top and sides of the cake. Brush the cake with the lemon glaze. If the glaze drips off, let the cake cool for a few more minutes, then continue brushing on the glaze. Let cool completely, at least 1 hour.
  11. Pour the icing over the top of the cake, letting it drip down the sides. Grate lemon zest over the icing. Let the glaze dry completely, about 30 minutes.
  12. Transfer the cake to a serving platter, slice, and serve.
  13. Enjoy!

Watch the recipe video here:

We love lemon bundts and we can not lie! Our non-stick bundt pan makes baking and clean-up easy breezy, ? squeezy. Get…

Posted by Tasty on Thursday, November 29, 2018
Dessert

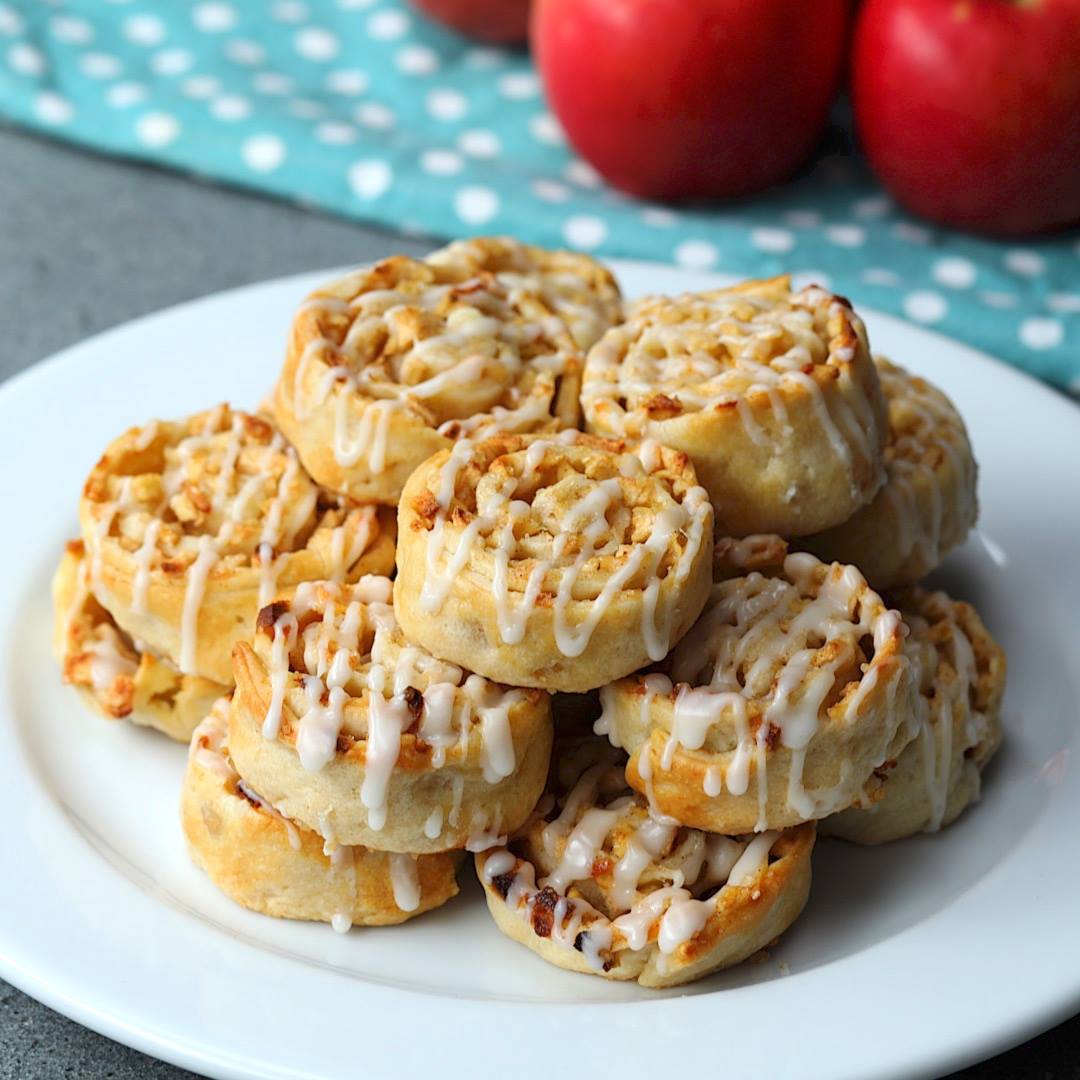
APPLE PIE COOKIES

APPLE PIE COOKIES
Apple Pie Cookies
Author:
Cuisine: American
Recipe type: Dessert
Ingredients
  • 3 medium apples peeled, cored and finely diced
  • ½ cup sugar
  • 1 tsp cinnamon powder
  • Melted butter
  • Pie dough
  • Demerara Sugar
  • 1 cup icing sugar
  • 2 tbsp milk
  • 2 tsp corn syrup
  • ½ tsp vanilla
Instructions
  1. In a small bowl mix together sugar and cinnamon.
  2. Coat apples with cinnamon sugar mixture
  3. Roll puff pie dough and brush with melted butter. Spread apples all over evenly being sure not to create a thick layer.
  4. Cut into about 6 strips and roll tightly. Bake for 30 minutes until golden brown. Cool.
  5. Make icing. Mix together icing sugar, milk and vanilla until smooth. Add cornstarch and stir to combine.
  6. Drizzle over cookies. Enjoy!

Watch the recipe video here:

Apple Pie Cookies

Apple Pie Cookies

Posted by Twisted on Sunday, August 5, 2018

Dessert

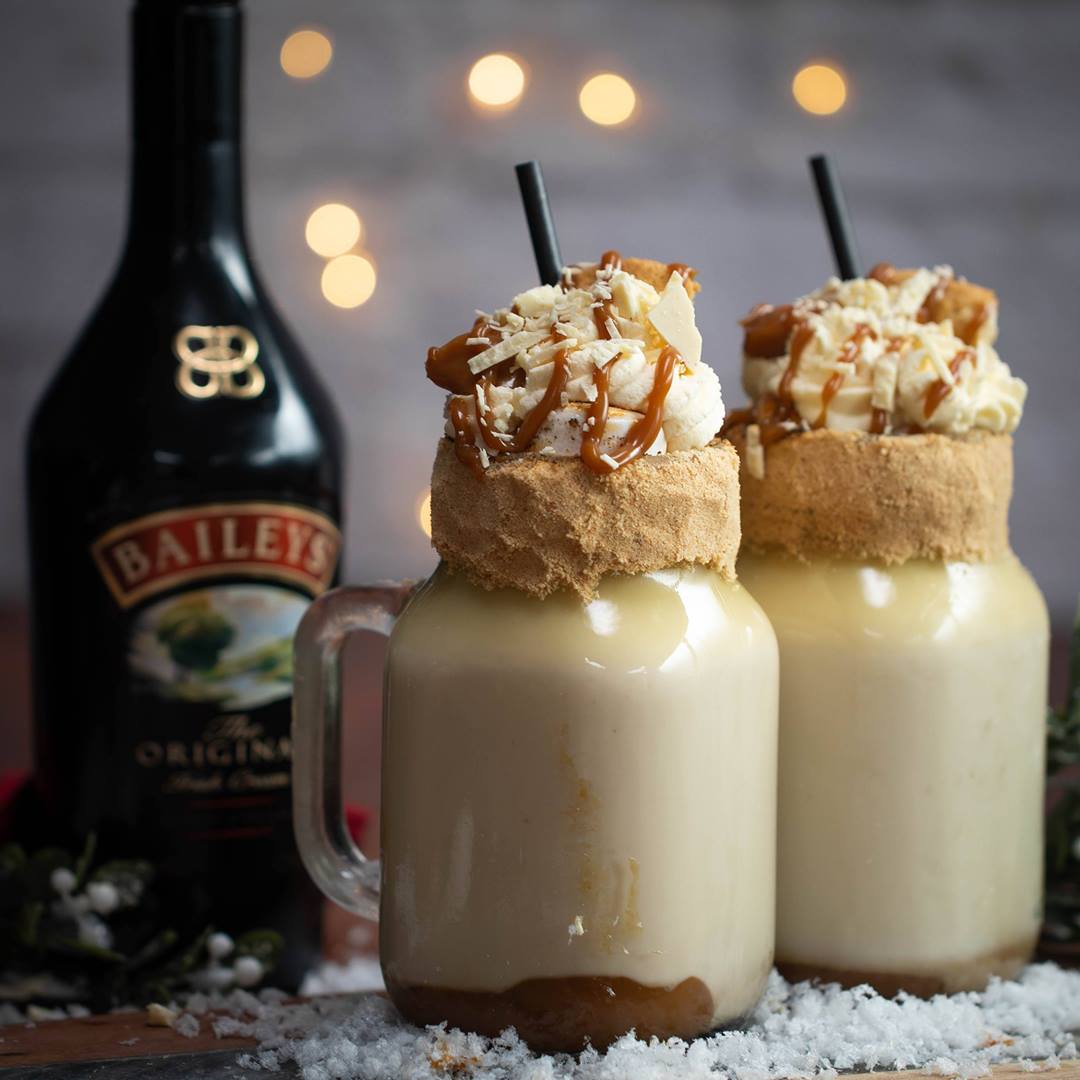
Baileys Snowball White Hot Chocolate

Baileys Snowball White Hot Chocolate
Author:
Cuisine: American
Recipe type: Dessert
Ingredients
  • 100g white chocolate
  • 250ml milk
  • 1 tsp vanilla extract
  • 50ml Baileys Original Irish Cream
  • 2 tbsps Salted caramel sauce
  • whipped cream
Instructions
  1. As chosen by our audience, and requested by Baileys, we are pleased to present our most decadent drink yet. Layers of gooey salted caramel sauce, melted white chocolate and whipped cream make this hot chocolate the only thing you’ll want to snuggle up with this winter. Ask, and ye shall receive.
  2. Add the chocolate, milk and vanilla to a saucepan over a low heat until all the chocolate is melted and mixed well.
  3. Take off the heat and add the Baileys, stir well.
  4. Garnish a mason jar with a biscuit rim, using honey.
  5. Add the salted caramel sauce as a base and carefully pour in the hot chocolate to cover.
  6. Top with marshmallows (toasted), whipped cream, more white chocolate pieces, white chocolate cookies, caramel pieces and drizzled a salted caramel sauce.

Watch the recipe video here:

Baileys Snowball White Hot Chocolate

Posted by Twisted on Thursday, November 29, 2018
Dessert

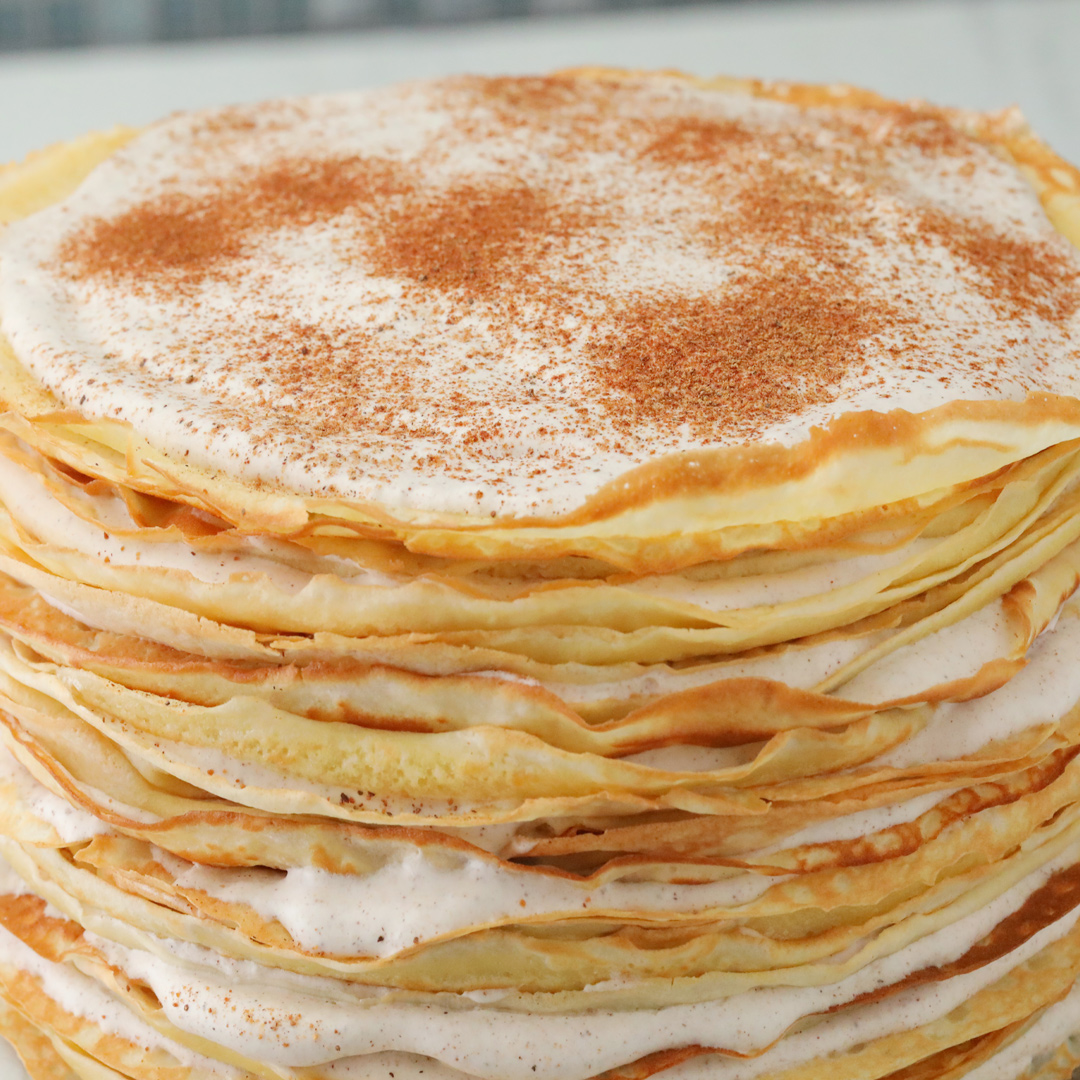
Pumpkin Spice Crêpe Cake

Pumpkin Spice Crêpe Cake
It's pumpkin spice season! Make this crêpe cake with International Delight® Pumpkin Pie Spice Creamer!
Author:
Cuisine: American
Recipe type: Dessert
Ingredients
Filling
  • 3 cups heavy cream
  • ½ cup International Delight® Pumpkin Pie Spice Creamer
  • 1 teaspoon salt
  • 2 teaspoons cinnamon
  • 2 teaspoons ground ginger
  • 1 teaspoon nutmeg
  • 1 teaspoon vanilla extract
Batter
  • 2 & ¼ cups all-purpose flour
  • 1 teaspoon salt
  • ¾ cup sugar
  • 5 eggs
  • 1 cup milk
  • ½ cup International Delight® Pumpkin Pie Spice Creamer
  • 1 & ½ cups water
  • 2 teaspoons vanilla extract
  • 4 & ½ tablespoons butter, melted
Instructions
  1. Place flour, salt, and sugar in a large bowl. Whisk to combine.
  2. In another bowl, whisk eggs. Add milk, 1⁄2 cup International Delight® Pumpkin Pie Spice Creamer , water, and vanilla extract, then whisk until combined. Add in melted butter and whisk again. Pour wet ingredients into the dry, then whisk until fully combined and no large lumps remain. Batter will still have tiny lumps from butter.
  3. Heat an 8-inch nonstick skillet over medium-low heat. Pour in a scant 1⁄4 cup of batter. Tilt pan in a circular motion so that the batter coats the pan in an even circle. Cook for 1 minute. Flip and cook other side for 30 seconds. Remove from pan. Repeat with the rest of the batter. Set aside crêpes to cool.
Batter:
  1. Using a hand mixer, beat the heavy cream in a large bowl until the whipped cream sticks up in firm peaks. Beat in the 1⁄2 cup International Delight® Pumpkin Pie Spice Creamer salt, cinnamon, ground ginger, nutmeg, and vanilla extract.
  2. Place the first crêpe on a cake stand. Spread a layer of filling onto the crêpe, then top with another crêpe. Repeat until all the crêpes have been used up. Reserve unused filling. Refrigerate cake for at least 4 hours or overnight.
  3. Spread reserved filling on the top layer. Sprinkle with extra spices. Slice and serve.

Watch the recipe video here:

Pumpkin Spice Crêpe Cake

It’s pumpkin spice season! Make this crêpe cake with International Delight® Pumpkin Pie Spice Creamer!

Posted by Tasty on Monday, October 15, 2018

Dessert

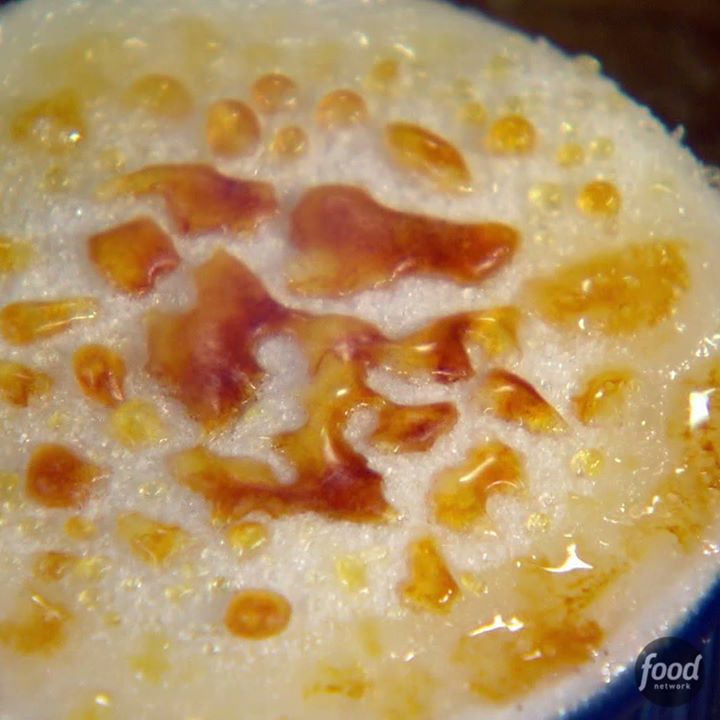
Yogurt Creme Brulee with Fresh Fruit and Granola

Yogurt Creme Brulee with Fresh Fruit and Granola
Forget about cereal and toast because we've got BREAKFAST ? CREME ? BRULEE ?
Author:
Cuisine: American
Recipe type: Dessert
Ingredients
  • 16 ounces 2-percent Greek yogurt
  • 1 teaspoon pure vanilla extract or ½ vanilla bean, scraped
  • 2 cups fresh berries, such as blueberries, raspberries, blackberries, strawberries or a combination
  • ½ cup granulated sugar, plus more
  • 2 teaspoons fresh lemon juice
  • ½ cup granola
Instructions
Special equipment: Four 8-ounce ramekins, kitchen blowtorch
  1. Mix together the yogurt and vanilla in a medium bowl until combined. Cover and refrigerate for at least 30 minutes to allow the flavors to meld.
  2. Put the berries in a small saucepan with ¼ cup water, cooking over medium heat until just softened, about 3 minutes. Remove from the heat and add the sugar and lemon juice. Let cool slightly before dividing the mixture among four 8-ounce ramekins.
  3. Sprinkle the granola evenly over the berries and top with the vanilla yogurt, filling to the top of the ramekins. Cover and place in the freezer for 5 minutes.
  4. Remove from the freezer and sprinkle 2 tablespoons of sugar over each ramekin. Using a kitchen blowtorch, caramelize the sugar by slowly sweeping the flame back and forth over the surface of the yogurt. Let the sugar harden, about 2 minutes, before serving.

Watch the recipe video here:

How To Make Bobby's Yogurt Creme Brûlée

Forget about cereal and toast because we've got BREAKFAST ? CREME ? BRULEE ?Watch Bobby Flay on tonight's new episode of #BeatBobbyFlay @ 10|9c!

Posted by Food Network on Thursday, February 8, 2018

Dessert

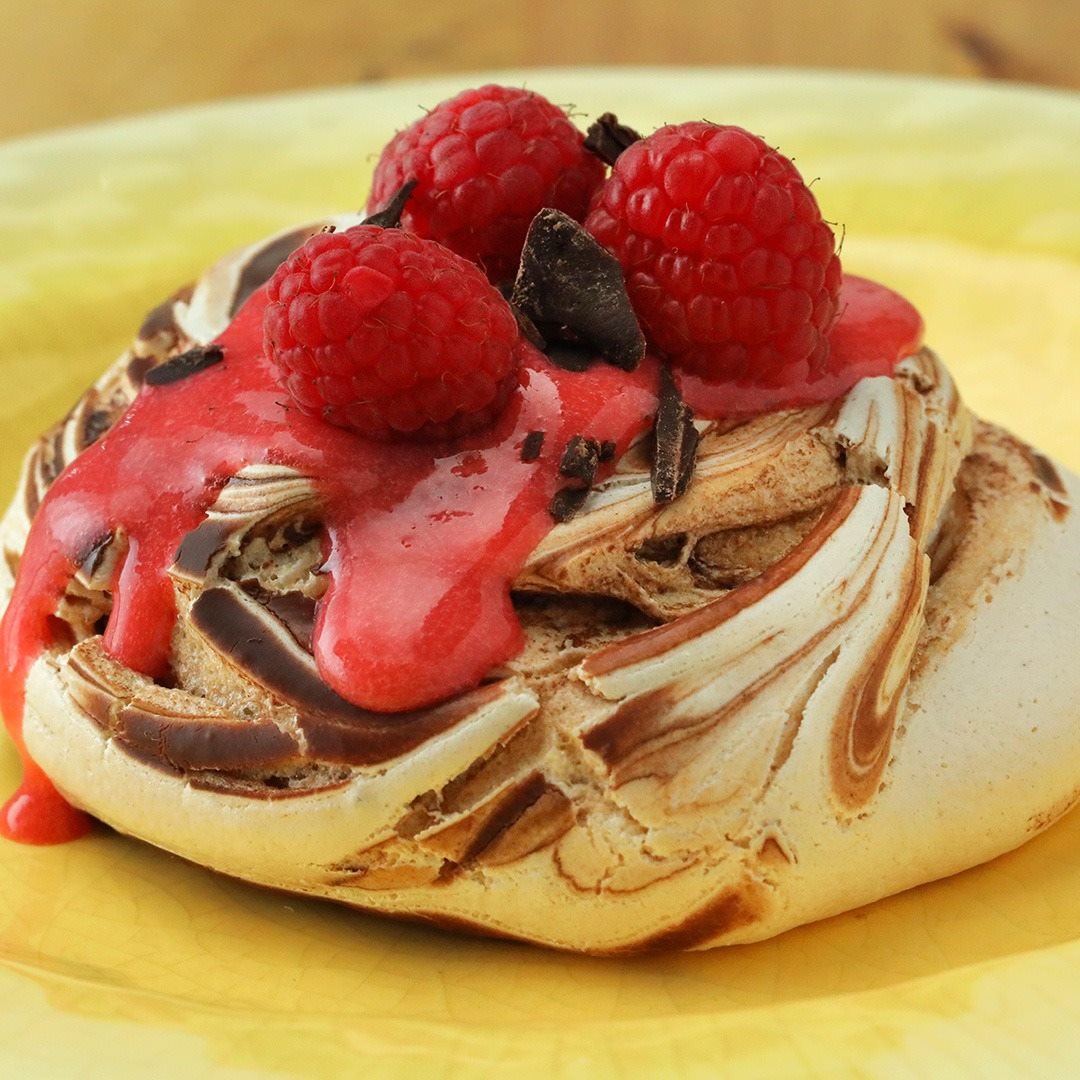
Mini Chocolate Pavlovas

Mini Chocolate Pavlovas
These mini chocolate pavlovas will be love at first bite.
Author:
Cuisine: American
Recipe type: Dessert
Ingredients
Pavlovas
  • 8 large egg whites
  • 1 pinch salt
  • 2 1⁄2 cups granulated sugar
  • 4 teaspoons cornstarch
  • 1⁄2 scant teaspoon vanilla extract 2 teaspoons white wine vinegar
  • 1 cup semi-sweet chocolate chips 1 tablespoon coconut oil
Raspberry Puree
  • 2 cups raspberries
Raspberry Curd
  • 8 ounces lemon juice
  • 8 ounces egg yolk (from about 10-12 eggs) 8 ounces sugar
  • Pinch of kosher salt
  • 11⁄2 tablespoons lemon zest
ASSEMBLY
  • Raspberries, to garnish
  • Shaved chocolate, to garnish
Instructions
  1. Preheat oven to 350°F (180°C).
  2. Whisk the egg whites with the salt until they form firm peaks but are not too stiff. Gently add the sugar, a few tablespoons at a time. Continue beating until meringue is glossy. Add cornstarch, vanilla, and the vinegar on top and fold in to combine.
  3. In a microwave, melt chocolate and coconut oil in a heat-proof bowl for 30 seconds at a time, stirring in between. Let cool slightly.
  4. Line 3 baking sheets with parchment paper and draw 6 (4-inch) circles (using a pint glass as a guide) on each of the parchment-lined sheets.
  5. Spoon 2 tablespoons of egg-white mixture onto each circle, followed by about 1⁄2 teaspoon of melted chocolate. Repeat a second time with each pavlova so that there are 2 layers each of meringue and chocolate. With a butterknife, make swirls in each pavlova. Use the back of the spoon to make an indentation in the center to hold the curd later.
  6. Transfer meringues to the oven, lowering the heat to 300°F. Bake for 40 minutes. Turn the oven off, leaving the meringues in the warm oven an additional 30 minutes, then remove from the oven to cool.
  7. Raspberry Puree: In a food processor, pulse raspberries until reaching a smooth puree. Strain into a small bowl, then discard the seeds.
  8. Raspberry Curd: Bring the lemon juice to a simmer in a medium (non-reactive) pot. Meanwhile, whisk together the egg yolks, sugar, and salt in a medium bowl. When the lemon juice begins to bubble, begin slowly whisking some of the lemon juice into the yolk, about 2 ounces at a time. Once yolks are tempered, pour back into the pot and cook on medium-low heat, stirring constantly with a heat-resistant spatula, until the curd has a thick, pudding-like consistency (about 185°F).
  9. Strain into a bowl, discarding any bits that remain. Add the lemon zest and raspberry puree, then whisk to combine until mixture is cooled. Store the curd in the refrigerator to thicken.
  10. Spoon about a tablespoon of raspberry curd into each indentation of the meringues and top each with a few raspberries and garnish with chocolate shavings.

Watch the recipe video here:

Mini Chocolate PavlovasThese mini chocolate pavlovas will be love at first bite.

Posted by Tasty on Tuesday, November 27, 2018

Dessert

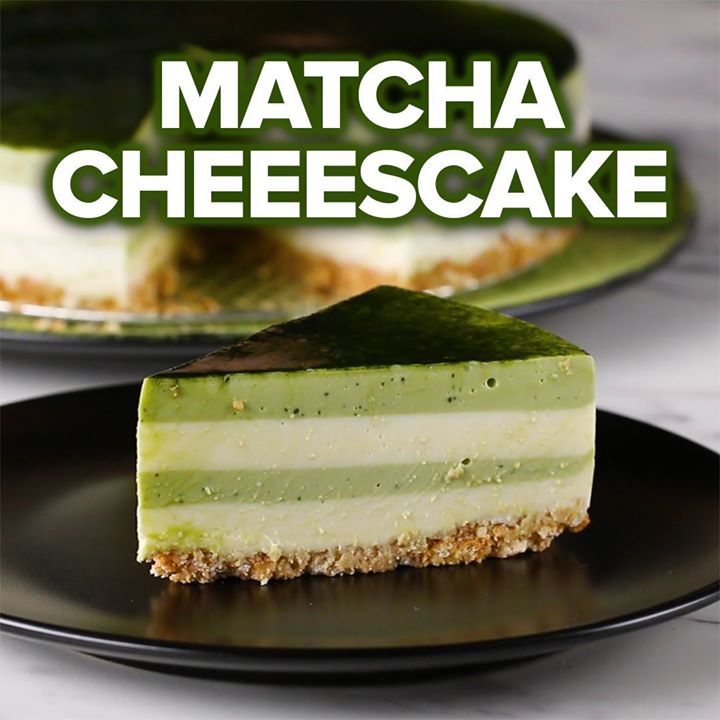
Matcha Layered Cheesecake

Matcha Layered Cheesecake
This matcha layered cheesecake is so beautiful! ?
Author:
Cuisine: American
Recipe type: Dessert
Ingredients
  • 1 ⅓ cups biscuit (140 g)
  • ⅓ cup melted butter (80 g)
  • 2 tablespoons milk
  • 5 teaspoons gelatin powder
  • 2 tablespoons water
  • 3 ⅓ cups cream cheese (750 g)
  • ⅔ cup sugar (120 g)
  • 1 ⅔ cups yogurt (400 g)
  • 1 ⅔ cups heavy cream (400 mL)
  • 2 tablespoons water, hot
  • 2 tablespoons matcha powder
Instructions
  1. Put the biscuit in a ziplock bag and crush it finely. Put it in a bowl, add melted butter and milk and mix.
  2. Place mixture in a 20 cm (7 in) spring-loaded mold and make shape with holding it firmly with your fingers. Put it in a refrigerator and cool it (about 30 minutes).
  3. Place gelatin in a heat-resistant small dish, add water and let it set.
  4. Add sugar to the cream cheese and mix well. Put yogurt and Heavy cream and mix well.
  5. Heat gelatin for about 30 seconds in a 600 W microwave oven and mix thoroughly every fifteen seconds. When the gelatin becomes liquid, filter it into mixture and mix well.
  6. Divide mixture into two equal parts, add Matcha melted with hot water to one side, and mix well.
  7. Pour half the amount of white filling into the bottom of the mold, put in a freezer for 15 minutes and solidify.
  8. Pour half of the filling containing the matcha into the mold and cool for 15 minutes.
  9. Repeat this until the remaining filling gets set up
  10. Cool in a refrigerator for about 3 hours.
  11. Remove the cake from the mold, put it on the dish, sprinkle the tea strainer on the surface and sprinkle matcha.
  12. Enjoy!

Watch the recipe video here:

Matcha Layered Cheesecake

This matcha layered cheesecake is so beautiful! ?FULL RECIPE: https://tasty.co/recipe/matcha-layered-cheesecakeMissing a couple tools to make this recipe? Click here: http://bit.ly/2oouPkn – We may make some $$ if you buy!

Posted by Tasty on Sunday, February 18, 2018

Dessert

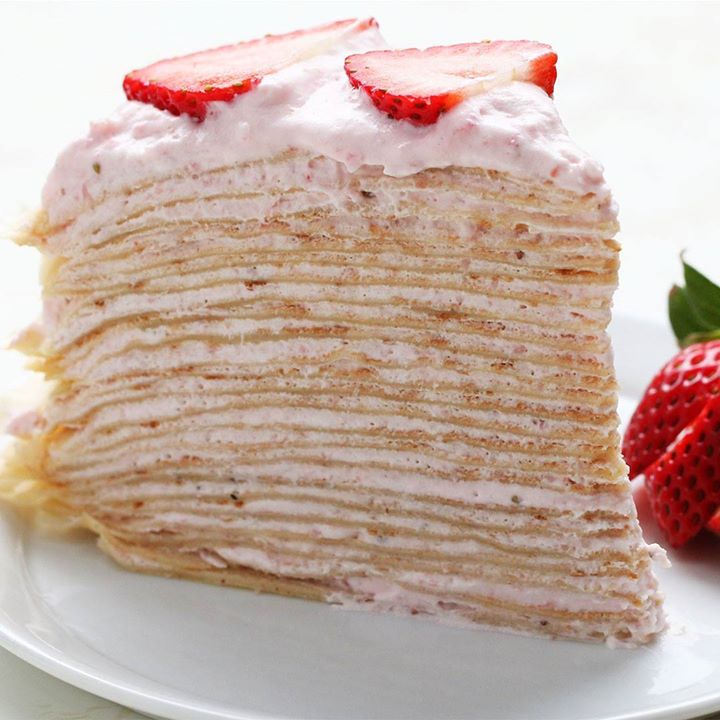
Strawberry Banana Crepe Cake

Strawberry Banana Crepe Cake
The layers of this strawberry banana crepe cake are so beautiful ? ?!
Author:
Cuisine: American
Recipe type: Dessert
Ingredients
  • 4 large eggs
  • 3 ½ cups milk (840 mL)
  • ⅓ cup oil (80 mL)
  • 2 teaspoons vanilla
  • 3 ripe bananas, very ripe
  • ½ cup sugar (100 g)
  • ½ teaspoon salt
  • 2 cups flour (250 g)
  • ½ teaspoon unsalted butter
  • 10 strawberries, stemmed, plus more, sliced for garnish
  • 1 ¼ cups heavy cream (300 mL)
  • 2 tablespoons powdered sugar
Instructions
  1. In a food processor or blender, add the eggs, milk, oil, vanilla, bananas, sugar, salt, and flour. Blend until the batter is smooth without clumps.
  2. In a medium nonstick skillet over medium heat, melt the butter and swirl so it coats the entire pan. Then pour in ¼ cup of crepe batter and tilt the pan to cover the entire bottom. Cook until the bottom surface of the crepe begins to brown and the edges are lacey, for about 3 minutes, and then flip. Repeat with the remaining crepe batter.
  3. In a food processor or blender, add the strawberries and puree until smooth. Pour the strawberry puree through a sieve into a medium bowl to remove any seeds and clumps. Chill for 15 minutes until the puree is cold.
  4. In a large bowl, using a whisk or hand mixer, beat the cream until thickened. Add the powdered sugar, and beat until soft peaks form. Add half of the strawberry puree, and blend with the hand mixer. Add the rest of the strawberry puree and gently fold it into the whipped cream with a spatula.
  5. Dollop a bit of strawberry cream on a plate, then place the first crepe and frost with about ¼ cup of filling. Stack the remaining crepes on top of each other, with strawberry whipped cream between each layer. Spread the rest of the strawberry whipped cream on top of the last crepe.
  6. Arrange slices of strawberry on top for garnish.
  7. Slice and serve.
  8. Enjoy!

Watch the recipe video here:

Strawberry Banana Crepe Cake

The layers of this strawberry banana crepe cake are so beautiful ? ?!FULL RECIPE: https://tasty.co/recipe/strawberry-banana-crepe-cake

Posted by Tasty on Thursday, March 1, 2018

Dessert

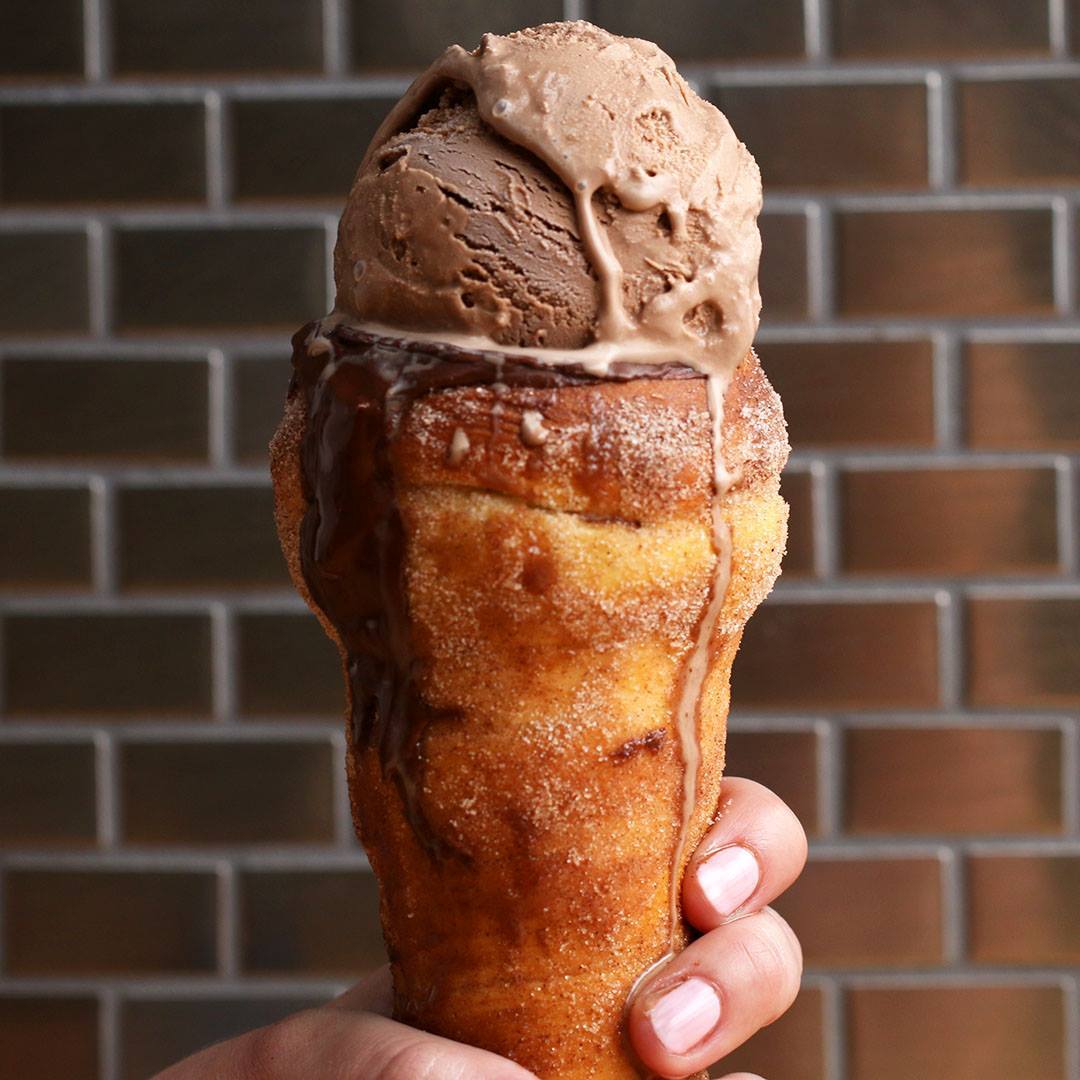
Cinnamon Sugar Donut Cones

Cinnamon Sugar Donut Cones
You'll never want ice cream in anything but these cinnamon sugar donut cones after watching this!
Author:
Cuisine: American
Recipe type: Dessert
Ingredients
  • ½ cup warm water (120 mL)
  • 2 tablespoons granulated sugar, plus 1 teaspoon, divided
  • 2 ¼ teaspoons active dry yeast
  • 3 cups all-purpose flour, plus more as needed (375 g)
  • 1 pinch salt
  • ½ cup warm milk, of your choice (120 mL)
  • 5 tablespoons unsalted butter, melted, divided
  • 2 large egg yolks, room temperature
  • 1 tablespoon olive oil
  • 1 large egg, beaten
FOR SERVING
  • 1 cup granulated sugar (200 g)
  • 2 teaspoons ground cinnamon
  • 1 cup chocolate, melted (225 g)
  • rainbow sprinkles, optional
  • ice cream
Instructions
  1. In a large bowl, stir together the water and 1 teaspoon sugar. Sprinkle the yeast over the water mixture and rest for 5 minutes, or until it becomes foamy.
  2. Sift together the flour, 2 tablespoons sugar, and the salt over the yeast mixture.
  3. Add the milk, 3 tablespoons melted butter, and the egg yolks. Stir until the dough comes together in a ball. Add more flour if dough is too sticky.
  4. Knead the dough for five minutes, or until the dough is smooth on the outside and springs back when pressed on with your fingers.
  5. Grease bowl with the oil, return the dough to the bowl, and cover with plastic wrap.
  6. Let rise for one hour at room temperature, or until the dough has doubled in size.
  7. Preheat the oven to 375°F (190°C).
  8. Cut the dough into eight equal parts.
  9. Roll out each piece of dough into a long, thick strip.
  10. Fold a sheet of aluminum foil in half and, starting from the bottom right hand corner, roll into a cone shape, measuring 6 inches (15 cm) long and about ⅛-inch (3 mm) thick around the opening. Repeat to make 7 more cones.
  11. Wrap the dough strips around each aluminum cone.
  12. Arrange the cones point-up in a muffin tin. Brush with egg wash.
  13. Bake for 18-20 minutes, or until golden brown.
  14. Cool for 10 minutes.
  15. On a large plate, mix the cinnamon with the remaining sugar.
  16. Brush the cones with the remaining melted butter.
  17. Carefully remove the aluminum foil.
  18. Roll the cone in cinnamon sugar.
  19. Fill the cone with melted chocolate, letting the excess drip out. Top with ice cream, or dip the edge in chocolate, then roll in rainbow sprinkles, if desired. Top with ice cream.
  20. Enjoy!

Watch the recipe video here:

You'll never want ice cream in anything but these cinnamon sugar donut cones after watching this!FULL RECIPE: https://tasty.co/recipe/cinnamon-sugar-donut-cones

Posted by Tasty on Friday, November 23, 2018

Dessert

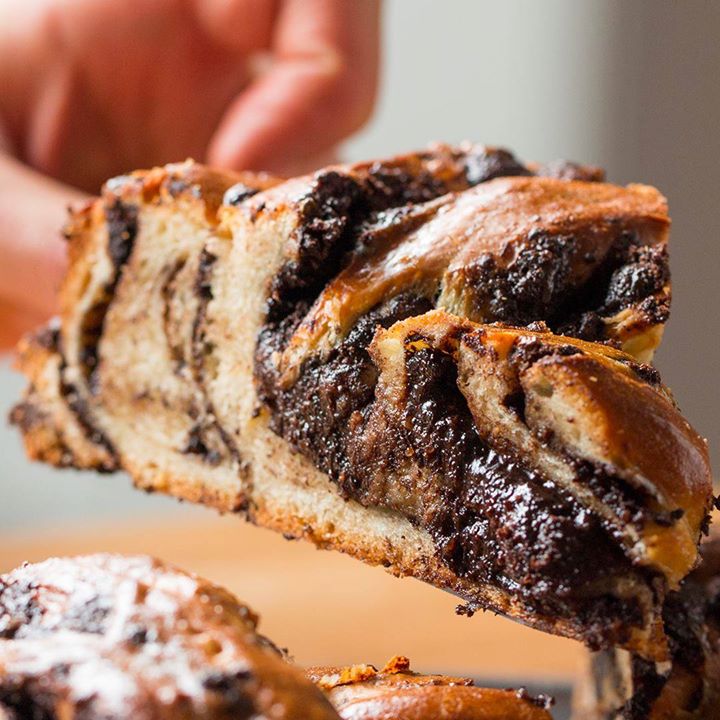
Chocolate Braided Swirl Bread (Babka)

Chocolate Braided Swirl Bread (Babka)
Author:
Cuisine: American
Recipe type: Dessert
Ingredients
DOUGH
  • 4 cups flour (500 g)
  • 2 ¼ teaspoons yeast
  • 1 cup whole milk, warm to the touch (240 mL)
  • 1 teaspoon salt
  • 1 ½ teaspoons vanilla
  • ¼ cup sugar (50 g)
  • ¼ cup honey (85 g)
  • 1 egg
  • 2 egg yolks
  • 10 tablespoons butter, softened
CHOCOLATE SAUCE
  • 12 oz bittersweet chocolate (340 g)
  • ¾ cup butter (170 g)
  • ½ cup sugar (100 g)
  • ¼ cup cocoa powder (30 g)
  • 1 tablespoon ground cinnamon
  • 2 tablespoons espresso powder
  • ½ cup turbinado sugar (100 g)
  • 1 egg wash
Instructions
  1. Combine the yeast and warm milk and let sit until foamy, about 5 minutes.
  2. In large mixing bowl, add the egg, egg yolks, vanilla, sugar, and honey and whisk to combine.
  3. Add in the milk and yeast mixture and whisk until fully incorporated.
  4. Gradually add in the flour and mix until fully incorporated.
  5. Gradually add in the butter and mix until fully incorporated.
  6. Cover with a towel and let rest for 30 minutes.
  7. Bring out the dough onto floured work surface and knead until smooth.
  8. Divide the dough into two equal parts and place in bowls and cover each with plastic wrap. Let the dough sit at room temperature for at least two hours, or when it has doubled in size.
  9. Preheat oven to 375˚F (190˚C).
  10. For the chocolate sauce, combine bittersweet chocolate, butter, sugar, cocoa powder, cinnamon, espresso powder, and turbinado sugar in a medium sized mixing bowl and microwave for 1-2 minutes. Stir to combine and set aside.
  11. Once the dough has doubled in size, transfer to a floured work surface and roll both pieces of dough into a rectangle roughly 10x15-inches.
  12. Cover the dough with half of the chocolate sauce leaving an ½ inch - 1 inch of room on all sides.
  13. Gently roll the dough up and repeat with second piece of dough and remaining chocolate sauce.
  14. Using a bench scraper or a knife, carefully cut each log vertically in half making sure the seam is side down.
  15. Lay one piece of dough horizontally and lay another piece over it vertically so you have a rough ‘plus sign’.
  16. Lay another piece horizontally over the vertical piece and above the other horizontal piece.
  17. Lay the final piece vertically on the right of the other vertical piece having it go over the top horizontal piece but weaving it under the lower horizontal piece.
  18. Starting with the bottom vertical piece on the right side, bring it to the left layering it over the other vertical lower piece.
  19. Follow this method around the dough clockwise.
  20. Once returned to the bottom lower vertical pieces. Take the original piece you crossed over (the lower left vertical piece) and cross that over to the right layering it over the last piece you used. Continue this counterclockwise until back at the bottom or you are unable to layer the dough anymore.
  21. Tuck in the excess pieces of dough under the bread.
  22. Transfer the bread into a parchment paper-lined baking sheet and brush with egg wash.
  23. Bake for 35-45 minutes, until lightly browned and cooked through.
  24. Enjoy!

Watch the recipe video here:

Chocolate Braided Swirl Bread "Babka"

Just look at that swirl ?…FULL RECIPE: https://tasty.co/recipe/chocolate-braided-swirl-bread-babkaYou have a kitchen, right? Well, we have the essentials! Shop all the must-have goods here: http://bit.ly/2FmQQHB – (BTW, we may make some $$ if you buy!)

Posted by Tasty on Tuesday, January 9, 2018