Showing 879 Result(s)
Dessert

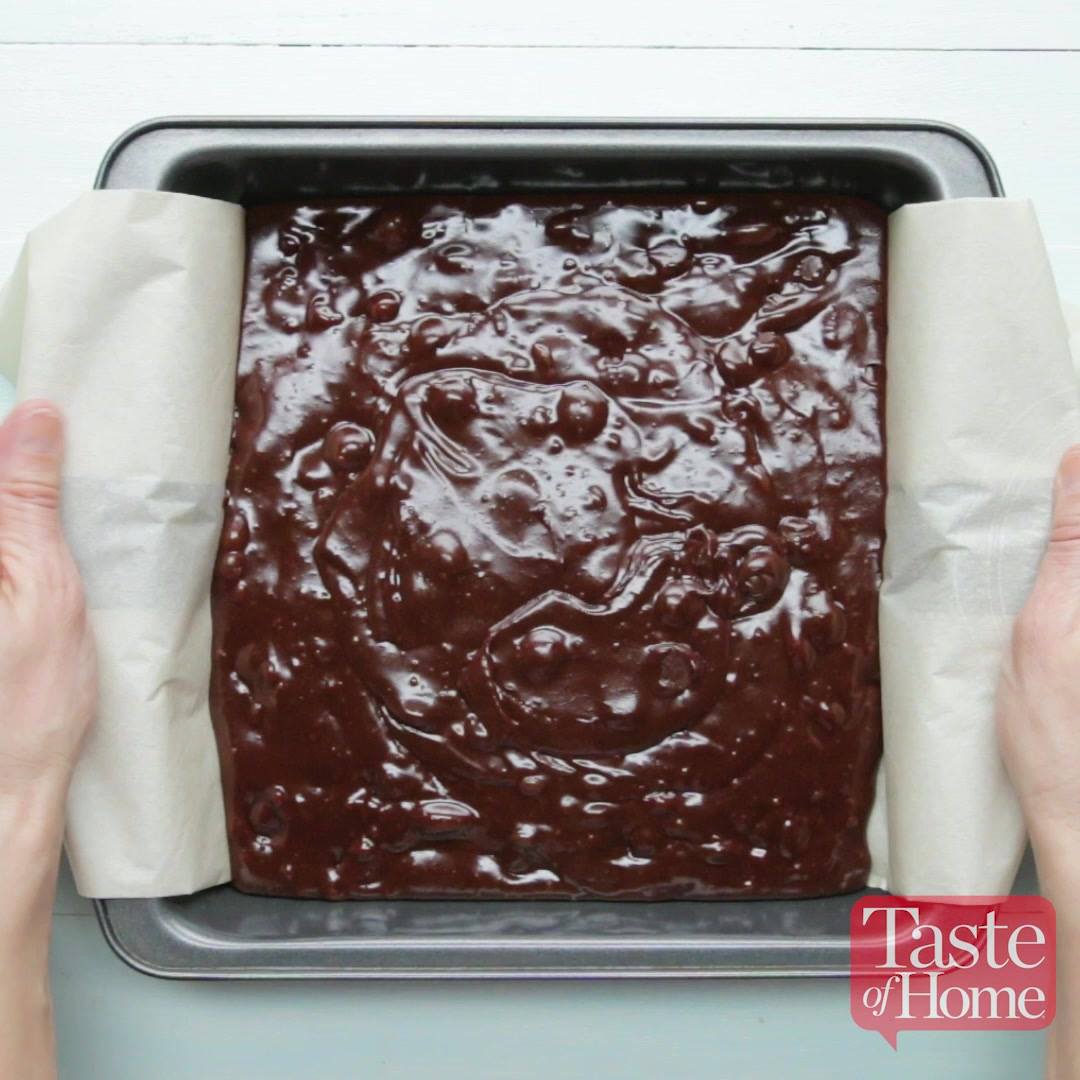
Ultimate Fudgy Brownies
Ultimate Fudgy Brownies
In these ultra fudgy brownies, coffee granules bump up the chocolate flavor. Add chocolate chips to the batter and you’ve got irresistible treats.
Author:
Cuisine: American
Recipe type: Dessert
Ingredients
  • 1 cup sugar
  • ½ cup packed brown sugar
  • ⅔ cup butter, cubed
  • ¼ cup water
  • 2 teaspoons instant coffee granules, optional
  • 2-3/4 cups bittersweet chocolate chips, divided
  • 4 large eggs
  • 2 teaspoons vanilla extract
  • 1-1/2 cups all-purpose flour
  • ½ teaspoon baking soda
  • ½ teaspoon salt
Instructions
  1. Preheat oven to 325°. Line a 9-in. square baking pan with parchment paper, letting ends extend up sides. In a large heavy saucepan, combine sugars, butter, water and, if desired, coffee granules; bring to a boil, stirring constantly. Remove from heat; add 1-3/4 cups chocolate chips and stir until melted. Cool slightly.
  2. In a large bowl, whisk eggs until foamy, about 3 minutes. Add vanilla; gradually whisk in chocolate mixture. In another bowl, whisk flour, baking soda and salt; stir into chocolate mixture. Fold in remaining chocolate chips.
  3. Pour into prepared pan. Bake on a lower oven rack 40-50 minutes or until a toothpick inserted in center comes out with moist crumbs (do not overbake). Cool completely in pan on a wire rack.
  4. Lifting with parchment paper, remove brownies from pan. Cut into squares.

Watch the recipe video here:

These are simply irresistible!–> Get the recipe for Ultimate Fudgy Brownies: https://trib.al/MOxJSNz

Posted by Taste of Home on Wednesday, August 14, 2019
Dessert

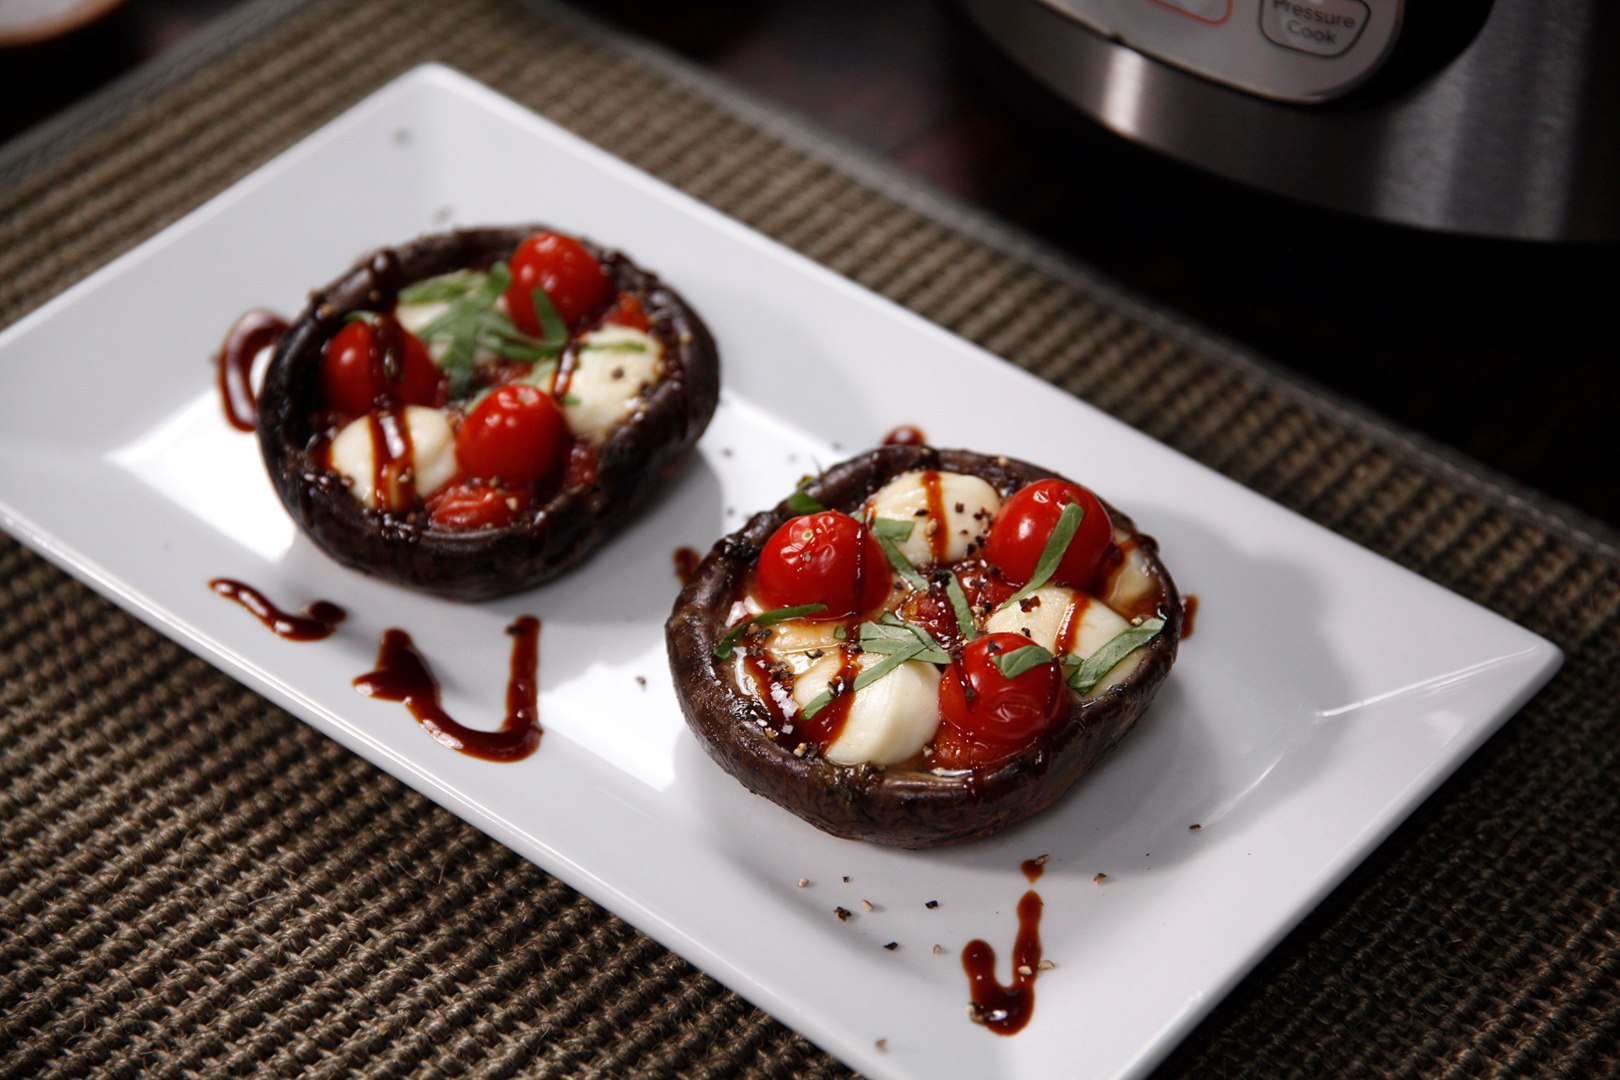
Instant Pot Caprese Garlic Butter Portobellos

Instant Pot Caprese Garlic Butter Portobellos
Make a melty caprese salad inside a portobello mushroom cap.
Author:
Cuisine: American
Recipe type: Dessert
Ingredients
  • 2 tbsp butter, melted
  • 1 tsp garlic powder
  • 2 tsp finely minced parsley
  • 3 3-4” diameter portobello mushrooms, stem removed
  • 6 cherry or grape tomatoes, halved
  • 3 oz pearl mozzarella (or other small mozzarella cut into ½″ pieces
  • 1 cup water
  • Balsamic glaze
  • 1 tbsp fresh basil, cut into ribbons
Instructions
  1. In a small bowl, melt butter. Add garlic powder and minced parsley and stir to combine.
  2. Brush both sides of the portobellos with the garlic butter and arrange in a steamer basket, stem side up.
  3. Divide the tomato halves and mozzarella among the mushrooms.
  4. Pour one cup of water in the Instant Pot and insert the steam rack. Carefully lower the steamer basket on to the steam rack.
  5. Secure the lid, making sure the vent is closed.
  6. Using the display panel select the MANUAL function*. Use the +/- keys and program the Instant Pot for 10 minutes.
  7. When the time is up, quick-release the pressure.
  8. Carefully remove the mushrooms from the pot. Drizzle with balsamic glaze and top with basil ribbons.
  9. Serve warm.

Watch the recipe video here:

Make a melty caprese salad inside a portobello mushroom cap.RECIPE: http://chopsecrets.com/instant-pot-caprese-garlic-butter-portobellos/

Posted by Chop Secrets on Tuesday, August 13, 2019

Dessert

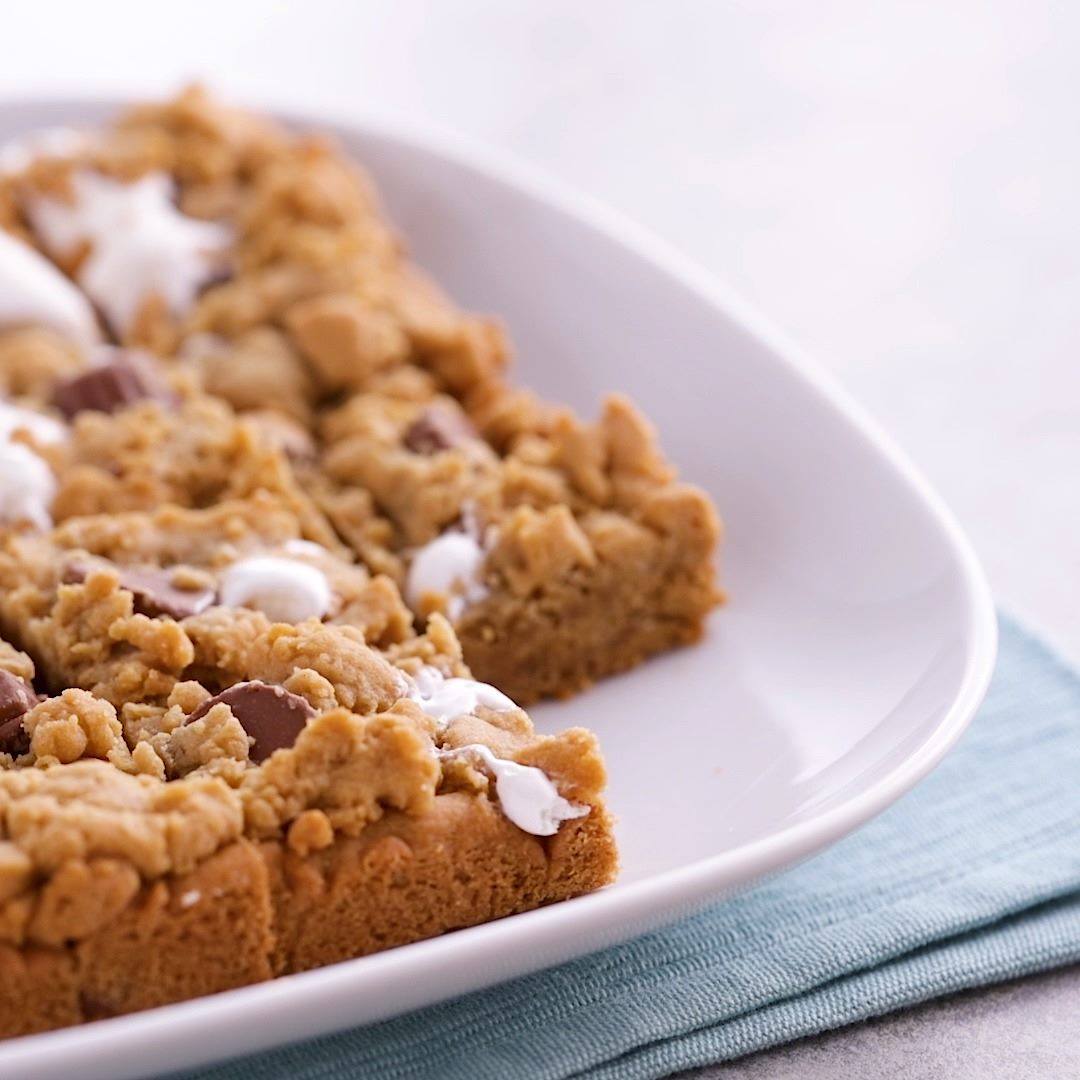
Fluffernutter Bars

Fluffernutter Bars
Marshmallow and peanut butter come together in these gooey, indulgent bars.
Author:
Cuisine: American
Recipe type: Dessert
Ingredients
  • 1 roll (16.5 oz) Pillsbury™ refrigerated peanut butter cookies
  • ½ cup milk chocolate Reese's™ minis peanut butter cups (from 8-oz package) (25 mini cups)
  • ½ cup marshmallow creme
Instructions
  1. Heat oven to 350°F.
  2. In medium bowl, mix cookie dough and peanut butter cups until well blended. Reserve 1 cup cookie dough. Press remaining dough evenly in bottom of ungreased 8-inch square pan. Bake 15 minutes.
  3. Drop tablespoonfuls marshmallow cream on bar base. Crumble reserved cookie dough onto marshmallow and bar base.
  4. Bake 14 to 18 minutes or until golden brown. Cool completely, about 1 hour. For bars, cut into 4 rows by 4 rows.

Watch the recipe video here:

3-ingredients is all it takes for gooey indulgent greatness. Fluffernutter Bars recipe:…

Posted by Pillsbury on Sunday, August 11, 2019

Dessert

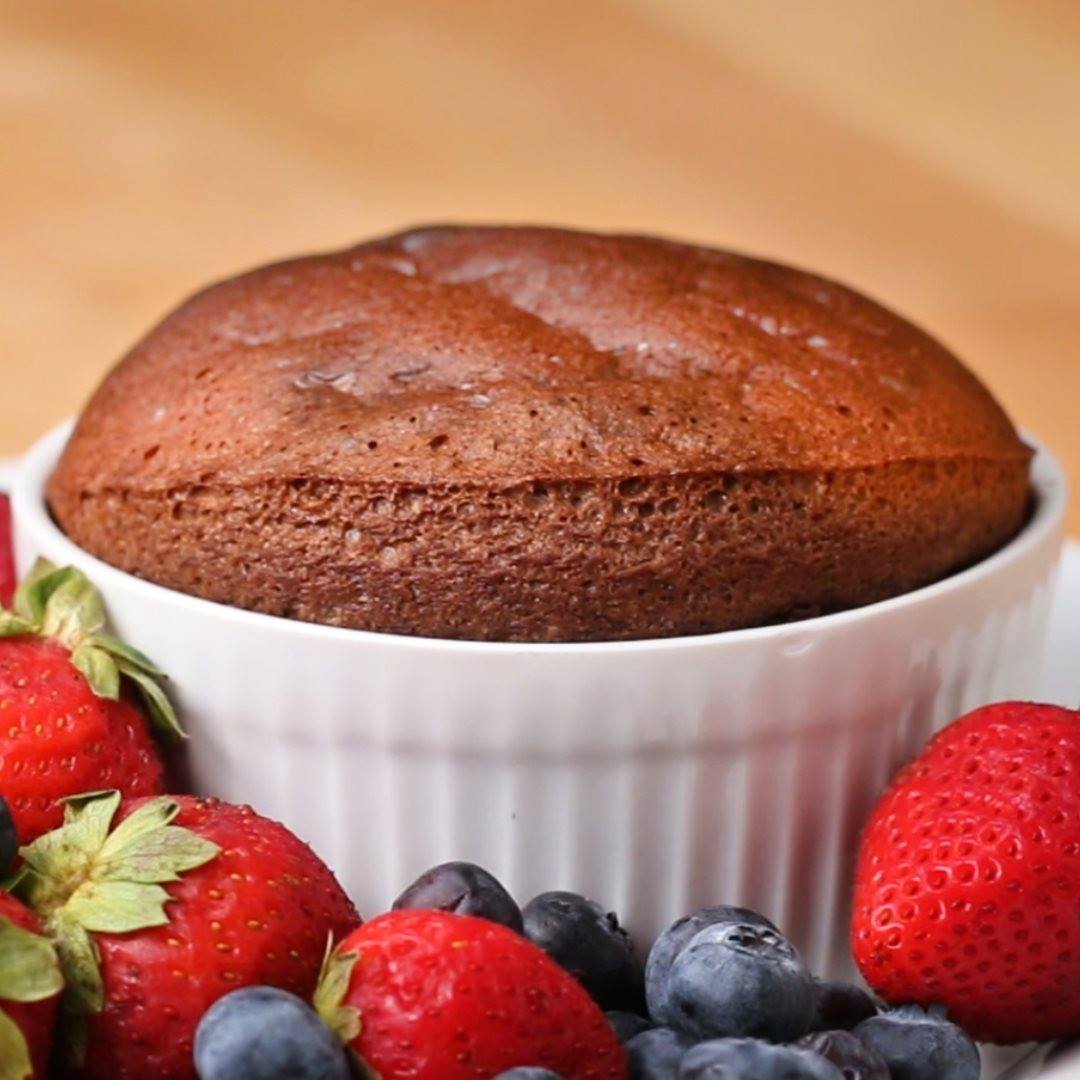
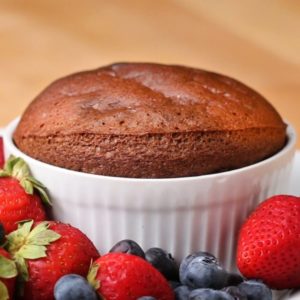
2-ingredient Chocolate Soufflé

2-ingredient Chocolate Soufflé
You can make this chocolate soufflé with only 2 ingredients ??
Author:
Cuisine: American
Recipe type: Dessert
Ingredients
  • ½ cup chocolate hazelnut spread (150 g)
  • 2 eggs
Instructions
  1. Preheat the oven to 375˚F (190˚C).
  2. Separate the egg yolks from the egg whites and place into two bowls.
  3. Mix the chocolate hazelnut spread into the bowl with the egg yolks.
  4. In the second bowl, whisk 2 egg whites until stiff peaks form.
  5. Fold ⅓ of the whipped egg whites into the chocolate/egg yolk mixture until fully incorporated. Add the remaining egg whites to the mixture and fold gently, but thoroughly, until the mixture is smooth.
  6. Pour the mixture into a greased ramekin. Clean the rims so the soufflé rises evenly, and bake for 15-17 minutes.
  7. Serve immediately.
  8. Enjoy!

Watch the recipe video here:

You can make this chocolate soufflé with only 2 ingredients ??FULL RECIPE: https://tasty.co/recipe/2-ingredient-chocolate-souffle

Posted by Proper Tasty on Saturday, August 10, 2019

Dessert

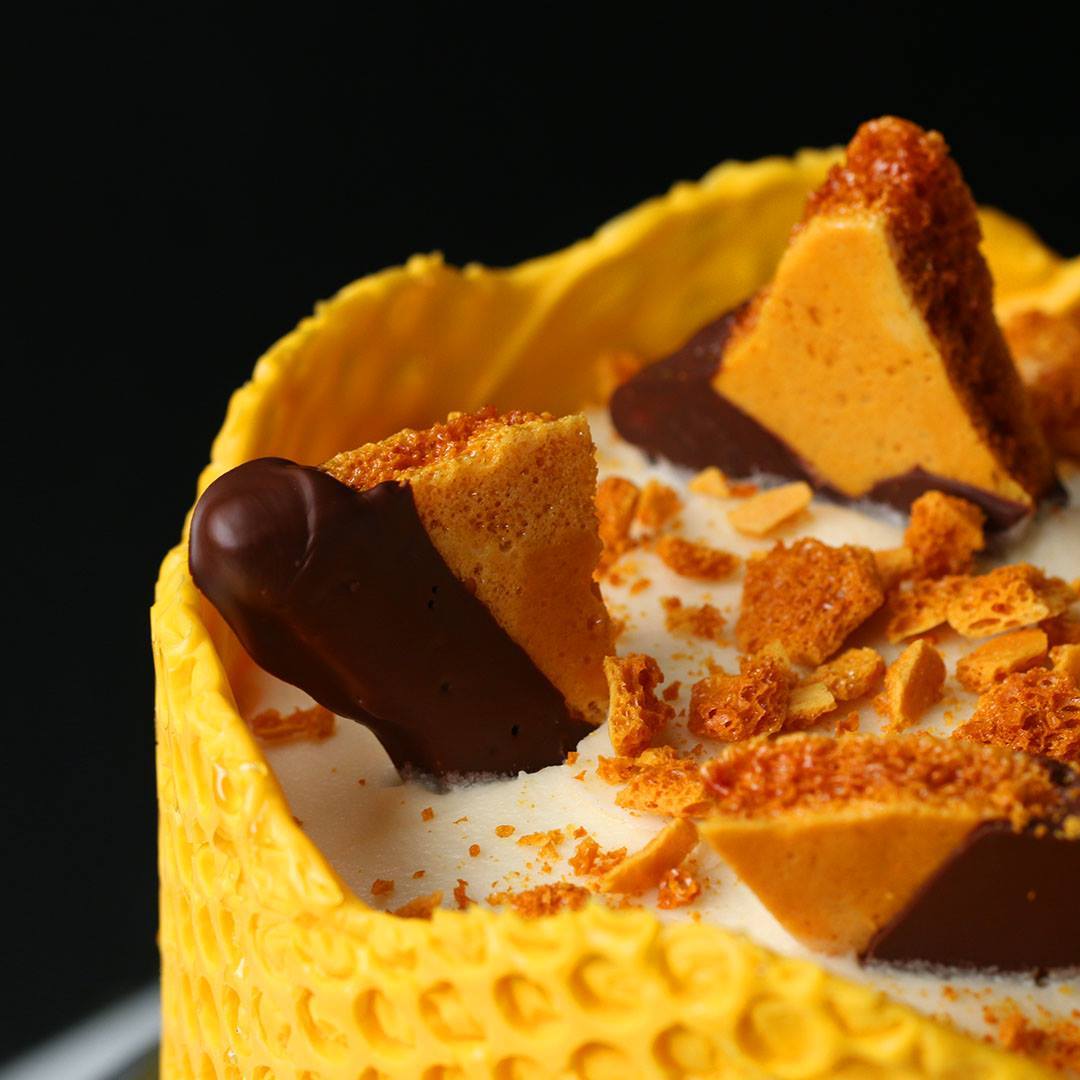
Bubble Wrap Honeycomb Cake

Bubble Wrap Honeycomb Cake
This cake is the bee’s knees! We used boxed cake mix to keep things simple, but feel free to get fancy by making your own. When melting the candy, make sure you’re on medium power. Microwaving on high power will cause the candy to seize. For a finishing touch, drizzle on extra honey and top with our homemade honeycomb. You and your guests won’t be able to stop buzzin’ about it!
Author:
Cuisine: American
Recipe type: Dessert
Ingredients
HONEY BUTTERCREAM FROSTING
  • 2 cups unsalted butter, softened (460 g)
  • 1 cup cream cheese, softened (225 g)
  • ½ cup honey (170 g)
  • 4 cups powdered sugar, sifted (480 g)
  • 1 pinch of salt
ASSEMBLY
  • 15.25 oz yellow cake mix, baked according to package instructions in 2 8-inch round cake pans, cooled completely and trimmed level (to remove domed tops) (430 g)
  • 15.25 oz chocolate cake mix, baked according to package instructions in 2 8-inch round cake pans, cooled completely and trimmed level (to remove domed tops) (430 g)
  • 24 oz yellow candy melts (680 g)
  • homemade honeycomb, to garnish
  • ⅓ cup crushed honeycomb, to garnish (115 g)
  • honey, for drizzling
SPECIAL EQUIPMENT
  • cake turntable
  • cardboard cake round
  • large offset spatula
  • bubble wrap, Clean, atleast 27x7 inch (70x18 cm) piece. 5/16 inch (1 cm) thick
Instructions
  1. Make the honey buttercream frosting: In a large bowl, cream together the butter and cream cheese with an electric mixer on medium speed until well combined, scraping down the sides of the bowl as needed. Add the honey and beat to incorporate. Add the powdered sugar and a pinch of salt and beat on low until mostly combined. Increase the mixer speed to high and beat for 3-5 minutes more, until the buttercream is light and fluffy. If the frosting feels soft, you can also refrigerate it for 10-15 minutes so it stiffens slightly.
  2. Assemble the cake: Place a cardboard cake round on a cake turntable and dab a small amount of frosting in the center of the cardboard round. Center one yellow cake layer over the dab of frosting, then evenly spread about ½ cup of buttercream on top with an offset spatula. Top with a layer of chocolate cake, then another ½ cup of frosting. Repeat with the remaining cake layers and frosting. After adding the final layer, lightly frost the entire cake to create a thin crumb coat.
  3. Refrigerate the cake for 15 minutes.
  4. Cover the chilled cake with the remaining frosting in an even layer. Return the cake to the refrigerator for 15 minutes more, to allow the frosting to stiffen.
  5. Take the cake out of the refrigerator. With the bubbles facing outward so they don’t get frosting on them, wrap the sheet of bubble wrap around the perimeter of the cake. Trim the wrap to form a collar that fits loosely around the cake and comes about 2 inches over the top edge. Remove the bubble wrap. Keep the cake in the refrigerator until you’re ready to finish the assembly.
  6. Make the yellow candy honeycomb: Place the candy melts in a medium microwave-safe bowl. Microwave on medium power (not on high, which will cause the candy to seize) in 30-second intervals, stirring in between, until the candy is fully melted and smooth.
  7. Place the bubble wrap bubble-side up on a flat surface. Pour most of the melted candy along the bottom two-thirds of the bubble wrap. Working quickly, use an offset spatula to spread the candy over the bubble wrap, leaving the top third empty. Once the bottom two-thirds are evenly covered, use a spatula to spread the candy in a wave pattern along the top edge. Let sit for 5 minutes. While you wait, remove the cake from the refrigerator and position it near the bubble wrap.
  8. After 5 minutes, test the bubble wrap by lifting up a corner. If it looks like it is beginning to harden and has a sheen to it but is still pliable, it is ready to be used. If the candy is still very loose and dripping, let sit for another 1-3 minutes, checking every minute.
  9. Once the candy has set, pick it up by the top corners and quickly wrap the side with the candy around the cake. Press it onto the cake so it sticks. Once attached, try to slowly peel one corner of bubble wrap off. It it sticks, let sit for 1-3 minutes, checking every minute, until ready to peel. If it begins to peel, continue slowly peeling off the bubble wrap until entirely removed. If the candy cracks while you are peeling off the bubble wrap, either remelt and repeat the process, or break it into large shards to decorate the outside of the cake. Refrigerate until serving time.
  10. Immediately before serving, top the cake with homemade honeycomb pieces and crushed honeycomb. Drizzle honey around the edges of the yellow candy honeycomb.
  11. Carefully slice the cake. Drizzle each piece with more honey before serving.
  12. Enjoy!

Watch the recipe video here:

This cake is the bee’s knees!Get the recipe: https://tasty.co/recipe/bubble-wrap-honeycomb-cake

Posted by Tasty on Friday, August 9, 2019

Dessert

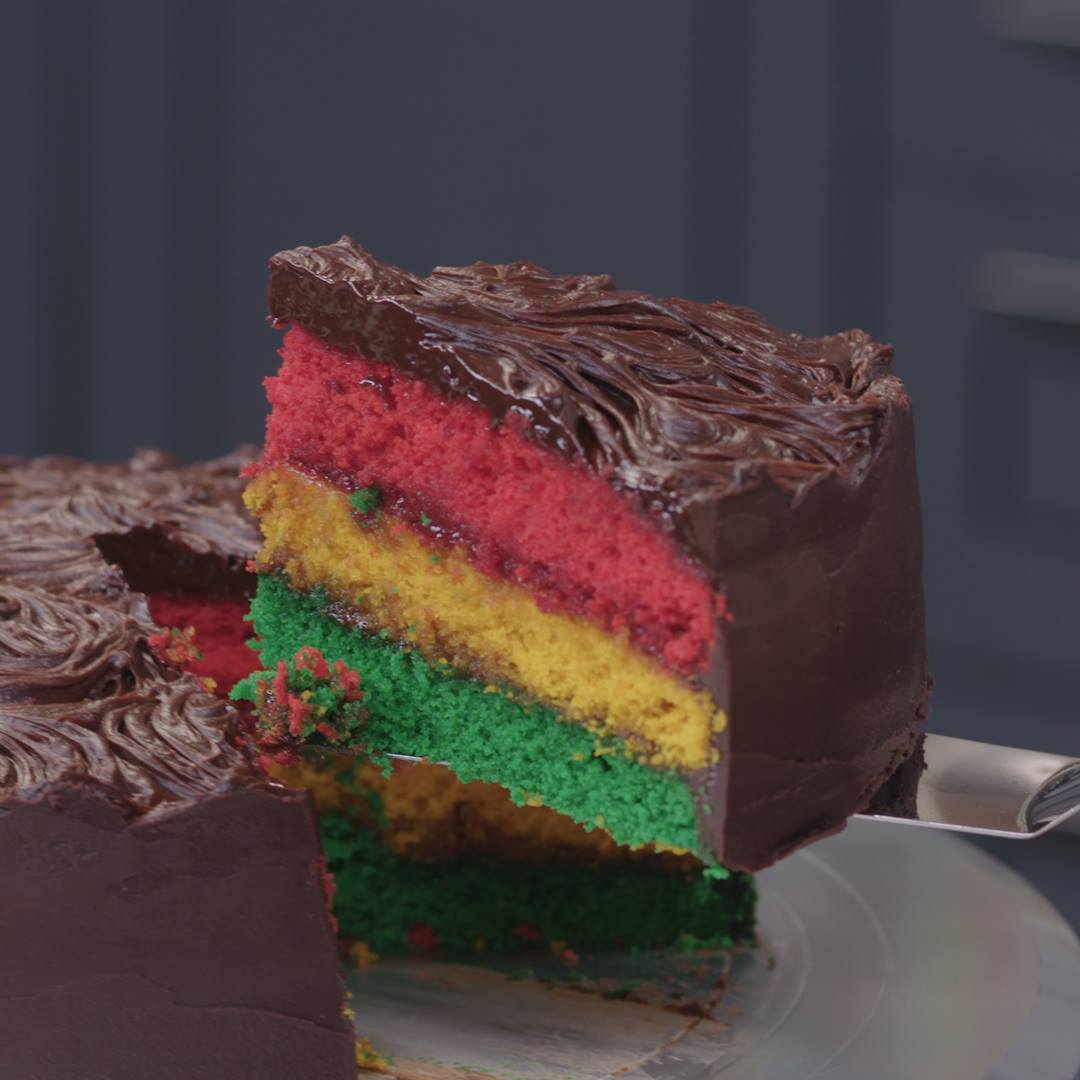
Italian Rainbow Cookie Cake

Italian Rainbow Cookie Cake
The Italian bakery cookie's iconic almond flavor and colorful stripes are on display in this giant-sized twist on the dessert. Store-bought almond pastry filling takes the place of almond paste here, offering extra richness and a superbly moist texture.
Author:
Cuisine: American
Recipe type: Dessert
Ingredients
  • 8 ounces bittersweet chocolate chips, finely chopped
  • ⅔ cup heavy cream
  • 1 teaspoon kosher salt
  • 16 tablespoons (2 sticks) unsalted butter, softened
  • 1½ cups all-purpose flour, plus more for the pans (see Cook's Note)
  • 1½ teaspoons baking powder
  • ¾ cup sugar
  • One 12-ounce can almond cake and pastry filling, such as Solo brand (1 cup plus 2 tablespoons)
  • 2 teaspoons fresh lemon juice
  • 1 teaspoon almond extract
  • ½ teaspoon vanilla extract
  • 3 large eggs, at room temperature
  • ½ teaspoon green liquid food coloring
  • ½ teaspoon yellow liquid food coloring
  • ¼ teaspoon red liquid food coloring
  • ½ cup seedless raspberry or apricot jam
Instructions
  1. Make the ganache: Place the chocolate in a medium bowl. Bring the cream and ½ teaspoon salt to a boil in a small saucepan, then pour over the chocolate. Shake the bowl so the chocolate is fully submerged in the cream, then let stand 1 minute. Using a small rubber spatula, slowly stir the chocolate and cream in the center of the bowl until it forms a shiny, smooth ganache. Cover the ganache with plastic wrap and let stand in a cool place in your kitchen until it is thick like pudding, but still pourable and spreadable, up to 2 hours. (See Cook's Note about timing.)
  2. Preheat the oven to 350 degrees F. Cut three 8-inch circles out of parchment paper. Using 2 tablespoons butter, grease and flour three 8-inch round cake pans and line each pan with a round of parchment paper.
  3. Whisk the flour, baking powder and the remaining ½ teaspoon salt in a medium bowl until evenly combined. Combine the sugar and remaining 14 tablespoons butter in the bowl of a mixer and beat on medium-high speed until pale and fluffy, about 3 minutes. Add the almond filling, lemon juice and almond and vanilla extracts and beat until smooth. Add the eggs one at a time, beating well after each addition. Add the flour mixture, then stir with a rubber spatula until the batter is combined.
  4. Divide the batter equally among 3 bowls. Add the green, yellow and red food colorings to the batter in their separate bowls, then stir the colorings. Scrape each batter into a prepared cake pan and smooth the top with a small offset spatula or rubber spatula. Bake until the cakes are lightly browned and a toothpick inserted in the middle of each cake comes out clean, 20 minutes.
  5. Transfer the cake pans to a wire rack and let cool 15 minutes. Invert the cakes onto the rack, remove the cake pans and discard the parchment paper rounds. Let the cakes cool completely, about 30 minutes. Flip the cakes right-side up and trim the top of each cake with a serrated knife so that it is flat, if necessary.
  6. Place the green cake on a cake stand and spread ¼ cup jam evenly over the top. Place the yellow cake over the green and spread the remaining ¼ cup jam evenly over the top. Place the pink layer on top, then loosely wrap the cake in plastic wrap and refrigerate for 30 minutes.
  7. Unwrap the cake and scrape the ganache on top (the ganache will be the consistency of thick pudding). Using an offset spatula, spread the ganache evenly over the side and top of the cake, leaving a slightly thicker layer on top. Once the ganache is smooth all around, drag the tines of a fork in a wavy pattern across the top of the entire cake. Refrigerate the cake to set the ganache, about 30 minutes. Allow the cake to come to room temperature before serving.
Cook’s Note
  1. When measuring flour, we spoon into a dry measuring cup and level off the excess. (Scooping directly from the bag compacts the flour, resulting in dry baked goods.) Our test kitchen used regular store-bought chocolate chips for this recipe. If you use a premium variety, the ganache may not need to stand for the full 2 hours.

Watch the recipe video here:

Wait until you see the inside of this Italian Rainbow Cookie Cake ???Get the recipe: https://foodtv.com/2Iu0YnS!

Posted by Food Network on Wednesday, August 7, 2019

Dessert

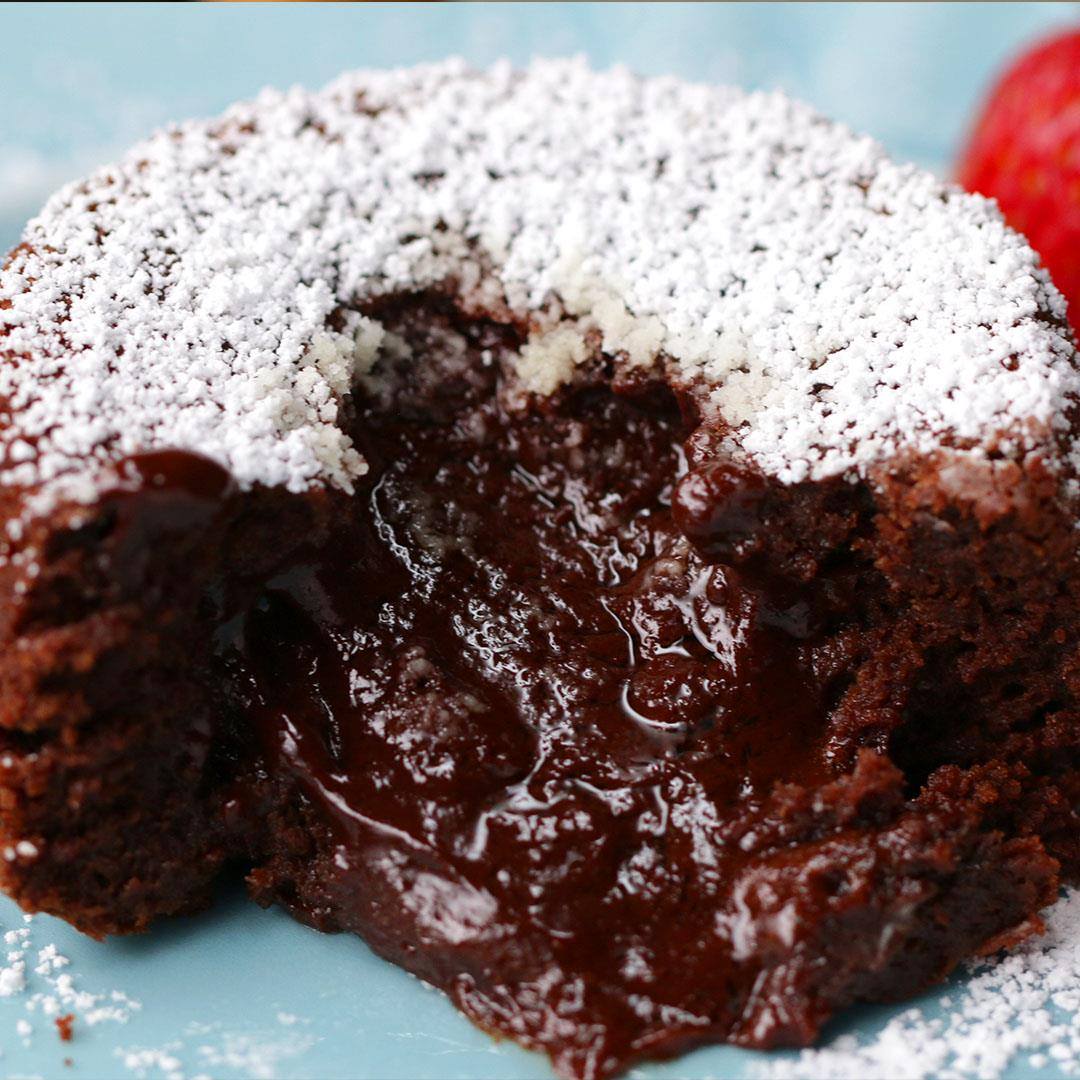
Chocolate Lava Cakes

Chocolate Lava Cakes
When you just really need that chocolate lava... ?
Author:
Cuisine: American
Recipe type: Dessert
Ingredients
  • 5 tablespoons unsalted butter, plus more, softened, for greasing ramekins
  • 2 tablespoons granulated sugar
  • ¼ cup heavy cream (60 mL)
  • 1 ¼ cups dark chocolate chip, divided (215 g)
  • 2 large eggs
  • 2 large egg yolks
  • ⅓ cup light brown sugar (75 g)
  • ½ teaspoon kosher salt
  • 1 teaspoon vanilla extract
  • 2 tablespoons all purpose flour
  • 1 cup whipped cream, for serving (240 mL)
  • 1 cup fresh berries, for serving (150 g)
Instructions
  1. Coat the inside of 4 1-cup (125 G) ramekins with softened butter, then sprinkle with the granulated sugar, tilting to coat completely. Set aside on a rimmed baking sheet.
  2. Heat the heavy cream in a small pot until boiling.
  3. Pour the boiling cream over ½ cup (120 ml) dark chocolate in a small bowl and let sit for 3 minutes. Stir until the chocolate is melted and smooth. Refrigerate for at least 30 minutes, or store in the freezer for up to 3 months.
  4. Preheat the oven to 425°F (220°C).
  5. In a small microwave-safe bowl, combine the remaining ¾ cup (170 G) chocolate and the butter. Microwave in 30-second intervals, stirring between, until completely melted.
  6. In a medium bowl, beat the eggs, egg yolks, brown sugar, salt, and vanilla with an electric hand mixer on medium-high speed until light and frothy, about 8 minutes.
  7. Gently fold the chocolate mixture into the egg mixture, being careful not to deflate the eggs. Add the flour and fold to incorporate.
  8. Divide half of the batter between the prepared ramekins. Add ½ tablespoon of the chilled ganache to the center of each ramekin, then scoop the remaining batter on top.
  9. Bake for 12 minutes, until the tops are set and the cakes begin to pull away from the sides of the ramekins.
  10. Let the lava cakes cool slightly, then invert onto plates. Dust with powdered sugar and garnish with berries. Serve immediately.
  11. Enjoy!

Watch the recipe video here:

When you just really need that chocolate lava… ?Recipe: https://tasty.co/recipe/chocolate-lava-cakes

Posted by Tasty on Tuesday, August 6, 2019

Dessert

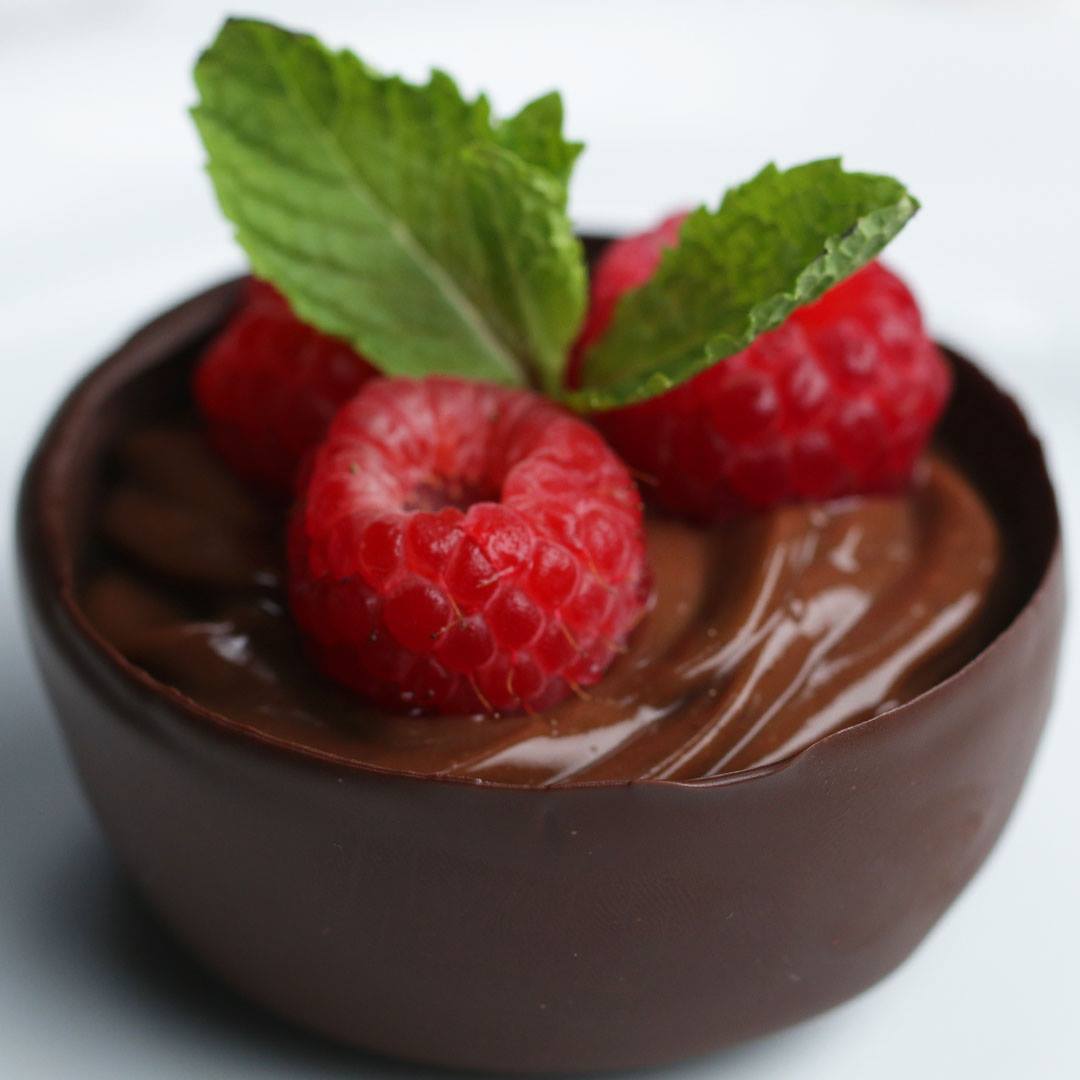
Easy Ice Cube Chocolate Cups

Easy Ice Cube Chocolate Cups
Author:
Cuisine: American
Recipe type: Dessert
Ingredients
  • water
  • 2 oz cream cheese, softened (55 g)
  • ¼ cup peanut butter (60 g)
  • 3 ½ teaspoons whole milk, divided
  • ½ teaspoon vanilla extract, divided
  • ¼ cup powdered sugar, plus 2 tablespoons, divided (40 g)
  • 1 pinch kosher salt
  • 1 ¼ cups whipped cream, divided (75 g)
  • 14 chocolate sandwich cookies, divided
  • 2.5 oz pudding mix, chocolate, 1 package (70 g)
  • 1 ½ cups whole milk, cold (360 mL)
  • 2 cups milk chocolate, melted (340 g)
  • 2 cups white chocolate, melted (340 g)
  • 2 cups dark chocolate, melted (340 g)
GARNISH
  • ¼ cup chopped nuts (30 g)
  • 4 mini peanut butter cups
  • 12 raspberries
  • fresh mint leaf
SPECIAL EQUIPMENT
  • 12 popsicle sticks
Instructions
  1. Please be aware, you have to place the ice cube right in the chocolate as soon as you're able to remove it from its slot otherwise it will start to melt and the chocolate will not adhere.
  2. Fill a 12-cup muffin tin with water.
  3. Place a popsicle stick into each muffin cup.
  4. Freeze until solid.
  5. In a medium bowl, whisk together the cream cheese, peanut butter, 1½ teaspoons milk, ¼ teaspoon vanilla, ¼ cup powdered sugar, and salt until smooth.
  6. Fold in ¼ cup of whipped cream with spatula. Set aside.
  7. Separate the cream from 12 chocolate sandwich cookies into a separate medium bowl.
  8. Add the remaining 2 tablespoons powdered sugar, remaining 2 teaspoons milk, and remaining ¼ teaspoon vanilla to the bowl with the cream filling. Whisk until well-combined.
  9. Fold in the remaining cup of whipped cream with a spatula. Set aside.
  10. Transfer the cookies to a zip-top bag and break into crumbs with a rolling pin. Set aside.
  11. In a small bowl, combine the chocolate pudding mix and cold milk. Whisk for 2 minutes, then let sit for 3 minutes, until the pudding thickens.
  12. Remove the muffin tin from the freezer. Give the ice a minute to melt down just enough to remove each ice mold from the muffin cups.
  13. Dip 4 of the ice discs into the melted milk chocolate, making sure not to fully submerge the ice disc. Set the chocolate-dipped ice discs onto a parchment-lined baking sheet or plate. Dip 4 of the ice discs in the melted white chocolate, and the remaining 4 discs in the melted dark chocolate.
  14. Once the chocolate has set, give the ice discs a minute to melt down slightly. Wiggle the ice disc out of the chocolate to reveal hollow chocolate cups.
  15. Pipe the peanut butter mousse into the milk chocolate cups. Top with chopped nuts and a mini peanut butter cup.
  16. Sprinkle chocolate sandwich cookie crumbs on the bottom of the white chocolate cups. Pipe the cookie cream filling on top of the crumbs. Garnish with more cookie crumbs and half of a chocolate sandwich cookie.
  17. Pipe the chocolate pudding mixture into the dark chocolate cups. Top each one with 3 raspberries and fresh mint leaves.
  18. Enjoy!

Watch the recipe video here:

These easy chocolate cups are like magic! ? Get the recipe: https://tasty.co/recipe/easy-ice-cube-chocolate-cups

Posted by BuzzFeed Food on Sunday, August 4, 2019

Dessert

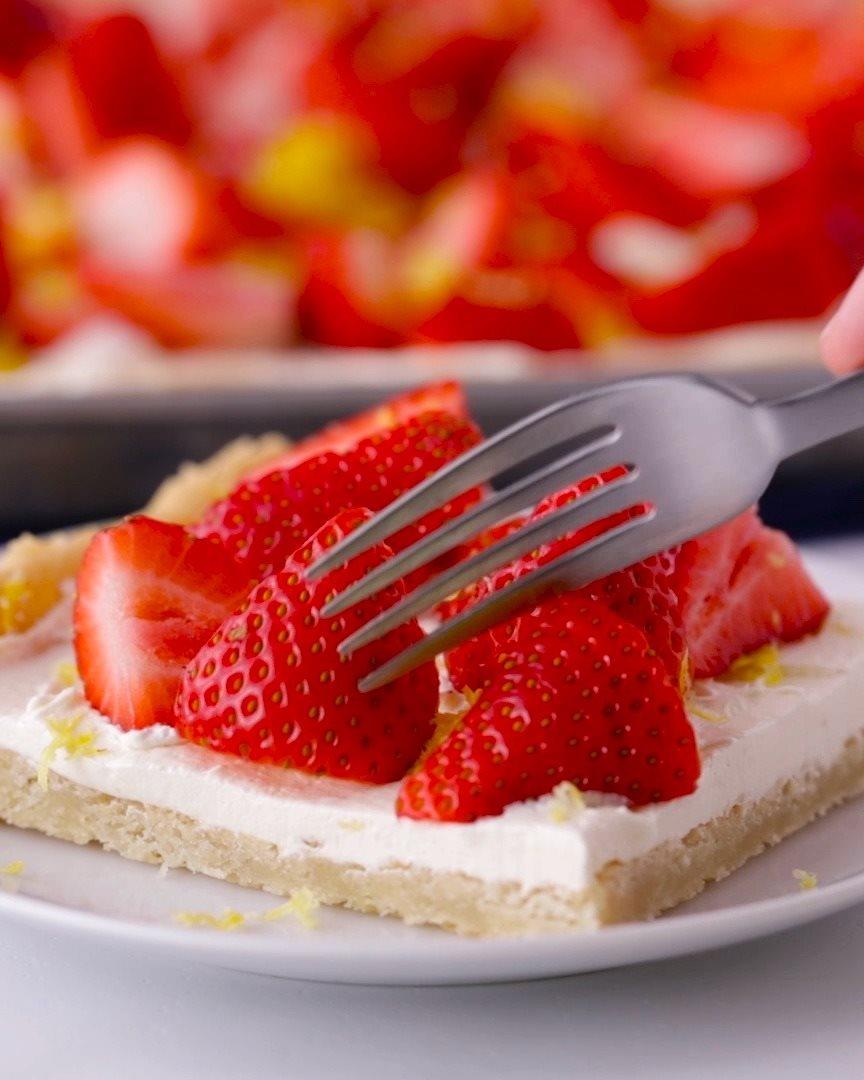
Strawberry-Lemonade Sugar Cookie Sheet-Pan Bars

Strawberry-Lemonade Sugar Cookie Sheet-Pan Bars
Fresh strawberries garnish a fluffy lemon curd topping that’s baked onto a sugar cookie crust for a sheet-pan dessert that tastes like springtime in every bite!
Author:
Cuisine: American
Recipe type: Dessert
Ingredients
  • 2 rolls (16.5 oz each) Pillsbury™ refrigerated sugar cookies
  • 1 jar (10 oz) lemon curd
  • 2 cups (from 8-oz container) Cool Whip™ frozen whipped topping, thawed
  • 4 icups chopped fresh strawberries (25 medium)
  • 1 tablespoon finely grated lemon zest, if desired
Instructions
  1. Heat oven to 350°F. Spray 15x10x1-inch pan with cooking spray. Break cookie dough into pieces; press evenly in bottom and up sides of pan.
  2. Bake 18 to 22 minutes or until golden brown. Cool completely, at least 1 hour.
  3. When ready to serve, in medium bowl, beat lemon curd and whipped topping with spoon until blended. Spread over baked crust. Top with chopped berries and lemon zest. Store loosely covered in refrigerator.

Watch the recipe video here:

This crowd-pleasing sheet-pan dessert tastes like summertime and happiness. Strawberry-Lemonade Sugar Cookie Sheet-Pan…

Posted by Pillsbury on Sunday, August 4, 2019

Dessert

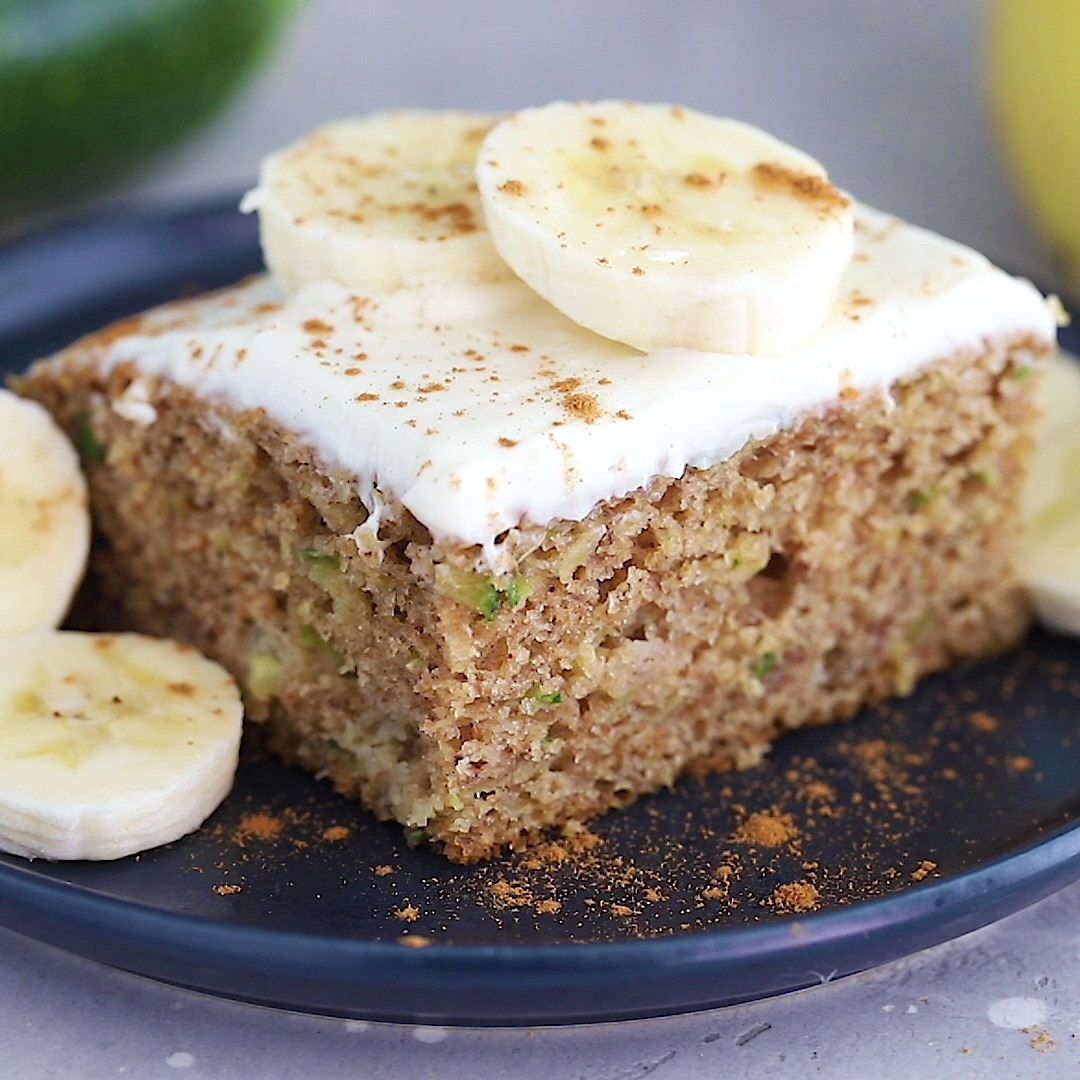
BANANA ZUCCHINI CAKE WITH CREAM CHEESE FROSTING

BANANA ZUCCHINI CAKE WITH CREAM CHEESE FROSTING
Fruity, moist and delicious, this banana and zucchini cake is crazy delicious!
Author:
Cuisine: American
Recipe type: Dessert
Ingredients
  • ¾ cup all-purpose flour
  • ¾ cup whole wheat flour
  • 2 teaspoons baking soda
  • 1 teaspoon salt
  • 1 teaspoon ground cinnamon
  • ¼ teaspoon nutmeg
  • ¼ teaspoon ground ginger
  • ⅔ cup honey
  • 2 tablespoons vegetable oil
  • 2 large eggs
  • 1 teaspoon vanilla extract
  • 2 cups mashed ripe bananas, from 5 small
  • 8 ounce zucchini, grated and squeezed well
  • 8 ounce can crushed pineapple in juice, drained well
FOR THE FROSTING:
  • 8 oz ⅓-less fat Philadelphia Cream Cheese
  • ¼ cup powdered sugar
  • 2 teaspoons vanilla extract
Instructions
  1. To prepare frosting, beat together cream cheese, powdered sugar and vanilla until smooth. Refrigerate until ready to use.
  2. Preheat oven to 350°F. Spray bottom of 13x9x2-inch nonstick metal pan with cooking spray.
  3. In a large bowl, combine flour, baking soda, salt, and spices; stir well with a whisk.
  4. In a medium bowl, combine honey, oil, eggs, and vanilla; stir well. Add zucchini, banana and pineapple; mix well.
  5. Fold wet ingredients with the dry ingredients and mix well with a spatula until combined.
  6. Spoon batter into the sheet pan.
  7. Bake at 350F for about 45 minutes, or until a wooden toothpick inserted in the center comes out clean.
  8. Cool completely on a wire rack.
  9. Spread frosting over the cake once cooled and cut into 16 pieces.

Watch the recipe video here:

Fruity, moist and delicious, this banana and zucchini cake is crazy delicious! 6 Freestyle Points • 172 Calorieshttps://www.skinnytaste.com/banana-zucchini-cake-with-cream-cheese-frosting/

Posted by Skinnytaste on Sunday, August 4, 2019