Showing 569 Result(s)
Main dish

Fudgy Black Cherry Brownies
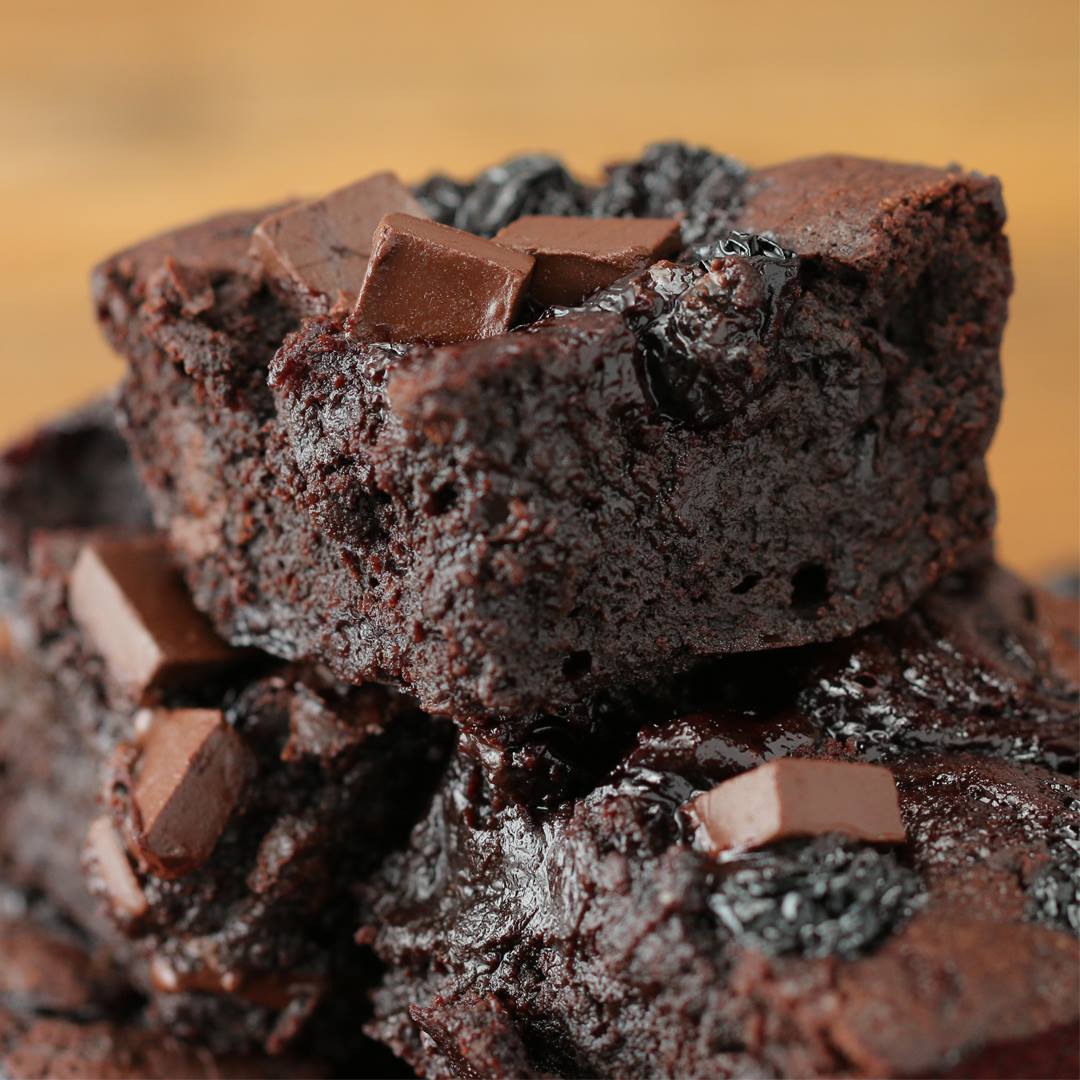
Fudgy Black Cherry Brownies
Makes 24 squares
Author:
Cuisine: American
Recipe type: Main dish
Ingredients
  • 10 ounces black cherries, fresh or frozen
  • 12 ounces REDD'S Black Cherry Ale
  • 10 tablespoons unsalted butter
  • 1¼ cups sugar
  • 1 cup dark cocoa powder
  • ¼ teaspoon salt
  • ½ teaspoon vanilla extract
  • 2 eggs
  • ½ cup flour
  • ½ cup dark chocolate chunks, chopped
Instructions
  1. Preheat oven to 325℉/160℃.
  2. Line an 8x8-inch baking pan with parchment paper.
  3. In a medium saucepan, bring cherries and REDD’S Black Cherry Ale to a rolling boil. Reduce heat and simmer for 25–30 minutes, stirring occasionally until almost all liquid has reduced. Set aside.
  4. In a medium mixing bowl, melt butter in the microwave until fully melted, add sugar and cocoa, then stir to combine. Mixture will be gritty.
  5. Add the eggs and stir together until fully incorporated.
  6. Fold in the vanilla and salt.
  7. Fold in flour gently. When flour is about 75% incorporated, add half of the cherry compote and ¼ cup of chocolate chunks. Stir until just fully mixed and no lumps remain.
  8. Pour batter into a lined pan and top with remaining cherry compote and chopped chocolate.
  9. Bake for 35–40 minutes. Brownies are done when the center just barely springs back in the middle.
  10. Enjoy!

Watch the recipe video here:

Fudgy Black Cherry Brownies

Fudgy Black Cherry BrowniesMake the ultimate brownies this fall with Redd’s Black Cherry Ale! #TogetherWeBeer

Posted by Tasty on Saturday, October 27, 2018
Main dish

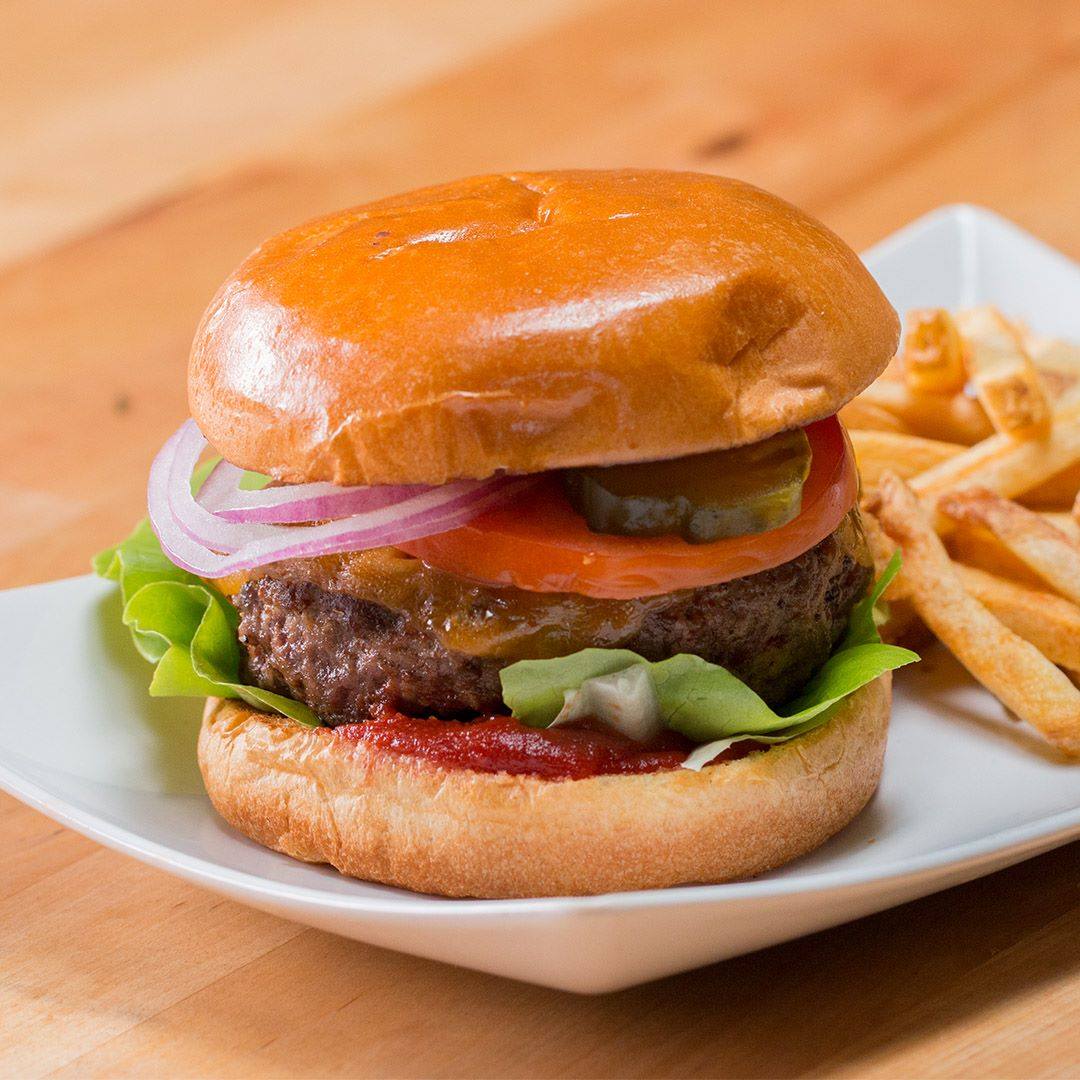
Bacon Cheddar Loaded Cheeseburger

Bacon Cheddar Loaded Cheeseburger
https://www.facebook.com/buzzfeedtasty/videos/2503202206599080/
Author:
Cuisine: American
Recipe type: Main dish
Ingredients
  • 5 strips bacon
  • 4 oz cream cheese, at room temperature (115 g)
  • ¼ cup green onion, thinly sliced (35 g)
  • 1 cup shredded sharp cheddar cheese (100 g)
  • 1 lb ground beef (455 g)
  • salt, to taste
  • pepper, to taste
  • 4 slices cheddar cheese
  • 4 hamburger buns, toasted
Instructions
  1. In a pan over medium-high heat, add the bacon, and cook until crispy. Transfer to a cutting board and roughly chop.
  2. In a bowl, add the bacon, cream cheese, green onions, and shredded cheddar. Mix well.
  3. Divide the ground beef into four even portions and shape into balls. Form a well into the center of each, large enough for the cheese mixture.
  4. Place a quarter of the cheese mixture into the center of each ball, and enclose inside the ground beef. Gently press each ball into a patty shape, and season both sides generously with salt and pepper.
  5. Heat a cast-iron pan over medium-high heat. Once hot, add the burgers and cook for 4-5 minutes on one side.
  6. Flip the burgers, and cook for 2 minutes. Add a slice of cheese on each burger and cook for an additional 2 minutes, until the burger is cooked through and the cheese is melted.
  7. Remove burgers from pan, and place on top a toasted burger bun. Top with condiments of your choice.
  8. Enjoy!

Watch the recipe video here:

Bacon-Cheddar–Loaded Cheeseburger

Would you make this loaded cheeseburger for a night in? ?Full Recipe: https://tasty.co/recipe/bacon-cheddar-loaded-cheeseburger

Posted by Tasty on Thursday, October 25, 2018

Main dish

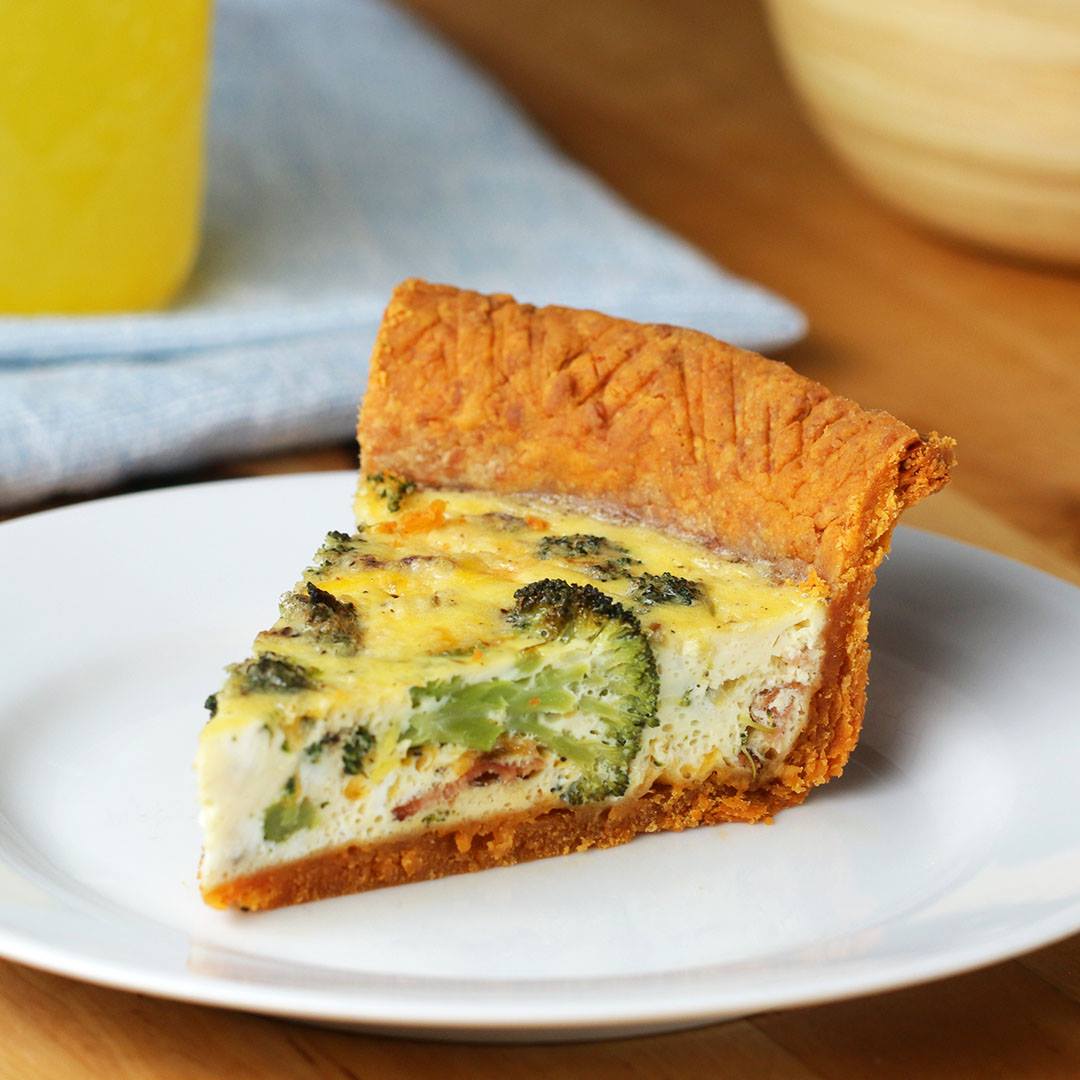
Cheddar-Crusted Bacon Broccoli Quiche

Cheddar-Crusted Bacon Broccoli Quiche
Saving this Cheddar-Crusted Bacon Broccoli Quiche for a perfect weekend brunch ?
Author:
Cuisine: American
Recipe type: Main dish
Ingredients
  • 2 ½ cups shredded cheddar cheese, divided (250 g)
  • 1 cup unsalted butter, 2 sticks, room temperature (230 g)
  • 2 cups all-purpose flour, plus more for dusting (250 g)
  • 1 tablespoon paprika
  • 1 tablespoon garlic powder
  • 2 ½ teaspoons salt, divided
  • 5 tablespoons ice water
  • 4 strips bacon
  • 2 cups small broccoli floret (300 g)
  • 6 large eggs
  • 1 cup milk (240 mL)
  • ½ teaspoon pepper
SPECIAL EQUIPMENT
  • pie weights, coffee beans, or dried beans
Instructions
  1. Preheat the oven to 350˚F (180˚C).
  2. Add 2 cups (200 g) of cheddar cheese and the butter to a large bowl. Mix to combine with an electric hand mixer or stand mixer.
  3. Add the flour, paprika, garlic powder, and 2 teaspoons salt and mix well. Add 3 tablespoons of ice water and mix. Add the remaining ice water 1 tablespoon at a time. The dough should hold together when pinched, but crumble apart if you break it up in your hand. If it seems too dry, add a bit more ice water.
  4. Transfer the dough to a clean surface and knead with your hands until it comes together. Shape the dough into a disc, then wrap in plastic wrap and chill in the refrigerator for 30 minutes.
  5. Lightly flour a clean surface and roll out the dough into a circle about ⅛ inch (8 mm) thick. Carefully transfer the crust to a 9½-inch (24-cm) glass pie dish.
  6. Trim the edges (save the trimmings to make crackers!). Poke holes in the bottom of the crust with a fork, then use the tines to crimp the edges. Line the dough with parchment paper and fill with pie weights.
  7. Bake for 30 minutes, until the edges are crisp.
  8. While the crust is baking, prepare the fillings. In a large skillet over medium-high heat, cook the bacon until crisp, 5-7 minutes. Using tongs, remove the bacon from the skillet and let drain on paper towels until cool enough to handle.
  9. Add the broccoli to the skillet and cook until lightly browned, about 5 minutes. Remove the pan from the heat.
  10. Chop the bacon.
  11. Remove the pie weights from the crust, then add the broccoli and chopped bacon to the center. Sprinkle with the remaining shredded cheddar cheese.
  12. In a medium bowl, lightly beat the eggs. Add the milk, remaining ½ teaspoon salt, and the pepper. Whisk to combine.
  13. Pour the egg mixture over the fillings in the crust.
  14. Bake for 35-40 minutes, or until the eggs are set and the top is lightly browned. Cover the edges with tinfoil if they are starting to burn.
  15. Let the quiche cool for 15 minutes before slicing and serving.
  16. Enjoy!

Watch the recipe video here:

Cheddar-Crusted Bacon Broccoli Quiche

Saving this Cheddar-Crusted Bacon Broccoli Quiche for a perfect weekend brunch ?Get The Recipe: https://tasty.co/recipe/cheddar-crusted-bacon-broccoli-quiche

Posted by Tasty on Thursday, October 25, 2018

Dessert

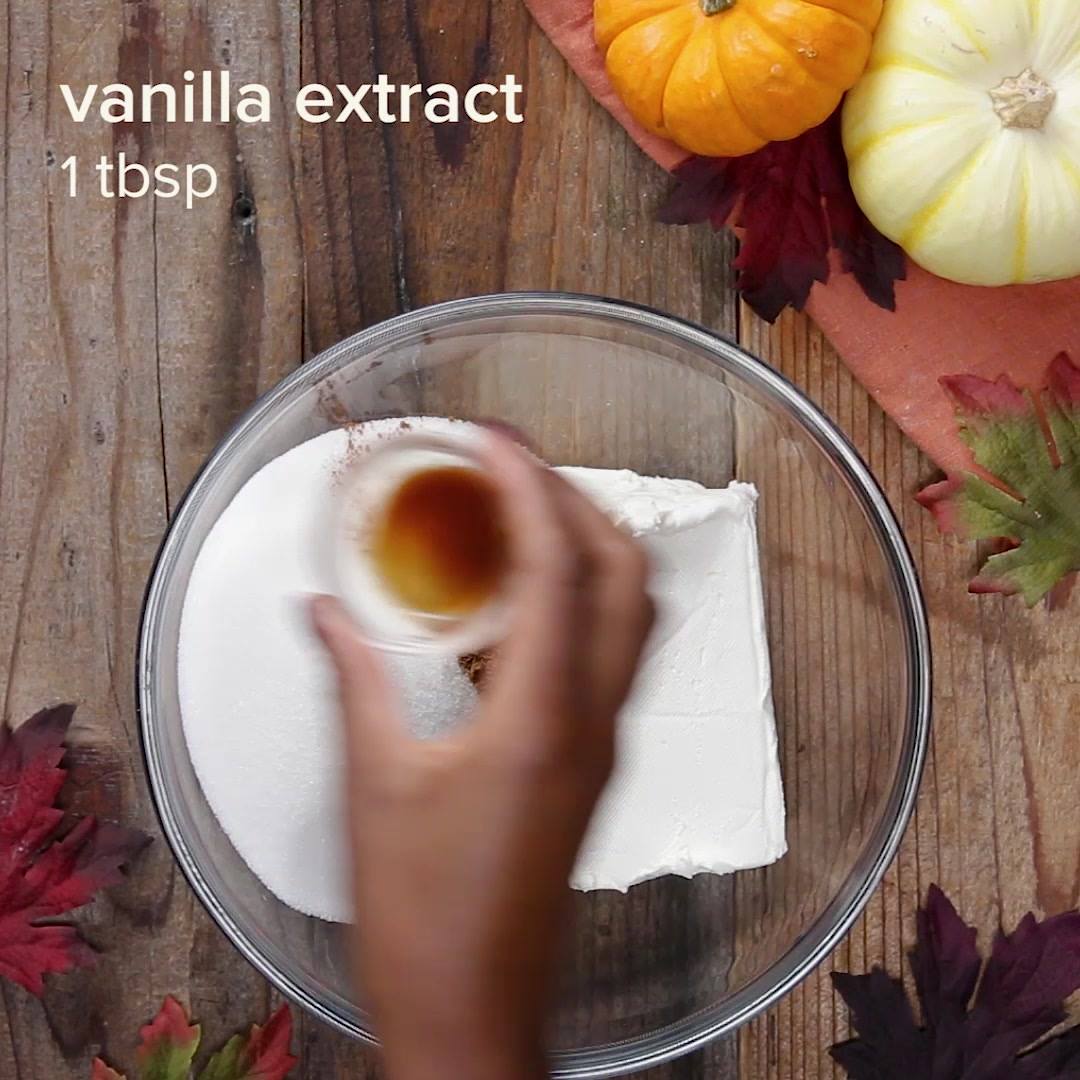
Pumpkin Bread-bottom Cheesecake

Pumpkin Bread-bottom Cheesecake
This pumpkin bread-bottom cheesecake is so delicious & beautiful! ✨
Author:
Cuisine: American
Recipe type: Dessert
Ingredients
  • PUMPKIN BREAD
  • 1 ¾ cups pumpkin puree (395 g)
  • 2 eggs
  • 1 cup sugar (200 g)
  • ¾ cup vegetable oil (180 mL)
  • 1 teaspoon vanilla extract
  • 2 ½ cups flour (310 g)
  • 2 teaspoons baking powder
  • 1 teaspoon baking soda
  • 1 tablespoon pumpkin pie spice
  • 1 teaspoon salt
CHEESECAKE
  • 24 oz cream cheese, at room temperature (680 g)
  • 1 cup sugar (200 g)
  • 1 teaspoon pumpkin spice
  • 1 teaspoon vanilla extract
  • 1 cup heavy whipping cream (240 mL)
Instructions
  1. Preheat oven to 350°F (180°C).
  2. In a large mixing bowl, whisk together pumpkin puree, eggs, sugar, vegetable oil, and vanilla until combined.
  3. Sift in the flour, baking powder, baking soda, pumpkin pie spice, and salt. Using a wooden spoon, mix together until just combined. Be careful to not overmix.
  4. Lightly coat a spring form pan with nonstick cooking spray, and pour batter into the pan, spreading an even layer.
  5. Bake for 35-45 minutes until center comes out clean when tested. Allow to cool completely in the pan.
  6. In a large mixing bowl, whisk together cream cheese, sugar, pumpkin spice, and vanilla extract.
  7. Add in whipping cream and beat for an additional 2-3 minutes.
  8. Spread cheesecake mixture onto the cooled pumpkin bread, spreading evenly. Cover and chill in the fridge for at least 4 hours before serving.
  9. Cut and serve.
  10. Enjoy!

Watch the recipe video here:

Pumpkin Bread-Bottom Cheesecake

This pumpkin bread-bottom cheesecake is so delicious & beautiful! ✨FULL RECIPE: https://tasty.co/recipe/pumpkin-bread-bottom-cheesecake

Posted by Tasty on Wednesday, October 24, 2018

Main dish

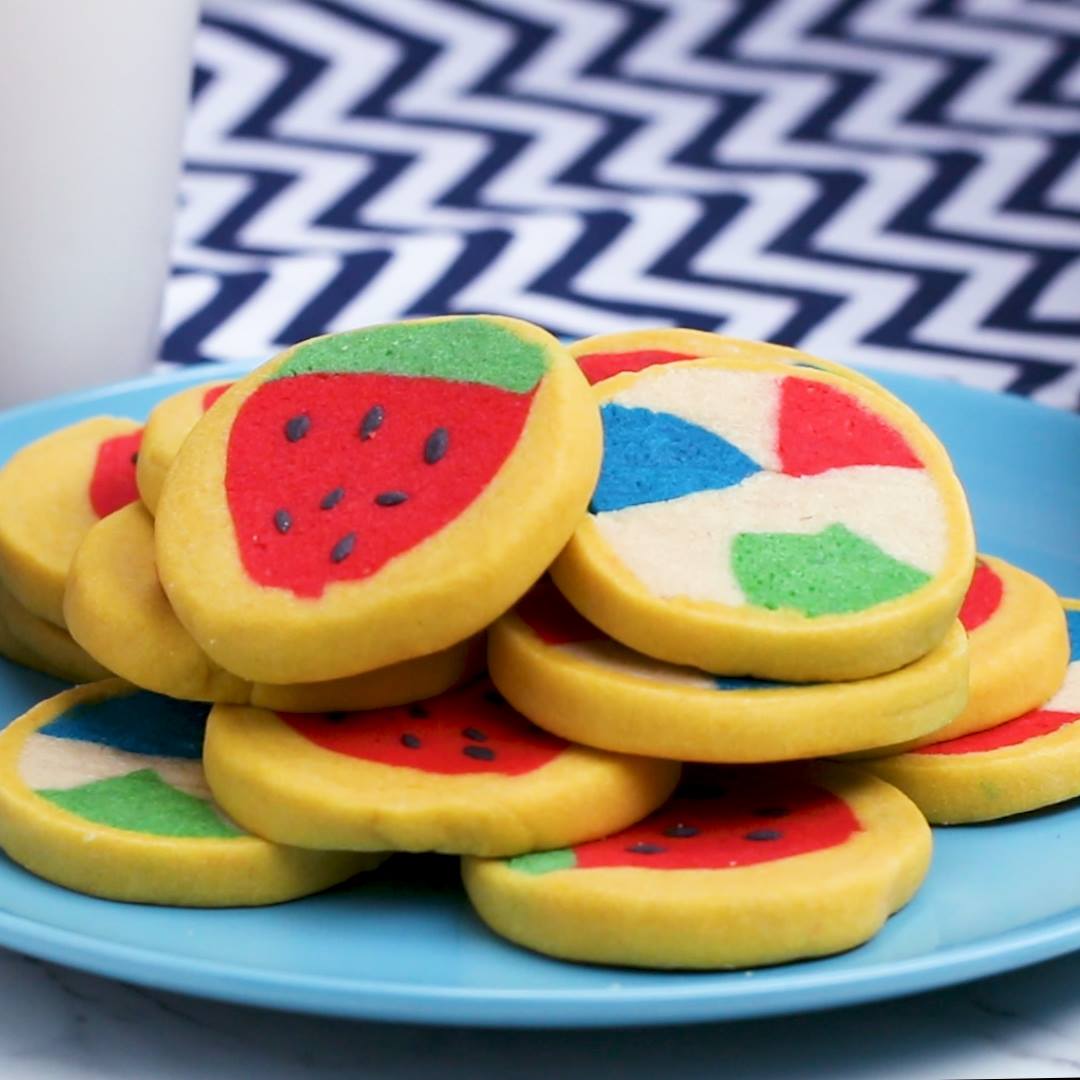
Double-Sided Sugar Cookies

Double-Sided Sugar Cookies
Author:
Cuisine: American
Recipe type: Main dish
Ingredients
  • 1 ½ cups unsalted butter, 3 sticks, softened (345 g)
  • 3 ¾ cups powdered sugar (450 g)
  • 1 ½ teaspoons vanilla extract
  • 4 large eggs
  • 5 cups all-purpose flour (625 g)
  • ½ teaspoon salt
  • 10 drops yellow food coloring
  • 10 drops red food coloring
  • 10 drops blue food coloring
  • 5 drops black food coloring
  • 10 drops green food coloring
SPECIAL EQUIPMENT
  • electric hand mixer
  • food-safe glove
Instructions
  1. Add the butter, powdered sugar, and vanilla to a large bowl. Beat with an electric hand mixer on low speed until smooth and creamy.
  2. Add the eggs 1 at a time and beat on medium speed to incorporate, scraping down the sides of the bowl with a spatula halfway through.
  3. Add the salt and incorporate the flour in 3 additions, scraping down the sides of the bowl as needed, until a dough forms.
  4. Turn the dough out onto a clean, floured surface and form into a ball. Cut the ball of dough in half. Cut one of the halves in half, and the other half into thirds, so you have 5 pieces total. Take one of the larger pieces and cover the rest with plastic wrap so they don’t dry out.
  5. Wearing gloves, add the yellow food coloring and knead into the dough until fully incorporated. Cover and set aside each piece of dough after working the color in. Dye the other large piece with red food coloring. Set aside one of the smaller pieces to remain plain. Remove a 1-tablespoon chunk from 1 of the 2 remaining pieces and dye with black food coloring. Dye the rest of that piece blue. Dye the remaining piece of dough green.
  6. Roll out 1 tablespoon of the the plain dough into a 6-inch-long (15-cm) rope. Roll the rest into a 6-inch-long (15-cm) log and cut crosswise into thirds. Shape the logs into 6-inch-long (15-cm) triangle wedges.
  7. Roll a third of the red dough into a 6-inch-long (15-cm) triangle wedge.
  8. Roll the blue piece into a 6-inch-long (15-cm) triangle wedge. Roll half of the green dough into a 6-inch-long (15-cm) triangle wedge.
  9. Form a beach ball shape by placing the plain rope in the middle and alternating the plain dough triangle wedges with the colored triangle wedges. Roll together to fuse, then wrap tightly in plastic wrap and chill in the refrigerator for 30 minutes while you assemble the other shape.
  10. Roll the remaining red dough into a 6-inch-long (15-cm) log, then shape into a triangle wedge.
  11. Roll the remaining green dough into a 6-inch-long (15-cm) log, then flatten.
  12. Place the red triangle on top and trim the edges with a bench scraper or knife.
  13. Cut the yellow dough in half. Set aside one half, then cut the other half in half again and roll into 2 6-inch-long (15-cm) logs and flatten slightly. Place the yellow pieces over each exposed side of the red dough, then pinch the yellow and green dough together to completely cover the red. Roll together to fuse, then wrap tightly in plastic wrap and chill in the refrigerator for 30 minutes.
  14. Use a ruler and a knife to score ¼-inch (6 mm) marks across both chilled logs. Cut into slices with a sharp knife, cleaning the knife after each slice, if necessary.
  15. Roll out the rest of the yellow dough to make a 6-inch (15-cm) by 12-inch (30-cm) rectangle.
  16. Build a single dough log by stacking alternating watermelon slices and beach ball slices over the center of the yellow dough. Wrap the yellow dough around the log, roll together to fuse, then wrap tightly in plastic wrap and chill in the refrigerator for 30 minutes.
  17. Preheat the oven to 300˚F (150˚C). Line a baking sheet with parchment paper.
  18. Use a ruler and a knife to score ¼-inch (6 mm) marks across the chilled dough. Cut into slices with a sharp knife, cleaning the knife after each slice, if necessary. Each slice should have a beach ball side and a strawberry side.
  19. Set the cookies on the prepared baking sheet, strawberry-side up. Break off tiny pieces of the black dough, roll into seeds, and press onto the strawberries.
  20. Bake the cookies for 10-12 minutes, or just until they begin to start turning golden brown. Cool on a wire rack for 5-10 minutes before serving.
  21. Enjoy!

Watch the recipe video here:

Double-Sided Slice & Bake Cookies

Whichever side you choose, it's bound to be delicious ?Get the recipe: https://tasty.co/recipe/double-sided-sugar-cookies

Posted by Tasty on Wednesday, October 24, 2018

Main dish

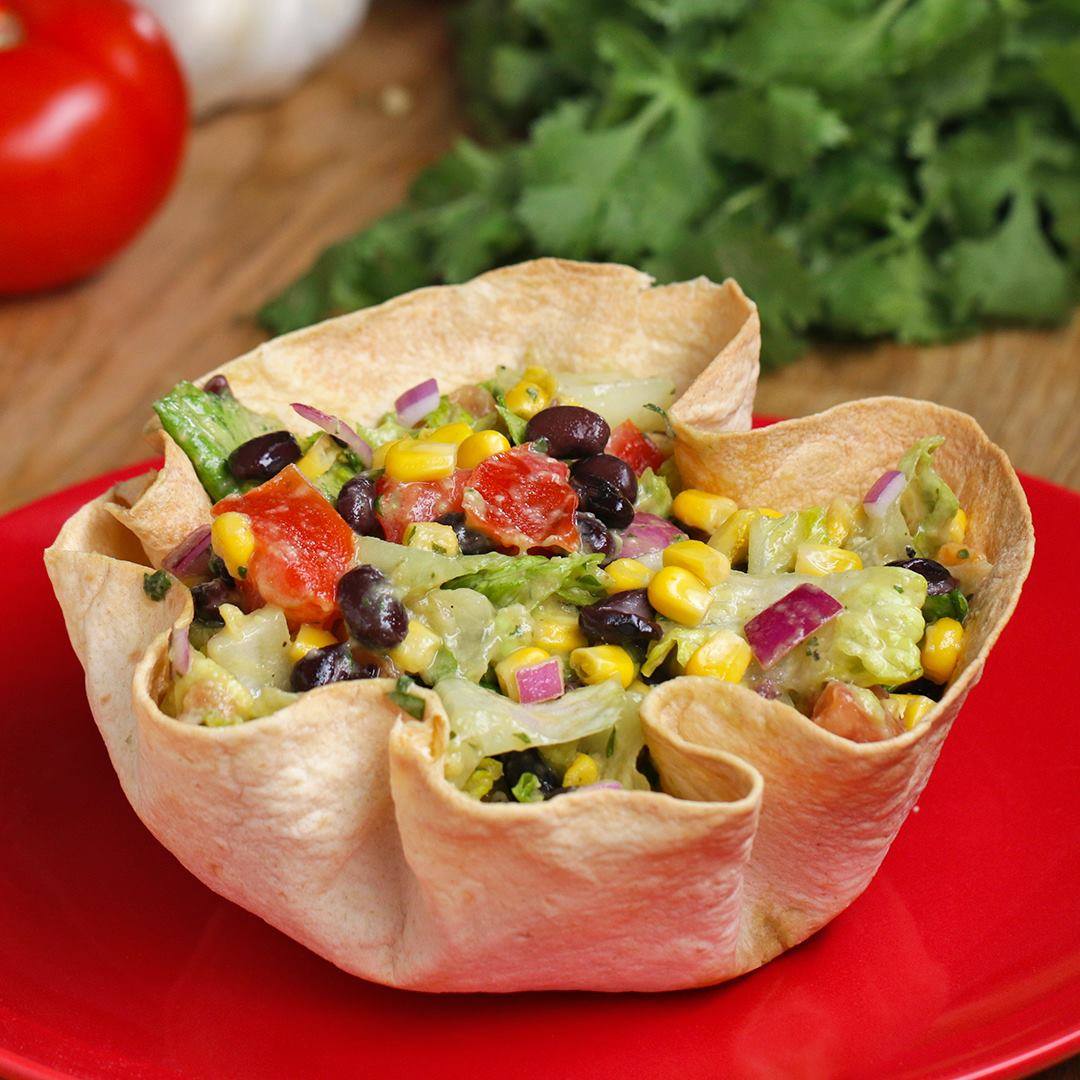
Tortilla Bowl Southwestern Salad

Tortilla Bowl Southwestern Salad
Author:
Cuisine: American
Recipe type: Main dish
Ingredients
  • 4 teaspoons vegetable oil
  • 4 large flour tortillas
  • 2 romaine lettuce hearts
  • 2 tomatoes
  • ½ red onion
  • 2 avocados
  • 1 cup corn, canned, rinsed and drained (175 g)
  • 1 cup black beans, canned, rinsed and drained (170 g)
  • ¼ cup olive oil (60 mL)
  • ¼ cup lime juice (60 mL)
  • 1 clove garlic, minced
  • ⅛ teaspoon cumin
  • ½ teaspoon red pepper flakes
  • 3 tablespoons fresh cilantro, chopped
  • ½ teaspoon salt
  • ½ teaspoon pepper
Instructions
  1. Preheat the oven to 350°F (180°C).
  2. Pour the vegetable oil (1 teaspoon per bowl) into medium (1.2 quart) oven-proof bowls and rub around to coat the surface. Press each tortilla into a greased bowl.
  3. Bake for about 10 minutes, until golden brown. Let the tortilla bowls cool.
  4. Make 3 cuts lengthwise on each of the romaine hearts, remove the stems, and chop into smaller pieces. Rinse, drain, and place in a large salad bowl.
  5. Dice the tomatoes and add them to the bowl with the romaine.
  6. Dice the onion and add it to the salad.
  7. Cut the avocados in half, remove the pits, and dice. Add to the salad.
  8. Add the corn and black beans.
  9. In a small bowl or liquid measuring cup, combine the olive oil, lime juice, garlic, cumin, red pepper flakes, cilantro, salt, and pepper. Mix well.
  10. Pour the dressing over the salad and toss well.
  11. Fill each tortilla bowl with the salad.
  12. Enjoy!

Watch the recipe video here:

Tortilla Bowl Southwestern Salad

This tortilla southwestern salad is all you'll taco'bout ?Get The Full Recipe: https://tasty.co/recipe/tortilla-bowl-southwestern-salad

Posted by Tasty on Tuesday, October 23, 2018

Main dish

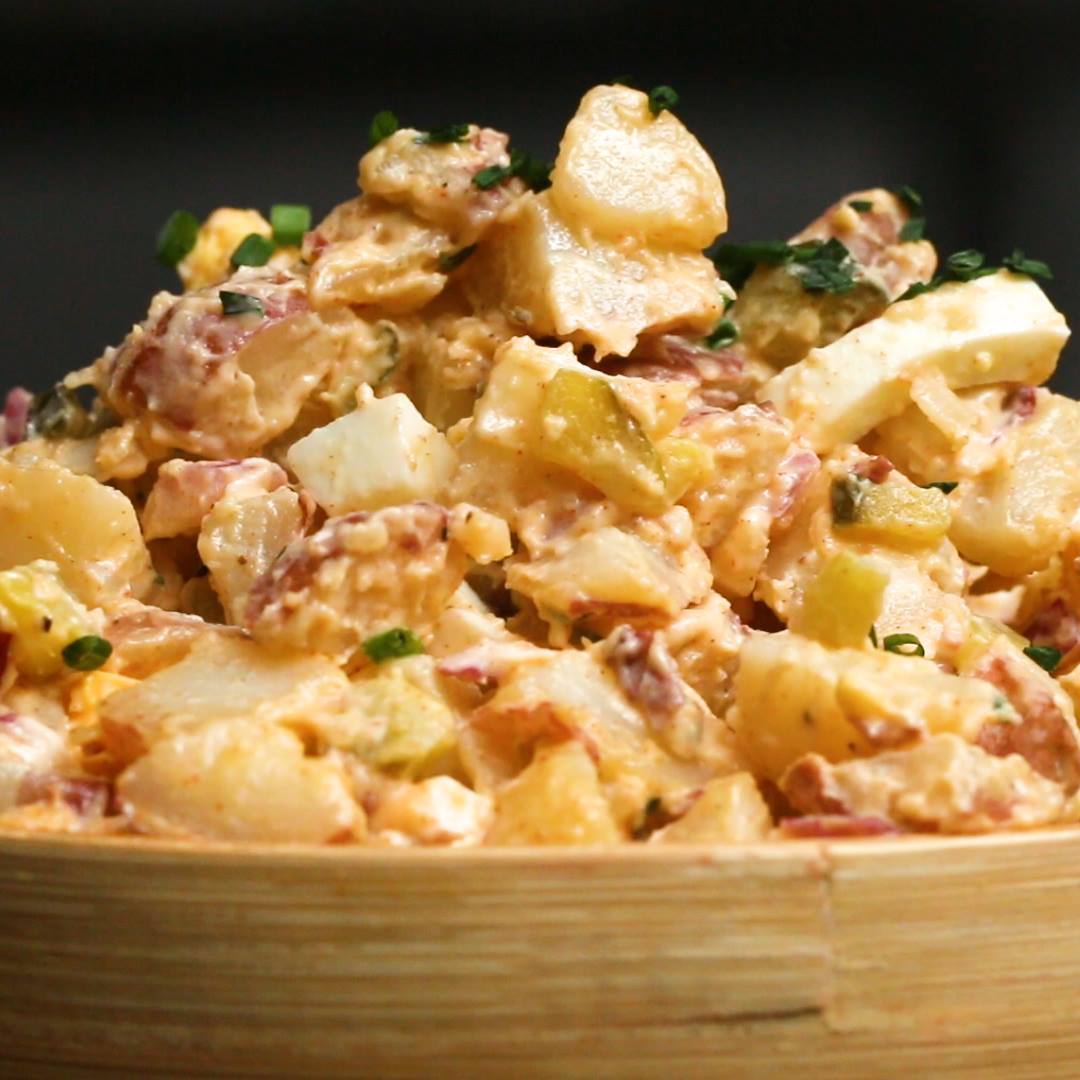
Hearty Potato Salad

Hearty Potato Salad
Hearty Potato Salad
Author:
Cuisine: American
Recipe type: Main dish
Ingredients
  • 1 ½ lb small red potato, cleaned and unpeeled (680 g)
  • fine sea salt, to taste
  • ½ cup mayonnaise (120 g)
  • ½ lemon, juiced
  • 2 teaspoons dijon mustard
  • ¼ cup red onion, finely chopped (75 g)
  • 2 hard-boiled eggs, coarsely chopped
  • ¼ teaspoon smoked paprika
  • freshly ground black pepper, to taste
  • ⅓ cup dill pickle, coarsely chopped (50 g)
  • 2 tablespoons chives, finely chopped, plus more for garnish
Instructions
  1. Place the potatoes in a large pot with enough water to cover them by 2 inches (5 cm), cover, and bring to a boil over high heat.
  2. Once boiling, season with salt, reduce the heat to medium, and cook until the potatoes are tender, 25-30 minutes. Drain and set aside to cool.
  3. In a large bowl, whisk together the mayonnaise, lemon juice, Dijon mustard, and paprika. Season with ½ teaspoon of salt and ½ teaspoon of pepper.
  4. Dice the potatoes and transfer to a separate large bowl, along with the onion, eggs, pickles, and chives. Season with salt and pepper to taste. Pour the sauce over the potatoes and toss to coat evenly. Sprinkle with chopped chives, for garnish.
  5. Enjoy!

Watch the recipe video here:

Hearty Potato Salad

This hearty potato salad is so delicious! ?FULL RECIPE: https://tasty.co/recipe/hearty-potato-salad

Posted by Tasty on Tuesday, October 23, 2018

Main dish

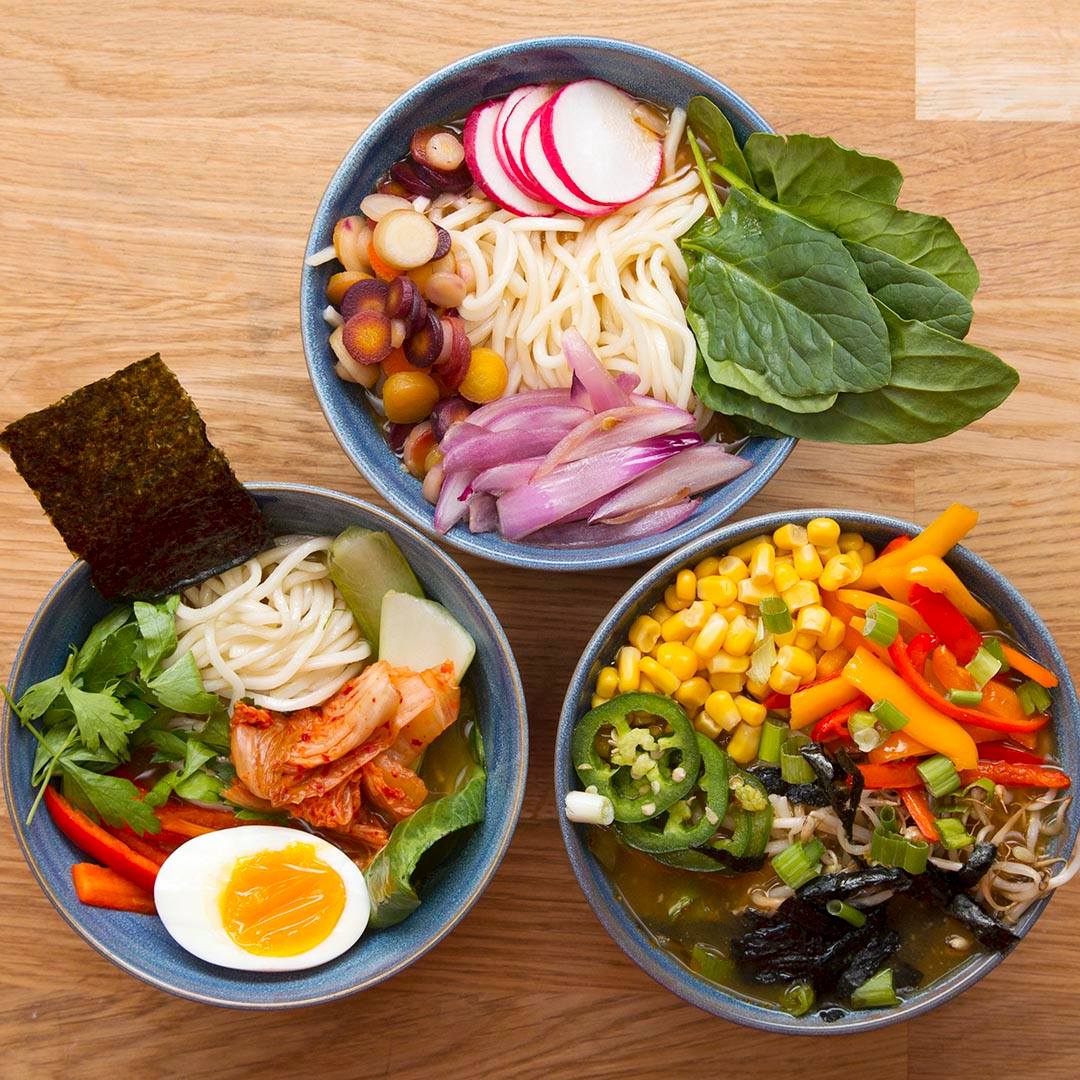
Ramen Any Vegan or Vegetarian Will Love

Ramen Any Vegan or Vegetarian Will Love
Mmmhmm.
Author:
Cuisine: American
Recipe type: Main dish
Ingredients
  • 1 tablespoon oil
  • 1 teaspoon sesame oil
  • 1 tablespoon ginger, minced
  • 6 cloves garlic, minced
  • 1 onion, diced
  • 6 cups vegetable stock
  • 1 cup water
  • 1 cup shiitake mushrooms, stems removed and sliced
  • 1 tablespoon soy sauce
  • 1 teaspoon miso paste
  • Ramen noodles
Toppings
  • Bok choy, sautéed
  • Peppers, sliced and sautéed
  • Parsley
  • Kimchi
  • Soft-boiled egg
  • Nori
  • Rainbow carrots, diced and sautéed
  • Radishes, sliced
  • Onions, sliced and sautéed
  • Spinach
  • Bean sprouts, sautéed
  • Corn
  • Jalapeños, sliced and sautéed
  • Green onions, sliced
Instructions
  1. # In a large pot or Dutch oven, heat the olive oil over medium heat. Add the garlic, ginger, and onions and sauté until onions become translucent.
  2. # Add vegetable stock, water, shiitake mushrooms, and soy sauce. Stir and simmer for at least 45 minutes, up to 3 hours. The longer you simmer, the more flavorful the broth will become.
  3. # Uncover the pot, add the miso paste, and stir.
  4. # Ladle the broth into a bowl and add noodles and toppings of your choice.
  5. # Enjoy!

Watch the recipe video here:

Ramen Any Vegan or Vegetarian Will Love

Ramen lovers will fall for this vegetarian or vegan take on the delicious soup ??FULL RECIPE: http://bzfd.it/2sCs2Wk

Posted by Tasty on Tuesday, October 23, 2018

Main dish

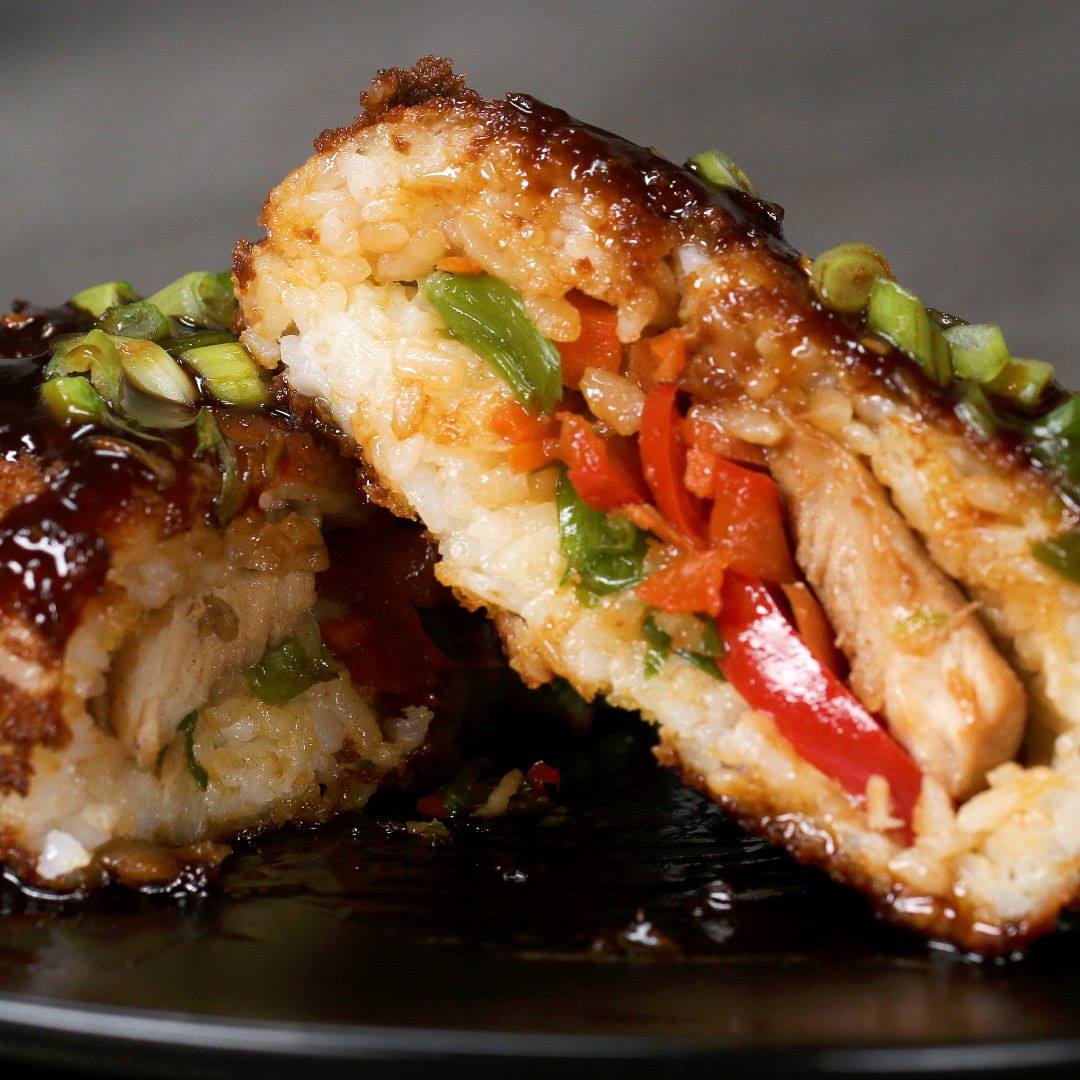
Crispy Chicken Teriyaki Rice Balls

Crispy Chicken Teriyaki Rice Balls
Author:
Cuisine: American
Recipe type: Main dish
Ingredients
  • 1 lb boneless, skinless chicken breast (455 g)
  • salt, to taste
  • white pepper, to taste
  • 2 tablespoons water
  • 1 ½ teaspoons cornstarch
  • ¼ cup soy sauce (60 g)
  • 2 tablespoons brown sugar
  • 1 teaspoon fresh ginger, minced
  • 1 teaspoon garlic, minced
  • 1 tablespoon honey
  • 1 teaspoon sesame oil
  • 1 tablespoon mirin
  • 2 tablespoons cooking oil
  • 1 cup bell pepper, julienned (100 g)
  • 1 cup carrot, julienned (120 g)
  • 4 cups short grain rice, cooked (800 g)
  • 3 eggs, beaten
  • 2 cups panko breadcrumbs (100 g)
  • 1 cup scallion, thinly sliced (100 g)
Instructions
  1. In a large measuring cup, combine water and cornstarch. Stir until combined and add soy sauce, brown sugar, ginger, garlic, honey, sesame oil, and mirin. Mix well.
  2. Season sliced chicken breast with salt and pepper, then pour ¼ cup (60 ml) of the sauce over the sliced chicken just until covered, and set aside. Mix the sauce with the sliced chicken, cover, and marinate in the refrigerator for at least 30 minutes.
  3. In a large skillet over medium-high heat, pour the rest of the sauce and stir occasionally as it comes to a boil. Once boiling, reduce heat to low and simmer for 10 minutes, or until the sauce has thickened. Set aside in a bowl.
  4. In the same skillet, add 1 tablespoon cooking oil and raise heat back to medium-high. Place sliced chicken pieces in the pan and cook for 3 minutes, flip, and cook an additional 3 minutes. Pour 1 tablespoon of the reduced sauce over the chicken and stir. Remove from the pan and set aside.
  5. Add the remaining cooking oil into the skillet and add the julienned vegetables. Season with salt and white pepper, and cook 3-4 minutes or until vegetables have softened. Add back the chicken and gradually add just enough sauce to coat the chicken and vegetables.
  6. Take ⅓ cup (65 g) of cooked rice and flatten out on a piece of plastic wrap. Layer the cooked chicken and vegetables in the center of the rice and wrap the rice around the fillings. Form into a square shape and repeat with the remainder of the rice and filling. Chill rice balls in the refrigerator for 30 minutes.
  7. Dip the rice ball in beaten eggs, then coat with panko. Shake off any excess bread crumbs.
  8. Heat ½ inch (1 cm) oil in a skillet to 350˚F (180˚C) and fry for 3 minutes on each side or until golden and crispy. Move to a cooling rack, and season with salt.
  9. Cut in half and serve with the remaining sauce for dipping.
  10. Enjoy!

Watch the recipe video here:

Crispy Chicken Teriyaki Rice Balls

These crispy chicken teriyaki rice balls are seriously delicious! ??FULL RECIPE: https://tasty.co/recipe/crispy-chicken-teriyaki-rice-balls

Posted by Tasty on Tuesday, October 23, 2018

Main dish

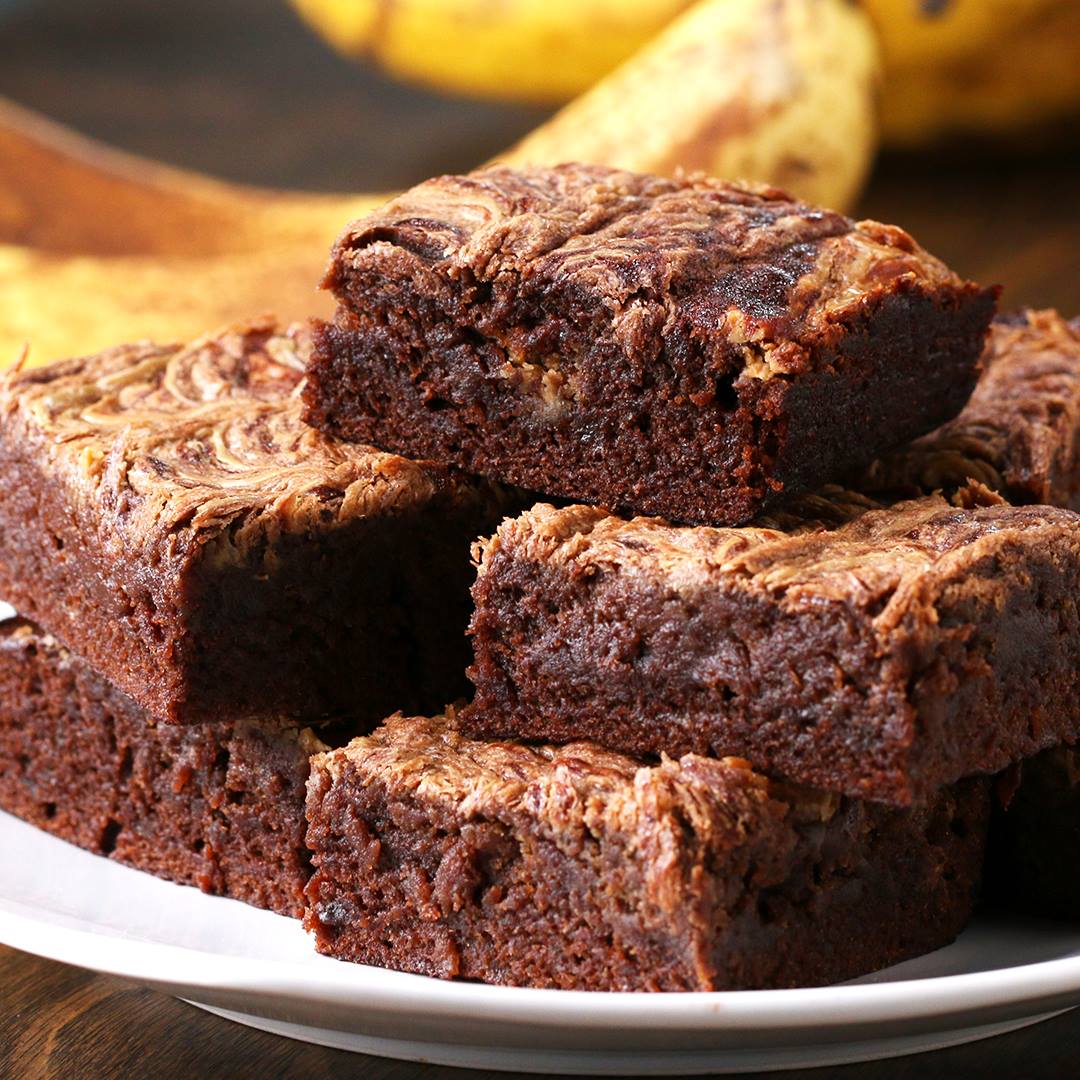
Peanut Butter Banana Brownies

Peanut Butter Banana Brownies
Use your overripe bananas & reduce your waste with these peanut butter banana brownies! ?
Author:
Cuisine: American
Recipe type: Main dish
Ingredients
  • 2 ripe bananas
  • 1 cup sugar (200 g)
  • ½ cup unsalted butter, melted, plus 1 tablespoon (130 g)
  • 1 teaspoon vanilla extract
  • ¾ cup flour (95 g)
  • ¼ cup cocoa powder, plus 1 tablespoon (40 g)
  • ⅛ teaspoon salt
  • ½ cup creamy peanut butter (120 g)
Instructions
  1. Preheat oven to 350°F (180°C).
  2. In a bowl, use a fork to mash the bananas. Add the sugar, ½ cup (115 g) of butter, and vanilla, and whisk until combined.
  3. Add the flour, salt, and cocoa powder, and whisk until fully incorporated.
  4. Use the remaining 1 tablespoon of butter to grease a 9x9-inch (23x23 cm) baking tray.
  5. Use the remaining 1 tablespoon of cocoa powder to dust every side of the baking tray.
  6. Pour batter into prepared baking dish.
  7. Use a spoon to add dollops of peanut butter on top of the batter. Use a butter knife to swirl the peanut butter into the brownie batter.
  8. Bake for 25-30 minutes, until center no longer jiggles when pan is shaken.
  9. Allow brownies to cool completely before cutting.
  10. Enjoy!

Watch the recipe video here:

Peanut Butter Banana Brownies

Use your overripe bananas & reduce your waste with these peanut butter banana brownies! ?FULL RECIPE: https://tasty.co/recipe/peanut-butter-banana-brownies

Posted by Tasty on Monday, October 22, 2018