Showing 38 Result(s)
Dessert

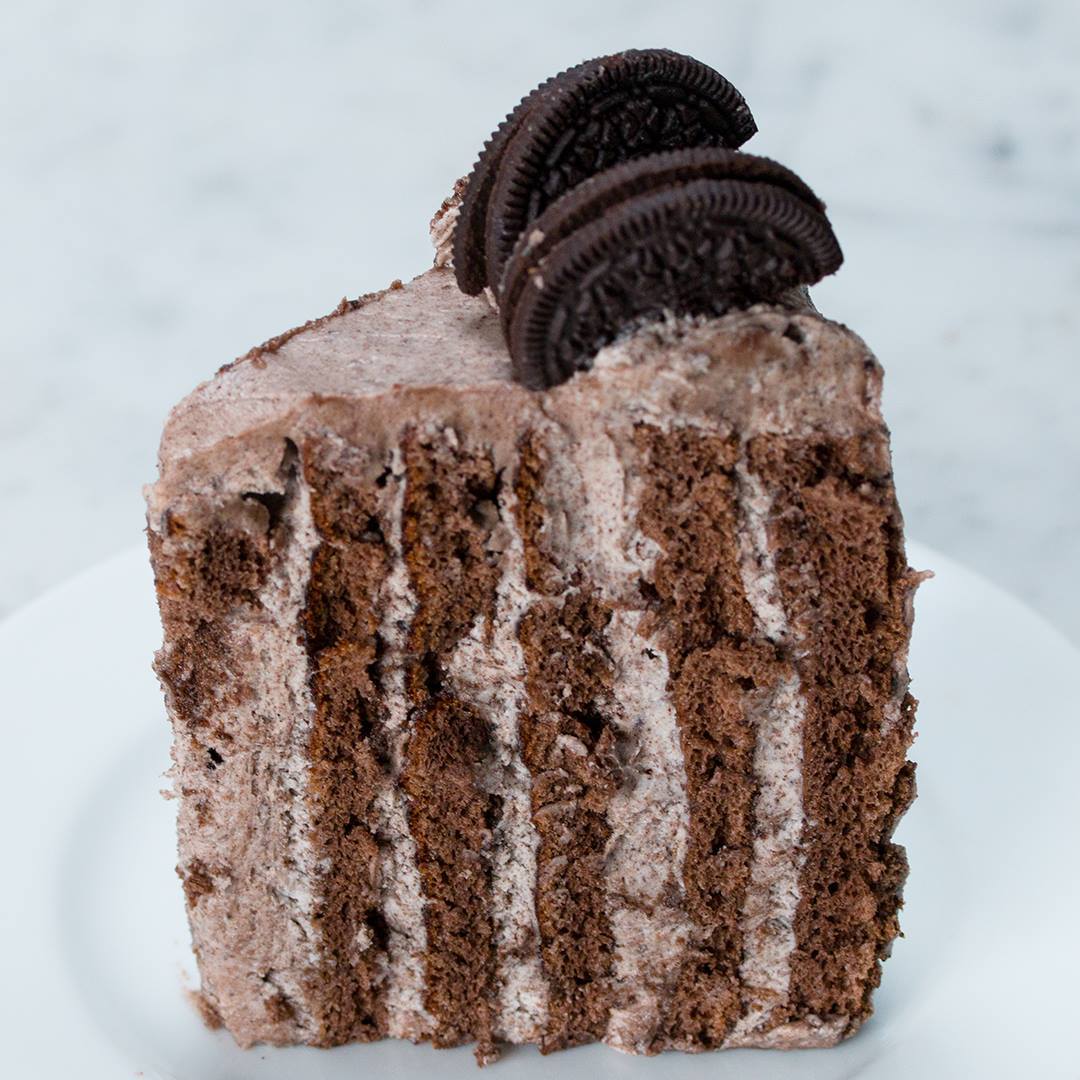
Vertical Layered Cookies & Cream Cake
Vertical Layered Cookies & Cream Cake
Author:
Cuisine: American
Recipe type: Dessert
Ingredients
CAKE
  • 10 large eggs, seperated
  • 1 ¼ cups sugar, divided (250 g)
  • 1 teaspoon vanilla extract
  • ¾ cup cake flour (90 g)
  • ½ cup cocoa powder, divided (60 g)
  • ½ teaspoon baking powder
  • ½ teaspoon salt
ICING
  • 24 oz cream cheese, room temperature (680 g)
  • ½ cup unsalted butter, 1 stick, room temperature (115 g)
  • 4 cups powdered sugar (640 g)
  • 2 teaspoons vanilla extract
  • 15 chocolate sandwich cookies, crushed
  • 5 chocolate sandwich cookies, halved
Instructions
  1. In a large mixing bowl, beat the egg yolks with 1 cup (200 g) of sugar and the vanilla extract until pale and fluffy, about 3 minutes.
  2. Sift in the flour, half of the cocoa powder, baking powder and salt. Mix until just combined, and set aside
  3. Preheat the oven to 400°F (200°C). Line two baking sheets with parchment paper.
  4. In a separate large mixing bowl, using a hand mixer, beat the egg whites until soft peaks form. Add the remaining sugar and beat until stiff peaks form.
  5. Beat a third of the egg whites into the chocolate mixture, then gently fold in the remaining egg whites.
  6. Divide the batter between the two baking sheets. Spread evenly and bake for 10-12 minutes. Let cool at room temperature until the pans are cool to touch.
  7. Dust the tops of the cakes with the remaining cocoa powder. Cover with parchment paper, and flip the cakes over to remove from the pans.
  8. Carefully peel away the baked parchment paper and discard. Cut each cake in half vertically, then set aside.
  9. In a large bowl, whip the cream cheese and butter until fluffy. Gradually incorporate the powdered sugar, then the vanilla extract.
  10. Use a spatula to fold in the crushed cookies.
  11. Evenly spread a thin layer of icing onto a cake quarter.
  12. Starting from one short end, tightly roll the cake into a spiral. Repeat with the remaining cake layers, placing the rolled piece at the start of each new layer.
  13. Wrap the cake tightly in plastic wrap and chill for at least an hour until icing in center is slightly firm.
  14. Use the remaining icing to cover the cake and pipe small swirls on the top. Garnish the top with the sandwich cookie halves, and chill for at least an hour before serving.
  15. Enjoy!

Watch the recipe video here:

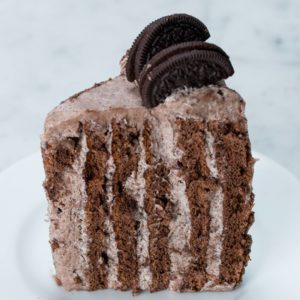
This cookies and cream cake has VERTICAL layers ?!Get the recipe: https://tasty.co/recipe/vertical-layered-cookies-cream-cake

Posted by BuzzFeed Food on Friday, June 28, 2019
Dessert

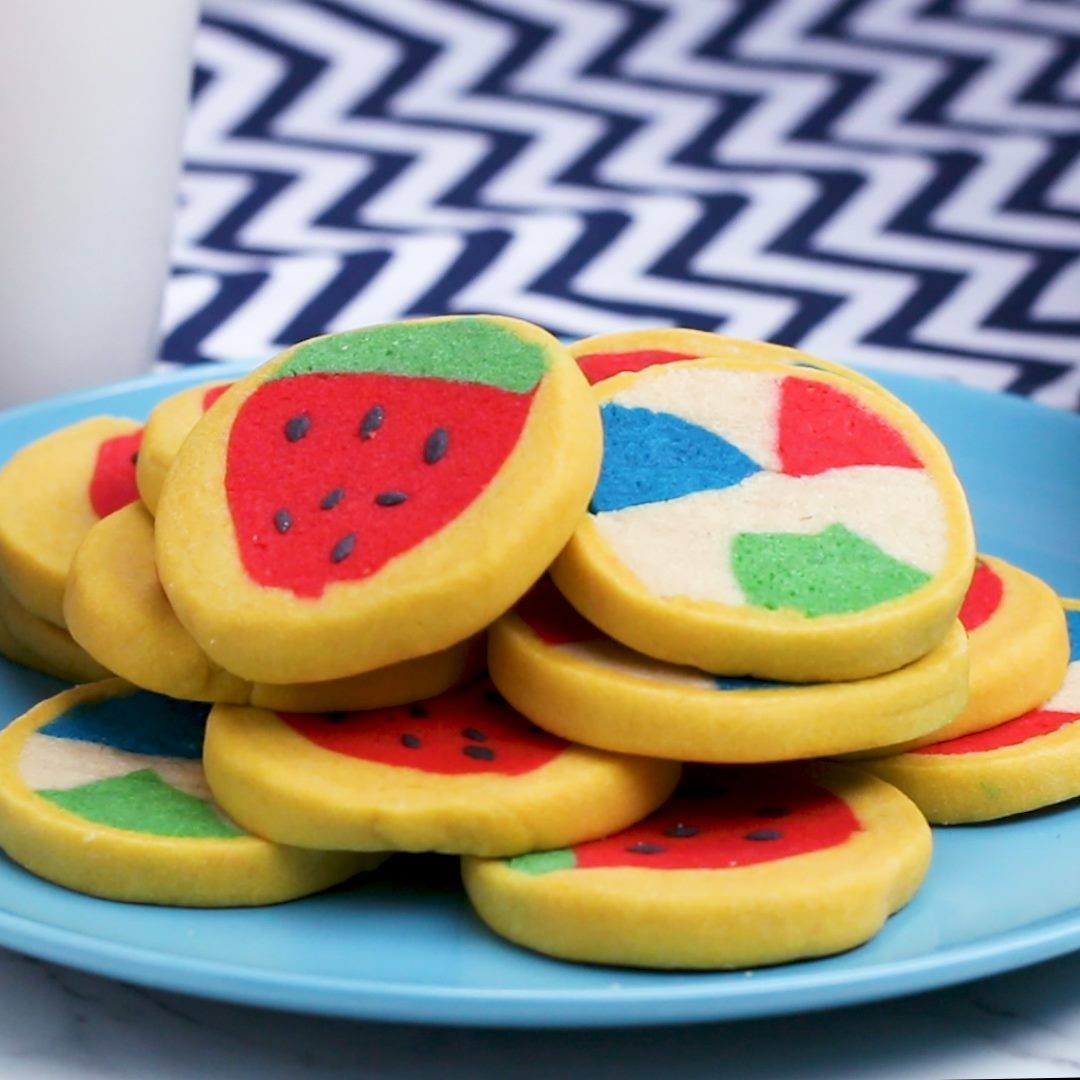
Double-Sided Sugar Cookies

Double-Sided Sugar Cookies
Author:
Cuisine: American
Recipe type: Dessert
Ingredients
  • 1 ½ cups unsalted butter, 3 sticks, softened (345 g)
  • 3 ¾ cups powdered sugar (450 g)
  • 1 ½ teaspoons vanilla extract
  • 4 large eggs
  • 5 cups all-purpose flour (625 g)
  • ½ teaspoon salt
  • 10 drops yellow food coloring
  • 10 drops red food coloring
  • 10 drops blue food coloring
  • 5 drops black food coloring
  • 10 drops green food coloring
SPECIAL EQUIPMENT
  • electric hand mixer
  • food-safe glove
Instructions
  1. Add the butter, powdered sugar, and vanilla to a large bowl. Beat with an electric hand mixer on low speed until smooth and creamy.
  2. Add the eggs 1 at a time and beat on medium speed to incorporate, scraping down the sides of the bowl with a spatula halfway through.
  3. Add the salt and incorporate the flour in 3 additions, scraping down the sides of the bowl as needed, until a dough forms.
  4. Turn the dough out onto a clean, floured surface and form into a ball. Cut the ball of dough in half. Cut one of the halves in half, and the other half into thirds, so you have 5 pieces total. Take one of the larger pieces and cover the rest with plastic wrap so they don’t dry out.
  5. Wearing gloves, add the yellow food coloring and knead into the dough until fully incorporated. Cover and set aside each piece of dough after working the color in. Dye the other large piece with red food coloring. Set aside one of the smaller pieces to remain plain. Remove a 1-tablespoon chunk from 1 of the 2 remaining pieces and dye with black food coloring. Dye the rest of that piece blue. Dye the remaining piece of dough green.
  6. Roll out 1 tablespoon of the the plain dough into a 6-inch-long (15-cm) rope. Roll the rest into a 6-inch-long (15-cm) log and cut crosswise into thirds. Shape the logs into 6-inch-long (15-cm) triangle wedges.
  7. Roll a third of the red dough into a 6-inch-long (15-cm) triangle wedge.
  8. Roll the blue piece into a 6-inch-long (15-cm) triangle wedge. Roll half of the green dough into a 6-inch-long (15-cm) triangle wedge.
  9. Form a beach ball shape by placing the plain rope in the middle and alternating the plain dough triangle wedges with the colored triangle wedges. Roll together to fuse, then wrap tightly in plastic wrap and chill in the refrigerator for 30 minutes while you assemble the other shape.
  10. Roll the remaining red dough into a 6-inch-long (15-cm) log, then shape into a triangle wedge.
  11. Roll the remaining green dough into a 6-inch-long (15-cm) log, then flatten.
  12. Place the red triangle on top and trim the edges with a bench scraper or knife.
  13. Cut the yellow dough in half. Set aside one half, then cut the other half in half again and roll into 2 6-inch-long (15-cm) logs and flatten slightly. Place the yellow pieces over each exposed side of the red dough, then pinch the yellow and green dough together to completely cover the red. Roll together to fuse, then wrap tightly in plastic wrap and chill in the refrigerator for 30 minutes.
  14. Use a ruler and a knife to score ¼-inch (6 mm) marks across both chilled logs. Cut into slices with a sharp knife, cleaning the knife after each slice, if necessary.
  15. Roll out the rest of the yellow dough to make a 6-inch (15-cm) by 12-inch (30-cm) rectangle.
  16. Build a single dough log by stacking alternating strawberry slices and beach ball slices over the center of the yellow dough. Wrap the yellow dough around the log, roll together to fuse, then wrap tightly in plastic wrap and chill in the refrigerator for 30 minutes.
  17. Preheat the oven to 300˚F (150˚C). Line a baking sheet with parchment paper.
  18. Use a ruler and a knife to score ¼-inch (6 mm) marks across the chilled dough. Cut into slices with a sharp knife, cleaning the knife after each slice, if necessary. Each slice should have a beach ball side and a strawberry side.
  19. Set the cookies on the prepared baking sheet, strawberry-side up. Break off tiny pieces of the black dough, roll into seeds, and press onto the strawberries.
  20. Bake the cookies for 10-12 minutes, or just until they begin to start turning golden brown. Cool on a wire rack for 5-10 minutes before serving.
  21. Enjoy!

Watch the recipe video here:

Whichever side you choose, it's bound to be delicious ?Get the recipe: https://tasty.co/recipe/double-sided-sugar-cookies

Posted by BuzzFeed Food on Tuesday, June 25, 2019

Dessert

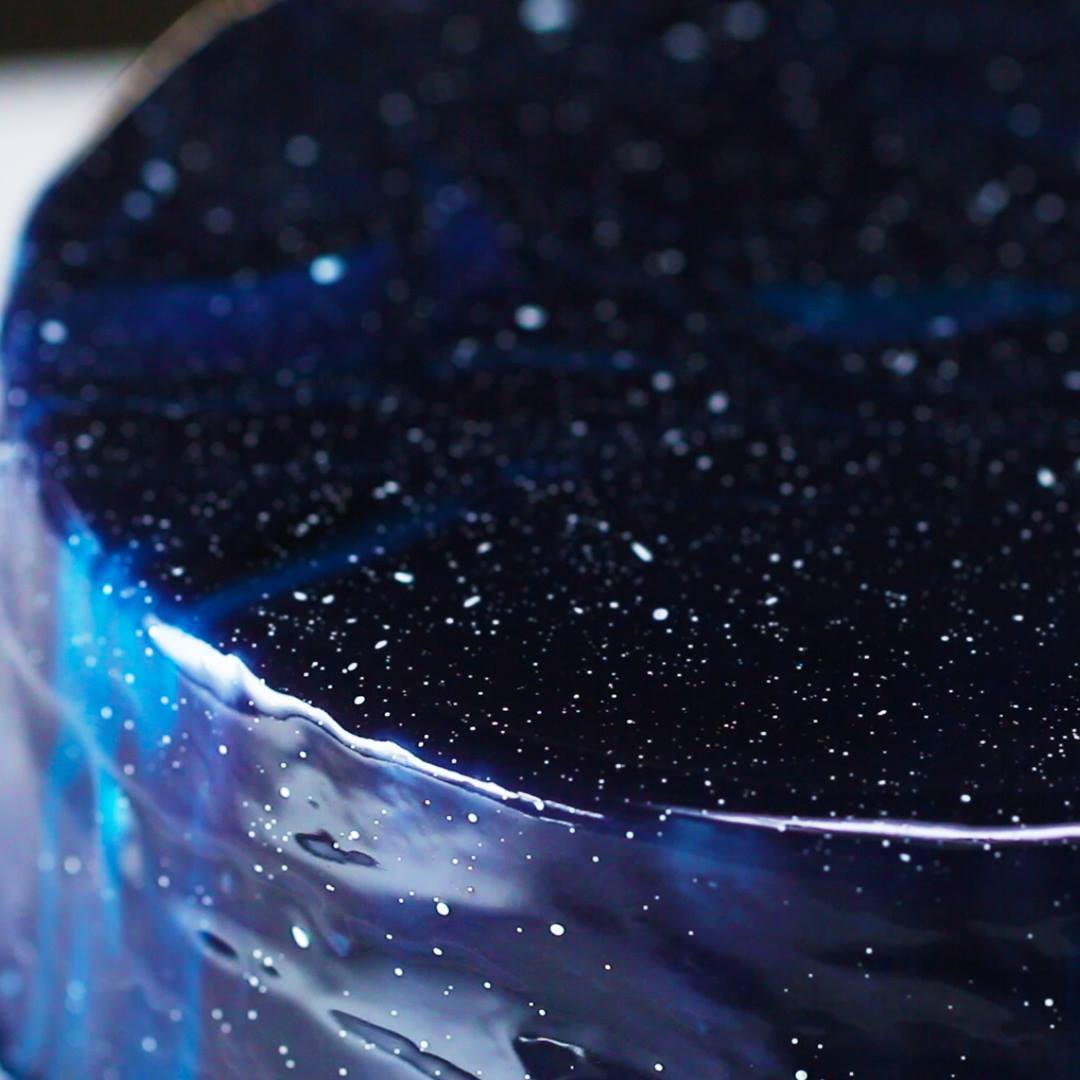
Galaxy Mirror Glazed ‘Box’ Cake

Galaxy Mirror Glazed 'Box' Cake
Author:
Cuisine: American
Recipe type: Dessert
Ingredients
CAKE
  • 2 chocolate cake mixes, 2 boxes, prepared according to package
VANILLA BUTTERCREAM
  • 2 cups butter, softened (460 g)
  • 2 teaspoons vanilla
  • 1 tablespoon milk
  • 6 cups powdered sugar (720 g)
GALAXY MIRROR GLAZE
  • 1 ¼ cups water (300 mL)
  • 1 ½ cups sugar (300 g)
  • 15 oz sweetened condensed milk, 1 can (395 g)
  • 15 sheets gelatin
  • 26 oz white chocolate, chopped, over 30% cocoa butter (740 g)
FOOD COLORING
  • black food coloring
  • navy blue food coloring
  • light blue food coloring
  • purple food coloring
  • pink food coloring
  • white food coloring
Instructions
  1. Prepare the cakes according to the package, or use your favorite cake recipe.
  2. To make the buttercream, mix the butter, vanilla, milk, and powdered sugar in a bowl with a hand mixer.
  3. Once the cakes are baked and cooled, place one cake on a turntable. If you don't have one, you can use a plate. Slice the top off the cakes to create a flat surface.
  4. Place a large dollop of the buttercream on the cake and spread to create an even middle layer of frosting.
  5. Place the second cake over the layer of buttercream.
  6. Frost the entire cake to create the crumb layer, creating a smooth surface.
  7. Place the cake in the freezer to keep cold.
  8. For the glaze, boil the water, sugar, and condensed milk in a pot for 1 minute, then remove from heat.
  9. Bloom the gelatin in 8 cups (2 liters) of cold water for 5 minutes, then wring the gelatin sheets of excess water and mix into the sugar mixture.
  10. Pour the sugar mixture over the chocolate, letting it sit for 2-3 minutes to allow the chocolate to soften.
  11. Using an immersion blender, carefully blend the chocolate and the liquid, making sure that you are not blending in air bubbles by lifting up the blender too high.
  12. Pour the glaze through a sieve into a large bowl to remove any excess bubbles.
  13. Separate the glaze into 5 different bowls (one medium-sized bowl and four smaller bowls).
  14. Color the biggest bowl of glaze with black and navy blue food coloring, stir the coloring with the glaze until the color is distributed evenly.
  15. In the next bowl, add the navy blue food coloring and stir.
  16. In the next bowl, add the lighter blue food coloring and stir.
  17. In the next bowl, add the purple food coloring and stir.
  18. In the next bowl, add the pink food coloring and stir.
  19. When you are ready to use the glaze, make sure each one is around 90-96°F (32-35°C). Microwave if necessary. Pour the colored glazes back into the biggest bowl of black and blue glaze. Swirl them gently with a spoon.
  20. Place the cake on a stand over a sheet tray to catch any excess glaze. Carefully pour the glaze over the cake.
  21. Dip a brush into the white food coloring and fling it onto the cake to create stars.
  22. Enjoy!

Watch the recipe video here:

This galaxy cake is out of this world ?Get the recipe: https://tasty.co/recipe/galaxy-mirror-glazed-box-cake Subscribe to our YouTube for more Tasty! ? https://bzfd.it/2UTmh3g

Posted by BuzzFeed Food on Sunday, June 23, 2019

Dessert

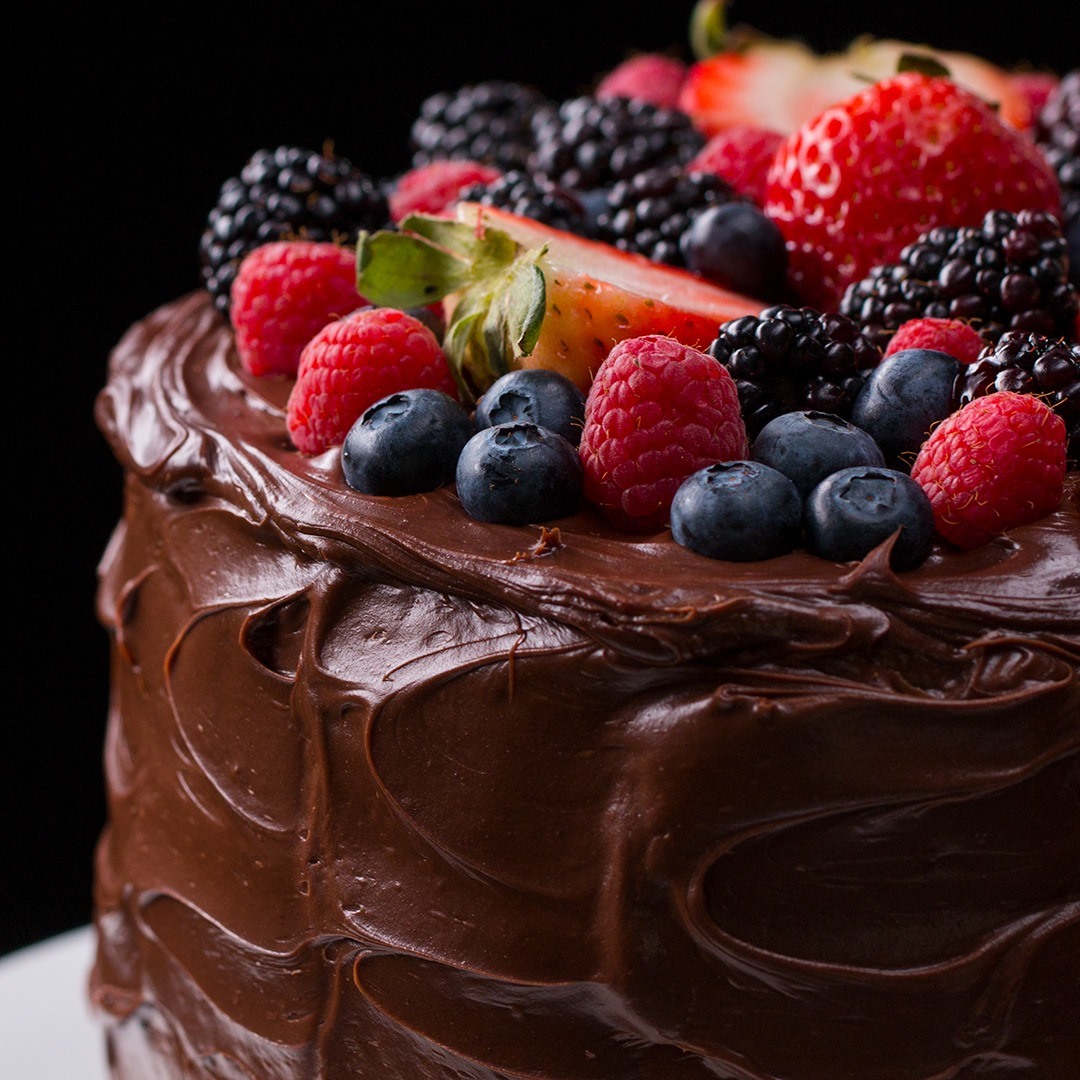
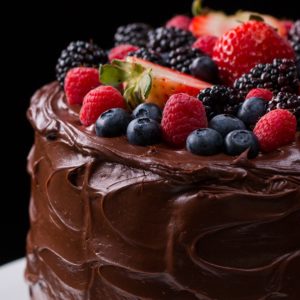
Fudgiest Dairy-Free Chocolate Cake

Fudgiest Dairy-Free Chocolate Cake
Author:
Cuisine: American
Recipe type: Dessert
Ingredients
  • FROSTING
  • 30 oz full-fat coconut milk, 2 cans (880 mL)
  • 3 cups dairy-free chocolate chunk (510 g)
  • ¼ cup coconut oil, melted (60 g)
  • 2 cups powdered sugar (240 g)
  • CAKE
  • 3 cups whole wheat flour (390 g)
  • 1 ½ cups dark cocoa powder (180 g)
  • 1 cup sugar (200 g)
  • 1 tablespoon baking soda
  • 1 ½ teaspoons baking powder
  • 1 pinch salt
  • 3 cups almond milk (710 mL)
  • 1 cup coconut oil, melted (240 g)
  • 1 ½ cups applesauce (380 g)
  • 1 ½ cups maple syrup (505 g)
  • 1 tablespoon apple cider vinegar
  • 1 tablespoon vanilla extract
  • berry, of choice, for garnish
Instructions
  1. In a microwave-safe measuring cup, or in a small pot on the stove, heat the coconut milk until hot, but not boiling (about 2 minutes in the microwave).
  2. Place the dairy-free chocolate in a large bowl and pour the hot coconut milk over it, allowing the milk to melt the chocolate. Mix well to combine.
  3. Once the chocolate is melted, add the coconut oil and powdered sugar. Beat with a hand mixer or whisk until smooth.
  4. Cover and refrigerate overnight.
  5. Preheat the oven to 350°F (180°C). Grease 3 separate 8-inch (20-cm) round cake pans and set aside.
  6. In a large bowl, add the whole wheat flour, dark cocoa powder, sugar, baking soda, baking powder, and salt. Whisk to combine and set aside.
  7. In a separate large bowl, add the almond milk, coconut oil, applesauce, maple syrup, apple cider vinegar, and vanilla extract. Whisk to combine.
  8. In two batches, add the dry mixture to the wet mixture, folding with a spatula until combined. Some clumps are okay.
  9. Divide the batter evenly between the 3 pre-greased cake pans and bake for 35–45 minutes, or until a toothpick comes out almost entirely clean. Cool completely.
  10. Remove the frosting from the fridge and mix it up well.
  11. Choose which cake will be your bottom layer and cover evenly with about 1 cup (115 G) of frosting. Top with the second layer, frosting evenly again. Add the final layer and frost the top and the sides of the cake generously, topping with berries of choice for garnish.
  12. Enjoy!

Watch the recipe video here:

This is the FUDGIEST non-dairy chocolate cake ?FULL RECIPE: https://tasty.co/recipe/fudgiest-dairy-free-chocolate-cake

Posted by BuzzFeed Food on Thursday, June 20, 2019

Main dish

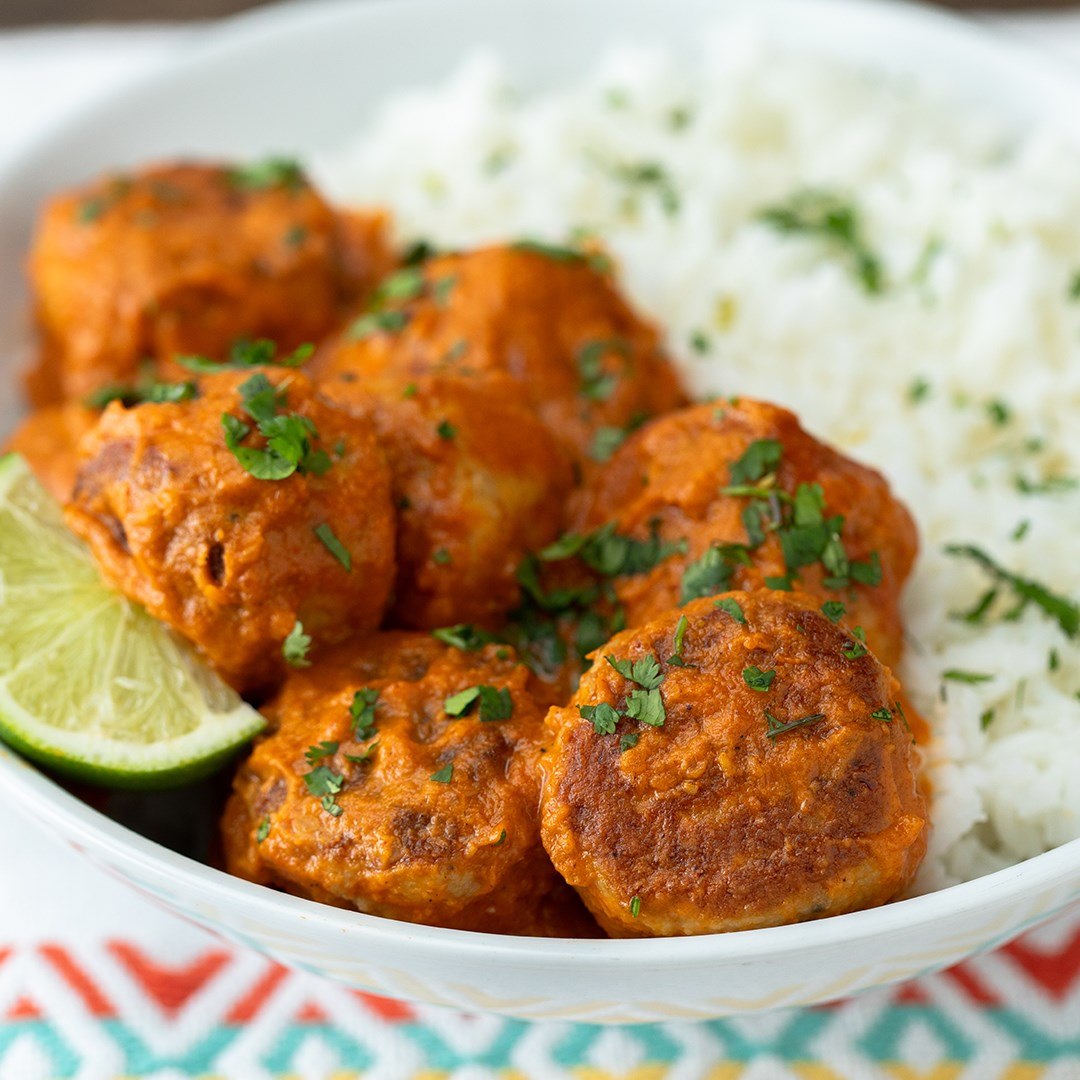
Butter Chicken Meatballs

Butter Chicken Meatballs
Author:
Cuisine: American
Recipe type: Main dish
Ingredients
MEATBALLS
  • ½ cup bread crumbs (60 g)
  • ½ cup milk (120 mL)
  • 1 clove garlic, minced
  • 1 egg
  • 2 teaspoons salt
  • ½ teaspoon pepper
  • 1 lb ground chicken (455 g)
  • 1 tablespoon vegetable oil
SAUCE
  • 1 tablespoon vegetable oil
  • 2 tablespoons butter
  • 1 yellow onion, diced
  • 3 garlics, minced
  • 1 tablespoon ginger, minced
  • 1 ½ teaspoons McCormick ® Ground Cumin
  • 1 teaspoon McCormick ® Paprika
  • 2 ½ teaspoons garam masala, divided
  • ½ teaspoon cayenne pepper
  • 1 ½ teaspoons salt
  • 14 oz crushed tomato (390 g)
  • 3 tablespoons butter
  • ½ cup heavy cream (120 mL)
  • fresh cilantro, minced, for garnish
  • lime wedge, for serving
  • rice, for serving
Instructions
Meatballs:
  1. In a medium bowl, stir together bread crumbs and milk. Let sit for 5 minutes. Add in garlic, egg, salt, and pepper, then stir until well-combined. Stir in ground chicken. Combine well, but do not overmix. With oiled hands, roll the meat into golf-size balls.
  2. Pour 1 tablespoon vegetable oil into a skillet over medium heat. Add meatballs and brown on all sides. Remove meatballs from the pan (meatballs will not be fully cooked through at this time). Wipe the pan out to make the sauce.
Sauce:
  1. Heat vegetable oil and butter in the same skillet over medium heat. Add onions and sauté until translucent, about 5 minutes. Add garlic and ginger, then let sizzle for a minute or two.
  2. Stir in McCormick Ground Cumin, McCormick Paprika, 1½ teaspoons garam masala, cayenne, and salt. Let spices heat through until fragrant, about 2 minutes. Add crushed tomatoes and bring sauce to a simmer, then take off the heat.
  3. Let the sauce cool for 5–10 minutes. Blend sauce until smooth, adding a tablespoon or two of water if it is too thick to blend.
  4. Pour the sauce back into the skillet. Whisk in the butter, cream, and 1 teaspoon garam masala. Add the meatballs to the sauce and stir to coat. Cover and cook for 5 minutes, or until meatballs are fully cooked through.
  5. Garnish with cilantro. Serve with rice and lime wedges.
  6. Enjoy!

Watch the recipe video here:

These delicious Butter Chicken Meatballs are fantastic for dinner.Get the recipe: https://tasty.co/recipe/butter-chicken-meatballs

Posted by BuzzFeed Food on Wednesday, June 19, 2019

Dessert

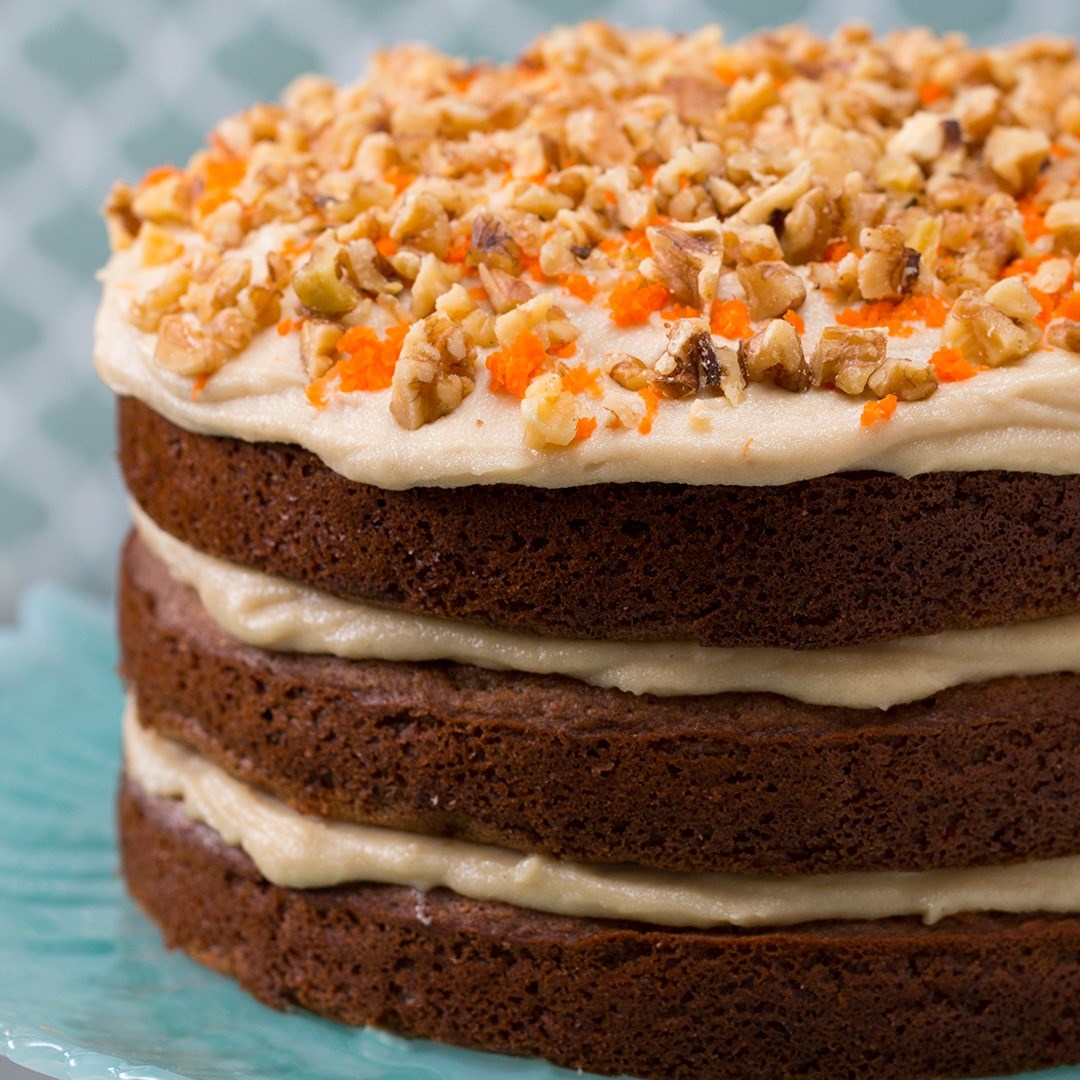
Decadent Dairy-Free Carrot Cake

Decadent Dairy-Free Carrot Cake
Author:
Cuisine: American
Recipe type: Dessert
Ingredients
CASHEW FROSTING
  • 4 cups raw cashew (520 g)
  • hot water
  • 15 oz full-fat coconut milk, cream from the top of the can (425 mL)
  • ½ cup powdered sugar (60 g)
  • 1 cup maple syrup (336 g)
  • ¾ cup coconut oil, melted (180 g)
  • 3 tablespoons lemon juice
  • 1 tablespoon vanilla extract
  • ½ tablespoon apple cider vinegar
  • 1 pinch salt
CAKE
  • 3 ½ cups flour, of choice, we used whole wheat (435 g)
  • 1 cup brown sugar (220 g)
  • 1 tablespoon baking soda
  • 1 ½ tablespoons baking powder
  • 1 tablespoon cinnamon
  • 2 teaspoons nutmeg
  • 1 pinch salt
  • 3 cups almond milk (720 mL)
  • ¾ cup coconut oil, melted (180 g)
  • 1 cup unsweetened applesauce (255 g)
  • ¾ cup maple syrup (250 g)
  • 1 tablespoon vanilla extract
  • 1 tablespoon apple cider vinegar
  • 2 cups carrot, finely grated (220 g)
  • 1 cup raisin, optional (150 g)
  • 1 carrot, for garnish
  • ½ cup walnuts, chopped, for garnish (50 g)
Instructions
  1. In a large bowl, add the cashews and enough hot water to cover them. Let soak for at least 1 hour.
  2. Rinse and drain the cashews, then add them to a food processor or blender. Add the coconut cream, powdered sugar, maple syrup, coconut oil, lemon juice, vanilla extract, apple cider vinegar, and salt. Blend until completely smooth, scraping down the sides as necessary.
  3. Transfer the cashew frosting to a bowl and refrigerate while you bake the cake.
  4. Preheat the oven to 350°F (180°C). Grease 3 separate 8-inch (20 cm) round cake pans and set aside.
  5. In a large bowl, add the flour, brown sugar, baking soda, baking powder, cinnamon, nutmeg, and salt. Whisk to combine.
  6. In a separate large bowl, add the almond milk, coconut oil, applesauce, maple syrup, vanilla extract, and apple cider vinegar. Whisk to combine.
  7. In two batches, add the dry mixture to the wet mixture, folding with a spatula until combined. Some clumps are okay.
  8. Add the grated carrots and raisins and fold them in.
  9. Divide the batter evenly between the 3 pre-greased cake pans and bake for 35 minutes, or until a toothpick comes out clean. Cool completely.
  10. Remove the cashew frosting from the fridge and mix it up well.
  11. Choose which cake will be your bottom layer and cover evenly with about ⅓ of the cashew frosting. Top with the second layer, frosting evenly again. Add the final layer and frost the top of the cake generously
  12. Grate a carrot over the top of the frosting and sprinkle with chopped walnuts for garnish.
  13. Refrigerate until ready to serve.
  14. Enjoy!

Watch the recipe video here:

This decadent carrot cake is dairy-free! ✨FULL RECIPE: https://tasty.co/recipe/decadent-dairy-free-carrot-cake

Posted by BuzzFeed Food on Monday, June 17, 2019

Dessert

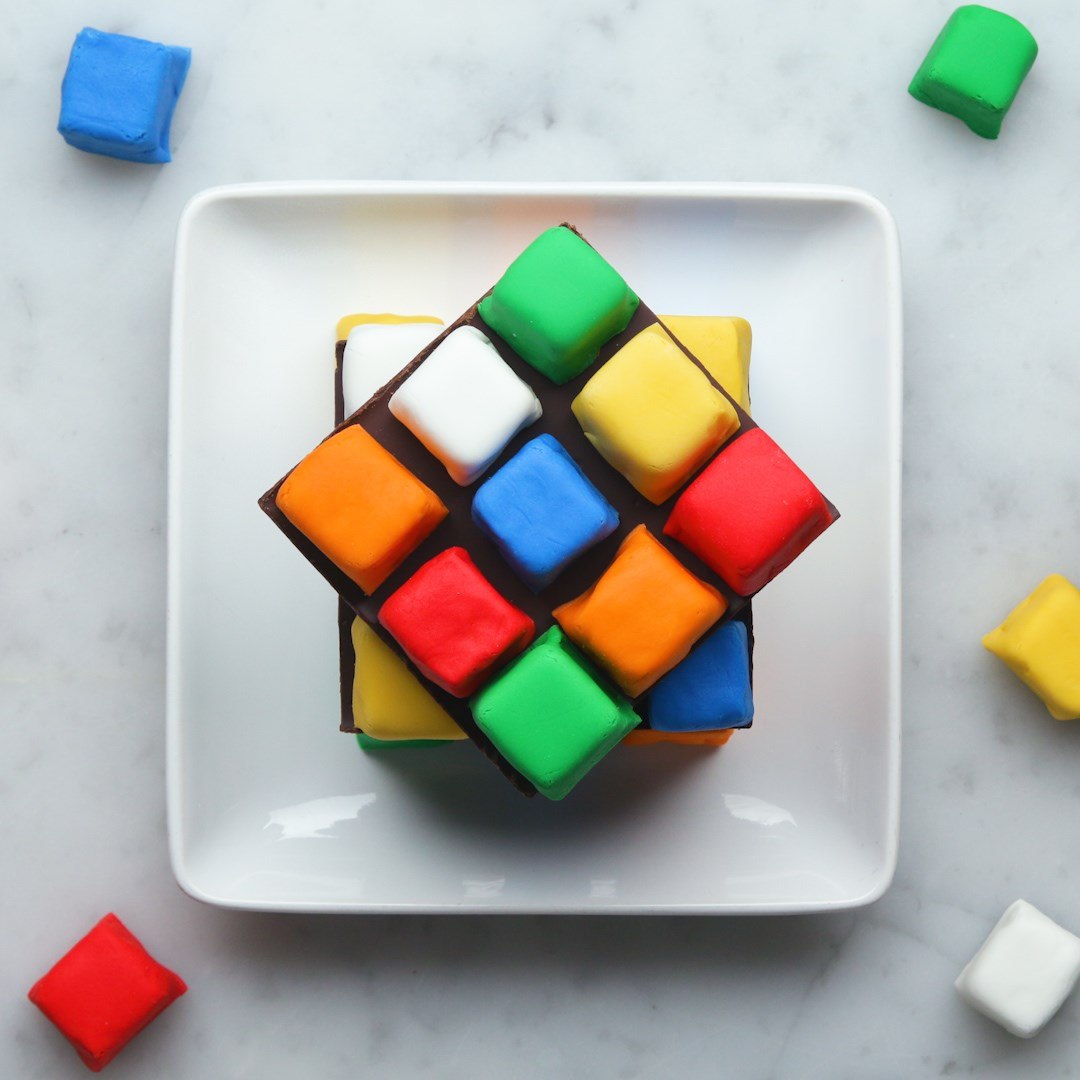
Rubik’s Cube Cake

Rubik’s Cube Cake
We have the secret to solving the Rubik’s cube: eat it! We recommend incorporating flavors into the vanilla frosting that reflect their specific color block, but if you want to keep things simple, simply keep the frosting as is. While this cake might not make you smarter, one thing’s for sure. You’ll want to use our marshmallow fondant recipe for more fun cakes to come.
Author:
Cuisine: American
Recipe type: Dessert
Ingredients
CAKE
  • 1 pound cake, store-bought frozen
  • ½ cup vanilla frosting (55 g)
  • ½ teaspoon lemon zest
  • ½ teaspoon lime zest
  • 1 teaspoon orange marmalade
  • 1 teaspoon strawberry jam
  • 1 teaspoon blueberry jam
MARSHMALLOW FONDANT
  • 1 bag marshmallow, white
  • 1 tablespoon water, plus more as needed
  • 4 tablespoons unsalted butter, softened
  • 5 cups powdered sugar, plus more as needed (550 g)
  • nonstick cooking spray, for greasing
  • red gel food coloring
  • blue gel food coloring
  • green gel food coloring
  • yellow gel food coloring
  • orange gel food coloring
ASSEMBLY
  • 2 large chocolate bars, cut into four 3 in (7 cm) squared
SPECIAL EQUIPMENT
  • food safe plastic gloves
Instructions
  1. Line a baking sheet with parchment paper.
  2. With a sharp knife, divide the cake crosswise into thirds, about 3 inches (7 cm) each. Slice the domed tops off of each piece. Very carefully slice each piece of cake into 4 even layers. Stack the layers in sets of 2 (there should be 6 stacks) with the bottom facing up on the prepared baking sheet. Each set of stacks will be a different color cube (white, yellow, green, orange, red, and blue)--write in marker on the parchment paper to label each stack.
  3. Open each set of layers like a book. Spread a layer of vanilla frosting on each slice.
  4. For the white cubes, stack the slices, frosted sides touching. For the yellow cubes, sprinkle with the lemon zest, then stack the slices, frosted sides touching. For the green cubes, sprinkle with the lime zest, then stack the slices, frosted sides touching. For the orange cubes, spread the orange marmalade on one piece and stack the slices. For the red cubes, spread the strawberry jam on one piece and stack the slices. For the blue cubes, spread the blueberry jam on one piece and stack the slices. Freeze for at least 30 minutes.
  5. Make the marshmallow fondant: In a large microwave-safe bowl, combine the marshmallows and water. Microwave on medium power for 2-3 minutes, stirring every 30 seconds, until the marshmallows are completely melted. Add the softened butter and use a silicone spatula to stir until combined.
  6. Add 5 cups (550 G) of powdered sugar to a separate large bowl and make a well in the center. Pour in the marshmallow mixture. Stir to combine. When it is mostly combined, grease your hands with nonstick spray and knead to bring the fondant together into a ball in the bowl. Add more powdered sugar as needed if the fondant is sticking to your hands.
  7. Grease a clean work surface and your hands with more nonstick spray. Turn the fondant out onto the greased surface. If it gets too dry, add a bit more water. Use more nonstick spray if the fondant is sticking to the surface. Continue kneading for 8-10 minutes, until the fondant is smooth and holds its shape.
  8. Divide the fondant into 6 even pieces, spray with nonstick spray, and cover with plastic wrap so they don’t dry out. Using the gel food coloring, dye 5 of the pieces green, blue, orange, red, and yellow by kneading each gel color into 1 section of fondant. Leave the remaining piece white. Spray again with nonstick spray and cover with plastic wrap.
  9. Remove the cake stacks from the freezer. Using a sharp knife and a ruler to measure, slice each stack into 9 ¾-inch (22 cm) cubes. Return to the marked baking sheet and separate into individual pieces, then freeze again for at least 30 minutes.
  10. Roll the green fondant into a log, then cut into 9 equal pieces. Grease the pieces you aren’t using yet with nonstick spray and cover with plastic wrap. Sprinkle a piece of fondant with powdered sugar and roll out to a ¼-inch-thick (6 mm) square. Remove the green cake cubes from the freezer. Cover a cube with the rolled out fondant on 5 sides, removing the excess fondant with a knife. Repeat with the remaining fondant and cake cubes.
  11. To assemble the cake, stack 9 cubes of varying color on a plate, spaced about ¼ inch (6 mm) apart. Place a piece of chocolate squarely on top of the cubes. Carefully stack another 9 cubes on top of the chocolate. Place another chocolate square on top of the cubes, slightly askew. Stack 9 more cubes on top of the chocolate. Repeat to make another cake.
  12. Enjoy!

Watch the recipe video here:

If you can't solve a rubik's cube… just eat it!! ?Get the recipe: https://tasty.co/recipe/rubiks-cube-cake

Posted by BuzzFeed Food on Thursday, May 30, 2019

Main dish

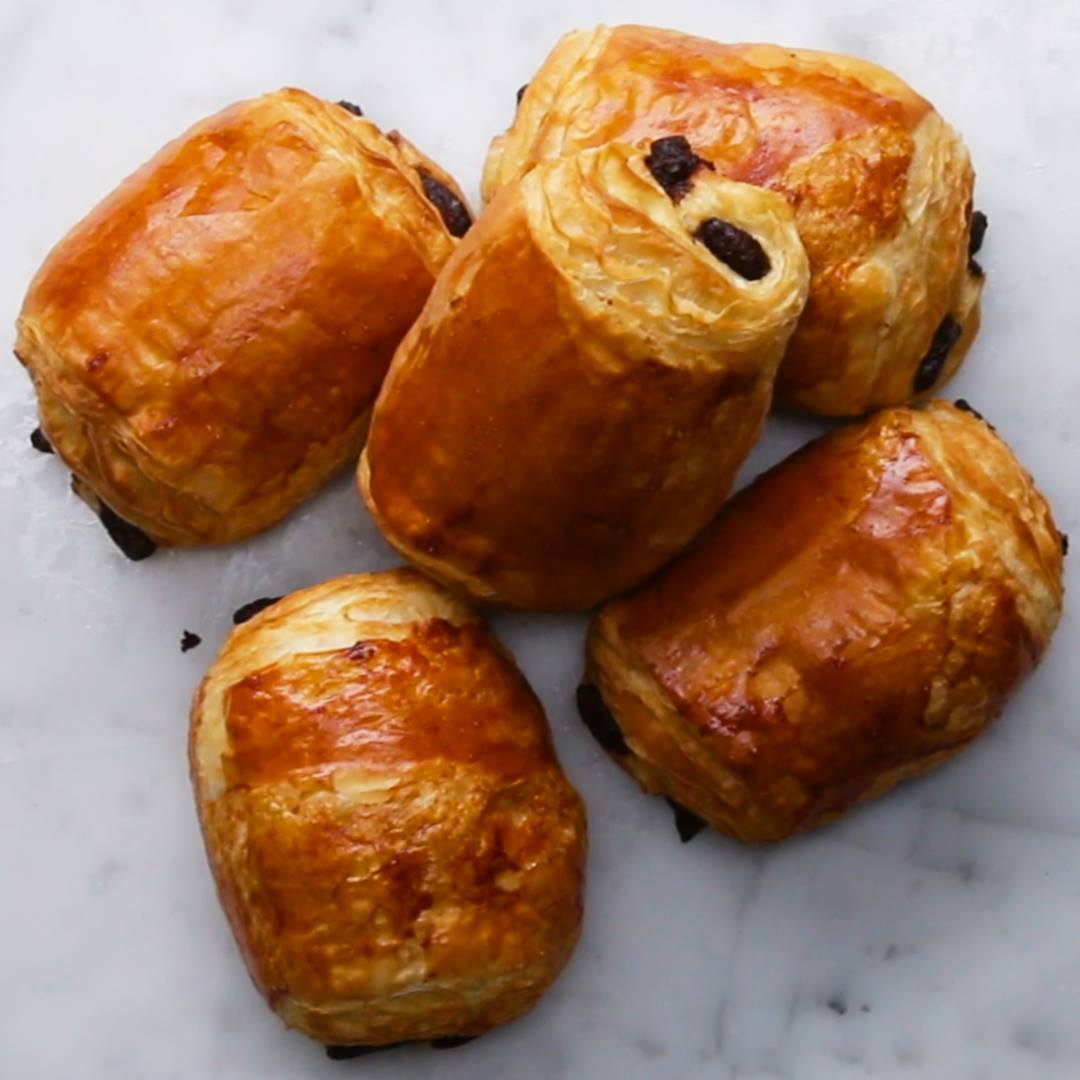
Homemade Chocolate Croissants (Pain Au Chocolate)

Homemade Chocolate Croissants (Pain Au Chocolate)
Author:
Cuisine: American
Recipe type: Main dish
Ingredients
  • 4 cups flour (500 g)
  • ½ cup water (120 mL)
  • ½ cup milk (120 mL)
  • ¼ cup sugar (50 g)
  • 2 teaspoons salt
  • 1 packet instant dry yeast
  • 3 tablespoons unsalted butter, softened
  • 1 ¼ cups cold unsalted butter, cut into ½-inch (1 cm) thick slices (285 g)
  • 1 egg, beaten
  • 2 bars sweetened chocolate bar
Instructions
  1. In a large bowl, mix the flour, water, milk, sugar, salt, yeast, and butter.
  2. Once the dough starts to clump, turn it out onto a clean counter.
  3. Lightly knead the dough and form it into a ball, making sure not to over-knead it.
  4. Cover the dough with plastic wrap and refrigerate for one hour.
  5. Slice the cold butter in thirds and place it onto a sheet of parchment paper..
  6. Place another piece of parchment on top of the butter, and beat it with a rolling pin.
  7. Keeping the parchment paper on the butter, use a rolling pin to roll the butter into a 7-inch (18 cm) square, ½-inch (1 cm) thick. If necessary, use a knife to trim the edges and place the trimmings back on top of the butter and continue to roll into a square.
  8. Transfer the butter layer to the refrigerator.
  9. To roll out the dough, lightly flour the counter. Place the dough on the counter, and push the rolling pin once vertically into the dough and once horizontally to form four quadrants.
  10. Roll out each corner and form a 10-inch (25 cm) square.
  11. Place the butter layer on top of the dough and fold the sides of the dough over the butter, enclosing it completely.
  12. Roll the dough with a rolling pin to seal the seams, making sure to lengthen the dough, rather than widening it.
  13. Transfer the dough to a baking sheet and cover with plastic wrap. Refrigerate for 1 hour.
  14. Roll out the dough on a floured surface until it’s 8x24 inches (20x61 cm).
  15. Fold the top half down to the middle, and brush off any excess flour.
  16. Fold the bottom half over the top and turn the dough clockwise to the left. This completes the first turn.
  17. Cover and refrigerate for one hour.
  18. Roll out the dough again two more times, completing three turns in total and refrigerating for 1 hour in between each turn. If at anytime the dough or butter begins to soften, stop and transfer back to the fridge.
  19. After the final turn, cover the dough with plastic wrap and refrigerate overnight.
  20. To form the croissants, cut the dough in half. Place one half in the refrigerator.
  21. Flour the surface and roll out the dough into a long narrow strip, about 8x40 inches (20x101 cm).
  22. With a knife, trim the edges of the dough.
  23. Cut the dough into 4 rectangles.
  24. Place the chocolate on the edge of the dough and roll tightly enclosing it in the dough.
  25. Place the croissants on a baking sheet, seam side down.
  26. Repeat with the other half of the dough.
  27. Brush the croissants with the beaten egg. Save the rest of the egg wash in the fridge for later.
  28. Place the croissants in a warm place to rise for 1-2 hours.
  29. Preheat oven to 400°F (200°C).
  30. Once the croissants have proofed, brush them with one more layer of egg wash.
  31. Bake for 15 minutes or until golden brown and cooked through. Serve warm.
  32. Enjoy!

Watch the recipe video here:

Homemade Chocolate CroissantsFULL RECIPE: http://bit.ly/2hxqGexSee the struggle it took to make these! Go behind the scenes here: http://bit.ly/2hvxhWN

Posted by BuzzFeed Food on Friday, May 24, 2019

Main dish

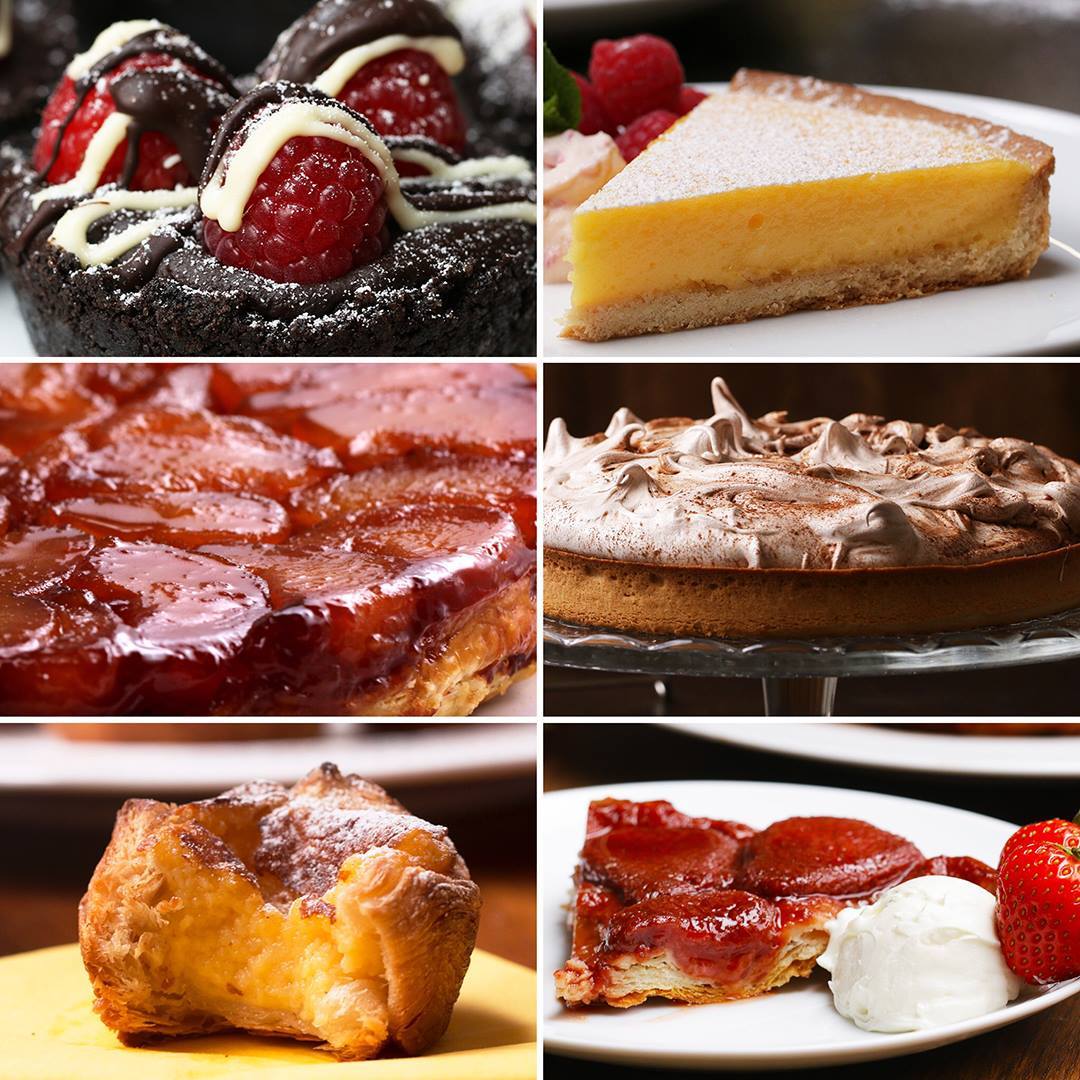
French-style Lemon Tart

French-style Lemon Tart
Author:
Cuisine: American
Recipe type: Main dish
Ingredients
  • LEMON CURD
  • 4 egg yolks
  • 4 eggs
  • ⅔ cup sugar (150 g)
  • 1 cup lemon juice (200 mL)
  • 2 lemon zests
  • ¾ cup butter (170 g)
  • 1 pre-baked tart shell
Instructions
  1. Pre-heat the oven to 180°C (350°F).
  2. Prepare the lemon curd by whisking the egg yolks, whole eggs, sugar, lemon juice and lemon zest over a bain marie (a large bowl placed over a pan of simmering hot water).
  3. Once combined, mix in the butter and whisk the mixture for about 10 minutes, until thick.
  4. Pour into a pre-baked tart shell.
  5. Bake for 6 minutes.
  6. Whilst the tart is baking, prepare the raspberry chantilly by whipping the raspberries, sugar, vanilla extract and cream together.
  7. Leave the tart to cool before dusting with icing sugar.
  8. Serve with the raspberry chantilly, fresh raspberries and mint for garnish.
  9. Enjoy!

Watch the recipe video here:

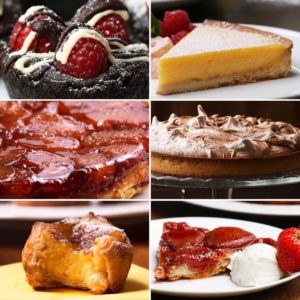
6 terrific tarts from Proper Tasty. ✨FULL RECIPE: https://tasty.co/recipe/french-style-lemon-tart

Posted by BuzzFeed Food on Sunday, April 28, 2019

Main dish

Cheddar-Crusted & Bacon Broccoli Quiche

Cheddar-Crusted & Bacon Broccoli Quiche
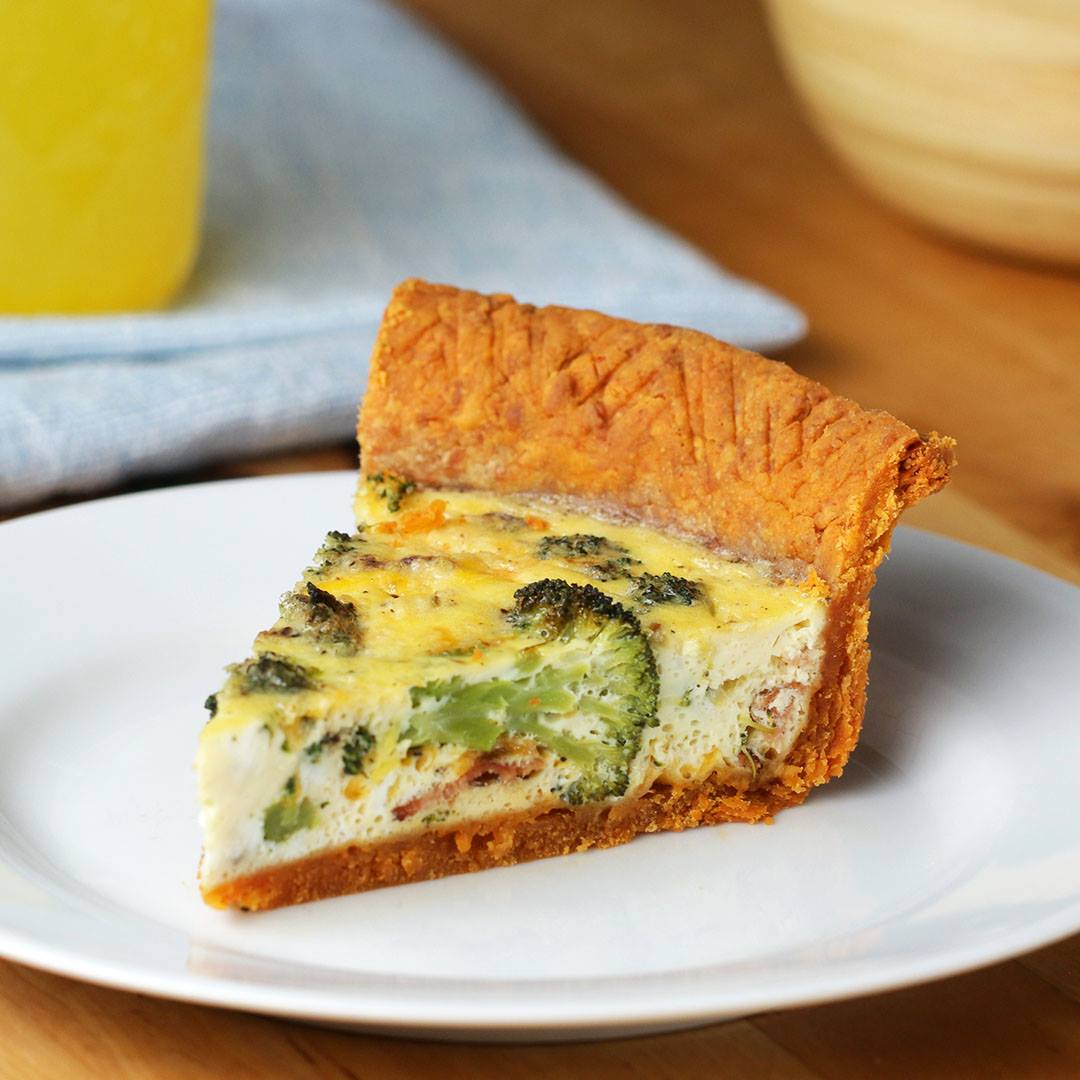
Saving this Cheddar-Crusted Bacon Broccoli Quiche for a perfect weekend brunch ?
Author:
Cuisine: American
Recipe type: Main dish
Ingredients
  • 2 ½ cups shredded cheddar cheese, divided (250 g)
  • 1 cup unsalted butter, 2 sticks, room temperature (230 g)
  • 2 cups all-purpose flour, plus more for dusting (250 g)
  • 1 tablespoon paprika
  • 1 tablespoon garlic powder
  • 2 ½ teaspoons salt, divided
  • 5 tablespoons ice water
  • 4 strips bacon
  • 2 cups small broccoli floret (300 g)
  • 6 large eggs
  • 1 cup milk (240 mL)
  • ½ teaspoon pepper
SPECIAL EQUIPMENT
  • pie weights, coffee beans, or dried beans
Instructions
  1. Preheat the oven to 350˚F (180˚C).
  2. Add 2 cups (200 g) of cheddar cheese and the butter to a large bowl. Mix to combine with an electric hand mixer or stand mixer.
  3. Add the flour, paprika, garlic powder, and 2 teaspoons salt and mix well. Add 3 tablespoons of ice water and mix. Add the remaining ice water 1 tablespoon at a time. The dough should hold together when pinched, but crumble apart if you break it up in your hand. If it seems too dry, add a bit more ice water.
  4. Transfer the dough to a clean surface and knead with your hands until it comes together. Shape the dough into a disc, then wrap in plastic wrap and chill in the refrigerator for 30 minutes.
  5. Lightly flour a clean surface and roll out the dough into a circle about ⅛ inch (8 mm) thick. Carefully transfer the crust to a 9½-inch (24-cm) glass pie dish.
  6. Trim the edges (save the trimmings to make crackers!). Poke holes in the bottom of the crust with a fork, then use the tines to crimp the edges. Line the dough with parchment paper and fill with pie weights.
  7. Bake for 30 minutes, until the edges are crisp.
  8. While the crust is baking, prepare the fillings. In a large skillet over medium-high heat, cook the bacon until crisp, 5-7 minutes. Using tongs, remove the bacon from the skillet and let drain on paper towels until cool enough to handle.
  9. Add the broccoli to the skillet and cook until lightly browned, about 5 minutes. Remove the pan from the heat.
  10. Chop the bacon.
  11. Remove the pie weights from the crust, then add the broccoli and chopped bacon to the center. Sprinkle with the remaining shredded cheddar cheese.
  12. In a medium bowl, lightly beat the eggs. Add the milk, remaining ½ teaspoon salt, and the pepper. Whisk to combine.
  13. Pour the egg mixture over the fillings in the crust.
  14. Bake for 35-40 minutes, or until the eggs are set and the top is lightly browned. Cover the edges with tinfoil if they are starting to burn.
  15. Let the quiche cool for 15 minutes before slicing and serving.
  16. Enjoy!

Watch the recipe video here:

Saving this Cheddar-Crusted Bacon Broccoli Quiche for a perfect weekend brunch ?Get The Recipe: https://tasty.co/recipe/cheddar-crusted-bacon-broccoli-quiche

Posted by BuzzFeed Food on Friday, April 19, 2019