
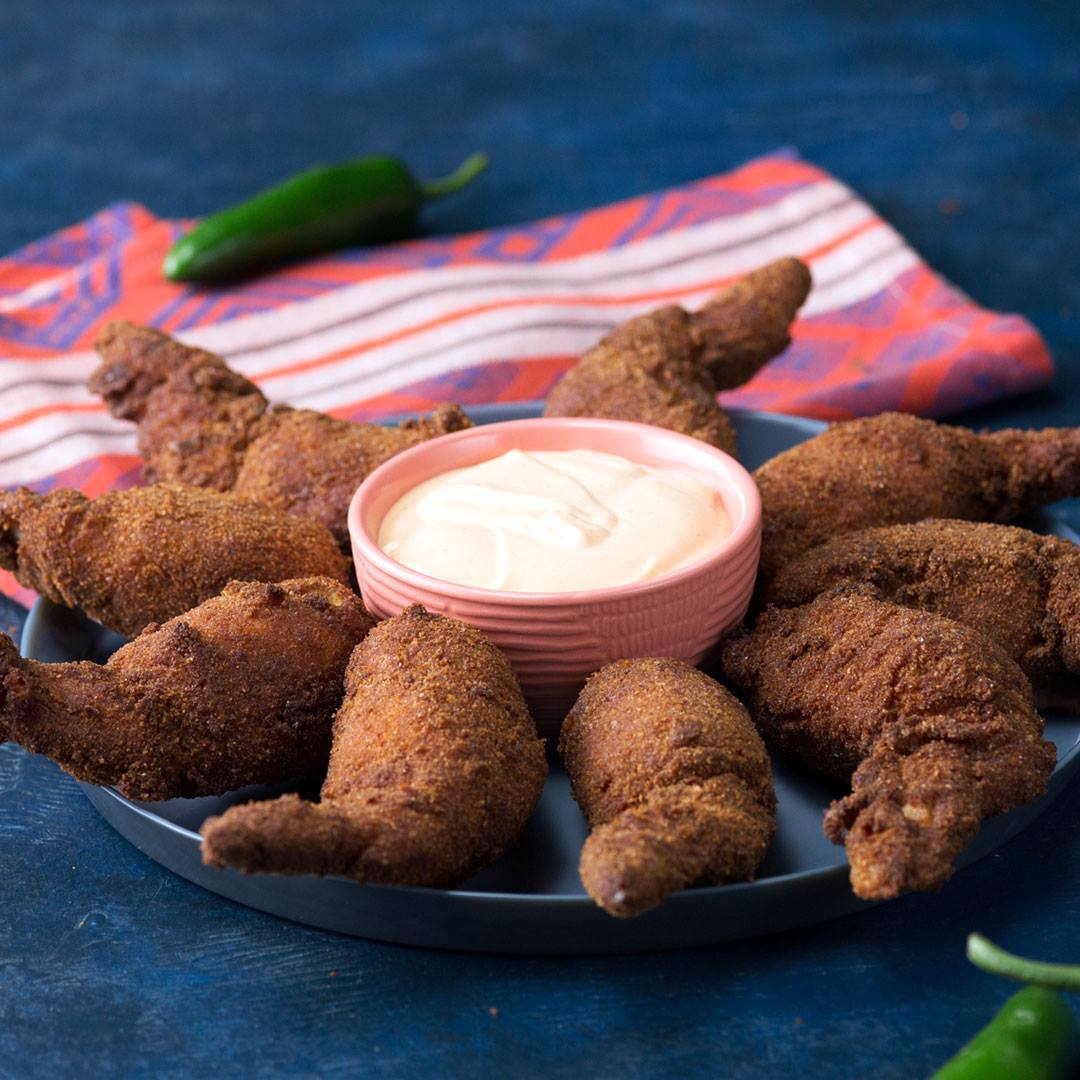
Jalapeño Popper Chicken Wings
Jalapeño Popper Chicken Wings
These wings wanna be jalapeño your business.
Author: The Chef
Cuisine: American
Recipe type: Breakfast
Ingredients
- 8 chicken wings (paddle and tip)
- 2 tablespoons garlic powder, divided
- 3 tablespoons soy sauce
- 4 ounces whipped cream cheese
- 2 ounces shredded sharp cheddar cheese
- 3 slices bacon, fried and chopped into bits
- ¼ cup chopped chives
- 8 small jalapeños
- 1 cup all-purpose flour
- 2 teaspoons kosher salt
- 2 large eggs
- 1 cup unseasoned breadcrumbs
- 1 teaspoon cayenne
For the spicy mayo:
- ½ cup mayonnaise
- 1 tablespoon lime juice
- 2 tablespoons Sriracha
Instructions
- Remove the bones from the paddle section of the wing using a paring knife. Insert your knife between the bone and the meat and work your way around until the bones are free and can be removed, leaving a cavity for stuffing.
- Place the cleaned wings in a medium glass bowl with 1 tablespoon of garlic powder and soy sauce. Let marinate for 30 minutes.
- Preheat oven to 350 degrees.
- In a small bowl, mix cream cheese, cheddar cheese, chives and bacon. Wearing gloves, remove the core and stem from the jalapeños and make a slit down on side. Fill the jalapeños with the cream cheese mixture.
- Stuff the filled jalapeños into the wings, open side first, and seal using toothpicks. Place on a foiled baking sheet and bake for 20 minutes. Let cool.
- In a small bowl, combine spicy mayo ingredients. Set aside.
- In 3 small bowls, create your breading station. In one bowl, mix the flour with the remaining garlic powder and salt. In another, the eggs and in the last, the breadcrumbs and cayenne. Dredge the wings first in the flour, then the egg, then the breadcrumbs and place on a wire rack.
- Deep-fry in oil heated to 350 degrees until golden brown. Season with more salt. Serve with spicy mayo.
Watch the recipe video here:
These wings wanna be jalapeño business.Taste for Yourself: taste.md/2s91rRK
Posted by Tastemade on Tuesday, July 3, 2018