Main dish

Giant BBQ Buffalo Chicken Sandwich

Giant BBQ Buffalo Chicken Sandwich
Just look at this guy. Succulent chunks of chicken marinaded in the signature flavours of buffalo sauce, grilled to perfection on the BBQ. A delicious ranch with charred spring onions. Overall a beautiful Adonis of a sandwich, glorious and dripping with a variety of sublime sauces.
Author:
Cuisine: American
Recipe type: Main dish
Ingredients
Chicken
  • 2 tbsp groundnut oil
  • 1 tbsp paprika
  • 1 tbsp cayenne
  • 1 tsp garlic powder
  • 1 tbsp fine sea salt
  • 1 tsp black pepper
  • 3 tbsp lemon juice
  • 2 tbsp honey
  • 5 chicken breasts, cut into equal chunks
  • 6 spring onions
  • Chopped lettuce
  • 1 large loaf of crusty bread
Buffalo
  • 100ml hot sauce
  • 100g butter
Ranch
  • 200g mayonnaise
  • 50ml buttermilk
  • 6 spring onions
  • 2 cloves garlic, finely crushed
  • 3 tbsp chopped chives
  • 1 tsp black pepper
  • 1 tsp salt
Instructions
  1. Whisk together the oil, paprika, cayenne, garlic powder, salt, pepper, lemon juice and honey.
  2. Add the chicken pieces and leave to marinate for at least an hour.
  3. Meanwhile, make the buffalo sauce - gently heat the hot sauce and add the butter in one piece at a time. Add the whole thing to a blender and whizz it up to make a smooth sauce.
  4. Thread the chicken on to soaked kebab sticks and heat your BBQ/Grill. Grill them until cooked along with the spring onions.
  5. Make the ranch - whisk together mayonnaise, buttermilk, chopped cooked spring onions, garlic, chives, salt and pepper.
  6. Build up the sandwich. Spread the bottom layer with ranch, top with chopped lettuce. Toss the chicken in the buffalo sauce and add to the sandwich, then place the top layer of bread.

Watch the recipe video here:

Giant BBQ Buffalo Chicken Sandwich

Giant BBQ Buffalo Chicken Sandwich

Posted by Twisted on Tuesday, August 21, 2018
Main dish

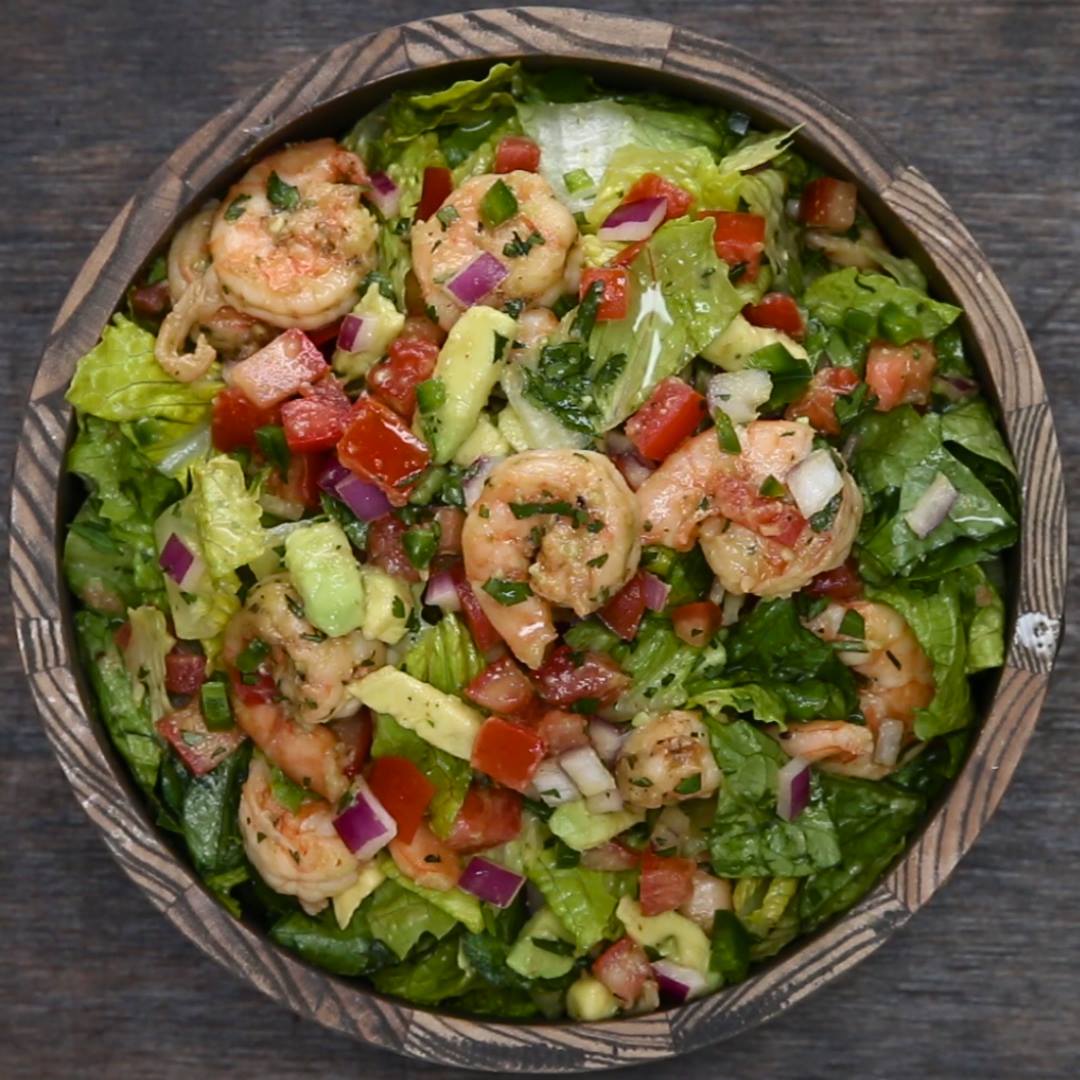
This Shrimp And Avocado Taco Salad Is Delicious And Low-Carb

This Shrimp And Avocado Taco Salad Is Delicious And Low-Carb
Shrimp + avocado = everything.
Author:
Cuisine: American
Recipe type: Main dish
Ingredients
  • 2 tablespoons oil
  • 1 pound medium shrimp, peeled and deveined
  • 1 large head romaine lettuce, chopped
  • 4 tomatoes, diced
  • ½ jalapeño, deseeded and finely diced(optional)
  • ¼ red onion, finely diced
  • 2 tablespoons cilantro, minced
  • 1 large avocado, diced
  • ½ teaspoon salt
  • 1 lime, juiced (2 tablespoons juice)
For the taco seasoning:
  • ½ teaspoon salt
  • ½ teaspoon black pepper
  • 1 teaspoon ground cumin
  • 1 teaspoon dried oregano
  • ¼ teaspoon garlic powder
  • ½ teaspoon chili powder
Instructions
  1. Heat the oil in a skillet over medium-high heat.
  2. Toss in the shrimp and immediately season with the taco seasoning. Sauté the shrimp just until each piece has started to turn pink, about 2 minutes. Remove from heat.
  3. In a large bowl, combine the lettuce, shrimp, tomatoes, jalpeño, red onion, cilantro, avocado, salt, and lime juice, and mix until the salad is well-combined.
  4. Serve with tortilla strips, if desired.
  5. Enjoy!

Watch the recipe video here:

Shrimp And Avocado Taco Salad

Shrimp and avocado taco salad ??FULL RECIPE: http://bzfd.it/2koxhV0

Posted by Proper Tasty on Tuesday, August 21, 2018
Dessert

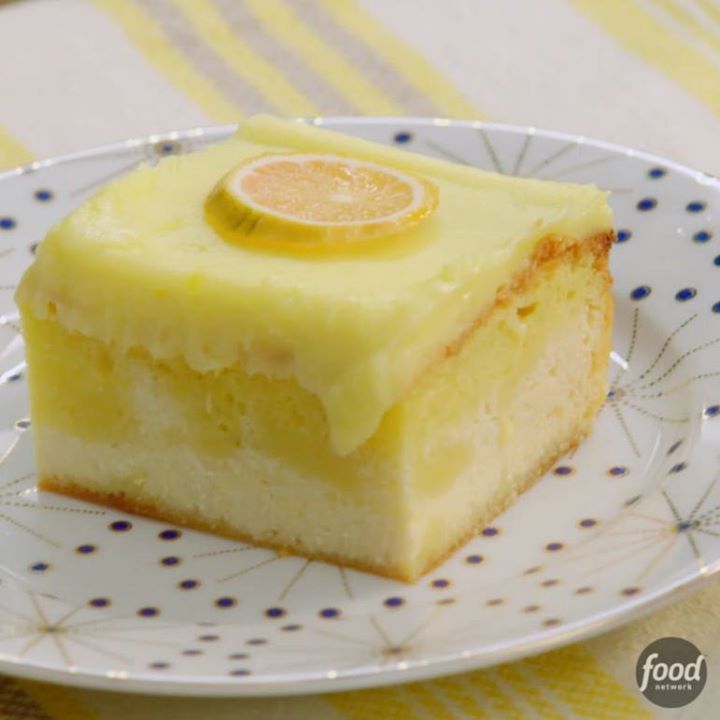
Lemon Love Cake

Lemon Love Cake
Recipe of the Day: Valerie Bertinelli's Lemon Love Cake ?
Author:
Cuisine: American
Recipe type: Dessert
Ingredients
  • Unsalted butter, for greasing
  • All-purpose flour, for dusting
  • One 16.5-ounce package lemon cake mix
  • 1 lemon, zested and juiced
  • One 32-ounce container part-skim ricotta
  • Two 8-ounce containers mascarpone
  • 4 large eggs
  • ¾ cup sugar
  • 1 teaspoon vanilla extract
  • 1 cup whole milk
  • One 3.4-ounce package lemon instant pudding mix, such as Jell-O
Instructions
  1. Preheat the oven to 350 degrees F. Grease a 13-by-9-inch baking pan with butter and dust with flour.
  2. Prepare the cake mix according to package directions, then add 2 tablespoons lemon juice. Pour the batter into the prepared baking pan and set aside.
  3. Beat the ricotta, lemon zest and 4 ounces of the mascarpone with an electric mixer on medium-low speed until smooth. Add the sugar and vanilla; beat until smooth. Add the eggs, one at a time, beating after each addition until just combined. Gently spread the ricotta mixture evenly over the cake batter.
  4. Bake until the cake layer has risen to the top (the ricotta and cake layers switch places) and a wooden pick inserted in the center of the cake comes out clean, 50 to 60 minutes. Let cool completely, about 30 minutes.
  5. Meanwhile, beat the remaining 12 ounces mascarpone with an electric mixer on medium speed until smooth. Gradually add the milk, beating until smooth. Add the pudding mix and beat until smooth. Let stand until thickened, about 5 minutes. Spread the frosting over the cooled cake.

Watch the recipe video here:

How To Make Valerie's Lemon Love Cake

Recipe of the Day: Valerie Bertinelli's Lemon Love Cake ?

Posted by Food Network on Sunday, September 24, 2017

Main dish

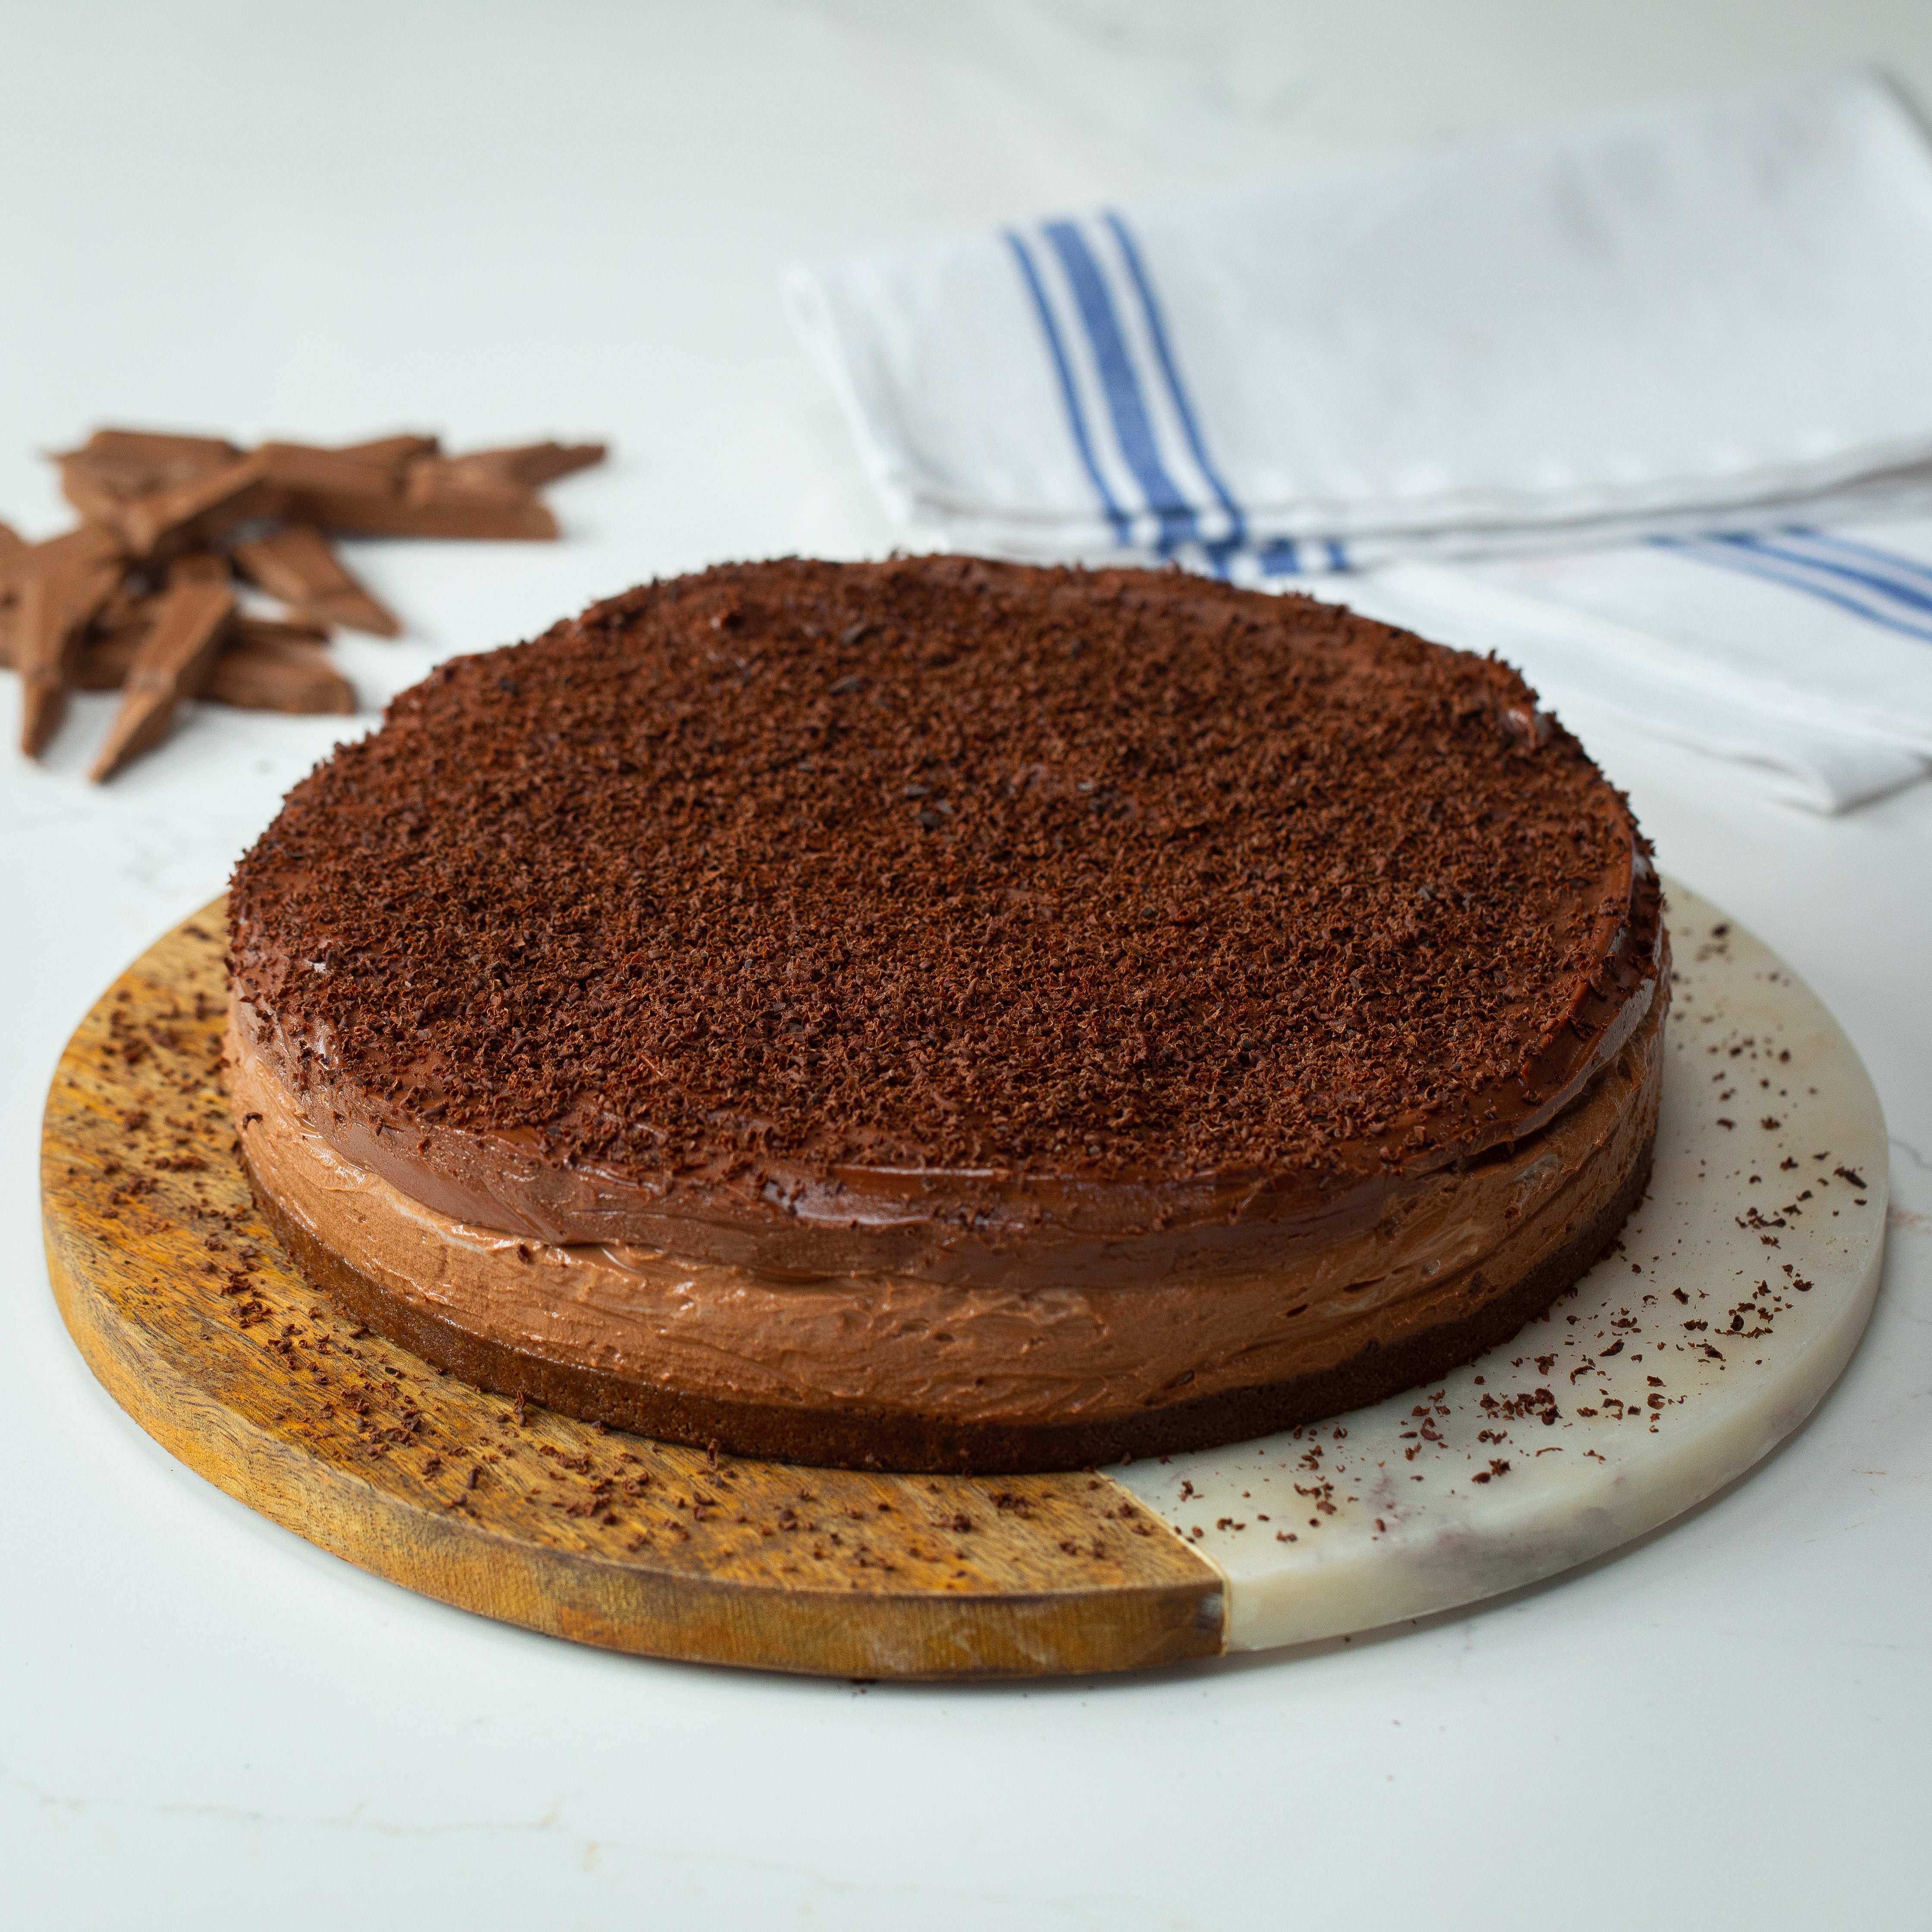
Chocolate Truffle Cheesecake

Chocolate Truffle Cheesecake
Chocolate truffles might well be the ultimate indulgence, a treat so luxuriously and unashamedly naughty they are probably banned in several countries. Essentially just a ball of chocolate and cream, they are perhaps best enjoyed with restraint. Or are they? Why not just add them to the top of a chocolate cheesecake? Is there ever such a thing as too much chocolate? We don't think so.
Author:
Cuisine: American
Recipe type: Main dish
Ingredients
  • 16 digestive biscuits
  • 2 tbsp cocoa powder
  • 100g butter, melted
  • 200ml cream
  • 150g caster sugar
  • 100ml sour cream
  • 500g cream cheese
  • 2 tbsp cocoa
  • 2 tbsp hot water
  • 200g chocolate, melted
Instructions
  1. In a food processor blitz the biscuits to crumbs. Add the cocoa and butter and continue mixing until the mixture resembles dark, soft, slightly damp sand. Press this into the bottom of a lined 23cm springform cake tin and set in the fridge to set.
  2. Using an electric whisk whip the cream and sugar until the sugar has melted and the cream is at the soft peak stage. Add the cream cheese and continue beating until the mix is light. Mix the cocoa powder with the water and fold in along with the chocolate.
  3. Pour this on top of the biscuit base and smooth out. Leave to rest in the fridge for around an hour until set.
  4. Meanwhile, heat the double cream and cream over a gentle heat. Careful it doesn't catch. When it's near at a simmer (but not boiling or scorching hot) pour it over the chocolate and stir to make a smooth ganache. If it looks like it's splitting pour a little of the split mix into a bowl with around 100ml fresh double cream and re-emulsify the split mix - it should start coming together again. Gradually add the split mix to the new, unsplit ganache (you might not be able to save the whole mix).
  5. Pour this ganache over the cheesecake layer and smooth out. Leave to set in the fridge until ready.
  6. Sift the cocoa powder on top and serve.
  7. Port Lockroy base in antarctica

Watch the recipe video here:

Chocolate Truffle Cheesecake

Chocolate Truffle Cheesecake

Posted by Twisted on Monday, August 20, 2018

Main dish

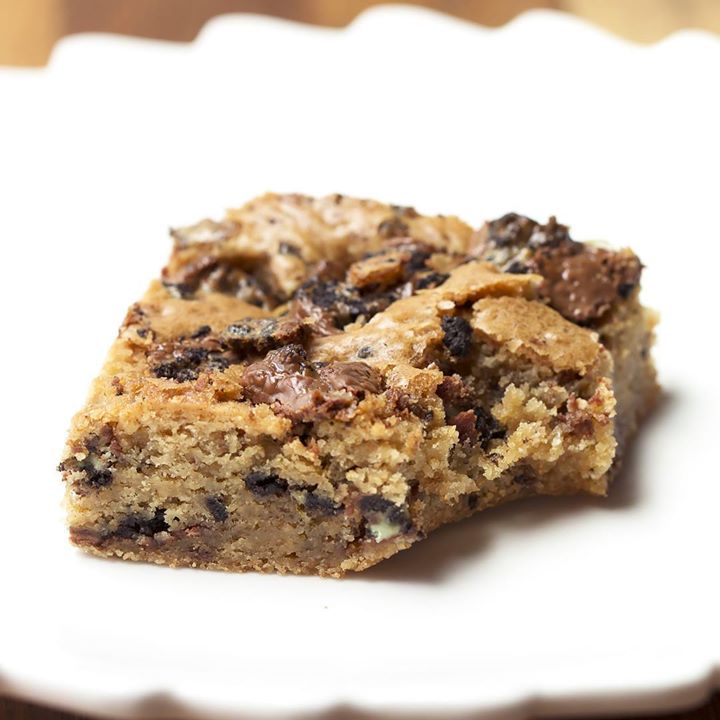
OREO MINT CHOCOLATE CANDY BLONDIES

OREO MINT CHOCOLATE CANDY BLONDIES
Make these minty treats for a delicious twist on a classic blondie.
Author:
Cuisine: American
Recipe type: Main dish
Ingredients
  • 4 Milka Mint Oreo Chocolate Candy Bars
  • 1 cup flour
  • ½ teaspoon baking powder
  • 1 teaspoon salt ½ cup butter, melted
  • 1 cup packed brown sugar
  • 1 teaspoon vanilla extract
  • ½ teaspoon peppermint extract
  • 1 egg
Instructions
  1. Preheat oven to 350ºF.
  2. Roughly chop the Milka Mint Oreo Chocolate Candy Bars into small pieces. Reserve a few tablespoons for the top and save the rest to fold into the blondie batter. Set aside.
  3. Mix together flour, baking powder, and salt in a small bowl.
  4. In a large bowl, mix together melted butter and brown sugar. Add in the vanilla extract and peppermint extract. Whisk the egg into the batter. Stir the dry ingredients into the batter.
  5. Line an 8 x 8” baking pan with parchment paper. Evenly spread the batter into the pan and sprinkle with the reserved crushed candy.
  6. Bake for 25 minutes, until a toothpick inserted into the blondies comes out clean.
  7. Let cool for 15–20 minutes before removing from pan and slicing.

Watch the recipe video here:

OREO Mint Chocolate Candy Blondie

OREO Mint Chocolate Candy BlondieMake these minty treats for a delicious twist on a classic blondie.

Posted by Tasty on Tuesday, March 20, 2018

Dessert

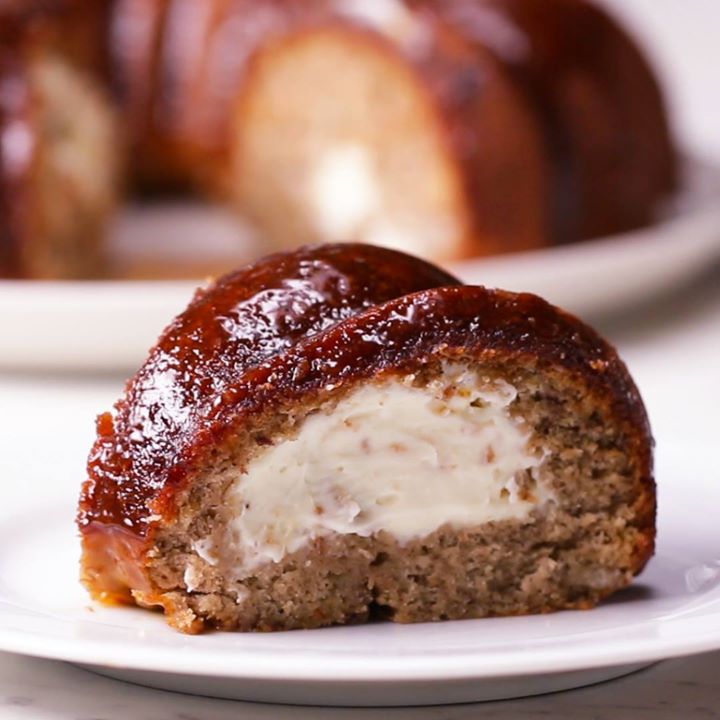
Cheesecake-Stuffed Banana Bread Ring

Cheesecake-Stuffed Banana Bread Ring
This cheesecake-stuffed banana bread ring is everything you've been dreaming of ? ? ✨!
Author:
Cuisine: American
Recipe type: Dessert
Ingredients
  • nonstick cooking spray
CHEESECAKE
  • 16 oz cream cheese, softened (450 g)
  • ½ cup powdered sugar (60 g)
  • 1 teaspoon vanilla extract
BANANA BREAD
  • 4 ripe bananas
  • 1 ½ cups all-purpose flour (190 g)
  • ½ cup granulated sugar (100 g)
  • 1 teaspoon baking powder
  • 4 tablespoons vegetable oil
  • 1 egg
  • 1 teaspoon baking soda
  • ¼ teaspoon salt
  • 1 teaspoon cinnamon
  • 1 teaspoon vanilla extract
CARAMEL
  • 1 cup granulated sugar (200 g)
  • 6 tablespoons butter
  • ½ cup heavy cream, room temperature (120 mL)
Instructions
  1. Preheat the oven to 350°F (180°C). Grease a Bundt pan with nonstick spray.
  2. In a medium bowl, whisk together the cream cheese, powdered sugar, and vanilla, stirring until smooth. Refrigerate.
  3. In a large bowl, mash the bananas with a fork. Add the flour, sugar, baking powder, oil, egg, baking soda, salt, cinnamon, and vanilla. Stir until just combined, without overmixing. Pour half of the batter into the prepared Bundt pan.
  4. With an ice cream scoop, scoop the cream cheese mixture evenly onto the cake batter in the pan, making sure that it does not touch the sides. Pour the rest of the banana bread batter on top and smooth it evenly.
  5. Bake for 30 minutes, or until the banana bread is golden.
  6. To make the caramel glaze, heat the sugar in a medium saucepan over medium-high heat. Once it begins to melt, stir with a wooden spoon or whisk. When it reaches a boil, add the butter and stir until melted. Remove from the heat, add the heavy cream, and immediately stir until incorporated. (Make sure the cream is at room temperature or else it will curdle the sauce.) Allow the caramel cool and thicken.
  7. Invert the banana bread onto a wire rack set over a baking sheet.
  8. Pour the caramel glaze over the cake, letting the excess drip off. Once the glaze has set, slice the cake.
  9. Enjoy!

Watch the recipe video here:

This cheesecake-stuffed banana bread ring is everything you've been dreaming of ? ? ✨!FULL RECIPE: https://tasty.co/recipe/cheesecake-stuffed-banana-bread-ring

Posted by Tasty on Saturday, March 10, 2018

Breakfast

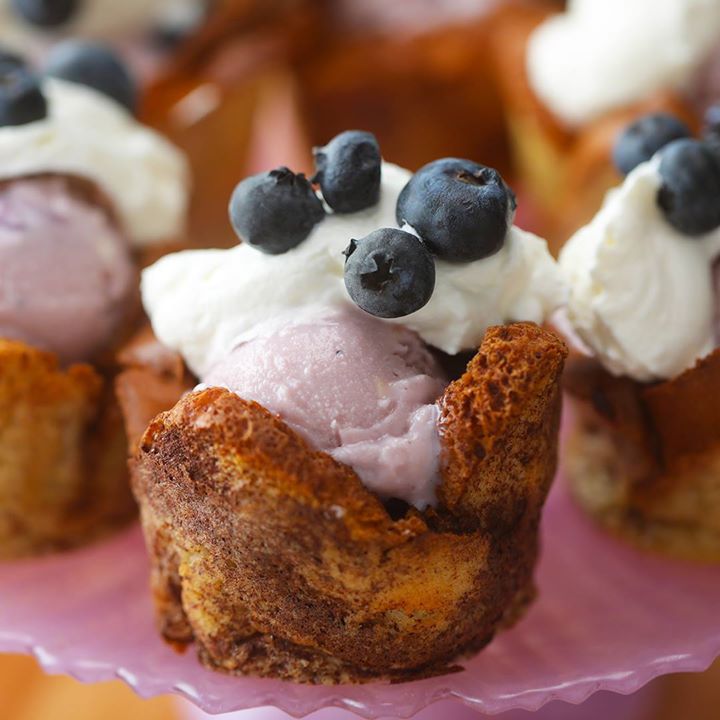
French Toast Ice Cream Cups

French Toast Ice Cream Cups
With Halo Top, make a breakfast that's both sweet AND satisfying.
Author:
Cuisine: American
Recipe type: Breakfast
Ingredients
  • 2 eggs
  • ½ cup milk
  • ½ teaspoon vanilla extract
  • ½ teaspoon cinnamon
  • ½ teaspoon salt
  • 6 pieces white bread
  • 1 pint Halo Top Blueberry Crumble
  • Whipped cream, for garnish
  • Blueberries, for garnish
Instructions
  1. Preheat oven to 375ºF.
  2. Whisk together the eggs, milk, vanilla, cinnamon, and salt.
  3. Spray a silicone muffin pan with cooking spray.
  4. Dip each slice of bread in the milk, coating both sides. Press the bread into each cup of the muffin pan, crimping the sides to get the bread to fit.
  5. Bake for 15–20 minutes, until edges of the french toast are crispy and cooked.
  6. Let cool, then remove the french toast cups from the pan.
  7. Place a scoop of Halo Top Blueberry Crumble in each cup and top with whipped cream and fresh blueberries. Serve and enjoy!

Watch the recipe video here:

French Toast Ice Cream Cups

French Toast Ice Cream CupsWith Halo Top, make a breakfast that's both sweet AND satisfying.

Posted by Tasty on Saturday, March 24, 2018

Main dish

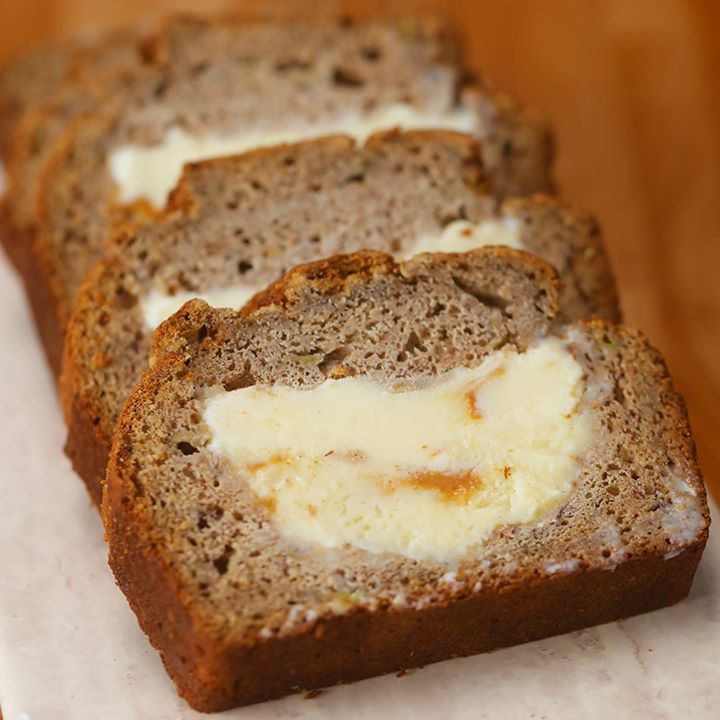
Ice Cream Stuffed Banana Bread

Ice Cream Stuffed Banana Bread
Step up your banana bread game by stuffing it with some sea salted caramel goodness from Halo Top.
Author:
Cuisine: American
Recipe type: Main dish
Ingredients
  • 2 cups flour
  • ¾ cup brown sugar, packed
  • 1 teaspoon baking soda
  • 1 teaspoon salt
  • 1 teaspoon cinnamon
  • 3 bananas, mashed
  • ¼ cup sour cream
  • 2 eggs
  • 6 tablespoons butter, melted
  • 2 teaspoons vanilla extract
  • 1 pint Halo Top Sea Salt Caramel
Instructions
  1. Preheat oven to 350ºF.
  2. In a medium bowl, mix together the flour, brown sugar, baking soda, salt, cinnamon, and cardamom.
  3. In another bowl, whisk together the bananas, sour cream, eggs, melted butter, and vanilla until smooth. Fold the dry ingredients into the wet ones and mix until all the dry streaks are gone.
  4. Spray a loaf pan with cooking spray. Pour the batter into the pan. Bake for 45–50 minutes, until a toothpick inserted into the loaf comes out clean.
  5. Let cool for 10 minutes, then remove the loaf from the pan and let it cool completely.
  6. Once cool, cut out the center of the loaf, leaving a 1-inch board along the bottom and along each side. Set aside the lid of the loaf for later. Fill the rectangular hole with Halo Top Sea Salt Caramel ice cream, using the back of a spoon to press it down and fill all the nooks and crannies.
  7. Take the loaf lid and trim off the extra banana bread from the bottom so that the lid will fit back on top of the ice cream.
  8. Freeze the loaf overnight. Take the loaf out of freezer and place it in the fridge for 30 minutes before slicing. Serve and enjoy!

Watch the recipe video here:

Ice Cream–Stuffed Banana Bread

Ice Cream–Stuffed Banana BreadStep up your banana-bread game by stuffing it with some sea-salted caramel goodness from Halo Top.

Posted by Tasty on Saturday, March 24, 2018

Taco

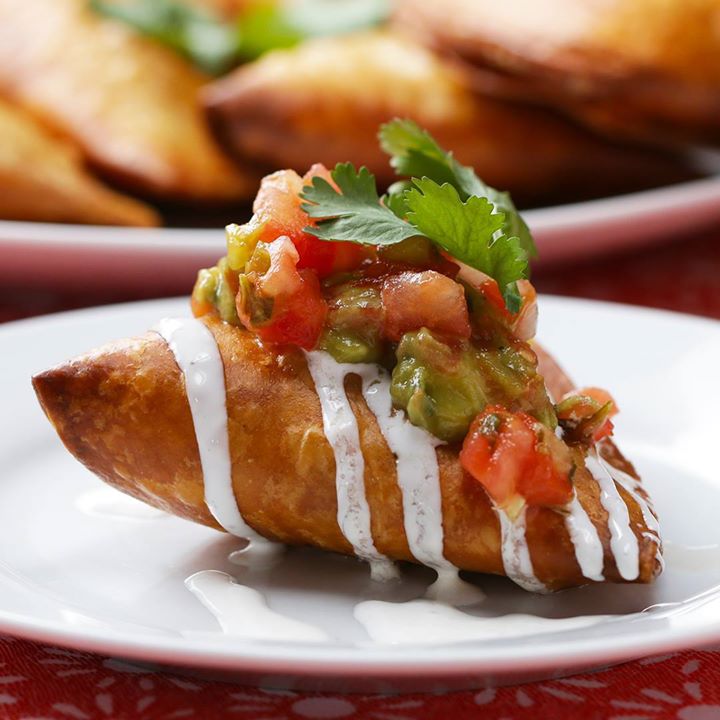
Taco Triangles

Taco Triangles
These taco triangles are easy to eat and make no mess ?!
Author:
Cuisine: Mexican
Recipe type: Taco
Ingredients
  • 1 tablespoon olive oil
  • 1 yellow onion, sliced
  • 1 red bell pepper, sliced
  • 1 green bell pepper, sliced
  • 1 teaspoon salt
  • ½ teaspoon pepper
  • 1 teaspoon paprika
  • 1 teaspoon chili powder
  • 1 teaspoon cumin
  • 1 teaspoon garlic powder
  • 1 teaspoon dried oregano
  • 1 lime, juiced
  • 1 cup shredded chicken (125 g)
  • 1 can black beans, drained and rinsed
  • 1 cup ground beef, cooked (200 g)
  • 10 flour tortillas
  • 2 cups cheese blend (200 g)
  • 1 large egg, beaten
  • oil, for frying
  • fresh cilantro, for serving
  • sour cream, for serving
  • guacamole, for serving
  • salsa, for serving
Instructions
  1. In a large pan over medium heat, add the olive oil, onion, red and green bell pepper, salt, pepper, paprika, chili powder, cumin, garlic powder, and dried oregano. Mix to combine.
  2. Add the lime juice and cook the vegetables until soft, about 5 minutes.
  3. Seperate the vegetables in three medium bowls.
  4. To one bowl, add the shredded chicken. To another bowl, add the black beans. To the last bowl, add the ground beef.
  5. Stir each bowl until everything is incorporated.
  6. Cut a tortilla in half with a pizza cutter or knife.
  7. Put a spoonful of one of the fillings in the center of the tortilla half and sprinkle with cheese.
  8. Fold each corner over the middle, forming a triangle.
  9. Flip the tortilla triangle over so the seam is down.
  10. Brush the edge of the tortilla with egg wash and press with a fork to seal.
  11. Repeat with the remaining tortillas and fillings.
  12. In a deep pan, heat two inches of oil to 350°F (180°C).
  13. Once the oil is hot, place 2-3 tortilla triangles in the pan and cook on each side for 3 minutes, or until golden brown.
  14. Drain the triangles on a rack
  15. Serve with cilantro, sour cream, guacamole, and salsa.
  16. Enjoy!

Watch the recipe video here:

Taco Triangles

These taco triangles are easy to eat and make no mess ?!FULL RECIPE: https://tasty.co/recipe/taco-triangles

Posted by Tasty on Saturday, March 24, 2018

Main dish

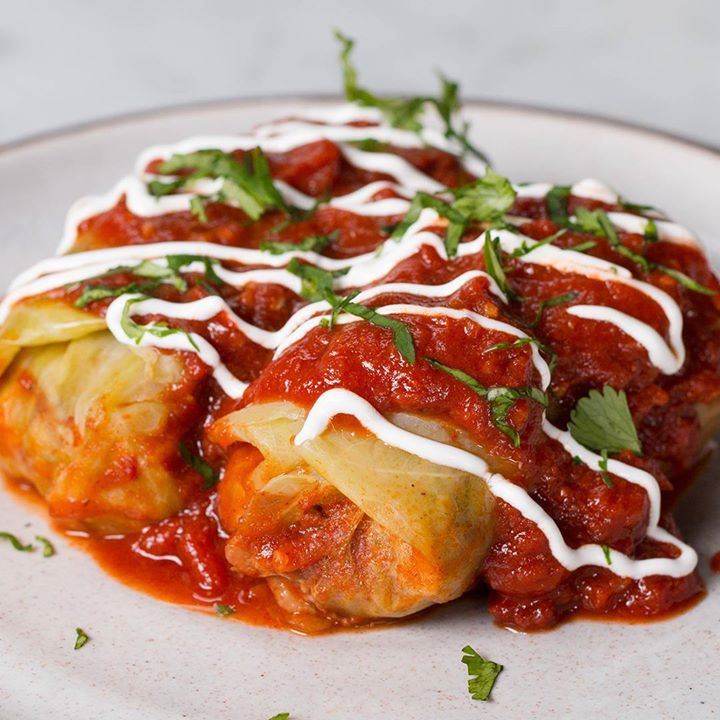
Stuffed Cabbage Rolls

Stuffed Cabbage Rolls
Wrap your dinner in vegetables and it's BASICALLY like eating a salad. ?
Author:
Cuisine: American
Recipe type: Main dish
Ingredients
  • SAUCE
  • 2 tablespoons olive oil
  • 2 cloves garlic, minced
  • 28 oz crushed tomato, 1 can (795 g)
  • 1 tablespoon paprika
  • 1 ½ teaspoons chili powder
  • 1 teaspoon ground cumin
  • salt, to taste
  • black pepper, to taste
  • CABBAGE ROLLS
  • 1 lb ground beef (455 g)
  • salt, to taste
  • black pepper, to taste
  • 1 teaspoon chili powder
  • 1 teaspoon ground cumin
  • 2 teaspoons dried oregano
  • ½ cup white rice, uncooked medium grain (100 g)
  • 1 green cabbage, core removed
  • sour cream, for serving
  • fresh cilantro, for garnish
Instructions
  1. In a medium pan over medium heat, heat the olive oil until shimmering, then cook the garlic until fragrant, for 1-2 minutes.
  2. Stir in the crushed tomato, paprika, chili powder, ground cumin, salt, and pepper. Reduce the heat to medium-low and simmer for 10 minutes. Set aside to cool.
  3. In a medium bowl, combine the ground beef, salt, pepper, chili powder, cumin, oregano, rice, and 1 cup (260 G) of tomato sauce. Mix until combined. Refrigerate until ready to use.
  4. Bring a large pot of water to a boil over high heat. Add the cabbage, cut side down. Cover with a lid, reduce the heat to medium, and simmer for 15 minutes.
  5. Preheat the oven to 350°F (180°C) for 45 minutes.
  6. Transfer the cabbage to a cutting board, cut side up, and let cool until it reaches room temperature.
  7. Peel off a layer of the cabbage. With the stem facing upwards, use a paring knife to trim the thicker stem, which will make the leaf easier to roll. With the stem side pointed towards you, place a few tablespoons of filling at the base of the leaf.
  8. Roll upwards so the filling is covered by a single layer of the cabbage. Fold both sides in, then roll all the way up.
  9. Place the cabbage roll seam side down in a 9x13-inch (23x33 -cm) baking dish and repeat with the remaining filling.
  10. Spoon the remaining tomato sauce over the cabbage rolls.
  11. Cover the dish tightly with foil and bake for 45 minutes.
  12. Enjoy!

Watch the recipe video here:

Stuffed Cabbage Rolls

Wrap your dinner in vegetables and it's BASICALLY like eating a salad. ?FULL RECIPE: https://tasty.co/recipe/stuffed-cabbage-rolls

Posted by Tasty on Friday, March 30, 2018