Showing 879 Result(s)
Dessert

Nut Goodie Ice Cream Bars
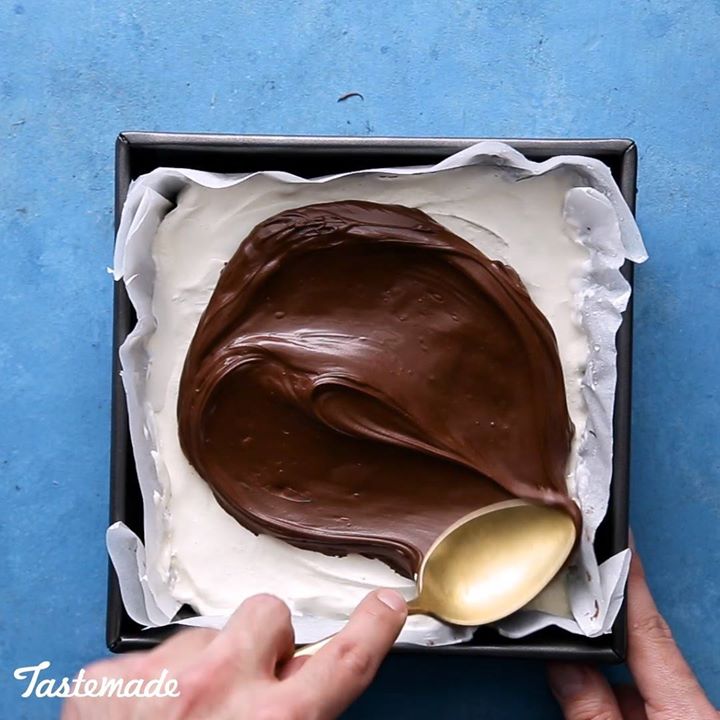
Nut Goodie Ice Cream Bars
Chocolate, peanut butter AND ice cream!? We are actually in heaven with these bars.
Author:
Cuisine: American
Recipe type: Dessert
Ingredients
Brownie base layer:
  • 2½ tablespoons salted butter, melted
  • 1 cup granulated sugar
  • 1 large egg plus 1 egg yolk
  • 1 teaspoon vanilla extract
  • 2 tablespoons plus 2 teaspoons vegetable oil
  • 6 tablespoons dark cocoa powder
  • 4 tablespoons all-purpose flour
  • 1 teaspoon cornstarch
  • ⅛ teaspoon salt
  • Pinch of baking soda
Chocolate layer:
  • 12 ounces semisweet chocolate chips
  • ½ cup creamy peanut butter
  • Sea salt
Maple fudge layer:
  • 3 ounces cream cheese, softened
  • 2½ cups powdered sugar
  • 2 tablespoons peanut butter
  • ¼ teaspoon maple extract
  • 1½ cups roasted salted peanuts
Ice cream layer:
  • 1 (8-ounce) container whipped topping
  • 2½ cups vanilla ice cream, softened
Instructions
  1. Preheat oven to 325 degrees. Line an 8 by 8-inch baking pan with parchment. Oil the parchment on the side that will be in contact with food.
For the brownie base:
  1. In medium bowl, mix the butter and sugar until smooth. Whisk in the eggs, vanilla extract, vegetable oil and cocoa powder.
  2. With a spatula, mix in flour, cornstarch, salt and baking soda until batter is smooth. Pour batter into the prepared pan. Bake 20 to 25 minutes or until moist crumbs stick to an inserted toothpick. Let cool completely.
For the chocolate layer:
  1. Place the semisweet chocolate chips and peanut butter in a medium-size microwave safe bowl. Microwave for 1 minute. Stir until smooth.
  2. Spread one-third of the chocolate evenly over the cooled brownie layer. Place in the fridge to cool for 20 minutes.
For the maple fudge layer:
  1. In a medium bowl, mix together softened cream cheese, powdered sugar, maple extract and peanut butter until smooth. Spread evenly over the chocolate layer, and top with peanuts, patting down slightly. Place in the fridge to cool for 20 minutes.
For the ice cream layer:
  1. With the back of a spoon, forcefully mix together the softened ice cream with the whipped topping. Place into a piping bag. Evenly pipe the ice cream mixture over the fudge layer. Use a spatula to smooth over the top. Place in the freezer until firm, 20 minutes.
For the final chocolate layer:
  1. Warm the remaining chocolate mixture if it is no longer fluid. Pour over the ice cream layer, and spread out evenly with a spatula. Garnish with sea salt. Place in the freezer until frozen, 1 hour.
  2. Flip bars out onto a cutting board (brownie side up), and cut into 8 equal-sized candy bars. Serve immediately, or cover with plastic wrap to keep in the freezer for up to 5 days.

Watch the recipe video here:

Nut Goodie Ice Cream Bars

You can't make everyone happy. You aren't this ice cream bar.Taste for Yourself: taste.md/2GDXLMQ

Posted by Tastemade on Thursday, April 5, 2018
Dessert

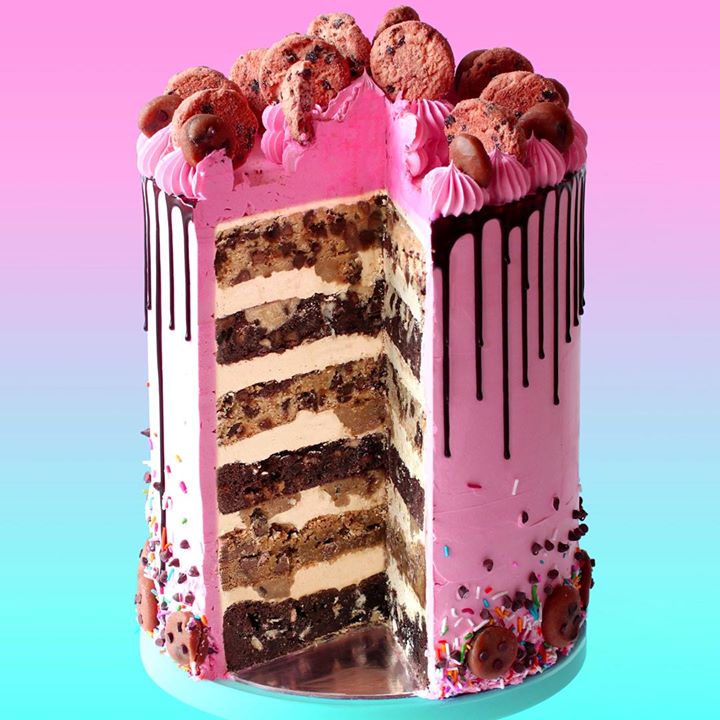
Giant Funfetti Cookie Dough Cake

Giant Funfetti Cookie Dough Cake
This most epic cake consists of vanilla and chocolate cookie layers with vanilla and choc chip cake layers, wrapped in strawberry frosting and more.
Author:
Cuisine: American
Recipe type: Dessert
Ingredients
  • Vanilla Cookie Layer (makes one 8” cake)
  • 200g unbleached all-purpose flour
  • 1 tsp baking soda
  • ½ tsp. salt
  • 125g unsalted butter, at room temperature
  • 90g granulated sugar
  • 1 large egg
  • 1 tsp. vanilla extract
  • 470 g dark chocolate chips
  • 110g packed brown sugar
  • Chocolate Cookie Layer (makes one 8” cake)
  • 200g unbleached all-purpose flour
  • 1 tsp baking soda
  • ½ tsp. salt
  • 125g unsalted butter, at room temperature
  • 90g granulated sugar
  • 1 large egg
  • 1 tsp. vanilla extract
  • 470 g white chocolate chips
  • 110g packed brown sugar
  • ½ cup unsweetened cocoa powder
  • Vanilla Cake Layer (makes two 8” cakes)
  • 429g all-purpose flour
  • 265g brown sugar
  • ½ tsp salt
  • 3 tsp baking powder
  • 375ml of milk
  • 125ml vegetable oil
  • 125g unsalted butter, softened
  • 2 tbsp Greek yogurt (can substitute with sour cream)
  • 1 tsp vanilla extract
  • 2 large eggs
  • 1 cup dark choc chips
  • Devils Food Chocolate Layer (makes two 8” cakes)
  • 100g cocoa powder
  • 350g all-purpose flour
  • ½ tsp salt
  • 1 tsp bicarbonate of soda
  • 500g caster sugar (yes this is the correct amount)
  • 350g unsalted butter, softened
  • 4 large eggs, at room temperature
  • 350ml milk
  • 1 cup white choc chips
  • 1 cup milk choc chips
  • Cookie Dough (any leftovers can be frozen)
  • 125g choc chips (milk, dark or white) for cookie dough
  • 60g soften butter
  • 85g brown sugar
  • 1 teaspoon vanilla
  • ¼ tsp salt
  • 100g plain flour
  • ½ cup milk (you might not need all of the milk)
  • Frosting (you’ll need 4 batches of this recipe. It’s a big cake remember? lol)
  • 200g egg whites
  • 250g caster sugar
  • ½ tsp cream of tartar
  • 450g unsalted butter (very soft)
  • 1 tsp vanilla extract
  • 4 tbsp molasses
  • 10 drops pink food gel
  • 4 tsp strawberries and cream essence (or any flavouring you like)
  • Extra Stuff
  • Chocolate sauce
  • Funfetti sprinkles
  • Store bought cookies for top
  • Mini choc chips
  • Simple syrup (brought to a boil and cooled)
  • 200g water
  • 200g sugar
Instructions
  1. Please note. This recipe will need to be split up into two days at least to allow the cakes and cookie layers to cool completely overnight.
  2. Vanilla and Chocolate cookie layers
  3. Preheat the oven to 180°C. Spray two 8” cake tins with oil and line with baking paper. Set aside.
  4. Beat the butter, brown sugar and granulated sugar until smooth, about 2 minutes. Add the egg, milk and vanilla and mix on low speed until blended.
  5. Add dark choc chips, mix. Then add half flour, baking soda and salt for the vanilla cookie and the same for the chocolate cookie including the cocoa powder. Mix until well combined.
  6. Add ⅔ of each cookie dough into prepare cake tins and patt down flat using clean hands. Bake for 30 min. Allow to chill before taking out of the cake tin.
  7. Vanilla Cake Layer
  8. Preheat a fan-forced oven to 160C (320F) or 180C (356F) for a conventional oven. Spray two 8” cake tins with oil spray and line the bottom with baking paper.
  9. In the bowl of a stand mixer fitted with the paddle attachment, add the flour, baking powder, caster sugar and salt. Turn mixer on low speed and allow it to mix for a couple minutes to help everything combine well (alternatively you may do this by sifting the ingredients together). Add the softened butter and mix until it resembles a fine sand like texture.
  10. Add the milk, oil, Greek yogurt, eggs and vanilla extract into the bowl with the dry ingredients and mix on medium speed until no dry ingredients are visible. Scrape down the bowl, add choc chips and fold in. The Greek yogirt is optional and helps keep the cake moist.
  11. Fill cake tins with batter.
  12. Bake for 30 min or until a toothpick inserted comes out clean. Allow the tins to cool for 2 min and then carefully flip the cake tins over on to a cooling wrack to cool completely before using.
  13. Using a large serrated knife, carefully trim the top off each layer of cake to make even and flat layers. Try to aim to get them all the same height. An easy way to do this is to find the lowest height of the cake, place a skewer or toothpick next to that point and mark it. As you go around each side of the cake cutting it, use the marked skewer to make sure each cut is at the same height.
  14. Chocolate Cake layer
  15. In the bowl of a stand mixer fitted with the paddle attachment, add the flour, bicarb soda, caster sugar and salt. Turn mixer on low speed and allow it to mix for a couple minutes to help everything combine well (alternatively you may do this by sifting the ingredients together). Add the softened butter and mix until it resembles a fine sand like texture.
  16. Add the milk and eggs into the bowl with the dry ingredients and mix on medium speed until no dry ingredients are visible. Scrape down the bowl, add choc chips and fold in.
  17. Fill cake tins with batter.
  18. Bake for 30 min or until a toothpick inserted comes out clean. Allow the tins to cool for 2 min and then carefully flip the cake tins over on to a cooling rack to cool completely before using.
  19. Using a large serrated knife, carefully trim the top off each layer of cake to make even and flat layers. Try to aim to get them all the same height. An easy way to do this is to find the lowest height of the cake, place a skewer or toothpick next to that point and mark it. As you go around each side of the cake cutting it, use the marked skewer to make sure each cut is at the same height.
  20. Cookie Dough
  21. Cream butter and sugar until it becomes pale and creamy. Stir in vanilla and milk. Mix in choc chips. Add salt and half of flour. Mix. Repeat with the rest of the flour. and flour, add more milk if needed. Place in the fridge to chill for one hour. Roll about 1 tsp sized balls and then flatten slightly. Chill in the fridge until ready to use.
  22. Frosting
  23. To frost this mega giant cake, you’ll need four batches of my Swiss meringue buttercream. You can find the recipe on my website. You’ll want to flavour 2 batches with molasses. Add enough molasses so that you can taste it. It gives the frosting a brown sugar flavour. You are of course free to flavour it with anything you like, but the brown sugar flavour reflects the flavours found in a cookie.
  24. Flavour the last two batches with strawberries and cream essence and add pink colour. Mix both until well combined.
  25. Crumb Coat
  26. To prepare crumb coat layer, add a dab of molasses frosting onto an 8” cake board or flat serving plate. Add first the chocolate cookie layer. Using a piping or zip lock bag to add frosting onto the cookie layer. Use a small offset spatula to flatten the frosting while spinning the cake. Add little blobs of cookie dough on top.
  27. Next add the vanilla cookie. Repeat the process, adding the chocolate cake, Drizzle with simple syrup. This helps keep your cake moist. Add frosting and cookie dough. Repeat the process with the vanilla cake, followed by chocolate, finishing with the vanilla cake.
  28. Add a blob of the molasses frosting on top and use an offset spatula to smoothen out. Use the offset spatula to smoothen out the frosting on the sides of the cake starting from the bottom and working your way up to the top. Making sure you use the frosting to fill the gaps in between the layers.
  29. Go around the cake with a cake scraper to get rid of any excess frosting. It should only be a thin layer. Chill for at least 1-2 hours.
  30. To add pink layer add frosting into a large piping bag and frost around the cake, starting from the bottom, working your way to the top. Frost the top as well.
  31. Use the cake scraper to go around the cake and smoothen the frosting around the sides and the top as demonstrated in the video.
  32. Chill for 1 hour. While the cake is chilling roll the
  33. Add sprinkles down the bottom of the cake. Then add mini choc chips followed by mini cookie dough cookies.
  34. Drizzle the top with chocolate sauce which is slightly warmed to make it drizzle easily. Make sure it’s not hot though. Add little blobs of frosting on the top perimeter of the cake using a Wilton 8B piping tip.
  35. Add little cookie dough cookies on top of every second blob of frosting and a choc chip cookie on the rest of the blobs. Add more choc chip cookies in the middle.

Watch the recipe video here:

Giant Funfetti Cookie Dough Cake

The most epic cookie dough cake you've ever seen. The Scran LineTaste for Yourself: taste.md/2w2qk5l

Posted by Tastemade on Tuesday, April 10, 2018

Dessert

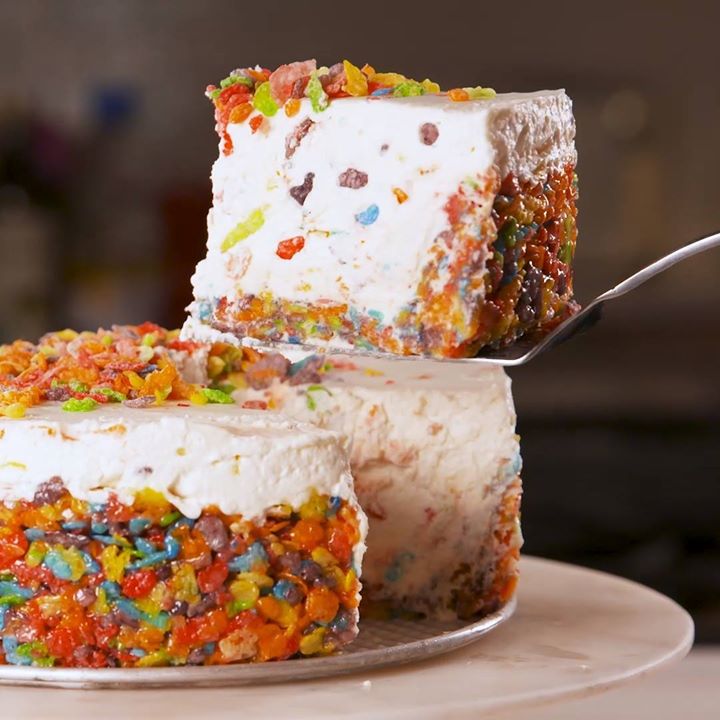
Fruity Pebbles Cheesecake

Fruity Pebbles Cheesecake
The new way to eat cereal.
Author:
Cuisine: American
Recipe type: Dessert
Ingredients
FOR THE CRUST
  • 1 (10-oz.) bag marshmallows
  • ½ c. (1 stick) butter
  • 5 c. Fruity Pebbles
FOR THE CHEESECAKE
  • 2 (8-oz.) blocks cream cheese, softened
  • ½ c. sugar
  • 1 tsp. vanilla extract
  • Pinch of kosher salt
  • 2 c. Cool Whip
  • ½ c. Fruity Pebbles, plus more for garnish
Instructions
  1. In a large saucepan over medium heat, melt marshmallows and butter, stirring to combine. Remove from heat and stir in Fruity Pebbles.
  2. Coat a springform pan with cooking spray, then press mixture into pan and up the sides. Let cool.
  3. Meanwhile, make filling: In a large bowl using a hand mixer, beat together cream cheese and sugar until light and fluffy, then add vanilla and salt. Stir in whipped heavy cream until no lumps remain, then fold in Fruity Pebbles.
  4. Spoon filling into cooled crust and refrigerate until set, at least 4 hours and up to overnight.
  5. Remove cheesecake from pan and garnish with more Fruity Pebbles before slicing and serving.

Watch the recipe video here:

How To Make A Fruity Pebbles Cheesecake

Fruity Pebbles Cheesecake = every cereal lover's DREAM come true ?Full recipe: http://dlsh.it/MeSEL9S

Posted by Delish on Monday, April 9, 2018

Dessert

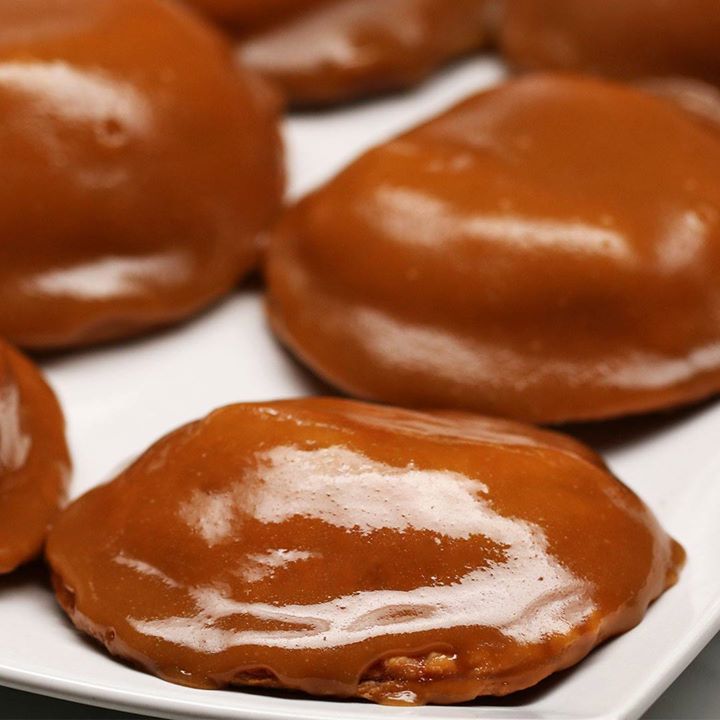
Caramel Apple Hand Pies

Caramel Apple Hand Pies
Author:
Cuisine: American
Recipe type: Dessert
Ingredients
  • 3 granny smith apples
  • ½ cup (100 g) granulated sugar
  • 2 tablespoons cornstarch
  • 2 teaspoons cinnamon
  • ½ teaspoon salt
  • 2 shells pie dough, thawed and prepared
  • 1 medium egg, beaten
  • ¼ cup (60 g) unsalted butter, ½ stick
  • 1 cup (220 g) brown sugar
  • 1 teaspoon vanilla
  • ½ teaspoon salt
  • ¼ cup (85 g) honey
Instructions
  1. Preheat the oven to 400˚F (200˚C). Line a baking sheet with parchment paper.
  2. On a cutting board peel and cut the apples into slices ¼-inch (6-mm) thick.
  3. Place the apple slices in a medium bowl. Add the sugar, cornstarch, cinnamon, and salt. Mix until the apples are well-coated, then set aside until ready to use.
  4. Roll out one of the pie crusts. Use a 4-inch (10-cm) diameter glass or ramekin to cut 6 rounds from the dough. Repeat with the remaining crust so you have 12 dough circles total.
  5. Place a few apple slices on top of one of the dough circles. Place another circle of dough on top, and seal the edges together. With a fork, crimp the edges and poke a few holes on the top of the hand pie. Repeat with the rest of dough and apples.
  6. Transfer the hand pies to the baking sheet and brush with egg wash. Bake for 20 minutes, until golden. Let cool for 10 minutes.
  7. In a small saucepan over medium heat, melt the butter with the brown sugar, vanilla, salt, and honey. Mix thoroughly until the caramel begins to bubble. Remove the sauce from the heat and pour into a small bowl for dipping.
  8. Once the hand pies have cooled, dunk them face down into the caramel, let any excess drip off. Flip the hand pies right-side up so the caramel oozes down to the edges. Let cool for 2 minutes.
  9. Enjoy!

Watch the recipe video here:

Caramel Apple Hand Pies

These caramel apple hand pies will satisfy your sweet tooth! ?FULL RECIPE: https://tasty.co/recipe/caramel-apple-hand-pies

Posted by Tasty on Saturday, April 7, 2018

Dessert

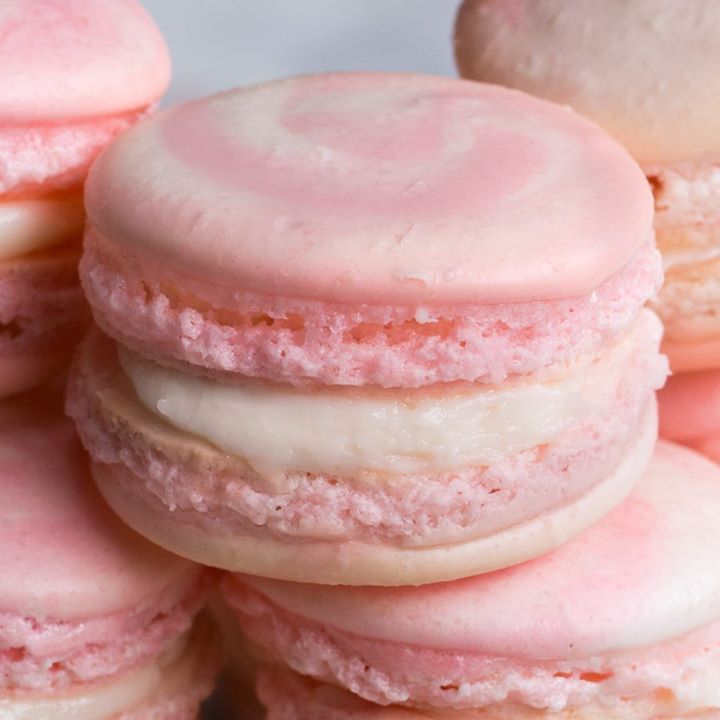
Strawberry Cheesecake Macarons

Strawberry Cheesecake Macarons
Author:
Cuisine: American
Recipe type: Dessert
Ingredients
  • 3 egg whites, room temperature
  • ¼ cup (50 g) sugar
  • 1 ¾ cups (280 g) powdered sugar
  • 1 cup (100 g) superfine almond flour
  • 3 drops red food coloring
FILLING
  • 8 oz (225 g) cream cheese, 1 package
  • 1 cup (160 g) powdered sugar
  • 2 tablespoons milk
  • strawberry jam
Instructions
  1. Preheat oven to 285ºF (140ºC).
  2. In a medium bowl, beat the egg whites until frothy.
  3. Keep beating and slowly add sugar until stiff peaks form.
  4. Sift powdered sugar and almond flour over the egg whites.
  5. Fold the dry mixture into the egg whites, giving the bowl a quarter turn every third fold. Make sure to not overmix or the macarons will not rise.
  6. Once the batter reaches a lava-like consistency, transfer half the batter to another bowl and add the food coloring. Mix until just combined. Do not overmix!
  7. Working quickly, put the white and pink batters into separate sandwich bags. Cut the corner off of each bag and squeeze the two batters evenly into a larger gallon-size bag or piping bag to create the multicolor effect.
  8. Pipe 1½-inch (4 cm) dollops onto a baking sheet lined with parchment paper (Tip: take a little batter to “glue:” down the edges of the parchment paper so it stays put).
  9. Let the cookies rest for 30 minutes to an hour, until they are no longer wet to the touch and a skin forms on top.
  10. While resting, make the filling by mixing the cream cheese, powdered sugar and milk in a bowl until smooth. Transfer to a piping bag and set aside until ready to fill.
  11. When the cookies are dry to the touch, bake for 13 to 15 minutes until they have risen to form a “foot.”
  12. Let rest for 10 minutes before filling. To fill, pipe a circle of the cream cheese mixture around the edge of one cookie and place a small dollop of jam in the center. Sandwich with another macaron.
  13. Macarons are best kept refrigerated until serving.
  14. Enjoy!

Watch the recipe video here:

YES, you can make these adorable strawberry cheesecake macarons at home! ?FULL RECIPE: https://tasty.co/recipe/strawberry-cheesecake-macarons

Posted by Tasty on Saturday, April 7, 2018

Dessert

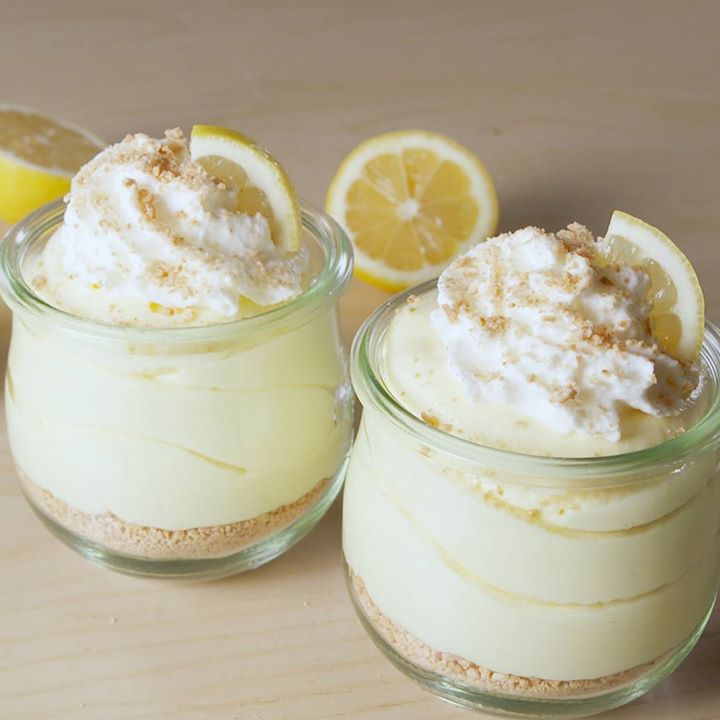
Lemon Cheesecake Mousse

Lemon Cheesecake Mousse
Picture perfect!
Author:
Cuisine: American
Recipe type: Dessert
Ingredients
  • 1 package graham crackers, crushed, plus more for garnish
  • 12 oz. cream cheese, softened to room temperature
  • 1 c. powdered sugar
  • Juice of 1 lemon
  • Pinch kosher salt
  • 1 c. whipped topping, plus more for garnish
  • Lemon wedges, for garnish
Instructions
  1. Divide crushed graham crackers between 4 dessert cups. In a large bowl using a hand mixer, whip cream cheese until light and fluffy. Add powdered sugar, lemon juice, and salt and beat until combined. Fold in 1 cup whipped topping.
  2. Pipe cream cheese mixture into cups and place in refrigerator until thickened, 1 hour up to overnight. When ready to serve, top with remaining whipped topping and garnish with crushed graham crackers and lemon wedges.

Watch the recipe video here:

How To Make Lemon Cheesecake Mousse

Lemon Cheesecake Mousse is the lightest, fluffiest spring dessert EVER ??Full recipe: http://dlsh.it/NU9dhlU

Posted by Delish on Sunday, April 8, 2018

Dessert

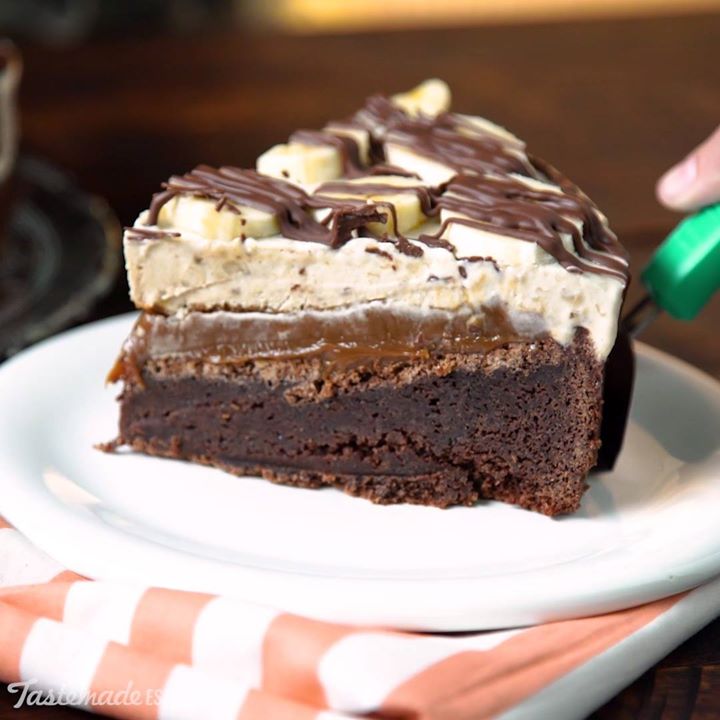
Banana Split Cake

Banana Split Cake
Can't seem to finish your banana split before it melts? Why not try a decadent banana split cake instead?
Author:
Cuisine: American
Recipe type: Dessert
Ingredients
  • 10 ounces semisweet chocolate
  • ¾ cup butter
  • 6 eggs
  • 2¼ cups sugar
  • Vanilla extract as needed
  • 2 cups flour
  • ¼ cup cocoa powder
  • 1 teaspoon salt
  • ½ teaspoon baking soda
  • For the mousse:
  • 2 bananas
  • Juice from ½ lemon
  • 3 egg yolks
  • ½ cup sugar
  • 1 cup heavy cream
  • 3¼ teaspoons flavorless gelatin
  • ¼ cup water
  • To finish:
  • Dulce de leche
  • 2 bananas, sliced
  • Chocolate sauce
Instructions
  1. Preheat oven to 350 degrees, and grease a springform pan with butter.
  2. In a large glass bowl over a double boiler, melt the chocolate and butter together. Remove from heat and add eggs, sugar and vanilla. Sift in the flour and cocoa powder, then add the baking soda and salt. Stir to combine, then pour into prepared pan. Bake for 18 minutes, then allow to cool.
  3. In a large mixing bowl, mash the bananas, then add the lemon juice, egg yolks and sugar. Mix to combine, then add the heavy cream and stir until combined.
  4. In a small bowl, combine the gelatin with cold water until gelatin is dissolved. Add a small amount of the banana mixture to the gelatin and stir before pouring the contents into the larger bowl.
  5. Add a layer of dulce de leche on top of the cake and use a spatula to spread evenly. Pour the banana mixture on top, then place the cake in the refrigerator to set.
  6. Remove from fridge and top with sliced bananas and chocolate sauce.

Watch the recipe video here:

Banana Split Cake

Because calories don't count on the weekend.Taste for Yourself: taste.md/2zdATUc?: Tastemade Español

Posted by Tastemade on Sunday, April 8, 2018

Dessert

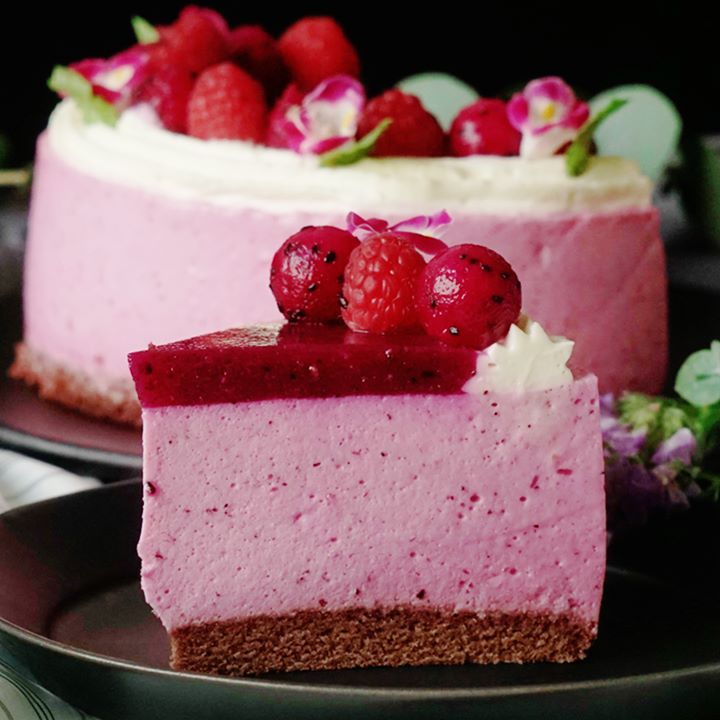
Bavarian Cream Dragon Fruit Cake

Bavarian Cream Dragon Fruit Cake
A creamy, jiggly and surprisingly light Bavarian cream cake made with dragon fruit.
Author:
Cuisine: Japan
Recipe type: Dessert
Ingredients
  • 1½ tablespoons powdered gelatin
  • 4 tablespoons water
  • Chocolate sponge cake
  • 1 cup heavy cream
  • 1 dragonfruit, quartered
  • ½ cup raspberries
  • 6½ tablespoons granulated sugar, divided
  • 1 tablespoon lemon juice
  • ¾ cup milk
  • 1 egg yolk
  • 2½ tablespoons granulated sugar
  • ¾ tablespoon gelatin powder (soaked in 2 tablespoons water)
  • Decorations:
  • Whipped cream
  • ¼ dragonfruit
  • Edible flowers
  • Raspberries
  • Mint leaves
Instructions
  1. In a small bowl, combine the powdered gelatin and water. Set aside to let bloom.
  2. Cut the sponge cake into a circle and place in the bottom of a springform pan.
  3. Whip the heavy cream for 7 minutes until it reaches stiff peaks.
  4. In a blender, add three quarters of the dragonfruit, the raspberries, 4 tablespoons of the sugar and lemon juice. Blend until combined, then transfer to a small saucepan over medium heat. Cook until just before boiling, then remove from heat and stir in half the gelatin.
  5. Pour about a cup of the mixture into a separate bowl, leaving the rest in the saucepan. To the bowl add the remaining gelatin and stir to combine. Allow mixture to cool, then add milk, egg yolk and remaining sugar and whisk until thickened. Fold in the whipped cream, then pour mixture into the cake mold. Place in the fridge to cool for up to 3 hours.
  6. Remove from fridge and pipe additional whipped cream around the edges to decorate. Pour remaining mixture from the saucepan over the top of the cake. Return to refrigerator to firm up. Once firm, remove from springform pan and garnish with fruit and mint leaves.

Watch the recipe video here:

Bavarian Cream Dragon Fruit Cake

Life advice: Always save room for dessert.Taste for Yourself: bit.ly/2EL4hEY?: Tastemade Japan

Posted by Tastemade on Sunday, March 18, 2018

Dessert

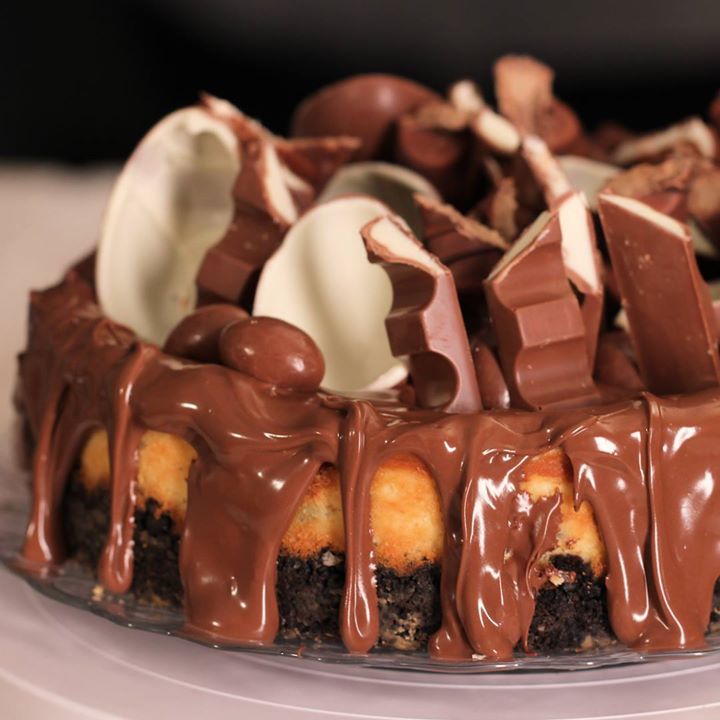
Oreo Cheesecake

Oreo Cheesecake
Two of your favorite desserts combine in this decadent white chocolate Oreo cheesecake. Top it off with bits of candy for an added crunch!
Author:
Cuisine: American
Recipe type: Dessert
Ingredients
  • 1 (14-ounce package) Oreos, crushed
  • ½ cup unsalted butter, melted
  • ¾ cup sugar
  • 3 cups cream cheese
  • ½ cup heavy cream
  • 3 eggs
  • 1 teaspoon vanilla extract
  • 10½ ounces white chocolate, melted
  • 8 to 10 Oreos, broken in pieces
  • 1 cup Nutella or chocolate sauce
  • Chocolate candies, to garnish
Instructions
  1. Preheat oven to 350 degrees.
  2. In a mixing bowl, combine the crushed Oreos and melted butter. Press firmly into the bottom of a springform pan. Bake for 15 minutes. Remove crust and reduce heat to 325 degrees.
  3. In a large bowl, add the sugar, cream cheese and heavy cream. Beat with an electric mixer. Add the eggs, vanilla extract and melted white chocolate and continue to mix. Stir in the broken Oreos. Pour filling on top of Oreo crust. Bake for 60 minutes, until edges begin to turn golden.
  4. Allow cake to cool in the oven with the oven door open, then cool at room temperature for at least 4 hours. Remove from pan and top with chocolate sauce and chocolate candies.

Watch the recipe video here:

Oreo Cheesecake

This cake is so extra, & we're loving it.Taste for Yourself: taste.md/2J7L1A2?: Tastemade France

Posted by Tastemade on Saturday, March 31, 2018

Dessert

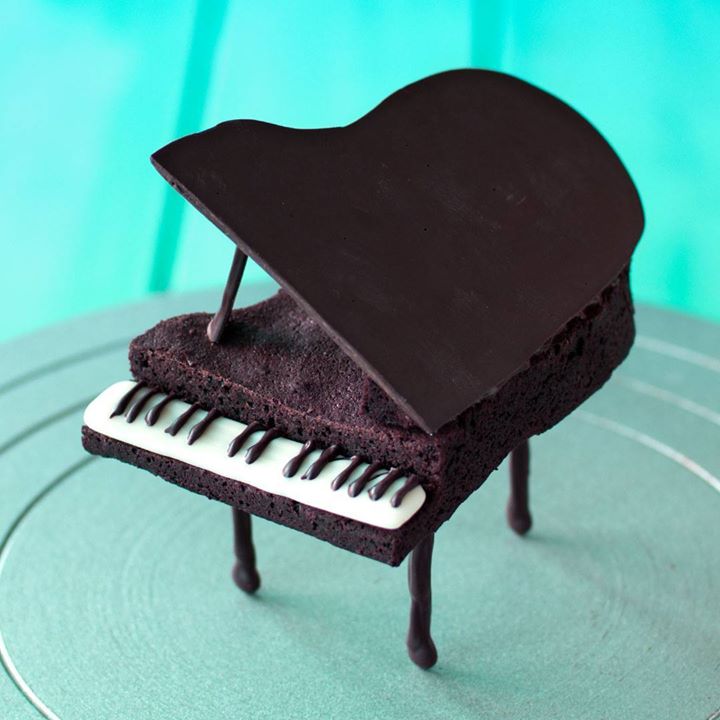
Piano Brownies

Piano Brownies
White and dark chocolate are "key" to decorating these piano-shaped brownies.
Author:
Cuisine: American
Recipe type: Dessert
Ingredients
  • Brownies
  • 75g plain flour
  • 75g cocoa
  • 300g castor sugar
  • 300g butter
  • 300g chocolate
  • 6 eggs
  • Chocolate shapes
  • 200g white chocolate (melted)
  • 500g dark chocolate (melted)
Instructions
  1. Method
  2. Preheat a fan forced oven to 175C (340F). Spray an 20cm by 30cm pan with non stick cooking spray and lay the bottom with parchment paper. Set aside.
  3. Add butter and chocolate to a microwave safe bowl. Microwave for 20 seconds at a time and repeat until it becomes smooth.
  4. Add flour, eggs, sugar to a large mixing bowl and mix on low speed using the paddle attachment or a wooden spoon until everything is combined.
  5. Slowly add chocolate and butter mixture while mixing on low speed.
  6. Add batter to baking tin lined with baking paper. Bake for 30 min or until a pick comes out with moist crumbs.
  7. While the brownies are baking and cooling draw a piano template on some paper. Place a piece of baking paper over it and draw a chocolate outline of the piano using a piping bag filled with melted dark chocolate.
  8. You’ll also want to make some dark chocolate legs for the piano too. Each piano should have 3 legs.
  9. To make the piano keys you’ll use the front of the piano template as a guide to make the white part in the shape of a long rectangle. Add some dark chocolate keys on top of that. If you don’t get it look neat, don’t worry you can come back with a sharp knife and carefully trim it all up.
  10. The last thing you need to prep is the brownies. Cut out the piano template and use that as a guide to cut out the brownies.
  11. You’ll need to cut out an indent at the front of the piano to make way for the keys.
  12. Add a dab of dark chocolate on the indent and use it to stick the chocolate keys. Let that set.
  13. To stick the legs on use the end of something small and round like the end of a small paint brush to make some shallow indents into the bottom of the pianos. Fill with chocolate and stick the chocolate legs on. The chocolate is now in the brownie which will help the, stay stable an strong.
  14. Lastly, cut out a long triangle of brownie the length of the side of the piano, add some dark chocolate and stick it to the top, side of the piano. That will help the piano lid stay on top which you’ll stick on with some more dark chocolate.

Watch the recipe video here:

Piano Brownie

This fudgy brownie is playing us a love song.Taste for Yourself: taste.md/2qaLRnx

Posted by Tastemade on Saturday, April 7, 2018