Showing 879 Result(s)
Dessert

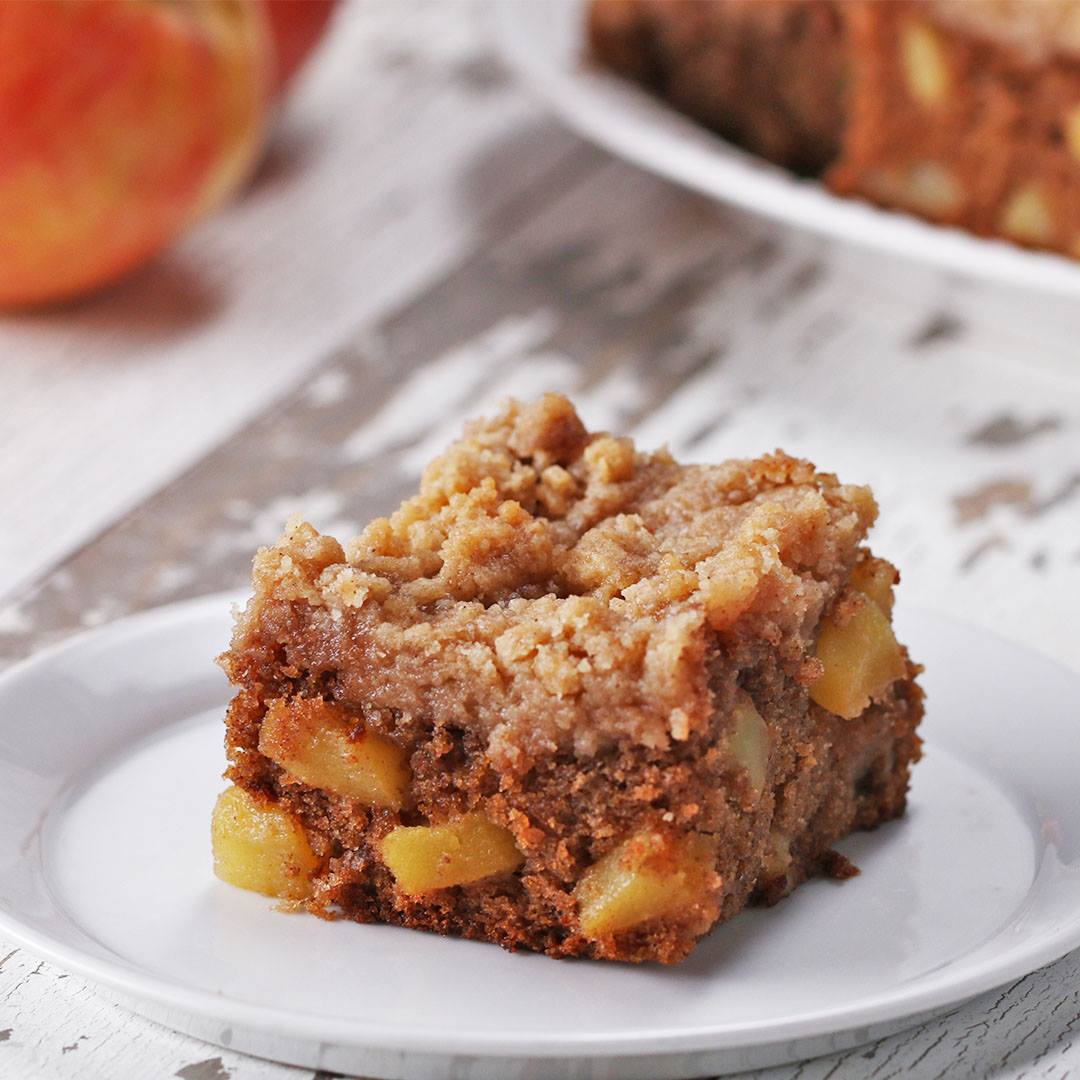
Apple Pie Crumble Blondies
Apple Pie Crumble Blondies
It's apple season ? Why not make these apple crumble blondies?
Author:
Cuisine: American
Recipe type: Dessert
Ingredients
  • CRUMBLE
  • ½ cup butter, cold and cubed (115 g)
  • ¼ cup brown sugar (55 g)
  • ¼ cup sugar (50 g)
  • ½ teaspoon cinnamon
  • 1 cup flour (125 g)
  • BLONDIES
  • 1 ¼ cups flour (155 g)
  • 2 teaspoons cinnamon
  • ½ teaspoon nutmeg
  • ½ teaspoon salt
  • ½ teaspoon baking soda
  • ½ cup unsalted butter, melted (115 g)
  • ½ cup brown sugar (110 g)
  • ¼ cup maple syrup (55 g)
  • 1 egg
  • 1 tablespoon vanilla extract
  • 2 apples, cored, seeded, and diced
  • 1 tablespoon lemon juice
Instructions
  1. Preheat oven to 350˚F (180˚C).
  2. In a bowl, add the butter, brown sugar, sugar, cinnamon and flour. Use a fork incorporate all of the ingredients until a coarse crumb forms. Chill until ready to use.
  3. In a bowl, add the flour, cinnamon, nutmeg, salt, and baking soda, stir to combine.
  4. In a large bowl, add the butter, sugar, and maple syrup. Whisk until fully incorporated,
  5. Add the egg and vanilla to the bowl with the butter and mix until fully incorporated.
  6. Add half of the flour mixture, and mix until just combined. Add the second half of the flour mixture and mix until there are streaks of flour still showing, making sure to not overmix.
  7. Pour the lemon juice over the apples then gently fold the apples into the batter.
  8. Spread batter evenly into a greased 9-inch (23 cm) square cake pan.
  9. Sprinkle crumble mixture over the top, creating different size crumble pieces by squeezing some small clumps together in your hands for varying texture.
  10. Bake for 25 minutes, or until toothpick comes out clean, cover with foil the last 5 minutes to prevent the top from over baking.
  11. Let cool for about 20 minutes, slice and serve.
  12. Enjoy!

Watch the recipe video here:

Apple Crumble Blondies

It's apple season ? Why not make these apple crumble blondies?FULL RECIPE: https://tasty.co/recipe/apple-pie-crumble-blondies

Posted by Tasty on Friday, October 26, 2018
Dessert

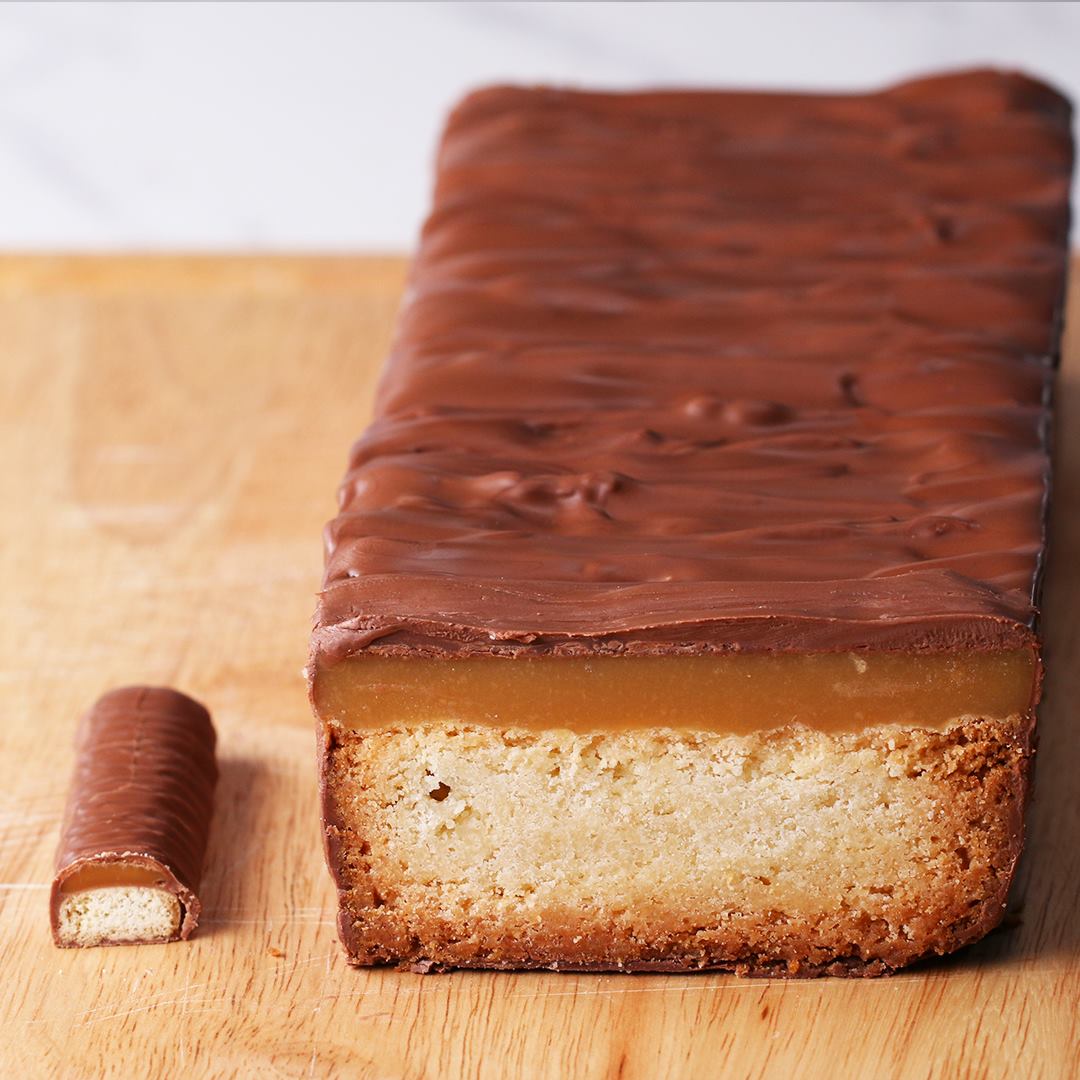
Giant Caramel Candy Bar Cake

Giant Caramel Candy Bar Cake
Author:
Cuisine: American
Recipe type: Dessert
Ingredients
SHORTBREAD
  • 3 cups all-purpose flour (375 g)
  • ¾ cup granulated sugar (150 g)
  • 1 teaspoon salt
  • 2 cups unsalted butter, 4 sticks, cubed, room temperature (460 g)
CARAMEL FILLING
  • ¾ cup light brown sugar (165 g)
  • ¾ cup light corn syrup (165 g)
  • ¾ cup unsalted butter, 1½ sticks (170 g)
  • ¾ cup heavy cream (180 mL)
  • 1 pinch salt
CHOCOLATE RIDGES
  • 1 cup milk chocolate chips, melted (175 g)
CHOCOLATE COATING
  • 2 cups milk chocolate chips (350 g)
  • 3 tablespoons coconut oil
SPECIAL EQUIPMENT
  • baking pan, 12x4½- in (30x11-cm)
Instructions
  1. Preheat the oven to 350˚F (180˚C). Grease a 12x4½- in (30x11-cm) baking pan and line with parchment paper.
  2. Make the shortbread: In a large bowl, whisk together the flour, granulated sugar, and salt. Add the butter. Use your hands to work it into the flour until a dough forms. Transfer to the prepared loaf pan and spread evenly. Cover with foil.
  3. Bake for 45 minutes, then remove the foil and bake for another 45-60 minutes, until light golden brown. Let cool completely.
  4. Make the caramel filling: In a medium, heavy-bottomed saucepan, combine the brown sugar, corn syrup, butter, cream, and salt. Over medium-high heat, bring the caramel to a boil and let cook for 5 minutes. 5. Then, reduce the heat to low and cook for 10 more minutes, until slightly deeper golden in color. Remove the pot from the heat.
  5. Pour the caramel over the shortbread cookie. Let cool in the refrigerator for 2 hours or until set.
  6. Once the cookie has chilled, line a baking sheet with parchment paper.
  7. Make the chocolate ridges. Pour ⅓ of the melted chocolate onto the prepared baking sheet and spread into a 13x5-inch (33x12 cm) rectangle.
  8. Lift the cookie out of the pan using the parchment paper, and remove the paper. Place the cookie on top of the chocolate rectangle. Pour the remaining melted chocolate on top of the caramel. Spread the chocolate to the edges in a zig-zag motion to create textured ridges. Return to the refrigerator for 20 minutes, until the chocolate hardens.
  9. While the cookie is chilling, make the chocolate glaze: Add the chocolate chips and coconut oil to a medium microwave-safe bowl. Melt in the microwave in 30 seconds intervals, stirring between each, until smooth. Set aside to cool for 15 minutes.
  10. Remove the cookie from the refrigerator. Invert 2 jars or glasses on a baking sheet or piece of parchment paper. Set the cookie bar on the jars and pour the chocolate glaze over the cookie. Use a spatula to carefully push the chocolate over the edges of the cookie to coat the sides, being careful not to flatten the edges. Carefully return to the refrigerator to chill for at least 1 hour, until the chocolate is hardened. Keep refrigerated until ready to serve.
  11. Cut into ¾-inch (2 cm) thick slices with a sharp knife.
  12. Enjoy!

Watch the recipe video here:

Giant Caramel Candy Bar Cake

The best way to end the month of October ??FULL RECIPE: https://tasty.co/recipe/giant-caramel-candy-bar-cake

Posted by Proper Tasty on Saturday, October 27, 2018

Dessert

Pumpkin Bread-bottom Cheesecake

Pumpkin Bread-bottom Cheesecake
This pumpkin bread-bottom cheesecake is so delicious & beautiful! ✨
Author:
Cuisine: American
Recipe type: Dessert
Ingredients
  • PUMPKIN BREAD
  • 1 ¾ cups pumpkin puree (395 g)
  • 2 eggs
  • 1 cup sugar (200 g)
  • ¾ cup vegetable oil (180 mL)
  • 1 teaspoon vanilla extract
  • 2 ½ cups flour (310 g)
  • 2 teaspoons baking powder
  • 1 teaspoon baking soda
  • 1 tablespoon pumpkin pie spice
  • 1 teaspoon salt
CHEESECAKE
  • 24 oz cream cheese, at room temperature (680 g)
  • 1 cup sugar (200 g)
  • 1 teaspoon pumpkin spice
  • 1 teaspoon vanilla extract
  • 1 cup heavy whipping cream (240 mL)
Instructions
  1. Preheat oven to 350°F (180°C).
  2. In a large mixing bowl, whisk together pumpkin puree, eggs, sugar, vegetable oil, and vanilla until combined.
  3. Sift in the flour, baking powder, baking soda, pumpkin pie spice, and salt. Using a wooden spoon, mix together until just combined. Be careful to not overmix.
  4. Lightly coat a spring form pan with nonstick cooking spray, and pour batter into the pan, spreading an even layer.
  5. Bake for 35-45 minutes until center comes out clean when tested. Allow to cool completely in the pan.
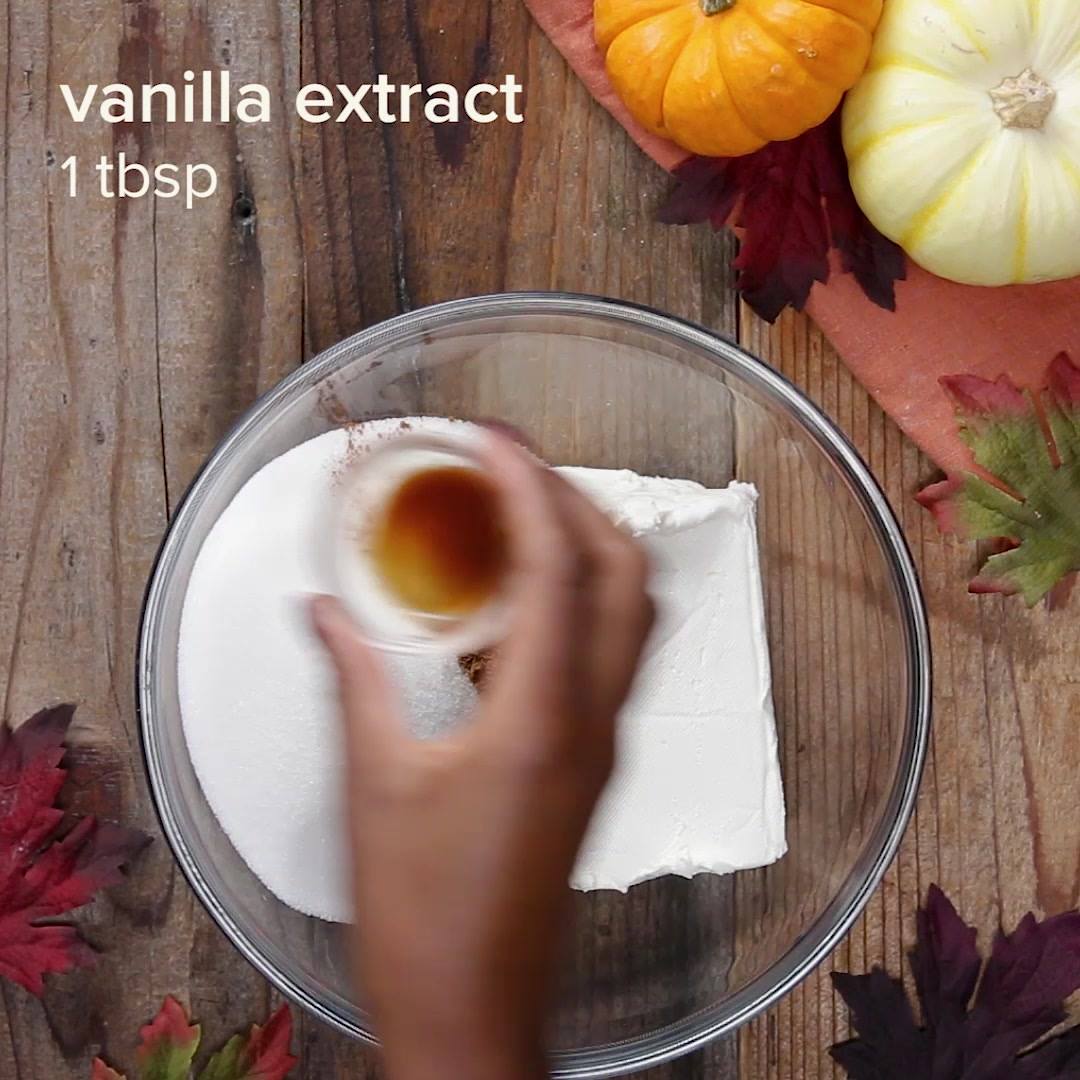
  6. In a large mixing bowl, whisk together cream cheese, sugar, pumpkin spice, and vanilla extract.
  7. Add in whipping cream and beat for an additional 2-3 minutes.
  8. Spread cheesecake mixture onto the cooled pumpkin bread, spreading evenly. Cover and chill in the fridge for at least 4 hours before serving.
  9. Cut and serve.
  10. Enjoy!

Watch the recipe video here:

Pumpkin Bread-Bottom Cheesecake

This pumpkin bread-bottom cheesecake is so delicious & beautiful! ✨FULL RECIPE: https://tasty.co/recipe/pumpkin-bread-bottom-cheesecake

Posted by Tasty on Wednesday, October 24, 2018

Dessert

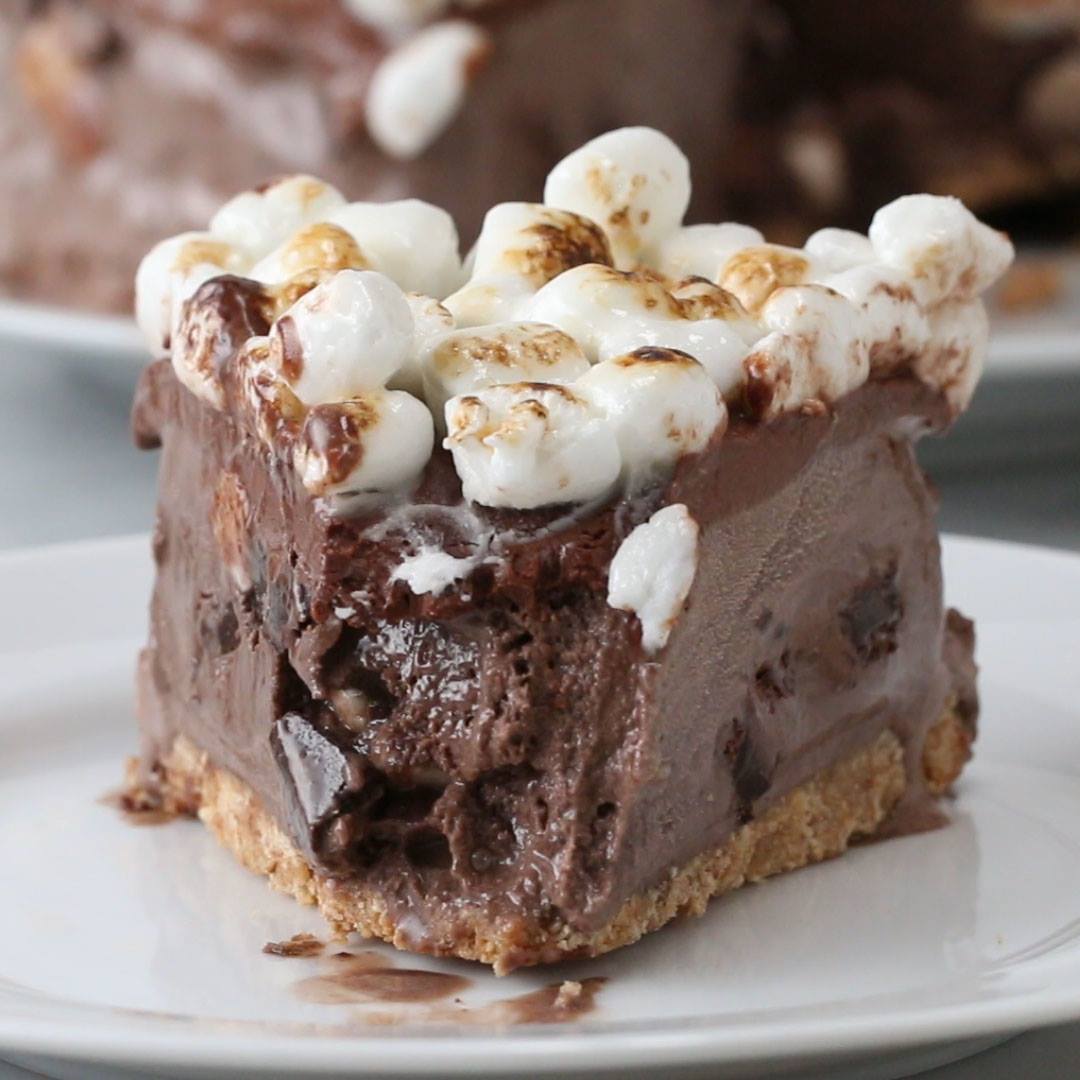
No-Bake S’mores Ice Cream Cake

No-Bake S’mores Ice Cream Cake
This no-bake s'mores ice cream cake is a childhood favorite that's perfect for grown-ups!
Author:
Cuisine: American
Recipe type: Dessert
Ingredients
  • 1 cup graham cracker (85 g)
  • 2 tablespoons sugar
  • 1 teaspoon cinnamon
  • ½ teaspoon salt
  • ½ cup butter, melted (115 g)
  • 1 pt chocolate ice cream (345 g)
  • 4 cups marshmallow, divided (200 g)
  • 1 cup chocolate chips (175 g)
  • 8 oz chocolate (225 g)
  • 2 cups heavy cream (480 g)
  • ⅓ cup rum (80 mL)
Instructions
  1. Place graham crackers in a zipper storage bag and crush with a rolling pin until the cookies are fully crushed.
  2. Transfer the graham cracker crumbs to a bowl, and add in the sugar, cinnamon, and salt, stirring to combine. Add in the melted butter and mix well.
  3. In a buttered 6-inch (15 cm) springform pan, add the graham cracker mixture and press firmly to form an even layer. Chill in the fridge for 30 minutes.
  4. In a medium size bowl, combine softened ice cream, half of the marshmallows, and chocolate chips.
  5. Pour over the graham cracker crust and freeze over night.
  6. Microwave the chocolate and heavy cream together in 30-second intervals, stirring in between, until the glaze is smooth and glossy.
  7. Pour the ganache over the ice cream cake. Freeze for 30 minutes.
  8. In a medium bowl, combine rum and remaining half of the marshmallows. Let sit for 15 minutes.
  9. Pour the marshmallows over the ice cream cake. Using a torch, brown the marshmallows on top of the cake.
  10. Slice and serve.
  11. Enjoy!

Watch the recipe video here:

No-Bake S'mores Ice Cream Cake

This no-bake s'mores ice cream cake is a childhood favorite that's perfect for grown-ups! FULL RECIPE: https://tasty.co/recipe/no-bake-smores-ice-cream-cake

Posted by Tasty on Sunday, October 21, 2018

Dessert

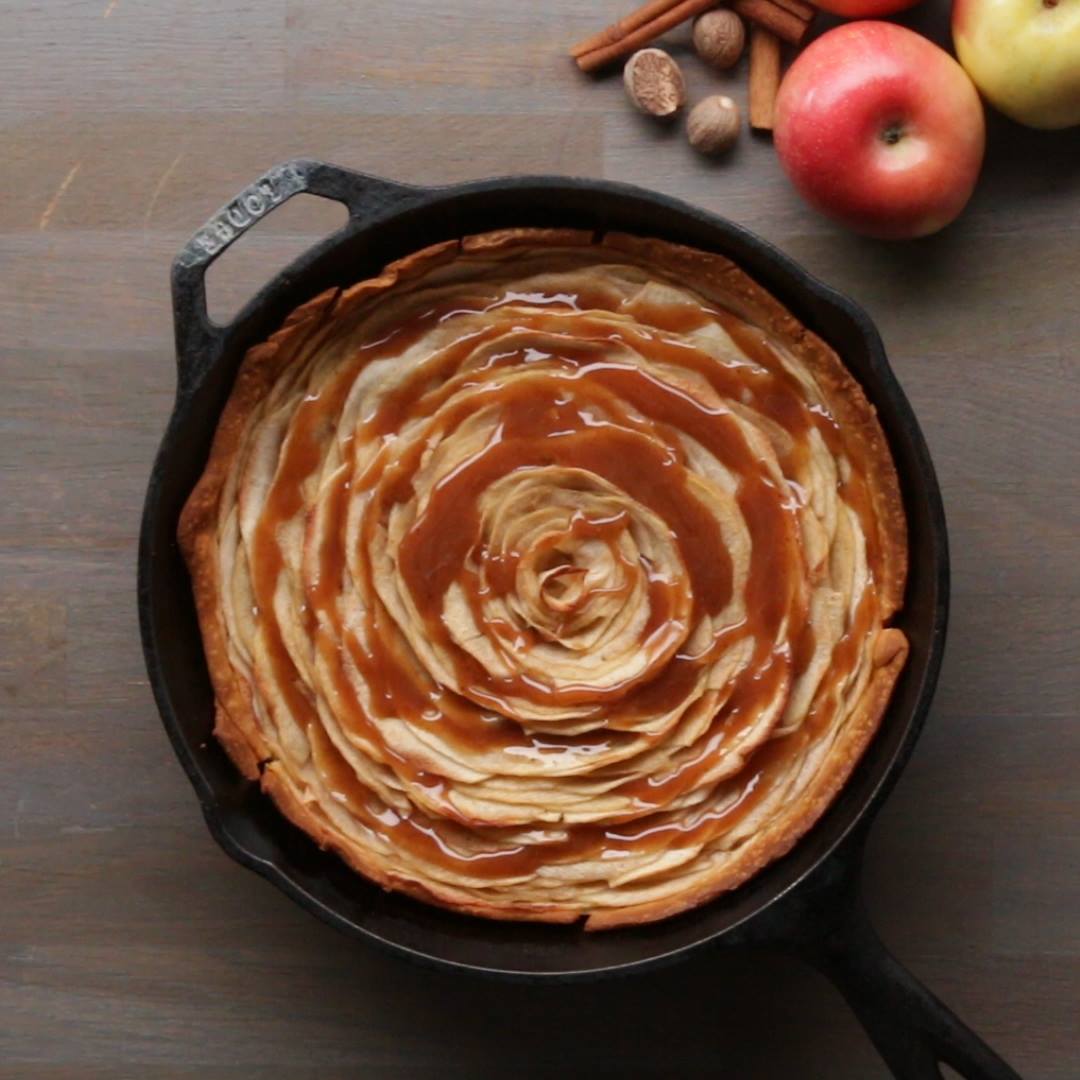
Caramel Rose Apple Pie

Caramel Rose Apple Pie
Author:
Cuisine: American
Recipe type: Dessert
Ingredients
  • 4 apples
  • 1 lemon, juiced
  • ½ cup granulated sugar (100 g)
  • ½ cup brown sugar (110 g)
  • ¼ teaspoon cinnamon
  • ¼ teaspoon nutmeg
  • 1 prepared pie dough
  • ¼ cup heavy cream (60 mL)
Instructions
  1. Peel the apples and place them in a large bowl with enough water to cover. Squeeze lemon juice in the water to prevent the apples from browning. Working with 1 apple at a time, cut around the core, discarding the core and removing the "cheeks." Slice the cheeks very thin.
  2. In a large bowl, combine the granulated sugar, brown sugar, cinnamon and nutmeg. Stir to combine. Add the sliced apples, stir to coat, and let sit for 30 minutes.
  3. Line a pie dough in a 9-inch (23-cm) cast-iron pan, and prick the dough with a fork all around. Chill in the fridge until very firm, 20-30 minutes.
  4. Working in batches, remove the apples from the cinnamon-sugar mixture by taking a handful at a time and carefully squeezing them with your hands to remove the excess moisture. Place the drained apples in a separate large bowl, reserving the liquid to make the caramel sauce.
  5. Preheat the oven to 375˚F (190˚C).
  6. Working from the outside in, line the apple slices on the pie dough by overlapping each slice to create a rose shape. Roll up 1 apple slice tightly and place it in the center, creating a bud shape. Cover the pan with foil and bake for 30 minutes. Uncover and bake for 10 minutes more, or until golden brown. Remove from the oven and let cool for 10 minutes.
  7. In a saucepan, bring the reserved cinnamon-sugar liquid to a boil. Once the liquid is reduced by half, 10-15 minutes, add the heavy cream and stir well.
  8. To serve, pour the caramel sauce over the apple pie.
  9. Enjoy!

Watch the recipe video here:

Caramel Rose Apple Pie

This caramel rose apple pie is mesmerisingly beautiful ??FULL RECIPE: https://tasty.co/recipe/caramel-rose-apple-pie

Posted by Proper Tasty on Saturday, October 20, 2018

Dessert

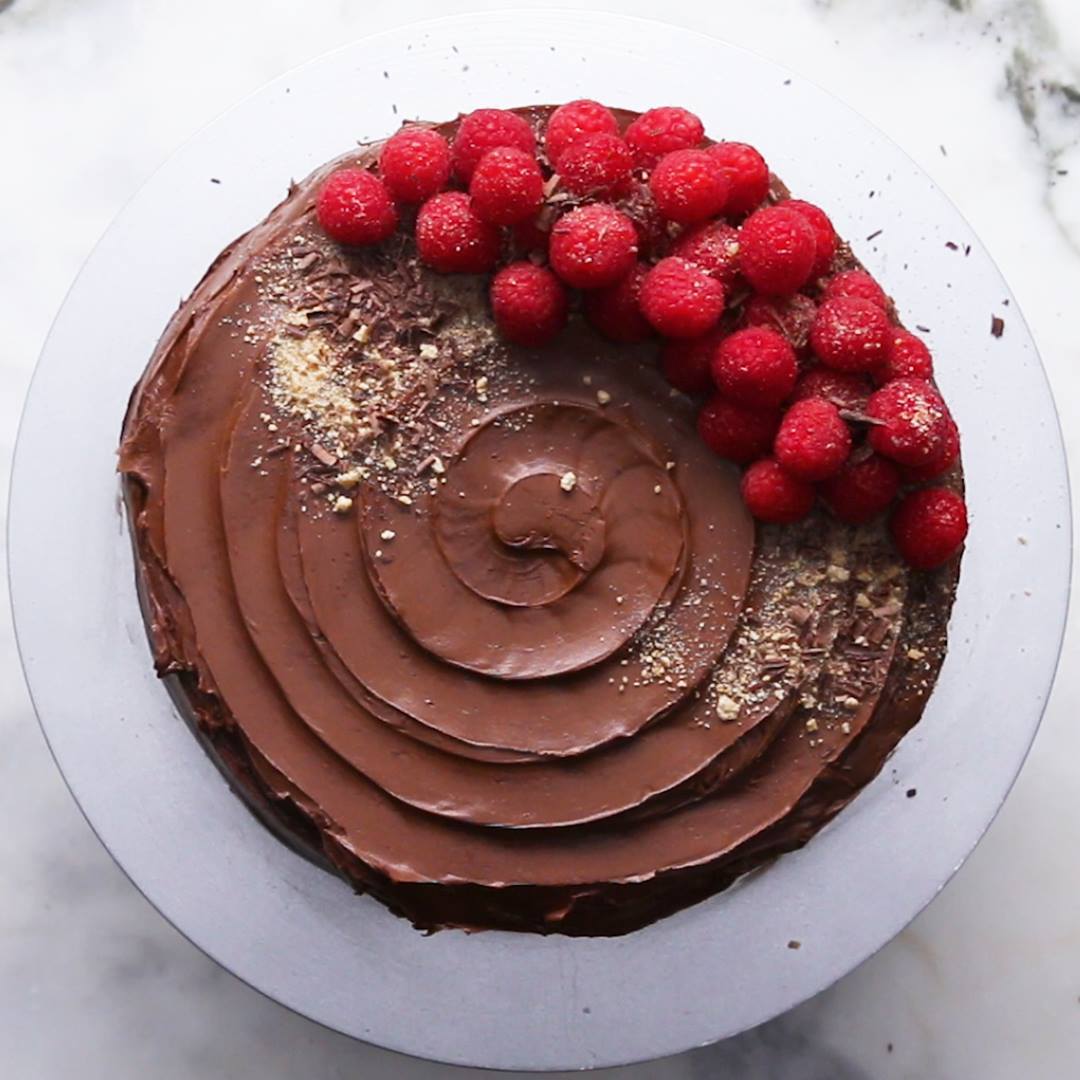
No-Bake Chocolate Pudding Cake

No-Bake Chocolate Pudding Cake
Author:
Cuisine: American
Recipe type: Dessert
Ingredients
  • 1 ½ cups chocolate hazelnut spread, warmed (435 g)
  • 24 graham crackers, halved
  • 2 packets instant chocolate pudding
  • 4 cups milk (945 mL)
  • 8 oz cream cheese (225 g)
  • ½ cup sugar (100 g)
  • 1 teaspoon vanilla
  • ½ cup chocolate, melted (85 g)
  • 2 cups chocolate frosting (230 g)
  • raspberry, for garnish
  • graham cracker crumbs, for garnish
  • chocolate shaving, for garnish
Instructions
  1. Line a baking sheet with parchment paper and grease with nonstick cooking spray.
  2. Spread the chocolate hazelnut spread into an even rectangle, leaving ¼ inch (6 mm) between each cracker.
  3. Place 20 graham cracker halves on top of chocolate hazelnut mixture and freeze until solid, about 30 minutes.
  4. Cut between the graham cracker pieces with a knife. Lay a cutting board on top of the graham crackers and invert the baking sheet.
  5. Carefully peel the parchment paper from the chocolate hazelnut layer. Return to freezer until ready to build cake.
  6. In a large bowl, combine the instant pudding and milk, and whisk until fully incorporated. Allow to set for at least five minutes.
  7. In a medium bowl, combine the cream cheese, sugar, and vanilla, and mix until fully incorporated.
  8. Fold in the melted chocolate until fully incorporated.
  9. Add the cream cheese mixture to the pudding mixture and stir until fully combined.
  10. Add three quarters of the pudding mixture to the bottom of a 10-inch (25-cm) greased springform pan.
  11. Make a ring along the edge of the pan with the chocolate hazelnut graham crackers pressing them until they are even with the top of the pan.
  12. Leave a ¼ to ½–inch (2 to 6-cm) gap and make another ring using plain graham cracker pieces. Repeat, alternating between chocolate hazelnut and plain graham crackers, until you reach the center.
  13. Fill the pan with the remaining pudding mixture and spread evenly across the top.
  14. Freeze the cake for at least 4 hours.
  15. Release the chilled cake from the pan and frost with chocolate frosting.
  16. Garnish with raspberries, crushed graham crackers, and chocolate shavings.
  17. Enjoy!

Watch the recipe video here:

Apple Tots

Just when you thought tater tots couldn't be more delicious! ?FULL RECIPE: https://tasty.co/recipe/apple-tater-tots

Posted by Tasty on Sunday, October 14, 2018

No-Bake Chocolate Pudding Cake

This no-bake chocolate pudding cake is hypnotizing ?Full Recipe: https://tasty.co/recipe/no-bake-chocolate-pudding-cake

Posted by Tasty on Tuesday, October 16, 2018

Dessert

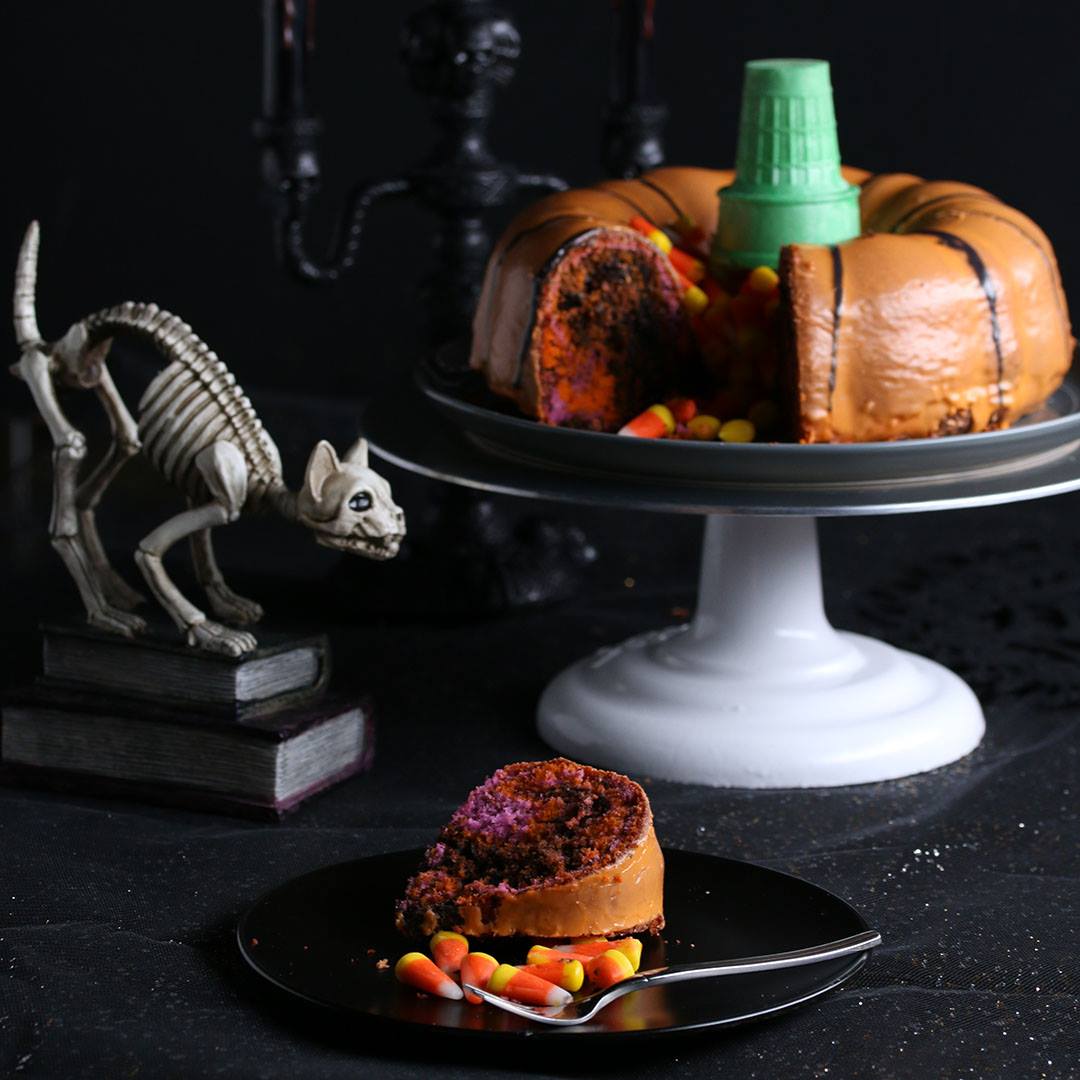
Halloween Bundt Cake

Halloween Bundt Cake
Author:
Cuisine: American
Recipe type: Dessert
Ingredients
CAKE
  • 1 ¾ cups granulated sugar (350 g)
  • 2 teaspoons vanilla extract
  • 1 teaspoon salt
  • 3 large eggs
  • ½ cup canola oil (120 mL)
  • 2 ¼ cups all-purpose flour (280 g)
  • 1 tablespoon baking powder
  • 1 cup whole milk (240 g)
  • 3 drops orange food coloring
  • 3 drops purple food coloring
  • 3 drops black food coloring
  • 1 tablespoon cocoa powder
GLAZE
  • 4 cups powdered sugar (480 g)
  • ½ cup milk, or water (120 mL)
  • 2 drops orange food coloring
  • 2 drops black food coloring
FOR DECORATING
  • candy corn
  • 1 ice cream sugar cones, green
Instructions
  1. Preheat the oven to 350˚F (180˚C).
  2. In a large bowl, combine the sugar, vanilla, salt, and eggs. Beat with an electric hand mixer for 2-3 minutes, until pale in color.
  3. Add the canola oil and beat until incorporated.
  4. In a medium bowl, mix together the flour and baking powder.
  5. Add half of the flour to the egg mixture and beat until almost completely combined. Add half of the milk and beat to incorporate. Add the remaining flour and then the rest of the milk and beat just until no flour streaks remain.
  6. Divide the batter between 3 medium bowls evenly. Add the orange food coloring to one bowl, the purple food coloring to another, and the black food coloring to the last. Sift the cocoa powder into the bowl with the black food coloring. Stir each batter well with a rubber spatula to combine.
  7. Grease a bundt pan and add ½ cup (120 ml) of batter at a time, alternating between colors to create a marbled effect, until all of the batter is used.
  8. Bake for 40-45 minutes, or until a toothpick inserted near the center of the cake comes out clean. Let cool before decorating.
  9. To make the glaze, add the powdered sugar and milk to a large bowl and whisk until thick and smooth.
  10. Transfer about 2 tablespoons of the glaze to a small bowl. Add orange food coloring to the large bowl of glaze and black food coloring to the small bowl. Mix well until the colors are smooth.
  11. Pour the orange glaze over the cake, coating evenly. Let dry for 5 minutes, then use a spoon to drizzle lines of black glaze over the cake to look like pumpkin ridges.
  12. Fill the center with candy corn and top with the green sugar cone as a “stem.”
  13. Enjoy!

Watch the recipe video here:

Halloween Marble Bundt Cake

Bundt Cake that will be the star of any Halloween party. Get the recipe: https://tasty.co/recipe/halloween-bundt-cakeHave the ultimate Halloween with Nifty and Tasty, with new videos every Sat & Sunday!

Posted by Tasty on Sunday, October 14, 2018

Dessert

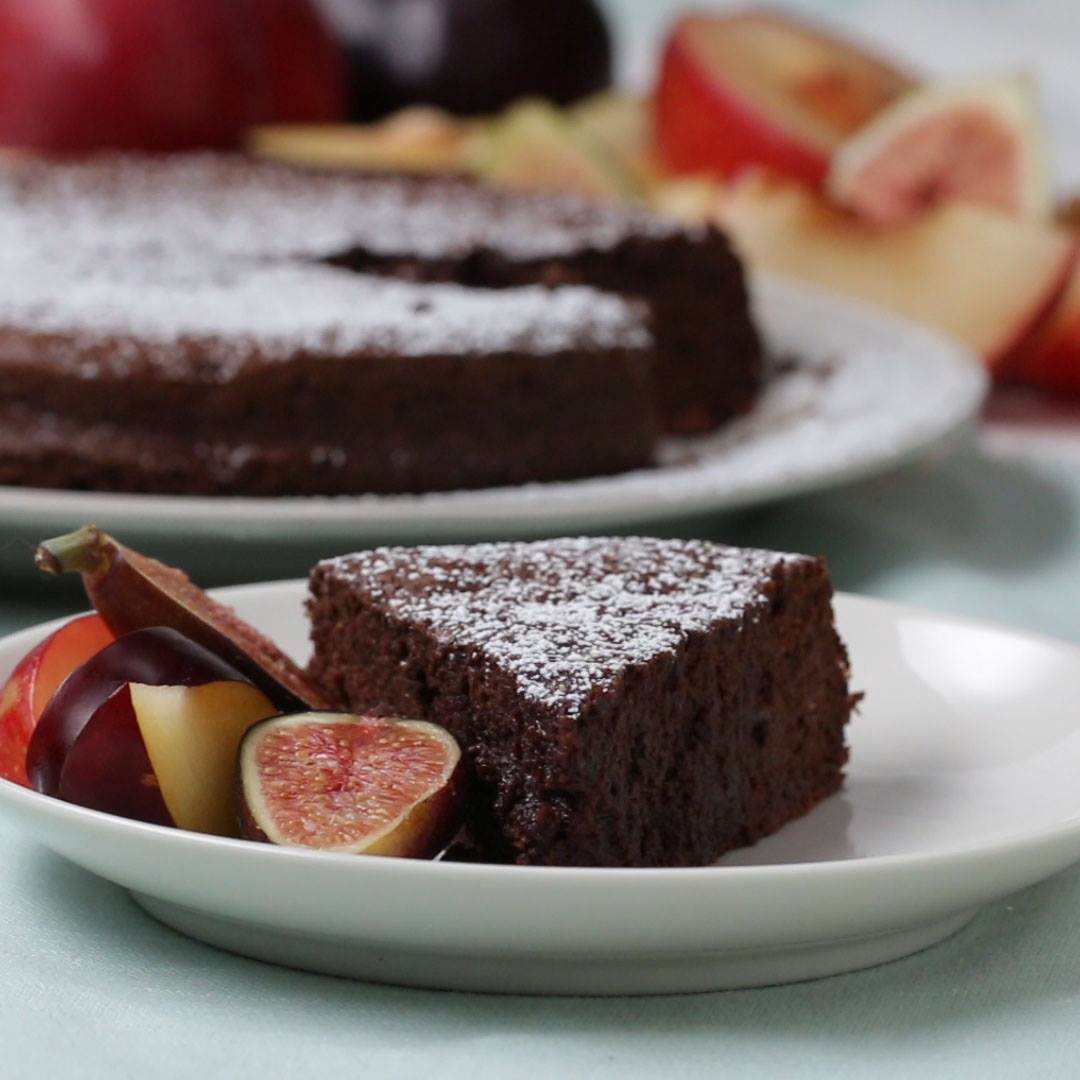
2-ingredient Chocolate Cake

2-ingredient Chocolate Cake
Author:
Cuisine: American
Recipe type: Dessert
Ingredients
  • 4 eggs, whites and yolks separated
  • 9 oz semi sweet chocolate (255 g)
  • powdered sugar, to serve
  • vanilla ice cream, to serve
  • seasonal fruit, to serve
Instructions
  1. Preheat the oven to 325˚F (170˚C).
  2. Place the chocolate in a microwave-safe bowl and melt completely, about 1 minute.
  3. Separate the egg yolks and egg whites. Using a hand mixer, whisk the whites until soft peaks form.
  4. Add the yolks, one by one, into the bowl of chocolate, whisking to combine.
  5. Using a rubber spatula, gently fold ⅓ of the whipped egg whites into the yolk and chocolate mixture. Repeat with the remaining egg whites, adding ⅓ at a time.
  6. Pour the batter in a greased 6-inch (15 cm) cake mold.
  7. Bake for 30 minutes.
  8. Once the cake is cool to the touch, gently invert it onto a plate.
  9. Optional: Sprinkle with powdered sugar, slice and serve top with ice cream. Serve with seasonal fruit.
  10. Enjoy!

Watch the recipe video here:

2-ingredient chocolate cake

For a chocolate emergency.Get the recipe: https://tasty.co/recipe/2-ingredient-chocolate-cake

Posted by Tasty on Friday, October 12, 2018

Dessert

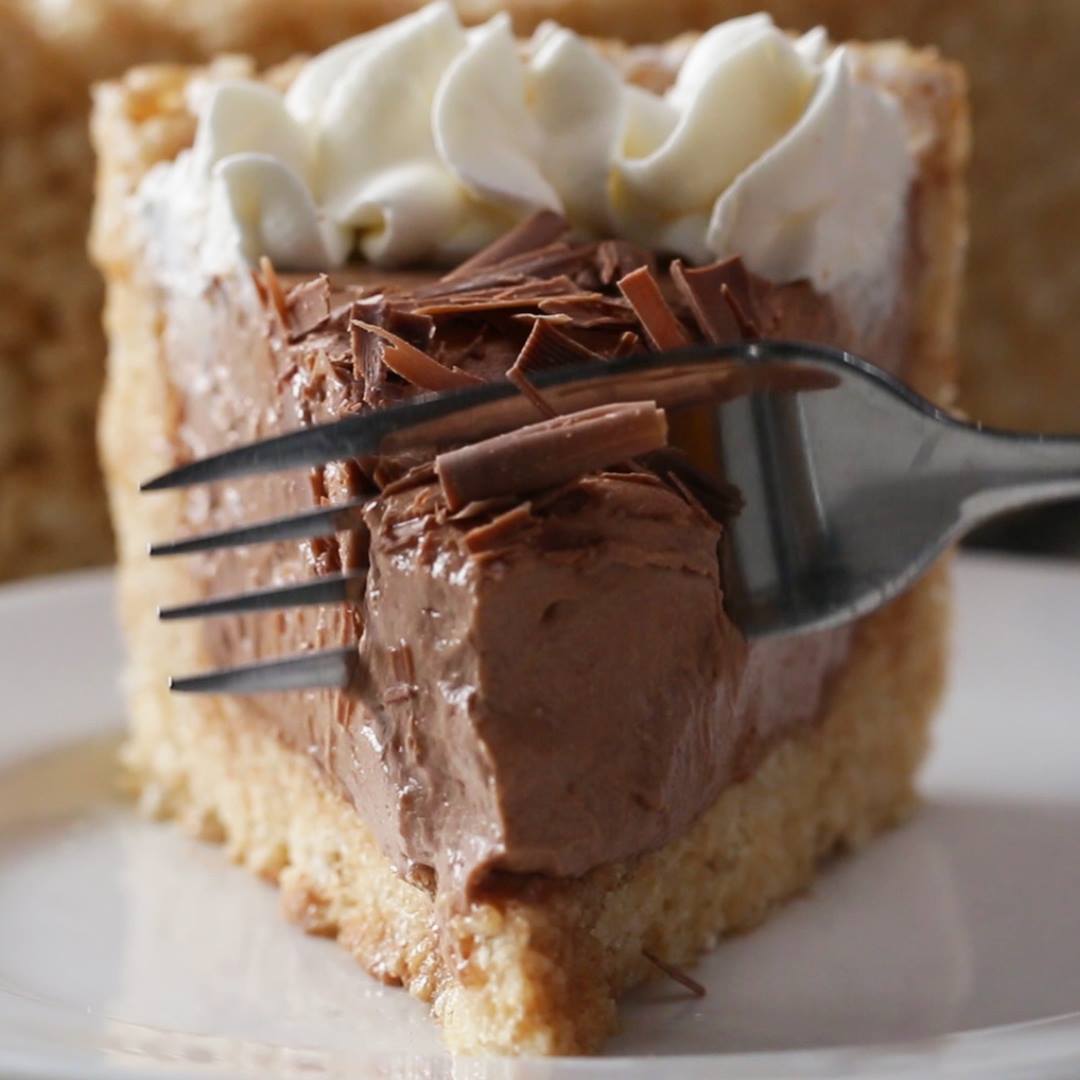
Crispy Rice Cereal Chocolate Cheesecake

Crispy Rice Cereal Chocolate Cheesecake
You won't believe how delicious this crispy rice cereal chocolate cheesecake is! ???
Author:
Cuisine: American
Recipe type: Dessert
Ingredients
  • ¼ cup unsalted butter, ½ stick (60 g)
  • 10 oz mini marshmallows (285 g)
  • 6 cups crispy rice cereal (180 g)
  • 8 oz semisweet chocolate (225 g)
  • ¼ cup heavy cream (60 mL)
  • 16 oz cream cheese, softened (455 g)
  • ½ cup sugar (100 g)
  • 1 teaspoon vanilla
  • 2 ½ cups whipped cream, divided (150 g)
  • chocolate bar, for shaving
Instructions
  1. In a large saucepan over medium heat, melt the butter.
  2. Add the marshmallows and stir until melted. Add the crispy rice cereal and stir to coat.
  3. While the crispy rice cereal mix is still warm, transfer them to a greased 10-inch (25 cm) springform pan.
  4. Using a greased measuring cup, press down into the cereal to form to the pan. Press the edges against the springform pan to create walls. Set aside.
  5. Place the chocolate in a small microwave-safe bowl and pour the heavy cream on top. Microwave in 30-second intervals, stirring until melted, about 1 minute.
  6. In a large bowl, mix the cream cheese, sugar, and vanilla until smooth.
  7. Pour in the melted chocolate and stir to incorporate.
  8. Add 1½ cups (90 g) of whipped cream to the chocolate mixture and fold with a spatula until combined.
  9. Pour the cheesecake mixture into the crispy rice base and smooth the top with a spatula.
  10. Refrigerate for 3-4 hours or overnight, until the cheesecake is set. Release the springform.
  11. Put the remaining cup of whipped cream in a piping bag fitted with a star tip and decorate the top of the cheesecake.
  12. Use a vegetable peeler to shave the chocolate into the middle of the cheesecake.
  13. Slice and serve.
  14. Enjoy!

Watch the recipe video here:

Crispy Rice Cereal Chocolate Cheesecake

You won't believe how delicious this crispy rice cereal chocolate cheesecake is! ???FULL RECIPE: https://tasty.co/recipe/crispy-rice-cereal-chocolate-cheesecake

Posted by Proper Tasty on Thursday, October 11, 2018

Dessert

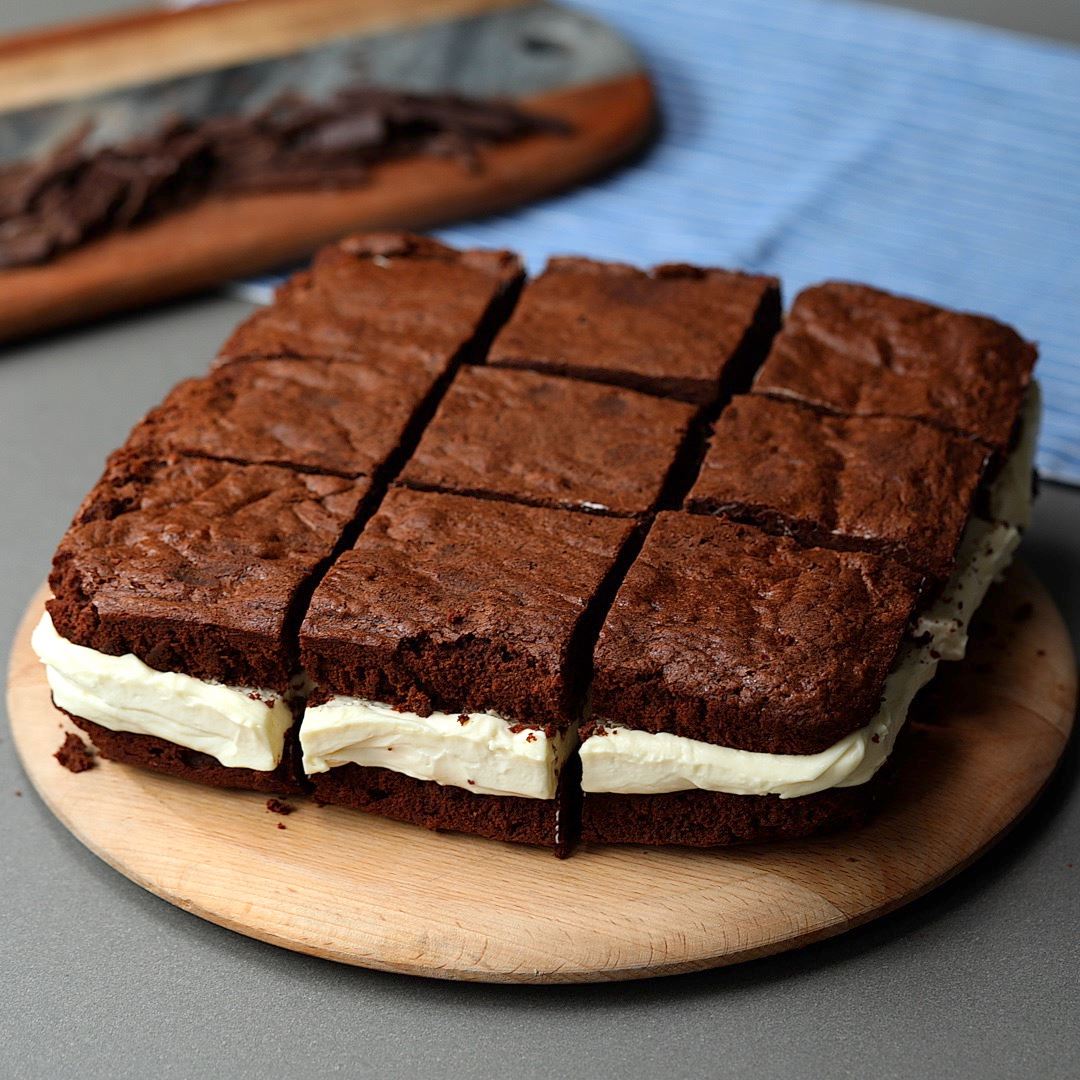
Cheesecake Brownie Sandwiches

Cheesecake Brownie Sandwiches
CHEESECAKE BROWNIE SANDWICHES
Author:
Cuisine: American
Recipe type: Dessert
Ingredients
  • 300g unsalted butter, melted
  • 300g 85% chocolate
  • 5 medium eggs
  • 300g caster sugar
  • 100g light brown soft sugar
  • 50g cocoa powder
  • 130g self-raising flour
  • 70g plain flour
  • 900g cream cheese
  • 300g mascarpone
  • 120g icing sugar
  • 1 tsp vanilla essence
Instructions
  1. Preheat oven to 180°C/350°F.
  2. Pour hot melted butter over the chocolate in a pyrex bowl and stir until the mixture is completely smooth. You can also add room temperature butter and chocolate to a bowl and microwave in 30 second bursts until smooth.
  3. Whisk the eggs and sugars together until the mixture is thoroughly mixed together and becomes light.
  4. Add the (cooled) chocolate/butter mix to the eggs and sugar and stir to make a glossy batter.
  5. Use a sieve to sift in the flour and cocoa powder. Add the nuts and pour into two 23cm/9inch square parchment lined baking tins. Bake for 20 minutes (or until the edges look cooked but the middle has a slight wobble).
  6. When cooled completely, whisk together the cream cheese, mascarpone, sugar and vanilla. Spread this layer between the two cooled brownies and leave to set in the fridge.

Watch the recipe video here:

Cheesecake Brownie Sandwiches

Cheesecake Brownie Sandwiches

Posted by Twisted on Saturday, October 6, 2018