Showing 879 Result(s)
Dessert

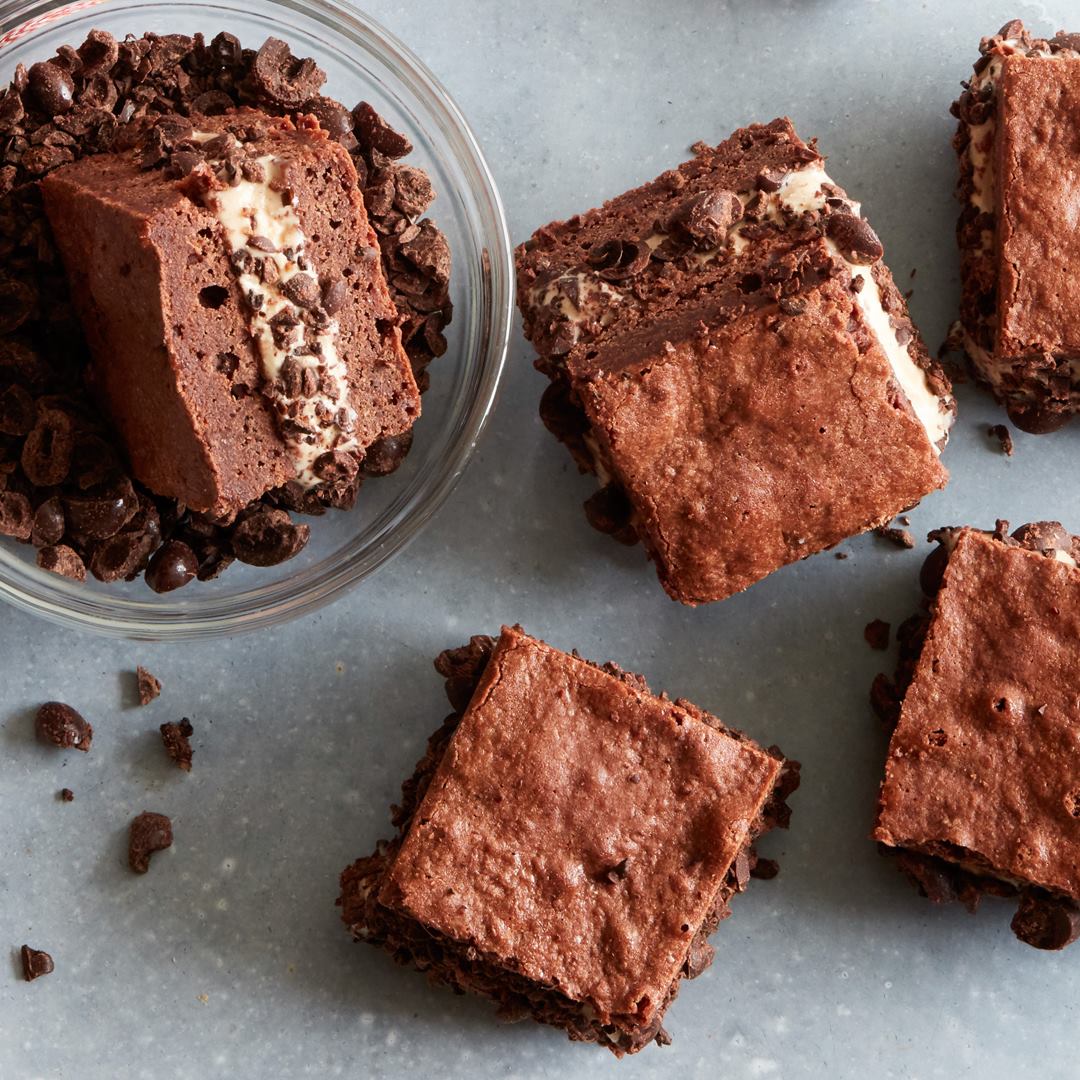
Mocha Brownie Ice Cream Sandwiches
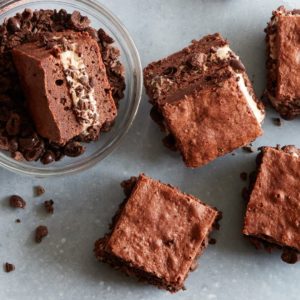
Mocha Brownie Ice Cream Sandwiches
Sandwich coffee ice cream between easy sheet-pan brownies for the perfect hand-held dessert.
Author:
Cuisine: American
Recipe type: Dessert
Ingredients
  • 2 sticks (16 tablespoons) unsalted butter, plus more for buttering the foil
  • 1½ cups all-purpose flour (see Cook's Note)
  • ⅓ cup unsweetened cocoa powder
  • ½ teaspoon fine salt
  • 4 ounces semisweet or bittersweet chocolate, chopped
  • 2 cups sugar
  • 4 large eggs, slightly beaten
  • ½ gallon coffee ice cream, softened
  • 1 cup chocolate-covered espresso beans, chopped
Instructions
Special equipment: an 18-by-13-inch rimmed baking sheet
  1. Preheat the oven to 350 degrees F. Line an 18-by-13-inch rimmed baking sheet with foil, leaving a 2-inch overhang on at least 2 sides. Butter the foil.
  2. Whisk together the flour, cocoa powder and salt in a medium bowl. Melt the butter and chocolate in a medium saucepan over medium heat, stirring frequently, then remove from the heat and let cool slightly. Stir in the sugar and eggs, then add the flour mixture and stir to combine. Pour the batter into the prepared pan and bake until a toothpick inserted in the center comes out with just a few crumbs adhering, 20 to 25 minutes. Let cool completely in the pan on a cooling rack, then place in the freezer to firm up, about 30 minutes.
  3. Use the foil overhang to help lift the brownie out of the pan and carefully flip it over onto a cutting board, making sure that it does not bend or crack. Peel the foil away from the bottom, then discard the foil and line the baking sheet with plastic wrap.
  4. Using a warm knife, trim the rough edges off of the brownie so it is even (the brownie should be 16-by-12-inches). Cut the brownie in half crosswise, resulting in 2 pieces that are 12-by-8-inches. Lay one of the brownie pieces onto the prepared baking sheet, top-side facing down. Working quickly, use a large ice cream scoop to spread the ice cream evenly across the brownie, getting close to the edge. Use an offset or rubber spatula to help smooth out the sides and top of the ice cream. Place the other brownie piece on top and gently press to create one large ice cream sandwich. Fold the plastic wrap around the assembled ice cream sandwich to help hold its shape, then return it to the freezer to harden, at least 6 hours or up to overnight.
  5. Use a warm knife to cut twenty-four ice cream sandwiches. Roll the edges of each sandwich into the chopped espresso beans until they stick to all of the exposed ice cream edges. Wrap each sandwich in parchment paper and enjoy.
Cook’s Note
  1. When measuring flour, we spoon it into a dry measuring cup and level off the excess. (Scooping directly from the bag compacts the flour, resulting in dry baked goods.) Before serving, let the ice cream sandwiches sit at room temperature for a few minutes so the brownies and ice cream can soften, making them easier to eat.

Watch the recipe video here:

Forget cookies… you should be making ice cream sandwiches using BROWNIES! Save the recipe: https://foodtv.com/30aqJOK!

Posted by Food Network on Saturday, May 18, 2019
Dessert

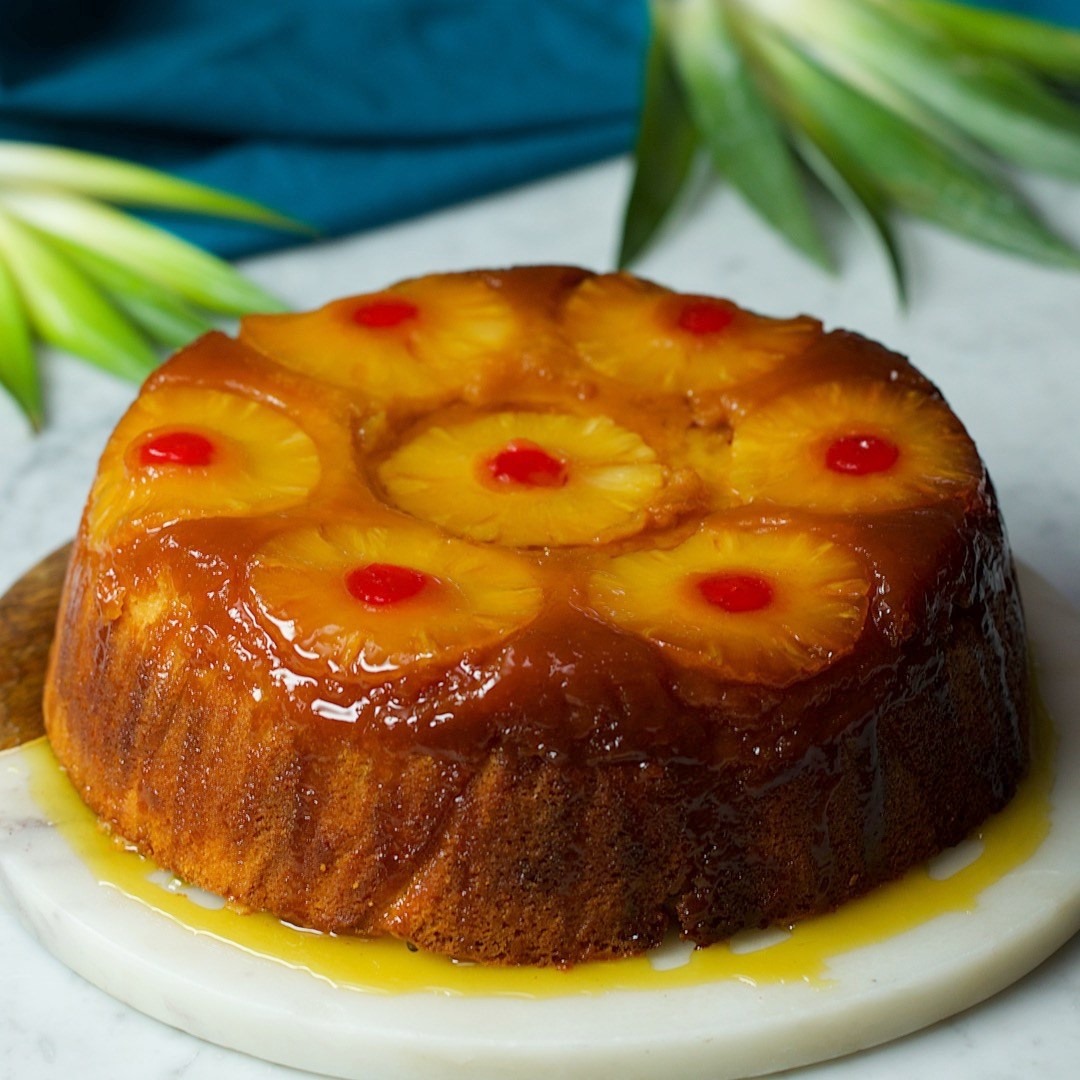
Whole Pineapple Upside Cake

Whole Pineapple Upside Cake
Whole Pineapple Upside Cake recipe.
Author:
Cuisine: American
Recipe type: Dessert
Ingredients
  • 400ml golden syrup
  • 50g butter
  • 450g very soft butter
  • 450g caster sugar
  • 6 medium eggs
  • 450g self raising flour
  • 15 tbsp milk
  • 1 large pineapple
  • 6 pineapple rings (from a can is fine)
  • 6 glace cherries
Instructions
  1. Preheat the oven to 180°C/360°F.
  2. Heat the golden syrup and butter until bubbling. Leave to cool a little.
  3. Cream together butter and sugar until light and fluffy.
  4. Add the beaten eggs a little at the time to the mixture, then fold in the flour. Thin down with the milk to make a spoonable cake batter.
  5. Line a deep casserole dish on both bottom and sides. Pour half the syrup over the bottom and arrange the pineapple rings on top. Place a cherry in the middle of each ring - cheeky!
  6. Trim the skin off the pineapple and cut out the middle. Roast for half an hour until fairly soft.
  7. Spoon a little of the cake batter on top and place the pineapple on top. Add the rest of the batter around the pineapple and spoon over it.
  8. Bake for around an hour, until a knife comes out clean, then leave to sit for ten minutes before lifting off the casserole. Pour the leftover syrup on top. Tuck in!

Watch the recipe video here:

Dessert

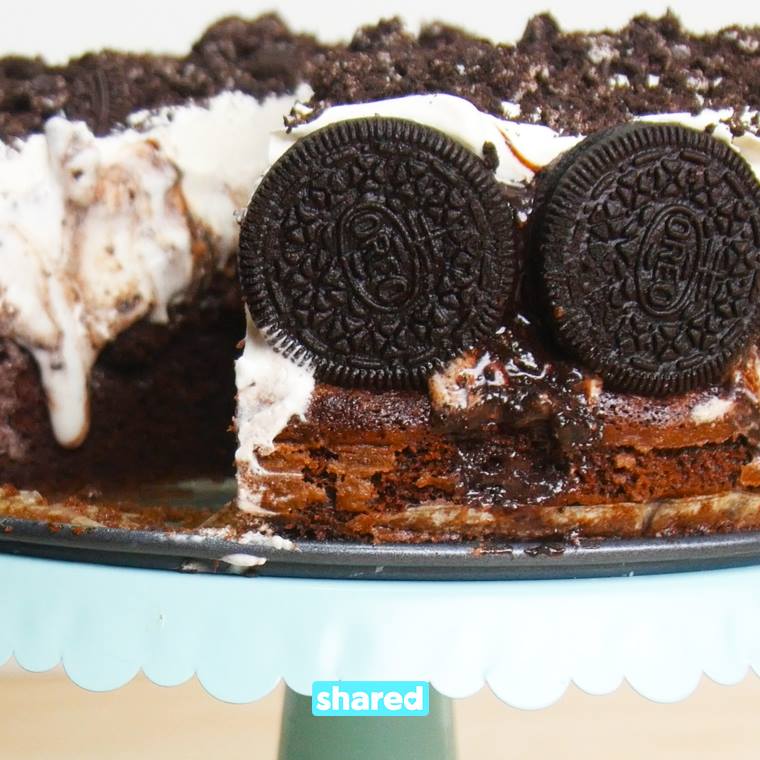
Summer Birthdays Need Ice Cream Cakes and What Better Than an Oreo Cookies & Cream!

Summer Birthdays Need Ice Cream Cakes and What Better Than an Oreo Cookies & Cream!
Finding the perfect ice cream cake has only been a problem for myself. I always thought I could make one way better than the grocery stores generic flavors. So I made the ultimate Oreo cake and it was actually pretty easy! This simple yet over the top ice cream cake starts with a light and chocolatey devil's food cake and then layers of smooth vanilla ice cream, crunchy oreos and chocolate fudge! Make any summer party into an occasion by trying this Oreo Ice Cream Cake!
Author:
Cuisine: American
Recipe type: Dessert
Ingredients
  • 1 box devils food cake mix + eggs, oil, water
  • 2 Bags Original Oreos
  • 2L tub Vanilla ice cream
  • 2 cups chocolate fudge sauce
  • 8 oz cool whip
  • 1 cup milk
Instructions
  1. Line 10 inch spring mold pan with parchment.
  2. In a large bowl mix cake mix, eggs, oil and water.
  3. Pour into spring mold and bake as per box instructions and allow to cool before continuing. Soak 1 bag of oreos in milk and line rim of pan in a single file(a few at a time, for no more than 30 sec).Spread half the ice cream in an even layer.
  4. Crush 1 bag of oreos, reserve ¼ of the oreos and place the rest in a medium bowl, add 1 cup of fudge sauce and mix until combined.
  5. Spread mixture on top of the ice cream.
  6. Spread in the rest of the ice cream on top.
  7. Spread whip topping and sprinkle remaining crumbled cookies and drizzle the remaining fudge sauce on top.
  8. Place back in freezer for 1 hour to set up.

Watch the recipe video here:

Dessert

Peachy Cookies

Peachy Cookies
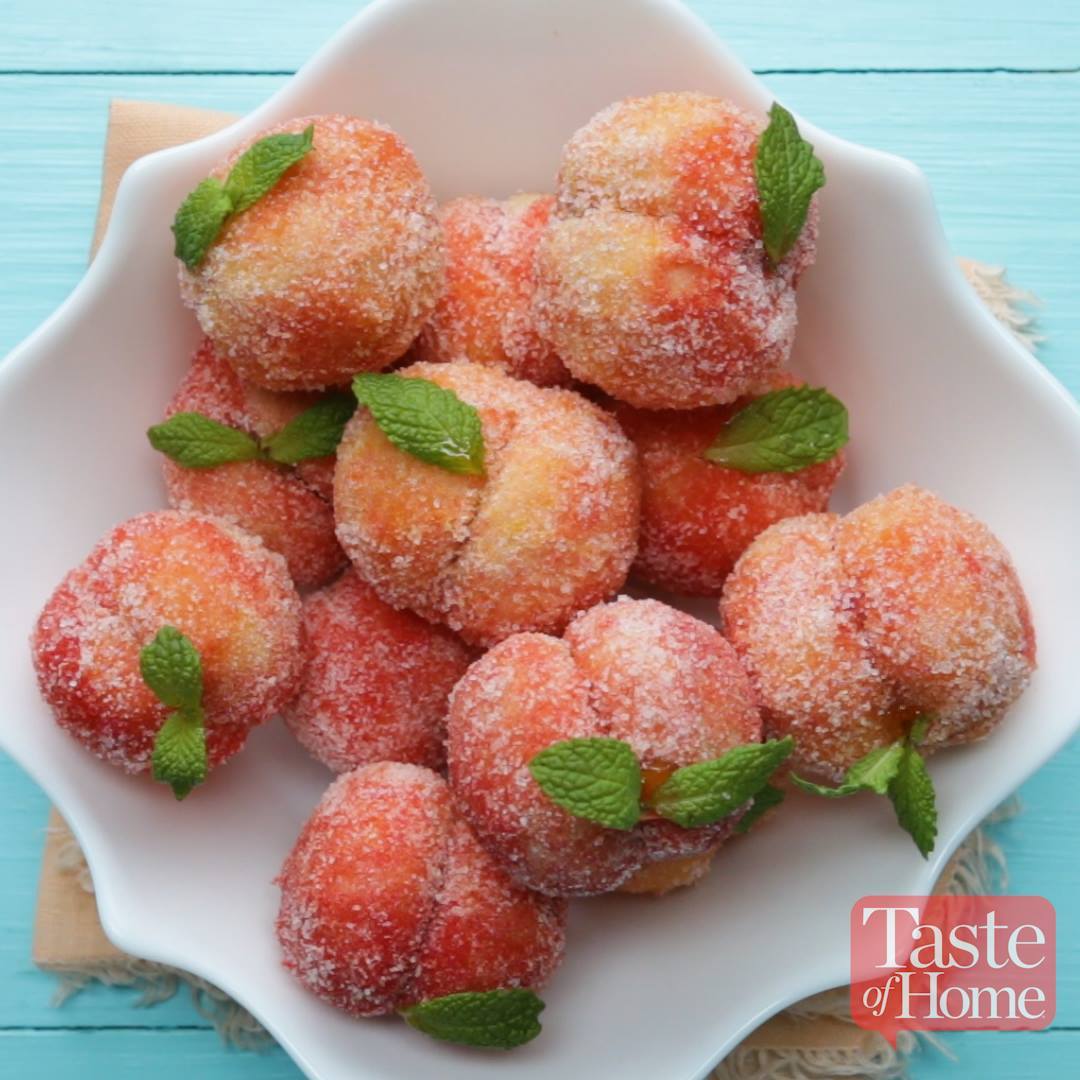
One bite of these pretty pastries and you'll think they came fresh off the tree instead of the cookie plate. Andrea Cuteri from Coraopolis, Pennsylvania bakes them for holidays, weddings and celebrations that call for a peach of a cookie!
Author:
Cuisine: American
Recipe type: Dessert
Ingredients
  • 2 large eggs
  • 1 cup sugar
  • ¾ cup canola oil
  • ½ cup 2% milk
  • ½ teaspoon vanilla extract
  • 4 cups all-purpose flour
  • ¾ teaspoon baking powder
FILLING:
  • 1 cup peach or apricot preserves
  • ½ cup finely chopped pecans
  • 3 ounces cream cheese, softened
  • 2 tablespoons unsweetened instant tea
  • ¾ teaspoon ground cinnamon
COATING:
  • 2 packages (3 ounces each) lemon gelatin
  • 2 packages (3 ounces each) peach or orange gelatin
  • 2 packages (3 ounces each) strawberry gelatin
  • ½ cup sugar
  • Mint leaves and additional apricot preserves
Instructions
  1. In a large bowl, beat the eggs, sugar, oil, milk and vanilla until blended. Combine flour and baking powder; gradually beat into egg mixture.
  2. Roll into ¾-in. balls. Place 2 in. apart on ungreased baking sheets; flatten slightly. Bake at 325° for 13-15 minutes or until firm. Remove to wire racks.
  3. While cookies are warm, use a sharp knife and small spoon to cut and scoop out about ½ teaspoon crumbs from the bottom of each cookie; set crumbs aside (about 1-1/2 cups) for filling. Cool cookies completely.
  4. In a small bowl, combine the filling ingredients; stir in reserved crumbs. Spoon into two cookies; spread a thin amount of filling on cookie bottoms and press together to form a peach. Repeat with remaining cookies and filling.
  5. In a shallow bowl, combine one package each of lemon and orange gelatin powder. Place one package of strawberry gelatin powder in another bowl. Place sugar in a third bowl.
  6. Working with one cookie at a time, spritz cookie with water. Dip in lemon gelatin mixture, then in strawberry gelatin and then in sugar; spritz with additional water and add more gelatin as needed to create desired peach blush effect. Place on a wire rack to dry for 1 hour.
  7. Repeat with remaining cookies and packages of gelatin. Attach mint leaves to the top of each cookie with additional preserves. Store in the refrigerator.

Watch the recipe video here:

The cutest cookies you'll ever eat!> Get the recipe for Peachy Cookies: https://trib.al/zBQg3Wm

Posted by Taste of Home on Sunday, May 5, 2019

Dessert

Chocolate Fondue Banana Bread Boat

Chocolate Fondue Banana Bread Boat
Author:
Cuisine: American
Recipe type: Dessert
Ingredients
BANANA BREAD
  • 4 bananas, as ripe as possible
  • 4 tablespoons vegetable oil
  • 1 egg
  • ½ cup sugar (100 g)
  • 1 teaspoon vanilla extract
  • 1 ½ cups flour (190 g)
  • 1 teaspoon baking powder
  • 1 teaspoon baking soda
  • ¼ teaspoon salt
  • 1 teaspoon cinnamon
CHOCOLATE FONDUE
  • 12 oz semi sweet chocolate, chopped (340 g)
  • 6 tablespoons heavy cream
  • 6 tablespoons milk
  • 1 teaspoon vanilla extract
  • 2 bananas, sliced, to serve
  • 12 strawberries, to serve
Instructions
  1. Preheat oven to 350˚F (180˚C).
  2. In a large bowl, mash the bananas with a fork.
  3. Add in the oil, egg, sugar, and vanilla. Stir until combined.
  4. Add in the flour, baking powder, baking soda, salt, and cinnamon. Stir until just combined.
  5. Pour the banana bread batter into a greased loaf pan.
  6. Bake for 45-55 minutes, or until a toothpick comes out clean.
  7. In a small saucepan, combine the cream milk and chocolate, and melt over low heat.
  8. Add the vanilla and stir to combine. Remove from heat, and cover with a lid.
  9. Let the banana bread cool in the pan for 30 minutes, then remove from the loaf pan and place on a serving dish.
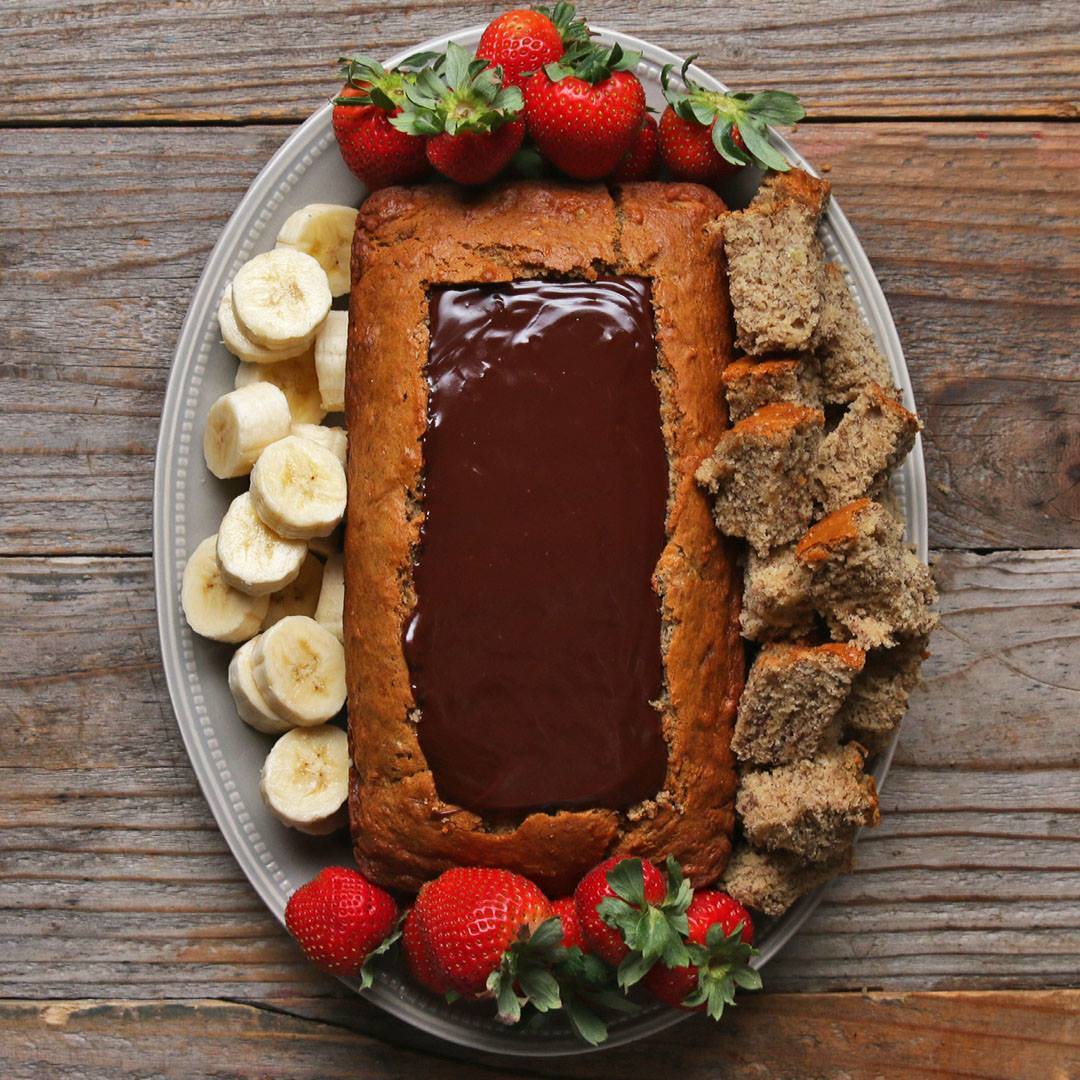
  10. Using a knife cut a rectangle out of the top center of the loaf, leaving a 2- to 3-inch (5 cm to 7cm) perimeter of banana bread, making sure to not slice through the bread. Cut the rectangle into 2-inch (5-cm) slices. Gently pull out each slice one at a time. Press the crumbs into the base of the cut out bread.
  11. Reheat the chocolate if needed then pour the chocolate into the banana bread boat.
  12. Place sliced bananas, strawberries, and the inside of the banana bread around the fondue boat.
  13. Enjoy!

Watch the recipe video here:

Banana bread fondue boat ??FULL RECIPE: https://tasty.co/recipe/chocolate-fondue-banana-bread-boat

Posted by Proper Tasty on Saturday, May 4, 2019

Dessert

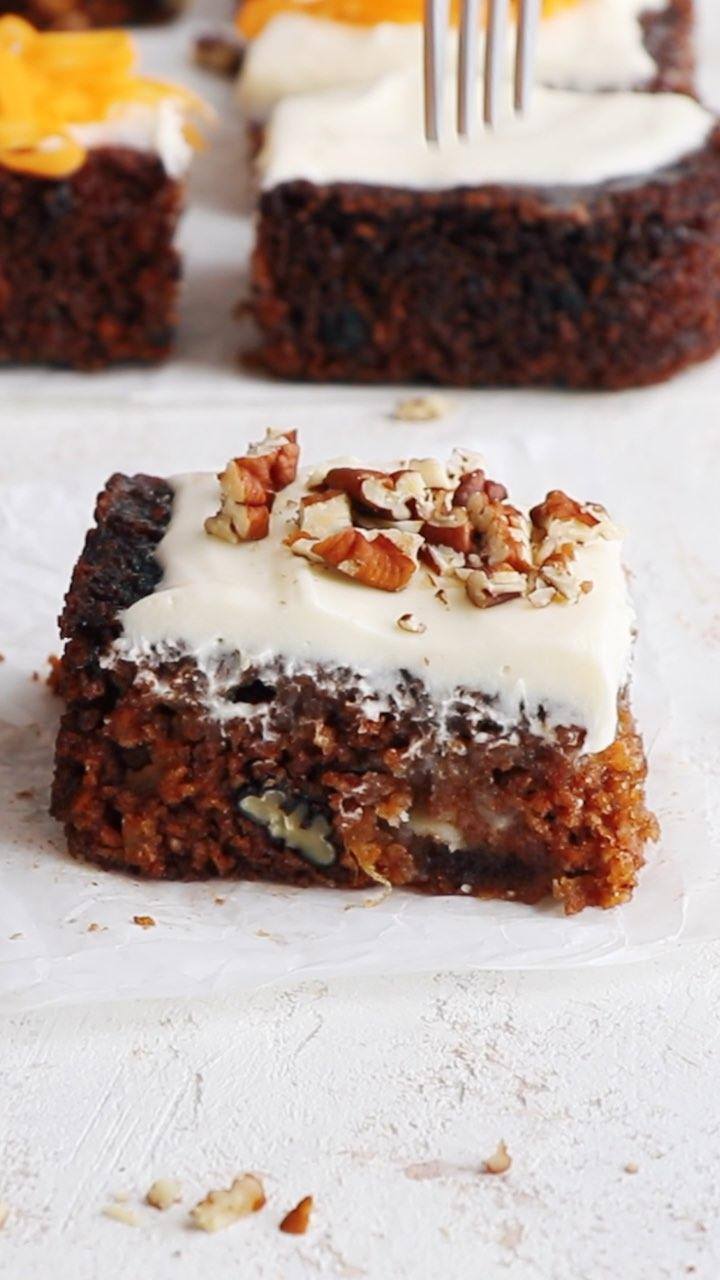
J. ALEXANDER’S CARROT CAKE

J. ALEXANDER'S CARROT CAKE
This copycat version of J. Alexander’s Carrot Cake is every bit as perfect as the original: full of carrots, pineapple and coconut, and soaked with a buttermilk syrup for a melt-in-your-mouth slice of cake.
Author:
Cuisine: American
Recipe type: Dessert
Ingredients
FOR THE CAKE:
  • 2 cups all-purpose flour
  • 1 tablespoon baking soda
  • 1 tablespoon cinnamon
  • 2 cups sugar
  • ¼ teaspoon salt
  • 3 large eggs
  • ¾ cup canola oil, plus more for pan
  • ¾ cup buttermilk
  • 2 teaspoons vanilla extract
  • 1 (8-ounce) can crushed pineapple, drained
  • 2 cups julienne carrots
  • 3 ounces shredded coconut, about 1 cup
  • 1 cup pecan pieces
FOR THE SYRUP:
  • 1 cup sugar
  • ½ cup buttermilk
  • 6 ounces (1½ sticks) unsalted butter, room temperature
  • 1 teaspoon vanilla extract
FOR THE FROSTING:
  • 6 ounces (1½ sticks) unsalted butter, room temperature
  • 8 ounces cream cheese, room temperature
  • 2 cups confectioners' sugar
Instructions
  1. Make the Carrot Cake:
  2. Generously grease a 9x13-inch cake pan, set aside. Preheat oven to 325 degrees. Mix flour, baking soda, cinnamon, sugar and salt in a large mixing bowl.
  3. Mix remaining cake ingredients in a separate medium bowl. Combine the wet ingredients with the flour mixture, mixing well.
  4. Transfer batter to prepared pan. Bake approximately 45-50 minutes or until a toothpick inserted in the center comes out clean. Cake should be 1 ½-inch thick.
  5. While the cake is still hot, poke holes all over the top with a large fork. Pour the Cake syrup over the top, allowing cake to soak up the syrup. Refrigerate cake until completely cool.
  6. Frost with Cream cheese frosting. Refrigerate cake to let frosting set.
  7. Make the Syrup:
  8. Using a medium saucepan over medium-high heat, combine ingredients. Cook, stirring occasionally, until sugar is dissolved.
  9. Make the Frosting:
  10. Using the bowl of an electric mixer fitted with a paddle attachment on medium speed, combine ingredients, mixing until smooth and free of lumps.

Watch the recipe video here:

This is hands-down one of my favorite recipes! RECIPE: https://www.mybakingaddiction.com/j-alexanders-carrot-cake/

Posted by My Baking Addiction on Wednesday, May 1, 2019

Dessert

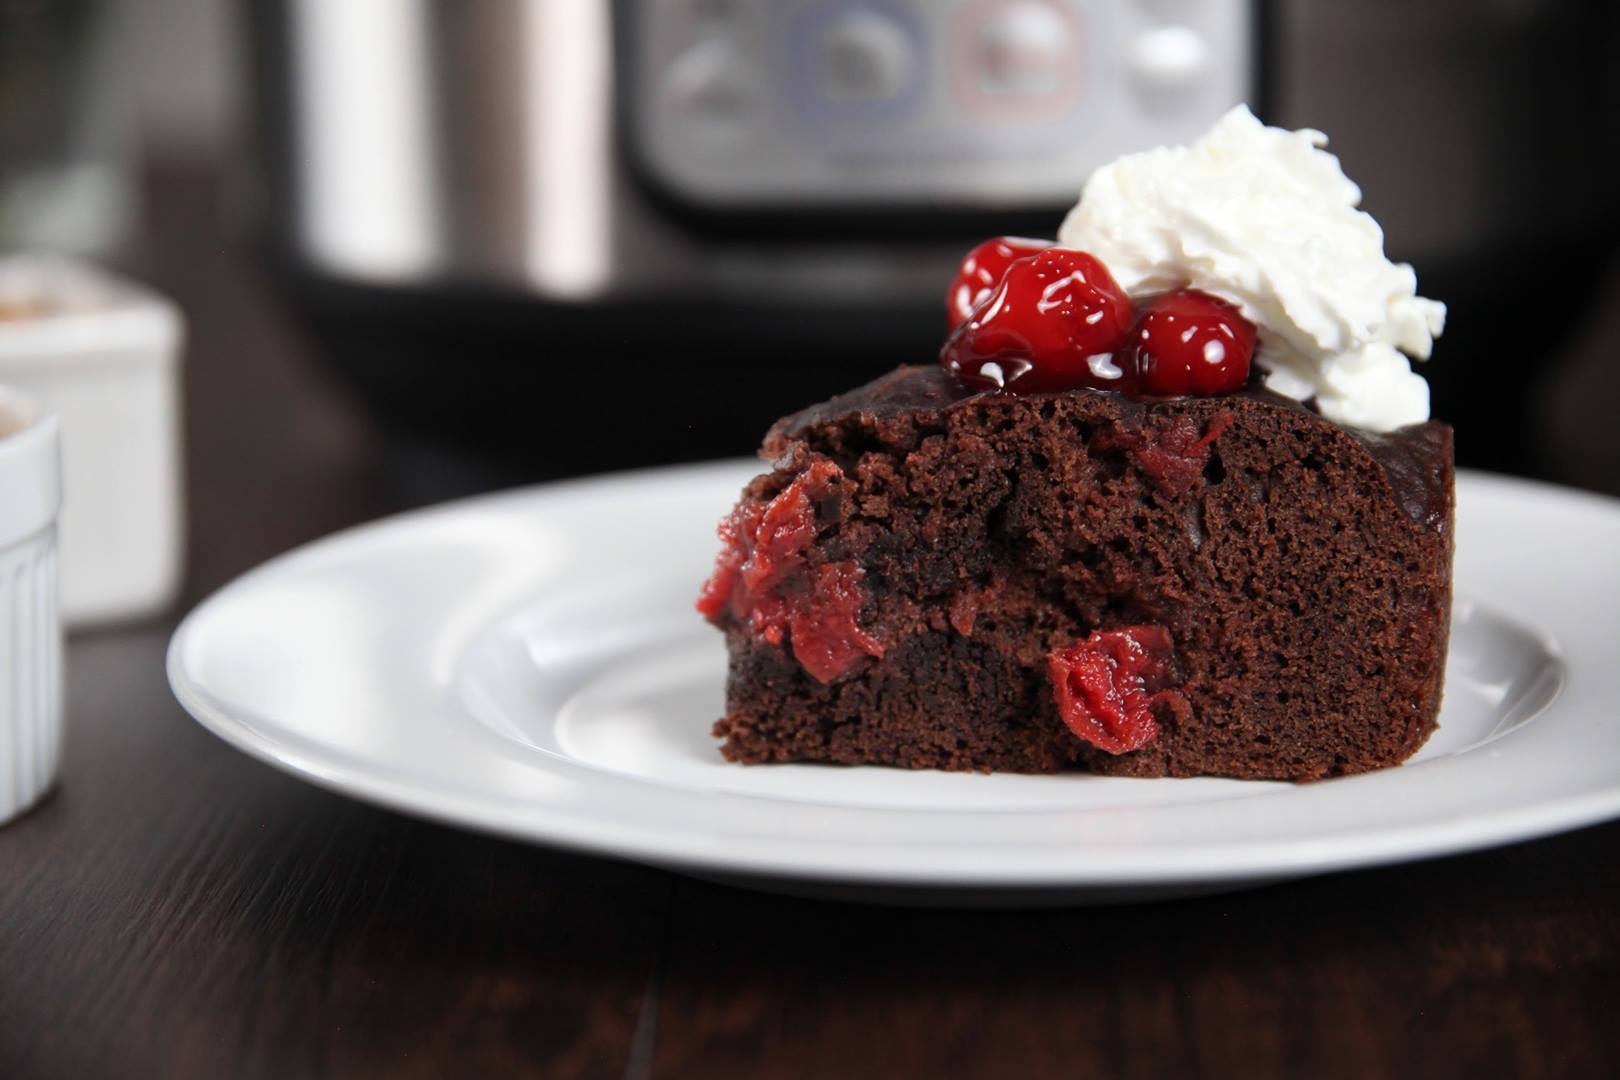
Instant Pot Cherry Chocolate Pudding Cake

Instant Pot Cherry Chocolate Pudding Cake
This cake is easy and elegant and has only FOUR ingredients!
Author:
Cuisine: American
Recipe type: Dessert
Ingredients
  • 7.5 oz devils food cake mix (about half the package)
  • 1 egg
  • 1 tbsp butter, melted
  • 21 oz can cherry pie filling, divided
  • 1½ cups water
Instructions
  1. In a medium bowl, combine cake mix, egg and melted butter until most of the dry mix is incorporated.
  2. Fold in 1½ cups of cherry pie filling (reserve the remaining ½ cup for topping).
  3. Coat the inside of a 1.5 qt casserole (these fit perfectly: https://amzn.to/2DtfXM4) with non-stick spray. Pour batter evenly into the casserole. Cover the dish loosely with foil – do not seal.
  4. Pour 1½ cups of water in the Instant Pot and insert the steam rack. Carefully lower the casserole on to the steam rack.
  5. Secure the lid, making sure the vent is closed.
  6. Using the display panel select the MANUAL function*. Use the +/- keys and program the Instant Pot for 25 minutes.
  7. When the time is up, let the pressure naturally release for 10 minutes, then quick-release the remaining pressure.
  8. Serve topped with remaining cherry pie filling (warmed if desired).

Watch the recipe video here:

This cake is easy and elegant and has only FOUR ingredients!RECIPE: http://chopsecrets.com/instant-pot-cherry-chocolate-pudding-cake/

Posted by Chop Secrets on Wednesday, May 1, 2019

Dessert

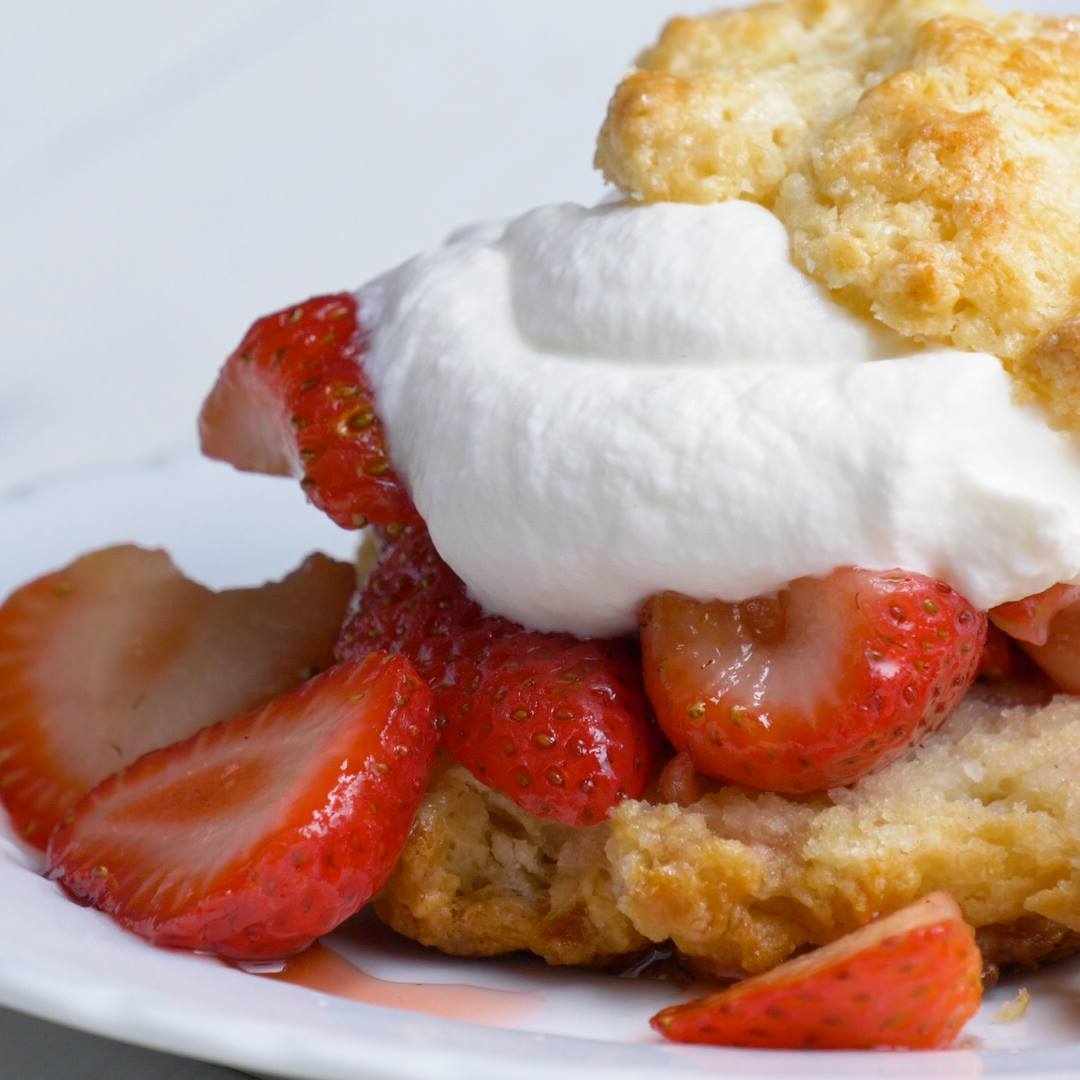
Grandma’s Old-Fashioned Strawberry Shortcake

Grandma’s Old-Fashioned Strawberry Shortcake
https://www.facebook.com/61511025427/posts/10156999342915428/ aWhen my grandma served this shortcake, she usually topped it with homemade vanilla ice cream. —Angela Lively, Conroe, Texas
Author:
Cuisine: American
Recipe type: Dessert
Ingredients
  • 6 cups sliced fresh strawberries
  • ½ cup sugar
  • 1 teaspoon vanilla extract
SHORTCAKE:
  • 3 cups all-purpose flour
  • 5 tablespoons sugar, divided
  • 3 teaspoons baking powder
  • 1 teaspoon baking soda
  • ½ teaspoon salt
  • ¾ cup cold butter, cubed
  • 1-1/4 cups buttermilk
  • 2 tablespoons heavy whipping cream
TOPPING:
  • 1-1/2 cups heavy whipping cream
  • 2 tablespoons sugar
  • ½ teaspoon vanilla extract
Instructions
  1. Combine strawberries with sugar and vanilla; mash slightly. Let stand at least 30 minutes, tossing occasionally.
  2. Preheat oven to 400°. For shortcake, whisk together flour, 4 tablespoons sugar, baking powder, baking soda and salt. Cut in butter until crumbly. Add buttermilk; stir just until combined (do not overmix). Drop batter by ⅓ cupfuls 2 in. apart onto an ungreased baking sheet. Brush with 2 tablespoons heavy cream; sprinkle with remaining 1 tablespoon sugar. Bake until golden, 18-20 minutes. Remove to wire racks to cool completely.
  3. For topping, beat heavy whipping cream until it begins to thicken. Add sugar and vanilla; beat until soft peaks form. To serve, cut biscuits in half; top with strawberries and whipped cream.

Watch the recipe video here:

Bring on the great memories!> Get the recipe for Grandma's Old-Fashioned Strawberry Shortcake: https://trib.al/ohSN6tS

Posted by Taste of Home on Wednesday, May 1, 2019

Dessert

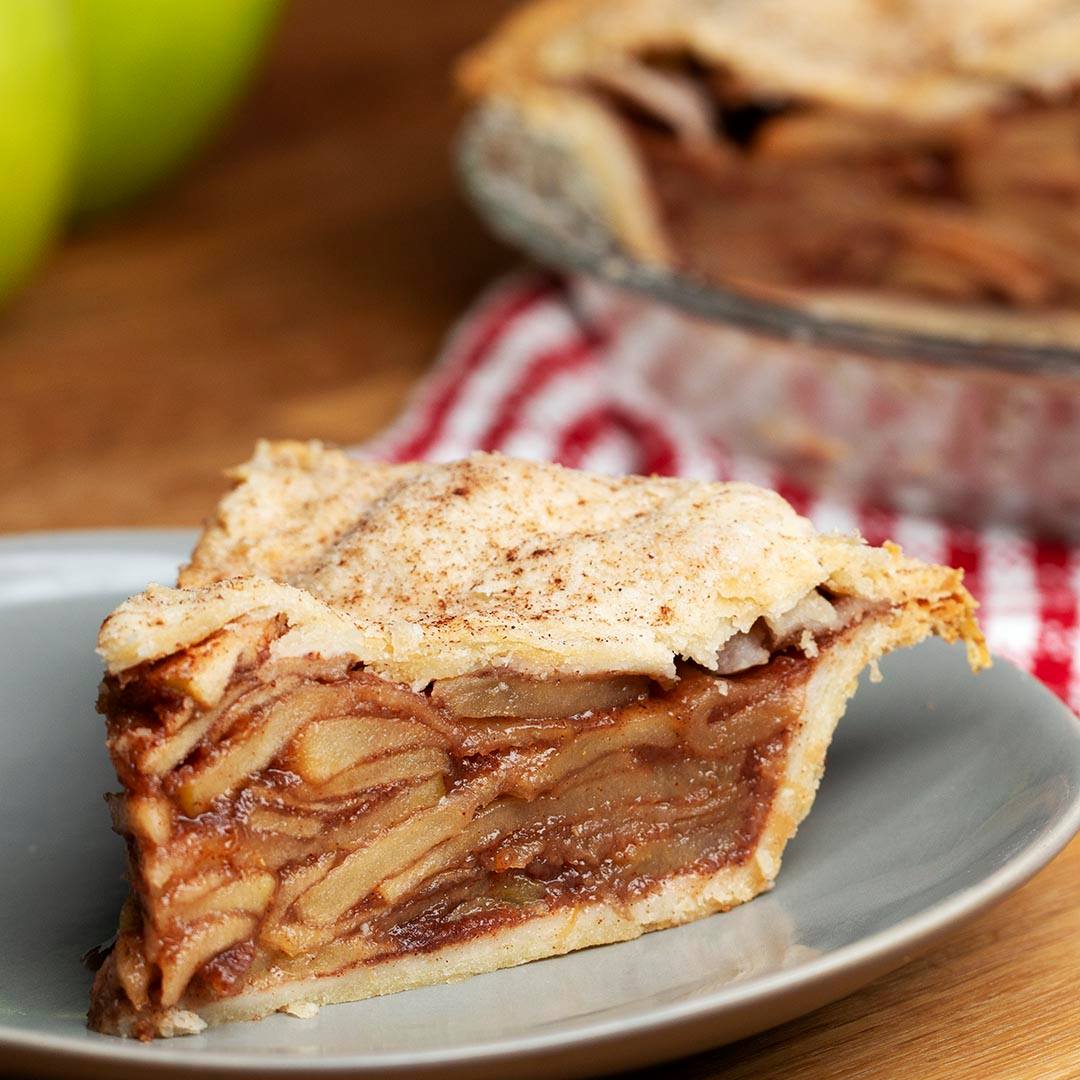
Vegan Apple Pie

Vegan Apple Pie
Vegan Apple Pie
Author:
Cuisine: American
Recipe type: Dessert
Ingredients
  • CRUST
  • 2 ½ cups all-purpose flour, plus more for dusting (310 g)
  • 1 tablespoon organic sugar
  • 1 teaspoon kosher salt
  • 1 cup vegan butter, cubed and chilled (225 g)
  • 6 tablespoons ice water
  • FILLING
  • 7 granny smith apples
  • 2 cups organic sugar, plus 1 teaspoon, divided (400 g)
  • 1 lemon, zested
  • 5 tablespoons cornstarch
  • ½ lemon, juiced
  • 1 tablespoon coconut oil, melted, plus 1 teaspoon, divided
  • ½ teaspoon salt
  • 4 teaspoons cinnamon, divided
Instructions
Make the crust:
  1. In a large bowl, combine the flour, sugar, and salt.
  2. Add the cubed butter, a bit at a time, and use a fork to work it into the flour with a fork until it breaks down to dime-sized pieces.
  3. Gradually add the ice water and mix just until the dough can be pressed together.
  4. Divide the dough in half and shape into discs. Wrap in plastic wrap and chill in the fridge for 1 hour.
  5. Preheat the oven to 350˚F (180˚C).
Make the filling:
  1. Peel and core apples, then thinly slice. Transfer to a large bowl and add 2 cups of sugar, the lemon zest, cornstarch, lemon juice, 1 teaspoon melted coconut oil, salt, and 3 teaspoons cinnamon. Toss until the apples are well-coated. Set aside.
  2. On a lightly floured surface, roll out both of the discs of dough to about 1 inch (2 cm) thick. Transfer one round to a greased 8-inch (20-cm) pie dish and gently press against the bottom and sides. Trim the excess dough around the edges, then prick the bottom of the pie crust all over with a fork
  3. Pour the apples into the bottom crust and cover with the top crust. Trim the excess dough around the edges, then crimp the top and bottom crusts together with a fork. Brush the top of the crust with the remaining tablespoon of melted coconut oil and sprinkle with the remaining teaspoon of sugar and cinnamon. Cut 4 vents in the top crust
  4. Bake for 1 hour, until crust is starting to turn golden brown.
  5. Let cool for 10 minutes, then slice and serve.
  6. Enjoy!

Watch the recipe video here:

We only have eyes for this vegan apple pie ?FULL RECIPE: https://tasty.co/recipe/vegan-apple-pie

Posted by Proper Tasty on Thursday, May 2, 2019

Dessert

MINT CHOCOLATE CHIP CUPCAKES

MINT CHOCOLATE CHIP CUPCAKES
Author:
Cuisine: American
Recipe type: Dessert
Ingredients
For the Cupcakes
  • 1 (18.25 ounce) package devil’s food cake mix
  • 1 (3.9 ounce) package instant chocolate pudding mix
  • 1 cup sour cream
  • 1 cup vegetable oil
  • 4 eggs, lightly beaten
  • 2 teaspoons pure vanilla extract
  • ½ cup warm water
  • 1½ cups Andes Crème de Menthe baking chips
For the Frosting
  • 4 sticks (2 cups) unsalted butter, room temperature
  • 1.5 pounds (28 ounces) confectioners’ sugar, sifted
  • 2 teaspoons pure vanilla extract
  • 3-4 tablespoons heavy cream
  • green gel dye
  • ¼ teaspoon pure peppermint extract
  • 2 ounces semi sweet chocolate, melted and cooled
  • 2 tablespoons unsweetened cocoa powder
  • mini chocolate chips
Instructions
  1. Preheat oven to 350°F. Line muffin tin with paper liners or spray with non-stick cooking spray.
  2. In the bowl of a stand mixer or a large bowl with a hand mixer, add the cake and pudding mixes, sour cream, oil, eggs, vanilla and water. Mix on medium speed for about 2 minutes until all ingredients are well combined and the batter is smooth. Stir in the Andes Crème de Menthe baking chips.
  3. Using a large scoop distribute the batter between 24 muffin wells; about 3 tablespoons of batter per well.
  4. Bake in preheated oven for 18-23 minutes or until the tops of the cakes spring back when lightly touched. Allow cupcakes to cool inside muffin tins for about 10 minutes.
  5. Remove cupcakes from muffin tins and allow to fully cool on a wire rack. Once cupcakes are cool, prepare your frosting.
For the Frosting
  1. In the bowl of a stand mixer fitted with the paddle attachment, beat the butter on medium-high speed for about 5 minutes.
  2. Turn the mixture down to low speed and gradually add in the confectioners’ sugar until it is completely incorporated. Add in vanilla and heavy cream. Turn the mixer back up to medium-high speed and beat the mixture for about 3-4 minutes or until light and fluffy.
  3. Remove half of the frosting from the mixer bowl and set aside. Add a tiny amount of green gel dye to the remaining frosting (I used Wilton Leaf Green). Turn the mixer on and fully incorporate the dye. Slowly add more dye until you achieve a nice minty green color. Stir in peppermint extract.
  4. Remove the mint frosting from the mixing bowl and set aside. Add the other half of the frosting back into the bowl of your stand mixer. Add in the cooled, melted chocolate and cocoa powder. Mix until fully incorporated.
  5. For the two-toned effect, I used this method from GoodLife Eats. You can also carefully layer the two colors into the piping bag, but I find Katie’s method to be much easier and cleaner.
  6. Pipe the frosting onto the cooled cupcakes and garnish with mini chocolate chips.

Watch the recipe video here:

Mint Chocolate Chip Cupcakes ?The perfect dessert for any celebration!https://www.mybakingaddiction.com/mint-chocolate-chip-cupcakes/

Posted by My Baking Addiction on Wednesday, May 1, 2019