Showing 879 Result(s)
Dessert

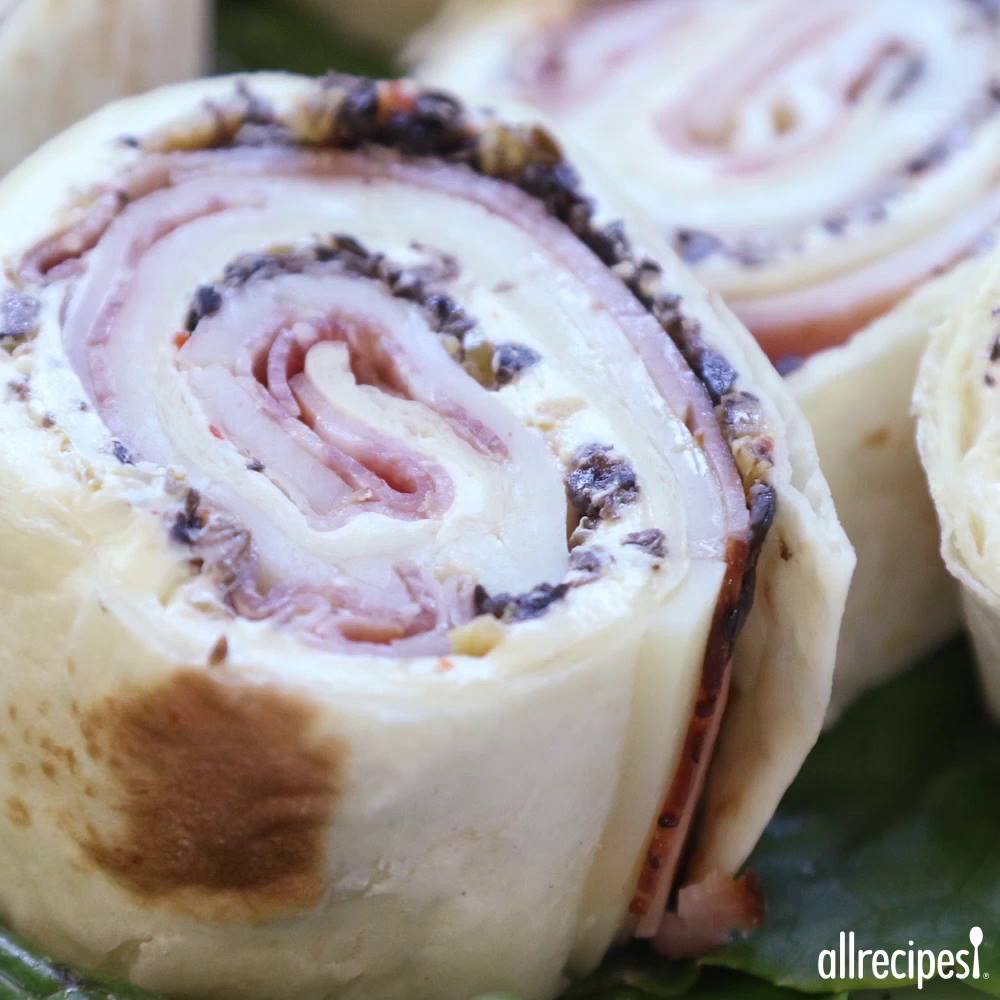
Muffuletta Pinwheels
Muffuletta Pinwheels
A appetizer sized version of the New Orleans traditional sandwich.
Author:
Cuisine: American
Recipe type: Dessert
Ingredients
  • ⅓ cup finely chopped pimento-stuffed green olives
  • ⅓ cup finely chopped black olives
  • ½ teaspoon dried oreganoextra virgin olive oil
  • 2 (8 ounce) packages cream cheese, softened
  • 1 pinch dried oregano
  • 1 pinch garlic powder
  • 5 (10 inch) flour tortillas
  • ¼ pound thinly sliced ham
  • ¼ pound thinly sliced provolone cheese
  • ¼ pound thinly sliced salami
  • ¼ pound thinly sliced mozzarella cheese
Instructions
  1. Combine green olives, black olives, ½ teaspoon oregano, and oil in a small bowl. Set aside. Beat together cream cheese, pinch of oregano, and pinch of garlic salt. Spread the mixture onto tortillas. Sprinkle olive mixture over the top of each. Starting at the top of each tortilla and about ⅛ inch down place a slice of ham, provolone, salami, and mozzarella slightly overlapping each slice.
  2. Roll the tortillas up and wrap in foil. Chill for at least 2 hours.
  3. Remove the foil and slice on a 45 degree angle into 1-inch pieces.

Watch the recipe video here:

Muffuletta Pinwheels: https://trib.al/nCKN0OZ

Posted by Allrecipes on Thursday, May 30, 2019
Dessert

Banana Marshmallow Pops

Banana Marshmallow Pops
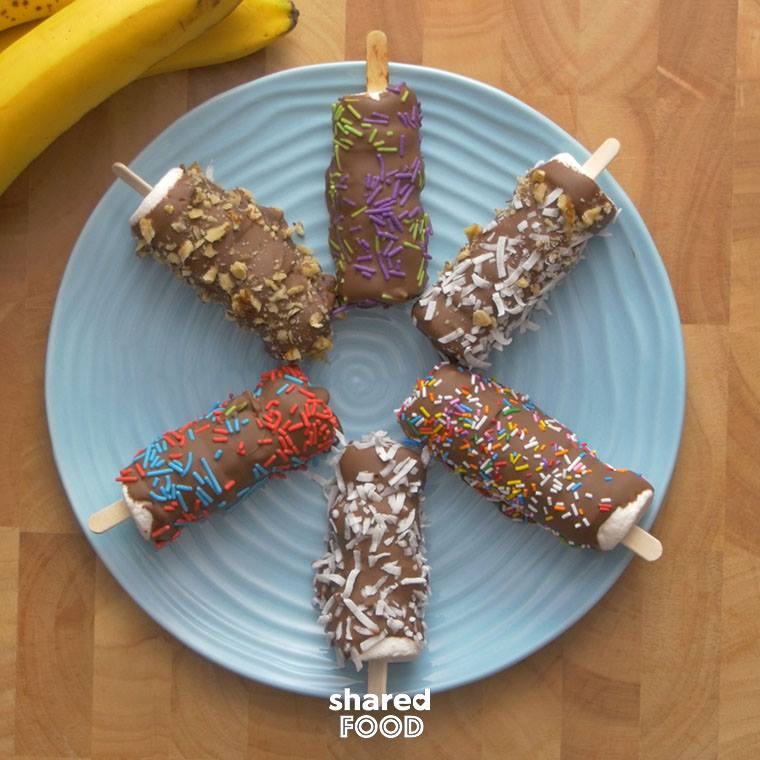
Creativity in the kitchen is a must, especially when making crazy unique snacks for your kids. Not going to lie about this one, I enjoyed these banana pops so much I forgot to give them to my kids. Tropical bananas together with sticky and sweet marshmallows all enrobed in milk chocolate and covered in nuts, sprinkles and coconut! Forgot to mention that they’re all on a stick!
Author:
Cuisine: American
Recipe type: Dessert
Ingredients
  • 4 large bananas
  • 6 large marshmallows
  • 3 cups milk chocolate chips, melted
  • Sweetened coconut flakes
  • Walnut pieces, crushed
  • Sprinkles
  • 6 popsicle sticks
Instructions
  1. Peel and cut bananas into inch long chunks, cut marshmallows in half (roughly the same size as the banana pieces)
  2. Starting with marshmallow, skewer onto popsicle stick, leaving enough room to still be able to hold the popsicle stick. Then skewer banana, keep going until it reaches the top and make sure to have a marshmallow at the top.
  3. Melt chocolate in a microwave safe bowl in 30 second intervals until smooth.
  4. Gently dip the entire pop into the melted chocolate and garnish with toppings before the chocolate sets.
  5. Place onto parchment lined baking sheet and place in fridge until set.
  6. Enjoy!

Watch the recipe video here:

Banana Marshmallow Pops are mouthwateringly delicious ?Recipe: http://sha.red/tJXwO

Posted by Shared Food on Thursday, May 30, 2019
Dessert

Rubik’s Cube Cake

Rubik’s Cube Cake
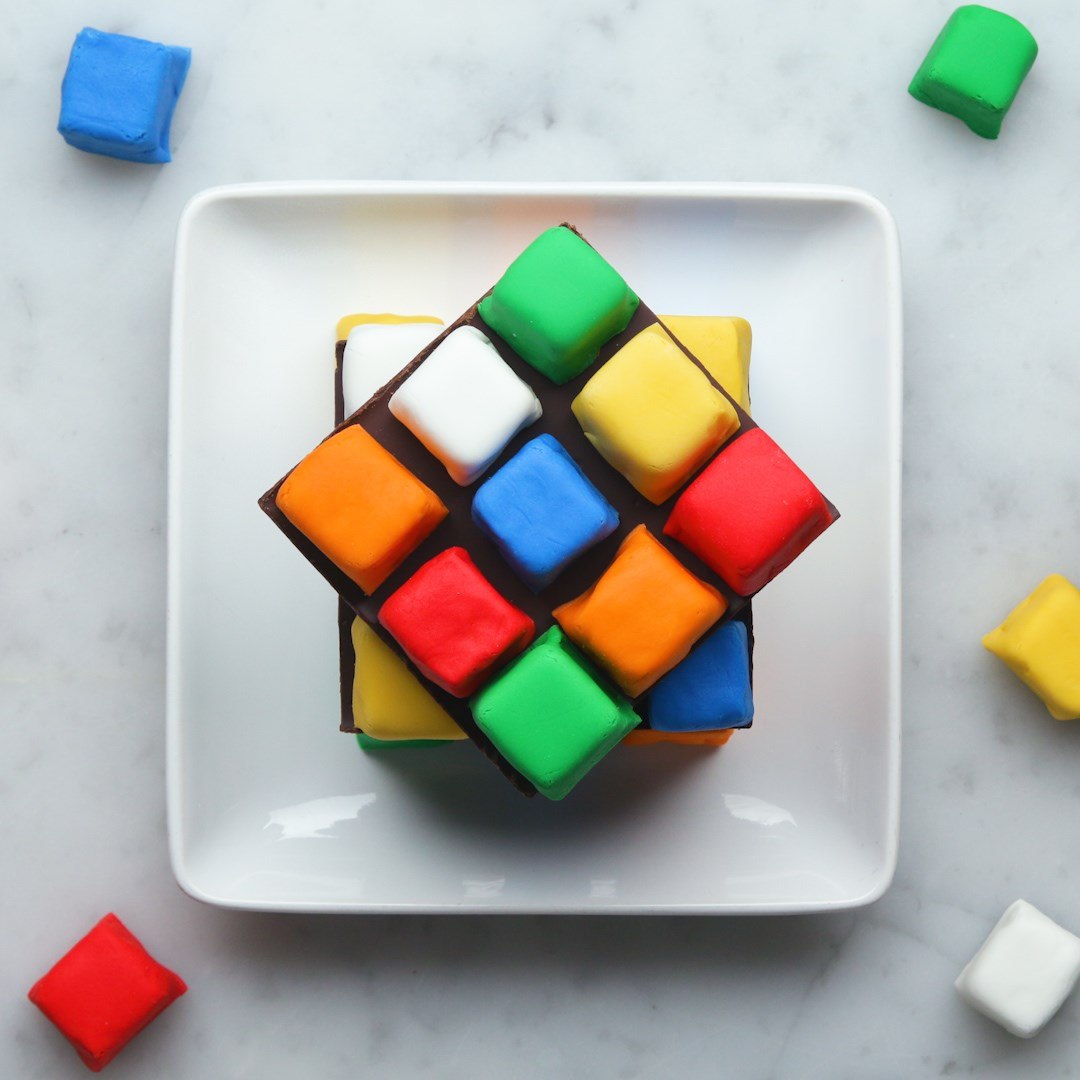
We have the secret to solving the Rubik’s cube: eat it! We recommend incorporating flavors into the vanilla frosting that reflect their specific color block, but if you want to keep things simple, simply keep the frosting as is. While this cake might not make you smarter, one thing’s for sure. You’ll want to use our marshmallow fondant recipe for more fun cakes to come.
Author:
Cuisine: American
Recipe type: Dessert
Ingredients
CAKE
  • 1 pound cake, store-bought frozen
  • ½ cup vanilla frosting (55 g)
  • ½ teaspoon lemon zest
  • ½ teaspoon lime zest
  • 1 teaspoon orange marmalade
  • 1 teaspoon strawberry jam
  • 1 teaspoon blueberry jam
MARSHMALLOW FONDANT
  • 1 bag marshmallow, white
  • 1 tablespoon water, plus more as needed
  • 4 tablespoons unsalted butter, softened
  • 5 cups powdered sugar, plus more as needed (550 g)
  • nonstick cooking spray, for greasing
  • red gel food coloring
  • blue gel food coloring
  • green gel food coloring
  • yellow gel food coloring
  • orange gel food coloring
ASSEMBLY
  • 2 large chocolate bars, cut into four 3 in (7 cm) squared
SPECIAL EQUIPMENT
  • food safe plastic gloves
Instructions
  1. Line a baking sheet with parchment paper.
  2. With a sharp knife, divide the cake crosswise into thirds, about 3 inches (7 cm) each. Slice the domed tops off of each piece. Very carefully slice each piece of cake into 4 even layers. Stack the layers in sets of 2 (there should be 6 stacks) with the bottom facing up on the prepared baking sheet. Each set of stacks will be a different color cube (white, yellow, green, orange, red, and blue)--write in marker on the parchment paper to label each stack.
  3. Open each set of layers like a book. Spread a layer of vanilla frosting on each slice.
  4. For the white cubes, stack the slices, frosted sides touching. For the yellow cubes, sprinkle with the lemon zest, then stack the slices, frosted sides touching. For the green cubes, sprinkle with the lime zest, then stack the slices, frosted sides touching. For the orange cubes, spread the orange marmalade on one piece and stack the slices. For the red cubes, spread the strawberry jam on one piece and stack the slices. For the blue cubes, spread the blueberry jam on one piece and stack the slices. Freeze for at least 30 minutes.
  5. Make the marshmallow fondant: In a large microwave-safe bowl, combine the marshmallows and water. Microwave on medium power for 2-3 minutes, stirring every 30 seconds, until the marshmallows are completely melted. Add the softened butter and use a silicone spatula to stir until combined.
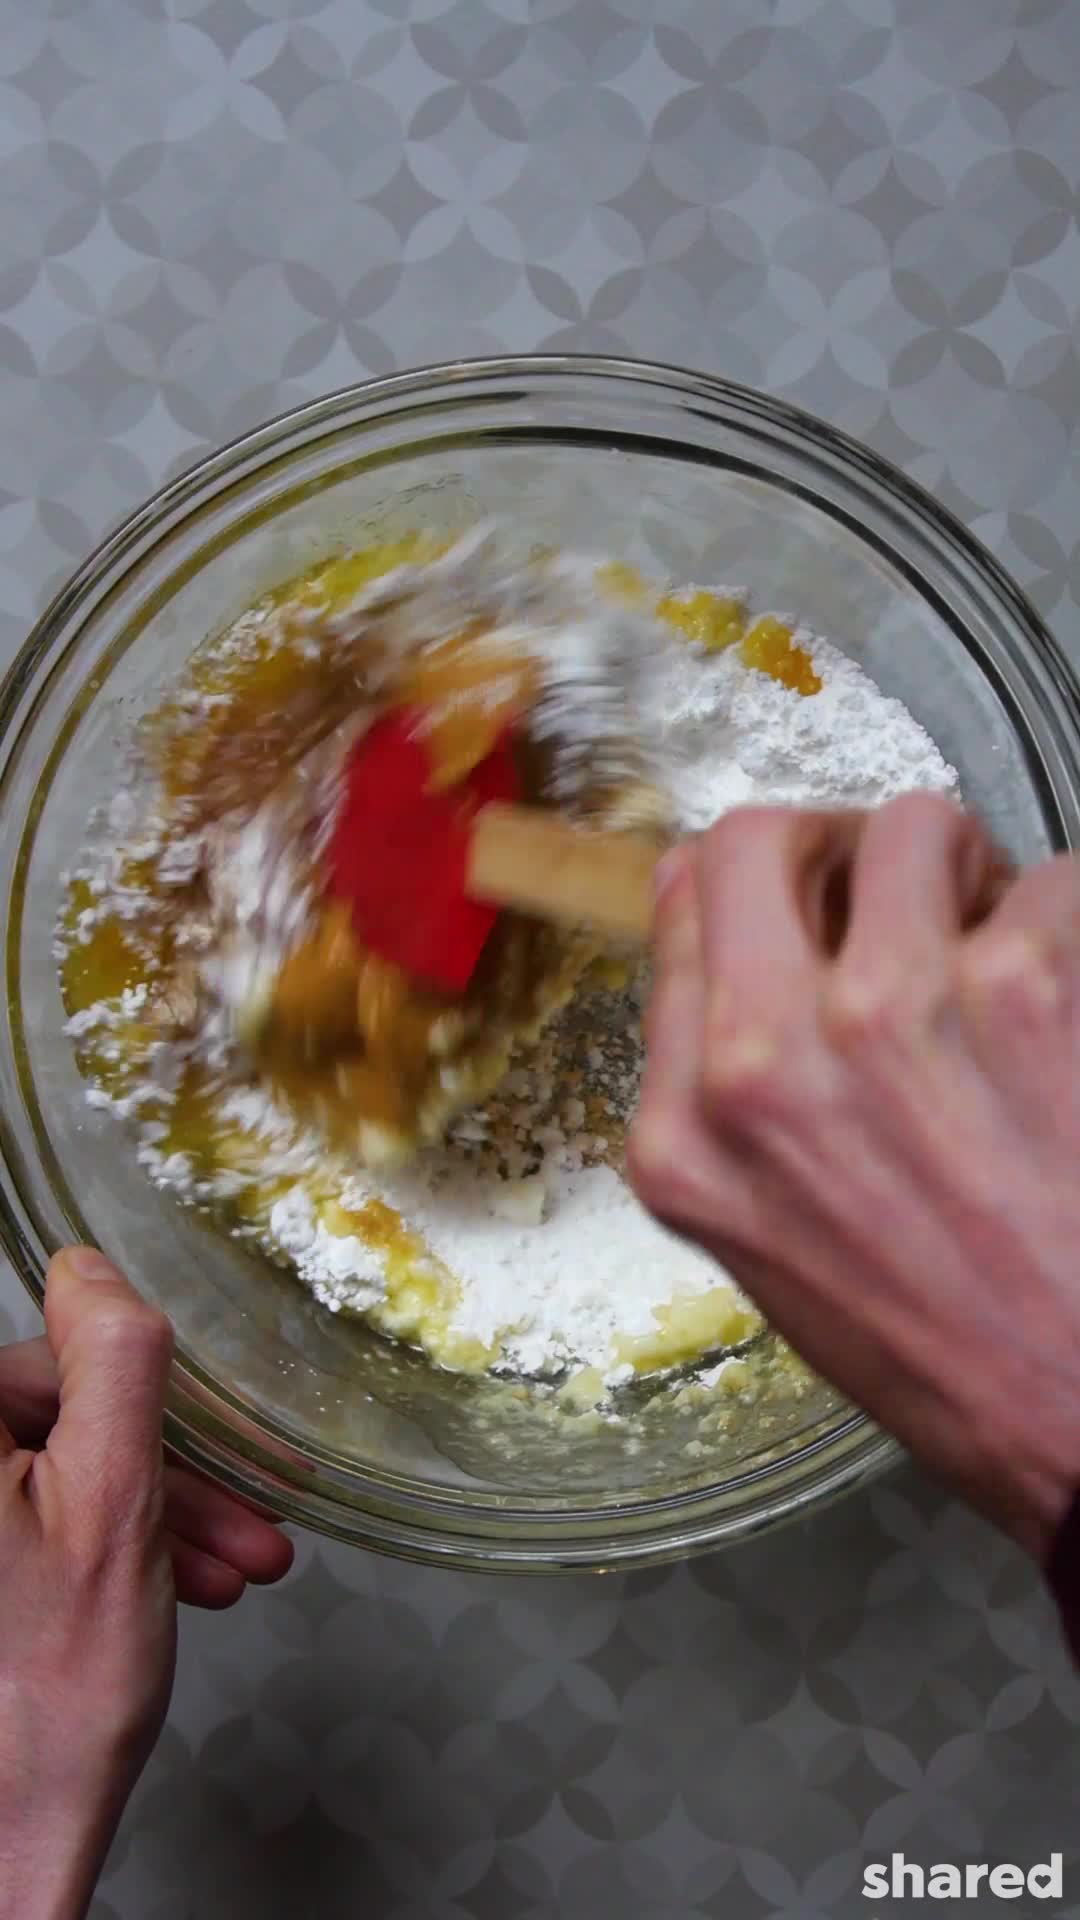
  6. Add 5 cups (550 G) of powdered sugar to a separate large bowl and make a well in the center. Pour in the marshmallow mixture. Stir to combine. When it is mostly combined, grease your hands with nonstick spray and knead to bring the fondant together into a ball in the bowl. Add more powdered sugar as needed if the fondant is sticking to your hands.
  7. Grease a clean work surface and your hands with more nonstick spray. Turn the fondant out onto the greased surface. If it gets too dry, add a bit more water. Use more nonstick spray if the fondant is sticking to the surface. Continue kneading for 8-10 minutes, until the fondant is smooth and holds its shape.
  8. Divide the fondant into 6 even pieces, spray with nonstick spray, and cover with plastic wrap so they don’t dry out. Using the gel food coloring, dye 5 of the pieces green, blue, orange, red, and yellow by kneading each gel color into 1 section of fondant. Leave the remaining piece white. Spray again with nonstick spray and cover with plastic wrap.
  9. Remove the cake stacks from the freezer. Using a sharp knife and a ruler to measure, slice each stack into 9 ¾-inch (22 cm) cubes. Return to the marked baking sheet and separate into individual pieces, then freeze again for at least 30 minutes.
  10. Roll the green fondant into a log, then cut into 9 equal pieces. Grease the pieces you aren’t using yet with nonstick spray and cover with plastic wrap. Sprinkle a piece of fondant with powdered sugar and roll out to a ¼-inch-thick (6 mm) square. Remove the green cake cubes from the freezer. Cover a cube with the rolled out fondant on 5 sides, removing the excess fondant with a knife. Repeat with the remaining fondant and cake cubes.
  11. To assemble the cake, stack 9 cubes of varying color on a plate, spaced about ¼ inch (6 mm) apart. Place a piece of chocolate squarely on top of the cubes. Carefully stack another 9 cubes on top of the chocolate. Place another chocolate square on top of the cubes, slightly askew. Stack 9 more cubes on top of the chocolate. Repeat to make another cake.
  12. Enjoy!

Watch the recipe video here:

If you can't solve a rubik's cube… just eat it!! ?Get the recipe: https://tasty.co/recipe/rubiks-cube-cake

Posted by BuzzFeed Food on Thursday, May 30, 2019
Dessert

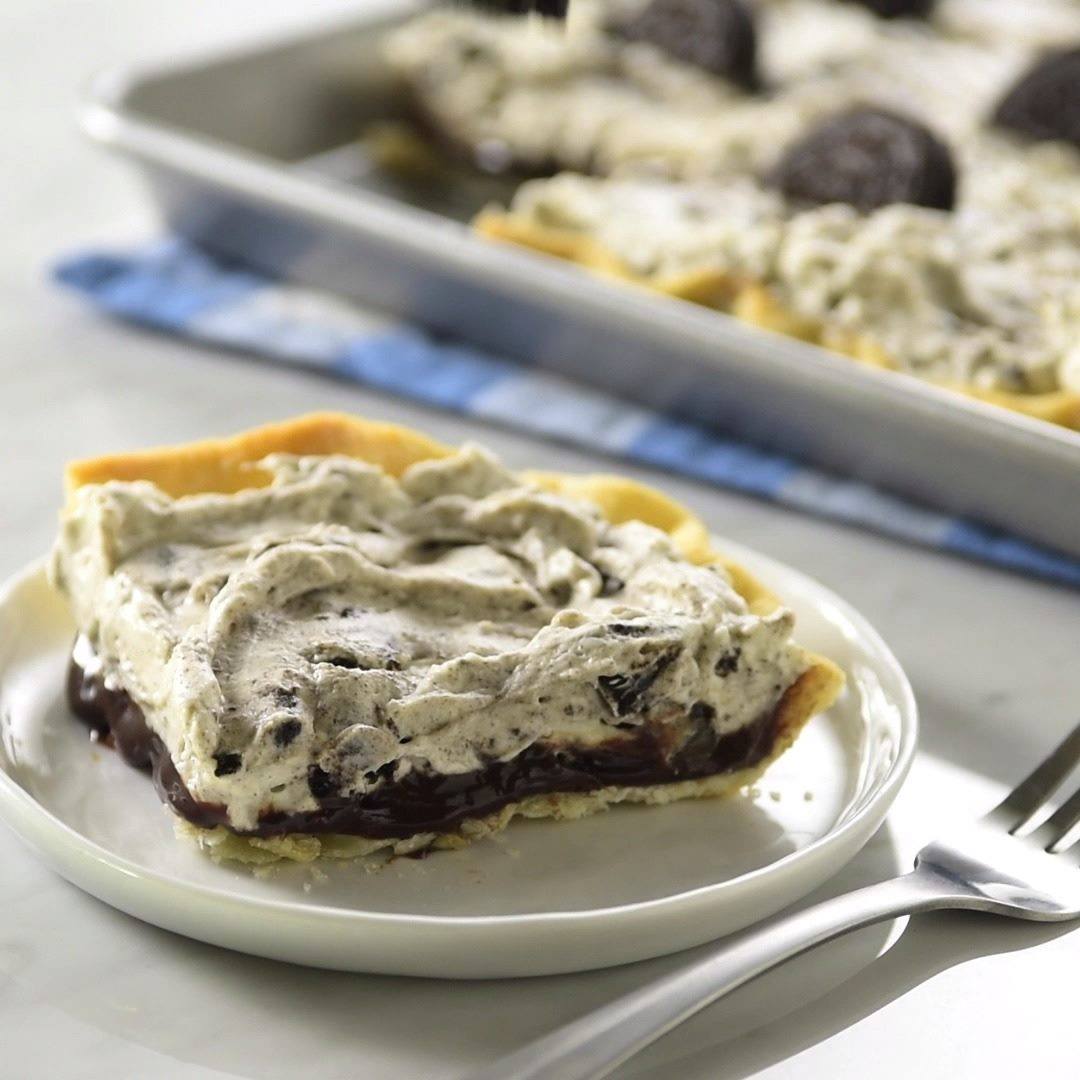
Oreo™ Slab Pie

Oreo™ Slab Pie
This easy cookies & cream slab pie is perfect for those summer backyard picnics.
Author:
Cuisine: American
Recipe type: Dessert
Ingredients
  • 1 box Pillsbury™ refrigerated pie crusts, softened as directed on box
  • 1 jar (16 oz) hot fudge topping (2 cups)
  • 1½ cups heavy whipping cream
  • 1 package (8 oz) cream cheese, softened
  • ⅓ cup sugar
  • ½ teaspoon vanilla
  • 16 Oreo™ cookies, coarsely crushed
  • 8 Oreo™ cookies, halved
Instructions
  1. Heat oven to 450°F. Remove pie crusts from pouches. Unroll and stack crusts on lightly floured surface. Roll to 17x12-inch rectangle. Fit crust into ungreased 15x10x1-inch pan, pressing into corners. Fold crust even with edges of pan. Flute or crimp edges. Prick crust several times with fork.
  2. Bake 10 to 12 minutes or until golden brown. Cool completely, about 30 minutes. Carefully spread hot fudge evenly on crust. Set aside.
  3. Meanwhile, in medium bowl, beat whipping cream with electric mixer on high speed until stiff peaks form. Set aside.
  4. In large bowl, beat cream cheese, sugar and vanilla with electric mixer on medium speed until smooth and creamy.
  5. Gently fold whipped cream into cream cheese mixture. Fold in crushed cookies.
  6. Spoon cream cheese mixture evenly over hot fudge. Refrigerate 1 hour. Garnish with halved cookies. Cover and refrigerate any remaining pie.

Watch the recipe video here:

Anything with “Oreo™” in the title is a guaranteed crowd-pleaser. Oreo™ Slab Pie recipe:…

Posted by Pillsbury on Wednesday, May 29, 2019

Dessert

These Chocolate Peanut Butter Cups Have A Secret Ingredient You’d Never Expect

These Chocolate Peanut Butter Cups Have A Secret Ingredient You'd Never Expect
There's no way you could ever improve chocolate and peanut butter cups...or so I thought! These indulgent sweet bites have only five ingredients, and one of them is totally unexpected - Cheerios! The cereal gives just the right amount of crunch to make these treats even more of a pleasure to eat. We used plain Cheerios, but you can experiment with all the different flavors to see which one you like best. What recipes have you make before using cereal?
Author:
Cuisine: American
Recipe type: Dessert
Ingredients
  • ½ cup salted butter, melted
  • 1 cup Cheerios cereal
  • 1 cup powdered sugar
  • ¾ cup peanut butter
  • 1 cup chocolate chips
Instructions
  1. Pulse the Cheerios in a food processor until ground into small pieces.
  2. Add the ground Cheerios to a large bowl with melted butter, powdered sugar and peanut butter. Mix until everything is combined.
  3. Add spoonfuls of the mixture to a lined muffin tin (regular sized or mini - your choice!).
  4. Melt the chocolate chips in a microwave safe bowl and top each peanut butter cupcake.
  5. Chill for 3 hours or until the bites have completely firmed up. Serve and enjoy!

Watch the recipe video here:

These chocolate peanut butter cups have a secret ingredient you'd never expect!Recipe: http://sha.red/wfaux

Posted by Shared Food on Tuesday, May 28, 2019

Dessert

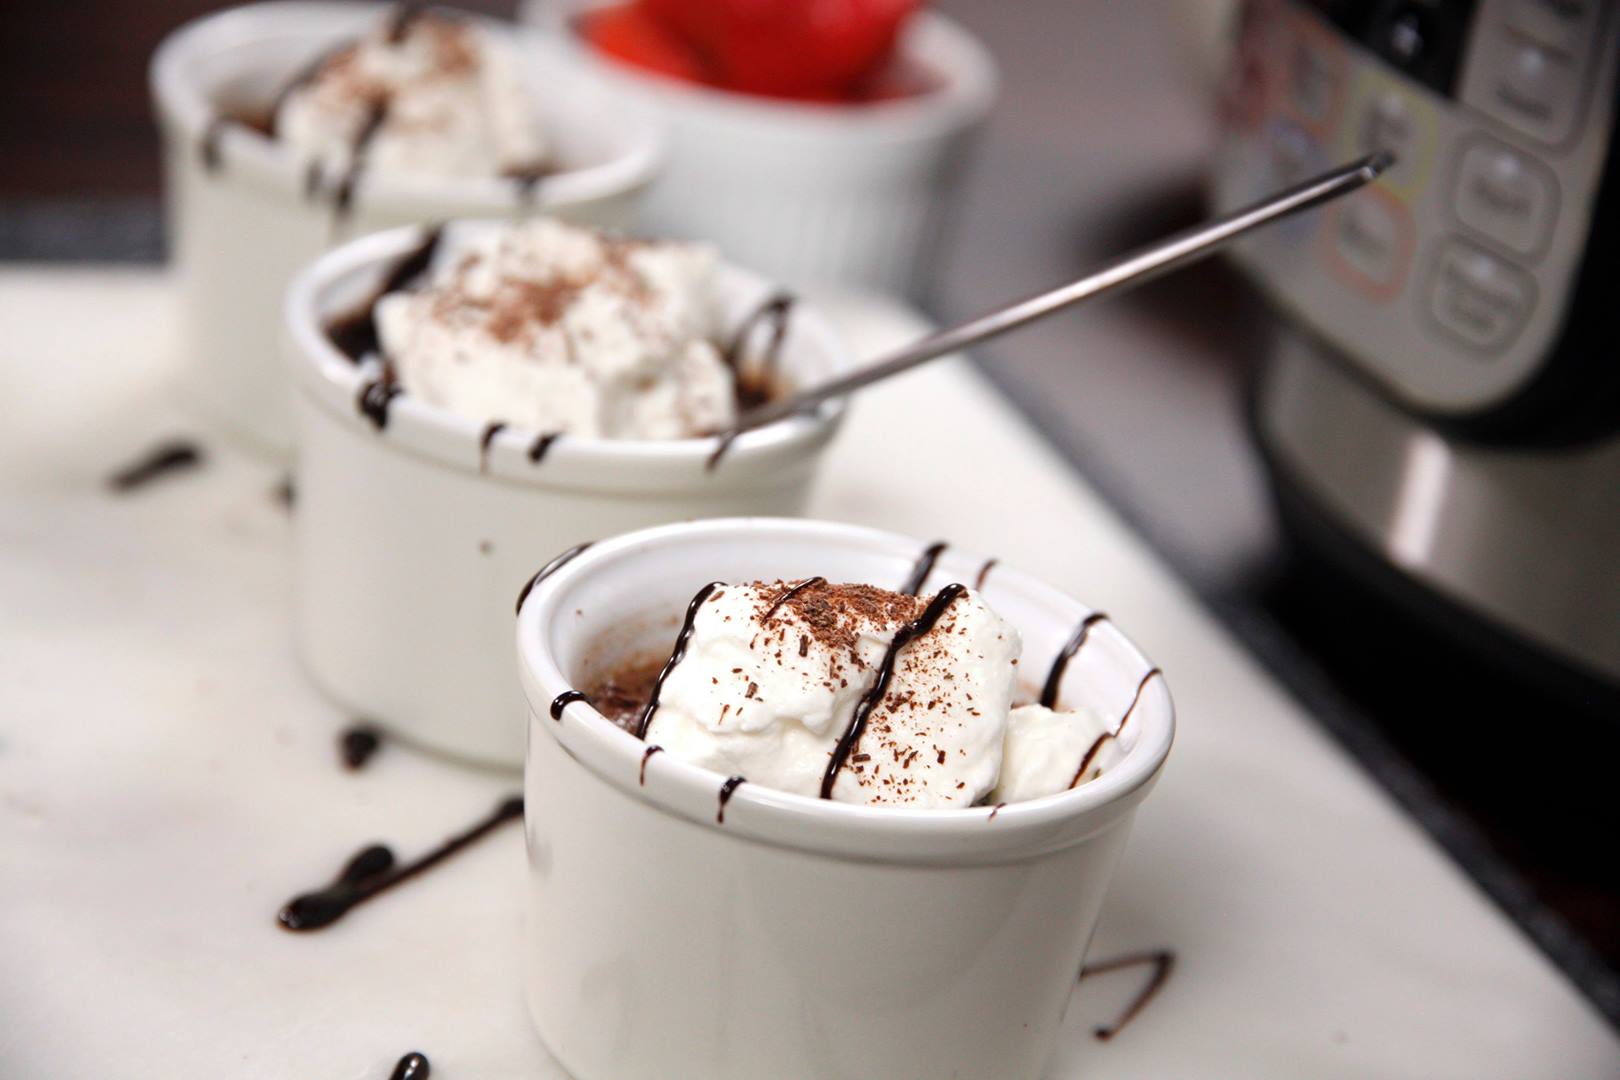
Instant Pot Chocolate Pots de Creme

Instant Pot Chocolate Pots de Creme
Lighter than a pudding, denser than a mousse and always sinfully decadent!
Author:
Cuisine: American
Recipe type: Dessert
Ingredients
  • 1 cup heavy cream
  • 2 oz semisweet chocolate, finely chopped
  • 2 oz bittersweet chocolate, finely chopped
  • 2 large egg yolks
  • 2 tbsp sugar
  • ¼ tsp vanilla
  • Pinch of salt
  • 1 cup water
  • Whipped cream and additional grated chocolate or cinnamon for serving (optional)
Instructions
  1. Combine cream and chopped chocolates. Heat gently on the stove or in the microwave, whisking until chocolate melts and mixture is smooth. Do not boil.
  2. In a large bowl, whisk together egg yolks, sugar, vanilla and salt. Slowly whisk in chocolate cream mixture until well blended.
  3. Divide custard evenly amongst 3 ramekins or custard cups.
  4. Pour 1 cup of water in the Instant Pot and insert the steam rack.
  5. Arrange 3 ramekins on the steam rack, then secure the lid, making sure the vent is closed.
  6. Using the display panel select the MANUAL function*. Use the +/- keys and program the Instant Pot for 5 minutes.
  7. When the time is up, let the pressure naturally release for 15 minutes, then quick-release the remaining pressure.
  8. Carefully remove the ramekins from the pot to a cooling rack. When completely cool, cover with plastic wrap and refrigerate for at least 4 hours.
  9. Serve with whipped cream and additional grated chocolate or cinnamon.

Watch the recipe video here:

Lighter than a pudding, denser than a mousse and always sinfully decadent!RECIPE: http://chopsecrets.com/instant-pot-chocolate-pots-de-creme/

Posted by Chop Secrets on Tuesday, May 28, 2019

Dessert

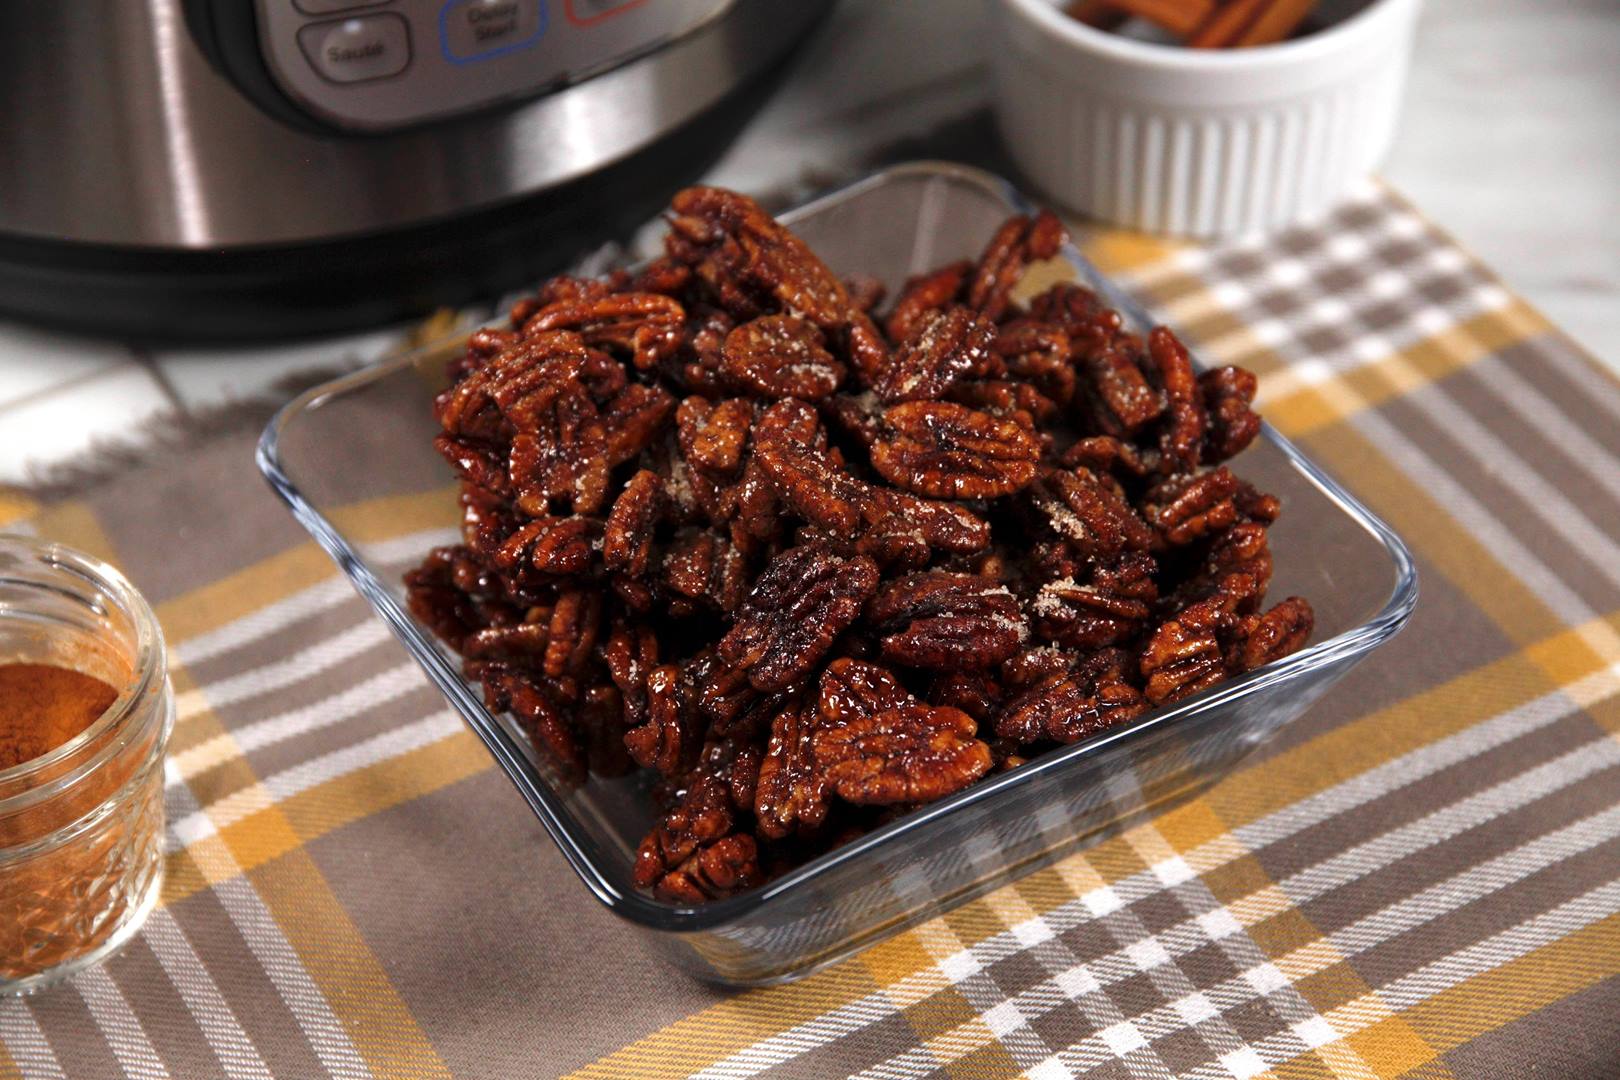
Instant Pot Maple Candied Pecans

Instant Pot Maple Candied Pecans
Beware, they’ll disappear in a flash!
Author:
Cuisine: American
Recipe type: Dessert
Ingredients
Syrup Mixture:
  • ⅔ cup pure maple syrup
  • 2 tsp cinnamon
  • 1 tsp vanilla
  • ½ tsp ground ginger
  • ½ tsp coarse salt
  • ¼ tsp nutmeg
  • ¼ tsp cayenne pepper, or to taste
  • ¼ tsp maple extract (optional, but amazing!)
  • 4 cups pecan halves (about 20 oz)
  • ⅓ cup water
Sugar Finish Mixture (optional)
  • ½ cup white sugar
  • ½ cup brown sugar
  • 1 tsp cinnamon
Instructions
  1. Combine Syrup Mixture ingredients in the Instant Pot. Using the display panel select the SAUTE function and adjust to MORE or HIGH.
  2. Add pecans and cook and stir constantly for 5 minutes, or until pecans are tender.
  3. Add water to the pot and stir to combine.
  4. Turn the pot off by selecting CANCEL, then secure the lid, making sure the vent is closed.
  5. Using the display panel select the MANUAL function*. Use the +/- keys and program the Instant Pot for 8 minutes.
  6. When the time is up, quick-release the pressure, then stir to combine.
  7. Using a slotted spoon, carefully remove pecans to parchment-lined baking sheet in a single layer.
  8. Bake at 300 degrees for 10 minutes, then stir. Bake an additional 5 minutes, watching carefully for signs of burning.
  9. (Optional) Remove from oven and allow to cool for 5 minutes, then mix Sugar Mixture ingredients in a gallon bag and add pecans, shaking to coat.
  10. Spread pecans evenly on parchment and allow to cool before packaging.

Watch the recipe video here:

Beware, they’ll disappear in a flash!RECIPE: http://chopsecrets.com/instant-pot-maple-candied-pecans/

Posted by Chop Secrets on Friday, May 24, 2019

Cake Dessert

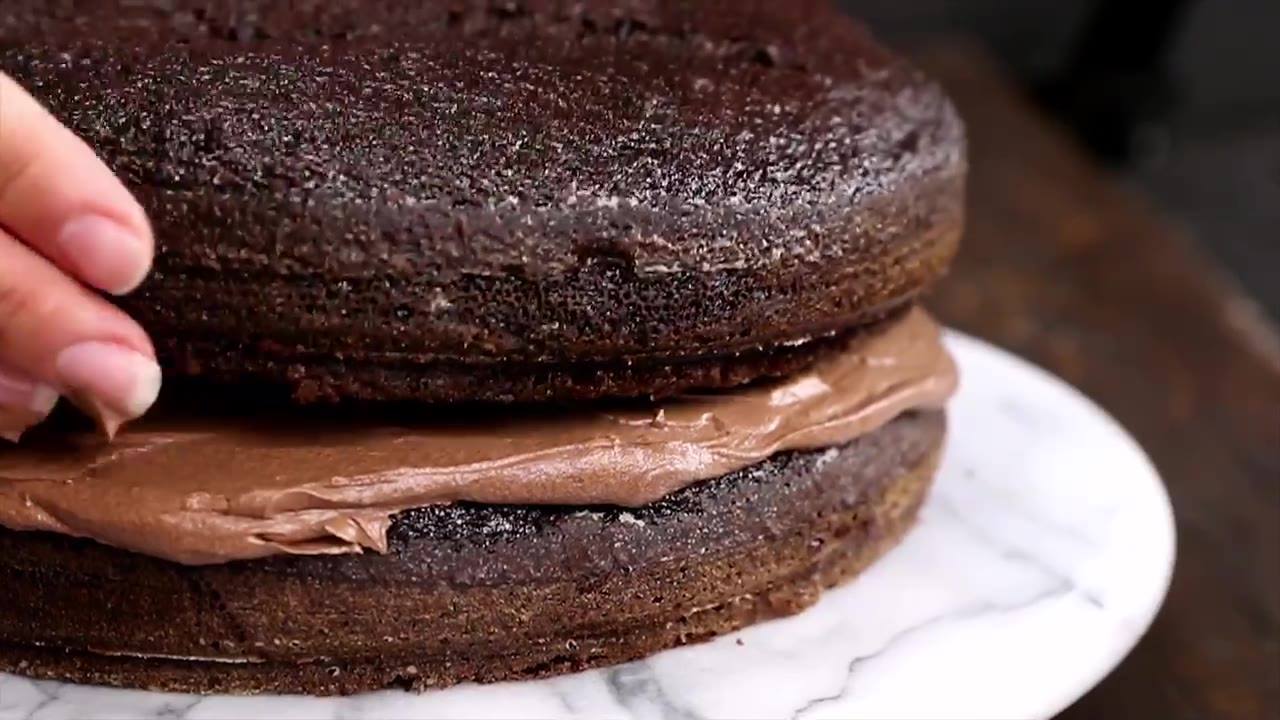
THE BEST CHOCOLATE CAKE RECIPE

THE BEST CHOCOLATE CAKE RECIPE
The Best Chocolate Cake combines cocoa and coffee to create a chocolate lover’s dream. The rich buttercream frosting makes it perfect!
Author:
Cuisine: American
Recipe type: Dessert
Ingredients
  • 2 cups sugar (400 grams)
  • 1¾ cups all-purpose flour (210 grams)
  • ¾ cup unsweetened cocoa powder (64 grams)
  • 2 tablespoons King Arthur Flour Black Cocoa, optional (11 grams)
  • 2 teaspoons baking soda (12 grams)
  • 1 teaspoon baking powder (4 grams)
  • 1 teaspoon kosher salt (6 grams)
  • 2 eggs
  • 1 cup buttermilk (240 mL)
  • 1 cup strong black coffee (I used Green Mountain Coffee’s Vermont Country Blend) (240 mL)
  • ½ cup vegetable oil (120 mL)
  • 2 teaspoons vanilla extract (4 grams)
  • Chocolate Buttercream Frosting
Instructions
  1. Heat oven to 350°F. Grease and flour two 9-inch round baking pans or one 13x9x2-inch baking pan. Set aside. In the bowl of a stand mixer fitted with the whisk attachment or in a large bowl with an electric mixer, combine the sugar, flour, cocoa(s), baking soda, baking powder and salt. Mix on low until dry ingredients are thoroughly combined.
  2. Add eggs, buttermilk, coffee, oil and vanilla. Beat on medium speed for about two minutes; the batter will be thin.
  3. Pour batter evenly into prepared pans.
  4. Bake in preheated oven for 30 to 35 minutes for round pans, 35 to 40 minutes for rectangular pan or until wooden toothpick inserted in center comes out clean.
  5. Cool 10 minutes; remove from pans to wire racks. Cool completely.
  6. Frost as desired. I used a simple and delicious Chocolate Buttercream Frosting from Savory Sweet Life. One batch was perfect for this chocolate layer cake.

Watch the recipe video here:

The Best Chocolate Cake with rich buttercream frosting! ?RECIPE: https://www.mybakingaddiction.com/the-best-chocolate-cake

Posted by My Baking Addiction on Friday, May 24, 2019

Dessert

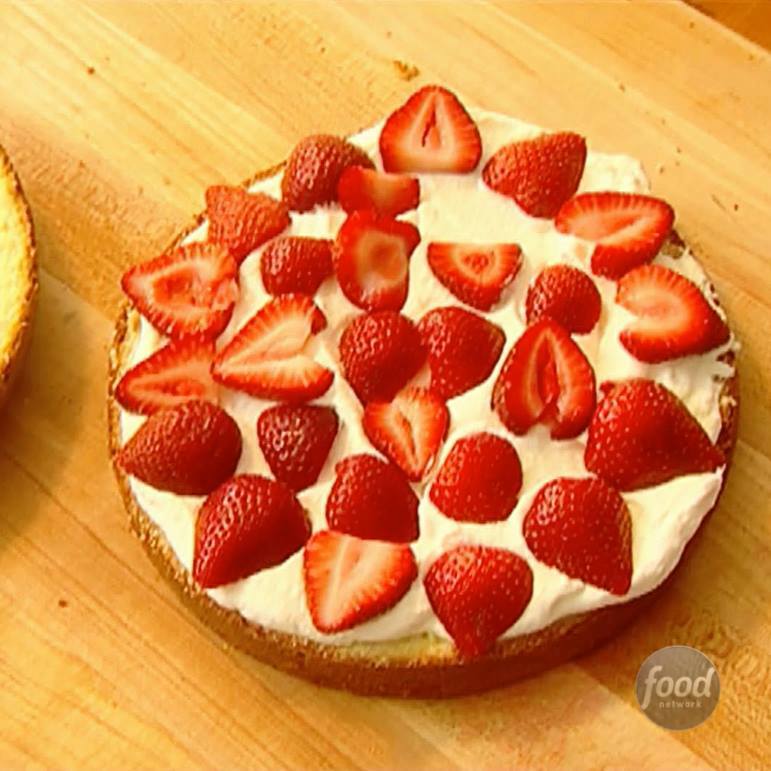
Strawberry Country Cake

Strawberry Country Cake
https://www.facebook.com/20534666726/posts/10157089209146727/
Author:
Cuisine: American
Recipe type: Desert
Ingredients
  • 12 tablespoons (1½ sticks) unsalted butter, at room temperature
  • 2 cups sugar
  • 4 extra-large eggs, at room temperature
  • ¾ cup sour cream, at room temperature
  • ½ teaspoon grated lemon zest
  • ½ teaspoon grated orange zest
  • ½ teaspoon pure vanilla extract
  • 2 cups all-purpose flour
  • ¼ cup cornstarch
  • ½ teaspoon kosher salt
  • 1 teaspoon baking soda
  • For the filling for each cake:
  • 1 cup (1/2 pint) heavy cream, chilled
  • 3 tablespoons sugar
  • ½ teaspoon pure vanilla extract
  • 1 pint fresh strawberries, hulled and sliced
Instructions
  1. Preheat the oven to 350 degrees F.
  2. Butter the bottom of two 8-inch cake pans. Then line them with parchment paper and butter and flour the lined pans.
  3. Cream the butter and sugar on high speed in the bowl of an electric mixer fitted with the paddle attachment until light and fluffy. On medium speed, add the eggs, 1 at a time, then the sour cream, zests, and vanilla, scraping down the bowl as needed. Mix well. Sift together the flour, cornstarch, salt, and baking soda. On low speed, slowly add the flour mixture to the butter mixture and combine just until smooth.
  4. Pour the batter evenly into the pans, smooth the tops, and bake in the center of the oven for 40 to 45 minutes, until a toothpick comes out clean. Let cool in the pans for 30 minutes, then remove to wire racks and let cool to room temperature. If using 1 cake, wrap the second well and freeze.
  5. To make the filling for one cake, whip the cream, sugar, and vanilla in a mixer fitted with the whisk attachment until firm. Slice one of the cakes in half with a long, sharp knife. Place the bottom slice of the cake on a serving platter, spread with ½ the whipped cream and scatter with sliced strawberries. Cover with the top slice of the cake and spread with the remaining cream. Decorate with strawberries.

Watch the recipe video here:

Recipe of the Day: Ina Garten's Strawberry Country Cake ?Save the recipe: https://foodtv.com/2VUzXjG!

Posted by Food Network on Friday, May 24, 2019

Dessert

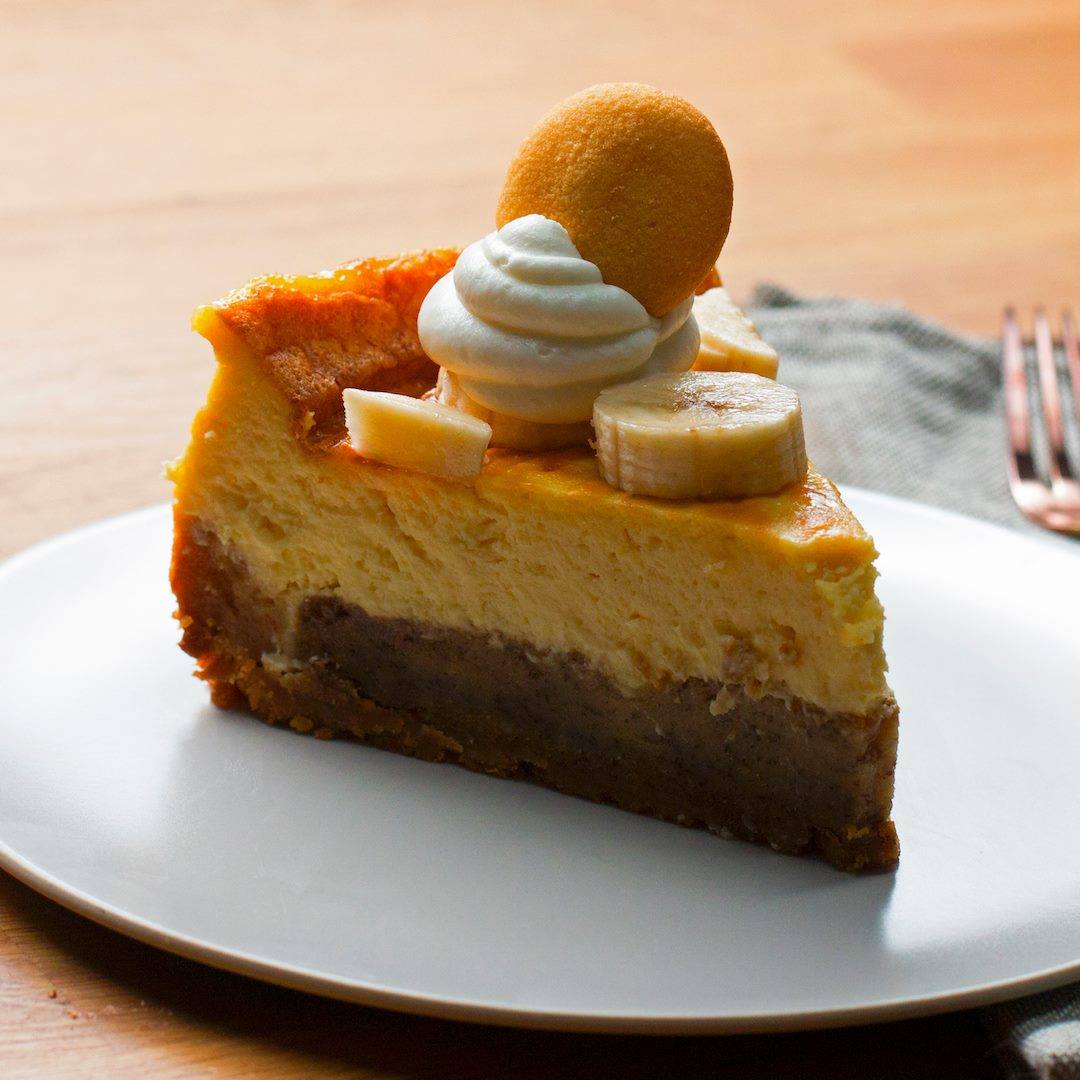
Banana Pudding Cheesecake

Banana Pudding Cheesecake
Author:
Cuisine: American
Recipe type: Dessert
Ingredients
BANANA BREAD CRUST
  • nonstick cooking spray
  • 11 oz vanilla wafer, 1 box, divided (310 g)
  • 1 cup unsalted butter, melted (230 g)
  • 2 ripe bananas
  • 1 cup sugar (200 g)
  • ½ cup vegetable oil (120 mL)
  • 1 large egg
  • 1 teaspoon vanilla extract
  • 1 teaspoon salt
  • 1 cup all-purpose flour (125 g)
  • 1 teaspoon baking powder
CHEESECAKE FILLING
  • 2 cups whole milk, hot (480 mL)
  • 2 ½ teaspoons gelatin powder
  • 3 oz banana pudding mix, 2 boxes (85 g)
  • ½ cup sugar (100 g)
  • 1 tablespoon vanilla extract
  • 32 oz cream cheese (905 g)
  • 6 large eggs
FOR DECORATION
  • 2 large bananas, sliced
  • whipped cream
  • 7 vanilla wafers
Instructions
  1. Preheat the oven to 350°F (180°C). Grease a 10-inch (25 cm) springform pan with nonstick spray.
  2. Make the banana bread crust: Set aside 7 vanilla wafers, then add the rest to a zip-top plastic bag and pound with a rolling pin into fine crumbs.
  3. Transfer the crushed wafers to a medium bowl, add the melted butter, and stir to combine.
  4. Pour the crust into the prepared pan and press against the bottom to about ¼ inch (6 mm) thick with a flat-bottomed measuring cup.
  5. In a large bowl, mash the bananas with a fork until smooth. Add the sugar, oil, egg, vanilla, salt, flour, and baking powder. Beat with an electric hand mixer until well-combined.
  6. Pour the banana bread mixture over the crust and spread evenly with a spatula.
  7. Bake for 30 minutes, or until golden brown and a toothpick inserted in the center comes out clean.
  8. Make the cheesecake filling: In a large bowl, combine the milk, gelatin, and banana pudding mix. Beat with an electric hand mixer until thick and smooth.
  9. Add the sugar, vanilla, and cream cheese, and beat again until well-combined.
  10. Add the eggs, 1 at a time, beating well after each addition.
  11. Pour the cheesecake filling over the banana bread crust.
  12. Bake for 1 hour, then turn off the oven and leave the cheesecake in the oven. Prop the oven door open slightly with a kitchen towel to let the hot air slowly escape. After 2 hours, remove the cheesecake from the oven. Refrigerate overnight.
  13. Arrange the sliced bananas on top of the cheesecake. Release the springform, then pipe whipped cream on top of 7 of the bananas. Place the reserved vanilla wafer cookies on top of the whipped cream.
  14. Slice and serve.
  15. Enjoy!

Watch the recipe video here:

Indulge a little with this banana pudding cheesecake! ??FULL RECIPE: https://tasty.co/recipe/banana-pudding-cheesecake

Posted by Proper Tasty on Sunday, May 19, 2019