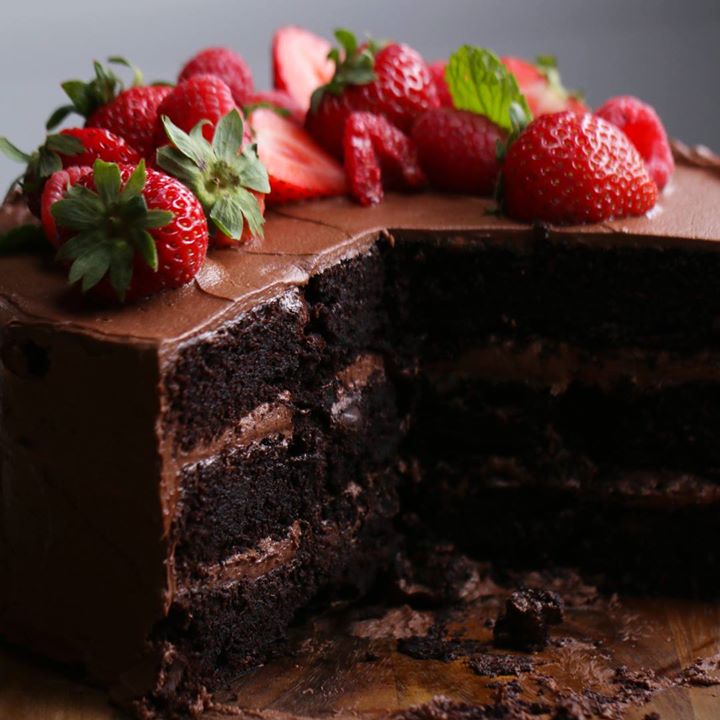
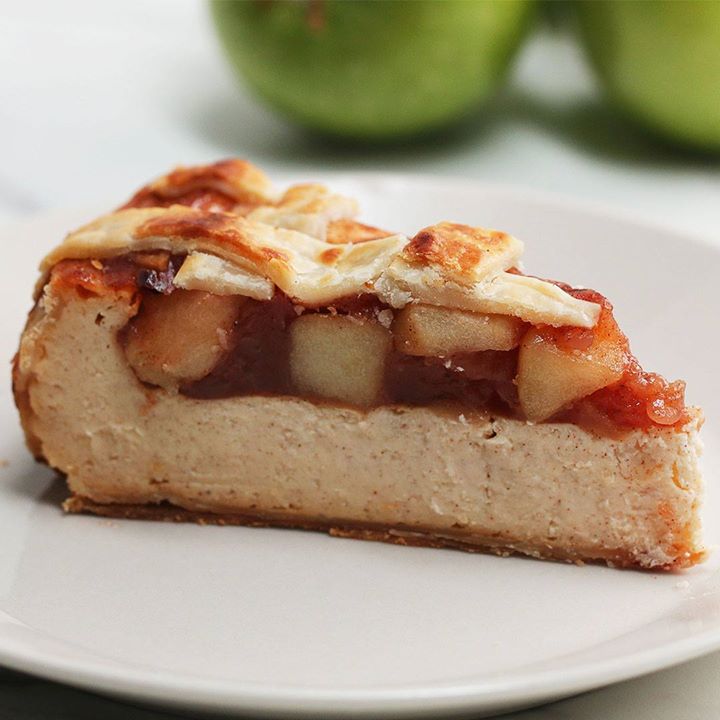
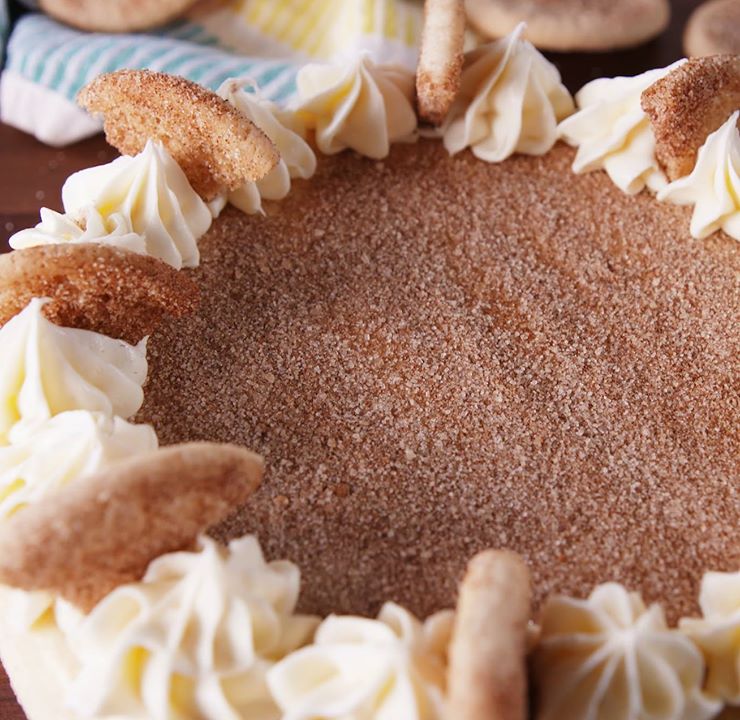
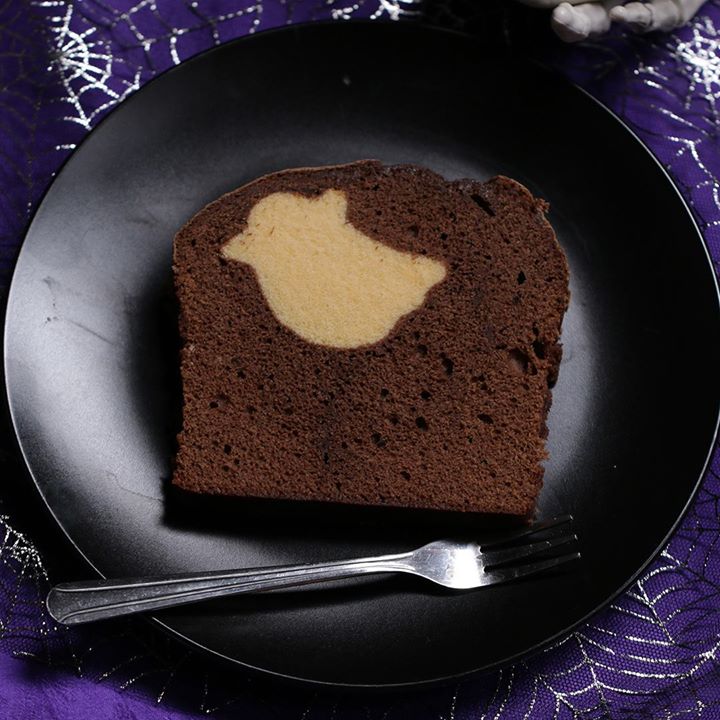
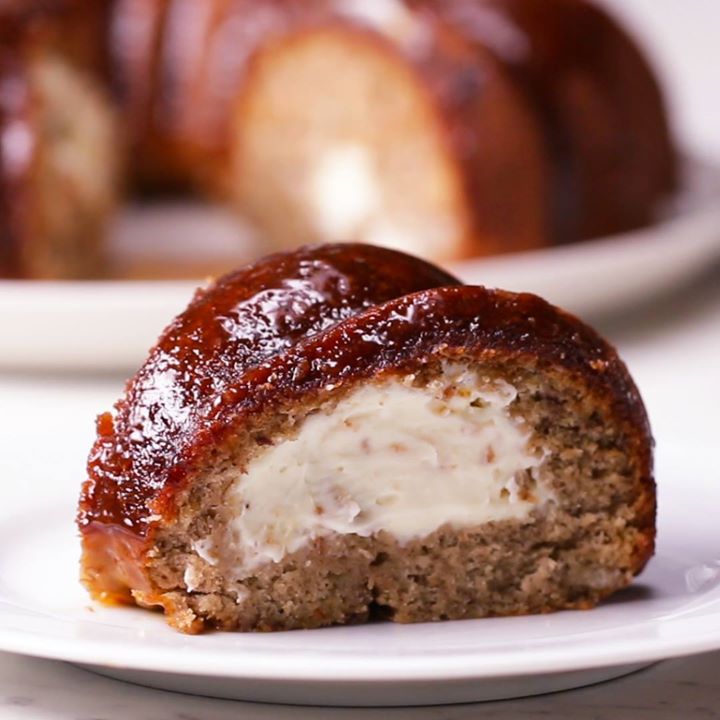
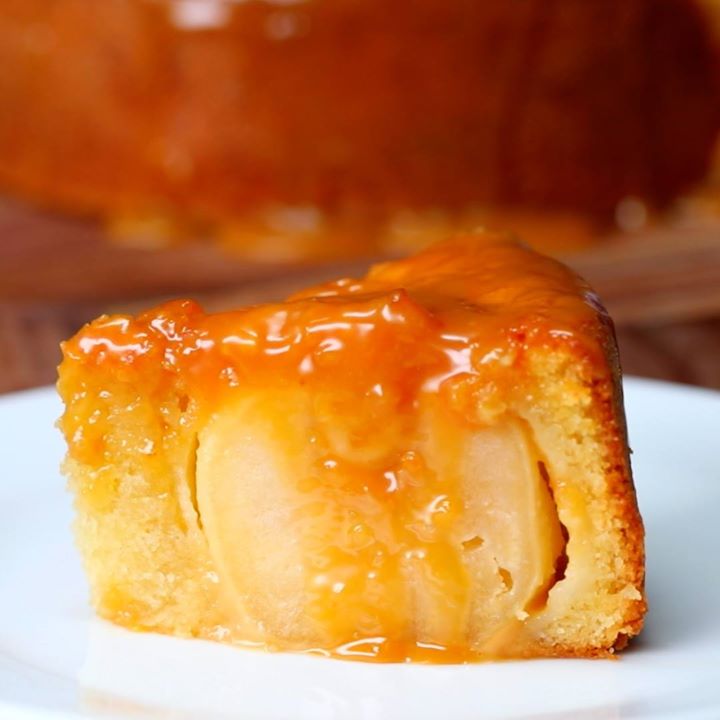
Showing 144 Result(s)
Cake Dessert

Caramel Apple Cake

Caramel Apple Cake
Caramel Apple Cake
Author:
Cuisine: American
Recipe type: Cake
Ingredients
  • 1½ c. Plain flour
  • 1½ tsp. baking powder
  • ¼ tsp. salt
  • ½ c. unsalted butter at room temperature
  • 1 c. sugar
  • 2 large eggs
  • ½ tsp. vanilla extract
  • ½ c. whole milk
  • 5 apples, peeled and cored
  • 1 cup caramel, slightly warmed
Instructions
  1. Pre-heat oven to 180ºC (350ºF).
  2. Sift flour, baking powder and salt together. Add butter and mix until it resembles coarse sand. Add sugar and blend until sandy. Add eggs and blend until smooth. Pour in vanilla and milk and blend just until smooth. Do not over mix.
  3. Arrange the apples in an 8” greased cake tin. Pour the cake batter in the center and spread it around the apples.
  4. Bake for 35-40 minutes until a toothpick comes out clean. Let cool for 10 minutes.
  5. Pour caramel over the top of the cake to drip on the sides.
  6. Serve with ice cream. Enjoy!

Watch the recipe video here:

Caramel Apple Cake

Posted by Twisted on Tuesday, October 31, 2017

Cake Dessert

THE ULTIMATE CHOCOLATE CAKE

THE ULTIMATE CHOCOLATE CAKE
This is the ULTIMATE chocolate cake! ? ?
Author:
Cuisine: American
Recipe type: Cake
Ingredients
CAKE
  • 1½ cups flour
  • 1 cup Dutch processed cocoa powder
  • 1 teaspoon salt
  • 1½ teaspoons baking soda
  • ½ teaspoon baking powder
  • 1½ cups stout
  • 1 tablespoon vanilla extract
  • 1 tablespoon espresso powder
  • 1 cup butter, softened
  • 1½ cups sugar
  • 3 eggs
  • ½ cup mayonnaise
  • 4 ounces dark chocolate, chopped
BUTTERCREAM
  • 1½ cups butter, softened
  • 1 tablespoon vanilla extract
  • ½ cup Dutch processed cocoa powder
  • 5 cups powdered sugar
  • Fresh fruit, to decorate
Instructions
  1. Preheat oven to 325˚F (160˚C).
  2. Grease and line three 8-inch cake tins with parchment paper.
  3. In a large bowl, sift together the flour, cocoa powder, salt, baking soda, and baking powder. Set aside.
  4. In a large glass measuring cup, combine the stout, vanilla, and espresso powder. Set aside.
  5. In a large mixing bowl, cream together the butter and sugar until it is light and fluffy, about 5 minutes, scraping down the sides occasionally to ensure all the ingredients are being evenly creamed together.
  6. Beat in the eggs, one at a time, ensuring each egg is fully incorporated before adding the next.
  7. Add the mayonnaise and beat until the mixture is smooth and creamy.
  8. Alternate adding the prepared dry and wet ingredients to the batter. Starting with about ⅓ of the dry ingredients, beat until incorporated. Then add ⅓ of the liquid ingredients, mixing until the batter comes together. Continue until all the wet and dry ingredients have been incorporated.
  9. Using a rubber scraper, fold the dark chocolate chunks into the batter.
  10. Distribute the batter evenly between the 3 prepared cake tins.
  11. Bake for about 35 minutes, or until a toothpick inserted into the center of the cake comes out clean.
  12. Place the cakes on a cooling rack and leave to cool for about 10-15 minutes, until the outside of the pan is cool enough to touch.
  13. Once the cakes have cooled, loosen the edges using a butter knife. Then place a large plate over the tin and invert to release the cake from the pan. Remove the parchment paper from the bottom of the cake and slide the cake back onto the cooling rack to cool completely. Repeat for the remaining two layers.
  14. While your cakes are cooling, prepare the buttercream.
  15. In a large bowl, beat together the butter and vanilla.
  16. Gradually add in the cocoa powder, powdered sugar, and milk, continuously beating until all the ingredients have been incorporated and the frosting is light and fluffy.
  17. Decorate to your liking.
  18. Enjoy!

Watch the recipe video here:

The Ultimate Chocolate Cake

This is the ULTIMATE chocolate cake! ? ?Get the recipe: https://tasty.co/recipe/the-ultimate-chocolate-cakeWatch the full version & more how-to's with our Tasty 101 series: http://bit.ly/2zSZpHt

Posted by Tasty on Saturday, October 28, 2017

Cake

Apple Pie Cheesecake

Apple Pie Cheesecake
This apple pie cheesecake is the best of both worlds ?!
Author:
Cuisine: American
Recipe type: Cake
Ingredients
CHEESECAKE
  • 2 pie crust
  • 24 oz cream cheese
  • 1 cup sugar
  • 1 cup sour cream
  • ½ teaspoon vanilla extract
  • ½ teaspoon ground cinnamon
  • ½ teaspoon ground nutmeg
  • 3 egg
APPLE PIE FILLING
  • 3 medium apple, peeled, cored and cubed
  • 1 cup water
  • ⅓ cup sugar
  • 1 teaspoon ground cinnamon
  • ½ teaspoon ground nutmeg
  • 2 tablespoons cornstarch
Instructions
  1. Preheat oven to 300˚F (150˚C).
  2. Line a springform pan with a pie crust, pressing it around the sides of the pan until smooth.
  3. In a medium bowl, beat the cream cheese, sugar, vanilla, cinnamon, and nutmeg until smooth.
  4. Add the sour cream and mix together. Add in one egg at a time, whisking until smooth.
  5. Pour mixture into the springform pan and bake for 1 hour and 15 minutes.
  6. After baking, turn off the oven and let the cheesecake cool inside for 1 hour without opening the oven door.
  7. Turn up the oven temperature to 425˚F (220˚C).
  8. In a saucepan, add the apples, sugar, cinnamon, nutmeg, cornstarch, and water over medium-low heat. Stir occasionally until apples are soft (about 10 minutes), then remove from heat. Let cool.
  9. Once cool, spread apple pie filling over cheesecake.
  10. Cut the other pie crust in to ¼-inch (6 mm) strips and make a lattice pattern across the top.
  11. Brush with egg wash.
  12. Bake for 25 minutes, until golden brown.
  13. Chill until set then serve.
  14. Enjoy!

Watch the recipe video here:

Apple Pie Cheesecake

This apple pie cheesecake is the best of both worlds ?!FULL RECIPE: https://tasty.co/recipe/apple-pie-cheesecakeShop the pie pan we used in this video here: http://bit.ly/2xv4p3p(Just so you know, we'll make some money if you use this link.)

Posted by Tasty on Sunday, October 29, 2017

Cake

Snickerdoodle Cheesecake

Snickerdoodle Cheesecake
Snickerdoodle lovers, we've found the cake for you.
Author:
Cuisine: American
Recipe type: Cake
Ingredients
  • 1 log refrigerated sugar cookie dough
  • 3 tbsp. cinnamon sugar, plus more for garnish
  • 3 8-oz. blocks cream cheese, softened
  • 1 c. granulated sugar
  • ¼ c. sour cream
  • 3 large eggs
  • 2 tsp. pure vanilla extract
  • ¼ tsp. ground cinnamon
  • pinch of kosher salt
  • vanilla frosting
Instructions
  1. Preheat oven to 350° and grease an 8” springform pan with cooking spray.
  2. In a large bowl, combine cookie dough and cinnamon sugar and stir until evenly incorporated. Press about half of the dough into the bottom of the springform pan. (Reserve extra dough to bake as cookies.)
  3. In another large bowl, beat the cream cheese until smooth. Add sugar and sour cream and beat until light and fluffy. Add eggs one at a time, beating well between each addition. Stir in vanilla, cinnamon and salt. Pour batter over the cookie dough crust.
  4. Bake until slightly jiggly in the center, about 1 hour. Turn off the oven and open the door slightly to let the cheesecake cool for about 1 hour. Then refrigerate until completely cool, at least 4 hours and up to overnight.
  5. Roll remaining dough into small balls (about a tablespoon) then flatten slightly. Place on baking sheet and bake until starting to turn golden around the edges, about 10 minutes. Transfer to a cooling rack to cool completely.
  6. Before serving, sprinkle the top of the cheesecake with more cinnamon sugar. Using a large star tip, pipe frosting around the edges of the cheesecake then garnish with snickerdoodle cookies.

Watch the recipe video here:

How To Make Snickerdoodle Cheesecake

Snickerdoodle Cheesecake is like a cookie on top and gooey in the center.Full recipe: http://dlsh.it/2ibrU9P

Posted by Delish on Wednesday, October 18, 2017

Cake Dessert

Peek-a-boo Ghost ‘Boxed’ Pound Cake

Peek-a-boo Ghost 'Boxed' Pound Cake
This peek-a-boo pound cake is a spooky way to get in the mood for Halloween ?!
Author:
Cuisine: American
Recipe type: Cake
Ingredients
  • 1 vanilla pound cake
  • 1 box pound cake mix
  • 1 tablespoon cocoa powder
  • ½ stick butter
  • 3 oz chocolate, melted
  • ⅔ cup milk
  • 2 egg
Instructions
  1. Preheat the oven to 350˚F (180˚C).
  2. Line a 8x4-inch (20x10 cm) loaf pan with parchment paper and generously grease the pan.
  3. Slice the vanilla pound cake as the same thickness as a ghost shaped cookie cutter. Cut out the cake with using a ghost-shaped cookie cutter. Set aside.
  4. In a medium bowl, combine pound cake mix, cocoa powder, butter, melted chocolate, milk, and eggs. Mix until well combined.
  5. In the lined and greased loaf pan, add ⅓ of the batter. Line the cut out ghost-shaped pound cake in the middle of the pan.
  6. Pour rest of the batter over the ghost-shaped cake.
  7. Smooth the top and bake for 35-40 minutes, or until inserted toothpick comes out clean. Cool completely on cooling rack
  8. Enjoy!

Watch the recipe video here:

Peek-A-Boo Pound Cake

This peek-a-boo pound cake is a spooky way to get in the mood for Halloween ?!FULL RECIPE: https://tasty.co/recipe/peek-a-boo-ghost-boxed-pound-cakeNow you can buy our ghost cookie cutter here: http://bit.ly/2x35M9y (Just so you know, we'll make some money if you use this link.)

Posted by Tasty on Tuesday, October 17, 2017

Cake

Bubble Pop Electric Cake

Bubble Pop Electric Cake
Make a cake fit for a pop star with this strawberry bubblegum flavored cake with gelatin bubbles on top.
Author:
Cuisine: American
Recipe type: Cake
Ingredients
  • 850g all-purpose flour
  • 530g caster (superfine) sugar
  • 1 tsp salt
  • 2 tbsp baking powder
  • 750 ml of milk
  • 250ml vegetable oil
  • 250g unsalted butter, softened
  • 4 tbsp Greek yogurt (can substitute with sour cream)
  • 2 tsp vanilla extract
  • 4 large eggs
  • 4 drops deep pink Americolor food gel
  • 2 tsp strawberry essence
  • 2 tsp bubblegum essence
  • Pink sprinkles. I used 4 different sizes or pink round sprinkles. But you can achieve the same gradient sprinkle effect with just one type of pink sprinkles! :0)
  • Gelatine Bubbles
  • x20 small balloons
  • 28g powdered gelatin
  • 1 or 2 drops Americolour Deep Pink gel colour
  • 8 tablespoons cold water
  • Frosting
  • 2 batches Swiss meringue buttercream frosting.
  • 1 tsp boysenberry essence
  • 2 tsp bubblegum essence
  • 4 drops sky blue Americolor food gel
Instructions
Gelatine Bubbles
  1. (Please note: these are food safe but are purely for decoration and no edible. I mean you could try eating them, but you’d be chewing for months and it’s like eating plastic!) You’ll also need to prepare these on the same day you bake the cake as making this entire cake is a two day process.
  2. Blow up about 20-25 food safe water balloons at about the same size, but do some little ones too. Attach blown up balloons to paper straw or cake pop sticks with tape. Gently coat each balloon with a little oil spray over each balloon and wipe it down with a paper towel. I didn’t show doing this in the video but you’ll need to do it.
  3. Add water and gelatin to a microwave safe bowl. Mix until well combined. Allow it to bloom (rest) for 5 min before you place it in the microwave for 10-15 seconds, or until melted. Add pink food gel and mix until well combined.
  4. Dip balloons into gelatin liquid making sure they’re coated evenly leaving the bit where the balloon meets the stick free of gelatin. You may want to coat these twice. Let the gelatin set on the first coat for 5 min, and then coat again. If the gelatin stiffens you can melt again in the microwave for 10 seconds.
  5. Place the coated balloons standing upright in a cup or in a Styrofoam block and allow to dry completely- about 24 hours.
  6. To remove balloon, cut away from the stick and pull the balloon out from the bubble. You’ll need to cut away the bottom of the bubbles so they sit evenly on top of the cake. You can do this using a pair of scissors.
Frosting
  1. To prepare frosting add blue food gel, boysenberry and bubblegum essence. Mix until well combined.
Cake
  1. Preheat a fan-forced oven to 160C (320F) or 180C (356F) for a conventional oven. Spray an 8” cake tin with oil spray and line the bottom with baking paper.
  2. In the bowl of a stand mixer fitted with the paddle attachment, add the flour, baking powder, caster sugar and salt. Turn mixer on low speed and allow it to mix for a couple minutes to help everything combine well (alternatively you may do this by sifting the ingredients together). Add the softened butter and mix until it resembles a fine sand like texture.
  3. Add the milk, oil, Greek yogurt, eggs, pink food gel, strawberry essence, bubblegum essence and vanilla extract into the bowl with the dry ingredients and mix on medium speed until no dry ingredients are visible. Scrape down the bowl and mix for another 20 seconds.
  4. Fill three 8” cake tins with batter.
  5. Bake for 30 min or until a toothpick inserted comes out clean. Allow the tins to cool for 2 min and then carefully flip the cake tins over on to a cooling wrack to cool completely before using.
  6. Using a large serrated knife, carefully trim the top off each layer of cake to make even and flat layers. Try to aim to get them all the same height. An easy way to do this is to find the lowest height of the cake, place a skewer or toothpick next to that point and mark it. As you go around each side of the cake cutting it, use the marked skewer to make sure each cut is at the same height.
  7. To prepare crumb coat, add a dab of frosting onto an 8” cake board or serving plate. Add first cake layer. Use a small offset to add a layer of frosting and smoothen out and layer the frosting on each layer before adding the next layer of cake. Add more frosting around the outside to fill the grooves between each layer. This should just be a neat thin layer of frosting which is aimed at trapping any cake crumbs so that random bits of cake crumbs don’t show up on the outside of the cake.
  8. Add a fresh layer of frosting using a small offset spatula. Use a cake scraper to smoothen out the frosting around the sides. Then smoothen out the top using a the cake scraper. Chill.
  9. Carefully add sprinkles to the bottom of the cake. I resorted to creating a huge mess by throwing them onto the cake. I didn’t want to touch my precious frosting with my warm hands and risk giant fingerprints in the cake. I didn’t lose that many sprinkles and I swept up whatever fell on the floor and ate them. Kidding! I threw them in the bin lol.
  10. I started with my bigger round sprinkles at the bottom and worked my way up using smaller ones with the big sprinkles and then less and less sprinkles as I got to the top of the cake.
  11. Finish off the cake by carefully placing the small gelatin bubbles around the outside of the top of the cake and the bigger ones in the centre.

Watch the recipe video here:

Bubble Pop Electric Cake

Make a cake fit for a pop star with this strawberry bubblegum flavored cake with gelatin bubbles on top. via The Scran LineFull Recipe: taste.md/2wOELX9

Posted by Sweeten on Thursday, October 12, 2017

Cake

Cheesecake-stuffed Banana Bread Ring

Cheesecake-stuffed Banana Bread Ring
This cheesecake-stuffed banana bread ring is everything you've been dreaming of ? ? ✨!
Author:
Cuisine: American
Recipe type: Cake
Ingredients
CHEESECAKE
  • 16 oz cream cheese, softened
  • ½ cup powdered sugar
  • 1 teaspoon vanilla
BANANA BREAD
  • 4 ripe banana
  • 4 tablespoons vegetable oil
  • 1 egg
  • ½ cup sugar
  • 1 teaspoon vanilla extract
  • 1 ½ cups all-purpose flour
  • 1 teaspoon baking powder
  • 1 teaspoon baking soda
  • ¼ teaspoon salt
  • 1 teaspoon cinnamon
CARAMEL
  • 1 cup sugar
  • 6 tablespoons butter
  • ½ cup heavy cream
Instructions
  1. Preheat the oven to 350°F (180°C).
  2. In a medium bowl, whisk together the cream cheese, sugar, and vanilla extract, stirring until smooth. Refrigerate.
  3. In a large bowl, mash the bananas with a fork.
  4. Add in the flour, sugar, baking powder, oil, egg, baking soda, salt, cinnamon, and vanilla. Stir until just combined, without over mixing.
  5. Pour half of the banana bread batter into a greased bundt pan.
  6. With an ice cream scoop, scoop the cream cheese mixture evenly onto the cake batter, making sure that it does not touch the sides of the cake pan.
  7. Pour the rest of the banana bread batter on top and smooth it evenly.
  8. Bake for 30 minutes, or until the banana bread is golden.
  9. To make the caramel glaze, heat the sugar in a saucepan over medium-high heat.
  10. Once the sugar begins to melt, stir with a wooden spoon or whisk.
  11. Once the sugar reaches a boil, add the butter and stir until melted.
  12. Remove from heat, add in the heavy cream and immediately stir until incorporated.
  13. Allow the caramel to cool and thicken.
  14. Invert the banana bread onto a wire rack set on top of a baking tray.
  15. Pour the caramel glaze over the cake, letting the excess drip off the wire rack and onto the baking tray.
  16. Once the glaze has set, slice the cake.
  17. Enjoy!

Watch the recipe video here:

Cheesecake-Stuffed Banana Bread Ring

This cheesecake-stuffed banana bread ring is everything you've been dreaming of ? ? ✨!FULL RECIPE: https://tasty.co/recipe/cheesecake-stuffed-banana-bread-ringNow you can buy our kitchen favorites here: http://bit.ly/2wCb4si(Just so you know, we'll make some money if you use this link.)

Posted by Tasty on Thursday, October 5, 2017

Cake Dessert

Spirograph Cake

Spirograph Cake
This colorful cake will make you feel like a kid again--and you'll have as much fun now experimenting with different designs as you did back then.
Author:
Cuisine: American
Recipe type: Cake
Ingredients
Spirograph® Decor:
  • 8 ounces white fondant
  • Confectioners' sugar, if needed
  • Fine-tipped food color markers in assorted colors
Chocolate Cake:
  • Flour-based cooking spray, for the baking pans
  • 6 ounces (1½ sticks) unsalted butter, softened
  • 1⅓ cups granulated sugar
  • 2 tablespoons vegetable oil
  • 2 large eggs
  • ¾ cup unsweetened dark cocoa powder
  • 1½ cups all-purpose flour
  • 1 teaspoon baking soda
  • ½ teaspoon salt
  • ½ cup sour cream
  • 1 cup hot brewed coffee
Buttercream Frosting:
  • 1 pound (4 sticks) unsalted butter, softened
  • 2 pounds confectioners' sugar
  • 1 tablespoon clear vanilla extract
  • ⅓ to ⅔ cup heavy cream
  • Pink, orange and lavender gel food color
  • Assorted sprinkles and nonpareils
Instructions
  1. Special equipment: Spirograph® drawing tools, graduated round cookie cutters, three 6-inch round or two 8-inch round baking pans, a cake leveler (optional), a large piping bag, an offset spatula and a bench scraper
  2. For the Spirograph® decor: Knead the fondant until smooth and pliable. If the fondant is sticky, knead in a little confectioners' sugar until the fondant is elastic and does not cling to your hands. Roll out the fondant between 2 sheets of parchment paper to ¼-inch thickness using a rolling pin. Remove the top sheet of parchment paper and allow the fondant to stand until the surface is firm and dry. This can take 2 to 4 hours (and up to overnight), depending on the surrounding humidity of the room in which you're working. The fondant can be tested for readiness by attempting a Spirograph® design. Place the Spirograph® tools on top of the fondant and begin to draw using light pressure with a food color marker. If the tip of the pen sinks into the fondant, it is not dry enough to use and needs to stand longer. If the pen glides across the surface, then it's ready to use.
  3. Use the Spirograph® tools to practice drawing on a piece of copy paper before you begin drawing on the fondant. Choose your favorite designs to replicate on the fondant.
  4. Place the Spirograph® tools on the dry fondant and use the food color pens to draw designs onto its surface. Make various sizes and patterns. You'll need about 14 designs to cover the entire cake. Allow the drawings to dry for 10 minutes, then use the cookie cutters to stamp out the designs. Store the stamped-out circles in a single layer between 2 pieces of plastic wrap.
  5. For the chocolate cake: Preheat the oven to 350 degrees F. Spray three 6-inch round baking pans (or two 8-inch pans) with flour-based baking spray.
  6. Beat the butter and granulated sugar together in the bowl of an electric mixer. Add the oil; beat in the eggs 1 at a time, mixing well after each addition.
  7. Whisk together the cocoa powder, flour, baking soda and salt in a large mixing bowl. Add the flour mixture to the creamed butter mixture alternately with the sour cream, beginning and ending with the flour mixture. Add the hot coffee at the end and mix on low speed until just combined. Use a spatula to scrape down the bowl and mix again on low until the batter is smooth.
  8. Divide the batter evenly among the prepared pans, filling each pan no more than three-quarters full. Bake for 30 to 35 minutes, or until the cakes spring back when pressed in their centers. Turn the cakes out onto wire racks to cool. When the cakes are completely cool, level the tops using a large serrated knife or cake leveler
  9. For the buttercream frosting: Cream together the butter and confectioners' sugar on low speed in the bowl of an electric mixer. When the mixture is combined, increase the speed to high and whip until light in color, about 3 minutes. Turn the mixer off and add the vanilla extract and ⅓ cup heavy cream. Beat again until the frosting is light and fluffy, about another 3 minutes. Add additional heavy cream if the mixture is too thick to spread or pipe.
  10. Place 1 cup of buttercream in a medium bowl. Drape a damp towel across the bowl to prevent the frosting from drying. Set aside.
  11. Place the remaining frosting in a large piping bag. Use the buttercream to fill the cake layers and to apply a thin crumb coat to the outside of the cake. Use an offset spatula or bench scraper to even the frosting. Place the cake in the refrigerator to chill until the frosting is firm, about 30 minutes. Meanwhile, divide the reserved 1 cup of frosting into 3 parts in separate bowls and tint each portion with one of the 3 gel food colors.
  12. When the crumb coat layer is well chilled, apply a second layer of white frosting and even the edges of the cake with a bench scraper. Use an offset spatula to randomly place dabs of pink, orange and lavender tinted buttercream over the edges and top of the cake. Carefully scrape away some of the tinted frosting using a single motion with a bench scraper. The colors will smear and blend together, creating a watercolor effect. Add more color dabs of frosting and repeat the process as desired. Transfer the cake to the refrigerator to chill.
  13. When the cake is well chilled, apply the fondant Spirograph® designs to the sides of the cake using buttercream as an adhesive. Use leftover white buttercream to pipe small mounds of frosting on top of the cake; cover the buttercream with assorted sprinkles and nonpareils. Place 1 fondant Spirograph® design on top of the cake if desired.

Watch the recipe video here:

How to Make Spirograph Cake

Your inner child is gonna flip for this SPIROGRAPH CAKE! Amazing job, SprinkleBakes!

Posted by Food Network on Sunday, October 8, 2017

Cake

Hidden Horror Black Widow Cake

Hidden Horror Black Widow Cake
You will certainly get the award for the most twisted dessert. Luckily, it's also delicious.
Author:
Cuisine: American
Recipe type: Cake
Ingredients
  • One 15.25-ounce box chocolate cake mix (plus required ingredients)
  • Nonstick cooking spray, for the bowl and parchment
  • 16 ounces bittersweet chocolate, finely chopped
  • 16 chocolate cream-covered biscuit sticks, such as Pocky
  • 1 tablespoon coconut oil
  • ⅓ cup chocolate or vanilla frosting
  • 6 candy eyes
  • 1 tube store-bought red decorating icing
  • Red sanding sugar, for decorating
  • 3 cups mini marshmallows
  • 2 tablespoons chocolate sprinkles
  • One 11.75-ounce jar strawberry ice cream topping
Instructions
  1. Special equipment: a pastry brush, small round piping tip (1S or 2)
  2. Prepare the chocolate cake according to the package directions in two 8-inch cake pans and let cool completely.
  3. Spray an 8-inch bowl with cooking spray. Line it with plastic wrap as neatly as possible and spray the wrap with cooking spray. Put in the freezer until very cold.
  4. Line a baking sheet with parchment and spray with cooking spray. Microwave the chocolate in a medium microwave-safe bowl in 30-second intervals, stirring in between each, until melted, about 3 minutes. Let cool for 5 minutes.
  5. Cut off 1 inch from the chocolate ends of 8 biscuit sticks, so you have 8 short and 8 regular-size sticks total. In same-length pairs, dip the chocolate ends into the melted chocolate and lay them on the prepared baking sheet so that they overlap slightly in the shape of a V. Refrigerate until set.
  6. Stir the coconut oil into the remaining chocolate.
  7. Remove the prepared bowl from the freezer and brush the inside with ¼ cup of the chocolate, then refreeze until firm, about 10 minutes. Repeat 4 more times, each time making sure the chocolate goes all the way to the rim of the bowl and doesn't pool in the bottom. Freeze until solid, about 30 minutes.
  8. Put one cake layer in the bowl of a food processor and pulse to fine crumbs. Add the frosting and pulse until it just comes together. Form into a ball that is slightly flattened on the bottom where it will sit on the platter, and freeze for 30 minutes. Remove from the freezer and brush to coat with the chocolate mixture. Refreeze for 15 minutes, then repeat 2 more times. On the final time, affix the eyes to the ball in the shape of a horseshoe. Attach a small round piping tip (1S or 2) to the tube of red decorating icing, and outline each eye with icing.
  9. Fill the chocolate-lined bowl with the marshmallows. Top with the remaining cake layer and then flip it out onto a large serving platter. Remove the plastic wrap from the chocolate dome. Arrange the head so it touches the chocolate dome body. Drizzle the body with the remaining chocolate mixture and sprinkle with the chocolate sprinkles. Make a black widow marking by piping a red hourglass on the upper third of the body close to the head. Sprinkle it with red sanding sugar. Position 4 biscuit stick legs on each side of the body, making sure the 2 shorter ones go in the middle; gently push the legs into the dome about 1 inch.
  10. When ready to serve, heat the strawberry topping in a small saucepan over medium heat until it boils. Slowly pour it over the spider's body to reveal all the eggs inside. Then run, screaming for your life.

Watch the recipe video here:

Melting Surprise Spider Cake

Just wait until you see this spider's surprise at 1:12! ?#HalloweenWars < premieres tonight @ 9|8c

Posted by Food Network on Sunday, October 1, 2017

Cake Dessert

Chocolate-Butterscotch Swirl Cheesecake

Chocolate-Butterscotch Swirl Cheesecake
Blondie lovers, take note -- you're going to flip for this cheesecake. The impressive-looking chocolate and butterscotch swirls are easy to make with a wooden skewer.
Author:
Cuisine: American
Recipe type: Cake
Ingredients
Crust:
  • 2 cups chocolate wafer cookie crumbs (from about 40 whole cookies)
  • 1 stick (8 tablespoons) unsalted butter, melted
  • 2 tablespoons sugar
  • Pinch fine salt
Filling:
  • Three 11.5-ounce containers whipped cream cheese
  • 1¼ cups sugar
  • One 16-ounce container sour cream, at room temperature
  • 1 cup heavy cream
  • 4 large eggs, at room temperature
  • 4 ounces bittersweet chocolate chips
  • 6 ounces butterscotch chips
  • 1 teaspoon pure vanilla extract
Instructions
  1. Special equipment: a 10-inch springform pan and a wooden skewer
  2. Position a rack in the middle of the oven and preheat to 325 degrees F.
  3. For the crust: Toss together the cookie crumbs, butter, sugar and salt in a medium bowl. Press into the bottom of a 10-inch springform pan. Bake until golden brown, 15 to 18 minutes. Cool completely. Wrap the bottom and sides of the pan with a large piece of foil and put in a large roasting pan.
  4. For the filling: Beat together the cream cheese and sugar in a large bowl with an electric mixer on medium speed for 1 minute. Add the sour cream and beat until just combined. Add the heavy cream and beat until just combined. Mix in the eggs by hand, 1 at time. Mix in the vanilla by hand until just combined. (Take care not to overmix, or the cheesecake will turn into a souffle!).
  5. Put the chocolate and butterscotch chips in 2 separate small microwave-safe bowls. Microwave until melted, stirring every 30 seconds, about 1 minute 30 seconds.
  6. Ladle 2 cups of cheesecake batter into a medium bowl and 2 cups into a second medium bowl. Fold the melted butterscotch into one of the bowls until completely combined. Fold the melted chocolate into the other bowl until completely combined. Leave the remaining batter white.
  7. Use an ice cream scoop or large spoon and drop scoopfuls of the batter onto the crust, alternating between the different flavors until all the batter is gone. Use a long wooden skewer and drag it through the batter, making sure the skewer reaches down to the bottom of the pan to marble the colors for a tie-dye effect. Add enough hot water to the roasting pan to come about halfway up the side of the springform pan.
  8. Bake until the outside of the cake is set, but the center is still slightly loose, about 1 hour 20 minutes. Turn the oven off and leave the cheesecake in the oven for another hour. Remove the cheesecake from the roasting pan to a cooling rack. Run a knife around the edge and cool to room temperature. Cover and refrigerate at least 8 hours.
  9. Run a knife around the edge of the pan one more time, unmold the cheesecake and transfer to a serving plate or cake stand. Smooth the edges of the cake with a knife just before serving.

Watch the recipe video here:

How To Make Chocolate-Butterscotch Swirl Cheesecake

Recipe of the Day: Chocolate-Butterscotch Swirl Cheesecake

Posted by Food Network on Thursday, September 28, 2017