Showing 126 Result(s)
Dessert

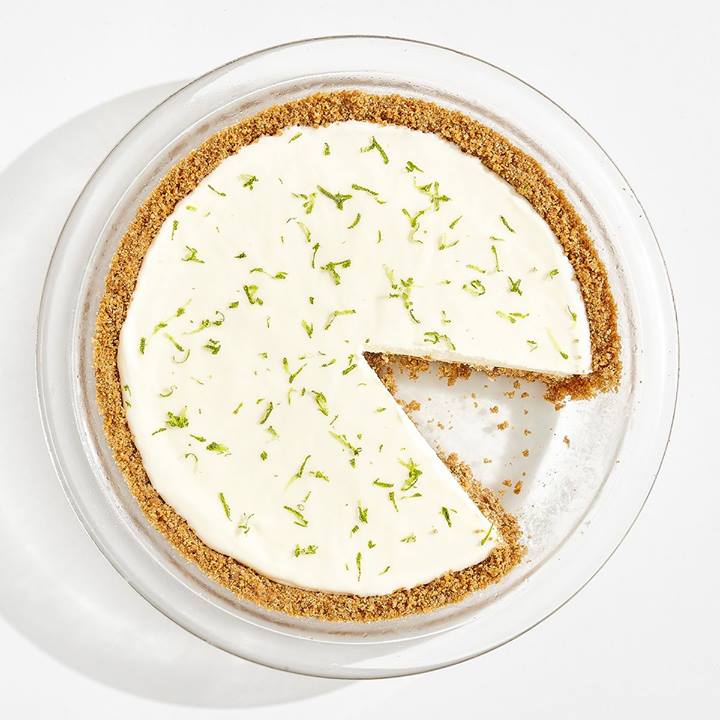
Frozen Margarita Pie
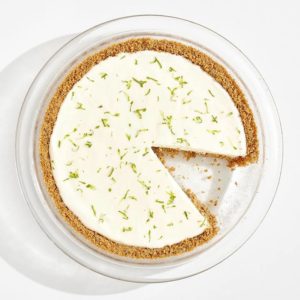
Frozen Margarita Pie
Your favorite cocktail in pie form—what's not to love? Just keep in mind that you'll need to freeze the pie at least 8 hours, preferably overnight, for the ideal texture, so be sure to plan ahead.
Author:
Cuisine: American
Recipe type: Dessert
Ingredients
  • 6 Tbsp. unsalted butter
  • 10 graham crackers
  • 3 Tbsp. sugar
  • ½ tsp. kosher salt. divided
  • ¾ cup chilled heavy cream
  • 5 limes, divided
  • 1 14-oz. can sweetened condensed milk
  • 3 Tbsp. tequila blanco
Instructions
  1. Melt 6 Tbsp. butter in a small saucepan over medium heat. Let cool slightly.
  2. Crumble 10 graham crackers into the bowl of a food processor. Add 3 Tbsp. sugar, ¼ tsp. salt, and melted butter to bowl and process until mixture resembles wet sand.
  3. Transfer graham cracker mixture to a shallow 9" pie pan. Using a measuring cup, press firmly into bottom and up sides of dish. Freeze 20 minutes.
  4. Meanwhile, whisk ¾ cup heavy cream in a medium bowl until cream begins to thicken to the point you see ripples and stiff peaks begin to form, 3–5 minutes.
  5. Cut 4 limes in half and juice into a fine-mesh sieve set over a glass measuring cup (you should have about ½ cup juice). Pour lime juice into another medium bowl and whisk in 14 oz. condensed milk, 3 Tbsp. tequila, and remaining ¼ tsp. salt until smooth.
  6. Fold half of whipped cream into lime juice mixture, carefully folding under and over while turning the bowl. Add remaining whipped cream and continue to fold until no streaks remain.
  7. Remove pie pan from freezer and pour in filling. Using the back of a spoon, gently spread filling to edge of crust.
  8. Using a microplane, zest half of the remaining lime over pie.
  9. Freeze pie at least 8 hours, or preferably overnight.

Watch the recipe video here:

Your favorite cocktail in pie form—what's not to love?Make it: http://bonap.it/F1utDNN

Posted by Bon Appétit Magazine on Wednesday, March 27, 2019
Main dish

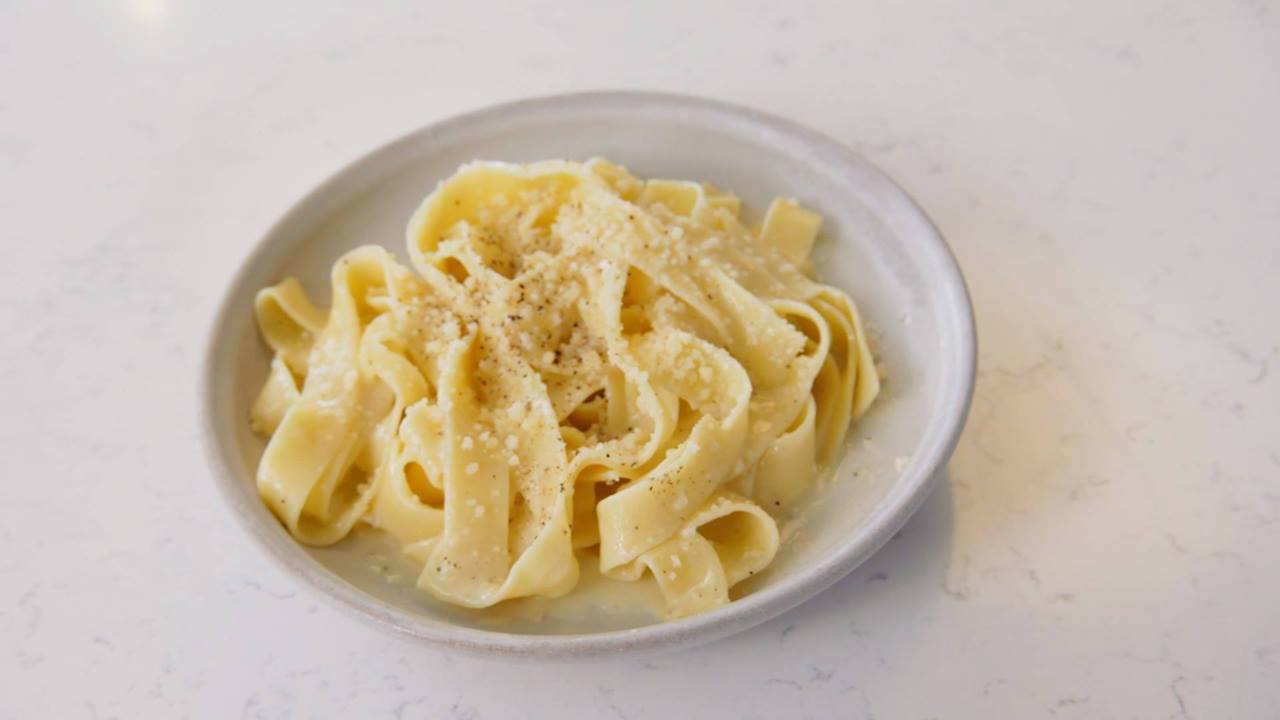
Fettuccine Alfredo

Fettuccine Alfredo
Real alfredo should never (never!) include cream; the silky sauce is the result of an emulsion between the grated cheese, melted butter, and starchy pasta water. This is part of BA's Best, a collection of our essential recipes.
Author:
Cuisine: American
Recipe type: Main dish
Ingredients
  • 12 ounces fettuccine or other long pasta
  • Kosher salt
  • ¼ cup (½ stick) unsalted butter
  • ¾ cup finely grated Parmesan, plus more for serving
  • Freshly ground black pepper
Instructions
  1. Cook pasta in a large pot of boiling salted water, stirring occasionally, until very al dente. Drain, reserving 2 cups pasta cooking liquid.
  2. Transfer 1 cup pasta cooking liquid to a large skillet. Bring to a gentle simmer, then whisk in butter, a piece at a time, until melted. Whisking constantly, gradually add cheese, making sure it’s completely melted and incorporated before adding more. Add pasta and toss to coat, adding more pasta cooking liquid as needed, until sauce blankets noodles completely. Serve topped with pepper and more cheese.

Watch the recipe video here:

Look ma' no cream!Make it: http://bonap.it/eGCEjDe

Posted by Bon Appétit Magazine on Tuesday, March 12, 2019

Main dish

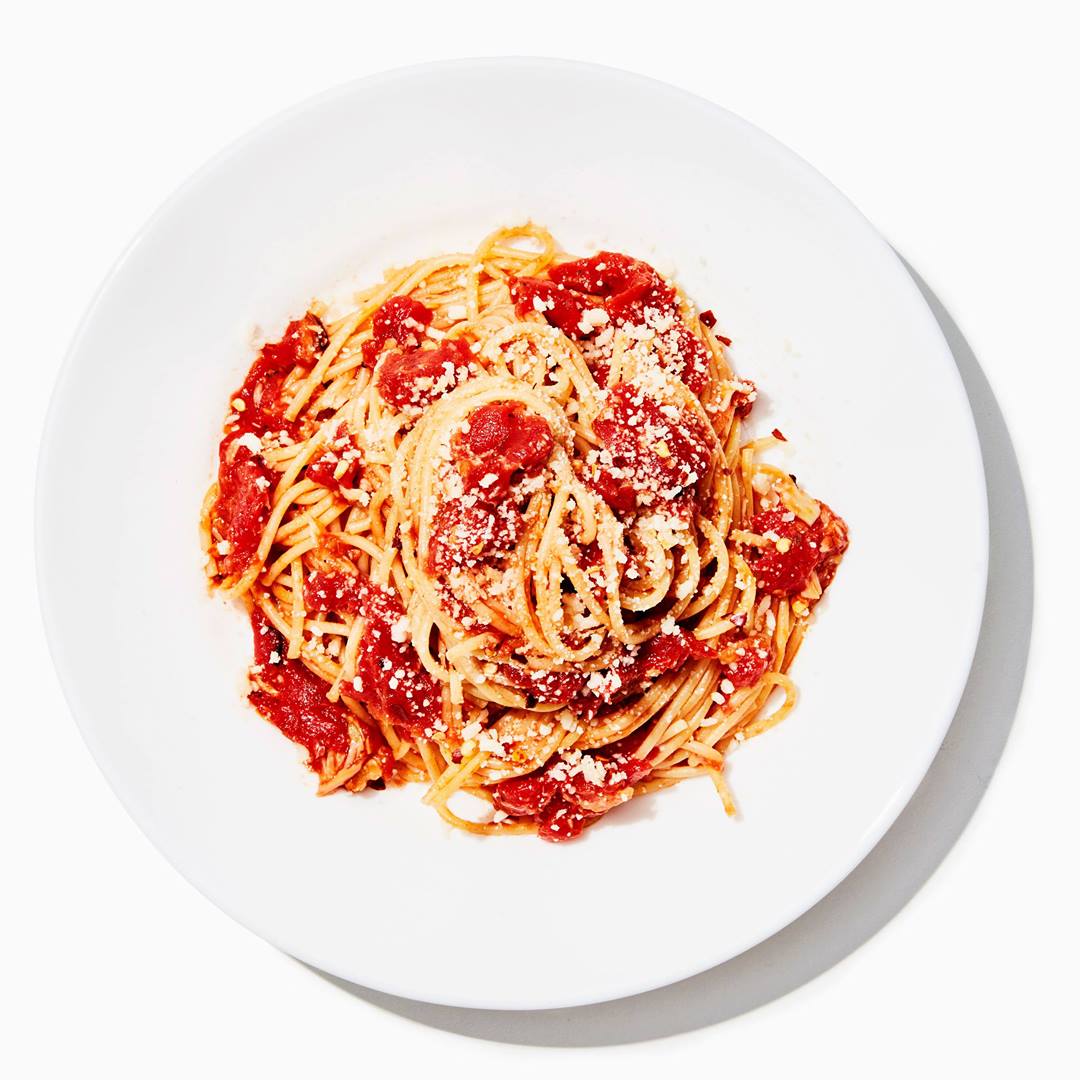
Bucatini with Butter-Roasted Tomato Sauce

Bucatini with Butter-Roasted Tomato Sauce
We love the way that roasting intensifies the flavor of canned tomatoes. While we're pretty obsessed with the texture of bucatini, a strand pasta with a hole running through it, this dish is every bit as delicious with spaghetti, linguine, or even rigatoni.
Author:
Cuisine: American
Recipe type: Main dish
Ingredients
  • 8 garlic cloves
  • ¼ cup (½ stick) unsalted butter
  • 1 28-ounce can whole peeled tomatoes
  • 2 anchovy fillets packed in oil
  • ½ teaspoon crushed red pepper flakes, plus more for serving
  • Kosher salt
  • Freshly ground black pepper
  • 12 ounces bucatini or spaghetti
  • Finely grated Parmesan (for serving)
Instructions
  1. Preheat oven to 425°. Crush 8 garlic cloves with the flat side of a chef's knife and remove peel. Cut ¼ cup (½ stick) butter into small pieces (about ½").
  2. Empty 28 oz. can of tomatoes into a 13x9" baking dish and crush lightly with your hands. Watch out for flying tomato juices. Scatter garlic, butter pieces, 2 anchovies, and ½ tsp. red pepper flakes over tomatoes; season with salt and black pepper.
  3. Roast tomatoes, tossing halfway through, until garlic is very soft and mixture is thick and jammy, 35–40 minutes. While tomatoes are roasting, bring a large pot of water (4-6 qt.) to a boil over high heat and add a small fistful of salt.
  4. Remove pan from oven and let sauce cool slightly. Using a potato masher or fork, break up garlic and tomatoes until mixture looks like coarse applesauce.
  5. Cook 12 oz. bucatini or spaghetti in pot of boiling water, stirring occasionally with tongs, according to package instructions for al dente. Toward end of cook time, use a heatproof measuring cup to scoop out and reserve ½ cup pasta cooking liquid. Drain pasta in a colander; reserve pot.
  6. Return pasta to pot and add tomato sauce and pasta cooking liquid. Cook over medium-high heat, tossing with tongs, until sauce coats pasta, about 3 minutes.
  7. Divide pasta among plates. Serve topped with Parmesan and more red pepper flakes.
Do Ahead: Tomato sauce can be made 4 days ahead. Let cool; cover and chill. Reheat before mixing with pasta.

Watch the recipe video here:

Because you need more butter-roasted things in your life. (via Basically)Recipe: http://bonap.it/8kyDbdY

Posted by Bon Appétit Magazine on Saturday, March 2, 2019

Main dish

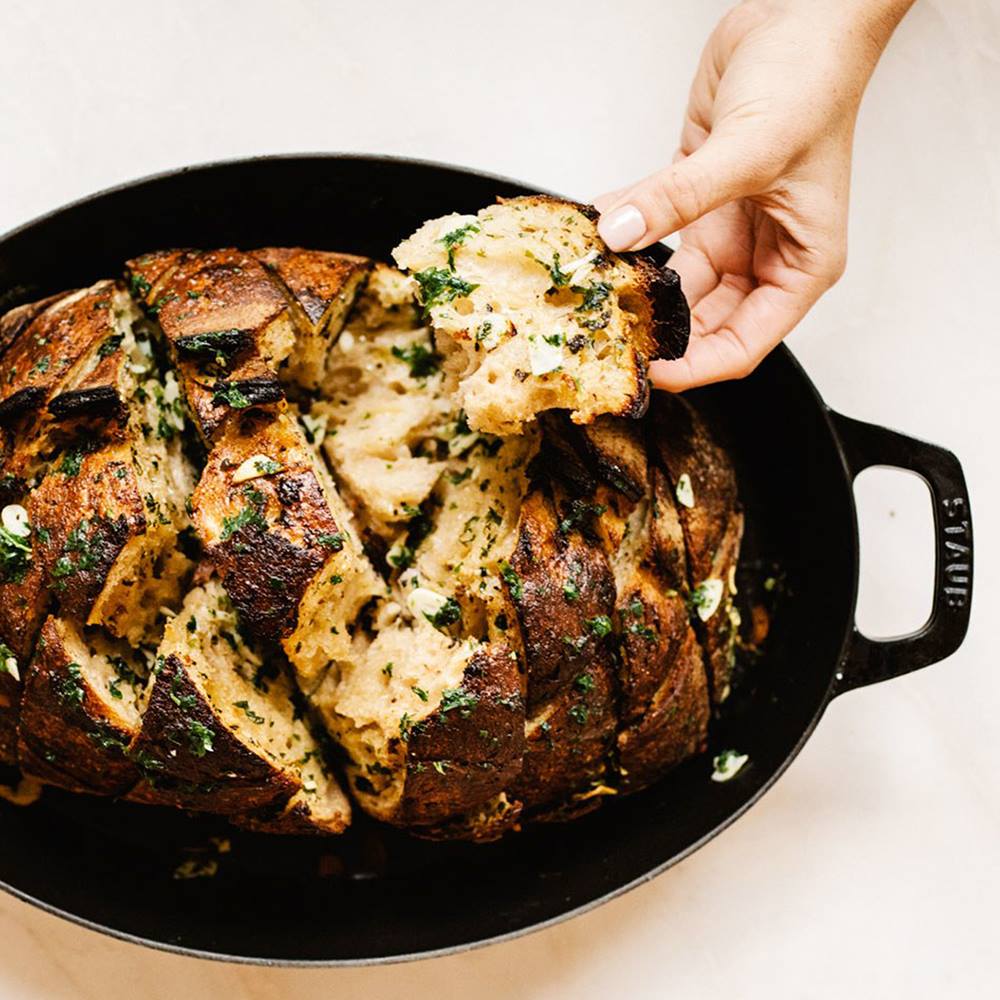
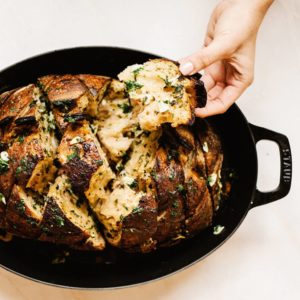
Pull-Apart Cheesy Garlic Loaf

Pull-Apart Cheesy Garlic Loaf
It can get tricky to hold the bread together when making the second set of cuts. Just do your best and plop any loose pieces back into place. Check out more recipes from Tartine here.
Author:
Cuisine: American
Recipe type: Main dish
Ingredients
  • 1 head of garlic, plus 4 cloves, finely grated
  • 1 tablespoon olive oil
  • 1 loaf country-style bread (about 2 pounds)
  • ½ cup (1 stick) unsalted butter
  • 2 tablespoons chopped parsley
  • 1 teaspoon chopped rosemary
  • 1 teaspoon chopped thyme
  • 1 teaspoon kosher salt
  • 1 teaspoon freshly ground black pepper
  • 10 ounces white cheddar, grated (about 3 cups)
Instructions
  1. Preheat oven to 400°. Cut top ½" off garlic bulb so that tops of cloves are exposed. Place on a square of foil and drizzle with oil, making sure as much as possible gets inside. Bring up foil around garlic to make a tight packet and bake until cloves are soft, 20–25 minutes. Transfer garlic bulb (still in packet!) to a foil-lined rimmed baking sheet, placing to one side (you want to leave room for the bread).
  2. Slice bread across the top in a 1" crosshatch pattern, cutting most of the way through but leaving the bottom crust intact.
  3. Melt butter in a small saucepan over medium; remove from heat. Add grated garlic and swirl pan to gently warm the garlic. Add parsley, thyme, rosemary, salt, and pepper and swirl pan to combine everything.
  4. Brush top and cut sides of bread with butter, working down into crevices. Sprinkle cheese over loaf, making sure some gets in between the cuts as well as on top.
  5. Set the loaf on baking sheet with garlic. Bake loaf until cheese is melted, 18–20 minutes. Unwrap garlic and serve with cheesy loaf.
  6. Do Ahead: Bread can be assembled 3 days ahead. Wrap tightly and chill.

Watch the recipe video here:

Cheesy. Garlic. Loaf. Does it get much better than that? We think not.RECIPE: http://bonap.it/JIyv1uB

Posted by Bon Appétit Magazine on Wednesday, February 27, 2019

Main dish

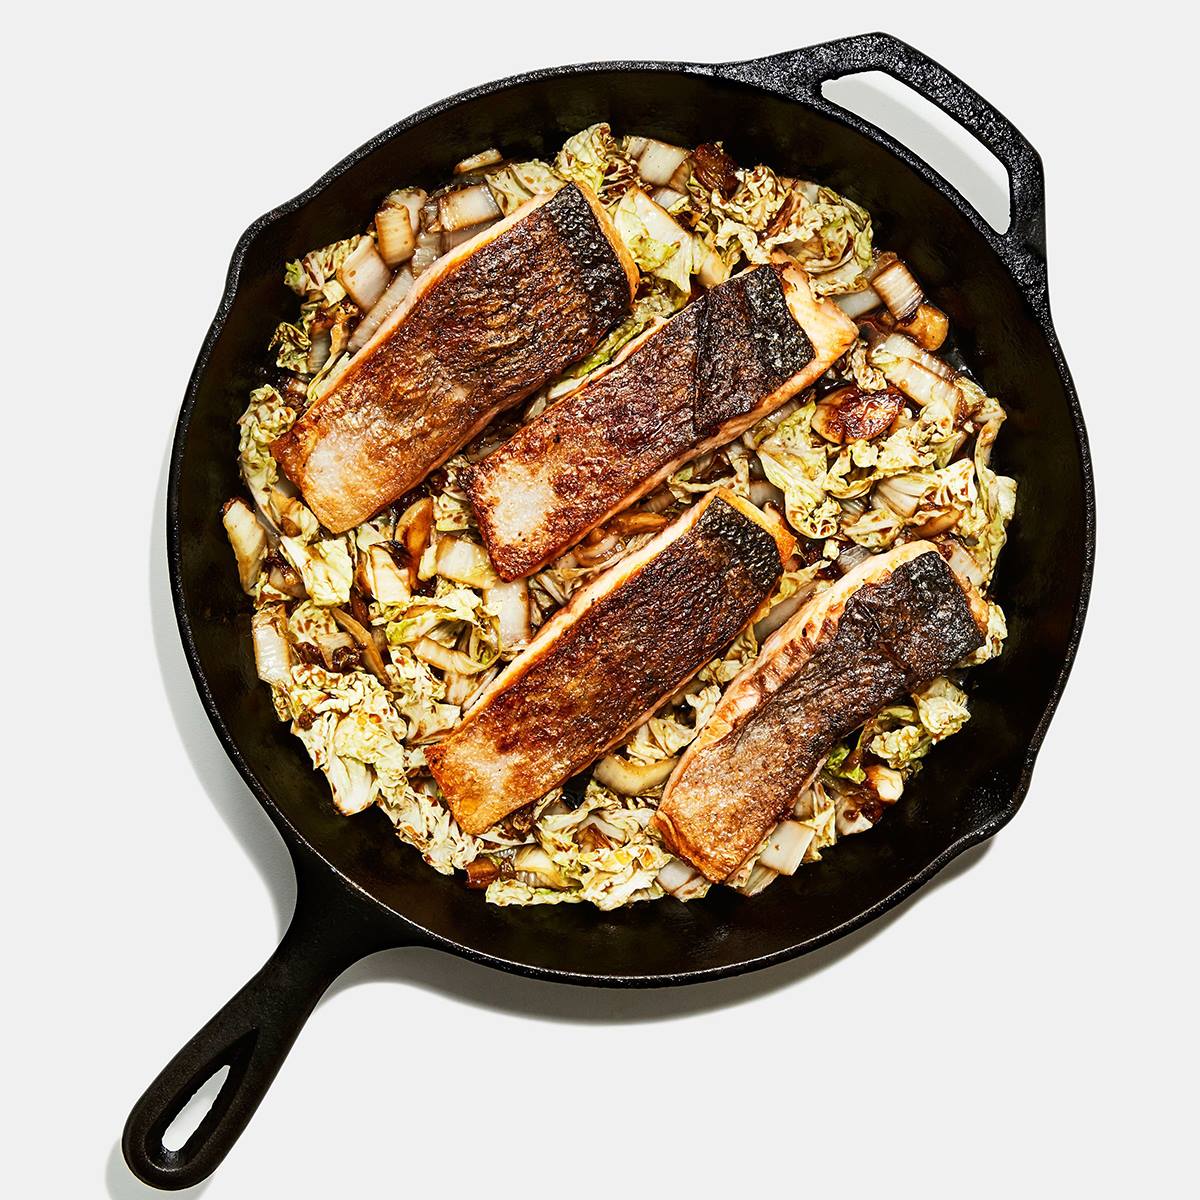
Crispy-Skin Salmon with Napa Cabbage

Crispy-Skin Salmon with Napa Cabbage
Does the thought of cooking fish at home freak you out? We got you. This method guarantees that the salmon comes out perfectly cooked with crispy skin. Use the same technique with any skin-on fish fillets for great results every time.
Author:
Cuisine: American
Recipe type: Main dish
Ingredients
  • 1 small head of Napa cabbage
  • 5 garlic cloves
  • 1 2-inch knob ginger
  • 2 tablespoons rice wine vinegar
  • 2 tablespoons soy sauce
  • 1 tablespoon honey
  • 1½ teaspoons cornstarch
  • 4 6-ounce skin-on salmon fillets
  • Kosher salt
  • Freshly ground black pepper
  • 3 tablespoons vegetable oil, divided
Instructions
  1. Starting at leafy green end of Napa cabbage, slice about one-third of head crosswise into ½”-thick ribbons. Set darker green pieces aside. Thinly slice remaining pale-green and white parts of cabbage crosswise and transfer to a medium bowl (discard cabbage core).
  2. Smash 5 garlic cloves and discard peel.
  3. Scrape down and around ginger with the curved tip of a spoon to remove skin, then thinly slice ginger crosswise.
  4. Stir 2 Tbsp. rice wine vinegar, 2 Tbsp. soy sauce, 1 Tbsp. honey, and 1½ tsp. cornstarch in a small bowl with a spoon until cornstarch is dissolved.
  5. Thoroughly pat dry 4 salmon fillets with paper towels. Season flesh side with salt and pepper.
  6. Drizzle 2 Tbsp. vegetable oil across surface of a large skillet, preferably cast iron. Arrange salmon fillets skin side down in skillet, spacing evenly apart. Heat skillet over medium (yes, you’re starting the cooking from cold).
  7. Cook salmon, occasionally sliding a flexible metal spatula underneath skin to lift fillets and let fresh hot fat flow underneath (if the skin is sticking, let it cook longer until skin releases), until flesh is opaque all the way up the sides of each fillet and only the top of thickest part is still translucent, 5–10 minutes. It will take more or less time depending on thickness of your salmon fillets. As fish is cooking, move pieces around pan to encourage even cooking.
  8. Using spatula and a pair of tongs, carefully turn each fillet so skin side is up. Turn off heat and let heat remaining in skillet gently cook second side. Once fillets have stopped sizzling, carefully transfer to a plate.
  9. Return pan to medium-high heat and add half of cabbage from bowl. Cook, tossing occasionally with tongs, until cabbage is wilted and browned and even charred in some spots, about 5 minutes. Toss in remaining cabbage from bowl and cook, stirring often, until second batch is tender, about 4 minutes.
  10. Scrape cabbage mixture back into bowl and add remaining 1 Tbsp. oil. Add garlic and ginger to pan and cook, tossing often, until garlic is browned all over and ginger is browned around the edges, about 3 minutes.
  11. Stir soy mixture to re-incorporate cornstarch and add to skillet. Stir rapidly until mixture is thickened, which will only take a few seconds, then remove from heat.
  12. Add cooked cabbage and uncooked green cabbage back to skillet and toss well to coat.
  13. Arrange salmon fillets over of cabbage and serve.

Watch the recipe video here:

Because you deserve the crispiest skinned fish. (via Basically) Recipe: http://bonap.it/HyokiDa

Posted by Bon Appétit Magazine on Monday, February 25, 2019

Main dish

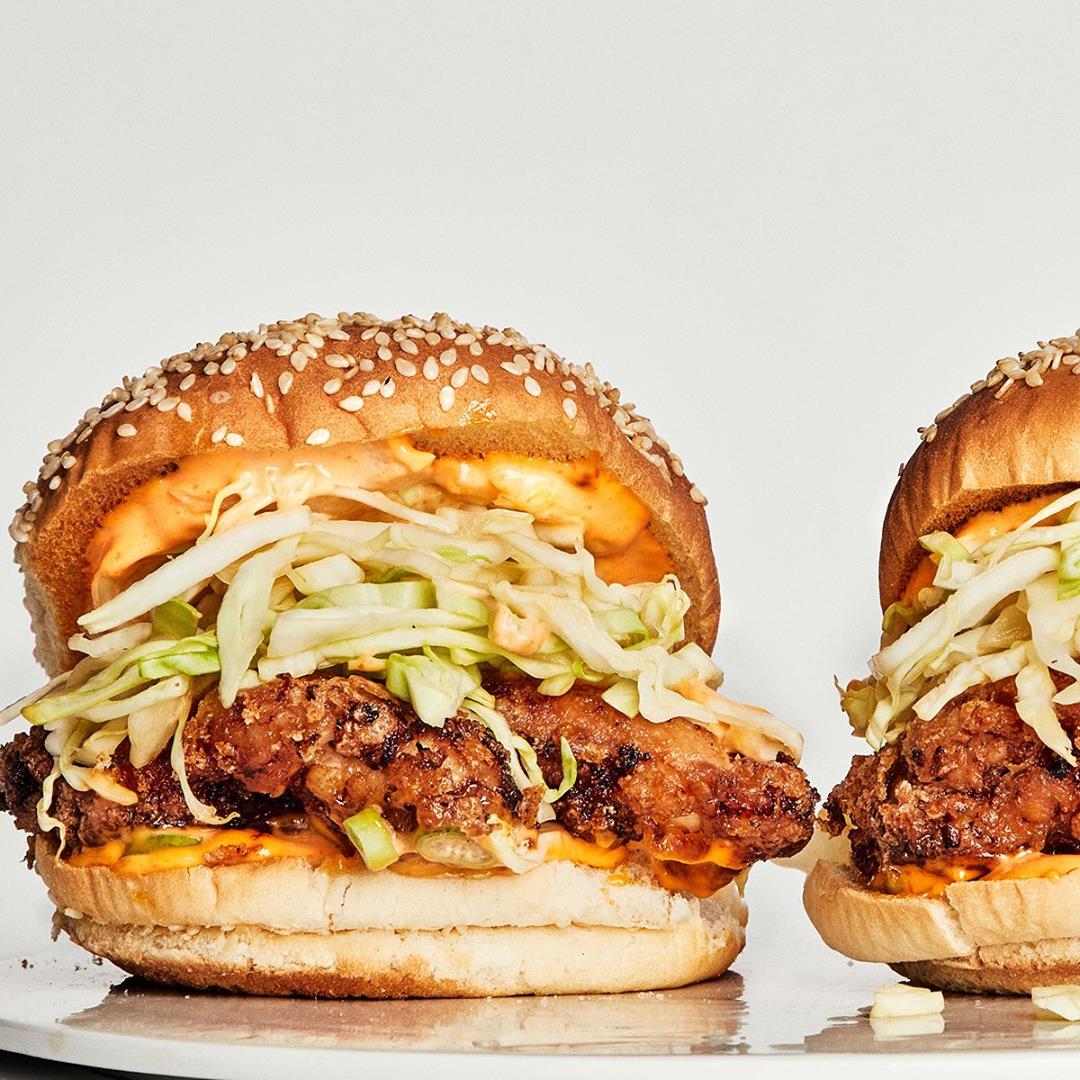
The Basically Fried Chicken Sandwich

The Basically Fried Chicken Sandwich
Our incredibly simple method for breading chicken thighs (no brine! no seasoned flour! no dipping!) is based on karaage, a type of Japanese fried chicken. Using a high-sided vessel like a Dutch oven for frying—instead of a shallow skillet—helps to cut down on any obnoxious splatter.
Author:
Cuisine: American
Recipe type: Main dish
Ingredients
  • 4 skinless, boneless chicken thighs (about 4 oz. each, 1 lb. total)
  • 4 Tbsp. seasoned rice vinegar, divided
  • 2 Tbsp. soy sauce, divided
  • Kosher salt
  • Freshly ground black pepper
  • Neutral oil, such as vegetable or peanut (for frying; 4–6 cups)
  • ½ cup mayonnaise
  • 2 Tbsp. Sriracha
  • 4 soft seeded hamburger buns
  • ¼ small head green cabbage
  • 2 scallions
  • ⅓ cup cornstarch
Instructions
  1. Pat 4 chicken thighs dry with paper towels, then transfer to a large resealable plastic bag. Add 2 Tbsp. rice vinegar and 1 Tbsp. soy sauce to bag. Sprinkle in a pinch of salt; season with pepper. Seal bag, pressing out air, and work chicken around inside bag to coat. Let sit while you prepare the other components.
  2. Pour oil into a Dutch oven to come 1"–1½" up the sides and heat over medium-high (the high sides make for less splatter during frying). Every few minutes check oil temperature with an instant-read thermometer. You want it right around 350° (this will take about 10 minutes total). As it surpasses the 300° mark, reduce heat to low to maintain.
  3. Stir ½ cup mayonnaise and 2 Tbsp. Sriracha in a small bowl with a spoon until smooth.
  4. Preheat boiler. If broiler element is at the top of your oven, move rack to highest position. Broil 4 buns (you can place them directly on the rack), cut sides up, just until surfaces are golden, less than a minute. Use tongs to remove and set aside.
  5. Very thinly slice ¼ head of cabbage and transfer to a medium bowl. Thinly slice 2 scallions; set aside for assembly.
  6. Remove chicken from bag with tongs, letting excess marinade drip back into bag, and transfer to another medium bowl. Add ⅓ cup cornstarch to bowl and toss with tongs until chicken is completely coated in cornstarch.
  7. Check oil and adjust temperature so thermometer registers around 350°. Carefully lay chicken into hot oil and cook, turning occasionally to prevent one side from browning too quickly, until crust is crispy and dark brown, 5–8 minutes. Keep an eye on your oil temperature, which will drop when you add the chicken; increase heat if needed to maintain 350°. Transfer chicken to a wire rack and let cool about 5 minutes.
  8. Meanwhile, toss cabbage with remaining 2 Tbsp. rice vinegar and 1 Tbsp. soy sauce.
  9. Spread about 1 Tbsp. Sriracha-mayonnaise across toasted sides of buns with the back of a spoon. Sprinkle reserved scallions over bottoms of buns, then arrange chicken over. Divide slaw evenly over chicken, then close with tops of buns.

Watch the recipe video here:

Everything you want in a crispy chicken sandwich, with none of the fuss.Make it: http://bonap.it/2meZaQ6

Posted by Bon Appétit Magazine on Thursday, February 21, 2019

Main dish

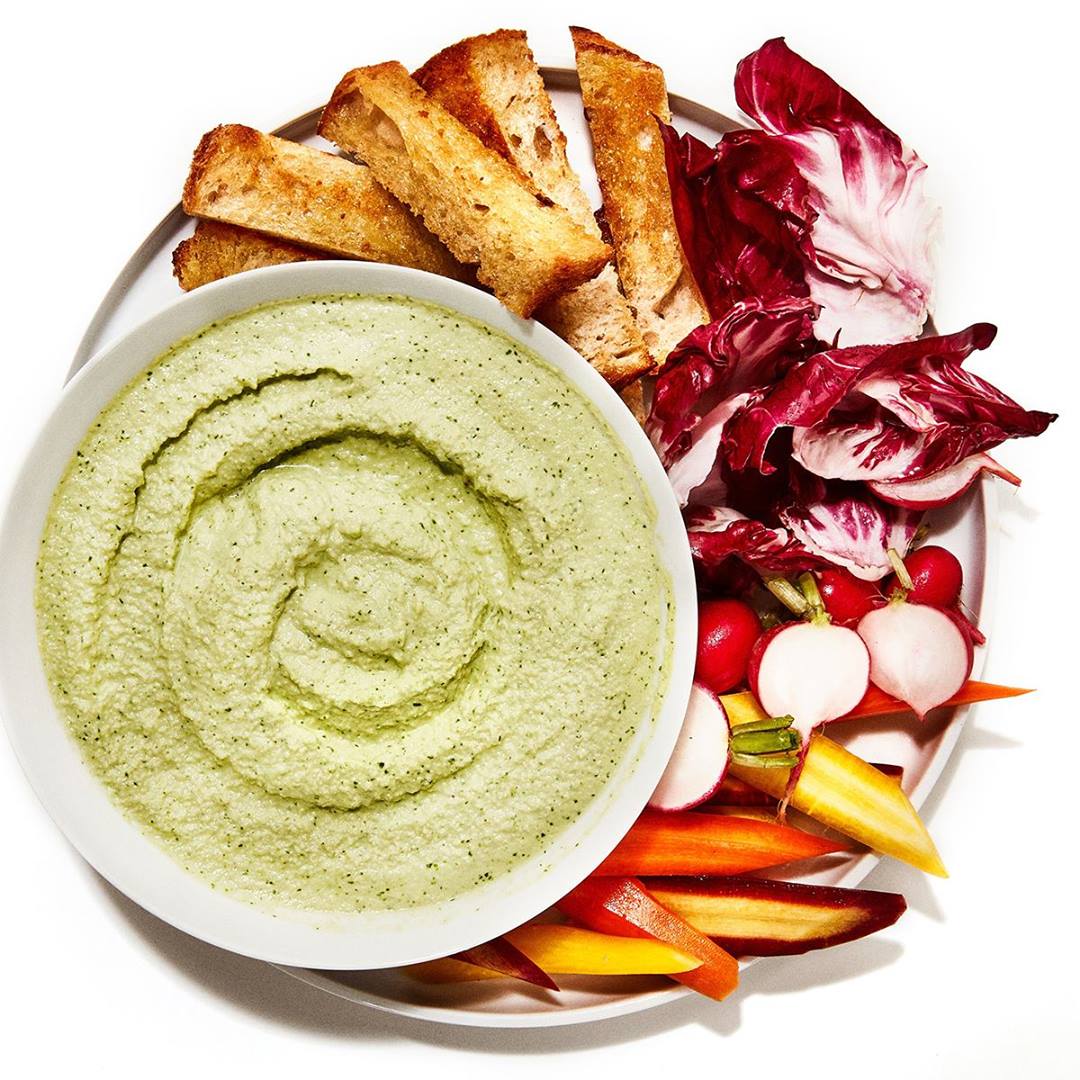
Put-It-On-Everything Cashew Sauce

Put-It-On-Everything Cashew Sauce
This rich, creamy vegan(!) sauce is your new all-purpose condiment. Packed with herbs, it's a no-brainer for a seasonal veggies-and-dip situation, but can easily be dressed up to suit any occasion. Swap the herbs and vinegar for lime juice and zest and you've got a perfect taco-topper. Add some chipotles in adobo to make a spicy, smoky bottom-of-the-plate schmear for roasted veggies. Or spike it with some grated garlic and thin it with lemon juice for a killer dairy-free ranch dressing.
Author:
Cuisine: American
Recipe type: Main dish
Ingredients
  • 2 cups raw cashews
  • 1 cup mixed tender herbs, such as parsley, cilantro, dill, and/or basil
  • 2 Tbsp. unseasoned rice or distilled white vinegar
  • 1 Tbsp. kosher salt
  • Crudités, such as radicchio, carrots, radishes, and batons of bread (for serving)
Instructions
  1. Bring 2 cups water to a boil in a tea kettle or small saucepan. Place 2 cups cashews in a medium heatproof bowl and cover with boiling water. Cover bowl with a plate or plastic wrap and let sit 10 minutes.
  2. Strain cashews through a fine-mesh sieve into another medium bowl, reserving soaking liquid.
  3. Transfer nuts to blender, then add 1 cup herbs, 2 Tbsp. vinegar, 1 Tbsp. salt, and half of soaking liquid.
  4. Blend on medium speed, scraping down sides with a spatula and adding more soaking liquid as needed, until cashew cream is very smooth and the consistency of yogurt, 1–2 minutes.
  5. Using spatula, transfer cashew cream to a medium bowl. Serve with crudités alongside.

Watch the recipe video here:

Rich, creamy, AND vegan—meet your new all-purpose condiment. (via Basically)Make it: http://bonap.it/m38Psgz

Posted by Bon Appétit Magazine on Wednesday, February 13, 2019

Main dish

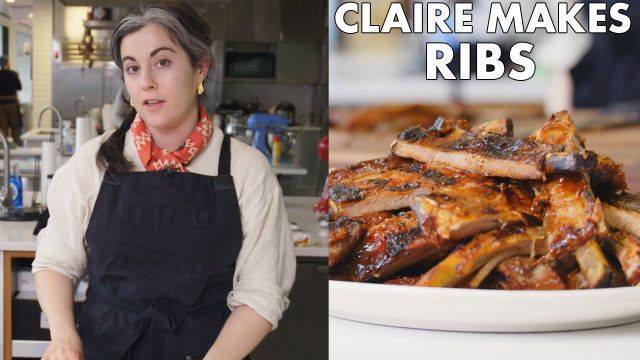
Best-Ever Barbecued Ribs

Best-Ever Barbecued Ribs
Got nothing but time on your hands? Cook these really low and slow. Set the oven at 300° and start checking the ribs after 3 hours. But don’t sweat it; they’ll be super-tender either way. Watch the step-by-step video here.
Author:
Cuisine: American
Recipe type: Main dish
Ingredients
  • 2½ tablespoons kosher salt
  • 1 tablespoon dry mustard
  • 1 tablespoon paprika
  • ½ teaspoon cayenne pepper
  • ½ teaspoon freshly ground black pepper
  • 8 pounds baby back pork ribs (8 racks) or St. Louis-style spareribs (4 racks)
  • Low-salt chicken broth (optional)
  • 1½ cups store-bought or homemade barbecue sauce plus more
Instructions
  1. Preheat oven to 350°. Combine first 5 ingredients in a small bowl. Place each rack of ribs on a double layer of foil; sprinkle rub all over ribs. Wrap racks individually and divide between 2 baking sheets.
  2. Bake ribs until very tender but not falling apart, about 2 hours for baby backs and 3 hours for spareribs. Carefully unwrap ribs; pour any juices from foil into a 4-cup heatproof measuring cup; reserve juices. Let ribs cool completely. DO AHEAD: Ribs can be baked up to 3 days ahead (the flavor will be more developed, and the cold ribs will hold together better on the grill as they heat through). Cover and chill juices. Rewrap ribs in foil and chill.
  3. Build a medium-hot fire in a charcoal grill, or heat a gas grill to high. Add broth or water to rib juices, if needed, to measure 1½ cups. Whisk in barbecue sauce to blend.
  4. Grill ribs, basting with barbecue sauce mixture and turning frequently, until lacquered and charred in places and heated through, 7-10 minutes. Transfer to a cutting board; cut between ribs to separate. Transfer to a platter and serve with additional barbecue sauce.

Watch the recipe video here:

Yeah, you're going to be making these ribs all summer long. Make them: http://bonap.it/vf3WcjS

Posted by Bon Appétit Magazine on Tuesday, February 12, 2019

Main dish

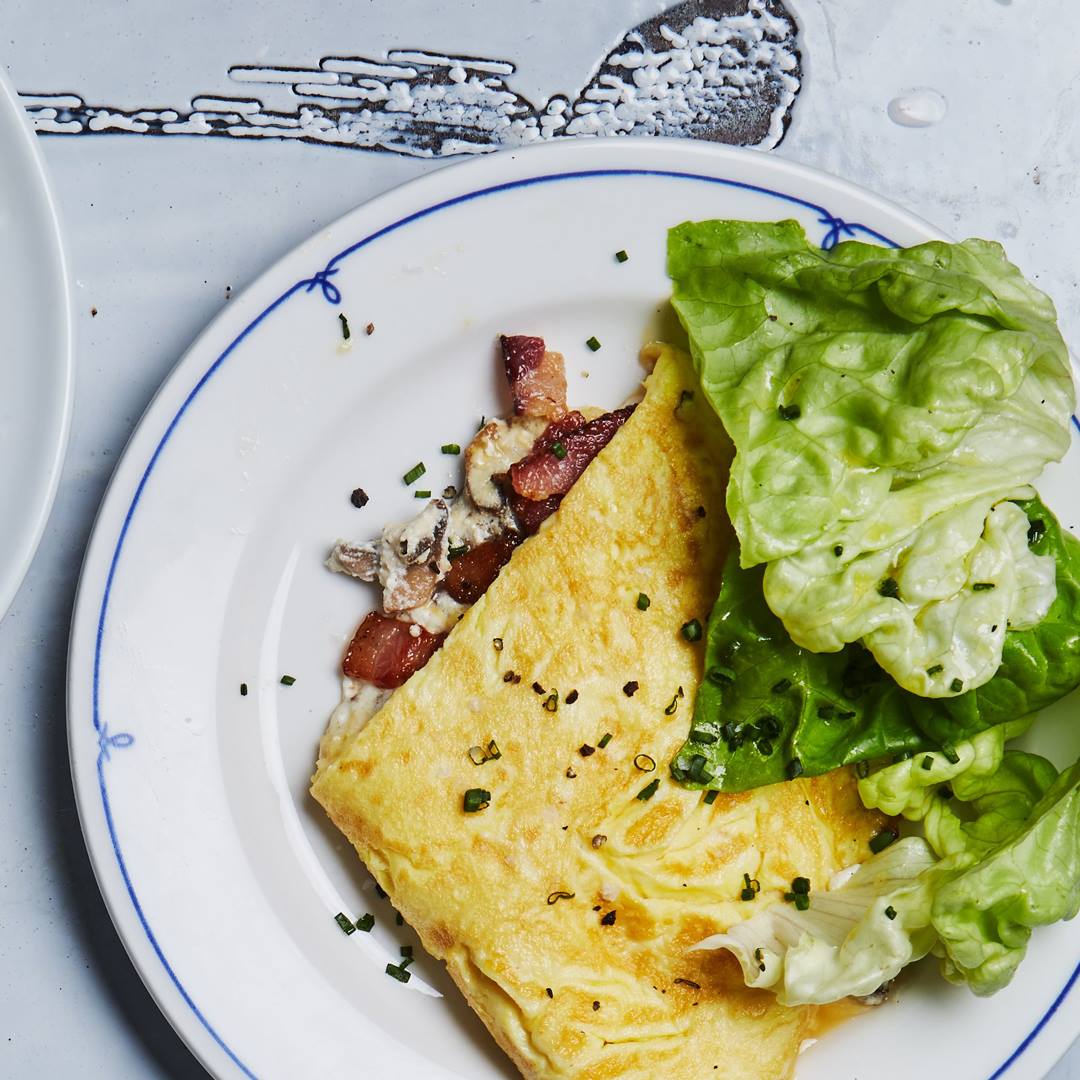
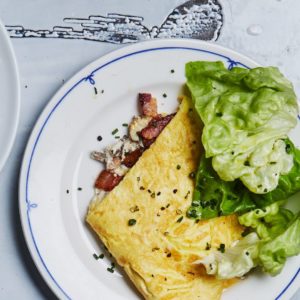
Omelet With Bacon, Mushrooms, and Ricotta

Omelet With Bacon, Mushrooms, and Ricotta
Author:
Cuisine: American
Recipe type: Main dish
Ingredients
  • Omelet
  • 3 slices thick-cut bacon
  • 4 ounces button mushrooms
  • Kosher salt, freshly ground pepper
  • 4 ounces fresh ricotta or cream cheese (about ½ cup)
  • ¼ ounce Parmesan, finely grated (about ¼ cup)
  • 6 large eggs
  • Salad
  • 2 tablespoons olive oil
  • 2 tablespoons white wine vinegar
  • 1 teaspoon Dijon or other mustard
  • 2 heads of Boston or Bibb lettuce, leaves separated
  • Handful of chopped chives
Instructions
Omelet
  1. Cut bacon crosswise into ½”-wide pieces. Cook in a large nonstick skillet over medium, stirring and turning occasionally, until starting to brown and crisp but not all of the fat is rendered, 6–8 minutes. Transfer to a small plate or bowl with a slotted spoon.
  2. While the bacon is cooking, finely chop the mushrooms.
  3. Add mushrooms to skillet with bacon drippings, season with salt and pepper, and increase heat to medium-high. Cook, tossing often, until browned and any liquid from mushrooms has cooked off, about 5 minutes. Use a slotted spoon to transfer to a small bowl; let skillet cool slightly. Add ricotta and Parmesan to mushrooms and stir well to combine; season with salt and pepper.
  4. Whisk eggs in a medium bowl until very smooth and a little frothy, about 1 minute; season with salt and pepper. Cook eggs in reserved skillet over medium, stirring constantly and making sure to scrape up eggs from bottom and around edge of pan, until large folded curds form. Shake pan to distribute uncooked eggs over surface and spoon mushroom mixture slightly off center. Top with bacon and cook until bottom of omelet takes on a light golden-brown color but surface is still slightly wet. Fold one side of omelet over filling (like a taco); slide omelet onto a cutting board or large plate.
  5. Salad and Assembly
  6. Whisk oil, vinegar, and mustard in a large bowl to combine; season with salt and pepper. Add lettuce and half of chives and toss to coat.
  7. Top omelet with remaining chives cut in half and serve with salad.
Salad and Assembly
  1. Whisk oil, vinegar, and mustard in a large bowl to combine; season with salt and pepper. Add lettuce and half of chives and toss to coat.
  2. Top omelet with remaining chives cut in half and serve with salad.

Watch the recipe video here:

This is what brunch dreams are made of.Recipe: http://bonap.it/DWS0Zss

Posted by Bon Appétit Magazine on Sunday, February 10, 2019

Main dish

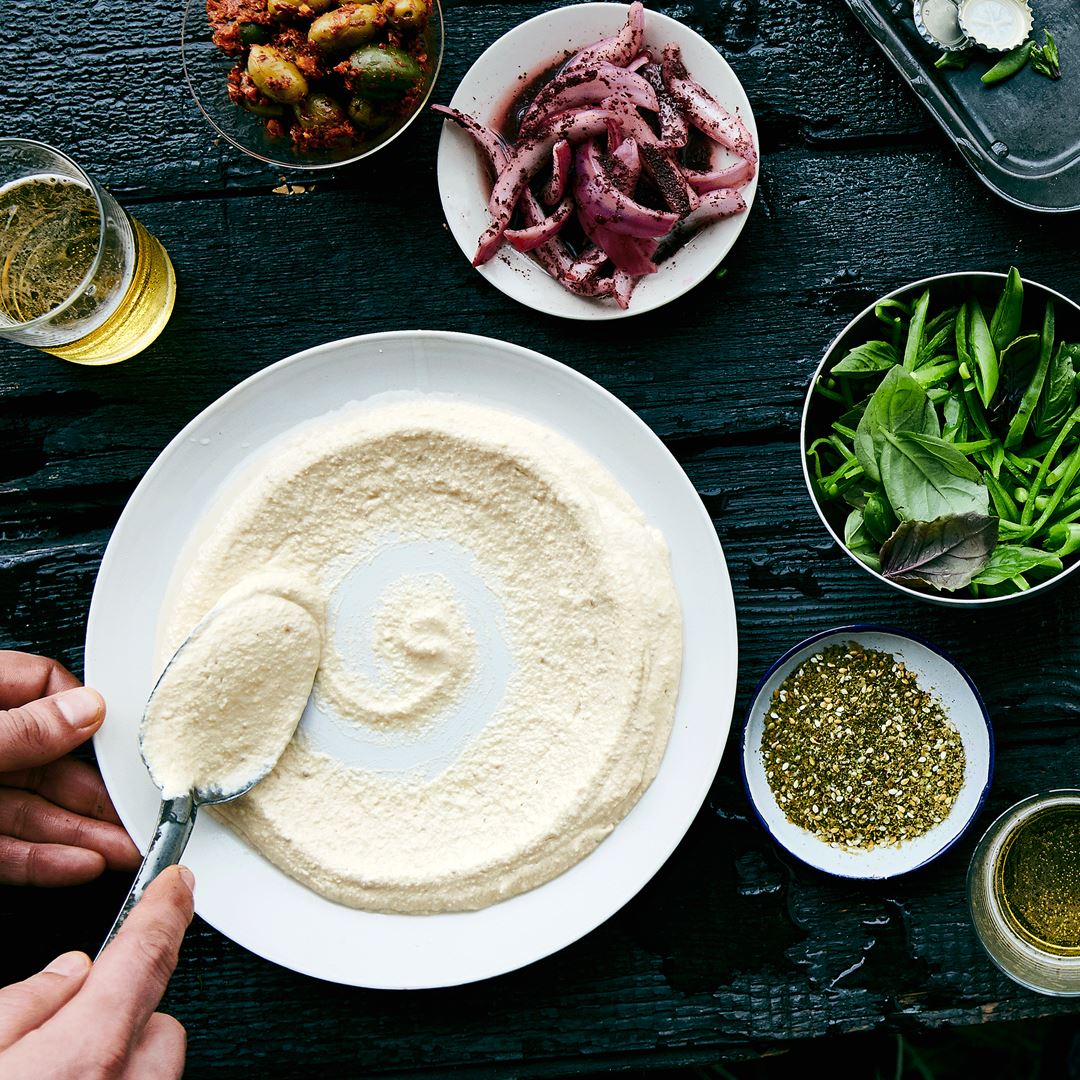
Creamy Hummus with Cumin

Creamy Hummus with Cumin
Don’t be afraid to let the food processor run the full 2 minutes. It’s one of the keys to supersmooth, aerated hummus. This recipe is from Tusk in Portland, OR.
Author:
Cuisine: American
Recipe type: Main dish
Ingredients
  • ¾ cup dried chickpeas
  • ½ teaspoon baking soda
  • 3 garlic cloves, 2 smashed, 1 finely grated
  • 1 dried red chile (such as chile de árbol)
  • 1 bay leaf
  • ⅓ cup (or more) fresh lemon juice
  • Kosher salt
  • 1 cup tahini
  • ⅓ cup olive oil
  • 1 teaspoon ground cumin
Instructions
  1. Combine chickpeas and baking soda in a medium bowl and pour in cold water to cover by 2". Cover and let sit 8–12 hours.
  2. Drain chickpeas, rinse, and place in a large saucepan along with smashed garlic, chile, and bay leaf. Pour in cold water to cover by 2". Bring to a boil over medium-high heat; reduce heat and simmer gently, skimming foam occasionally from surface, until chickpeas are falling apart, 35–45 minutes. Drain, reserving about 1 cup cooking liquid. Pluck out and discard garlic, chile, and bay leaf.
  3. Combine grated garlic, lemon juice, and a pinch of salt in a food processor and let sit until the bite in garlic mellows, about 5 minutes. Add tahini and ½ cup ice water and process until smooth. With the motor running, slowly stream in oil. Season with another large pinch of salt. Add chickpeas and cumin and process until hummus is very smooth, light, and creamy, about 2 minutes. It will tighten up as it cools, so it should be loose to the point of being pourable at this stage. If it looks thick, thin with chickpea cooking liquid, pulsing in by the tablespoonful until you reach the right consistency. Taste hummus and season with salt and more lemon juice if needed.
Do Ahead: Hummus can be made 1 week ahead. Cover and chill. Bring to room temperature before serving.

Watch the recipe video here:

What's your hummus swooshing strategy? RECIPE: http://bonap.it/KMuBfvx

Posted by Bon Appétit Magazine on Sunday, February 10, 2019