Showing 126 Result(s)
Main dish

Grilled Salmon with Lemon-Sesame Sauce
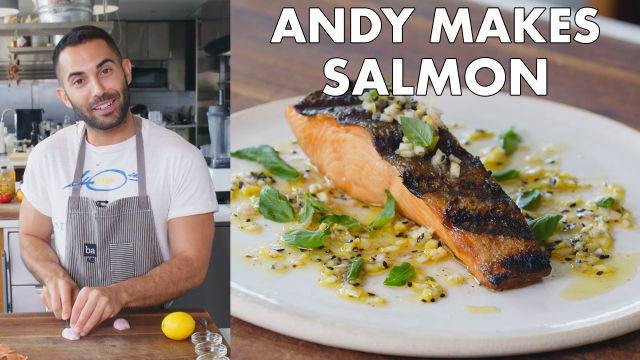
Grilled Salmon with Lemon-Sesame Sauce
For this lemony grilled salmon recipe, you absolutely want to cook fish that still has its skin on. It protects the fish while it grills and, despite what you think or have been told, will help it release from the grill grates more easily.
Author:
Cuisine: American
Recipe type: Main dish
Ingredients
  • 4 6-oz. skin-on salmon fillets, pin bones removed, patted dry
  • 2 Tbsp. plus ⅓ cup extra-virgin olive oil, plus more for grill
  • Kosher salt
  • 1 small lemon
  • 1 small shallot, finely chopped
  • 2 tsp. black sesame seeds
  • 1 tsp. honey
  • ½ tsp. toasted sesame oil
  • Freshly ground black pepper
  • 1 cup torn basil leaves
Instructions
  1. Prepare a grill for medium heat. Rub salmon with 2 Tbsp. olive oil; season both sides with salt.
  2. Cut ends off lemon and discard. Place lemon upright and slice off outer lobes in 4 sections, leaving a square-shaped core and seeds behind. Finely chop lobes (flesh, pith, and all) and transfer to a small bowl (you should have about ⅓ cup). Squeeze out juice from core over bowl. Add shallot, sesame seeds, honey, sesame oil, and remaining ⅓ cup olive oil; season with salt and lots of pepper. Toss to combine.
  3. Clean and oil grate, then immediately place salmon on grill skin side down. Cover grill and cook, skin side down the entire time, until skin is lightly charred and fish is opaque, 6–8 minutes. Transfer salmon to a plate and let cool slightly.
  4. Divide salmon among plates. Top with basil. Spoon lemon-sesame sauce over.

Watch the recipe video here:

Very much here for the whole lemon-sesame sauce. Make it: http://bonap.it/x2e5zE2

Posted by Bon Appétit Magazine on Friday, January 4, 2019
Dessert

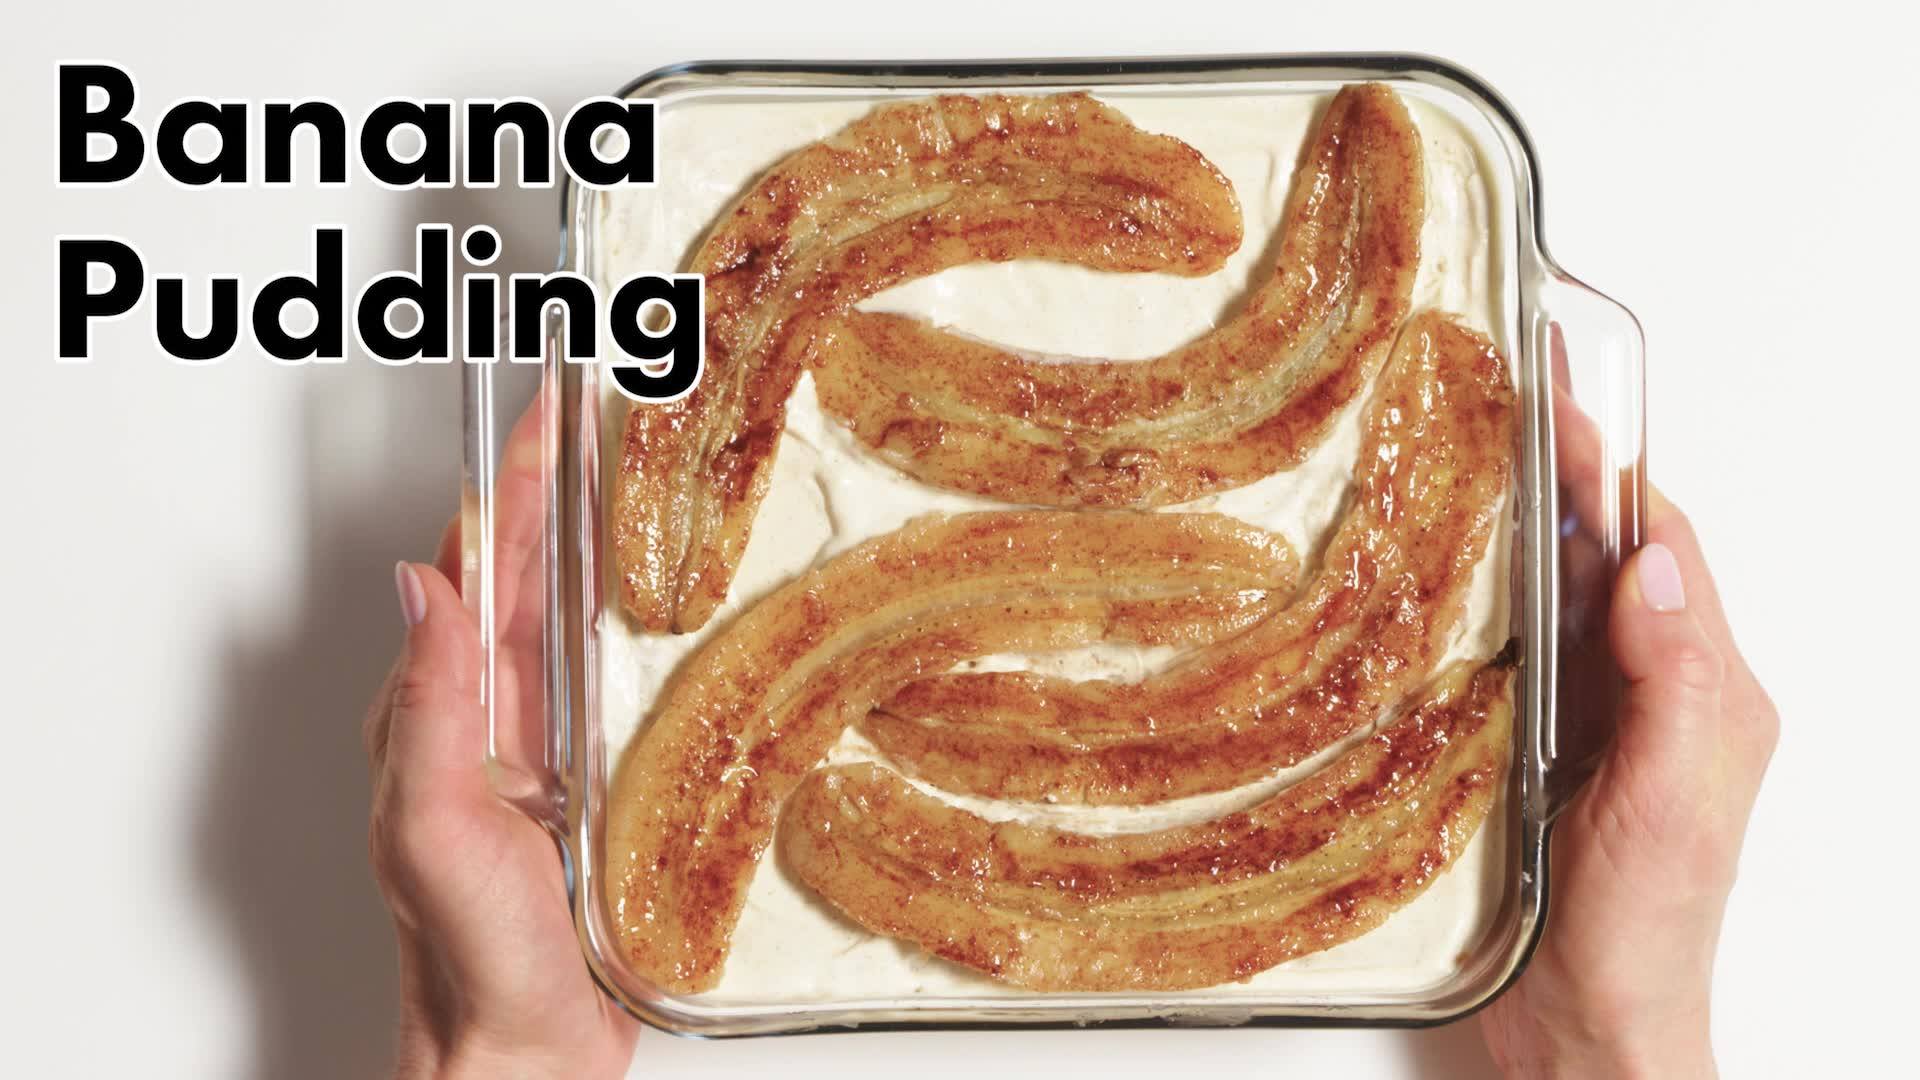
Caramelized Banana Pudding

Caramelized Banana Pudding
Author:
Cuisine: American
Recipe type: Dessert
Ingredients
  • ¾ cup plus 2 Tbsp. sugar, divided
  • 1 tsp. ground cinnamon, divided
  • 6 medium bananas (yellow but not yet browning)
  • 3 Tbsp. cornstarch
  • ¼ tsp. kosher salt
  • 2½ cups half-and-half, divided
  • 1 Tbsp. unsalted butter
  • 1½ tsp. vanilla extract
  • 1½ cups sour cream
  • 15 graham crackers
Instructions
  1. Place rack in bottom third of oven; preheat to 450°. Line a large rimmed baking sheet with parchment paper. Sprinkle ¼ cup sugar and ½ tsp. cinnamon evenly over parchment.
  2. Using the tip of a knife, poke holes all over 6 bananas, then cut in half lengthwise. Arrange bananas cut side down on parchment, moving them around so cut sides pick up as much cinnamon-sugar as possible.
  3. Arrange bananas in a single layer and roast until skins are deep brown and sugar seeping from underneath bananas is deep amber, 15–20 minutes. If any liquid leaches out of the bananas, discard. Let bananas sit until cool enough to handle.
  4. Meanwhile, whisk 3 Tbsp. cornstarch, ¼ tsp. salt, and ½ cup sugar in a medium saucepan. Very slowly stream in 2½ cups half-and-half, whisking constantly, until lump-free. Cook over medium heat, whisking constantly and vigorously, until pudding is bubbling and thick enough that wires of whisk leave a trail, 7–10 minutes.
  5. Remove from heat. Stir in 1 Tbsp. butter and 1½ tsp. vanilla until smooth. Let cool slightly.
  6. Scrape 4 caramelized banana halves into pot with pudding; discard skins. (Save the remaining 8 halves for layering and decorating the top.) Purée with an immersion blender or transfer to a food processor and process until smooth and creamy. Let cool while you prepare your other ingredients. The pudding should be warm but not hot when assembling (you can also make the pudding ahead of time, chill, and assemble cold).
  7. Whisk 1½ cups sour cream and remaining 2 Tbsp. sugar and ½ tsp. cinnamon in a medium bowl until sugar is dissolved (this could take several minutes).
  8. Remove remaining 8 bananas from their skins (you may need to use a butter knife to help scrape bananas from parchment paper).
  9. Time to assemble: Lay 4–5 graham crackers in a single layer in an 8x8" baking dish, then spoon about one-third of sour cream mixture evenly over crackers.
  10. Spread half of banana pudding over sour cream, then top with 3 banana halves.
  11. Repeat with 4–5 more graham crackers, half of remaining sour cream, and all of remaining banana pudding (do not add more bananas).
  12. Top with 4–5 more crackers, then spread remaining sour cream mixture over, working to edges of dish.
  13. Arrange remaining 5 banana halves decoratively over.
  14. Cover and chill pudding for at least 4 hours and up to overnight to meld the flavors.
Do Ahead: Pudding can be made 3 days ahead. Cover with plastic, pressing directly onto surface, and keep chilled.

Watch the recipe video here:

The classic we all know and love—but better.Make it: http://bonap.it/jmG3IIU

Posted by Bon Appétit Magazine on Friday, January 4, 2019
Breakfast

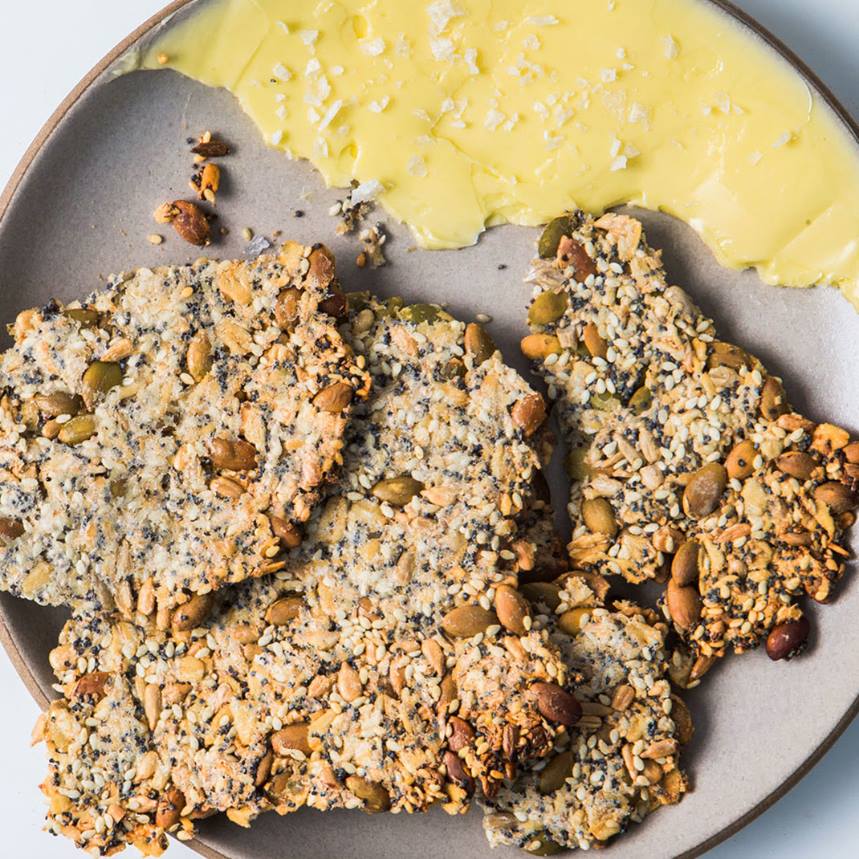
Seedy Oat Crackers

Seedy Oat Crackers
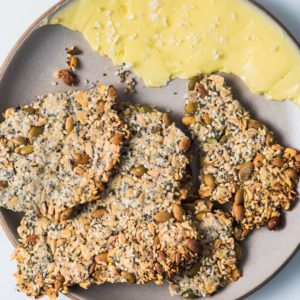
This crackers recipe features a variety of seeds, and the combination of colors and textures is impressive, but you can use fewer types—just make sure you use chia seeds (they're not optional) and the total volume stays the same.
Author:
Cuisine: American
Recipe type: Breakfast
Ingredients
  • 1 cup old-fashioned oats
  • ¾ cup raw pumpkin seeds (pepitas)
  • ⅓ cup raw sunflower seeds
  • ⅓ cup sesame seeds
  • 3 tablespoons chia seeds
  • 3 tablespoons poppy seeds
  • 1 teaspoon kosher salt
  • 1 tablespoon plus 1 teaspoon vegetable oil
  • 1 tablespoon pure maple syrup
Instructions
  1. Preheat oven to 375°. Mix oats, pumpkin seeds, sunflower seeds, sesame seeds, chia seeds, poppy seeds, and salt in a large bowl. Stir oil, maple syrup, and ¾ cup room-temperature water in a medium bowl to combine. Pour liquid over oat mixture and toss until mixture is completely soaked. Let sit 10 minutes; mixture will absorb water and thicken.
  2. Form oat mixture into a ball and transfer to a parchment-lined baking sheet. Press a second sheet of parchment paper directly on top and, using a rolling pin, flatten to ⅛" thick (the shape doesn’t matter). Remove top layer of parchment.
  3. Bake cracker until golden brown around edges, 15–20 minutes. Remove from oven and carefully turn out, parchment side up. Place a fresh sheet of parchment on baking sheet. Remove parchment from cracker, carefully turn cracker over, and return to baking sheet. Bake until firm and golden brown around edges, 15–20 minutes. Let cool on baking sheet, then break into pieces with your hands.
Do Ahead: Crackers can be made 1 week ahead. Store airtight at room temperature.

Skip the chips and make these crackers instead. (via Healthyish)GET THE RECIPE: http://bonap.it/1FSxRxB

Posted by Bon Appétit Magazine on Wednesday, January 2, 2019

Dessert

Oat and Apple Pancakes with Yogurt and Honey

Oat and Apple Pancakes with Yogurt and Honey
Author:
Cuisine: American
Recipe type: Dessert
Ingredients
  • 1 cup whole wheat flour
  • ¾ cup old-fashioned oats
  • ¼ cup finely chopped pecans or almonds
  • 1 teaspoon baking powder
  • 1 teaspoon baking soda
  • ½ teaspoon ground cinnamon
  • ½ teaspoon kosher salt
  • 1 large egg
  • 1¾ cups buttermilk
  • 2 tablespoons pure maple syrup, plus more for serving
  • 2 tablespoons virgin coconut oil, melted, slightly cooled, plus more for skillet
  • 1 medium apple (such as Granny Smith or Pink Lady), peeled, cored, sliced crosswise ¼ inch thick
  • Plain yogurt (for serving)
Instructions
  1. Whisk flour, oats, pecans, baking powder, baking soda, cinnamon, and salt in a large bowl. Whisk egg, buttermilk, 2 Tbsp. maple syrup, and 2 Tbsp. oil in a medium bowl; mix into dry ingredients.
  2. Heat a griddle or large nonstick skillet over medium; brush with oil. Place 2 apple slices in skillet, spacing about ½" apart, and cook until lightly golden, about 1 minute. Turn over and pour ⅓ cup batter over apples, spreading batter to cover. Cook pancake until bottom is golden brown and bubbles form on the surface, about 3 minutes. Flip and cook until cooked through and other side is golden brown, about 2 minutes. Transfer to a plate. Repeat with remaining apple slices and batter, brushing griddle with more oil as needed.
  3. Serve pancakes with yogurt and more maple syrup.

Watch the recipe video here:

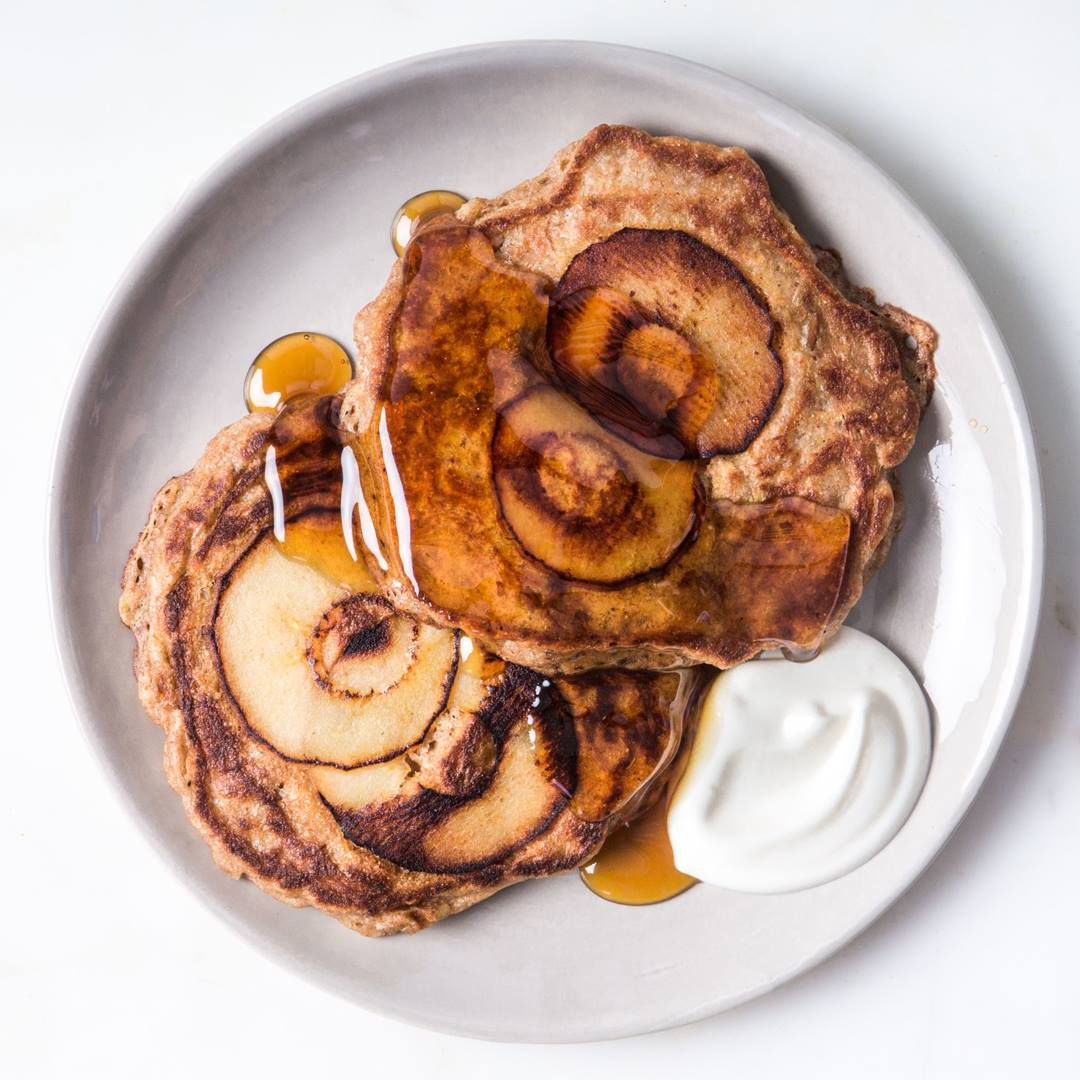
You and these pancakes have a date this morning. (via Healthyish)GET THE RECIPE: http://bonap.it/EWbxsBD

Posted by Bon Appétit Magazine on Wednesday, January 2, 2019

Dessert

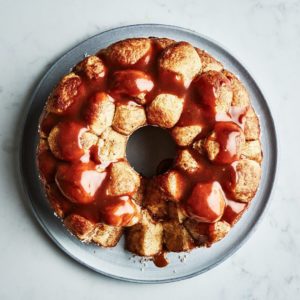
Monkey Bread

Monkey Bread
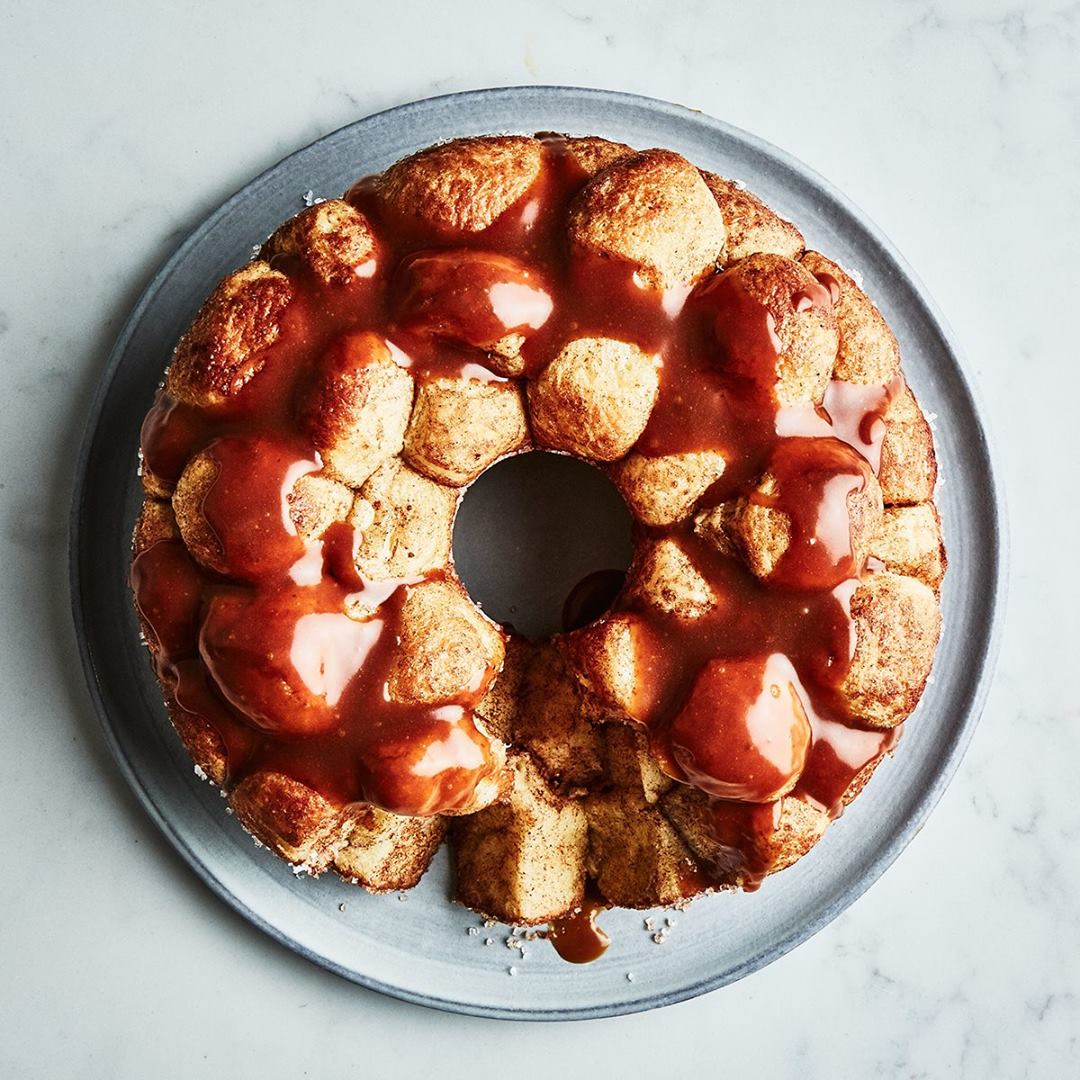
No secrets here—the key to the buttery flavor and signature texture of monkey bread is the brioche dough.
Author:
Cuisine: American
Recipe type: Dessert
Ingredients
  • Dough
  • 1 cup (2 sticks) chilled unsalted butter, cut into 1-inch pieces, plus more for bowl
  • ⅓ cup whole milk
  • 1 ¼-ounce envelope active dry yeast (about 2¼ teaspoons)
  • 3 cups (or more) all-purpose flour
  • 3 tablespoons sugar
  • 1 teaspoon kosher salt
  • 4 large eggs, room temperature
  • Assembly
  • ¾ cup granulated sugar
  • 1 tablespoon ground cinnamon
  • 6 tablespoons unsalted butter, melted, slightly cooled, plus more for pan
  • Sanding or granulated sugar (for pan)
  • Prepared caramel sauce (for serving)
  • Special Equipment
  • A 10-inch tube pan or 10-cup Bundt pan
Instructions
Dough
  1. Beat 1 cup butter in the bowl of a stand mixer fitted with the paddle attachment on medium-low speed until butter is smooth and pliable but still cold, about 1 minute. Scrape into a medium bowl; set aside. Save mixer bowl because you’re going to use it again in a minute (no need to wash).
  2. Gently heat milk in a small saucepan over low until warm to the touch but not steaming hot. It should be 110°–115°. Whisk milk and yeast in a small bowl to dissolve yeast, then let sit until foamy, about 5 minutes.
  3. Meanwhile, whisk flour, sugar, and salt in reserved mixer bowl to combine. Add yeast mixture and eggs, fit bowl back onto mixer, and beat on low speed with dough hook, gradually increasing mixer speed to medium as dry ingredients are incorporated, until dough comes together around hook. Continue to mix on medium speed until dough is smooth, elastic, and no longer sticking to the sides of the bowl, about 5 minutes. Add more flour by the tablespoonful as needed if dough isn’t pulling away from bowl cleanly.
  4. With motor running, gradually add reserved butter about a tablespoonful at a time, waiting until it is absorbed before adding more. This process can take several minutes, so be patient. When you’re done adding the butter, the dough will be extremely smooth, soft, and supple but not sticky. Place dough in a large buttered bowl and cover. Let sit in a warm, draft-free spot until nearly doubled in size, 55–65 minutes.
  5. Uncover dough and punch down several times to deflate. Line a 13x9" baking dish with plastic wrap, leaving generous overhang on all sides. Place dough in pan and press into an even layer, working all the way to the sides of the pan. Fold plastic up and over dough, eliminating air pockets between dough and plastic. Chill dough in freezer until firm to the touch, 20–30 minutes.
Do Ahead: Dough can be made 1 day ahead. After punching down, pat into plastic-lined pan and chill in refrigerator instead of freezer.
Assembly
  1. Mix granulated sugar and cinnamon in a medium bowl to combine. Lightly brush tube pan with butter. Sprinkle with sanding sugar, tapping out excess; set aside. Remove dough from freezer and peel back plastic. Brush entire surface with melted butter and sprinkle generously with some cinnamon sugar. Shake excess sugar back into bowl, then invert baking pan and turn out dough onto work surface sugar side down. Remove plastic; discard. Brush other side of dough with butter and sprinkle with more cinnamon sugar. Use a pizza cutter or a chef’s knife to cut dough into a 12x6 grid.
  2. Working relatively quickly so dough doesn’t become too soft, separate pieces and, working one at a time, roll lightly between your palms into balls, dusting with more cinnamon sugar as needed to prevent sticking. Place in prepared tube pan as you go. Cover pan with plastic wrap and let sit in a warm, draft-free spot until pieces have swelled to nearly doubled in size, 40–50 minutes. Preheat oven to 350° a little before monkey bread is ready to bake.
  3. Remove plastic from pan and bake monkey bread until golden brown, 25–35 minutes. Let cool 10 minutes, then use a small offset spatula to loosen monkey bread from sides of pan. Pull bottom out from pan and use spatula to loosen bread from bottom. Slide bread back into pan; invert onto a plate and remove pan. Place a wire rack over bread and invert right side up onto rack. If using a Bundt pan, just invert directly onto wire rack. Let cool at least 15 minutes before serving.
  4. Pour about ½ cup caramel sauce over monkey bread if desired. Serve with more sauce alongside for dipping.

Watch the recipe video here:

Nothing brings people together quite like a warm, gooey monkey bread.Make it: http://bonap.it/nfrbYll

Posted by Bon Appétit Magazine on Tuesday, January 1, 2019

Main dish

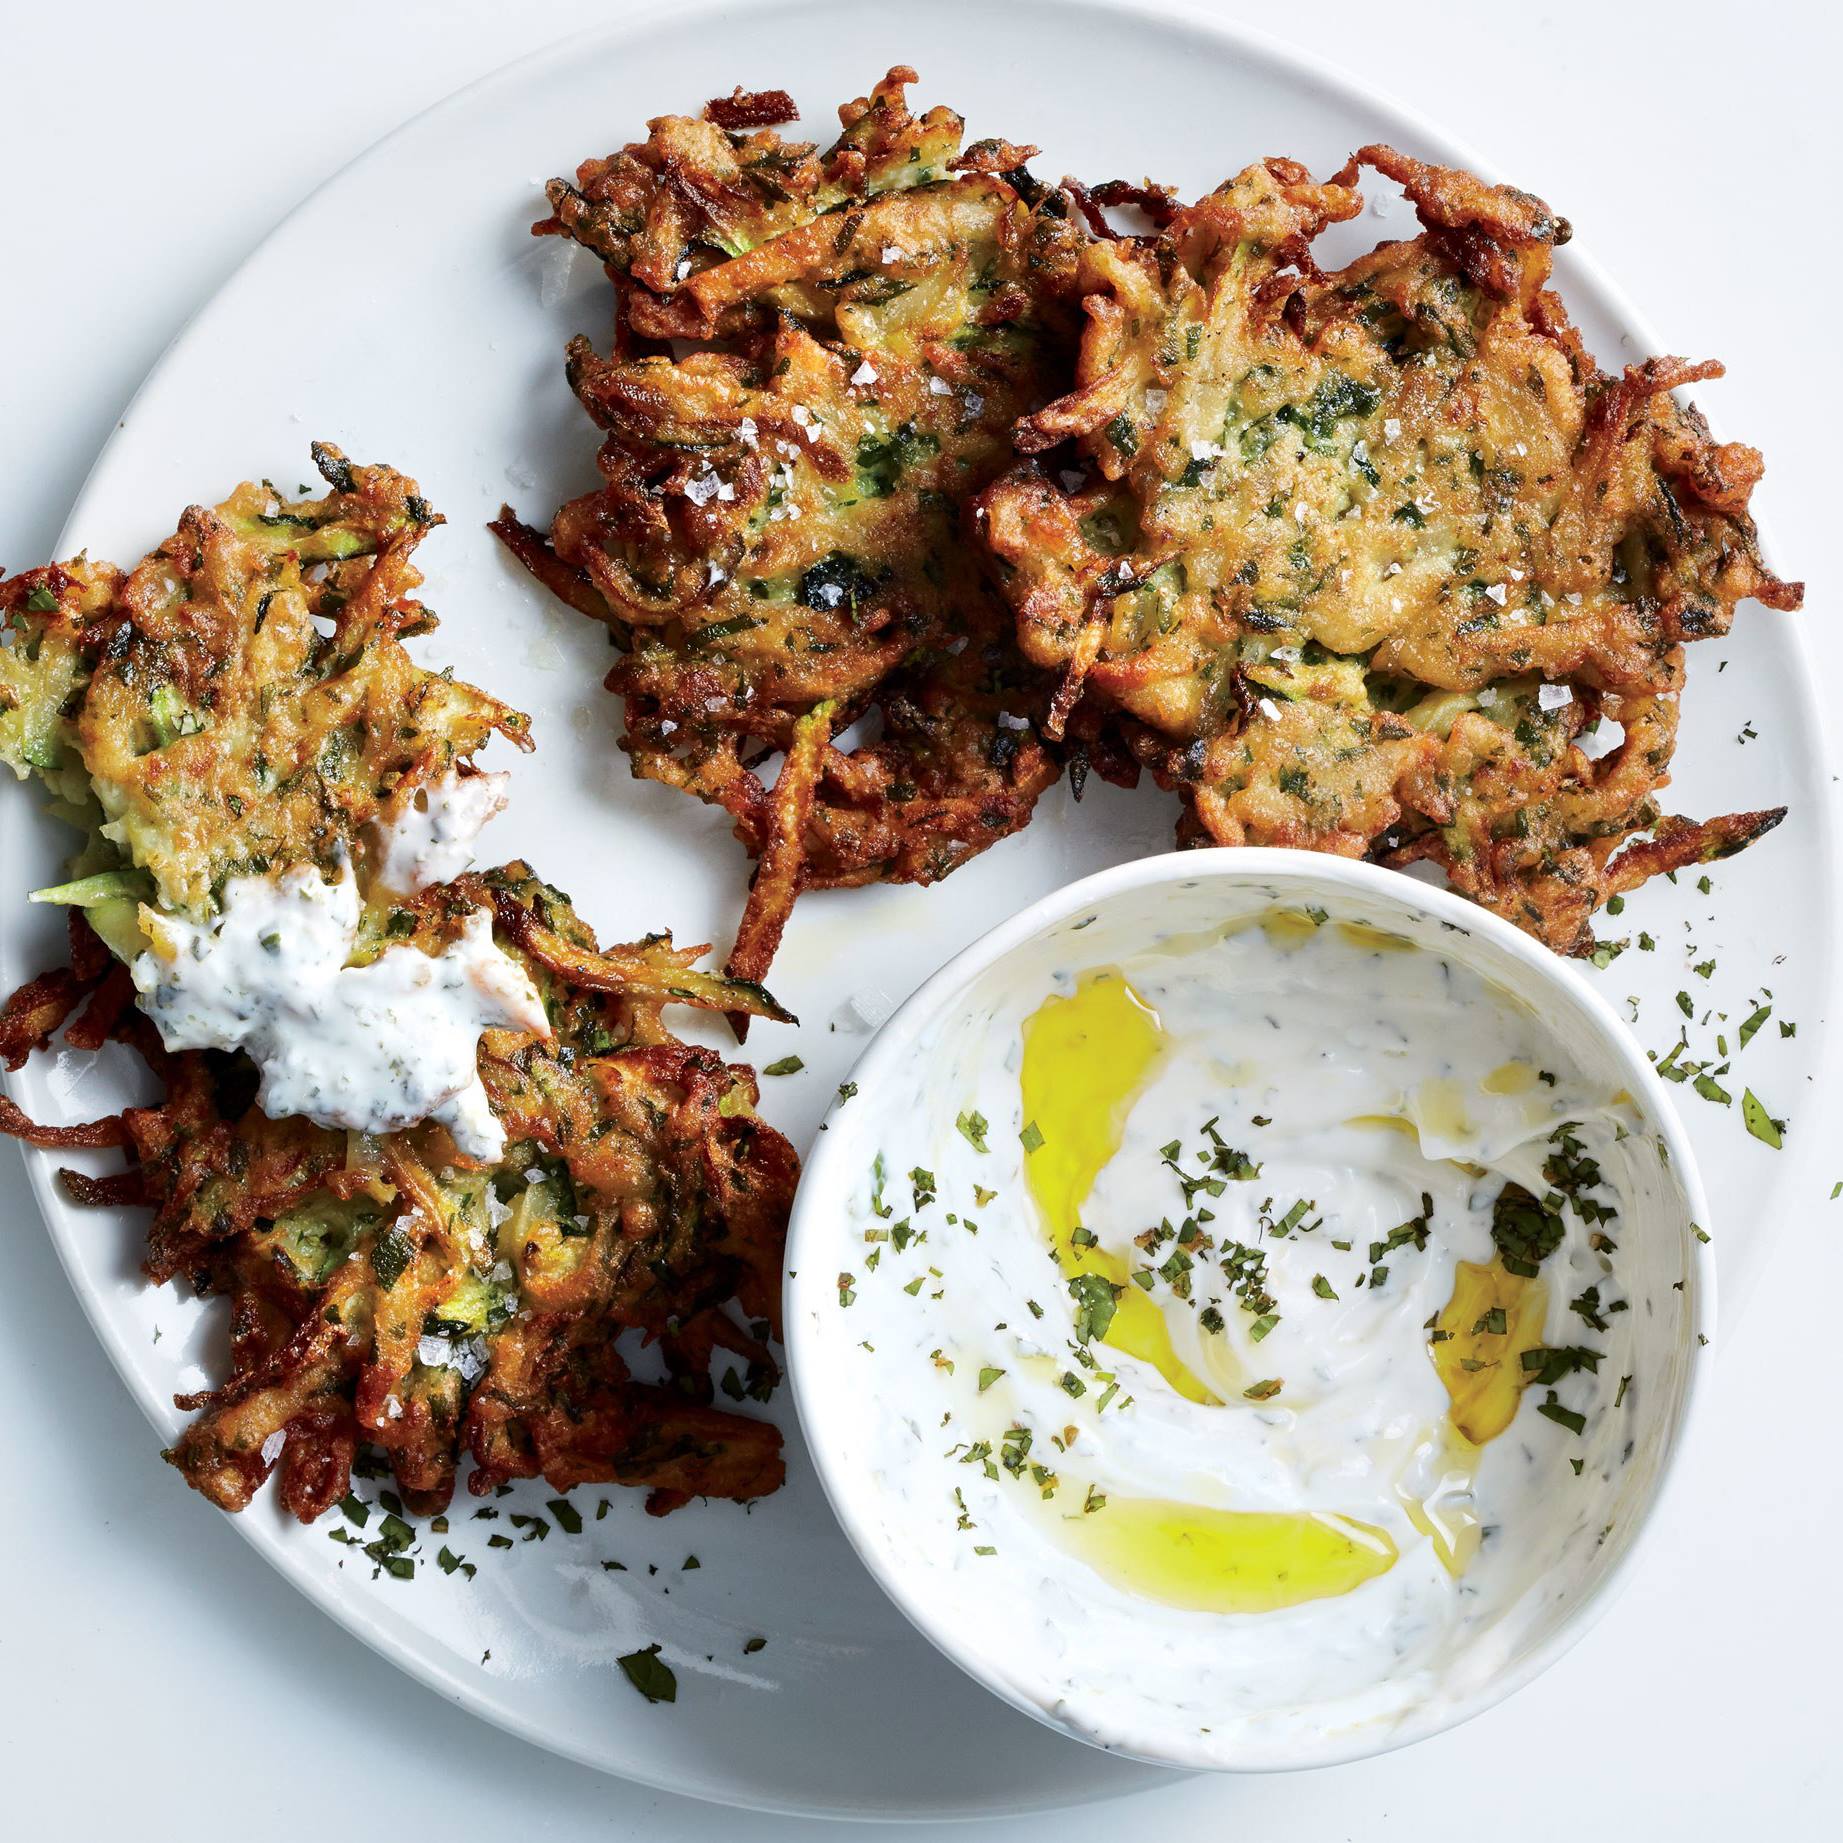
Zucchini-Herb Fritters with Garlic Yogurt

Zucchini-Herb Fritters with Garlic Yogurt
Squeezing the liquid out of the zucchini is the secret to crisp fritters. (The potato helps, too.)
Author:
Cuisine: American
Recipe type: Main dish
Ingredients
Garlic Yogurt
  • ½ cup plain yogurt (not Greek)
  • 2 tablespoons finely chopped fresh mint
  • 2 tablespoons fresh lemon juice
  • 2 tablespoons olive oil
  • 1 teaspoon honey
  • 1 garlic clove, finely grated
  • Kosher salt and freshly ground black pepper
Fritters and Assembly
  • 2 small zucchini, ends trimmed
  • 1 small russet potato, peeled
  • ½ medium onion
  • 2 teaspoons kosher salt, plus more
  • 2 large eggs, beaten to blend
  • 1 garlic clove, finely grated
  • ½ teaspoon ground cumin
  • 3 tablespoons finely chopped fresh parsley, plus more for serving
  • 2 tablespoons finely chopped fresh mint, plus more for serving
  • Freshly ground black pepper
  • ⅓ cup all-purpose flour
  • ½ teaspoon baking powder
  • ½ cup vegetable oil
  • Olive oil (for serving)
Instructions
Garlic Yogurt
  1. Mix yogurt, mint, lemon juice, oil, honey, and garlic in a small bowl; season with salt and pepper. Cover; chill.
Fritters and Assembly
  1. Grate zucchini, potato, and onion on the large holes of a box grater. Transfer to a mesh sieve set over a bowl and toss with 2 tsp. salt. Let vegetables sit until they release their liquid, 30−40 minutes.
  2. Mix eggs, garlic, cumin, 3 Tbsp. parsley, and 2 Tbsp. mint in a medium bowl; season with salt and pepper. Gather up half of zucchini mixture in a kitchen towel; squeeze out excess liquid. Add to bowl with egg mixture and repeat with remaining zucchini mixture. Sprinkle flour and baking powder over; mix gently.
  3. Heat vegetable oil in a large skillet over medium-high. Working in batches, spoon scoops of mixture into skillet, flattening gently with a spatula. Cook until golden brown and crisp, about 3 minutes per side. Transfer to a wire rack; season with salt. Drizzle yogurt sauce with olive oil and top with more herbs; serve alongside warm fritters.

Watch the recipe video here:

There's literally never a bad time to make these.Recipe: http://bonap.it/CeIRRoh

Posted by Bon Appétit Magazine on Tuesday, January 1, 2019

Main dish

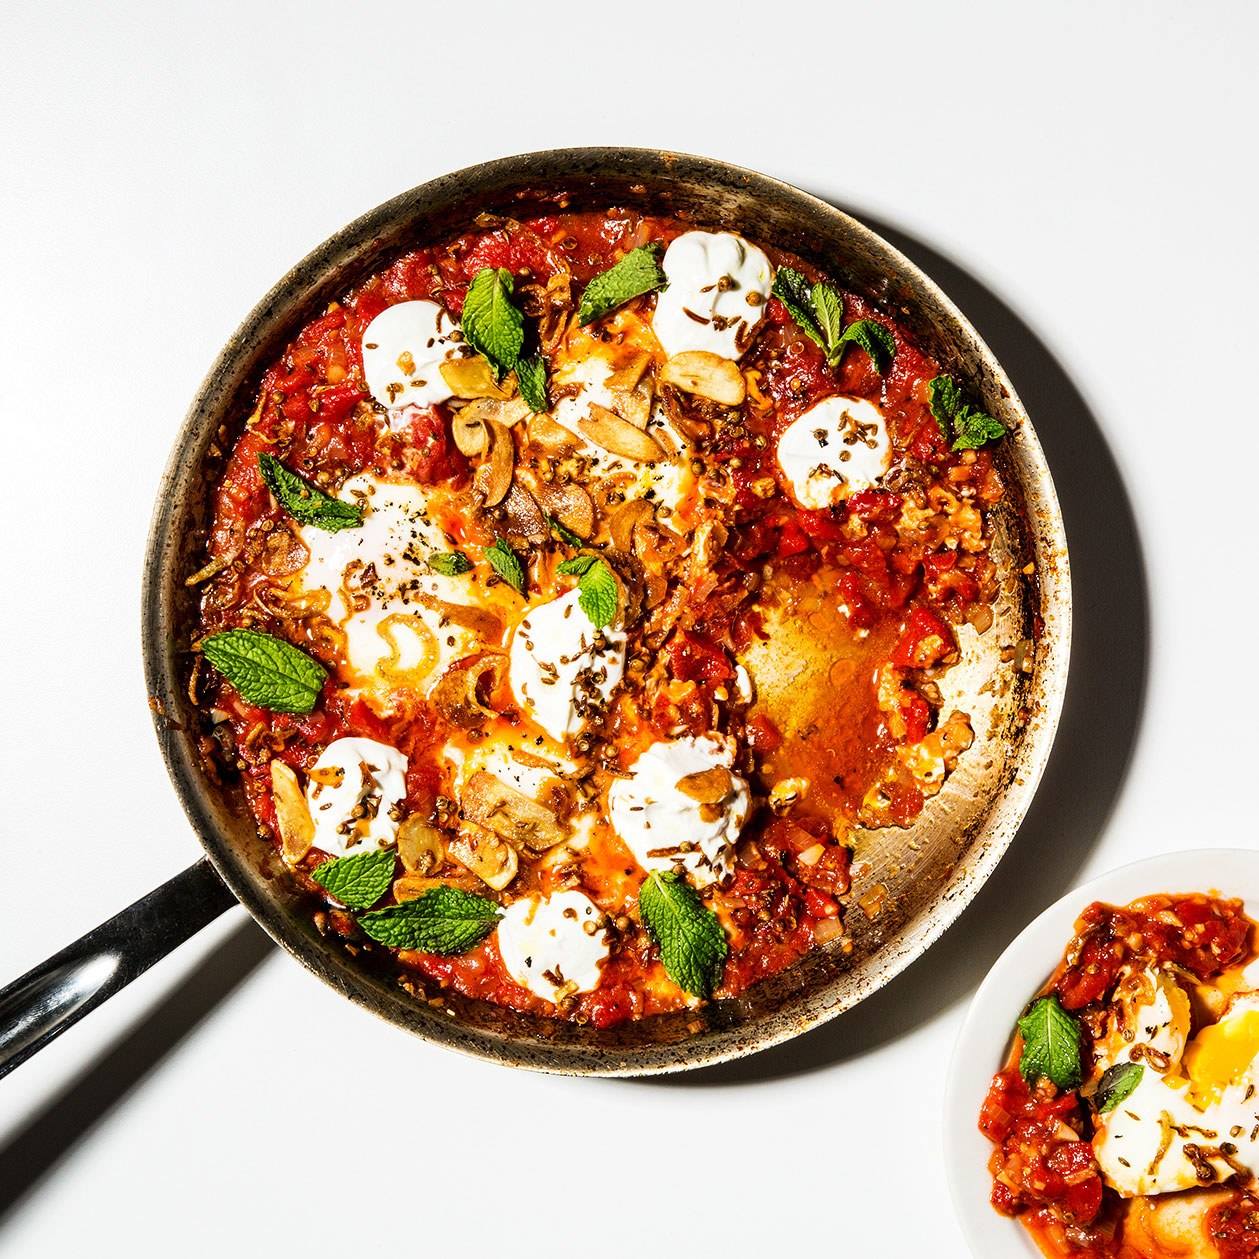
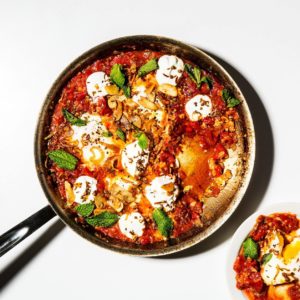
30-Minute Shakshuka with Yogurt

30-Minute Shakshuka with Yogurt
Shakshuka might just be the ultimate weeknight pantry meal. The trick is getting the eggs cooked so that the whites are set and the yolks are still jammy—starting with room temperature eggs is key, so soak them in hot water for a few minutes if they're cold from the fridge.
Author:
Cuisine: American
Recipe type: Main dish
Ingredients
  • 1 teaspoon coriander seeds
  • 1 teaspoon cumin seeds
  • 6 garlic cloves, divided
  • 2 medium shallots, divided
  • 1 12-ounce jar roasted red peppers
  • ¼ cup extra-virgin olive oil, plus more for drizzling
  • Kosher salt
  • Freshly ground black pepper
  • 1 28-ounce can whole peeled tomatoes
  • 4 large eggs
  • ½ cup plain Greek yogurt
  • Mint leaves and crusty bread (for serving)
Instructions
  1. Place 1 tsp. coriander seeds and 1 tsp. cumin seeds in little piles on a cutting board. Using the bottom of a medium skillet, crush seeds, pressing down firmly with even pressure. You’ll have to do this several times, repositioning skillet to break apart any whole seeds that remain. Transfer seeds to a small heatproof bowl.
  2. Slice 2 garlic cloves as thinly and evenly as you can; add to bowl with seeds. Finely chop remaining 4 garlic cloves.
  3. Cut half of 1 shallot into thin rounds and add to same bowl with seeds and garlic. Chop remaining shallots.
  4. Open jar of red peppers and pour off any liquid. Remove peppers and coarsely chop.
  5. Combine ¼ cup oil and seed/garlic/shallot mixture in skillet you used for crushing seeds. Heat over medium and cook, stirring constantly with a wooden spoon, until seeds are sizzling and fragrant and garlic and shallots are crisp and golden, about 3 minutes.
  6. Place a strainer over same heatproof bowl and pour in contents of skillet, making sure to scrape in seeds and other solids. Do this quickly before garlic or shallots start to burn. Reserve oil.
  7. Spread out seed mixture across paper towels to cool. Season with salt and pepper.
  8. Return strained oil to skillet and heat over medium. Add remaining chopped garlic and shallot and cook, stirring often, until shallot is translucent and starting to turn brown around the edges, about 5 minutes. Season with salt and lots of pepper.
  9. Add chopped peppers to skillet and stir to incorporate. Using your hands, lift whole peeled tomatoes out of can, leaving behind tomato liquid, and crush up with your hands as you add to skillet (beware squirting tomato juices). Discard leftover liquid. Season with more salt and pepper.
  10. Cook shakshuka, stirring often, until thickened and no longer runs together when a spoon is dragged through, 10–12 minutes.
  11. Reduce heat to low. Using the back of wooden spoon, create four 2"-wide divots in tomato sauce. Working one at a time, carefully crack an egg into each divot.
  12. Cover skillet and cook, simmering very gently and reducing heat if necessary, until whites of eggs are set while yolks are still jammy, 7–10 minutes. Uncover skillet and remove from heat. Season tops of eggs with salt and pepper.
  13. Top shakshuka with dollops of yogurt, sprinkle with seed mixture, then drizzle with more olive oil. Finish by scattering mint leaves over top.
  14. Serve shakshuka with crusty bread alongside.

Watch the recipe video here:

Shakshuka might just be the ultimate weeknight pantry meal. (via Basically)Recipe: http://bonap.it/pn9Us9J

Posted by Bon Appétit Magazine on Tuesday, January 1, 2019

Main dish

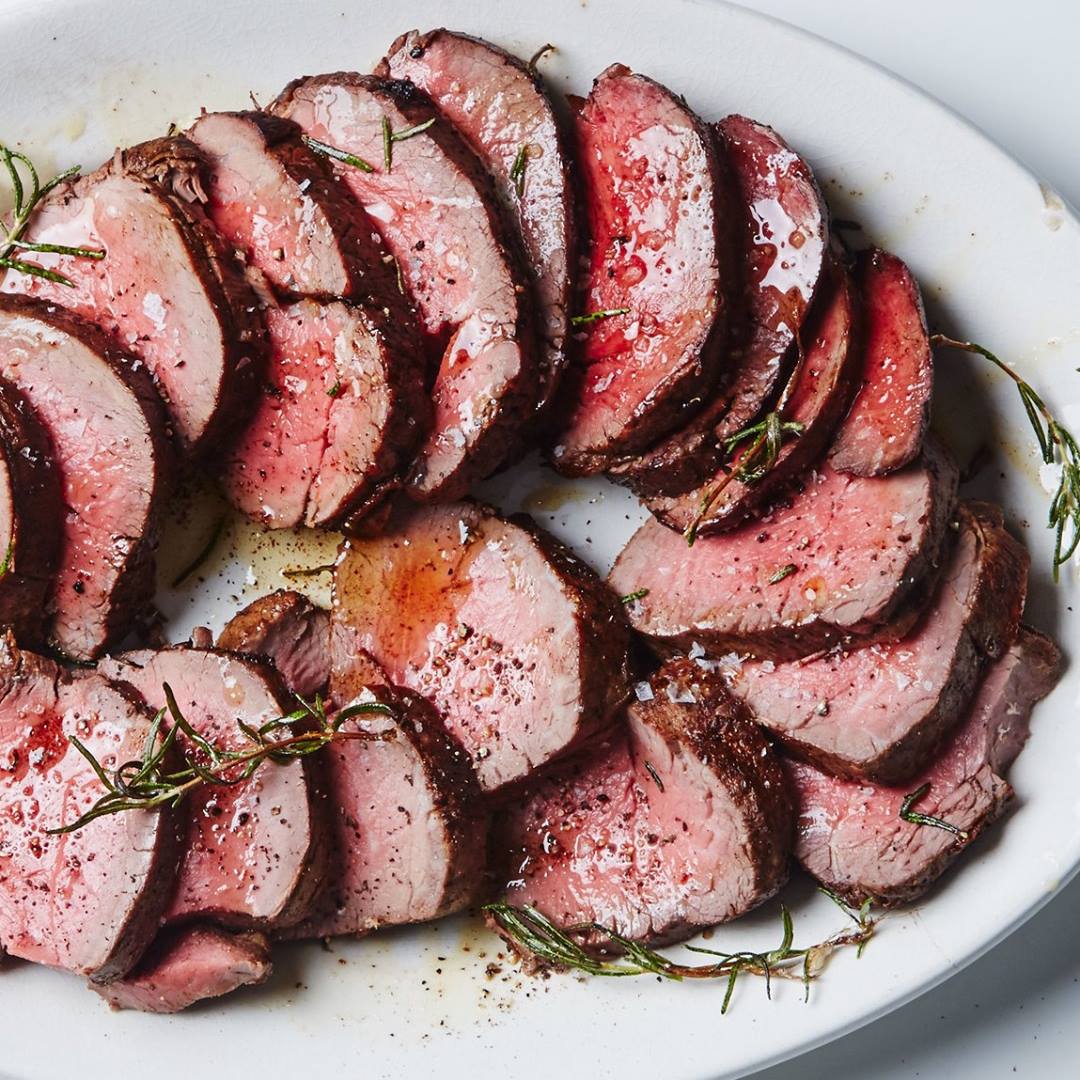
Roast Beef Tenderloin with Garlic and Rosemary

Roast Beef Tenderloin with Garlic and Rosemary
This recipe method combines high-heat searing for a crusty, well-seasoned exterior, with low-temperature roasting for a perfectly even and very tender interior. Truly the best of both worlds.
Author:
Cuisine: American
Recipe type: Main dish
Ingredients
  • 2 garlic cloves
  • 2 tablespoons rosemary leaves, plus sprigs
  • 1 4-pound trimmed center-cut beef tenderloin
  • Kosher salt, freshly ground pepper
  • 1 tablespoon vegetable oil
  • 1 cup plain whole-milk Greek yogurt
  • ⅓ cup sour cream
  • 2 tablespoons prepared horseradish
  • ½ teaspoon finely grated lemon zest
  • 3 tablespoons unsalted butter
  • Flaky sea salt (for serving)
Instructions
  1. Thinly slice garlic, then mash into a paste using the side of a chef’s knife. Scatter rosemary leaves over garlic; finely chop and mix into garlic. Slice tenderloin in half crosswise to create 2 smaller roasts. Season generously with salt and pepper; rub with garlic-rosemary paste. If your butcher didn’t already tie the roast for you, this is the time to do it: Place tenderloin onto lengths of precut kitchen twine spaced about 1" apart and tie closed snugly. Place on a rimmed baking sheet and chill uncovered 12 hours.
  2. Let tenderloin sit at room temperature at least 1 hour and up to 2 hours before cooking.
  3. Preheat oven to 250°. Heat oil in a large ovenproof skillet over medium-high. Add tenderloin and cook, turning occasionally, until well browned all over, 8–10 minutes. Transfer skillet to oven and roast tenderloin, turning every 10 minutes or so, until an instant-read thermometer inserted into the thickest part registers 120°, 25–30 minutes. Transfer tenderloin to a cutting board and let rest 15 minutes before removing kitchen twine and slicing. Reserve skillet.
  4. Meanwhile, mix yogurt, sour cream, horseradish, and lemon zest in a small bowl to combine; season with salt and pepper.
  5. Cook butter and rosemary sprigs in reserved skillet over medium heat, scraping up browned bi ts on the bottom, until butter is melted and very fragrant, about 4 minutes. Transfer sliced tenderloin to a platter; drizzle with rosemary-infused butter and sprinkle with sea salt. Serve with horseradish yogurt.
Do Ahead: Tenderloin can be seasoned and chilled 2 days ahead; wrap in plastic wrap after 12 hours. Horseradish yogurt can be made 1 day ahead; cover and chill.

Watch the recipe video here:

You know what your holiday table needs? This crowd-pleasing tenderloin.GET THE RECIPE: http://bonap.it/psDPxve

Posted by Bon Appétit Magazine on Monday, December 24, 2018

Main dish

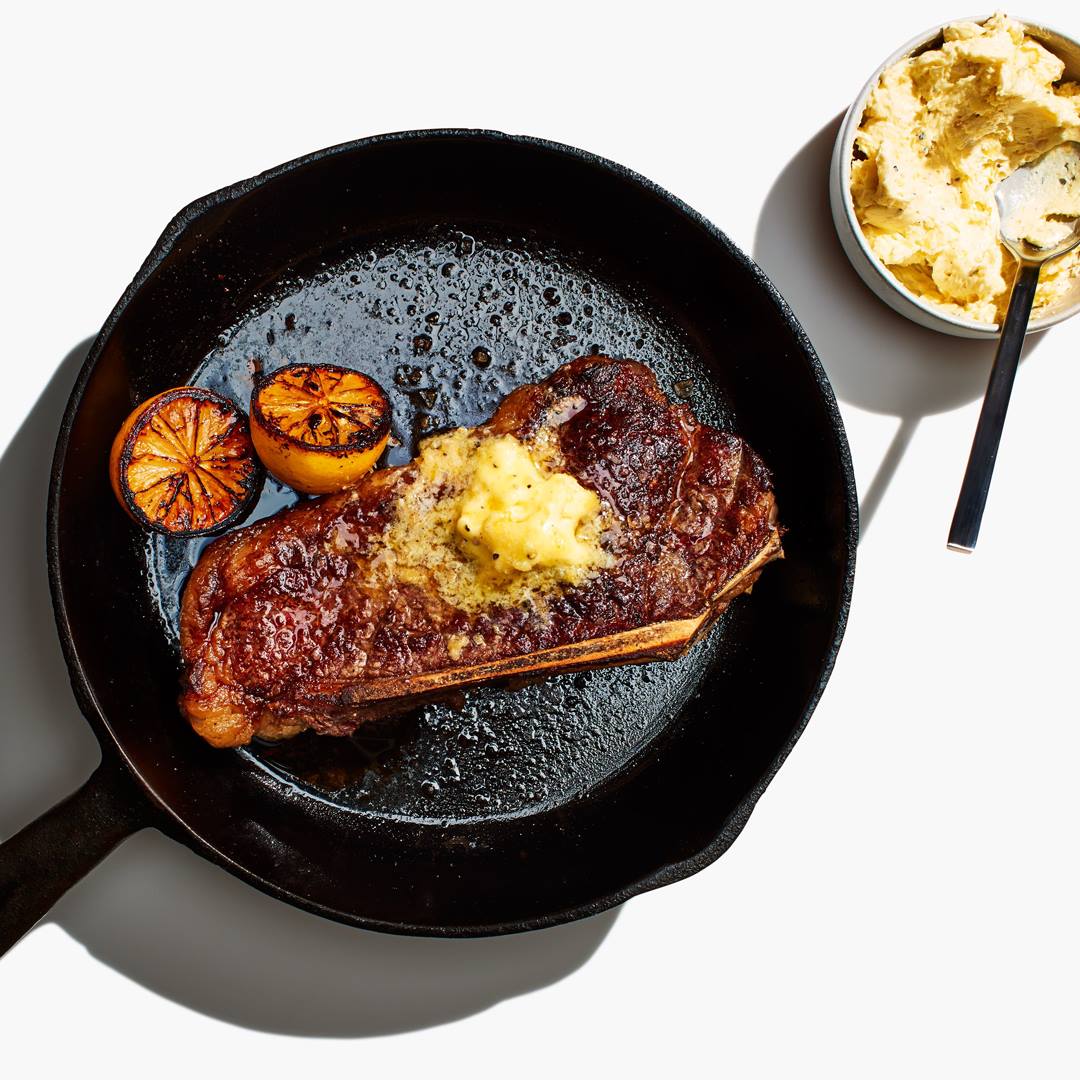
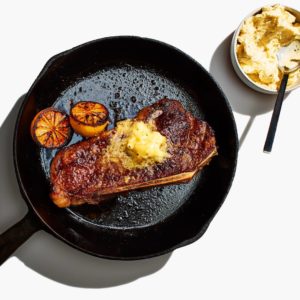
Steak with Lemon Butter and Jammy Lemon Halves

Steak with Lemon Butter and Jammy Lemon Halves
Often only the rind of preserved lemons gets used, but we’ve learned that the flesh is just as good—as long as you remove the seeds.
Author:
Cuisine: American
Recipe type: Main dish
Ingredients
Lemon Butter
  • ½ preserved lemon, seeds removed, finely chopped
  • ½ cup (1 stick) unsalted butter, room temperature
  • 1 teaspoon finely grated lemon zest
  • 1 teaspoon kosher salt
  • ½ teaspoon freshly ground black pepper
  • 2 tablespoons fresh lemon juice
Steak and Assembly
  • 2 1¼–1½-inch-thick bone-in New York strip steaks (about 3 pounds total)
  • 1 tablespoon vegetable oil
  • Kosher salt
  • 1 lemon, halved
Instructions
Lemon Butter
  1. Process preserved lemon, butter, lemon zest, salt, and pepper in a food processor, scraping down sides as needed, until smooth. (Alternatively, you can whisk together in a large bowl.) With motor running, add lemon juice in a steady stream. Process until completely incorporated.
  2. If not using right away, transfer lemon butter to a sheet of parchment paper and roll into a cylinder. Or scoop it into a small bowl and cover.
Do Ahead:
  1. Lemon butter can be made 3 days ahead. Chill.
Steak and Assembly
  1. Let steaks sit at room temperature about 1 hour before cooking.
  2. Preheat oven to 350°. Heat oil in a large ovenproof skillet over medium-high. Season steaks with salt. Add steaks to skillet and arrange lemon halves, cut side down, around. Cook, turning steaks every 2 minutes or so, until steaks are well browned and cut sides of lemon are very dark, 6–8 minutes. Transfer lemon halves to a plate.
  3. Place skillet in oven and roast steaks until an instant-read thermometer inserted into the thickest part registers 120°, about 4 minutes. Transfer steaks to a wire rack set inside a rimmed baking sheet and top with some lemon butter. Let steaks rest at least 10 minutes before slicing.
  4. Top steaks with more butter and serve with cooked lemon halves for squeezing over.

Watch the recipe video here:

Your week just got infinitely better due to this Steak with Lemon Butter.RECIPE: http://bonap.it/3swwSno

Posted by Bon Appétit Magazine on Thursday, December 20, 2018

Main dish

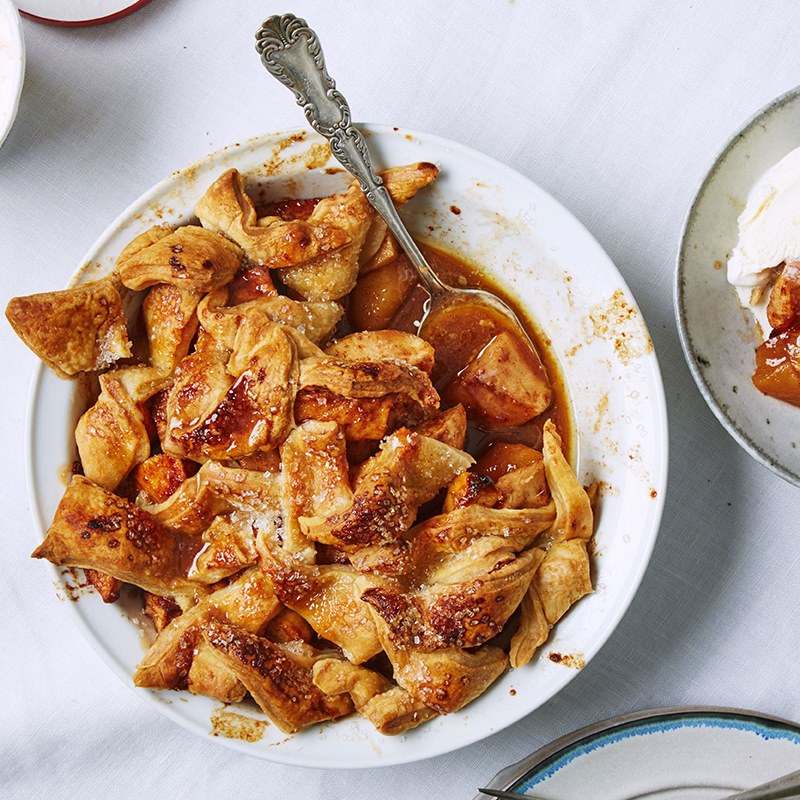
Apple Pandowdy

Apple Pandowdy
Funny name, serious—and seriously easy—dessert. This apple pandowdy recipe is so delicious that we're just going to have to say...cobbler: You’ve been warned.
Author:
Cuisine: American
Recipe type: Main dish
Ingredients
  • 6 tablespoons unsalted butter
  • 4 pounds Pink Lady and/or Granny Smith apples
  • ⅔ cup (packed) dark brown sugar
  • 3 tablespoons all-purpose flour, plus more for surface
  • 1 tablespoon vanilla extract
  • 2 teaspoons ground cinnamon
  • ½ teaspoon kosher salt
  • 1 lemon
  • 1 ½-inch piece ginger
  • 1 package frozen puff pastry (preferably Dufour), thawed by covering pastry sheet with plastic and leaving at room temperature 30 minutes
  • Granulated sugar (for sprinkling)
  • 2 pints vanilla ice cream
Instructions
  1. Preheat oven to 425°. Cook 6 Tbsp. butter in a small saucepan over medium heat, swirling often, until bubbling and golden, about 5 minutes; set aside.
  2. Prepare your apples: Using a vegetable peeler, remove peel from apples. Stand them upright and slice down along core, working all the way around to remove big lobes of flesh. Cut lobes lengthwise into 1" pieces (irregular shapes are fine). Discard peel and cores. Transfer apples to a large bowl.
  3. Add ⅔ cup dark brown sugar, 3 Tbsp. flour, 1 Tbsp. vanilla, 2 tsp. cinnamon, and ½ tsp. salt to bowl with apples.
  4. Using a microplane or fine rasp grater, grate zest of ½ lemon over apples. Cut lemon in half and squeeze juice from zested half over apples, catching any seeds. Using peeler, remove peel from ginger, then grate over apples.
  5. Toss apple mixture until combined, then transfer to a shallow 3-qt. baking dish. Drizzle all but 2 Tbsp. brown butter over apples.
  6. Dust cutting board with a light coating of flour and unfold puff pastry on floured surface. Dust top with flour. Cut puff pastry into irregular 1" pieces (any shape is fine).
  7. Arrange pieces of puff pastry over apples, overlapping but spreading to cover almost completely. Brush pastry with remaining brown butter. Sprinkle with granulated sugar.
  8. Bake pandowdy until pastry is puffed and golden around edges, 25–30 minutes. Reduce oven temperature to 350° and continue to bake until juices are thick and bubbling and pastry is brown all over, 30–35 minutes longer.
  9. Using a spoon, press pastry down into warm juices (but don’t submerge); let cool slightly.
  10. Serve pandowdy warm with ice cream.
Do Ahead: Pandowdy can be made 1 day ahead. Let cool. Cover loosely with foil and store at room temperature. Reheat uncovered in a 200° oven 20 minutes before serving.

Watch the recipe video here:

Funny name, serious—and seriously easy—dessert. (via Basically)Make it: http://bonap.it/pQ7uKP4

Posted by Bon Appétit Magazine on Tuesday, December 18, 2018