Showing 879 Result(s)
Dessert

HOMEMADE CHERRY PIE FILLING
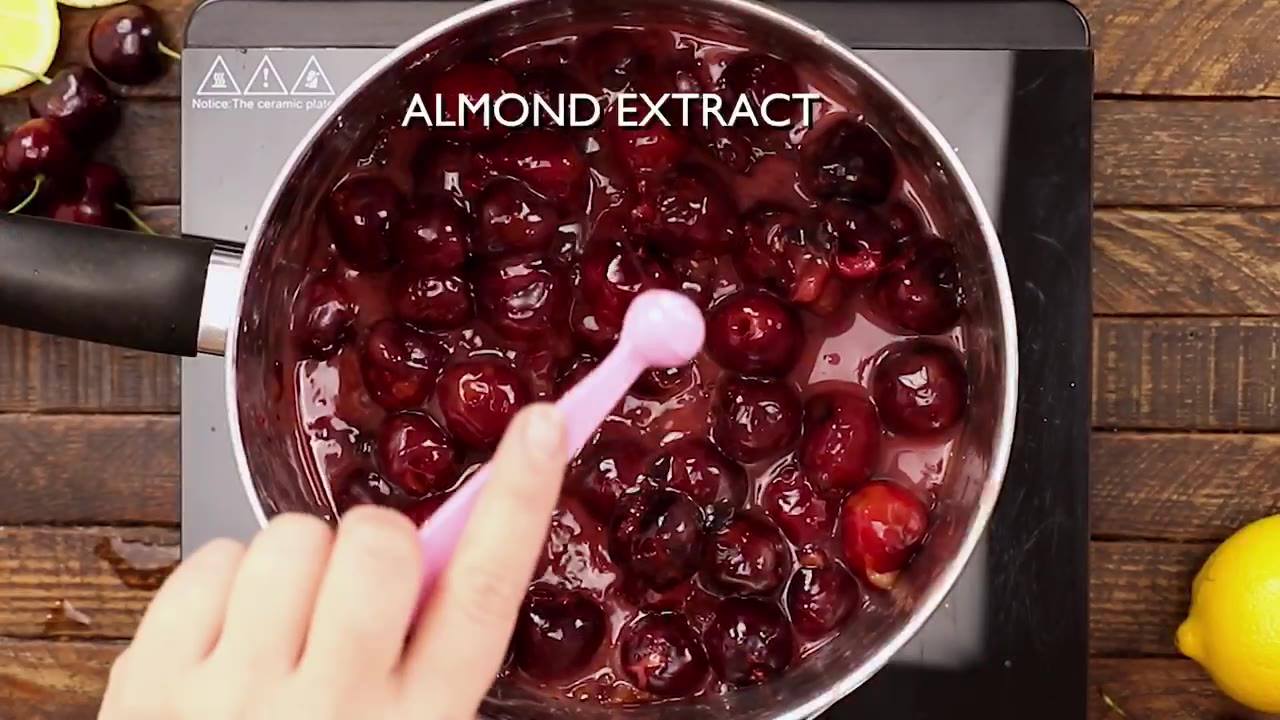
HOMEMADE CHERRY PIE FILLING
Homemade Cherry Pie Filling comes together in just a few minutes. Try a spoonful with your morning yogurt or spooned over a stack of fresh, crispy waffles for a delicious treat!
Author:
Cuisine: American
Recipe type: Dessert
Ingredients
  • 5 to 6 cups fresh pitted cherries, about 2½ to 3 pounds
  • ½ cup water
  • 2 tablespoons freshly squeezed lemon juice
  • ⅔ cup granulated sugar
  • 4 tablespoons cornstarch
  • ¼ teaspoon almond extract, optional
Instructions
  1. In a saucepan over medium heat, combine cherries, water, lemon juice, sugar and cornstarch.
  2. Bring to a boil; reduce heat to low and cook, stirring frequently, for about 10 minutes.
  3. If using, stir in almond extract. Cool slightly before using as a topping.
NOTES
  1. If using sour cherries, you will need to adjust the amount of sugar. I’d recommend starting about ¾ cup and working your way up if more sweetness is needed.
  2. Refrigerate leftover fresh cherry pie filling in a sealed container for up to 3 days.
  3. This recipe freezes beautifully.

Watch the recipe video here:

Homemade Cherry Pie Filling comes together in just a few minutes. Try a spoonful with your morning yogurt or spooned…

Posted by My Baking Addiction on Monday, March 18, 2019
Dessert

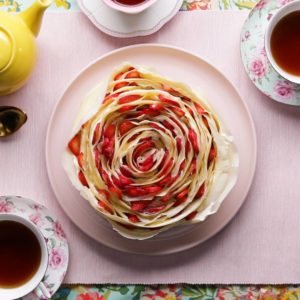
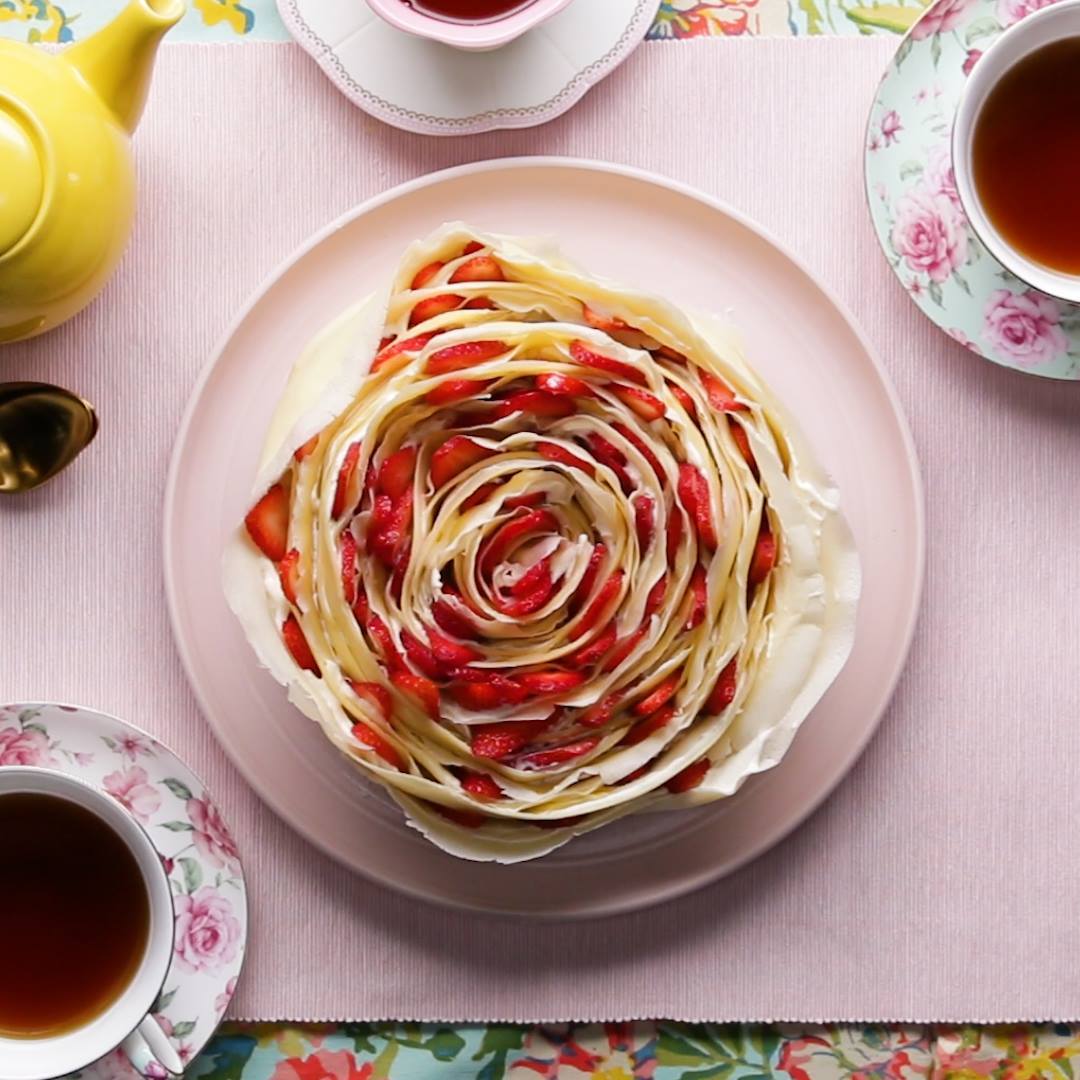
Strawberry Rose Crepe Cake

Strawberry Rose Crepe Cake
Author:
Cuisine: American
Recipe type: Dessert
Ingredients
  • 2 cups all-purpose flour (250 g)
  • ¼ cup unsalted butter, ½ stick, melted (60 g)
  • 3 tablespoons granulated sugar
  • 3 large eggs
  • 3 cups whole milk (720 mL)
FILLING
  • 8 oz cream cheese (225 g)
  • 3 tablespoons sugar
  • ⅓ cup heavy cream (80 mL)
  • 1 cup strawberry, thinly sliced (150 g)
Instructions
  1. In a large bowl, combine the flour, butter, sugar, and eggs.
  2. Add ½ cup (120 ml) of milk at a time, stirring vigorously, making sure that each addition is completely incorporated into the batter and that the batter is smooth before adding more milk.
  3. Strain the batter through a fine mesh sieve. The batter should be very liquidy and have no lumps. Rest in the fridge for at least 30 minutes or up to overnight.
  4. Make the filling: In a medium bowl, combine the cream cheese and sugar. Using a hand mixer, beat until combined. Add the heavy cream and mix until smooth. Set aside.
  5. In a 9.5 inch (24-cm) nonstick pan over medium heat, pour ⅓ cup (40 g) of the batter in the center, and swirl the batter around to the edges of the pan.
  6. Cook the crepe until bubbles rise to the surface and the bottom is golden brown, about 3 minutes. Flip and cook on the other side until the edges start to crisp slightly, about 1 minute more.
  7. Transfer the crepe to a wire rack to cool. Repeat with the remaining batter.
  8. Stack the crepes on top of each other, then cut in half. Stack the halves on top of each other, and cut the stack into two even strips.
  9. Place two crepe strips on a flat surface and spread the cream cheese mixture on both. Arrange sliced strawberries on one of the strips.
  10. Roll up the first strip with the strawberries, then roll the second strip around it. Repeat with the rest of the strips of crepes, alternating between strips with strawberries and strips without. Once it becomes too large to roll, lay the cake on a serving platter.
  11. Spread the remaining crepe strips with cream cheese and gently press them around the outside of the cake. Refrigerate for 15-30 minutes to set.
  12. Enjoy!

Watch the recipe video here:

This strawberry rose crepe cake is so beautiful ?FULL RECIPE: https://tasty.co/recipe/strawberry-rose-crepe-cake

Posted by Proper Tasty on Monday, March 18, 2019
Dessert

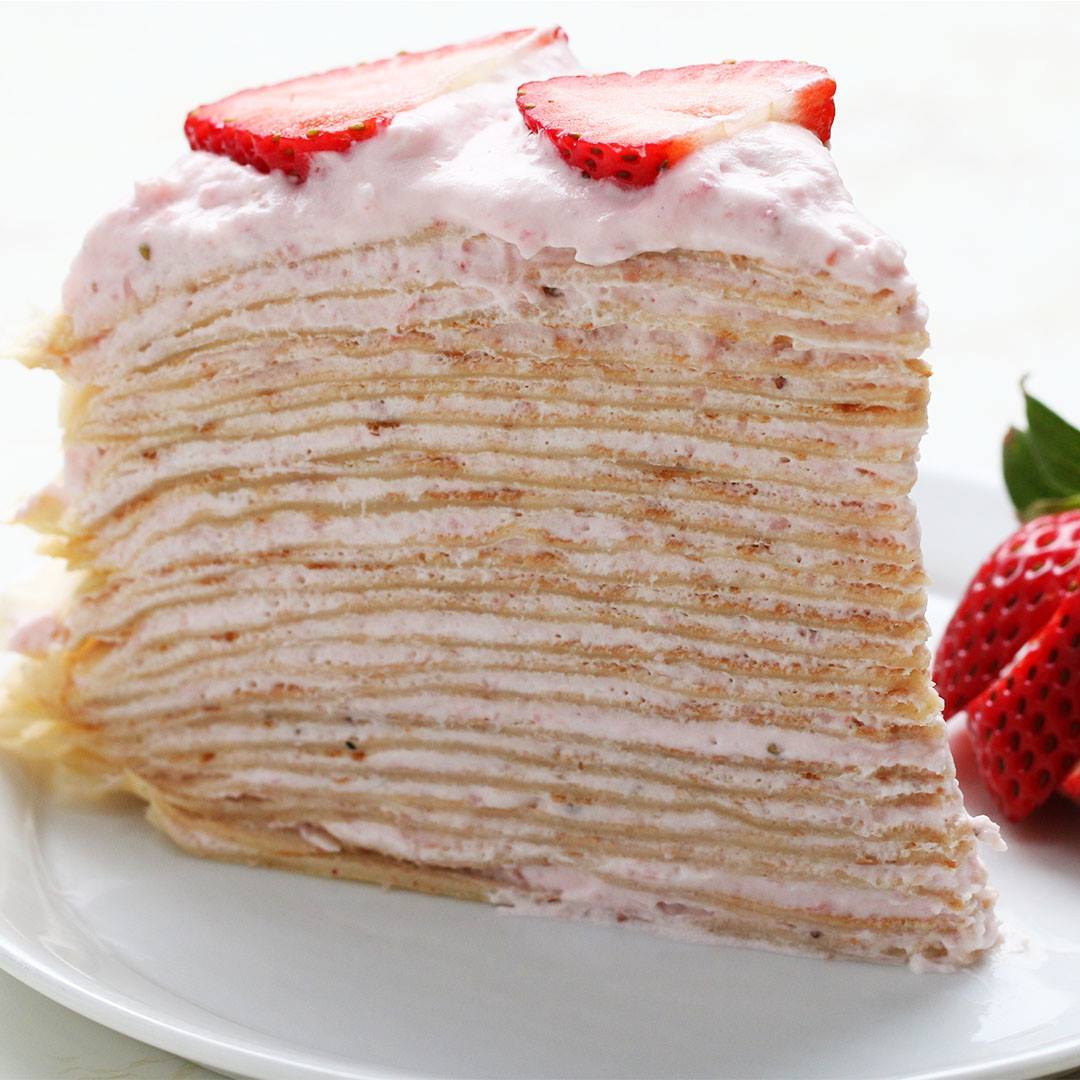
Strawberry Banana Crepe Cake

Strawberry Banana Crepe Cake
Author:
Cuisine: American
Recipe type: Dessert
Ingredients
  • 4 large eggs
  • 3 ½ cups milk (840 mL)
  • ⅓ cup oil (80 mL)
  • 2 teaspoons vanilla
  • 3 ripe bananas, very ripe
  • ½ cup sugar (100 g)
  • ½ teaspoon salt
  • 2 cups flour (250 g)
  • ½ teaspoon unsalted butter
  • 10 strawberries, stemmed, plus more, sliced for garnish
  • 1 ¼ cups heavy cream (300 mL)
  • 2 tablespoons powdered sugar
Instructions
  1. In a food processor or blender, add the eggs, milk, oil, vanilla, bananas, sugar, salt, and flour. Blend until the batter is smooth without clumps.
  2. In a medium nonstick skillet over medium heat, melt the butter and swirl so it coats the entire pan. Then pour in ¼ cup of crepe batter and tilt the pan to cover the entire bottom. Cook until the bottom surface of the crepe begins to brown and the edges are lacey, for about 3 minutes, and then flip. Repeat with the remaining crepe batter.
  3. In a food processor or blender, add the strawberries and puree until smooth. Pour the strawberry puree through a sieve into a medium bowl to remove any seeds and clumps. Chill for 15 minutes until the puree is cold.
  4. In a large bowl, using a whisk or hand mixer, beat the cream until thickened. Add the powdered sugar, and beat until soft peaks form. Add half of the strawberry puree, and blend with the hand mixer. Add the rest of the strawberry puree and gently fold it into the whipped cream with a spatula.
  5. Dollop a bit of strawberry cream on a plate, then place the first crepe and frost with about ¼ cup of filling. Stack the remaining crepes on top of each other, with strawberry whipped cream between each layer. Spread the rest of the strawberry whipped cream on top of the last crepe.
  6. Arrange slices of strawberry on top for garnish.
  7. Slice and serve.
  8. Enjoy!

Watch the recipe video here:

The layers of this strawberry banana crepe cake are so beautiful ??FULL RECIPE: https://tasty.co/recipe/strawberry-banana-crepe-cake

Posted by Proper Tasty on Monday, March 18, 2019
Dessert

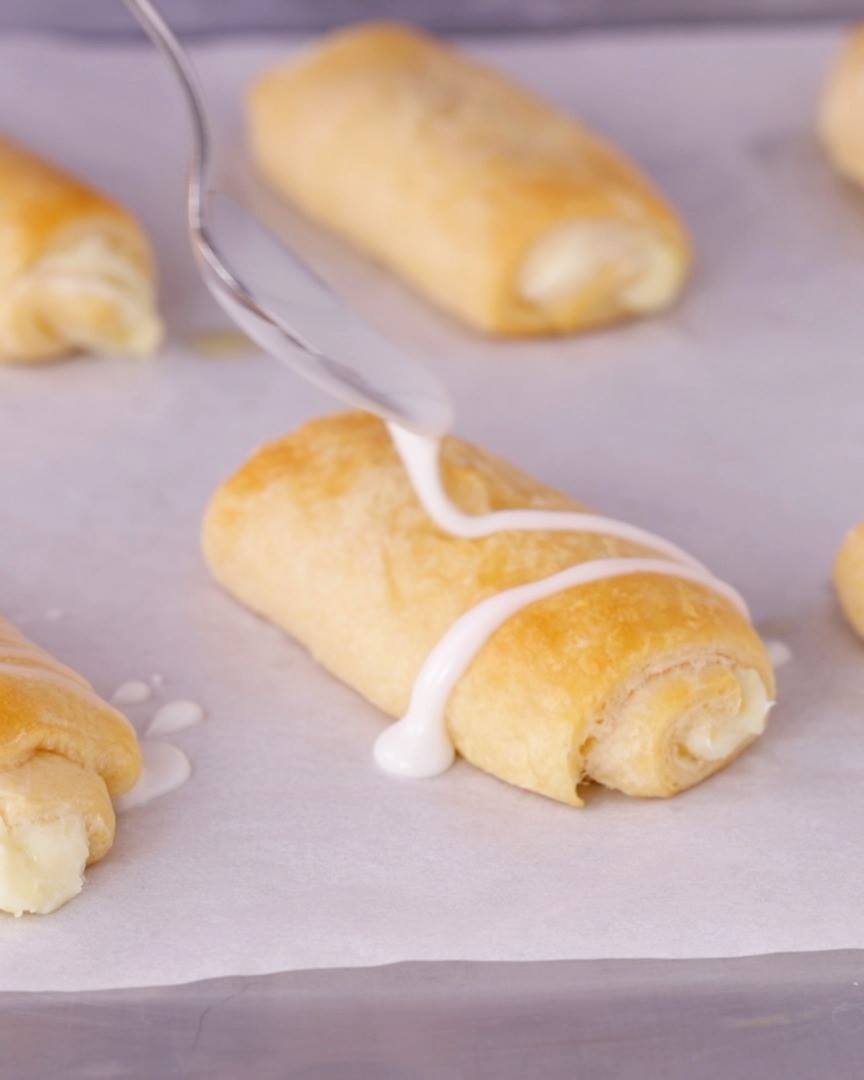
Lemon Cheesecake Crescent Roll-Ups

Lemon Cheesecake Crescent Roll-Ups
These crescent roll-ups are bursting with that tart flavor lemon lovers love! The creamy cheesecake filling is a delicious addition for that perfect balance between sweet and citrus-y.
Author:
Cuisine: American
Recipe type: Dessert
Ingredients
Crescent Roll-Ups
  • 1 package (8 oz) cream cheese, softened
  • ¼ cup granulated sugar
  • 4 teaspoons grated lemon peel (from 1 large lemon)
  • 1 can (8 oz) Pillsbury™ refrigerated crescent dough sheet
  • 1 tablespoon butter, melted
Glaze and Topping
  • ½ cup powdered sugar
  • 2 to 3 teaspoons lemon juice
  • Additional grated lemon peel, if desired
Instructions
  1. Heat oven to 375°F. Line cookie sheet with cooking parchment paper.
  2. In medium bowl, mix cream cheese, granulated sugar and 4 teaspoons lemon peel with electric mixer on medium speed until well mixed and no lumps remain.
  3. Unroll dough on work surface into 12x7-inch rectangle, and cut into 8 rectangles (3x3½ inches each). Spread 2 tablespoons of the cream cheese mixture over each dough rectangle to within ¼ inch of the short ends.
  4. Roll up each rectangle, starting with shortest side, and pinch seam to seal. Place on cookie sheet, seam side down; brush with melted butter. Bake 11 to 14 minutes or until golden brown. Cool 10 minutes on cookie sheet.
  5. In small bowl, mix powdered sugar and 2 teaspoons of the lemon juice. If necessary, add additional lemon juice, ½ teaspoon at a time, until thin enough to drizzle. Drizzle over warm crescent roll-ups, and garnish with additional grated lemon peel. Serve warm.

Watch the recipe video here:

Lemon lovers, this one's for you!Lemon Cheesecake Crescent Roll-Ups recipe:…

Posted by Pillsbury on Saturday, March 16, 2019

Dessert

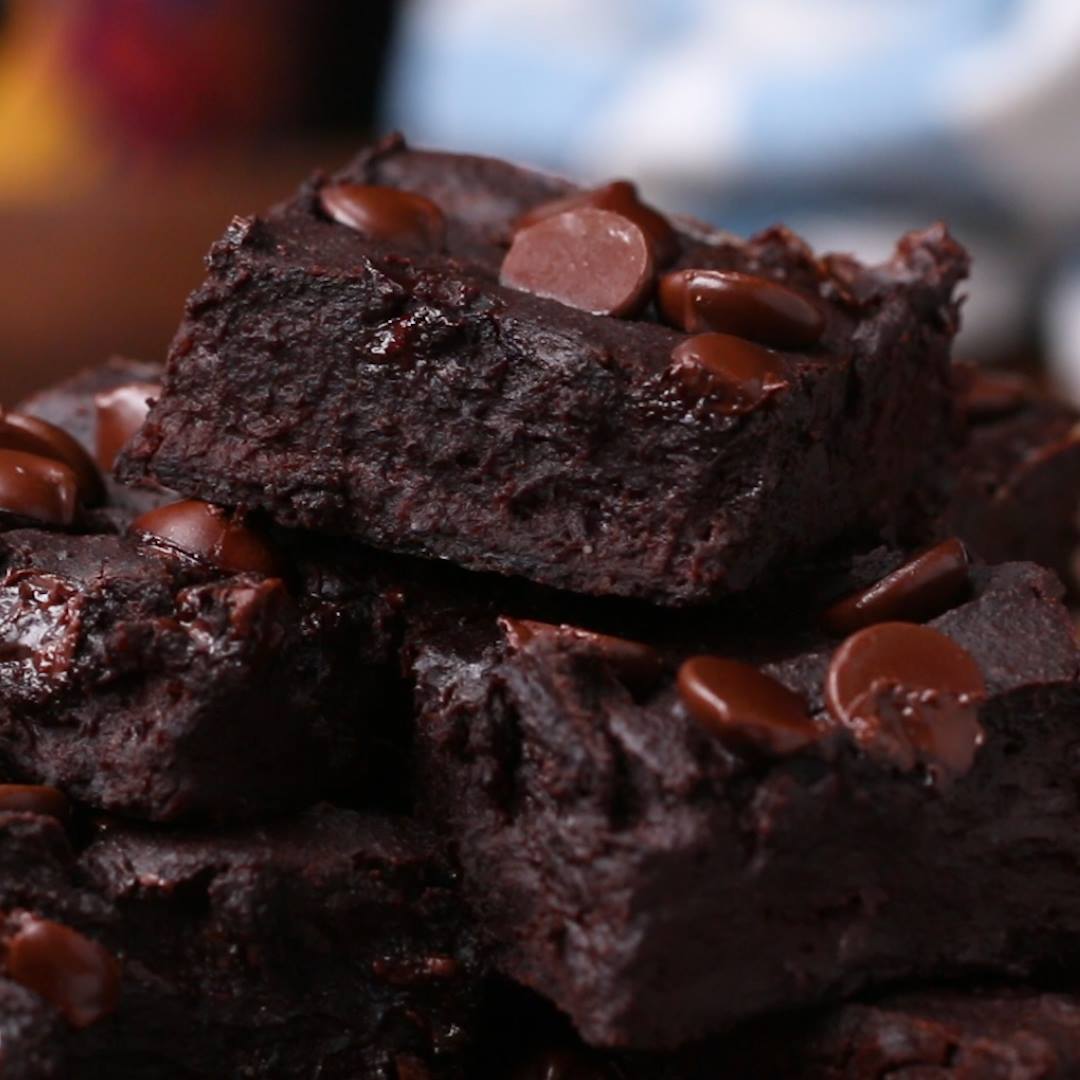
Power Protein Brownies

Power Protein Brownies
Want a protein-packed treat after your workout that won’t undo all of your hard work? These power protein brownies are the perfect, slightly sweet treat. Stick around ‘til the end of the video for some of our other favorite high-protein snacks.
Author:
Cuisine: American
Recipe type: Dessert
Ingredients
  • 3 bananas, very riped, chopped
  • 15 oz black beans, rinsed and drained (425 g)
  • ½ cup dark cocoa powder (60 g)
  • ⅔ cup almond butter, or nut butter of choice (160 g)
  • 1 cup almond flour (95 g)
  • ¼ teaspoon kosher salt
  • 1 teaspoon baking powder
  • 1 tablespoon pure vanilla extract
  • ¼ cup dark chocolate chips (40 g)
Instructions
  1. Preheat the oven to 350°F (180°C). Grease and line a 8-inch (20 cm) square baking dish with parchment paper.
  2. In a food processor, combine the bananas, black beans, cocoa powder, almond butter, almond flour, salt, baking powder, and vanilla. Pulse until smooth.
  3. Pour the batter into the prepared baking dish. Sprinkle the dark chocolate chips over the top.
  4. Bake for 25 minutes, or until the brownies are set.
  5. Let cool, then slice into 12 pieces. Enjoy the brownies immediately, or store in the fridge for 1 week or in the freezer for up to 1 month.
  6. Enjoy

Watch the recipe video here:

Level up with these brownies! ?Get the recipe: https://tasty.co/recipe/power-protein-brownies

Posted by Tasty on Saturday, March 16, 2019

Dessert

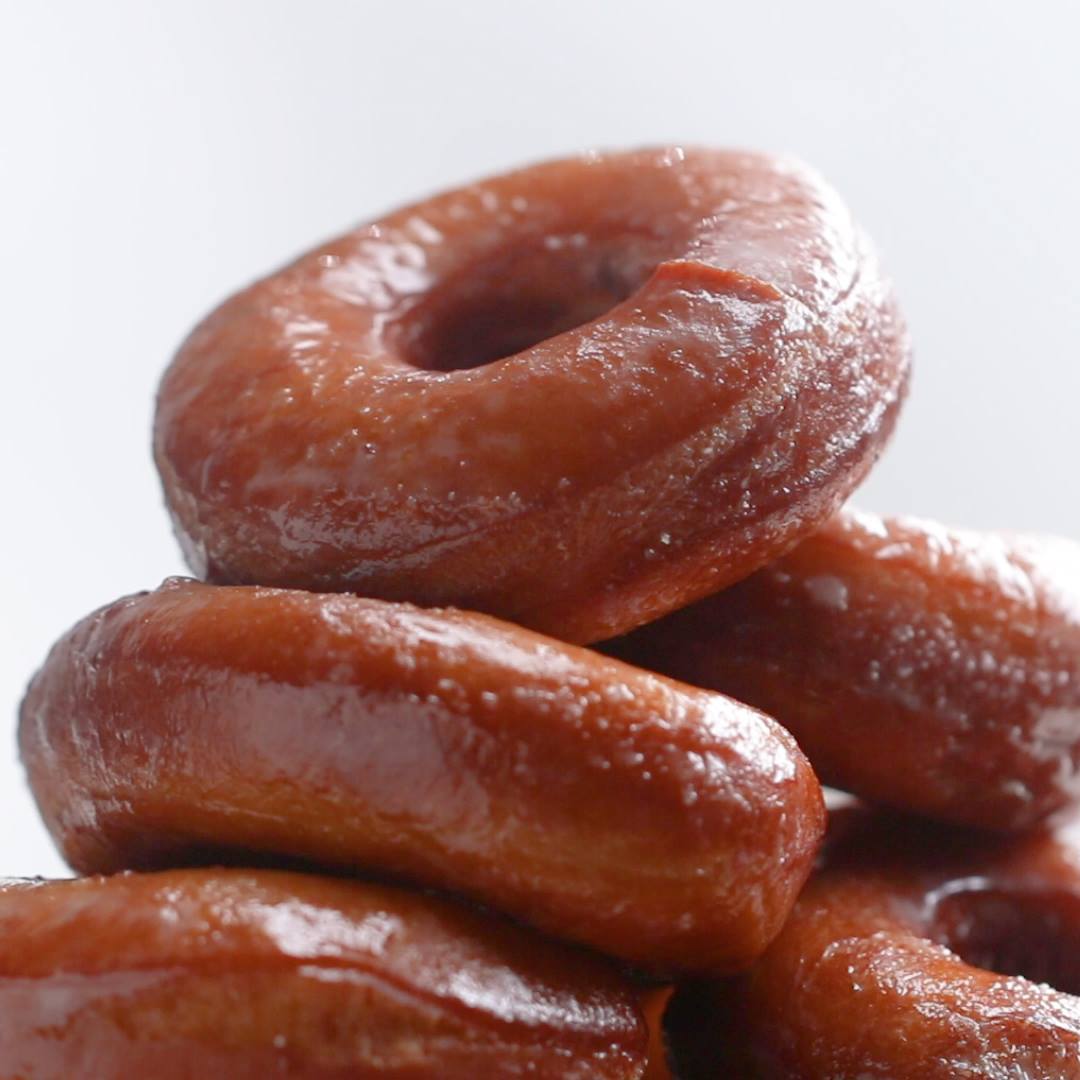
Classic Glazed Donuts

Classic Glazed Donuts
Author:
Cuisine: American
Recipe type: Dessert
Ingredients
DONUT
  • 1 ½ cups milk, warm to the touch (360 mL)
  • 1 cup sugar (200 g)
  • ½ oz yeast (15 g)
  • 1 stick unsalted butter, soft
  • 3 eggs
  • 1 tablespoon vanilla extract
  • 5 cups flour, sifted (625 g)
  • 1 tablespoon vegetable oil
  • shortening, for frying
GLAZE
  • 3 cups powdered sugar (480 g)
  • 1 cup dry milk powder (70 g)
  • 1 tablespoon vanilla extract
  • ½ cup water, hot (120 mL)
Instructions
  1. In a medium bowl, add the milk, sugar, and yeast, stirring to combine.
  2. In a separate medium bowl, add the butter, eggs, and vanilla extract, stirring to combine.
  3. Add the milk mixture to the egg mixture and whisk to combine. Transfer to a large bowl and add the flour in thirds, stirring between each addition.
  4. Dump the dough onto a lightly floured surface and knead for 5 minutes, until smooth. Gently poke the dough with a finger--the dough should bounce back up from the indentation.
  5. Place the dough in a large bowl, and lightly coat the dough with oil. Cover the bowl with plastic wrap.
  6. Let the dough rise in a warm place for an hour, or until doubled in size.
  7. Take the dough out and knead on a floured surface for 5 minutes until smooth. Place the dough in an oiled bowl and repeat with rise overnight in refrigerator.
  8. Roll out the dough on a floured surface until ¼ inch (6 mm) thick.
  9. Cut out the doughnuts and donut holes with a cookie cutter and piping tip.
  10. Melt enough shortening over medium heat to come up just 2 inches (5 cm) up on the side of a heavy frying pan. Heat the shortening to 375°F (190°C)
  11. Fry the donuts and donut holes for 45 seconds on each side, or until golden brown.
  12. In a bowl, combine the powdered sugar, dry milk powder, vanilla extract and hot water until smooth.
  13. Strain the glaze through a fine-mesh sieve to remove any lumps.
  14. Dunk the donuts in the glaze or drizzle the glaze on top.
  15. Enjoy!
  16. Tips

Watch the recipe video here:

Need these NOW! ?FULL RECIPE: https://tasty.co/recipe/classic-glazed-donuts

Posted by Proper Tasty on Sunday, March 17, 2019

Dessert

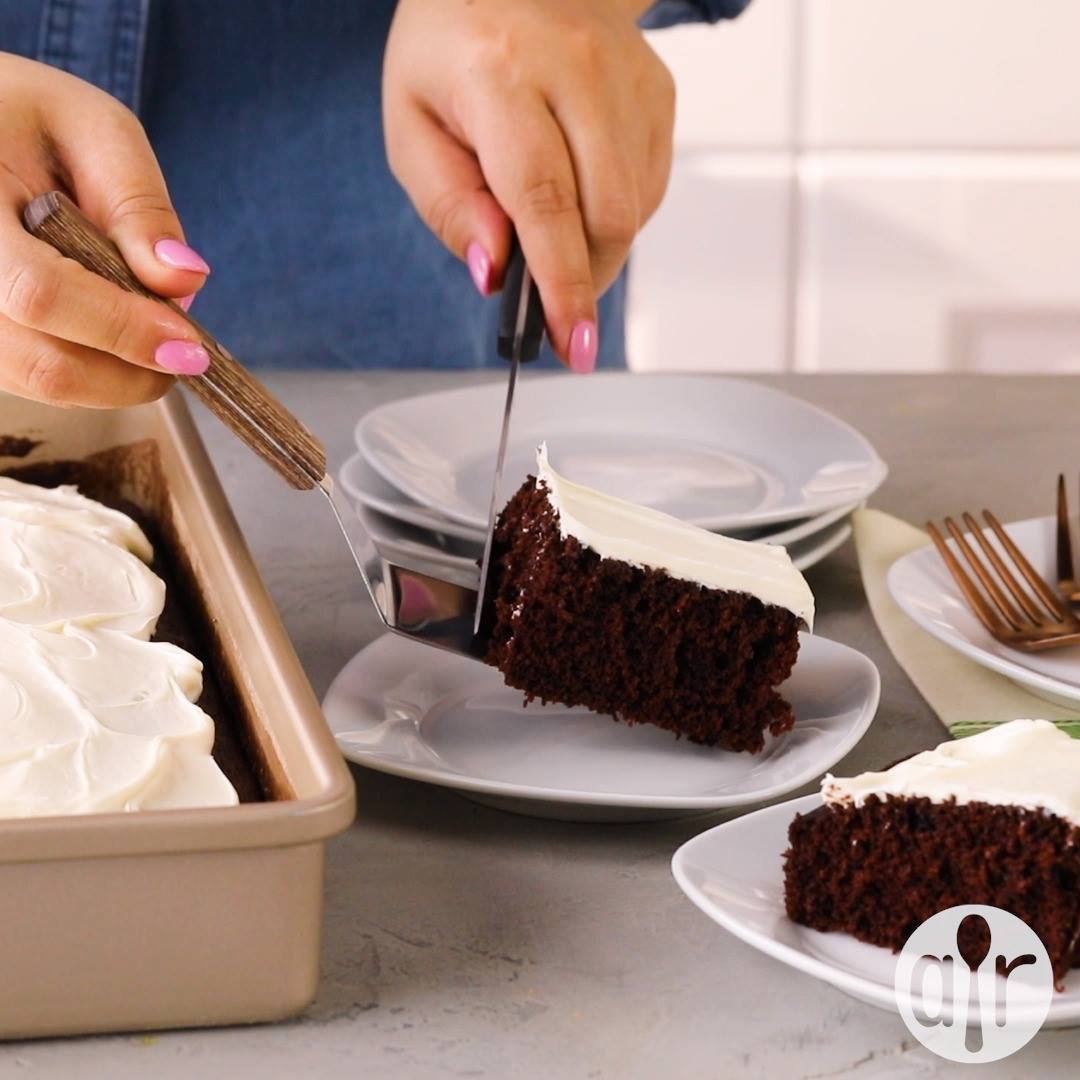
Crazy Cake

Crazy Cake
"This cake was popular during the depression, and does not have eggs in it."
Author:
Cuisine: American
Recipe type: Dessert
Ingredients
  • 3 cups all-purpose flour
  • 2 cups white sugar
  • 1 teaspoon salt
  • 2 teaspoons baking soda
  • ½ cup unsweetened cocoa powder
  • ¾ cup vegetable oil
  • 2 tablespoons distilled white vinegar
  • 2 teaspoons vanilla extract
  • 2 cups cold water
Instructions
  1. Sift flour, sugar, salt, soda, and cocoa together into a 9 x 13 inch ungreased cake pan. Make three wells. Pour oil into one well, vinegar into second, and vanilla into third well. Pour cold water over all, and stir well with fork.
  2. Bake at 350 degrees F (175 degrees C) for 30 to 40 minutes, or until tooth pick inserted comes out clean. Frost with your favorite icing.

Watch the recipe video here:

"Would give this recipe 10 stars if I could!"Crazy Cake: https://trib.al/0cnZhdh

Posted by Allrecipes on Tuesday, March 12, 2019

Dessert

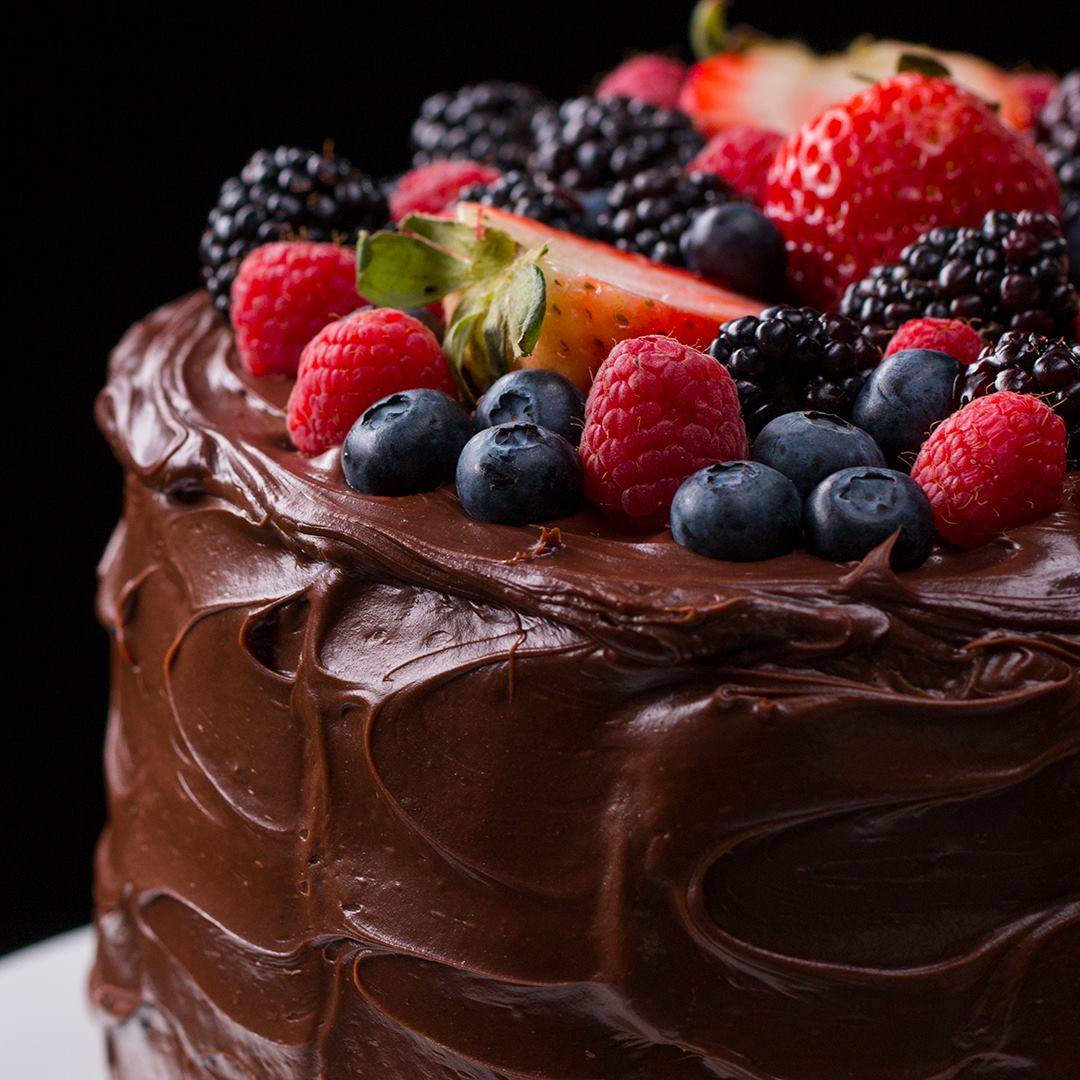
Fudgiest Dairy-Free Chocolate Cake

Fudgiest Dairy-Free Chocolate Cake
Author:
Cuisine: American
Recipe type: Dessert
Ingredients
FROSTING
  • 30 oz full-fat coconut milk, 2 cans (880 mL)
  • 3 cups dairy-free chocolate chunk (510 g)
  • ¼ cup coconut oil, melted (60 g)
  • 2 cups powdered sugar (240 g)
CAKE
  • 3 cups whole wheat flour (375 g)
  • 1 ½ cups dark cocoa powder (180 g)
  • 1 cup sugar (200 g)
  • 1 tablespoon baking soda
  • 1 ½ teaspoons baking powder
  • 1 pinch salt
  • 3 cups almond milk (710 mL)
  • 1 cup coconut oil, melted (240 g)
  • 1 ½ cups applesauce (380 g)
  • 1 ½ cups maple syrup (360 g)
  • 1 tablespoon apple cider vinegar
  • 1 tablespoon vanilla extract
  • berry, of choice, for garnish
Instructions
  1. In a microwave-safe measuring cup, or in a small pot on the stove, heat the coconut milk until hot, but not boiling (about 2 minutes in the microwave).
  2. Place the dairy-free chocolate in a large bowl and pour the hot coconut milk over it, allowing the milk to melt the chocolate. Mix well to combine.
  3. Once the chocolate is melted, add the coconut oil and powdered sugar. Beat with a hand mixer or whisk until smooth.
  4. Cover and refrigerate overnight.
  5. Preheat the oven to 350°F (180°C). Grease 3 separate 8-inch (20-cm) round cake pans and set aside.
  6. In a large bowl, add the whole wheat flour, dark cocoa powder, sugar, baking soda, baking powder, and salt. Whisk to combine and set aside.
  7. In a separate large bowl, add the almond milk, coconut oil, applesauce, maple syrup, apple cider vinegar, and vanilla extract. Whisk to combine.
  8. In two batches, add the dry mixture to the wet mixture, folding with a spatula until combined. Some clumps are okay.
  9. Divide the batter evenly between the 3 pre-greased cake pans and bake for 35–45 minutes, or until a toothpick comes out almost entirely clean. Cool completely.
  10. Remove the frosting from the fridge and mix it up well.
  11. Choose which cake will be your bottom layer and cover evenly with about 1 cup (115 G) of frosting. Top with the second layer, frosting evenly again. Add the final layer and frost the top and the sides of the cake generously, topping with berries of choice for garnish.
  12. Enjoy!

Watch the recipe video here:

This is the FUDGIEST non-dairy chocolate cake ?FULL RECIPE: https://tasty.co/recipe/fudgiest-dairy-free-chocolate-cake

Posted by BuzzFeed Food on Wednesday, March 13, 2019

Dessert

RAINBOW SWIRL CAKE

RAINBOW SWIRL CAKE
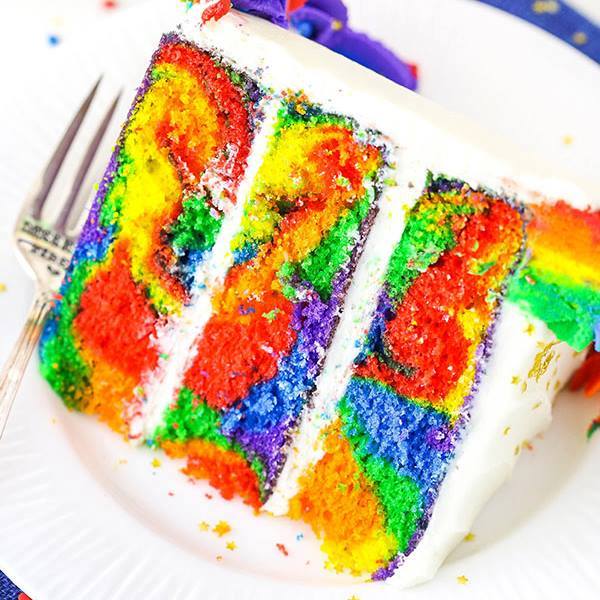
This Rainbow Swirl Cake is made with three layers of homemade cake with rainbow swirl frosting decorating the cake around the edges! It’s a moist, delicious cake that’s easy to make and perfect for a celebration, kids birthday party cake or even St. Patrick’s Day!
Author:
Cuisine: American
Recipe type: Dessert
Ingredients
VANILLA RAINBOW CAKE
  • 3 cups (390g) all purpose flour
  • 3 tsp baking powder
  • 1 tsp salt
  • ¾ cup (168g) unsalted Challenge butter, room temperature
  • ¼ cup (60ml) vegetable oil
  • 2 cups (414g) sugar
  • 4 eggs
  • 1 tbsp vanilla extract
  • 1⅓ cups (400ml) buttermilk*
  • Violet gel icing color
  • Royal Blue gel icing color
  • Leaf Green gel icing color
  • Lemon Yellow gel icing color
  • Orange gel icing color
  • Red gel icing color
VANILLA RAINBOW BUTTERCREAM
  • 2 cups (448g) salted Challenge butter, room temperature
  • 1 cup (189g) shortening
  • 11-12 cups (1265g-1380g) powdered sugar
  • 1 tbsp vanilla extract
  • 4-5 tbsp (60-75ml) water or milk
  • Violet gel icing color
  • Royal Blue gel icing color
  • Leaf Green gel icing color
  • Lemon Yellow gel icing color
  • Orange gel icing color
  • Red gel icing color
Instructions
  1. Prepare three 8 inch cake pans with parchment paper circles in the bottom and grease the sides. Preheat oven to 350°F (176°C).
  2. Combine the flour, baking powder and salt in a medium sized bowl and set aside.
  3. Add the butter, vegetable oil and sugar to a large mixer bowl and beat together until light in color and fluffy, about 3-4 minutes. Do not skimp on the creaming time. You should be able to see the change in the color and texture of the mixture.
  4. Add the eggs two at a time, mixing until well combined after each. Add the vanilla extract with the second round of eggs. Scrape down the sides and bottom of the bowl as needed to be sure all ingredients are well incorporated.
  5. Add half of the dry ingredients to the batter and mix until combined.
  6. Add the buttermilk and mix until well combined.
  7. Add the remaining dry ingredients and mix until well combined and smooth. Scrape down the sides of the bowl as needed to be sure all ingredients are well incorporated. Do not over mix the batter.
  8. Divide the batter evenly between 6 bowls. It should be a little more than a cup per bowl.
  9. Add gel icing color to the bowls (one color per bowl) and gently fold until the color is mixed throughout. You should have one bowl each of purple, blue, green, yellow, orange and red.
  10. Add the colored cake batter to the cake pans. Starting with the purple batter, add spoonfuls of batter around the bottom of the pan. Divide each color evenly between the three pans. Give the pan a little side-to-side shake to distribute the batter around a bit between each color. After the purple, add the blue, then green, then yellow, then orange and finally red.
  11. Bake for 28-33 minutes, or until a toothpick inserted comes out clean.
  12. Remove the cakes from the oven and allow to cool for about 2-3 minutes, then remove to cooling racks to cool completely.
  13. To make the frosting, add the butter and shortening to a large mixer bowl and beat until smooth.
  14. Add about half of the powdered sugar and mix until well combined and smooth.
  15. Add the vanilla extract and 2 tablespoons of water or milk and mix until well combined.
  16. Add the remaining powdered sugar and mix until well combined and smooth.
  17. Add additional water or milk as needed to get the right consistency.
  18. To put the cake together, first remove the domes from the top of the cakes so they are level.
  19. Place the first layer of cake on a cake plate or cardboard cake circle, then top it with about 1 cup of frosting and spread into an even layer.
  20. Add the second layer of cake another layer of frosting.
  21. Add the final layer of cake on top, the frost the outside of the cake. Feel free to use my tutorial for frosting a smooth cake, if you like.
  22. Divide the remaining frosting between 6 bowls. I had about ⅓ cup of frosting per bowl, but you may have a little more or less, depending on how much you use to frost the cake.
  23. Use the gel icing colors to color each bowl of frosting, using one color per bowl.
  24. To make the rainbow swirl frosting border, add each color of frosting to a ziplock bag. Lay a piece of clear wrap out on the table. Trim the corner off of each ziplock bag. Pipe a thick row of each color of frosting in this order – purple, blue, green, yellow, orange, red – side-by-side onto the clear wrap.
  25. Fold the clear wrap over into a long log (see photos above for guidance). Twist one end closed and trim the other end, if needed, so that the frosting is right at the end.
  26. Put the log into a piping bag with the open end of the log going into the piping tip. I used piping tip Ateco 849.
  27. Begin piping shells of frosting around the top edge of the cake. After each shell is piped, turn the piping bag just a little bit before piping the next shell. As you continue piping and turning the piping bag, you’ll get a rainbow that rotates around so you see all the colors.
  28. To pipe shells around the bottom of the cake, create another log of rainbow frosting, add it to the piping bag and pipe shells around the bottom in the cake manner – turning the bag slightly after each shell.
  29. Store cake in an airtight container until ready to serve. Cake is best for 2-3 days.

Watch the recipe video here:

Rainbow Swirl Cake! Three layers of homemade rainbow cake with rainbow frosting decorating the edges! Perfect for St….

Posted by Kitchen Fun With My 3 Sons on Wednesday, March 13, 2019

Dessert

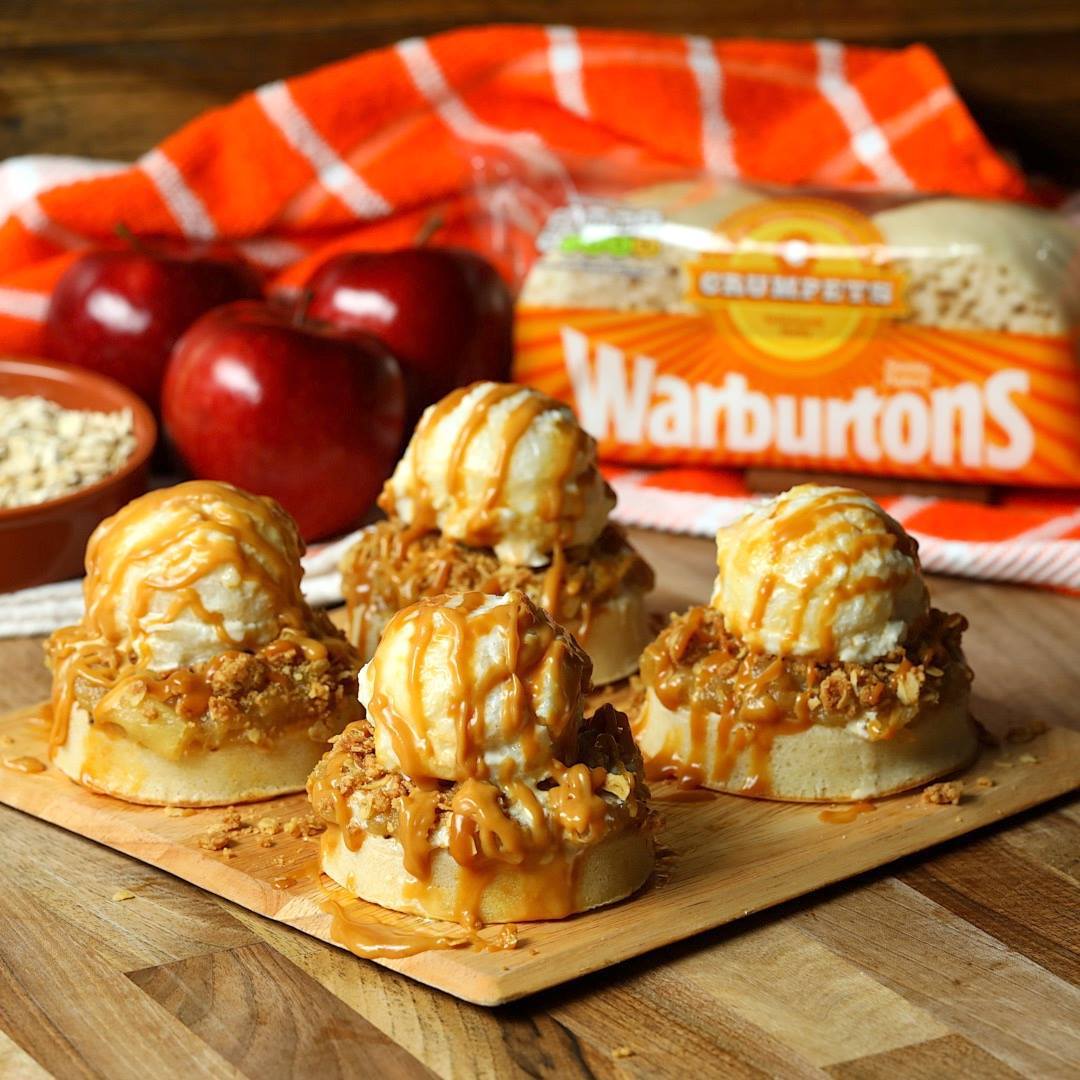
WARBURTONS TOFFEE APPLE CRUMBLE CRUMPETS

WARBURTONS TOFFEE APPLE CRUMBLE CRUMPETS
Improving the ultimate dessert is never easy, but stuffing it on top of a crumpet isn’t a bad place to start. Sticky, fruity and just as decadent as every good pud should be, these Toffee Apple Crumble Crumpets take the best of breakfast and make them sweeter than ever. Say hello to your new family favourite.
Author:
Cuisine: American
Recipe type: Dessert
Ingredients
  • 4 Warburtons crumpets
  • 25g butter
  • 50g sugar
  • 4 cooking apples, peeled and cored and cut into chunks
  • 30ml golden syrup
  • ¼ tsp cinnamon
  • 50g flour
  • 40g cold butter, diced
  • 25g oats
  • 50g brown sugar
  • Vanilla ice cream, to serve
  • Caramel sauce, to serve
Instructions
  1. Heat oven to 200C/400F.
  2. Put the flour and butter into a large bowl. Rub together with your finger tips to break up the butter and mix it in with the flour, until the mixture looks like yellow breadcrumbs and is starting to clump together. Add the brown sugar and oats and bring together with your hands to combine.
  3. Spread the mixture on a baking tray and bake for 15-20 mins, until the crumble is crisp and golden. Set aside to keep warm.
  4. In a large saucepan, melt your butter. When it starts to foam, tip in the sugar. Cook on a low heat until the sugar starts to go a caramel colour. Add the apples, golden syrup and cinnamon then cook on a medium heat until the apples have softened and the sauce has thickened.
  5. Toast your crumpets. Top with your toffee apple compote and your crumble. Top with ice cream and drizzle with caramel sauce.
  6. Serve and enjoy!

Watch the recipe video here:

https://www.facebook.com/1045035215535674/posts/2311461335559716/