Showing 879 Result(s)
Dessert

Spiked Caramel Corn Shake

Spiked Caramel Corn Shake
This shake made with Captain Morgan spiced rum and topped with homemade caramel corn is a home run!
Author:
Cuisine: American
Recipe type: Dessert
Ingredients
Caramel Corn/Sauce
  • 5 cups fresh popped corn
  • ⅓ cup roasted unsalted peanuts
  • ½ cup light brown sugar
  • 5 tablespoons unsalted butter
  • 1 tablespoon corn syrup
  • ¼ teaspoon salt
  • 1½ tablespoon Captain Morgan Spiced Rum
  • ¼ teaspoon baking soda
  • 1½ tablespoon heavy cream
Shake
  • 4 cups vanilla ice cream
  • ¾ cup whole milk
  • 6 ounces Captain Morgan rum
  • Whipped cream, optional
Instructions
  1. Preheat oven to 250°F.
  2. Line a baking sheet with parchment.
  3. Over med-high heat, cook brown sugar, butter, and corn syrup. Bring to simmer and cook for 4 minutes.
  4. Remove from heat and add baking soda and rum. Stir well. Reserve ¼ cup caramel.
  5. Working quickly, mix popcorn and peanuts with remaining carmel, making sure to completely cover all the popcorn. Spread on baking sheet and dry out in about 15 minutes or until dry.
  6. Add cream to remaining ¼ cup caramel and stir, then set aside.
  7. Add 4 cups of vanilla ice cream to a blender with ¾ cup of whole milk and 6 ounces of Captain Morgan. Blend until creamy.
  8. Divide remaining caramel sauce into 4 glasses and top with milkshake. Top with whipped topping and caramel corn, then serve with remaining caramel corn.

Watch the recipe video here:

Welcome in Summer with this Spiked Caramel Corn Shake!

Posted by Tasty on Tuesday, June 25, 2019

Dessert

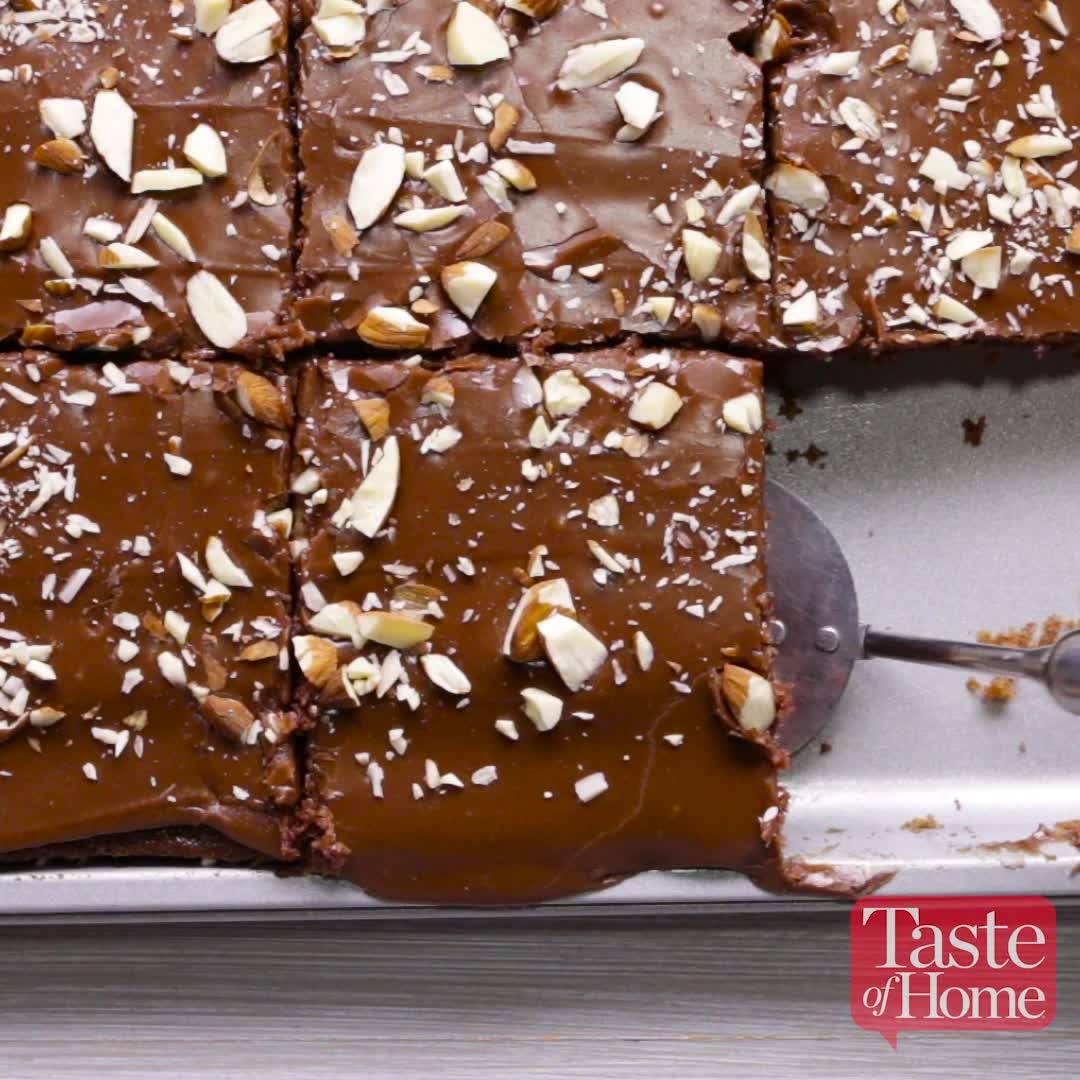
Chocolate Buttermilk Squares

Chocolate Buttermilk Squares
Every time I take a pan of these to a picnic, it comes back clean! At home, they disappear as fast as I can stir them. —Clarice Baker, Stromsburg, Nebraska
Author:
Cuisine: American
Recipe type: Dessert
Ingredients
  • 1 cup butter, cubed
  • ¼ cup baking cocoa
  • 1 cup water
  • 2 cups all-purpose flour
  • 2 cups sugar
  • 1 teaspoon baking soda
  • ½ teaspoon salt
  • ½ cup buttermilk
  • 2 large eggs, room temperature, beaten
  • 1 teaspoon vanilla extract
  • 3 to 4 drops red food coloring, optional
FROSTING:
  • ½ cup butter, cubed
  • ¼ cup baking cocoa
  • ¼ cup buttermilk
  • 3-3/4 cups confectioners' sugar
  • 1 teaspoon vanilla extract
  • Dash salt
  • ¾ cup chopped almonds, optional
Instructions
  1. In a large saucepan, bring butter, cocoa and water just to a boil. Cool.
  2. Meanwhile, in a large bowl, combine the flour, sugar, baking soda and salt. Add cocoa mixture and buttermilk; mix well. Beat in the eggs, vanilla and, if desired, food coloring. Pour into a greased and floured 15x10x1-in. baking pan.
  3. Bake at 350° for 20 minutes. For frosting, melt butter with cocoa and buttermilk. Stir in the confectioners' sugar, vanilla and salt. Spread over warm cake. Garnish with nuts if desired.

Watch the recipe video here:

These delicious treats are sure to be a crowd-pleaser.Get the recipe for Chocolate Buttermilk Squares here–> http://trib.al/CMmxUai

Posted by Taste of Home on Monday, June 24, 2019

Dessert

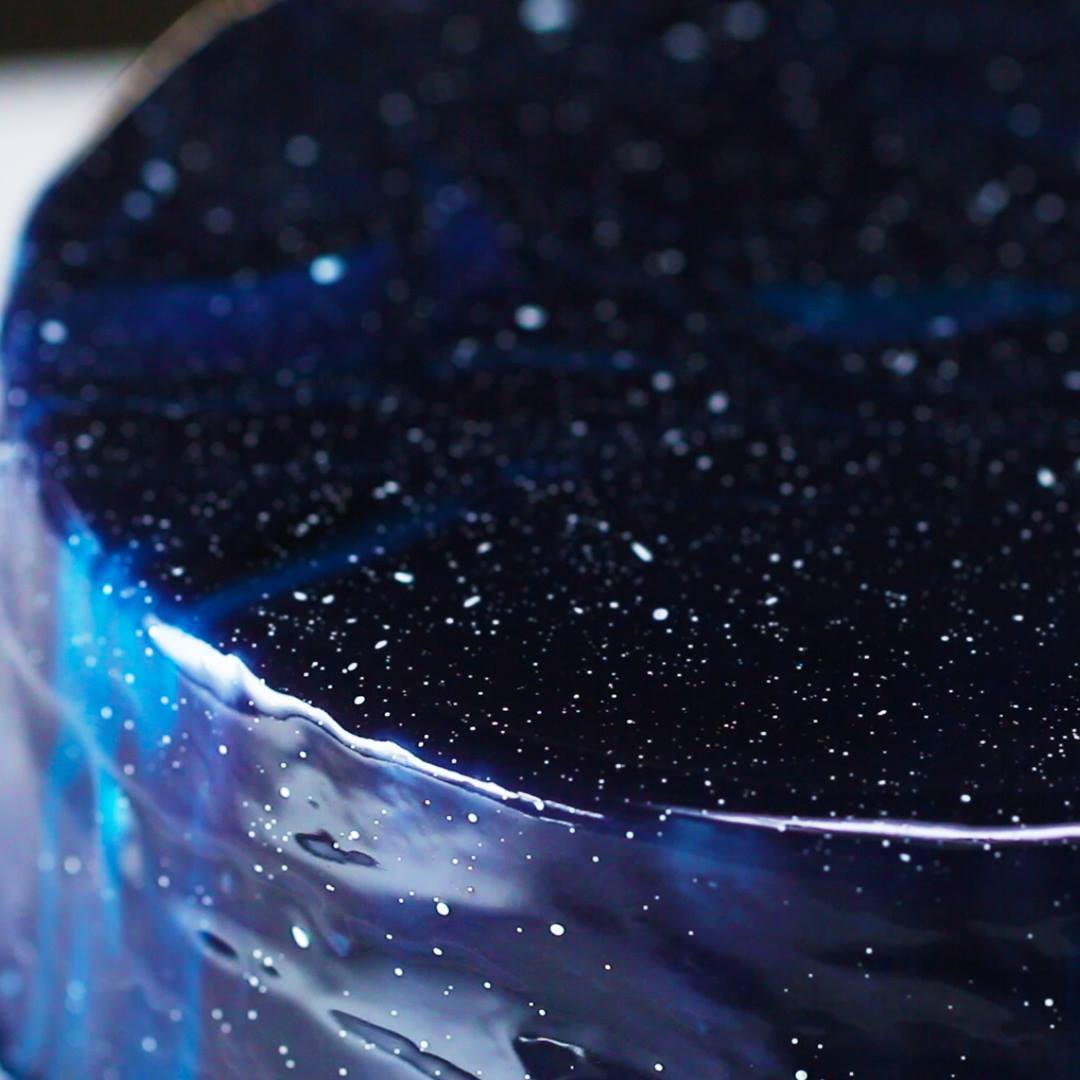
Galaxy Mirror Glazed ‘Box’ Cake

Galaxy Mirror Glazed 'Box' Cake
Author:
Cuisine: American
Recipe type: Dessert
Ingredients
CAKE
  • 2 chocolate cake mixes, 2 boxes, prepared according to package
VANILLA BUTTERCREAM
  • 2 cups butter, softened (460 g)
  • 2 teaspoons vanilla
  • 1 tablespoon milk
  • 6 cups powdered sugar (720 g)
GALAXY MIRROR GLAZE
  • 1 ¼ cups water (300 mL)
  • 1 ½ cups sugar (300 g)
  • 15 oz sweetened condensed milk, 1 can (395 g)
  • 15 sheets gelatin
  • 26 oz white chocolate, chopped, over 30% cocoa butter (740 g)
FOOD COLORING
  • black food coloring
  • navy blue food coloring
  • light blue food coloring
  • purple food coloring
  • pink food coloring
  • white food coloring
Instructions
  1. Prepare the cakes according to the package, or use your favorite cake recipe.
  2. To make the buttercream, mix the butter, vanilla, milk, and powdered sugar in a bowl with a hand mixer.
  3. Once the cakes are baked and cooled, place one cake on a turntable. If you don't have one, you can use a plate. Slice the top off the cakes to create a flat surface.
  4. Place a large dollop of the buttercream on the cake and spread to create an even middle layer of frosting.
  5. Place the second cake over the layer of buttercream.
  6. Frost the entire cake to create the crumb layer, creating a smooth surface.
  7. Place the cake in the freezer to keep cold.
  8. For the glaze, boil the water, sugar, and condensed milk in a pot for 1 minute, then remove from heat.
  9. Bloom the gelatin in 8 cups (2 liters) of cold water for 5 minutes, then wring the gelatin sheets of excess water and mix into the sugar mixture.
  10. Pour the sugar mixture over the chocolate, letting it sit for 2-3 minutes to allow the chocolate to soften.
  11. Using an immersion blender, carefully blend the chocolate and the liquid, making sure that you are not blending in air bubbles by lifting up the blender too high.
  12. Pour the glaze through a sieve into a large bowl to remove any excess bubbles.
  13. Separate the glaze into 5 different bowls (one medium-sized bowl and four smaller bowls).
  14. Color the biggest bowl of glaze with black and navy blue food coloring, stir the coloring with the glaze until the color is distributed evenly.
  15. In the next bowl, add the navy blue food coloring and stir.
  16. In the next bowl, add the lighter blue food coloring and stir.
  17. In the next bowl, add the purple food coloring and stir.
  18. In the next bowl, add the pink food coloring and stir.
  19. When you are ready to use the glaze, make sure each one is around 90-96°F (32-35°C). Microwave if necessary. Pour the colored glazes back into the biggest bowl of black and blue glaze. Swirl them gently with a spoon.
  20. Place the cake on a stand over a sheet tray to catch any excess glaze. Carefully pour the glaze over the cake.
  21. Dip a brush into the white food coloring and fling it onto the cake to create stars.
  22. Enjoy!

Watch the recipe video here:

This galaxy cake is out of this world ?Get the recipe: https://tasty.co/recipe/galaxy-mirror-glazed-box-cake Subscribe to our YouTube for more Tasty! ? https://bzfd.it/2UTmh3g

Posted by BuzzFeed Food on Sunday, June 23, 2019

Dessert

THE BEST CHOCOLATE CAKE RECIPE

THE BEST CHOCOLATE CAKE RECIPE
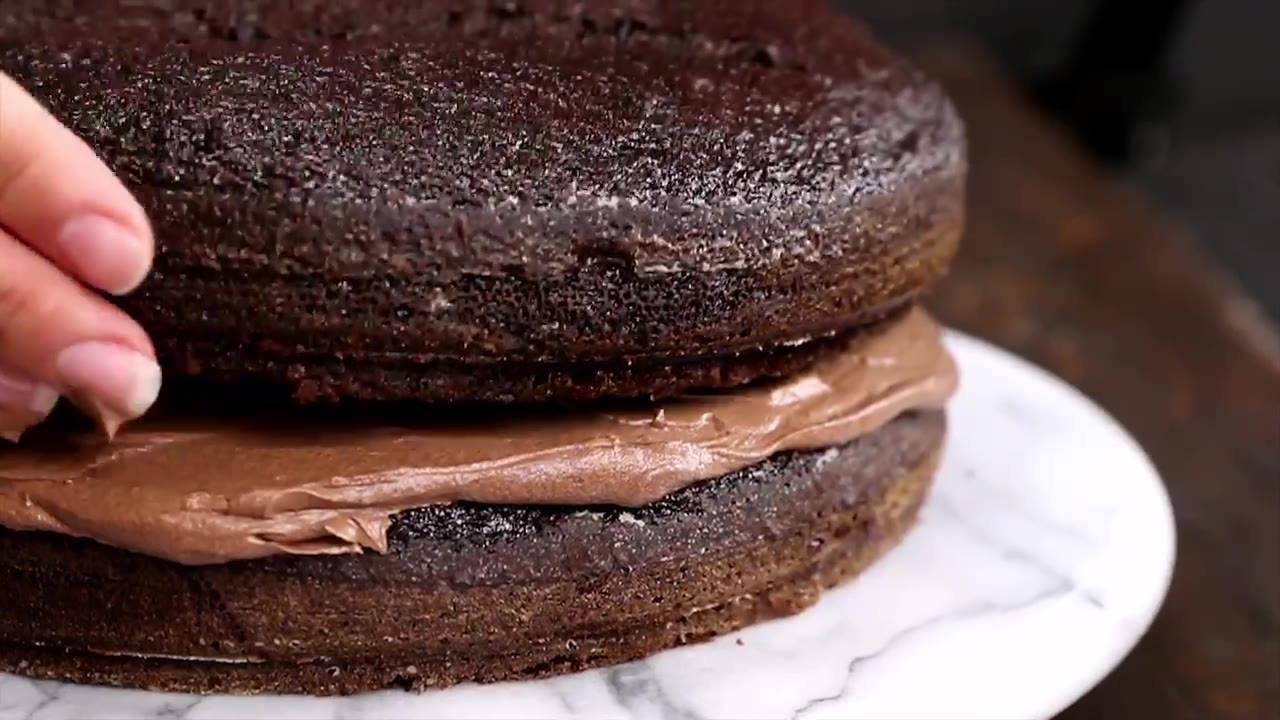
The Best Chocolate Cake combines cocoa and coffee to create a chocolate lover’s dream. The rich buttercream frosting makes it perfect!
Author:
Cuisine: American
Recipe type: Dessert
Ingredients
  • 2 cups sugar (400 grams)
  • 1¾ cups all-purpose flour (210 grams)
  • ¾ cup unsweetened cocoa powder (64 grams)
  • 2 tablespoons King Arthur Flour Black Cocoa, optional (11 grams)
  • 2 teaspoons baking soda (12 grams)
  • 1 teaspoon baking powder (4 grams)
  • 1 teaspoon kosher salt (6 grams)
  • 2 eggs
  • 1 cup buttermilk (240 mL)
  • 1 cup strong black coffee (I used Green Mountain Coffee’s Vermont Country Blend) (240 mL)
  • ½ cup vegetable oil (120 mL)
  • 2 teaspoons vanilla extract (4 grams)
  • Chocolate Buttercream Frosting
Instructions
  1. Heat oven to 350°F. Grease and flour two 9-inch round baking pans or one 13x9x2-inch baking pan. Set aside. In the bowl of a stand mixer fitted with the whisk attachment or in a large bowl with an electric mixer, combine the sugar, flour, cocoa(s), baking soda, baking powder and salt. Mix on low until dry ingredients are thoroughly combined.
  2. Add eggs, buttermilk, coffee, oil and vanilla. Beat on medium speed for about two minutes; the batter will be thin.
  3. Pour batter evenly into prepared pans.
  4. Bake in preheated oven for 30 to 35 minutes for round pans, 35 to 40 minutes for rectangular pan or until wooden toothpick inserted in center comes out clean.
  5. Cool 10 minutes; remove from pans to wire racks. Cool completely.
  6. Frost as desired. I used a simple and delicious Chocolate Buttercream Frosting from Savory Sweet Life. One batch was perfect for this chocolate layer cake.

Watch the recipe video here:

The Best Chocolate Cake with rich buttercream frosting! ?RECIPE: https://www.mybakingaddiction.com/the-best-chocolate-cake

Posted by My Baking Addiction on Saturday, June 22, 2019

Dessert

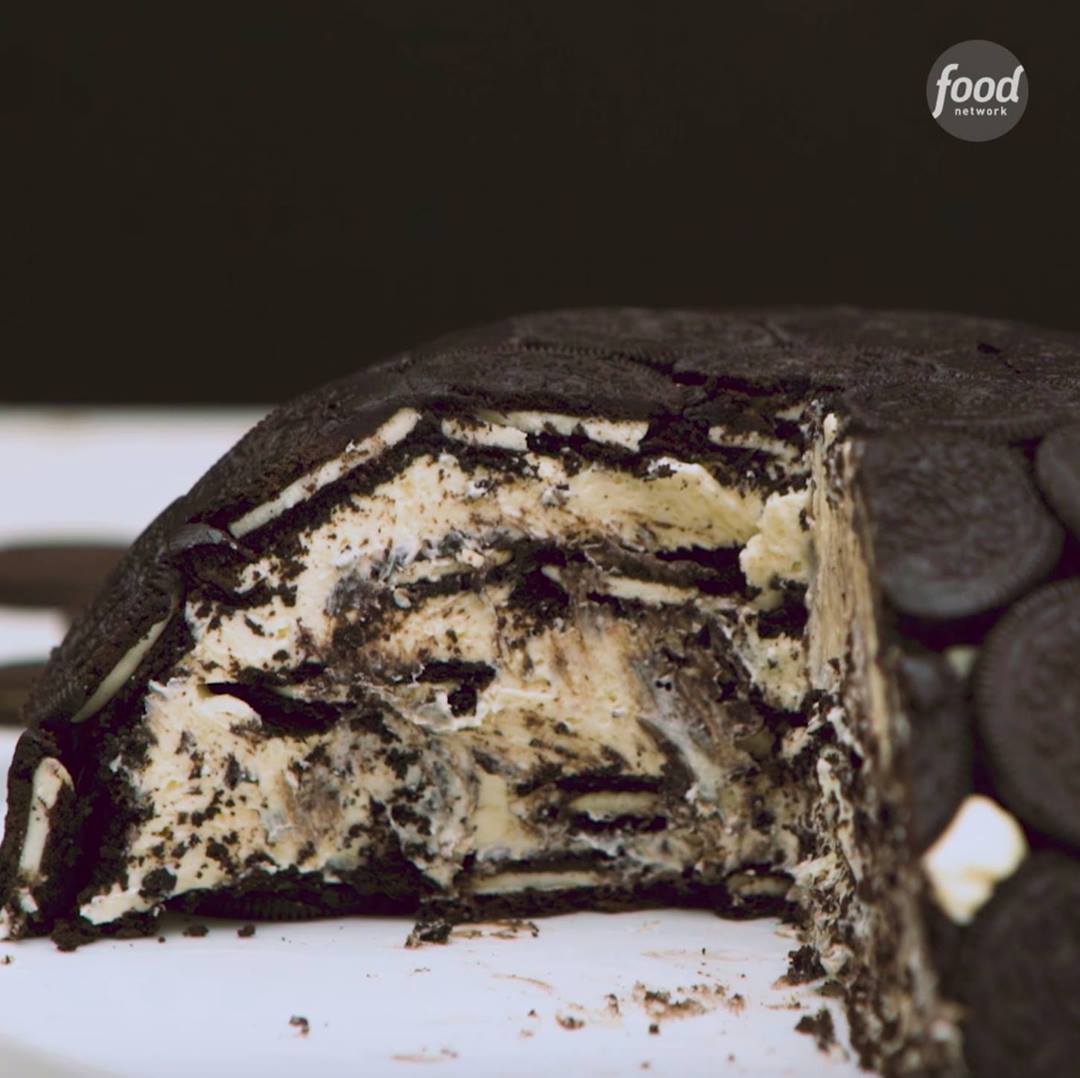
Oreo Bombe

Oreo Bombe
This impressive cookie bombe is the perfect dessert to make when the last thing you want to do is turn on the oven. The light and fluffy filling has a hefty amount of cream cheese whipped into it, so it mimics cheesecake -- but with half of the work.
Author:
Cuisine: American
Recipe type: Dessert
Ingredients
  • 1 pound cream cheese, at room temperature
  • 2 cups confectioners' sugar
  • 1 tablespoon vanilla extract
  • 3 cups heavy cream
  • 106 cream-filled chocolate sandwich cookies (from about three 14.3-ounce packages), such as Oreos
  • 1 cup milk
Instructions
Special equipment: a large bowl that is 10 inches wide at the top, 5½ inches wide at the bottom and 4 inches tall
  1. Line a large glass bowl (10 inches wide at the top, 5½ inches wide at the bottom and 4 inches tall) with plastic wrap, allowing there to be at least 1 inch of overhang on all sides of the bowl. Set aside.
  2. Put the cream cheese, confectioners' sugar and vanilla extract in a large bowl and use an electric mixer to blend until completely smooth. Add the heavy cream and whip until stiff peaks form. Set aside.
  3. Quickly submerge 1 chocolate sandwich cookie into the milk, then place the cookie in the bottom of the prepared glass bowl. Continue to dip cookies and line the bowl until you reach the very top of the bowl, about 48 to 50 cookies total. Cut the cookies at the top as needed so that they do not go over the edge of the bowl.
  4. Scoop 2 cups of the cream over the cookies in the bowl, then use the back of a large spoon to gently spread the cream over all of the cookies, making sure to go all the way to the top of the bowl. Spoon ½ cup of the cream into the bottom of the bowl and spread it out into a flat layer. Dip 9 cookies and arrange in 1 flat layer on top of the cream. Continue adding flat layers in this order: 1 cup cream, 13 milk-dipped cookies, 2 cups cream, 15 milk-dipped cookies, all of the remaining cream then 19 milk-dipped cookies.
  5. Fold over the plastic wrap, then cover completely with another sheet of plastic wrap and refrigerate until completely chilled and the cookies have softened, at least 6 hours and up to overnight.
  6. When ready to serve, carefully invert the bowl onto a large serving platter or cutting board, then use the plastic wrap lining to ease the bombe out of the bowl. Cut into wedges and serve immediately.

Watch the recipe video here:

Recipe of the Day: Oreo BombeSave the recipe: https://foodtv.com/2R5sB9O!

Posted by Food Network on Saturday, June 22, 2019

Dessert

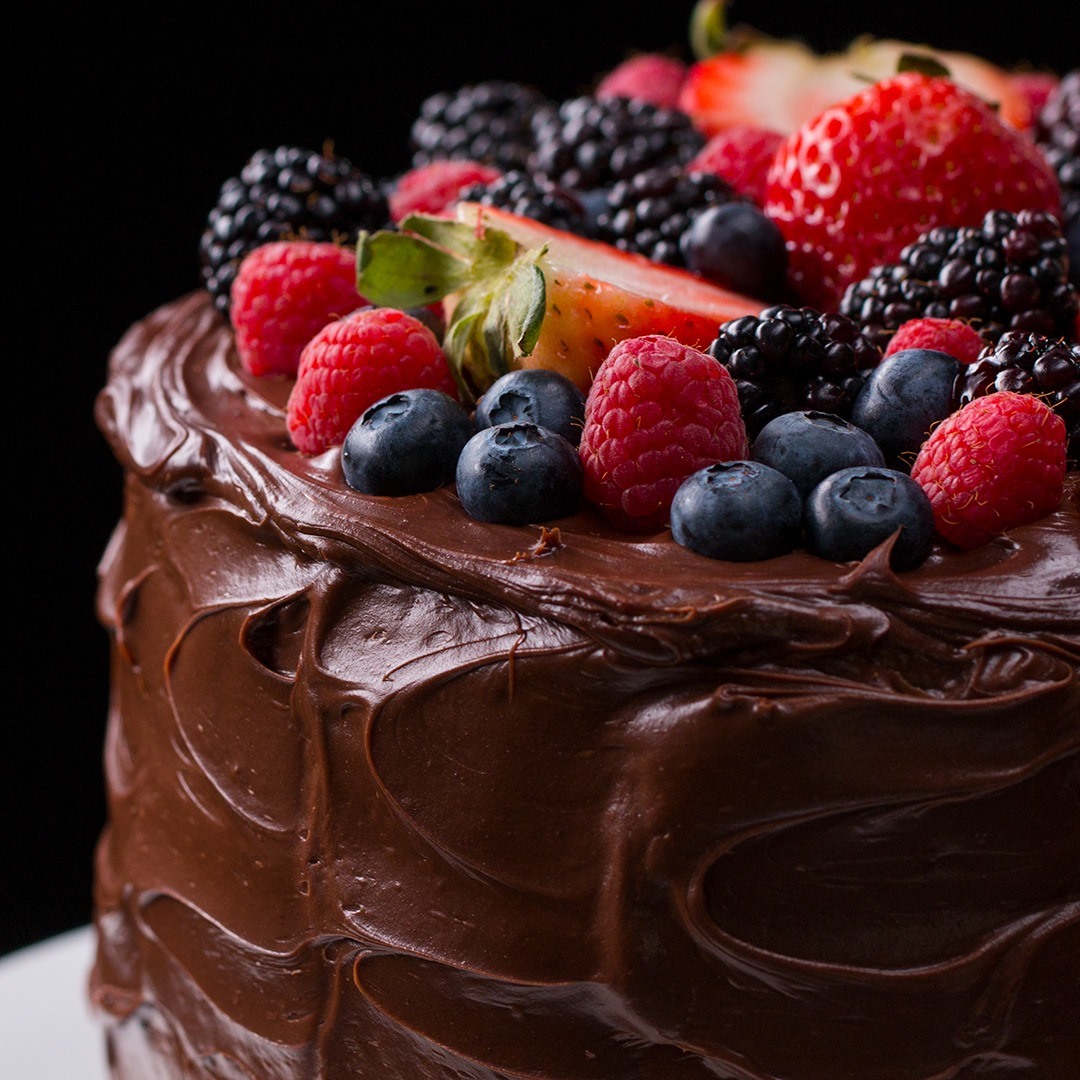
Fudgiest Dairy-Free Chocolate Cake

Fudgiest Dairy-Free Chocolate Cake
Author:
Cuisine: American
Recipe type: Dessert
Ingredients
  • FROSTING
  • 30 oz full-fat coconut milk, 2 cans (880 mL)
  • 3 cups dairy-free chocolate chunk (510 g)
  • ¼ cup coconut oil, melted (60 g)
  • 2 cups powdered sugar (240 g)
  • CAKE
  • 3 cups whole wheat flour (390 g)
  • 1 ½ cups dark cocoa powder (180 g)
  • 1 cup sugar (200 g)
  • 1 tablespoon baking soda
  • 1 ½ teaspoons baking powder
  • 1 pinch salt
  • 3 cups almond milk (710 mL)
  • 1 cup coconut oil, melted (240 g)
  • 1 ½ cups applesauce (380 g)
  • 1 ½ cups maple syrup (505 g)
  • 1 tablespoon apple cider vinegar
  • 1 tablespoon vanilla extract
  • berry, of choice, for garnish
Instructions
  1. In a microwave-safe measuring cup, or in a small pot on the stove, heat the coconut milk until hot, but not boiling (about 2 minutes in the microwave).
  2. Place the dairy-free chocolate in a large bowl and pour the hot coconut milk over it, allowing the milk to melt the chocolate. Mix well to combine.
  3. Once the chocolate is melted, add the coconut oil and powdered sugar. Beat with a hand mixer or whisk until smooth.
  4. Cover and refrigerate overnight.
  5. Preheat the oven to 350°F (180°C). Grease 3 separate 8-inch (20-cm) round cake pans and set aside.
  6. In a large bowl, add the whole wheat flour, dark cocoa powder, sugar, baking soda, baking powder, and salt. Whisk to combine and set aside.
  7. In a separate large bowl, add the almond milk, coconut oil, applesauce, maple syrup, apple cider vinegar, and vanilla extract. Whisk to combine.
  8. In two batches, add the dry mixture to the wet mixture, folding with a spatula until combined. Some clumps are okay.
  9. Divide the batter evenly between the 3 pre-greased cake pans and bake for 35–45 minutes, or until a toothpick comes out almost entirely clean. Cool completely.
  10. Remove the frosting from the fridge and mix it up well.
  11. Choose which cake will be your bottom layer and cover evenly with about 1 cup (115 G) of frosting. Top with the second layer, frosting evenly again. Add the final layer and frost the top and the sides of the cake generously, topping with berries of choice for garnish.
  12. Enjoy!

Watch the recipe video here:

This is the FUDGIEST non-dairy chocolate cake ?FULL RECIPE: https://tasty.co/recipe/fudgiest-dairy-free-chocolate-cake

Posted by BuzzFeed Food on Thursday, June 20, 2019

Dessert

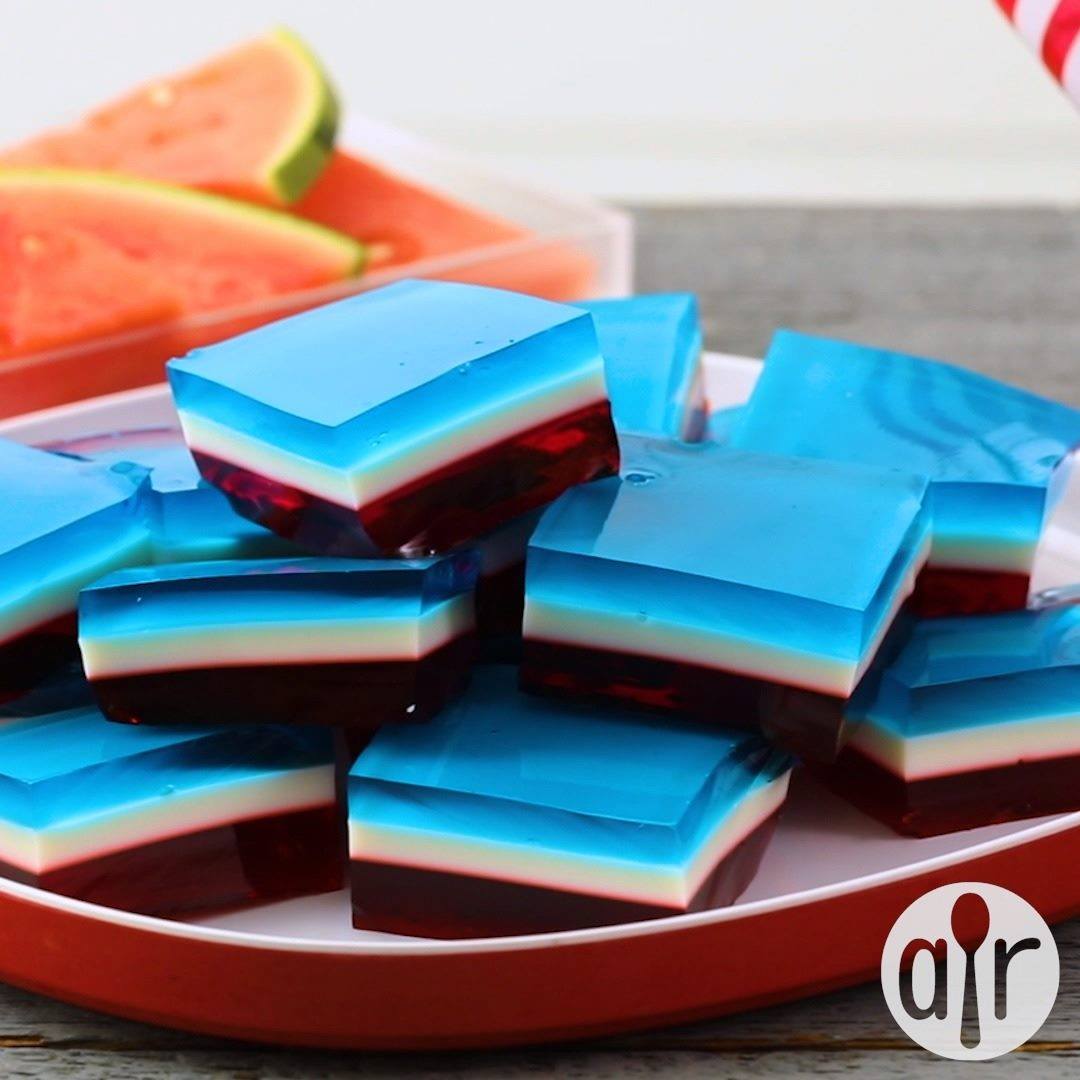
Fourth of July Layered Gelatin

Fourth of July Layered Gelatin
A hit with kids and those young at heart. My childhood neighbor made it our block party and now, even though I have moved far away, I still make it with fond memories...it just isn't Fourth of July without it! I have seen similar recipes where the white layer is made with sour cream or whipped topping, but this one uses sweetened condensed milk...easy and delicious!
Author:
Cuisine: American
Recipe type: Dessert
Ingredients
  • 1 (6 ounce) package cherry flavored Jell-O® mix
  • 2 (.25 ounce) envelopes unflavored gelatin
  • 2 cups boiling water
  • 4 (.25 ounce) envelopes unflavored gelatin
  • 1 cup boiling water
  • 1 (14 ounce) can sweetened condensed milk
  • 1 (6 ounce) package blue raspberry flavored Jell-O® mix
  • 2 (.25 ounce) envelopes unflavored gelatin
  • 2 cups boiling water
Instructions
  1. Place cherry gelatin mix into a heatproof bowl, stir in 1 packet of unflavored gelatin, and mix with 2 cups of boiling water, stirring until the gelatin has dissolved and the mixture is clear, about 2 minutes. Pour into the bottom of a 9x13 rectangular glass baking dish. Place in refrigerator until completely cold and set, about 1 hour.
  2. Sprinkle 4 packets of unflavored gelatin onto 1 cup of boiling water in a heatproof bowl, allow to stand for about 3 minutes, and stir until dissolved; mix in the sweetened condensed milk. Allow to cool but not thicken, about 10 minutes; gently pour into a layer on top of the cherry layer. Return to refrigerator and allow to chill completely, about 1 more hour.
  3. Place blue raspberry gelatin mix and 1 packet of unflavored gelatin into a heatproof bowl, and mix with 2 cups of boiling water, stirring until the blue gelatin is clear, about 2 minutes. Allow to stand and cool but not thicken, about 10 minutes; gently pour onto the white layer. Chill in refrigerator until the dessert is firm and cold, about 1 hour. To serve, cut into squares.

Watch the recipe video here:

Fourth of July Layered Gelatin: https://trib.al/yZwntGu

Posted by Allrecipes on Monday, June 17, 2019

Dessert

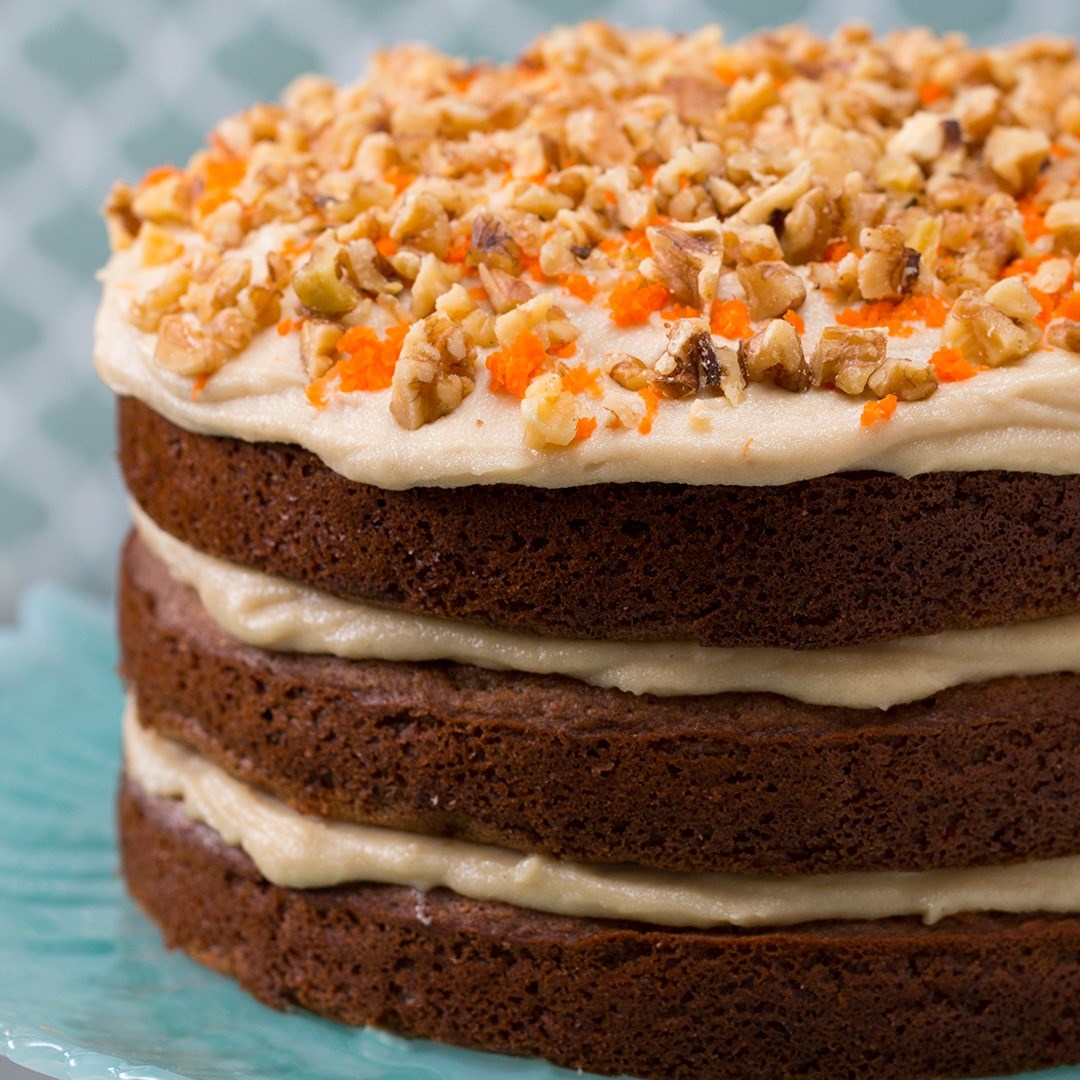
Decadent Dairy-Free Carrot Cake

Decadent Dairy-Free Carrot Cake
Author:
Cuisine: American
Recipe type: Dessert
Ingredients
CASHEW FROSTING
  • 4 cups raw cashew (520 g)
  • hot water
  • 15 oz full-fat coconut milk, cream from the top of the can (425 mL)
  • ½ cup powdered sugar (60 g)
  • 1 cup maple syrup (336 g)
  • ¾ cup coconut oil, melted (180 g)
  • 3 tablespoons lemon juice
  • 1 tablespoon vanilla extract
  • ½ tablespoon apple cider vinegar
  • 1 pinch salt
CAKE
  • 3 ½ cups flour, of choice, we used whole wheat (435 g)
  • 1 cup brown sugar (220 g)
  • 1 tablespoon baking soda
  • 1 ½ tablespoons baking powder
  • 1 tablespoon cinnamon
  • 2 teaspoons nutmeg
  • 1 pinch salt
  • 3 cups almond milk (720 mL)
  • ¾ cup coconut oil, melted (180 g)
  • 1 cup unsweetened applesauce (255 g)
  • ¾ cup maple syrup (250 g)
  • 1 tablespoon vanilla extract
  • 1 tablespoon apple cider vinegar
  • 2 cups carrot, finely grated (220 g)
  • 1 cup raisin, optional (150 g)
  • 1 carrot, for garnish
  • ½ cup walnuts, chopped, for garnish (50 g)
Instructions
  1. In a large bowl, add the cashews and enough hot water to cover them. Let soak for at least 1 hour.
  2. Rinse and drain the cashews, then add them to a food processor or blender. Add the coconut cream, powdered sugar, maple syrup, coconut oil, lemon juice, vanilla extract, apple cider vinegar, and salt. Blend until completely smooth, scraping down the sides as necessary.
  3. Transfer the cashew frosting to a bowl and refrigerate while you bake the cake.
  4. Preheat the oven to 350°F (180°C). Grease 3 separate 8-inch (20 cm) round cake pans and set aside.
  5. In a large bowl, add the flour, brown sugar, baking soda, baking powder, cinnamon, nutmeg, and salt. Whisk to combine.
  6. In a separate large bowl, add the almond milk, coconut oil, applesauce, maple syrup, vanilla extract, and apple cider vinegar. Whisk to combine.
  7. In two batches, add the dry mixture to the wet mixture, folding with a spatula until combined. Some clumps are okay.
  8. Add the grated carrots and raisins and fold them in.
  9. Divide the batter evenly between the 3 pre-greased cake pans and bake for 35 minutes, or until a toothpick comes out clean. Cool completely.
  10. Remove the cashew frosting from the fridge and mix it up well.
  11. Choose which cake will be your bottom layer and cover evenly with about ⅓ of the cashew frosting. Top with the second layer, frosting evenly again. Add the final layer and frost the top of the cake generously
  12. Grate a carrot over the top of the frosting and sprinkle with chopped walnuts for garnish.
  13. Refrigerate until ready to serve.
  14. Enjoy!

Watch the recipe video here:

This decadent carrot cake is dairy-free! ✨FULL RECIPE: https://tasty.co/recipe/decadent-dairy-free-carrot-cake

Posted by BuzzFeed Food on Monday, June 17, 2019

Dessert

Instant Pot Confetti Birthday Cake

Instant Pot Confetti Birthday Cake
This 'set it and forget it' cake is perfect for the summer months when you don't want to turn the oven on. And if you forget it in the Instant Pot®, it won't burn!
Author:
Cuisine: American
Recipe type: Dessert
Ingredients
Cake:
  • Nonstick cooking spray
  • 1½ cups cake flour (see Cook's Note)
  • 3 tablespoons rainbow sprinkles, plus more for decorating
  • 2½ teaspoons baking powder
  • ¼ teaspoon baking soda
  • ¾ teaspoon kosher salt
  • 8 tablespoons (1 stick) unsalted butter, at room temperature
  • 1½ cups confectioners' sugar
  • 1 teaspoon vanilla extract
  • 1 large egg, at room temperature
  • ½ cup sour cream
Buttercream:
  • 4½ cups confectioners' sugar
  • 24 tablespoons (3 sticks) unsalted butter, at room temperature
  • 1 vanilla bean, split
  • 2 to 3 tablespoons heavy cream
Instructions
Special equipment: kitchen twine; a 6- to 8- quart Instant Pot® multi-cooker
  1. For the cake: Coat a 7-inch round cake pan with 3-inch sides with nonstick spray. Line the bottom of the pan with a parchment, coat the paper.
  2. Whisk together the flour, sprinkles, baking powder, baking soda and salt in a medium bowl to combine.
  3. Beat the butter in a large bowl with an electric mixer until pale yellow, 2 minutes. Add the confectioners' sugar and beat on high speed until light and fluffy, 3 to 4 minutes. Add the vanilla and egg, scraping down sides and bottom of the bowl, and continue to beat until creamy, about 2 minutes (the mixture will look curdled but will come back together after it has been beaten for 1 or 2 minutes).
  4. With the mixer on low speed, add the flour mixture in 3 additions, alternating with the sour cream in 2 additions, beginning and ending with the dry ingredients.
  5. Scrape the batter into the prepared pan and smooth the top.
  6. Place two 18-inch pieces of twine criss-crossing one another on a clean work surface. Place the cake pan over the twine, then lay a clean dish towel over the top of the cake pan and tuck the ends under. Take the 2 ends of 1 piece of twine and tie them into a tight knot over the top of the cake pan. Repeat with the remaining twine so that you have two twine handles to support and lift the cake.
  7. Set a rack inside the Instant Pot® and add 2 cups water. Using the twine handles, place the cake inside the pot. Follow the manufacturer's guide for locking the lid and preparing to cook. Set to pressure cook on high pressure for 40 minutes (see Cook's Note).
  8. After the pressure cook cycle is complete, follow the manufacturer's guide for quick release and wait until the quick release cycle is complete. Be careful of any remaining steam and unlock and remove the lid.
  9. Lift the cake out of the pot. Cut the twine and unwrap the cake pan, then transfer to a wire rack. Let the cake cool in the pan, 30 minutes, then invert the cake onto a rack, peel off the parchment and let cool completely.
  10. Invert the cake again so that it is right-side up. Horizontally trim the top dome from the cake with a long serrated knife to create a flat surface. Slice the cake in half horizontally to make 2 layers. (Cake can be baked 1 day ahead.) Wrap tightly in plastic wrap and store at room temperature.
  11. For the buttercream: Beat the confectioners' sugar and butter with an electric mixer on high speed until light and fluffy, about 5 minutes. Scrape in the seeds from the vanilla bean, then add 2 tablespoons cream and continue to beat on high speed for 1 minute more, adding more cream if necessary for a spreadable consistency.
  12. Place 1 cake layer on a cake stand or large plate. Spoon 1½ cups buttercream over the top. Smooth the buttercream to the edge of the cake using an offset spatula or the back of a spoon, creating an even layer. Place another cake layer on top. Spread the remaining buttercream over the top and sides of the cake. Decorate with sprinkles as desired.
Cook’s Note
  1. When measuring flour, we spoon it into a dry measuring cup and level off the excess. (Scooping directly from the bag compacts the flour, resulting in dry baked goods.) Settings may vary on your Instant Pot® depending on the model. Please refer to manufacturer's guide.

Watch the recipe video here:

Recipe of the Day: Instant Pot Confetti Birthday Cake?Save the recipe: https://foodtv.com/2XjRA9a!

Posted by Food Network on Sunday, June 2, 2019

Dessert

Cherry Pie Cookies

Cherry Pie Cookies
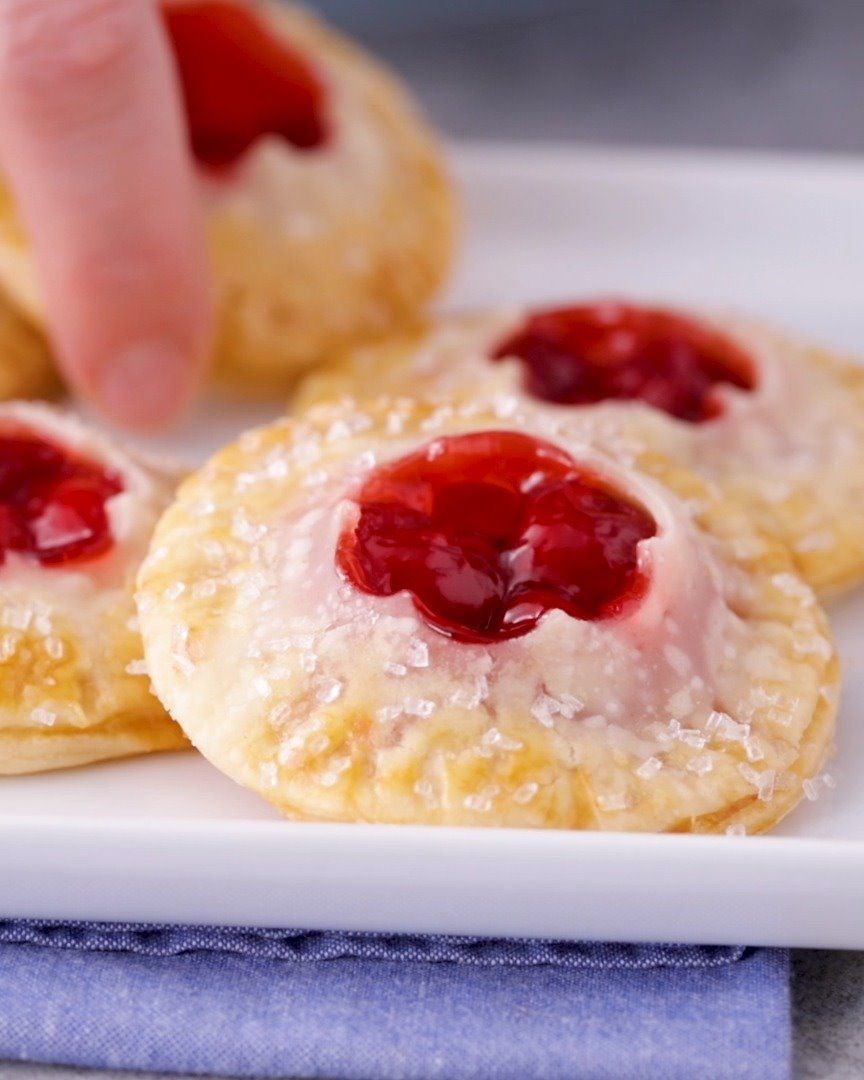
We didn’t think pie season could get any better…until we made these four-ingredient cherry pie cookies! Personalize your own with your favorite cookie cutters and pie filling.
Author:
Cuisine: American
Recipe type: Dessert
Ingredients
  • 1 box Pillsbury™ refrigerated pie crust, softened as directed on box
  • 1 cup more fruit cherry pie filling (from 21-oz can)
  • 1 egg, beaten
  • 2 teaspoons coarse white sparkling sugar
Instructions
  1. Heat oven to 375°F. Line large cookie sheets with cooking parchment paper.
  2. Unroll 1 pie crust on lightly floured work surface. Using rolling pin, roll pie crust into 12-inch round. Using 3-inch round cookie cutter, cut out 16 rounds from pie crust, rerolling scraps as needed. Repeat rolling and cutting with second pie crust.
  3. Place 8 rounds on each cookie sheet. Spread 1 tablespoon pie filling in center of each round, leaving an edge. Brush edge of rounds with beaten egg. Using small (1 to 1½-inch) cookie cutter of your choice, cut out center in each of the remaining 16 rounds. Top each bottom with cut out dough round, pressing down on outer edges with fork to seal.
  4. Brush tops of dough rounds with egg; sprinkle sugar on tops.
  5. Bake 17 to 19 minutes or until golden brown on top and edges. Remove to cooling rack and cool completely, about 30 minutes.

Watch the recipe video here:

A fun four-ingredient twist on classic cherry pie!Cherry Pie Cookies recipe:…

Posted by Pillsbury on Sunday, June 2, 2019