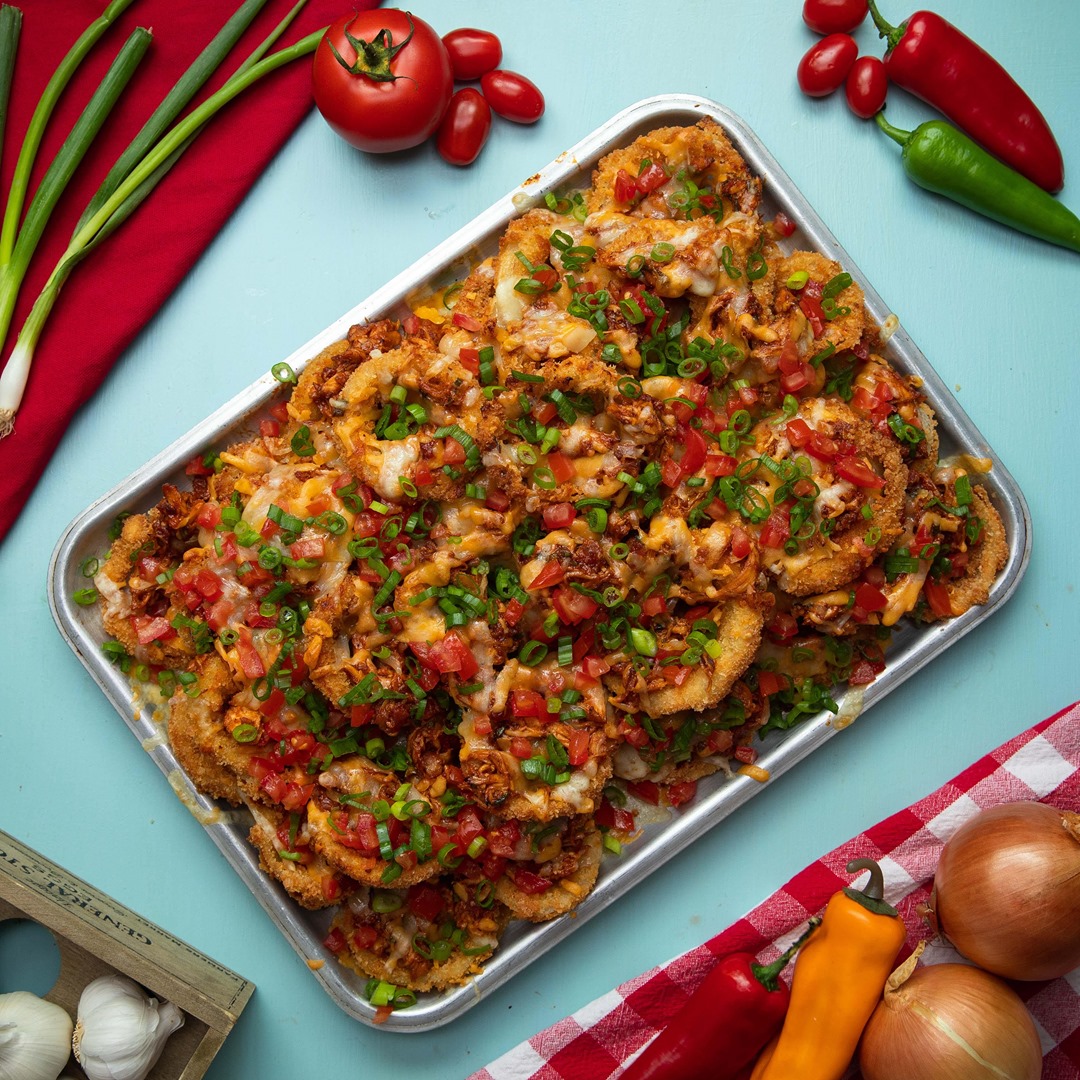
BBQ Chicken Loaded Onion Rings
BBQ Chicken Loaded Onion Rings
BBQ Chicken Loaded Onion Rings

Author: The Chef
Cuisine: American
Recipe type: Cake
Ingredients
BBQ RUB:
- ½ tbsp paprika
- 1 tsp ground cumin
- 1 tsp chili powder
- ½ tsp garlic powder
- ½ tsp mustard powder
- 2 tsp sugar
- ½ tsp salt
- ½ tsp pepper
- 1 tbsp oil
BBQ SAUCE:
- 400g ketchup
- 150ml cider vinegar
- 200g light muscovado sugar
- 2 tsp smoked paprika
- 200ml orange juice
- 2 garlic cloves, crushed
- 4 chicken breasts
- 4 spring onions, chopped finely
- 10 rashers bacon, cooked crispy and chopped
- 4 large white onions, sliced into rings
- 1 cup seasoned flour
- 1 ½ cups buttermilk
- 1 egg, whisked
- 2-3 cups panko breadcrumbs
- Oil for frying
Garnish:
- Chopped tomatoes
- Chopped spring onions
- 1 cup mixed cheese, grated
Instructions
- Preheat oven to 180ºC.
- In a bowl, mix together all of the bbq rub ingredients. Coat the chicken breasts in the mixture well. Arrange on a tray and bake for 20-30 minutes until cooked through. Shred chicken when cooked.
- In a saucepan over medium heat, add all of the bbq sauce ingredients. Cook until it begins to boil then lower to simmer until thickened.
- Toss the shredded chicken with chopped spring onions and cooked bacon. Set aside.
- Add flour into a Ziploc bag with onion rings. Shake to coat well and evenly.
- Whisk the egg into the buttermilk. Dip each onion rings into the milk mixture and then into the panko breadcrumbs, pressing to coat.
- Heat oil to 170ºC in a large pot.
- Fry each onion ring until golden brown, set aside on a cooling rack to drain.
- Lay half of the onion rings and top with half of the bbq chicken mixture. Top with remaining onion rings and bbq chicken. Sprinkle evenly with cheese.
- Grill for 5 minutes until cheese has melted
- Garnish with chopped tomatoes and spring onions. Enjoy!
Watch the recipe video here:
BBQ Chicken Loaded Onion Rings
Posted by Twisted on Saturday, June 22, 2019